
Statistics
We looked inside some of the posts by yeobooseyo and here's what we found interesting.
Average Info
Notes Per Post
108K
Likes Per Post
37K
Reblog Per Post
70K
Reply Per Post
629
Time Between Posts
3 days
Number of Posts By Type
Text
16
Photo
1
Last Seen Tumblr Blogs


Fun Fact
US Tumblr user growth rate is estimated to slow down to 4.1%.


Text

2025 carat revival ★ evolution week 17tv: 10 seasons and counting
71 notes
·
View notes
Text


SEUNGKWAN — S.O.S (CARATLAND, 2025)
137 notes
·
View notes

Text
mutuals i am politely asking you what color i remind you of
103K notes
·
View notes


Text


happy birthday to the best boy, Mingyu ✨
493 notes
·
View notes
Text


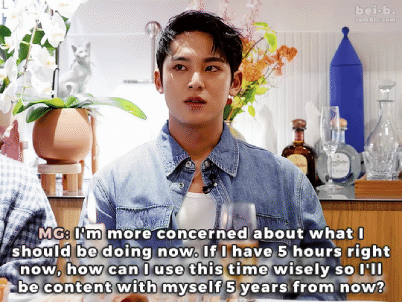
#1 yapper meets #1 listener
720 notes
·
View notes


Text


hello!!! i haven’t logged in since february bc life got too busy but i wanted to share with all of you that i saw svt on friday!!! it was spectacular, everyone looked so good, literally ethereal, and even though the set was short, they gave their all with each song. i got to listen to GOM live, the first song of theirs that i listened to 💖 it was such a magical moment.


i also got tons of beautiful freebies and my Wonwoo axolotl to complete the Boo axolotl i already had 💛💜
sorry for disappearing but i hope all of you are doing well! i’ll try to log in more often even if i don’t post that much. take care! ❤️🩹🥹
12 notes
·
View notes
Text
you're starring in a movie with the last person saved in your camera roll and the last song you listened to is the title... who/ what is it?


thank you yena @fairyhaos for tagging me! this was so cute💖
tagging: @soonhoonsol, @kimsja, @bei-b, and @yeobooseyo (no pressure ofc! ignore if you want to!)🩵
#omg hello!#thanks for tagging me :)#and sorry for being late hehe#what an interesting movie that would be!#mary 👾#tag game
7 notes
·
View notes
Text


2025 carat revival: week three seventeen as... album covers 💿
234 notes
·
View notes
Photo


Happy Birthday to our special boys, I can’t believe the world was lucky enough to have two treasures born on the same day like this🥰
#DK_VERNON_218bro_DAY #도겸_버논_218브로_생일축하해
1K notes
·
View notes
Text


the usual 218 birthday live activities

623 notes
·
View notes
Text
HOW TO: change the background color of a gif with a lot of movement ⭐
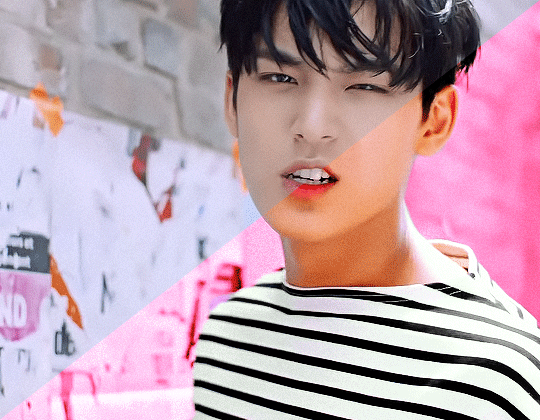
for if you are lazy as fawkkk like me and don't feel like figuring out how to use keyframes, or if your gif has too much movement to make it work teehee. it is labor intensive, but this gif originally looked like this so it is definitely worth the effort!
METHOD 1: adjustment layers
this works well with movement, however results are best if the background is very distinct! i would not advise against attempting this with a red or yellow background because it is going to mess with the skintones. i'd aim for blues, cyans, pinks, purples and very saturated greens (because some shades of green will be picked up as yellow and not adjust well)
for tutorial purposes, i'm going to go with a gif with a background that's cyan/blue. you can go ahead and get your gif loaded in, sharpened, etc. you can color it first, however i'm not going to be doing so.
the first thing you're going to do is make a hue/sat adjustment layer. you are going to bring the overall saturation up first (so leave it how it is and increase saturation). this is very much a matter of personal taste so just do as much or as little as you'd like. i'm also going to do a levels layer. use the eyedropper to pinpoint the darkest black and whitest white on the image. this leaves us with this, the goal here being to accentuate the background a bit.
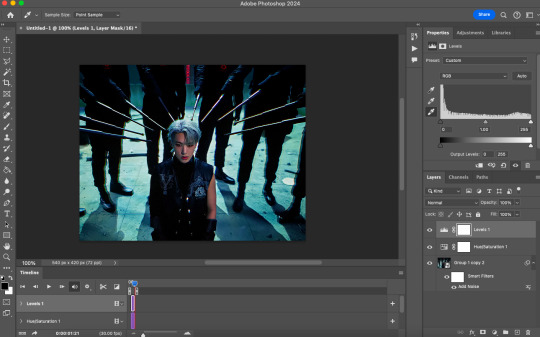
now, create another hue/saturation adjustment layer. instead of leaving it as is, change 'master' to the most prominent color in your background. i'm going to go with blue. if you are working with a blueish background, you will likely need to follow this step with blue and cyan for everything to be picked up!
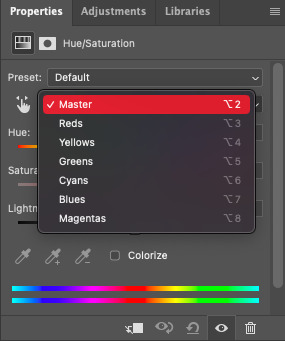
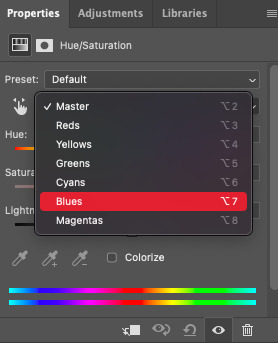
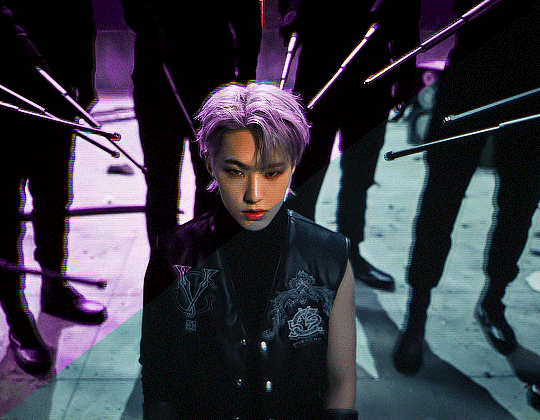
drag the 'hue' slider over in either direction until you achieve the color you're looking for. some shades will be easier than other: going from a blue to a purple or pink will be easier than reaching a yellow shade. however with enough tweaking anything is possible :3 this is what it looks like now.

i'm going to do some coloring over this now, and some underneath as well. color to your liking! if the skin tones are off when coloring over this layer, move your coloring layers beneath it. you can also just color it first as i mentioned earlier :) either works fine. export it and this is what we're left with!
METHOD 2: frame by frame
this method is a little more time intensive, but it works well when your background is a neutral color, multiple colors, or too close to a skintone to be manipulated.
a few notes here: this works best in my experience if the person in the gif has dark hair. it can totally work otherwise but dark is more forgiving lol. it also helps it blend better because you can change the highlights without throwing the rest of the hair off!
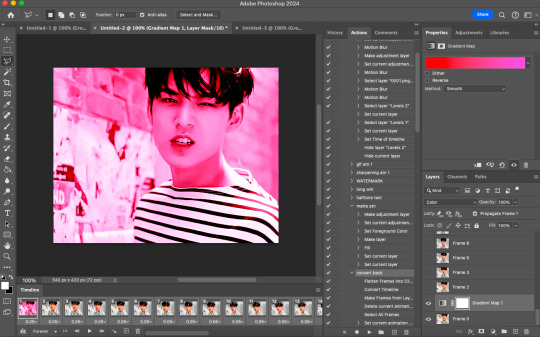
you are going to want to do all of your sharpening, coloring and any other edits first. otherwise, your background may be messed up when coloring over it. once your coloring is done, convert your gif back to a frame animation. you can find a quick tutorial on how to do this as well as an action here.
with your gif converted back, create a gradient map with the color(s) you want your background to be. start with the very first frame in the gif and put the gradient map one layer above this frame. change the blend mode to whatever you happen to think looks best: i'm using color here.
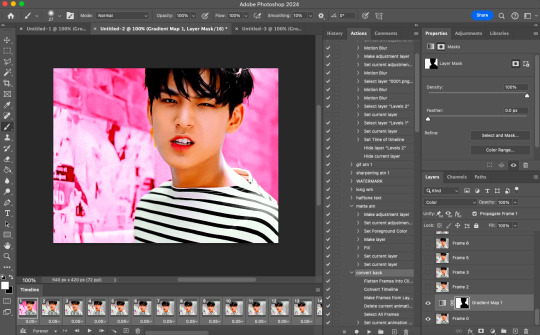
now, you're going to click that first frame and select your magic wand tool. on your top toolbar you'll see an option to 'select subject'. click the drop down menu, select 'cloud select'. then click 'select subject' and it'll select the person in your gif.

then, go back to your gradient map and select your layer mask. make sure your foreground color is white and background color is black. then, go to edit -> cut. this will mask the layer so the gradient map is only applied to the background. make any adjustments using a white brush tool on the layer mask. here, there's still some small orange pieces left over so i'm going to fix that.
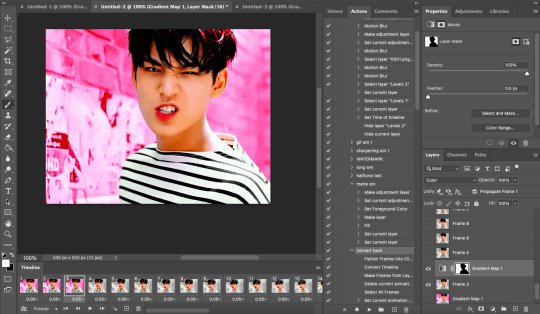
afterward, you will merge your frame with your gradient map (i recommend copying the gradient map first so you don't have to create it over and over again lmfao).
the highlights in his hair start to become more visible a few frames in, so when i'm adjusting the layer mask i'm going to account for this by brushing over his hair so the highlights go from their original white to pink. again, this is optional! the white just stands out too much for my linking.
now... you are going to repeat this step until you reach the end of your gif :) gradient map above the frame you're working with, layer mask, merge, repeat. it's time consuming but worth it!
once you're finished and your sanity is depleted, delete the frames from the timeline. the animation is going to be thrown off by all the editing we've done so it's best to just remake it.
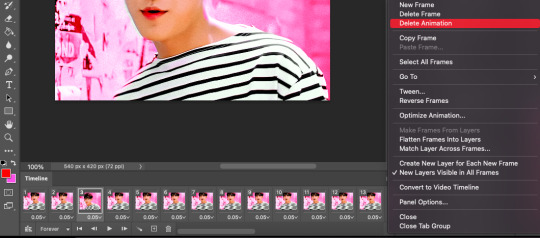
to remake it, click the three lines, then 'make frames from layers'

then, select all your frames and set the frame delay to 0.07 (you can do 0.05 too but that's just my preference). you can either export it like this or convert it to a smart object for further editing. this is how it turns out!
44 notes
·
View notes
Text


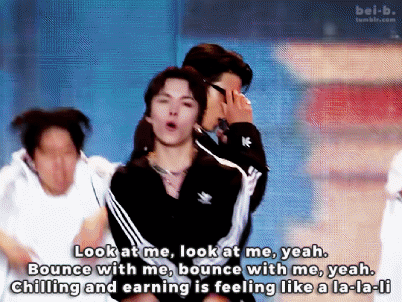
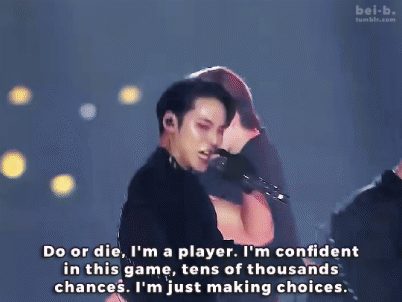
rizzmaster level 9000 comeback
564 notes
·
View notes