We've been around long enough to know what's good. We bring the best that's out there. Sistaround is known to be one of the best resource blogs out there. And we're proud of everything we've built. For you! So please, make sure to like/reblog everything you take. It's all free. Welcome, and enjoy! ♥ created by amourelo
Don't wanna be here? Send us removal request.
Statistics
We looked inside some of the posts by sistaround and here's what we found interesting.
Average Info
Notes Per Post
2K
Likes Per Post
1K
Reblog Per Post
391
Reply Per Post
2
Time Between Posts
25 days
Number of Posts By Type
Note
9
Text
1
Photo
7
Last Seen Tumblr Blogs


Fun Fact
US Tumblr user growth rate is estimated to slow down to 4.1%.
Note
Hey, do you happen to know where i can the post for the color porn psds? I found it on deviantart but haven't been able to locate it on Tumblr.
are you talking about a specific post here on tumblr hon?
7 notes
·
View notes
Text
Olá pessoal aqui é a Chi! Quanto tempo ne? Aqui ainda tem movimento?
3 notes
·
View notes
Note
oii perdão incomodar mas não sei mais oq fazer, quando vou criar uma caixa de texto sempre deixo a letra no tamanho 24 mas agora ela fica grande como se fosse tamanho 36 ou maior, até tamanho 8 fica grande!! não sei se vai poder me ajudar mas n custa tentar 😔
amor, é no photoshop? pq se for, depende muito da resolução que oce coloca, quanto menor o número, maior o texto vai ficar, não sei se oce entendeu, vê em baixo na imagem que explica melhor:
Resolução em 300, e o tamanho da fonte em 8px

Resolução em 72 e o tamanho da fonte em 8px

Na hora de criar um novo documento só alterar a resolução chuchu

Espero ter ajudado beijão <3 /lily
12 notes
·
View notes
Photo

PSD file number thirty five 35 by sistaround. - psd made by @vanillapsds - We do this for free and sharing our work inspires us to keep going, so please give us a like and/or reblog if you use this psd or plan on using it. RULES: • like or reblog this post if you download or plan on doing so. • don't redistribute or claim as your own. • adjust the layers or add new ones if needed. • this file is for your own personal use only. download: deviantart
210 notes
·
View notes
Note
indica psd pra lockscreens pf?
vc pode encontrar aqui xxx. Vou te indicar alguns dos meus favoritos: (xxx), (xxx), (xxx), (xxx).
-ju ♥
9 notes
·
View notes
Note
sim ;) só que variados
aqui xxx tem vários :*
- ju ♥
1 note
·
View note
Photo
PSD file number thirty four 34 by sistaround. - psd made by @hunteredit. name: hindu.psd - We do this for free and sharing our work inspires us to keep going, so please give us a like and/or reblog if you use this psd or plan on using it. RULES: • like or reblog this post if you download or plan on doing so. • don't redistribute or claim as your own. • adjust the layers or add new ones if needed. • this file is for your own personal use only. download: deviantart • cloudapp • mediafire
#completeresources#whoaps#chaoticresources#psd#psds#sistar#sistar: psd#sistar: psds#sistar: gabs#sistar: colorful#sistar: all psds#gabs#psd 34#psd vibrance
89 notes
·
View notes
Note
desculpa incomodar mais esse psds que aparecem é para usar no deviantart o site é? obrigada se responderem!!! e se sim, como acho eles lá? mais uma vez obrigada e uma boa tarde!!! ❤️
você baixar por lá baby! no @peachcoloring tem varios, só apertar em download que eles te direcionam pra lá, e baixa!
4 notes
·
View notes
Note
Hi please some new psd pink and red tones for gifs , and i want to ask you if you can make psd for bollywood movies too like : kalank , student of the year 2 , bharat .Pleease
i’ll try the pink ones later, ok? but i really hope that you enjoy the psd for bollywood movies ♥
1 note
·
View note
Photo


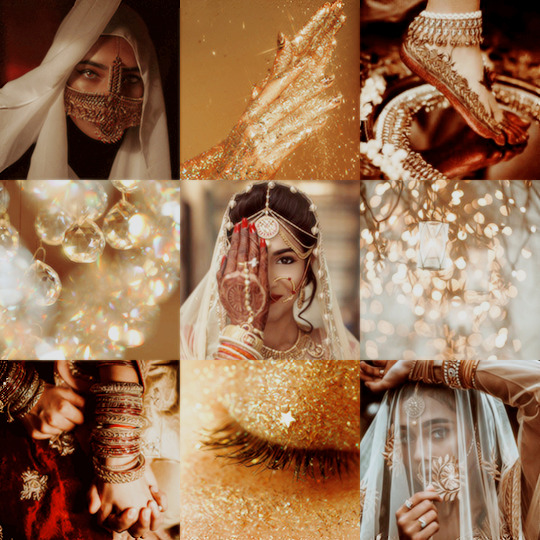
PSD file number thirty three 33 by sistaround. - psd made by @hunteredit. name: bollywood.psd - We do this for free and sharing our work inspires us to keep going, so please give us a like and/or reblog if you use this psd or plan on using it. RULES: • like or reblog this post if you download or plan on doing so. • don't redistribute or claim as your own. • adjust the layers or add new ones if needed. • this file is for your own personal use only. download: deviantart • cloudapp • mediafire
#completeresources#whoaps#chaoticresources#bollywood#psd#psds#sistar#sistar: psd#sistar: psds#sistar: gabs#sistar: colorful#sistar: gif psd#gif psd#sistar: all psds#gabs#psd 33#psd for gifs#psd vibrance
149 notes
·
View notes
Note
Link of photoshop for dowload?
here and here
45 notes
·
View notes
Note
hi! love your stuff! i was wondering if you could share the dimensions for each of the individual image squares for template psds 7 & 11? i was having some trouble with them - thanks!
hi sweetie, the secret is: always put the layer of your picture under the layer of the template, like this:
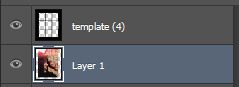
Them, use “ctrl + t” to ajust the square, like this:
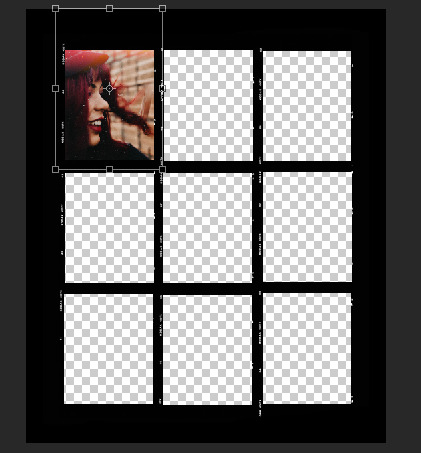
hope it help!
#sistar: ask#sistar: tips#sistar: tip#sistar: gabs#ask#asker#gabs#thequeenosnes#sugar we're goin down
26 notes
·
View notes
Photo
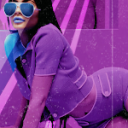
PSD file number thirty two 32 by sistaround. - psd made by @selenapastel. - We do this for free and sharing our work inspires us to keep going, so please give us a like and/or reblog if you use this psd or plan on using it. RULES: • like or reblog this post if you download or plan on doing so. • don't redistribute or claim as your own. • adjust the layers or add new ones if needed. • this file is for your own personal use only. download: dropbox • cloudapp • mediafire
#completeresources#itsphotoshop#whoaps#chaoticresources#psd#psds#sistar#sistar: psd#sistar: psds#sistar: red#sistar: colorful#sistar: lily#sistar: all psds#sistar: imagem psd#psd 32#psd pastel#psd vibrance
574 notes
·
View notes
Photo

Template PSD for collage lockscreens file number sixteen 16 by sistaround. - Templates (2) made by @Hunteredit. - We do this for free and sharing our work inspires us to keep going, so please give us a like and/or reblog if you use this psd or plan on using it. RULES: • like or reblog this post if you download or plan on doing so. • don't redistribute or claim as your own. • adjust the layers or add new ones if needed. • this file is for your own personal use only. download: deviantart • cloudapp • mediafire
#templatepsds#itsphotoshop#completeresources#yeahps#template#templates#template for lockscreen#template collage#collage template#sistar: template#sistar: templates#template: lockscreen#template: collage#sistar: gabs#template 16
147 notes
·
View notes
Note
preciso de um psd que só aumente a saturação ou deixe a foto assim... prntscr com/rigkzh
postei mô ♥ espero que cê goste
4 notes
·
View notes
Photo

PSD file number thirty one 31 by sistaround. - psd made by @Hunteredit. - We do this for free and sharing our work inspires us to keep going, so please give us a like and/or reblog if you use this psd or plan on using it. RULES: • like or reblog this post if you download or plan on doing so. • don't redistribute or claim as your own. • adjust the layers or add new ones if needed. • this file is for your own personal use only. download: deviantart • cloudapp • mediafire
#completeresources#allresources#whoaps#psd#psds#red#sistar: gabs#sistar: psd#sistar: psds#color: red#gabs#colorful#for icons#psd vibrance
108 notes
·
View notes
Photo

tutorial by sistaround.
portuguese (br) + english
please if this tutorial was useful to you reblog/like.
i really hope that this tutorial will be useful to you.
sorry, english is not my first language.
Primeiro tutorial: Icon transparente simples First tutorial: Simple transparent icon

1) Abra a imagem que vai usar e corte da forma que desejar, respeitando a proporção quadrada Open the picture that you’re going to use and cut as you wish, but always respecting the square proportion
2) Daí, usando a ferramenta Quick Selection, selecione somente a parte que ficara em seu icon Then, using the Quick Selection Tool, select just the part of the picture that you want in your icon


3) Copie e cole (ctrl+c ctrl+v) a seleção feita Copy and paste (ctrl+c ctrl+v) the selection that you did

4) Apague a camada de fundo e aplique um .psd de sua escolha (aqui temos vários) Delete the background layer and add a .psd of your choice (here we have a lot for you choose)

5) Agora é só mesclar as camadas (ctrl+shift+e) e redimensione para o tamanho de icon (100x100) Now is just merge your layers (ctrl+shift+e) and resize to a icon size (100x100)

6) Agora é só aplicar a nitidez Now is just aply the sharpen

Essas são as configurações de nitidez que uso para esse tipo de icons: Those are the sharpen settings that i use those kind of icons:

7) Salve seu icon em formato .png para garantir que o fundo fique transparente, e pronto, é só usar no perfil ♥ Save your icon in .png format to ensure that the background is transparent, and that's it, just use it in the profile ♥
Segundo tutorial: Icon redondo Second tutorial: Circle icon

1) Crie um novo documento em branco (eu uso o tamanho 300x300 para ter espaço para visualizar melhor) Create a new blank document (I use the size 300x300 to have space for a better view)

2) Usando a ferramenta Ellipse eu crio dois círculos: Using the Ellipse Tool i create two circles:

O primeiro círculo em 150x150 preenchido com cor (a escolha da cor não influencia no resultado final): The first circle in the size 150x150 filled with color (the choice of color does not influence the final result):


O segundo círculo em 170x170 sem nenhum preenchimento, somente como contorno (cor de sua preferência): The second circle in the size 170x170 without any padding, only as an outline (color of your preference):


3) Arraste a imagem que você quer para o icon em cima da camada do primeiro circulo (o preenchido) e ajuste (ctrl + t) do tamanho desejado: Drag the picture that you want for your icon on top of the layer of our first circle (the filled one) and adjust (ctrl + t) the size as you wish:

4) Feito isso, clique com o botão direito em cima da camada da imagem e selecione a função de máscara de corte: After that, right-click on the image layer and select create clipping mask function:


5) Corte a imagem mais próximo ao círculo maior, sempre respeitando a proporção quadrada Cut the picure right next no the big circle, always respecting the square proportion

6) Apague a camada de fundo e aplique um .psd de sua escolha (aqui temos vários) Delete the background layer and add a .psd of your choice (here we have a lot for you choose)


7) Redimencione para 100x100 e aplique nitidez somente na camada da imagem: Resize to 100x100 e aply sharpen only in the picture layer:

8) Agora é só mesclar as camadas (ctrl+shift+e) e salvar seu icon em formato .png para garantir que o fundo fique transparente, e pronto, é só usar no perfil ♥ Now is just merge your layers (ctrl+shift+e) and save your icon in .png format to ensure that the background is transparent, and that's it, just use it in the profile ♥
#yeahps#completeresources#chaoticresources#icon tutorial#tutorials#sistar: tutorial#sistar: tutorials#sistar: icon tutorial#sistar: gabs#gabs
169 notes
·
View notes