#(followed a tutorial instead of just winging it-)
Explore tagged Tumblr posts
Visit Tumblr Blog
Explore Tumblr blogs with no restrictions, modern design and the best experience.
Last Seen Tumblr Blogs


Fun Fact
Tumblr is used by 21% of adults online aged 18-29 years.
Text

This is part of a comic I'm doing, but I think it worked well enough to deserve a post all by itself~ :D:D:D (drawing Azula is very fun :D)
#Got avatar on the brain atm#:D:D:D#azula#avatar the last airbender#atla fanart#atla#wanted to try out some more 'realistic' stuff#like actually doing skin rendering and all that#I like how this turned out#so I guess it worked!#:D#(followed a tutorial instead of just winging it-)#Ye.#im gonna add text for the comic#which goes something like#'Oh look who finally decided to show up'#>:D#princess azula#>:D>:D>:D
154 notes
·
View notes
Note
4 and 20 for the Artist Ask Game! 👀
4. Fav character/subject that's a bitch to draw
not sure about character...but subject? probably poses/anatomy in general. still bad at it. brain can't quite comprehend shapes lol all the anatomy tutorials just go in one ear/eye and out the other. no brain process in between 😅 same with lighting/shadows. basic art things make me trip and fall
20. Something everyone else finds hard to draw but you enjoy
eyes?? do people think eyes are hard? I always enjoyed doing eyes. maybe hair. hair is fun but i've seen many people say it's hard
#ask games#thank you for sending numbers!!!!#answering these im realizing how much i pretend i know what im doing but i know nothing even after endless tutorial videos and#reading stuff and taking classes. its more of a fake it to you make it and wing it and hope for the best lmao#just follow your heart and dont use your brain at all. head empty when arting. no thought process there. no technical skils applied#maybe this is why people who have done art fkr 3 years tell me to practice more. usuallt theyre art students. they see lack of skill#even though ive been drawing for like 25 years fhdhdjddnkdd#cant think technically and follow the “rules” when brain wanders off into some orher realm and forgets everything and experiments#and forgets how reality works. is hard to explain but my brain ks bad at learning and everything it “learns” is oil while brain is water#people love telling me “watch youtube videos! read things! take a class!” as if that will magically make oil stay mixed with water#oops how did this turn to a whole ramble lmao#lee rambles#but seriously i feel like people see this lack of skill and just feel my art is off and maybe that's why i dont have successful art#after 25+ years of “practice” and at least 10 years of posting it online. is that the secret? having a brain that can acrually learn#and apply what it learns. instead of relying on instinct or something lmao. in that case im screwed 😆#it miggt just be an uncaught learning disability of some kind because i cant explain why my brain is so bad at learning things!#ok done rambling. didnt mean to make this a ramble rant post lmao
1 note
·
View note
Note
Hello, curious on how you do your toon anatomy! (Ex. Proportions, guidelines) It looks so much like the game but for Cosmo it doesn’t follow the body including legs is 1 1/2 the head rule I’ve noticed! (I’m struggling so much to draw cos lol)
I'm so sorry I am not the best person to teach but I tried my best to show how I do it 😭

I wouldn't say my artstyle is close to the game, but I do have a cartoony anatomy. I don't follow a guideline, cause I just wing it pretty much all the time. The way I draw Toons tend to look taller somewhat.
A LOT of my turns are very round if you notice, I rarely got a few sharp turns since that's just a preference of mine.

I usually do long, smooth strokes for my lines instead of shorter ones. Shorter lines or having a scratchy sketch makes my art look stiff in my opinion. I favor my characters looking dynamic over accurate anatomy. It feels more fun for me. (Anatomy is VERY important too but I have priorities lol.)

Proportions and anatomy also depend on which character you're doing. It's common for artists to draw kids with big heads and eyes and shorter limbs.
Anyway, I'm not sure what else to put here.. I recommend using a lot of references and practice.. I just searched up "cartoon anatomy" in Pinterest and there are tutorials over there that can teach you way better than I can. 🥹
My art isn't perfect, I'm only self-taught. I've only really learned through analysing the hell out of other artists/shows/games I admire and try to apply it on my own art... 😭 So you gotta find your inspiration!
Study what makes something work for others so you can apply it to yours. This is what I did when I first tried to figure out how to draw the Toons.. (my first art of them looks HORRID)
If it helps, I don't mind if people want to take some inspiration on how I draw the Toons. So analyze the hell outta my art if you wish LOL. (It brings me joy to be a factor of someone's art journey the way the bigger artists I admired were part of mine :')
#ronu's artwork#ronu's rambles#TLDR; I wing it#I honestly don't have a proper#process??#All it takes is practice#and take advantage of references!#They can help#Goodluck :D#the inbox
418 notes
·
View notes
Text


You, after an endless amount of failed attempts at doing a soft winged eyeliner, had Gojo Satoru, your lovely boyfriend, swing in to help, but it came with consequences.
fluff , gojo satoru x f!reader

After scrolling past a stunning eyeliner look on Instagram — one that seemed to effortlessly complement your exact eye shape — inspiration had struck hard and fast. The attached reel promised an easy tutorial, the caption dripping with false hope: “Soft, subtle, effortless.”
Lies. All of it.
Now, you were cross-legged on the bedroom floor, surrounded by chaos. Your makeup bag lay open beside you, brushes poking out like weapons of war, and a pathetic little mountain of crumpled wipes had formed nearby — the casualties of your failed attempts.
With each frustrating try, your determination only sharpened. So did the flush of irritation blooming across your cheeks. Biting lightly on your tongue, you leaned into a handheld mirror and tried again, dragging the eyeliner across your lid with painstaking precision.
The goal was simple: a soft, delicate wing — subtle and pretty. But every line curved wrong, smudged, or turned out uneven.
And each time it failed, you reached for another wipe, scrubbing at your poor eyelid with the kind of exasperation that only comes from watching hope slowly die. The skin beneath your eye had already taken on a grayish tint, stained from pigment and stubborn pride.
Naturally, that was when Satoru wandered in — somewhere around attempt number five. Fresh from the shower, hair damp and sticking to his forehead in careless strands, he was wearing his utterly ridiculous bear-patterned pajamas and working through a blue raspberry lollipop like it was a serious task.
At first, he’d collapsed onto the bed with his phone, occasionally sighing — loudly — whenever you asked him to turn the volume down so you could focus. But after a while, his phone had ended up abandoned. You, apparently, were the new main event.
You could feel his eyes on you with every swipe and every muttered curse, his silent amusement radiating like heat.
Just as you leaned toward the mirror again, liner poised, another wipe already in hand, you heard the wet click of the lollipop leaving his mouth, followed by the sound of him swallowing.
“Babe—” he began, already smug, already teasing.
You didn’t even look up. “Not a word.”
Satoru blinked, now sitting sideways on the bed with his long legs stretched out and the half-sucked lollipop resting between his fingers. He watched you for a beat, then grimaced at the way you were aggressively scrubbing your already-rosy eye.
“Okay,” he said mildly — not out of understanding, but because he was clearly calculating how to make this worse for you in the most annoying way possible. Then, humming with mischief, he added, “But what if I use my actions to deeply, passionately judge you instead?”
You groaned and flopped back against the carpet, eyeliner still gripped like the weapon that had defeated you. “I told you to shut up,” you muttered. The tutorial was still playing in the background, chipper and mocking.
You were two seconds from giving up altogether. Maybe you should’ve used tape. Maybe you should’ve abandoned the idea of looking cute to begin with.
Gojo tossed the lollipop into the trash with the lazy flair of someone who had never finished anything he didn’t feel like finishing. Then, barefoot and mildly chaotic, he padded over and crouched beside you.
He poked one of the used wipes with his toe before poking your cheek with a gentle finger. To your surprise, his touch softened, brushing over the irritated skin beneath your eye with unexpected care.
“God, babe. Did Sephora wrong you?” he murmured, inspecting the damage. “This looks like a crime scene.”
His attention shifted to the eyeliner pen in your hand. He plucked it away before you could protest, holding it up like it was some kind of forensic clue. “This looks expensive. Good quality,” he said with an approving nod. “Yep. Definitely not the liner’s fault. This one’s on you.”
You let out a frustrated groan and reached for it. “No, I almost had it. It looked good on the girl in the reel! We have the same eye shape! But my hand just… doesn’t do what hers did. Like—how did she—ugh. I give up.”
“Oh, no no no.” He held the pen aloft like a sacred relic. “You don’t give up. You call in backup.”
You gave him a deeply skeptical look. “What backup?”
He tapped the liner against his chin, grinning. “Me, duh.”
“You?” you deadpanned. “You don’t even know how eyeliner works.”
“Please.” He scoffed, settling into a seated sprawl like he was preparing to compose a masterpiece. “You’re forgetting something crucial. I’m Gojo Satoru. I could do this with my eyes closed. Actually — I could probably do it with both of our eyes closed.”
[Subtle foreshadowing: “YOU BROKE IT?!”]
Your thumb hovered over your phone. “Do you want to at least watch the tutorial?”
He leaned forward for exactly one second, squinted at the video, then waved it away like it had offended his pride.
“Ah ah ah — don’t insult me.” He said waving his index finger dangerously close to your face.
“That wasn’t an insult. You need to watch it.”
“Nope. I’m going in blind. Call it instinct. Call it divine talent. Call it—”
“Delusion.” You retorted.
He clutched his chest in mock pain. “You wound me. And yet, I still choose to bless you with my services.” He tapped your chin, then poked your cheek again. “C’mere. Let me make you beautiful.”
“I’m already beautiful.”
He grinned. “Exactly. I can only enhance.”
Without any warning, he scooped you up by the hips to which you groaned, and deposited you into his lap, adjusting your legs around him like a personal project. He pulled a pillow over, propping it on his thighs, then gently tilted your head back against it — like he was about to paint the Mona Lisa.
He grabbed a fresh wipe and dabbed carefully at the smudges under your eyes, surprisingly gentle. His fingers were light, thoughtful, and his expression took on a rare kind of focus — like he actually cared about getting it right.
Then, the eyeliner.
He uncapped it with theatrical flair, holding it like a wand or a scalpel. “Alright, babe. Look up. Don’t move. I’m about to do art.”
“You’re about to poke me in the eye.”
“That’s the risk of art.”
You stayed still, holding your breath, watching as he furrowed his brow in dramatic concentration. To your shock, his hand was steady. His touch was careful. His free hand cupped your cheek as he lined your lash line slowly, tenderly — no smudges, no veering off course. You kept waiting for the wing to go wrong.
But it didn’t.
With one final flick, he leaned back and beamed. “There. Boom.” His grin could’ve lit up the room. “Gojo Satoru — eyeliner god.”
He held up the mirror.
You blinked, tilted your head, and stared.
It was… good. Not perfect — one wing was slightly longer than the other — but it was soft. Playful. Pretty. It looked intentional, wearable. And somehow, it looked like you. And it had been done by him.
“Holy shit,” you muttered. “You actually… didn’t mess it up.”
“Excuse you,” he said, puffing his chest. “I nailed it.” He gave you the dramatic TikTok arm swing for extra sass. “Bet I could do better than actual makeup artists.”
You raised a brow. “Do you even know what this eyeliner look is called?”
“I make my own titles,” he declared. “And this one’s called 'Hot Girlfriend Who’s Probably Gonna Make Out With Me After This'.”
You shoved his shoulder, laughing as the frustration finally melted out of your system. “Thanks, Toru.”
His expression softened, grin fading into something warmer. He leaned down and pressed a kiss to your temple.
Then you glanced down to his hands — and froze.
“Hey! Cap it or it’ll dry out!” You said motioning to the eyeliner that he was gripping in his hand.
He raised the pen, squinting. Then blinked after further inspection, the eyeliner had cracked clean in the middle, snapped right in half, from the strength of his grip.
Your eyes widened in horror. “YOU BROKE IT?!”
He was already backing away, peeling you off his lap as he scrambled upright, laughter bubbling from his chest.
“Oops — love you!” he shouted, bolting for the door.
You launched a pillow at his retreating form. “I SWEAR TO GOD, TORU—!” but his laughter echoed down the hallway, loud and unrepentant.
But deep down, you knew — probably within the next hour — a new eyeliner would arrive. Better. Smoother. Delivered express. Along with it probably six backups, just in case.
Gojo’s on his deriod yall 🙄
#jjk#jujutsu kaisen#gojo satoru#gojo x reader#jjk x reader#gojo satoru x reader#fluff#jjk drabbles#jjk x you#jjk gojo#satoru gojo#jjk fluff#funny#riiee!writes
269 notes
·
View notes
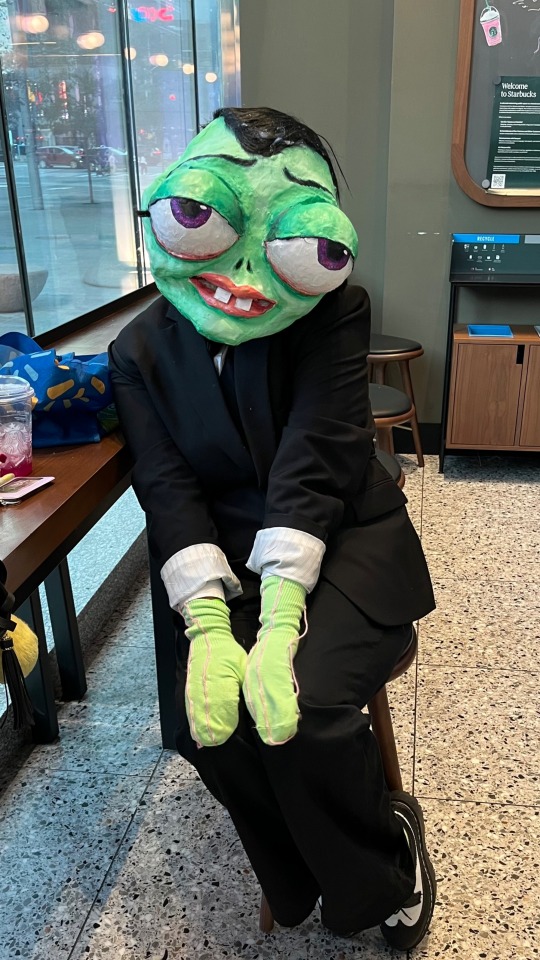
Text
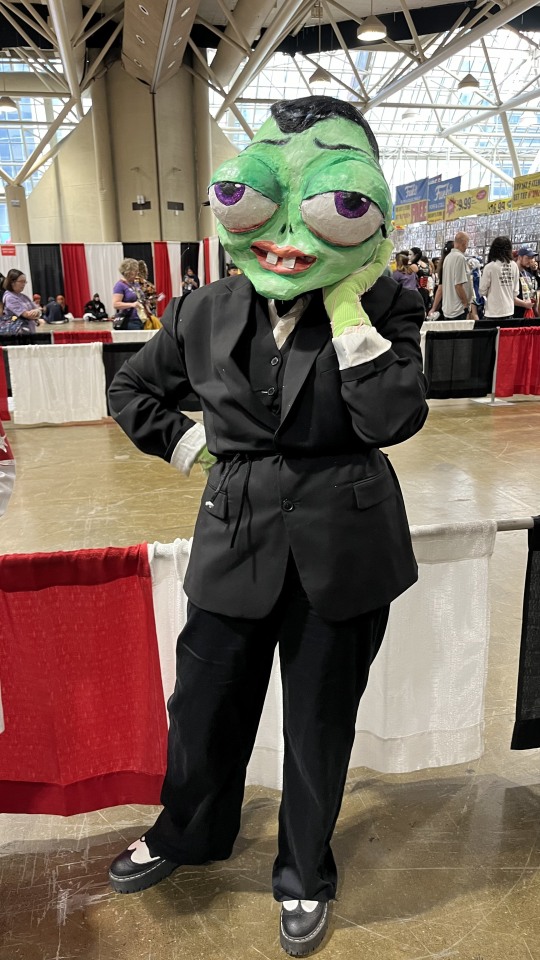
So I went to Fan Expo yesterday! I wish I bought tickets for two days instead of one, i couldn't do all that I wanted. Most of my day was just waiting in line to meet voice actors.
Buuut the highlight of my day is that I met Dee Bradley Baker! I got a selfie with him and I asked what was his favorite Spongebob character to play. He said Bubble Bass's mom. He did voice impressions of them both. Its so weird to hear the voices come out of him since I'm used to hearing it on the TV. It was great though.
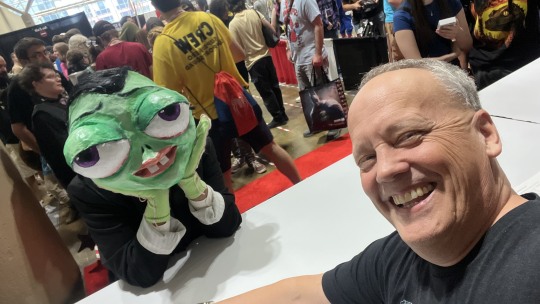
He LOVED my Slappy cosplay and said it was freaky. I am so so happyyyy. When I took a selfie with him, my friend said some lady also took out her phone to snap a picture of my cosplay. It may not be the most polite thing to do without asking but I really don't mind it lmao
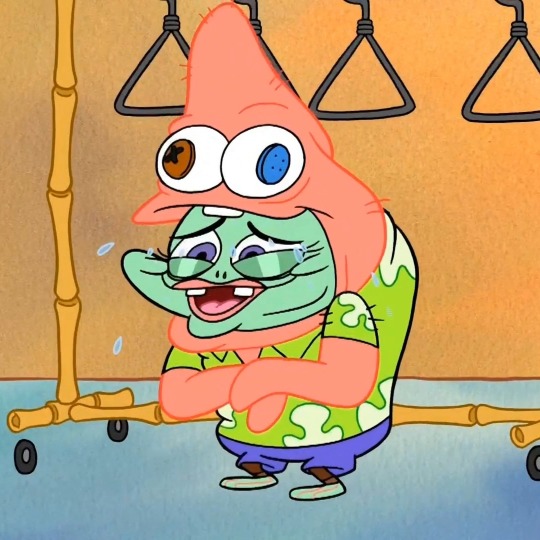
It was my dream to go as Slappy since the first time I ever went to Fan Expo. Which isn't long ago but still. I felt like I was wearing his skin✨
I finally know how Slaps felt like in this instance wearing the Patrick costume
I spent the past week making the head out of paper mache and I'm very proud of it. It's not particularly strong because I was figuring this out while it was foing along. I spent most of my time sculpting and ensuring it LOOKED like Slappy, I didn't give much consideration towards visibility (his mouth is a seeing hole but you can just barely see. Also towards the end of the day, it began cracking around his jaw area so I couldn't wear it anymore. It's fine and easy to fix, I do kinda want to fix it up and make it stronger. Probably put a helmet on the inside and pad out the inside. I also want to give him false eyelashes lmao.

I had a lot of fun painting him though. It was like doing his makeup UwU he's also actually wearing makeup since I used an eyeshadow pallette to use as a highlighter on his skin. He's sparkly in person.
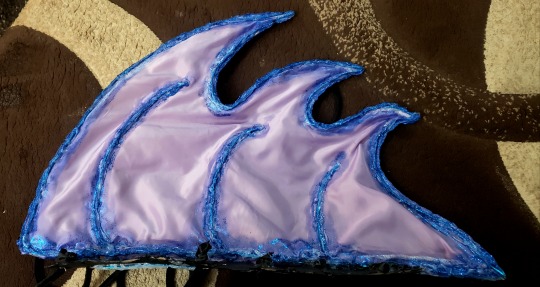
I also made his dorsal fin (I followed a basic fairy wings tutorial to make it) and my sister helped out and made the little gloves from socks. She finds this costume horrifying. I think that's the best part. I chased her around a bit as Slappy.
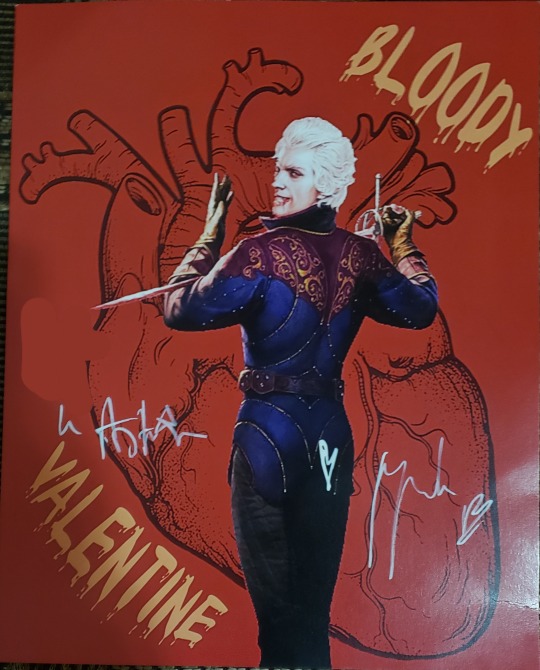
I also attended a panel and got an autograph from Neil Newbon who voices Astarion from Baulders Gate 3.
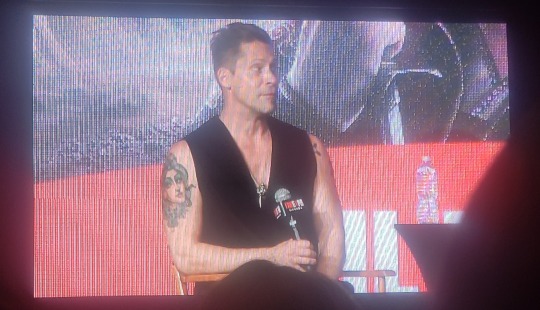
Mainly because my friend has been obsessed with the game lately. I didn't think I'd care much until I actually met him. Hes actually wonderful and witty and polite and professional, I could go on and on about it. My friend and I were both gushing about it. Even for the brief moment of meeting him at the table and he shakes your hand with both hands and looks you in the eye AHHHH✨✨✨😭😭
Unexpected but REALLY made my day <33
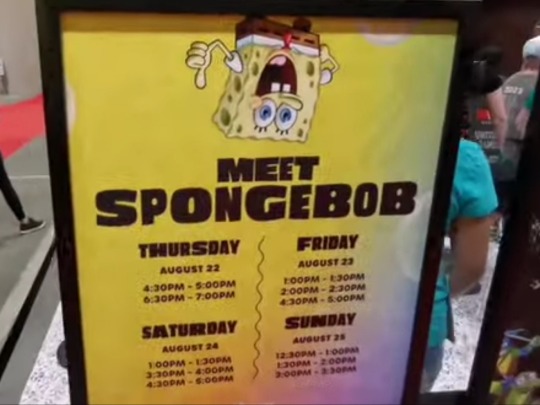
I ended up missing photo opportunity to meet Spongebob because the line was so long but this is a rare moment where I think it was worth it.
Especially since despite all of that, there are many folks who asked for pictures. Especially older folks. They were able to tell right off the bat that it was Peter Lorre related!
And the ones who were younger and closer to my age were still able to get it. I got a lot of people asking "is that Gomez Addams?" because Gomez is Peter Lorre inspired. Which was the PERFECT opportunity to infodump and tell them that Slappy and Gomez are both caricatures of Peter Lorre. I actually have a printed picture of Peter Lorre that I kept in my tote bag just for this purpose <3

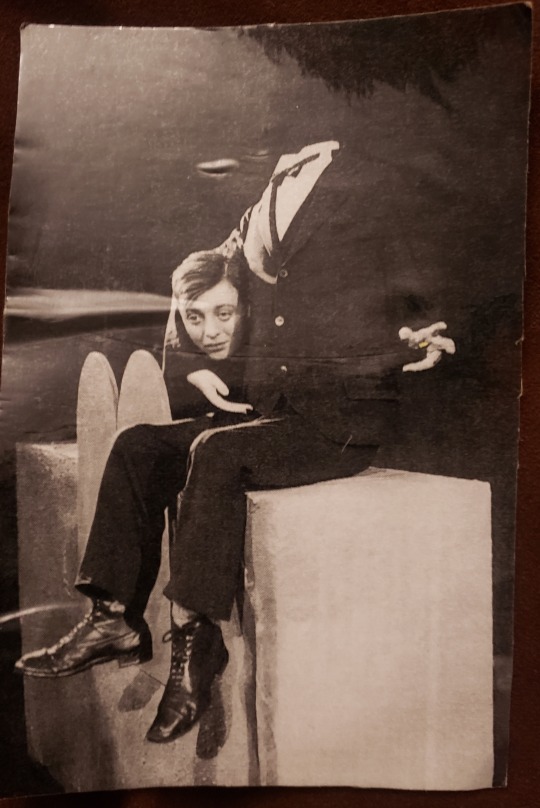
When I was standing in line, one man was looking at the Slappy head for a bit and said "he has a face only a mother could love. He reminds me of a certain actor" to which I just had to say "Peter Lorre!" Hehehehehe
There was also a paramount section where they had Spongebob mini golf.
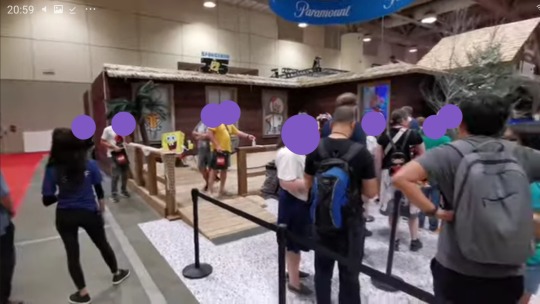
I actually met a dude while I was in line and he was also a Hardcore Spongebob fan. Its actually crazy to find someone as deranged as I am irl. It was soooo much fun just chatting with him. We ended up traded socials. I kinda wish I stuck around longer but we didn't have much time left ro really explore the con so my friend and I did a mad dash trying to get through as much as we could before the con closed.
All in all, I had fun. I'll probably reuse this costume next year. Perhaps I could find a brown tailcoat suit too so the cosplay can be 100% accurate.
Here are some miscellaneous cosplay pictures:

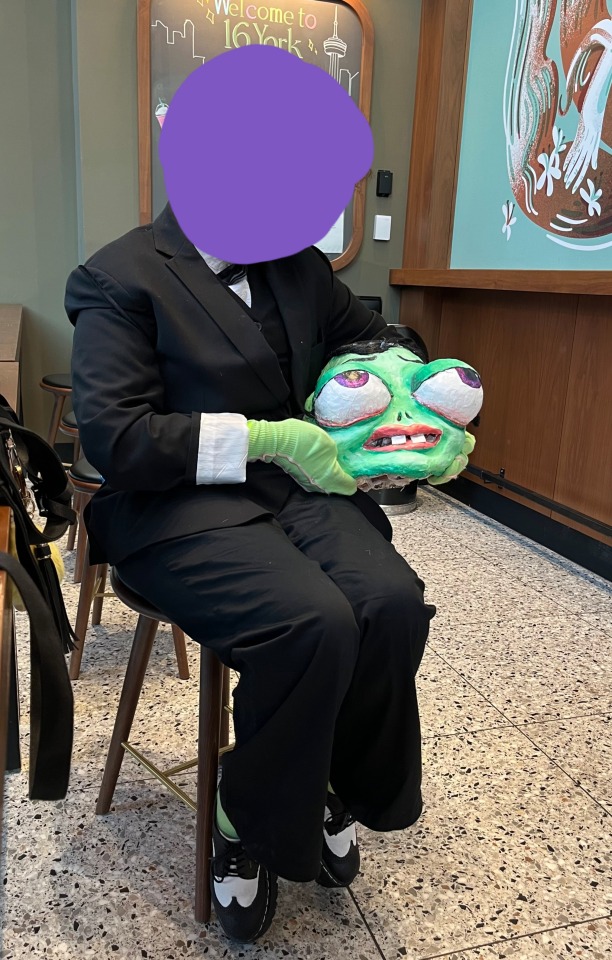
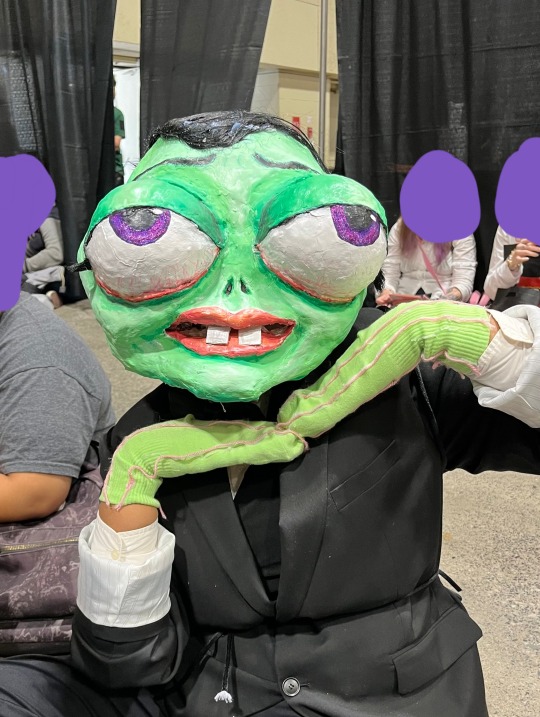

This one is my favorite <3
#I had fun#My hair was a mess by the end of the day and I was tired and sweaty and having dehydration headaches#but it was all worth it#The spongebob connoisseur#spongebob square pants#spongebob#spongebob squarepants#sb#spongebon squarepants#spongebob meme#slappy laszlo#slappy spongebob#laszlo spongebob#Peter lorre fish#The patrick star show#The patrick show#Dee Bradley Baker#Fanexpo#Fan expo#Cosplay
40 notes
·
View notes
Note
congrats on the photoshop! if u dm talking abt, what’s ur gif-ing process :3
tyty! and you've activated my trap card, I love talking
It usually goes like
1. download the mp4 from youtube or some other place and trim the clip until I get the parts I want
2. import the mp4 into photopea, which automatically splits it into frames for me (haven't tried directly loading it into photoshop actually).
if this step gets messed up and the frames aren't generated properly/smoothly (this happened in one of the hu tao gifs and I didn't realize until about a week ago lmao) I have to use the mkv player method a lot of gif tutorials talk about (I followed this one).
3. crop it to either 960px or 540px (widths), settings below. everyone says use 540 but I've done 960 on several occasions by now just because I like clicking on images and having them actually zoom in. it's supposed to be worse for the normal preview though

4. add adjustment layers and fool around with them. for this I almost always add hue/saturation and selective color, and sometimes brightness/contrast and gradient map as well, and maybe others depending on how I feel. a ton of tutorials add curves layers but I haven't figured out how to not make them look ass lol
this step is super vibes and eyeballing based tbh I use different colors for every gif including ones in the same set. I know coloring psds/actions are a thing but I haven't looked into that
5. sometimes I will also add gradient fill (did this for the lyney gifs and some other non-genshin ones) for more strongly colored backgrounds
6. finally open the file in photoshop and do: make video timeline > convert to frame animation > make frames from layers > delete any blank frames (manually) > select all frames > set the frame delay to 0.05. exactly the same steps as this tutorial, without the reverse frames part
7. tweak the color details until it looks better / finished. I've had to mess around with layer masks for some of the gradient fill parts (to make sure the subject of the gif isn't colored over by the gradient), and that's kinda painful, but I've only done that for ~3 gifs so it's fine
8. add sharpening layers, I think I use the settings in this tutorial? I tend to make the gaussian blur stronger than 15% (usually 40-70% lol) because sometimes the 2 sharpens look too pixelated. idk if that's bc of differences between animation and live action or personal preference
9. squint at the gif a lot when exporting (I usually use adaptive color and pattern dithering, but sometimes I have to use perceptive color instead to lower file size...) and go through at least 3 different minor color or sharpen tweaks before being like yeah that's probably good enough
photopea doesn't have dithering settings which is the reason I switched to actual photoshop (sigh). it makes the gif colors look smoother
also there's a bug where the frame delay you set gets changed (usually increased) when exporting, but often times I'm too lazy to fix it back and export again. idk it doesn't make a difference to my eyes but fyi ig
10. save as draft on tumblr and add alt text. it's fun and my internet is shitty enough that my own gifs load very slowly too, so the description is helpful especially when all I can see is a gradiently colored square
there are a lot of photoshop actions that people recommend and I haven't looked at any of them, mostly I'm lazy and prefer to just wing it myself. also I feel like the main ""trick"" to gifs/giffing and making your """style""" or whatever is in choosing and adjusting colors, but besides making things brighter and more colorful, I don't really have rhyme or reason behind how I adjust things lol
also if you have any other questions feel free to ask! I can also send cracked photoshop and the gif tutorials I've used if you want lmao
#teyvat thoughts#asks#thank you for sending this it was fun to think about! maybe I'll look back on it in a year and see what's changed#gradient map is kind of weird and I haven't figured it out. idk curves or levels either although i theoretically know how they work
2 notes
·
View notes
Text
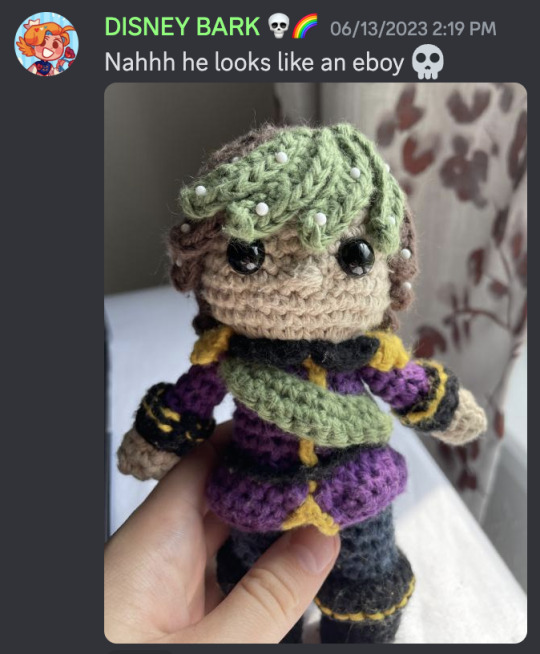
How I made little Haarlep


A few days ago I posted about my latest finished crochet project for my good friend @tavyliasin, and I wanted to share how I made them! This is for people who would also like to make a little Haarlep (Raphael, Karlach, or any other character with horns for that matter), those who are curious how I did it, and I just love to yap about my projects. When I started this project I had only been crocheting for about 8 months, and it really pushed me to step out of my comfort zone, try new things, and learn a whole lot. I took the time to explore, experiment, and try again if needed. And man, did I learn from little Haarlep.
Note that this isn't a tutorial; I have made mistakes, oversights, and stumbled against problems. I will try my best to list these here, but if you have any questions about the listed patterns I advise you to head over to the linked etsy store to ask the creator of said pattern. But if you have any questions specifically regarding this project I'll try my best to answer them as best as I can. There are also some parts of little Haarlep where I didn't use a pattern at all, and either freehanded it, or did a load of guesswork.
Now, let's get started!
Used patterns:
Body: Doll base Amigurumi Body Version 3 by TheLoftyLoop
Wings: Kawaii Bat by ZeroGravityCrochet (I have also used this pattern for my Batstarion plushie)
Horns: Horns (3 sizes) by KnottedLovebymima
Used Materials:
Body: Katia Bambi #312 (3x)
Hair: Twister Solid XL Black #105 (1x)
I had bought the yarn for the hair and horns in a local yarn shop, and have thrown away the labels a long time ago. Once I have found them again I will list them here as well.
Polymer stuffing
PLA filament (optional)
Small chains which were part of a jewelry repair kit.
Soft silver RVS rings, 1,5 x 7,0 millimeters
Epoxy Resin (optional)
Gold and orange pigment powder
Gold glitter
Red embroidery thread
Used tools:
Crochet needles (3,0 millimeters and 3,5 millimeters)
Knitting markers
Yarn scissor
Yarn needles
Row counter (optional although it literally saved my life)
3d printer (Optional)
Silicone half circle mold
Pliers (x2)
Cutting pliers
Mini hand drill
Instant glue
Tweezers (optional)
Step-by-step guide:
First, I needed to know what the hells I was getting myself into. For that I have used several references on Haarlep. I have used these as a guidelines for the entirety of the project. The screenshots have been provided by @tavyliasin.


Then, I made a list every single part of the doll I needed to make.
Body
Tail
Wings
Horns
Ears
Eyes
Face
Harness
Hair
The body


For the body I have used the 3,5 millimeter crochet needle because I wanted the stitches to be as tight as I could. I had ignored the advised crochet hook size on the label of the yarn because of this. Although I quickly found out that the yarn itself was too large for this pattern as well, resulting in the doll becoming bigger and longer than I initially expected. But this is not necessarily a mistake because that would mean that there would be more to cuddle!
The head ended up being way too long though, so after I finished the body I folded the part of the head that was too long and stitched it on the back of the head.
The Tail

I didn't use a pattern for the tail, instead I made a magic ring with 6 single crochet stitches, and increased the stitch each time I felt like I should make the tail wider. For this I also used the 3,5 mm needle.
The wings

I used my trusty 3,5mm needle for this part as well. I already had a pattern for a bat plushie, which I had used to make the wings. From there I diverged from the pattern, and created a bigger 'spiral' so to speak by adding 3 more rounds.
If you are using this pattern, I diverged from the guide from row 5:
r5.1: 5dc, inc.
r5.2: 6dc, inc.
r5.3: 6dc, inc.
After that I followed the pattern again, and diverted from it once more to add more single crochet stitches to each 'spike' of the wings, making them more bulky and longer.
The ears

I also didn't follow any pattern for the ears, I just made a triangle of single crochets (again, with my 3,5mm needle), and stitched the points of the ears to one another to make them more pointy and give them more depth. Then I attached them on the side of the head with *only* the base of the triangles. This is because I was going to add the hair and horns later on, and I didn't want the ears to get in the way of them.
The eyes.


I worked with resin before, and still had some. I mixed a small amount of epoxy resin with gold and orange pigment powder, and golden glitters. I poured it in a half circle silicone mold I have with various sizes. After it had cured I tested which size I liked the most for the doll, and used those for the eyes.
Next was the application, glueing the eyes directly on the head would be a surefire way for them to detach in the near future. So at first I tried to use these screw eyes by hanging them over the mold as the resin cured, so I could simply sew them in. But that didn't work as the resin swallowed the entirety of the screw, and the thread I hung them over the mold with. The 'eyes' were still semi-transparent even though I used a lot of pigment, so I could easily see the ends of the screws inside the eyes. So this was a failure.
On my second try I didn't mess with the resin as it cured at all, and used even more pigment powder just to be sure it wouldn't be transparent. This time, I used a small hand-drill to create 2 holes on each side of the half-circle, as close to the edge as I could. Then I drilled another 2 holes on the flat side where the end of the first 2 holes ended, making a little tunnel. I took some tweezers and stuffed and pulled the thread through the tunnels until I could pull it through. I tied them on each end, and superglued the knots for extra security.
Once everything was dry I sew the eyes directly on the spots I wanted them to be. But I wasn't too happy with the result, in all honesty...

... So I gave Haarlep some eyelids. Sure, they still look quite bug-eyed, but I decided to trust the process.
The horns (and a nose!)

I had completely forgotten to photograph any of my progress from when I was done with the eyes t'ill the horns were already finished. I had also decided to give Haarlep a little nose (which I made out of a magic circle with 10 single crochets, 2 rows of increases, and 3 rows of decreases).
In the original pattern there are 3 sizes available, and I used size 1 and 2 for the horns on this doll. The yarn I used for this was quite thin, but I made the mistake to use the 3,5 mm needle *again*. Which is why I could see directly through all the stitches, and see all the polymer filling within. I admit that the horns were about my least favourite part of this project, and I was struggling to get through them (no hate to the creator of the pattern at all, as it was a very well-written pattern! I just didn't enjoy making these because of some Morb-problems). So I was not ready to do it all over again. Instead, I noticed I had a lot of yarn I used for the horns left, so I used that as filling so the large holes in each stitch wouldn't be noticeable.
The Hair

Again, I forgot to take any pictures of this process, so I'll have to write down what I did. I used the Twister solid XL yarn for this.
First I gave Haarlep a much-needed hairline to map out where I wanted his hairdo to start and finish. For each 'strand' of hair I repeated one of 2 processes whether I wanted it to curl or not.
(fun fact, the 'curly' hairs are based on a very simple pattern a friend of mine created to make toys for her cat!)
Curls:
Chain (make it as long as you want depending on how long you want it to be, but for this project I used in between 8-15 chains per strand), single crochet in the 2nd chain stitch from the end of your chain. 3 single crochets in every chain (I did this for about 3-6 chain stitches). Than I did a bunch of single crochets in every chain until I reached the end of the chain. Then I put another single crochet in the 2nd chain, and put 1 single crochet per chain stitch until you reach the end, tie and cut your yarn on both ends. I kept about 15-20 centimeters of yarn on the end that's the furthest away from the curl so I could use that to sew the strand of hair directly onto the head.
You can also put 2 single crochets per chain, or more than 3 depending on how curly you want your strand of hair to be.
Straight strand:
Follow the same steps as the curls, but just keep adding single crochets per chain stitch after you've made your chain, and repeat this twice.
I then worked in layers when attaching each strand of hair onto the head, I added one or two rows of "hair" starting from the neckline. Once I sew in those strands I sew about 3-5 centimeters of hair directly onto the head (the point that's the furthest away from the curl/the part of the strand that's attached to the head). This is so if the hair on the doll moves it wouldn't go out of place, and you wouldn't see any bald spots. This way I also wouldn't have to make countless of strands and add too much hair.
I have no idea how I can explain this properly without pictures, so if anyone reading this really wants to know how I did it I'll recreate the steps mentioned above.


I also added some sideburns to give Haarlep's hair a bit more of a finished look. After I was completely done with the hair (checked that I had not left any bald spot unchecked) I attached their ears on their lower horns using a piece of the same yarn I have used for the body.
The Harness
This was arguably my favourite part of this entire project! I really enjoyed making this as I could use several types of materials into this. I wanted to make the harness without having to directly attach it to Haarlep's body, so that it could be tight enough for it to stay attached. Bit first I had to start with the basics.

The undies! I freehanded the underwear as well, which goes as follows:
I started with the front, and made a chain that reached the diameter of Haarlep's body. From there I worked down, adding a single crochet per chain stitch. And at each end of the row I made a decrease. I used knitting markers to attach the underwear on the body as I made it to get as much of an accurate fit as possible. I kept going until I reached the hind, which is where I had to "split" the underwear to accommodate the tail. At first I went to the left, making every row very small until it reached 3/4 of the top of the tail (while making sure it could reach the front side of the underwear). I then made a chain that went around the entire top of the tail, and kept going until I reached the other side of the underwear, and attached my chain on it. I did the same stitching as I did on the other side of the tail, except in reverse until I reached the rest of the underwear. From there I finished up the underwear by securing all sides of the underwear to each other using the same yarn so it would seamlessly fit across the doll's waist.


I have no idea how to write a comprehensive tutorial and/or a pattern. So again, if you don't understand how I did this from the text I wrote please send me a message. I'll draw how I did this instead, and edit it into this post.
Next was the harness itself. I used a chain with a double crochet per chain stitch, and measured the chain against the body as I made it. I started out from the middle (the back strap that divides on the shoulders, to the front of the chest where it splits. I made several different sizes of "straps", always making a pair. I then attached every strap on a chainmail ring (the soft silver RVS rings), and kind of worked my way from there. I opened each ring with 2 pliers, slid on the end of each strap in place, and closed the ring with the pliers again. This was very much a 'trust the process' type of work for me.

If I couldn't secure the strap just yet I held them in place with a knitting marker (see shoulders).
For the shoulder pads I only used a chain to make the straps that go under the arms, and almost followed the same steps as I did when creating the underwear. Start with a chain (except smaller, like 5 or 6 chain stitches), do a round of single crochets, decrease at the ends of the rows, a round of single crochets, etc. Until I got a tiny rounded triangle, which I attached to the shoulder chain.
Next, I wanted to create the spikes that go on top of the shoulder pads. At first I wanted to make the tiniest studs using some embroidery thread. But I recently acquired a 3d printer! And as I already was using metal in the harness, I wanted those studs to match.
So I created a simple design on Tinkercad.com using a simple cone, printed 10 of them (using a 0,25mm nozzle and neutral white PLA filament), and painted them silver. Then I figured that I could drill a little hole in it with the same small hand drill I used on the resin, but turns out that cured PLA filament is quite hard, and brittle at the same time. So I went back to Tinkercad, and designed a cone with a hole in it that would allow a larger needle to go through it. I made the cone 0,5x0,5 millimeters.


After that was done I painted them silver again. Below you also see the shoulder pads, which is the only picture I have of them before I attached them to the doll.

I used 5 studs per shoulder pad, and sewed them directly onto the pads with black thread. After I secured them with a tiny drop of instant glue so they wouldn't shift. I could've created another hole that ran opposite of the one already going through the cone, but I think that it would've made the integrity of the inner (teeny tiny) supports within the cone too vulnerable.
After that was done I attached the shoulder pads around the arms and the harness.


For the final touches I attached the small chains from the jewelry kit, mirroring the references I found. I simply opened them with the pliers, hooked them through a stitch in the harness, and closed them. I actually had run out of these chains, and literally dismantled a necklace as I wasn't going to wait around and buy another jewellery kit or a whole spool of necklace chains when I was so close to the end. And I'm glad I did, because my patience had run out after I had been working on little Haarlep since August 2024.
And with that, they were done!

As soon as I was done I made pictures, and sent Haarlep on their way to Lia along with some snacks and a few other bits and bops. This project was such a challenge, but very much a welcome one. I had started learning how to crochet in december 2023, and truly went out of my comfort zone, and learned so much about crocheting techniques, trusting the process, and Frankensteining several patterns into one.
If you have any questions regarding this project, or if I can clear up anything mentioned here I'd love to help to the best of my abilities! Other than that, thank you for reading this and following the journey of creating the most intricate and hardest crocheting project I have made so far. And it was a joy to make. But it will most likely not be the last one, and not the hardest as I have no plans of quitting crocheting anytime soon. Who knows I'll surprise myself with the next Baldur's Gate 3, or other fandom project I'll decide to undertake.
#my art#my crochet#crochet plushie#crochet project#crochet guide#baldur's gate 3#bg3#baldur's gate 3 haarlep#bg3 haarlep#baldur's gate 3 fanart
5 notes
·
View notes
Note
thank u for postin wips of ya falin cosplay i been wanting to do her for so long but had no idea where to even start, actively taking notes as you make it!
amazing work cant wait to see how it all turns out
Absolutely I'm glad to help!! Here's some detail stuff that isn't really clear from the photos:
-the shirt that I'm wearing is actually a shirt and a shrug. The shrug is a stretchy knit fabric that I glued probably close to 800 real feathers on. Initially I used that quick dry fabric glue and it worked for some of them, but going forward I think I'm gonna switch to hot glue, just because it does have to move a lot in the process of putting it on.
The other shirt is a layer of power mesh sewed to a lace back (I decided to do lace for the back because in a lot of references theres feathers but you can also see her musculature like shoulder blades etc. So I figured something lacy and see thru would work best there.) And then theres a feather ish fabric sewn to the power mesh on the front. Keeping the brood patch visible was very important to me, but I don't want my stomach hanging out, hence the mesh.
The reason I did a shirt and a shrug instead of just a long sleeve shirt is because, if necessary, the shrug is there to hide any sort of harnessing that may be needed to keep the body (the centaur ass as I call it) level. It's not clear if I'll actually Need the harness because the body and the back legs are being made in a way that they'll just kinda roll across the ground as they move. The original plan was to have them completely articulated, but with the weight of it all its just not possible.
- if you do make this and need to make the digitigrade pants, MAKE A DUCT TAPE DUMMY to get your pattern!! If every fursuit maker on earth does it YOU DO IT TOO. I didn't do it and trying to get the pattern off of that myself was a maaajor pain.
- the stilts are flashy, they're the major thing people notice, but they are NOT without risk and need for training. The ones I have I made myself with dad's help following a build log from Willow Creative and a buunch of other videos, instructables, etc. There's a lot of ways to do them. I used aluminum slats, but wood is a cheaper, easier to work with choice, and there are many videos and tutorials for how to do it with wood.
The way that mine are built, with the toe stop, there is quite a bit of pressure on the front of your foot. If you have experience with high heels you'll probably have a better time than me. I've walked on the fronts of my feet forever, and I regularly roller blade, and even then after about 20 minutes my feet will start to ache. I'm hoping if I work with them like any other exercise they'll get easier, but who knows. I'd definitely say if you Want the look but without the hassle, look into pure digitigrade padding and fursuiting. It's still a hassle just in a different way lol.
Thank you once again!! There's a lot of ways to do these, and you could even make one in a way where all of its on your body (like wings with a shoulder harness, tail with a belt), or I've seen some where it was more translated to a dress....it's all cosplay! It's for fun! I'm a crazy person and making this for a contest so keep that in mind lol!! If you do ever make yours, send it to me!!!!
One last thing, if you have a cosgear account, I'm on there at Maltrock !!
16 notes
·
View notes
Text
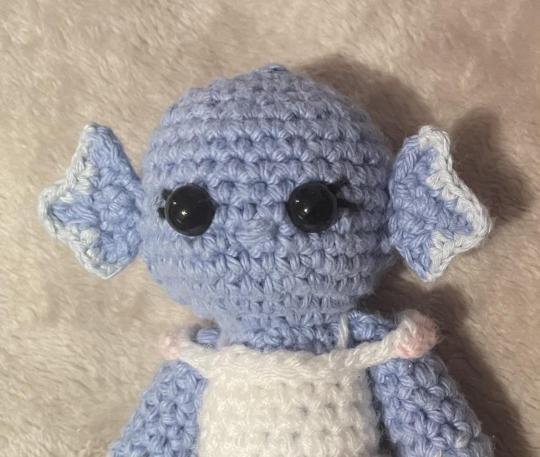
So...lately I decided to try something different...
I had a sudden urge... to create a handpuppet. Specifically one of the Norway-dragon I made a while ago. Why this one specifically? I don't know... but I wanna try!
I started by looking up tutorials on Youtube and it did not disappoint... Puppet Nerd had some great tips to get me started though I didn't follow his advice 100%... I still wanted to make this my own.

It all started with this sketch...

I moved on to making this base. Then I had to take a break because for some reason nobody sells blue fleece anymore for some reason?? At least not of the kind that actually fits with the red and white I already have...
Until I found a fleece carpet. Its not 100% the right type of fleece but its blue! So finally I was able to get started on his "skin"

Then came the question about how to make his mane... now making it out of faux fur... but then how would I make the stripes???
Well I decided to instead make things a whole lot harder for myself... and made it out of yarn...


Each strand is basically just tied up in knots on the inside of the fleece... yes it took forever...

Afterwards I went over it with a pet brush to make it look smoother and...less like yarn.

I then created his body, and did the same yarn method on the top of the front, to create a lion's mane.

This is where I'm at right now. He is constantly asking for hugs, as someone who doesn't like hugs its a bit uncomfortable...but I accept it because he's so very soft... (I stuffed his body and face with cotton filling in addition to the foam "skeleton" to make him look less pointy and more plump. That was a good call...except it makes his mouth a tad bit harder to move...but its still perfectly usable.)

His paws are biiiig... Armrods have been ordered.
I debated with myself I should give him more traditional puppet eyes, I even got some styrofoam balls to make them out of... but after checking how it would look with just pieces of paper I decided I prefer my usual method of creating puppet eyes... painting on a piece of fleece. The freckles are made with needle felting.
I also intend to give him legs, wings and feet, as the sketch implies. I haven't quite decided if I'm gonna do the antlers yet...cuz I haven't entirely decided what the best method to do that... For a while I pondered if I should do his crown too and if so how...then I remembered I have worbla-plastic, a heat gun and gold paint...I can easily make him a custom crown!
He has already been given a name btw...that isn't just Norway-puppet or Norway-Dragon...his name is Harald Hårfagre the second, named after a famous king (known as Fairhair in English) because...well have you seen his mane?? Its fabulous... best yarn hair in Norway. But you can call him Hairy Harry.
9 notes
·
View notes
Text

Hello esteemed mutual. If you are reading this, then that means my propaganda is working. But you might still have questions, so I am here to answer them. This one is a bit different from others, since it's about a genre and I will just give some recommendations without getting too deep into it. If you want more information, tell me and, well, then expect another Captain America meme.
What is a farming sim?
As the name suggests, it's a simulation game where you farm. Yes, that's it. It sounds like nothing, which is exactly why people were sceptical when Harvest Moon first came out, *Holster voice* but it's all about the gratifications, bro. The gratifications.
It's a satisfying gameplay loop where you make your little farm thrive. Common elements of farmings sims are farming (wow!), loving animals, caring for the land, getting to know citizens of a little town, fishing, gathering materials through foraging or mining, attending festivals in town, and marrying someone to have kids with.
The idea is that you can basically do what you want. Many farming sims have quests/a questline, and some function as tutorials, whereas others truly try to tell a cohesive story. It's all about taking the time. You can try to be the most profitable farmer as possible, or you can just vibe. I also like that many of these games have a lot of hours of gameplay, so you can really go into it, and it often makes the price more appealing (although the latter still depends on the price, cause some farming sims are €5, others €50).
What are your favourite farming sims?
Stardew Valley
This one is often seen as a God tier standard farming sim, following the footsteps of (and dethroning) Harvest Moon/Story of Seasons. I have an entire propaganda post about it here. You are not immune to Stardew Valley propaganda.
youtube
Story of Seasons: Pioneers of Olive Town
Yet another classic "you move to Olive Town to become a farmer, carrying on your grandpa's legacy" game. For some reason, people actually seem to dislike Olive Town, as in, I have heard people say it misses something. And it's true that this doesn't have the most memorable story (after all, I can't remember it while writing this!), I liked it a lot. It was a satisfying gameplay loop. This installment of the series also put more focus on the processing of (artisan) goods, which might not be everyone's vibe, but I vibed with it.
youtube
Fae Farm
The big selling point of Fae Farm is the magic. There are fairies here with fairy crops, potions, wings and what not. The story isn't groundbreaking, but the thing I love the most about this game is the gameplay itself. It's very polished and it has some quality of life features that I honestly wish more games would implement. The decorating and customisation in this game also works really, really well and also, the game looks stunning.
The social aspect of this game is, unfortunately, the absolute worst I have ever seen in a farming game. It's honestly remarkable how they managed to get so many things right, and yet fuck this up in such a spectacular way. But in some way, the fact that the characters were as uninteresting as a wet newspaper gave me more time to do other things, since I didn't see the need to socialise. Also, don't buy the DLC, it isn't worth it.
youtube
Ooblets
Ooblets is a combination of a farming sim and a critter collection game. You farm crops and forage for stuff in order to catch Ooblets. But Ooblets are also grown on your farm, so yay, more farming! There's also a story in the background, but again, the point is that you need to grow your farm and unlock stuff in order to get more and more Ooblets. This game doesn't really have a livestock element (unless you count the Ooblets), and the social aspect is just dece. It also has no combat and mining, which is something people prefer. Instead of fighting, you have dance battles!
youtube
Eastward: Octopia!
This one is a difficult one to recommend, even though I loved it, because it's a DLC! The base game Eastward is not a farming sim! Eastward is an RPG where John and Sam have to uncover the secrets of the world and fight baddies and explore dungeons, yada, yada, you get the drill. Eastward: Octopia! is a completely separate mode that can be accessed from the game's menu, and yeah, it's a farming sim. It takes place in a parallel universe where John and Sam start a new life as farmers in Octopia, and together with other Eastward NPCs, they decided to rebuild the town.
It's honestly good DLC, especially since it's only €5 or something. In fact, I spent more hours in Octopia than in the base game, and the DLC is way more up my alley. But you NEED to have bought the base game, obviously, which raises the price, and even though it takes place in a parallel universe, a lot of joy comes from seeing the Eastward characters in this new setting. And somewhere mid-game, it does actually connect to the story of the base game. But gameplay wise, it is a solid farming sim for €5, even though in late-game it turns into a sleeping simulator. But it's still nice, it's simple, and I never had a farming sim stop me in the evening to have dinner with my kid.
youtube
Are there also games that aren't technically farming sims but have similar elements AND allow you to grow crops at one point?
Yes, and if you like farming sims, you'll probably like these too. Behold, games that aren't technically farming sims but have similar elements AND allow you to grow crops at one point:
Potion Permit
Instead of a farmer, you're an chemist moving to a quaint town called Moonbury. It's up to you to cure illnesses, using handcrafted potions. The townsfolk don't trust you, though, after an incident with the previous chemist. This game focuses more on the foraging: you got to gather ingedients for your potions. This did lead to a lot of grinding and during the foraging, you will encounter overworld enemies. But there's still some planting, and other elements like the social aspect, the fishing and working your way up are part of this game.
youtube
My Time at Portia
I mistakenly thought this was a farming sim when I bought it, but in my defense, look at the trailer: they're leaning hard on the farming, whereas that is a small part of the game. You're not a farmer, you're a builder! You inherit your pa's old workplace in Portia and decide to move there. It has all the traits from a farming sim, except for the fact that you build stuff instead of farm. And honestly, it's really satisfying, because the stuff you built for quests has a direct impact on the environment.
Oh yeah, quests. Probably the biggest difference between this and traditional farming sims (apart from the building) is that this game has a LONG, LONG cohesive storyline. As in, 100+ hours of story long. It beat Persona 3 and 4 in hours. And that story also puts focus on combat. The Portia world has overworld enemies and hazardous dungeons that you need to clear. That might disqualify it from being "cosy" but damnit, I loved this game.
youtube
My Time at Sandrock
The sequel to My Time at Sandrock. Honestly, everything that I've said about Portia applies here as well. Sandrock is newer, so it looks better, is more polished and has better quality of life elements. You don't need to have played Portia to play Sandrock, so if you only want to play one, I recommend Sandrock, but the Sandrock storyline runs parallel to Portia's, so it's fun as a Portia-fan to see it unravel as an addition to Portia's story.
youtube
And do Animal Crossing: New Horizons, Cozy Grove and Spiritfarer count? I don't think so. The basics of these games are still so different from this genre, but hey, a lot of people who like farming sims also like these.
What are farming sims you would like to play?
Oh, multiple. There are a lot of them coming out and there have been a lot of new ones. Honestly, there is almost a farming sim fatigue, but there are great ideas on the market: prehistoric farming sims, vampiric farming sims, farming sims with witches or other magic, farming sims with dinosaurs, farming sims that take place underwater and have merfolk, farming sims in the sky, farming sims that focus more on building up the town... etc.
... Are there farming sims you didn't like?
Yea, lol. Sprout Valley, Story of Seasons: A Wonderful Life and Harvest Moon. Sprout Valley was too repetitive and grindy, which is saying something, since the genre is supposed to have a repetitive loop and you need to grind, but this was just... bad. SoS: AWL is a nostalgia bait and I never played the original one, so I have been stuck on it for over a year, because this game bored me to no end. Same goes for Harvest Moon, which, yea, respect your elders and all that, but man, it is indeed old and I noticed.
Cattails is a game that isn't technically a farming sim but it has similar elements AND it allows you to grow crops at one point. It was just fine. Nothing to write home about, so I also think you can skip it.
Are there German characters in any of these games?
The better question is if Germany even exists in those games.
3 notes
·
View notes
Text
NattiKay fursuit 3.0: digitigrade edition is in the works 👀 still in the planning/materials gathering stage atm but hoping to start on the actual work within the next week or so. If all goes according to plan she should be ready in time for AWU in a few months!
NattiKay 1.0 was made in 2017, followed shortly by 2.0 in 2018. I'd wanted a digi suit even back then but I was new to fursuit making and figured digitigrade might be a bit above my level, so I stuck with plantigrade. Welp, since then I've upgraded almost every part of 2.0 at least once (at this point it's probably more like 2.7 or smth lol)...EXCEPT for the wings and bodysuit, which is still that same plantigrade one I made in 2018, so it's been in use for nearly six years now. The most recent upgrade was her current head, which was...I think two years ago?
SOOO...after getting inspired by seeing some of @happyfoxx-art's WIPs, I've decided...it's finally time. No more 2.2, 2.5, 2.8. It's time for 3.0!! Gonna make every single part fresh!! And finally gonna try to upgrade to digi style legs!! Been wanting to for years and now the time is right!!
I'm a little apprehensive because I know it's gonna be a ton of work and I'm wary of getting burnt out (has happened before, usually because of rushing to finish before a con) but I am DETERMINED to pace myself and take my time and do it RIGHT even if that means slow. I'm starting early enough that there should still be plenty of time to get it done before AWU without feeling rushed, and if I'm gonna put in all the time effort to make a whole new suit from scratch instead of just a replacement here and there I want it to look GOOD. Been looking up tons of tips and tutorials and such and definitely hype! I'm trying to temper my expectations because of course my execution is not gonna be pro level BUT there's definitely a lot of potential and it should at least be decent!!
I will admit I'm "cheating" with the head by using a premade base this time though. Found a really adorable expanding-foam-cast one for sale and I'm hoping the fact that it'll be all smooth and symmetrical will help with the furring, especially around where the muzzle connects to the head, which is a spot I've always struggled with sculpting and furring in the past. And I suppose if I end up not liking it for whatever reason I could always go back and sculpt my own anyways. We shall see!
#i mean. using a premade base isn't really ''cheating''. that's what they're there for#just felt like i should disclose that because with my previous versions I sculpted the foam myself#so if this head ends up looking nicer than the previous ones it's only PARTLY my own skill improvement at play 😅#furring and finishing is still its own skill of course. one that can make or break the final product#BUT the base is of course also very important so 😅 yeah lol#a n y w a y s sorry to ramble. this has been consuming my thoughts for the past few days lol#SO EXCITED FOR DIGI LEGS SUIT I HOPE I CAN MANAGE MAKING IT
18 notes
·
View notes
Text
Hi everyone!!
Lots of people asked for the pattern I used for my Joel and Lizzie dolls, but due to my mental unwellness, my "pattern" was actually a chaotic blend of multiple patterns, as well as my own spontaneity.
Nonetheless, I am going to attempt to explain the method to my madness in this post! (Fair warning, it will get long.)
(If you actually want to try to recreate this please PLEASE reach out to me!!! I can go into way more detail and do diagrams and whatnot if you really wanna see the full idea!!!)
I'm gonna do my best to divide this up into sections based on how I made them, but because I modified a lot of things and Joel and Lizzie are clearly not the same, it may get a little muddled along the way, but here goes!
The Bodies
First thing's first, this is the link to the tutorial I used for the basic body shape. Super great video, easy to understand, fantastic starting point for any doll!! :D
For Joel, I followed the tutorial pretty exactly, minus that middle seam for a belt. I changed colors for the boots, pants, and coat and kept all the measurements the same.
For Lizzie, I modified her pattern to be a little bit bigger bc haha funny tall wife. On parts of the pattern where the stitch count stayed the same, I added a few more rows to make them longer. I added 4 rows to the legs, 3 rows to the chest, and two rows to the arms.
Like this!
listen I had to visualize it somehow-
I also did a gradient for Lizzie's arms/legs/tail! Here is the video I used to figure out how to do it (I don't have the measurements for where I changed colors I'm sorry I'm goofy </3)
Also, here is a link to a post where I half-heartedly liveblogged the early stages of making them. You can kinda get a rough idea of where I changed colors for different parts of their outfits, etc. but I only got two steps, really- oops.
The Clothes
Now, this is the part where I documented virtually nothing, but honestly, it still turned out just fine!
For Joel, I made boot and sleeve cuffs by just single crocheting a chain to fit around his arm/leg and adding a couple of sc (single crochet) rows. Then I sewed the ends together with a long yarn tail, used thinner gold yarn to add some detailing (look up backstitching! it works really well!!), and sewed the edges on.
His coat ends were made in the same way, but bigger, and instead of sewing the edges fully together, I only connected the top stitches when I was attaching it. And because I'm a messy sewer, I easily hid the seam with a black sc-chain belt :)
The gold details of his coat is also a sc-chain just sewed on. The edges at the bottom... were sorta a sc-hemming type deal-? I don't know, I winged it and I don't like how it turned out </3
The shoulder pads I actually can tell you! It's 5 sc in a magic circle, sc around, and then I picot stitched around in each stitch. Then I tied off a long tail and sewed it onto the top of the arms before I attached them. The badge/flower is the same pattern, but without the sc round in between the mc and the picots.
The sash was a little wonky doing it as a full loop the whole time, so it was basically a long rectangle and when I was attaching the ends together I did it under the shoulder things so it wouldn't be bulky and ugly on top. I think it's decently easy to understand from the pictures in the original post, but if not lmk! (if any of this is coming across at all then bless you tbh.)
The collar is just two rectangles I sewed side by side, they don't continue to the back at all bc they were ugly /lh
And this is the tutorial I used for the crown! I threaded a little piece of green yarn through to make the jewel and tied a knot in the back :)
For Lizzie, I literally made the skirt up as I went along, but it was roughly based on this video. I started with a sc chain to get the right size, then made it a rectangle for a couple of rows (maybe like four?) before joining it together. (That way, I could make the skirt separately and still be able to get it back on her when I was done without being too tight!)
At some point, I picked a stitch as my "center point" and started going back and forth from about that point instead of completing the full circle, doing half double crochets close to it, then double crochets, then triple crochets, then back to dc and hdc as I got close to it again. I think I did about 6-8 for each stitch type section? The GOAL was to make the skirt's hem asymmetrical, which worked, but it's hard to explain bc I literally made it up.
Then I made another sc chain for the belt thing after I attached it :)
The top detailing is also a sc chain, but with some joined yarn above the arms for extra color. There's also bits of yarn that are supposed to be straps, but you can't really see them in any of the pictures, so that's optional rip.
For the frilly hem, I joined the yarn at the "center point" and basically just worked around the whole hem repeating (1 dc, 2dc inc) to make it all wavy and fun!
The Hair
The pattern I based the hair off of was from this kpop star doll that I was originally going to base my entire Joel doll off of.
The difference is I changed the lengths of the strands (I did it based off looks, so all of them are slightly different in length to look more natural) and also color changed the very front few strands of Joel's hair to be green. I also put two strands in a few of the back stitches instead of just one so they completely covered the back of the head (so there are 15-16 strands instead of 14.)
To attach the hair, I used pins to mark out where I wanted to place each strand. Here's a quick progress shot I sent to my friends:
Now, I wasn't smart, and used long pieces of thread from tying off the "hair mop" to sew all the strands onto the head individually. It took forever and make it kinda messy in the back because of weird overlapping. If I could redo it now, I'd use fabric glue or something to glue each strand so it lays flat, although if you don't have it or want to avoid the potential mess, sewing it does in fact work just fine.
Extra Bits (mostly for Lizzie)
Lizzie's tail is more or less the same as her arm, but it starts thinner and goes for longer at the end. For the frilly edge, I remember using a crochet beta fish fin design, but I can't for the life of me find it in my history now?? But it was essentially joining the yarn a few stitches from the point and crocheting (hdc, dc 2x, tr, dc 2x, hdc, dc 2x, tr) and mirroring it on the other side so it looked like this:
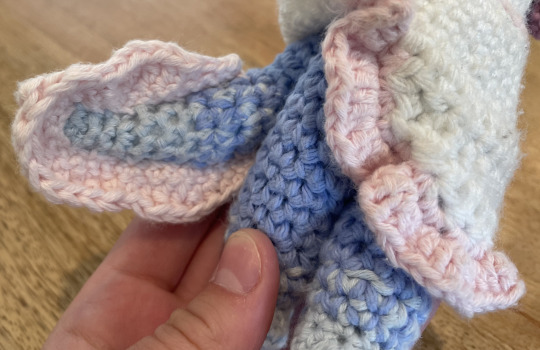
Here's a closer view of both the tail and the skirt's hem.
Lizzie's fins were made by making a magic circle, chaining 4 and sc-ing back, and slip stitching back into the circle three times to make the three points. Then I joined onto one point with the lighter color and sc-ed along to the other point to make it more detailed.
Here's a cursed image I sent to my friends of bald Lizzie and her fins.
Lizzie's space buns were a fever dream to me because I made them at 1 am, but I did something that looks similar to this puff stitch flower with only three "petals." I attached it to the head and then used a short chain of another color to add some color and detail.
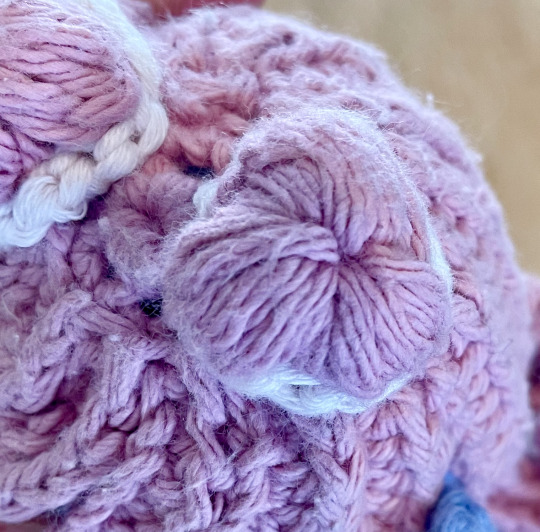
Here's a view of a bun from the top.
---
I think that's just about it! If I missed anything or want to know how I did something better, please please PLEASE reach out to me!!
I'd love to go into more depth on things, but I predict this post will top off at 5 notes so I don't really want to spend hours explaining something that'll go completely unseen /lh
Nonetheless, I hope you enjoyed this little insight into the inner workings of my brain! Feel free to share and tag me in anything if you decide to try to do this yourself.
Cheers!! <3
#WOO I DID IT.#hope you enjoy this it took forever AHSJDSA#pho.posts#pho.doodles#<- bc it's from my project haha#when i eventually make a dl pearl i'll document it better so you can see it in action haha#empiresblr#empires smp#esmp s1#smallishbeans#joel smallishbeans#ldshadowlady#lizzie ldshadowlady#jizzie#crochet#amigurumi#amigurumi doll#pho.crochets
30 notes
·
View notes
Text
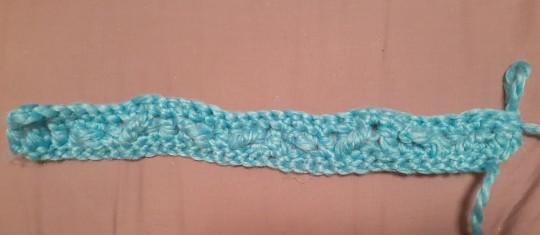
First time attempting to crochet a winged cable stitch. I start with a base chain of 36. Row of single crochets. Then the row with the cables. I get to the end and I have three 'leftover' stitches instead of two. I count. Yeah thats somehow 37. Throw in a decrease and finish the row. Next row of single crochets, counting as I go, now there are 35.
Sometimes in general Im off by one, and I thought it was that I was doing the starting slip stitch wrong, but I followed this person exactly. This tutorial btw by B.Hooked https://www.youtube.com/watch?v=N2Vn5gyiQqg
I just recounted my starting chain and theres 36.
Any idea what the heck is going on? Do I throw in an increase and play hide and seek with this moving stitch? Actually I dont have enough of this yarn for another row but I might have the same in a different colour.
Will add a photo in a sec.
Tadaaah
3 notes
·
View notes
Text
I finally retrieved the ancient texts from my storage unit
aka the "books" I made from the ages of like 9-12(??) by writing and drawing on printer paper (or just notebook paper!!) and then stapling them together, I'd do a lil cover and everything, I'd write a summary on the back like Real Books Have, and I was so proud of them
and I have kept them all. and now. I decided to look at them once more. the relics from as early as 2005..
so. You guys wanna see an unfinished dragon comic written by a 10-year-old?? haha yeah you do c'mere
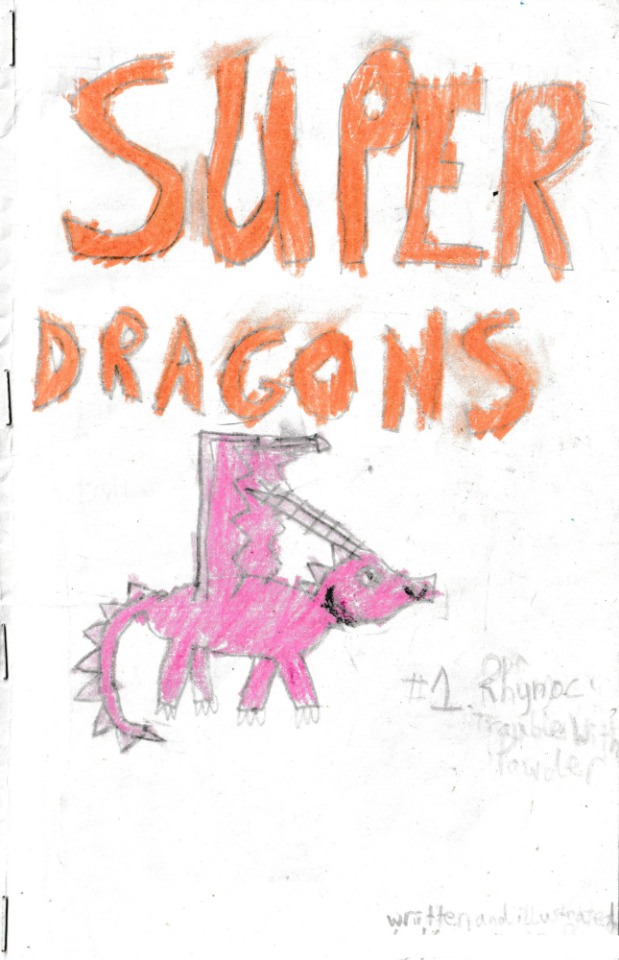
Super Dragons #1. Rhynoc Trouble With Powder
Written and illustrated by (full name redacted for privacy reasons)
This is labeled #1 but I never did more lmaoo let's dive into this mess
(rest will be under the cut, along with transcriptions of the writing because it didn't scan very well but also I just had terrible handwriting and the crayons smudged like hell. I WILL preserve any spelling or grammar mistakes in my transcription so you can really get an idea of my skill level back then)
So first off can I just say. I am. OBSESSED with how I would consistently draw dragon wings backwards, ignoring my older brother who constantly pointed it out to me and I was like "no they're not", until I eventually paid more attention and tried following some tutorials on how to draw Spyro-style dragons and I was just like ohh. Okay. Yeah. I'll fix that.
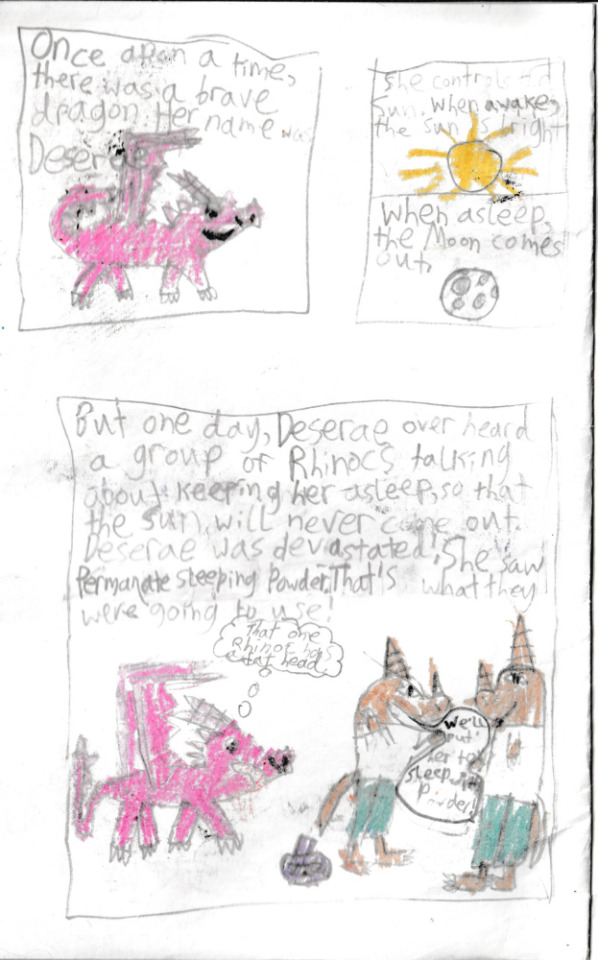
Also I like that while Deserae is a "sun dragon" she has no features that would make you think that, she's just a magenta and pink dragon. Though in retrospect I'd suppose that'd make for a fun subversion of expectations. My thinking was clearly next level. So, the text:
Once upon a time, there was a brave dragon. Her name was Deserae. She controls the Sun. When awake, the Sun is bright. When asleep, the Moon comes out. But one day, Deserae overheard a group of Rhinocs talking about keeping her asleep, so that the Sun will never come out. Deserae was devastated! She saw Permanate Sleeping Powder. That's what they were going to use!
Deserae: (thinking) That one Rhinoc has a fat head
Unnamed Rhynoc: We'll put her to sleep with Powder!
Now here's a fun thing of note, young me insisted on trying to fit characters fully into the panel instead of just letting parts go past the borders, so. Keep an eye on parts like tails going forward because it's ridiculous what I did with them sometimes. I also would have characters like, think about random stuff I personally thought was funny while drawing, or they'd explain things unnecessarily. idk why, it's just what I did

Spyro jumpscare! Deserae makes a badly done flier trying to find a bodyguard (if she has such an important role why does she not already have one? who knows) and surprise, Spyro answers the call. Because he's a heroic guy and that's what he does <3 And bigger surprise, he and Deserae immediately fall in love. He was a boy, she was a girl, can I make it anymore obvious?
Deserae started to make posters to get protection. She isn't a good drawer, but it worked!
The poster reads "WANTED BODY GUARD. FOR INFO CALL 111-2531"
In just 1 hour Spyro called. He did it for free! (An arrow points at Spyro, labeling him as Spyro) Deserae accepted him. Spyro got to Deserae as fast as possible. Spyro and Deserae fell in love with each other as soon as they met.
Spyro: (thinking) She's the girl for me.
Deserae: You're handsome.

Spyro said, "So... What is it you need to be protected from?" Deserae told him all about the Rhynocs and the Permanate Sleeping Powder. They went off to find the Rhynocs.
Spyro: (thinking) Great! Tracks!
Spyro and Deserae headed to the lake. There wasn't anything there. The volcano did not have anything either. Finally they came to a forest.
Spyro: They might be in the forest!

They found a bag of the Sleeping Powder. Spyro destroyed it, but little did they know, it was a fake!
Meanwhile...
Unnamed Rhynoc 1: Where did I put that Sleeping Powder?
Unnamed Rhynoc 2: How should I know!? (while thinking 'It's in the safe.')
Back to the dragons...
Spyro: At least we got rid of the Sleeping Powder.
So he thought. The real Powder was in the metal safe.
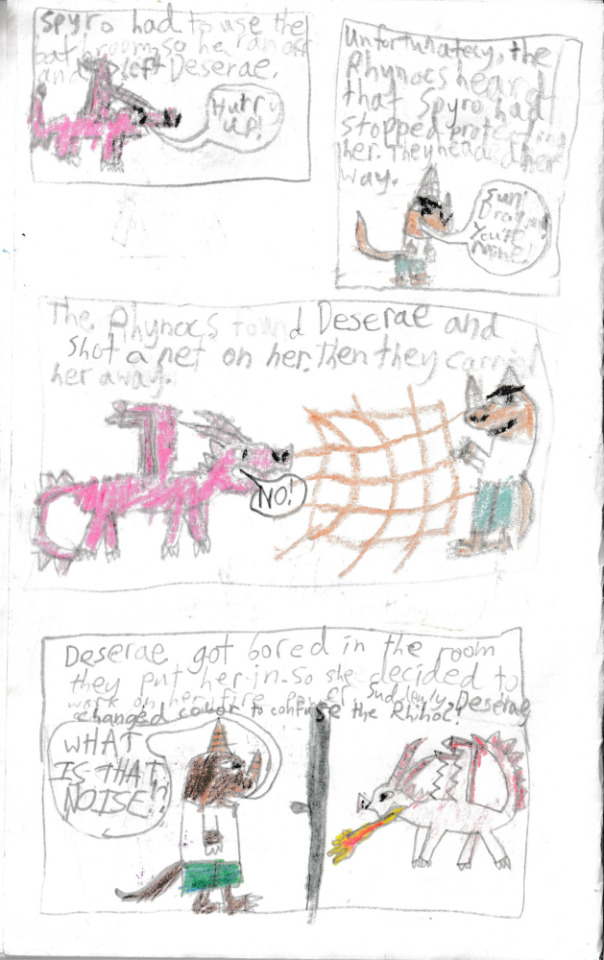
Spyro had to use the bathroom, so he ran off and left Deserae.
Deserae: Hurry up!
Unfortunately, the Rhynocs heard that Spyro had stopped protecting her. They headed her way.
Unnamed Rhynoc: Sun dragon! You're mine!
The Rhynocs found Deserae and shot a net on her. Then they carried her away.
Deserae: No!
Deserae got bored in the room they put her in. So she decided to work on her fire power. Suddenly, Deserae changed color to confuse the Rhinoc!
Unnamed Rhynoc: WHAT IS THAT NOISE!?
Note: I love how I keep switching between spelling it as Rhinoc and Rhynoc. For the record, they're a classic Spyro enemy and Rhynoc is the correct spelling, I believe. Meanwhile, Deserae's color swap was done entirely because I was using a different set of crayons from the usual ones and had to use different pinks for her, so I just decided to make the color switch a part of the story. Lmaoo
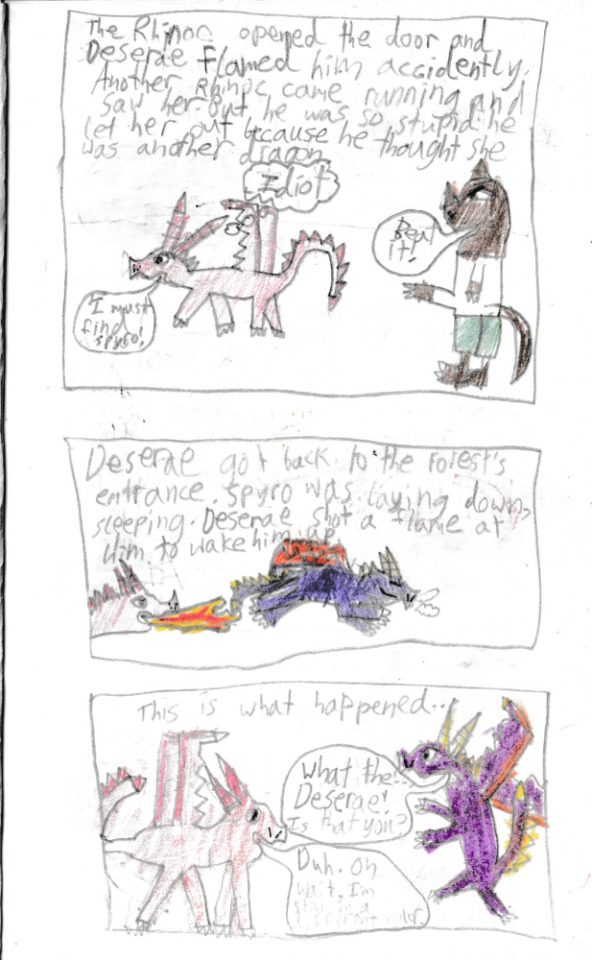
The Rhinoc opened the door and Deserae flamed him accidently. Another Rhinoc came running and saw her. But he was so stupid he let her out because he thought she was another dragon.
Desarae: I must find Spyro! (while thinking 'Idiot')
Rhynoc: Beat it!
Deserae got back to the forest's entrance. Spyro was laying down, sleeping. Deserae shot a flame at him to wake him up.
This is what happened...
Spyro: What the... Deserae! Is that you?
Deserae: Duh. Oh wait, I'm still a different color.
I adore how my sequence of events here is Spyro going off to use the bathroom, Deserae gets taken in the meantime, and apparently when he gets back and can't find her, he just... lays down to take a nap?? Okay man. Sure

Spyro went to find some sleep. Deserae turned back to shades of red-violet.
Deserae: My horn bent! (While thinking 'I'll have to fix it...')
Deserae headed to the lake for a drink and some fish. It's very dark water.
Suddenly, and trust me when I say I don't know how it happened, Snape from Harry Potter walked up.
Deserae: Snape! I like your daring! I do stupid things too!
Deserae: (thinking) Is that a dress or robe? His skin is pale.
Snape: Do I know you? (While thinking 'Dragons are big...')
Snape ran away for unknown reasons. Deserae found Spyro.
Spyro: Stop doing that!
Deserae: It does work. (While thinking 'I'm good at talking while flaming')
aand that's it. I never got further than that. The goddamn Snape cameo hit me like a truck, god. I forgot I just threw him into this for no reason. He's there for one entire panel and just runs off again. Good riddance.
So yeah, that's Super Dragons. Again, I love Spyro walking away from the person he agreed to protect to go sleep, and she again just went and found him and flamed him to wake him up. That probably would have been a running joke if I kept writing this. There's also how they fell in love at first sight, only for that to proceed to just not be relevant for the rest of it. Spyro/Deserae I guess
But yeah looking back at this was SO fun, yeah there's very little artistic talent but nonetheless, I had an idea and I followed it, and ya gotta respect that. Everyone starts somewhere, and that's where I started with learning to write and draw. With silly lil dragon stories like this, many of which didn't get finished or shared, but any practice was still valuable. For anyone who decided to read through this whole post, I hope you've enjoyed taking a look at my oldest creative works. I might scan and share more of my old "books", I'll use the tag 'my old writing' for any of it, lemme know if you're interested in seeing more! :D
#artwork#my art#my writing#my old writing#dragon#dragons#spyro#comic#this is so silly but so fun to look back on#long post
9 notes
·
View notes
Text
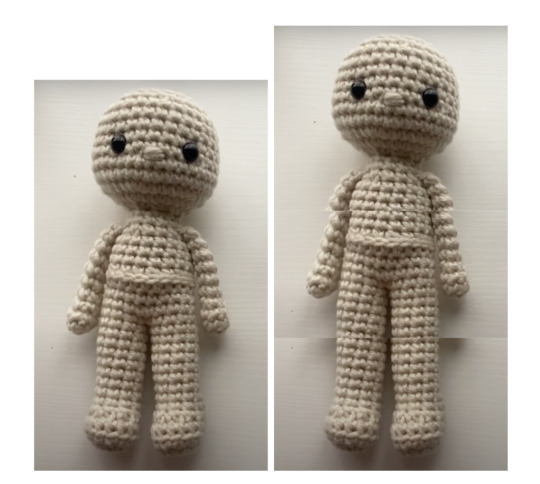
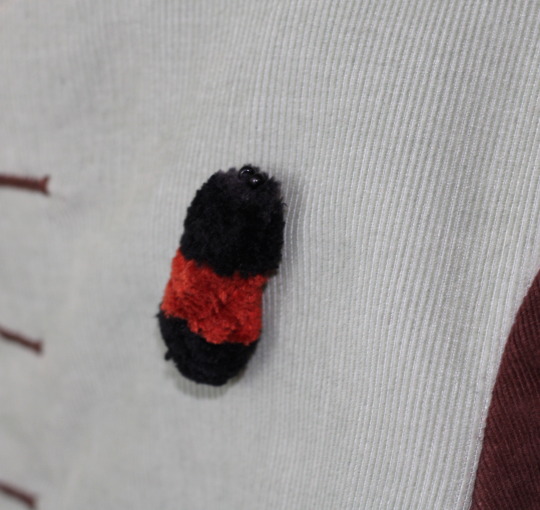
the first time I saw this post I KNEW I had to make this guy

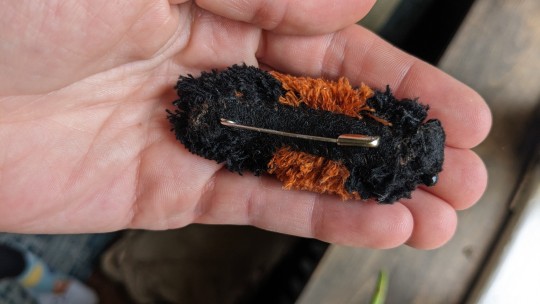

I didn't follow the tutorial exactly, just kind of winged it, but I'm very happy with him.
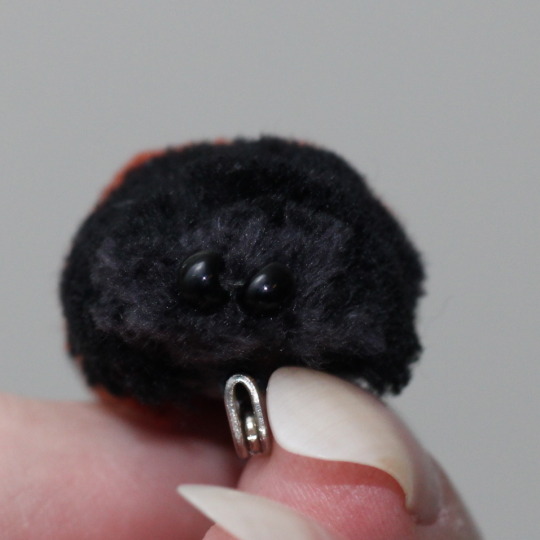
I decided to give him a head instead of just eyes. the head is a tiny strip of tightly rolled felt that I stitched together and then sewed the eyes on at either end. I took little notches out for the eyes with an exacto knife.
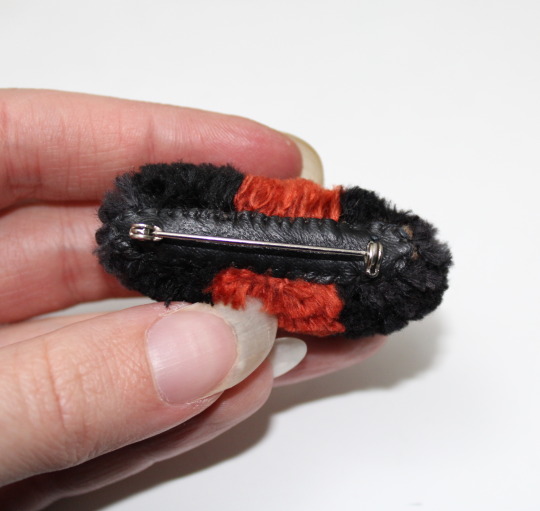
also his tummy zone is felt, and I only had a safety pin available so I glued it into the felt and sewed them both in place at once

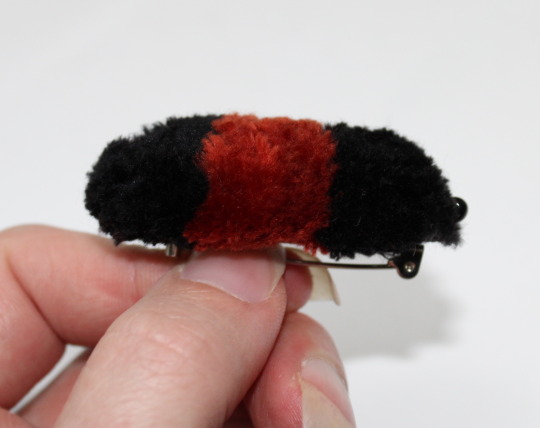

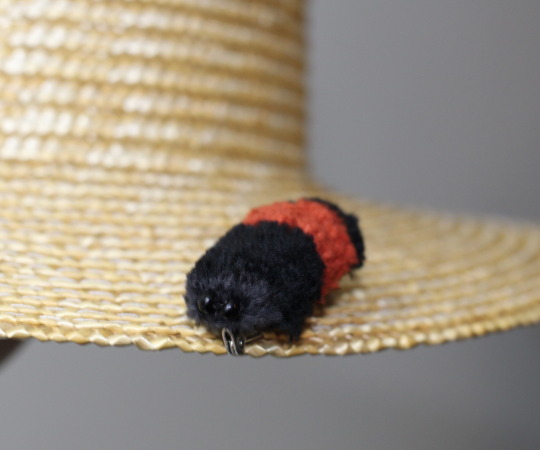
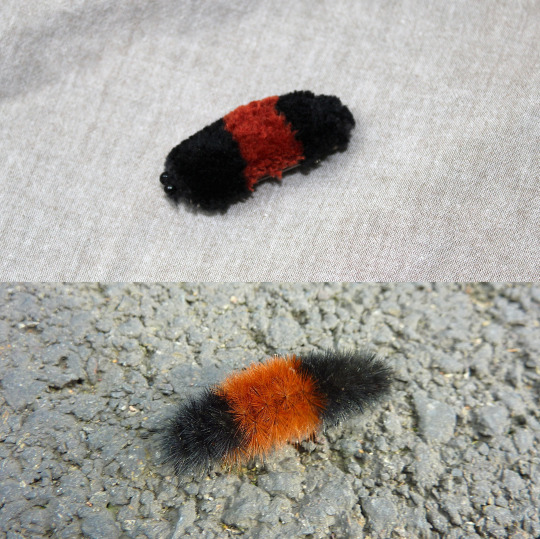
I made a little wooly bear caterpillar. I was inspired by The Closet Historian's moth brooch video to learn turkey stitch, and I tried brushing it with a wire brush, which really fluffed it up a lot more. I had to trim it a little bit more after the brushing.
All the materials were from my stash, and I didn't time it but it took quite a few hours. I wish I'd used a thinner fabric because this felted coat wool was a bit tough to sew through, and didn't want to bend into a rounded caterpillar shape.
I'm quite happy with it, it turned out so cute! It's a bit bigger than a real one.
#bug art#fiber art#:33#i ran out of black embroidery floss so hes a mild beginning of winter and harsh end of winter prophet. lmao#which is partly why he needed a head. to fill in that blank space
9K notes
·
View notes
Text
10 Smart & Simple Ways Small Businesses Can Boost Their Social Media Presence
Let’s face it—social media is the new storefront. Whether you run a cozy café, a homegrown product brand, or a service-based business, your social media game can make or break your brand image.
If you're looking for ways to grow your business online, especially in competitive markets like Noida, this guide is for you. (Pro tip: partnering with a trusted social media marketing agency in Noida can speed up your results—but more on that later.)
Here are 10 easy-to-follow ways small businesses like yours can seriously step up their social media presence—without burning out. 1. Know What You're Aiming For
Jumping on Instagram or Facebook just because “everyone’s doing it” won’t cut it. Ask yourself:
* Do I want to attract more customers?
* Build a brand people trust?
* Or simply stay top-of-mind?
Clarity = Direction. When you know your “why,” your content becomes more focused, and your audience gets what they came for.
2. Be Where Your People Are**
Don’t spread yourself thin trying to be on every platform. Instead, double down on the 1–2 platforms where your target audience actually hangs out.
* Selling clothes? Instagram is your runway.
* Offering professional services? LinkedIn is your arena.
* Want community interaction? Facebook is still gold.
Action Step: Research your audience. Choose quality over quantity.
3. Give Your Profile a Makeover
Your profile is your digital handshake—make it firm and friendly.
* Use a recognizable logo or clear headshot.
* Write a catchy bio that says *who you help* and *how*.
* Add a clickable link to your website or product page.
>Think of it as your elevator pitch in under 5 seconds.
4. Plan, Don’t Panic (Create a Content Calendar)
Winging it every day leads to burnout. A simple weekly content plan helps you stay consistent and relevant.
Here’s a mix that works:
Monday: Quick tip or hack
Wednesday: Customer review or case study
Friday: Behind-the-scenes or product story
Sunday: Ask a question or run a poll
Tool Tip: Use free tools like Trello, Google Sheets, or Notion to map it out.
5. Look Sharp—Design Matters
Ever stopped scrolling just because a post looked beautiful? That’s the power of good design.
You don’t need to be a designer to make scroll-stopping content. Use tools like Canva to create clean, branded visuals. Stick to your brand colors and fonts for consistency.
Hot Tip: Natural photos > overly edited stock images.
6. Don’t Ignore Stories & Reels
If posts are your storefront, Reels and Stories are your megaphone. They get more reach, feel personal, and show the human side of your brand.

What to post?
* Quick tutorials
* FAQs answered on video
* “A day in the life” behind the scenes
* Time-lapse of your work
Reminder: Authenticity wins over perfection.
7. Talk With Your Audience, Not At Them
Social media is not a billboard—it’s a conversation. Reply to comments, respond to DMs, engage with followers’ content. Make people feel seen and heard.
Want more interaction?
Ask open-ended questions. Use polls. Do “this or that” games in Stories.
Pro Move: Follow your top 20 customers or fans and regularly engage with their content.
8. Use Hashtags That Make Sense
Hashtags can make your posts discoverable—but don’t just throw 30 random tags on every post.
Use:
* 2–3 popular industry hashtags
* 3–5 niche hashtags your audience follows
* 1–2 branded or local hashtags
Don’t do this: #like4like #followmeplease #instagood — they don’t bring real value.
9. Team Up With Micro-Influencers or Locals
You don’t need to chase celebrities. Micro-influencers (1k–10k followers) often have more engaged audiences and are affordable.
Try:
* Gifting products in exchange for a reel or story
* Collaborating on giveaways
* Asking for an honest review
Bonus: You get content you can repost too!
10. Track What’s Working (Then Do More of It)
What gets measured gets managed. Dive into your analytics every 2–4 weeks.
Look at:
* Which posts get the most likes, saves, or comments
* What time your followers are online
* Which type of content drives clicks or inquiries
Tool Tip: Instagram Insights or Meta Business Suite gives you great free data.
Final Words
Your social media presence is like a garden—water it consistently, give it the right nutrients (aka content), and it will bloom. Don’t stress about going viral overnight. Instead, focus on showing up with value, building trust, and being relatable.
And if you’re looking to speed things up or get expert support, working with a trusted social media marketing agency in Noida can help you go from inconsistent to impactful—fast.
Over time, your audience will grow—and so will your business.
#digital marketing agency#digital marketing in noida#best digital marketing company#digital marketing agency in noida#digital marketing service#social media marketing agency#social media marketing agency in Noida
0 notes