#3dsmax command panel
Explore tagged Tumblr posts
Visit Tumblr Blog
Explore Tumblr blogs with no restrictions, modern design and the best experience.
Last Seen Tumblr Blogs


Fun Fact
Average visit duration of Tumblr.com is 10 mins and 25 secs.
Text
youtube
In this quick tip short video, we will learn how to use the Expert mode inside 3DS Max and, at the same time, keep the Command Panel.
#3dsmax#3ds max tutorials#autodesk#autodesk 3dsmax#learn 3dsmax#3dsmax tips#3dsmax how to#3dsmax expert mode#3dsmax command panel#Youtube
0 notes
Text
Week 8 Studio Tutorial- Digital iteration
This week we started to learn how to move from physical to digital models, we visited MCIC and observed how to use a machine to scan our Object into a 3d model, we also learned about different modifiers in class, some of the common ones are Noise Skew, Ripple, Squeeze, Stretch and bend, Twist, Melt and taper, FFD and symmetry, FFD, twist and taper.
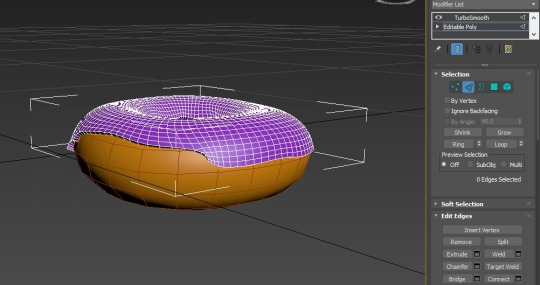
For 3dmax, I tried to follow an online tutorial video to learn how to make a Donut to get similar to 3dsmax. I’m trying to write down the steps here. To start off first create a torus as a donut, then go to modify tab and type in the data and select the modifier with Noise. It is helpful to rename the object and change the colour for easy understanding. Then add an edit poly modifier and then choose the polygon selection type, select the polygons on top of the donut, press Alt and the icon which is cross with arrowhead and shift to move up as the chocolate on the top. Then back to edit poly modifier and choose the vertex selection type that the vertex moves along the edge to make it look more realistic. Select two of both and choose TurboSmooth in order to smooth out the mesh. With the icing selected add a shell modifier on top of the edit poly modifier and type in the value. Go back to the edit poly modifier and choose the edge selection type then hold down shift and draw the edge down to create a new polygon. Click on the toggle end result button to see the mesh with all the modifiers applied to it to make it look more accurate choose the vertex selection.
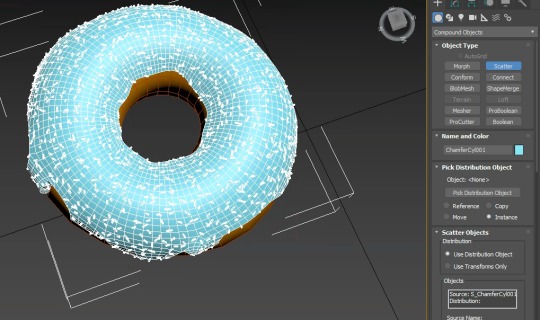
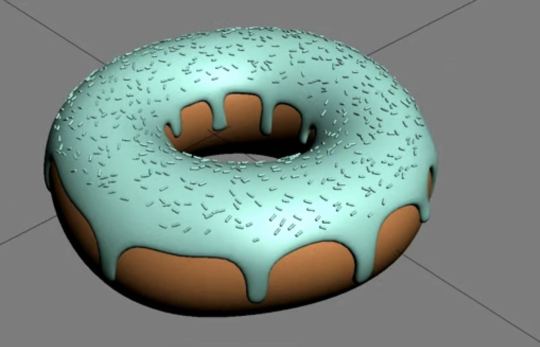
Final, Create a new ChamgerCy for decorating the donut, rotate it to 90 degrees on the x-axis, go to the utilities panel and click on the reset form button and reset selected, choose the new modifier Bend to make it more real. Select compound objects from the command panel and click on scatter, increase the number and change the size. Then the doughnut is done! ( BUT the most sadness this is in the final step I forgot to cut the screen and save it :( )


13 notes
·
View notes
Video
youtube
How to Create Custom UI and Toolbars | command panel missing RELATED HASH TAGS zillus3d,ui,custom,toolbar,customize,user interface,3ds max,custom ui,tutorial,autodesk 3ds max,arch viz,how to,learn,3dsmax,learn arch viz,course,tools,3ds max tutorial,beginner,vray toolbar missing 3ds max,3ds max main toolbar disappeared,3ds max command panel missing,how to show main toolbar in 3ds max,3ds max toolbar icons missing
0 notes