#I finally learned how to use a layered photoshop image like a normal person instead of just abusing the fill tool
Explore tagged Tumblr posts
Visit Tumblr Blog
Explore Tumblr blogs with no restrictions, modern design and the best experience.
Last Seen Tumblr Blogs


Fun Fact
Users from the US are the majority of Tumblr visitors.
Text
Behold, a bitchy oc
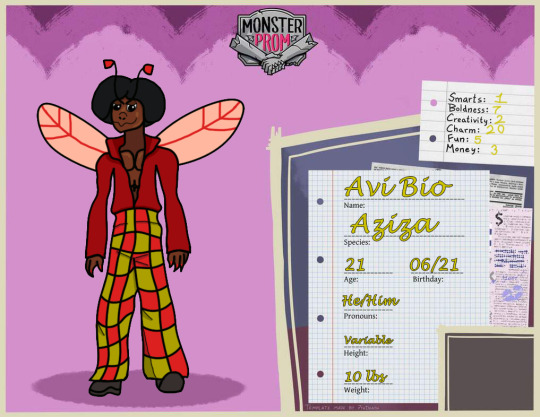
If I had the transparent jpeg of him I would post it down here, but I don't lol.
The best part of having an oc oc is now I can insert him into anything!
#monster prom oc#oc#my art#my artwork#my oc art#I finally learned how to use a layered photoshop image like a normal person instead of just abusing the fill tool#do not ask me about his shoes#I tried my absolute hardest to match MP's artstyle but I think I still failed to capture it's distinct angularness#oh well#also why is my artwork so compressed???
2 notes
·
View notes
Photo

Hi everyone! This is an updated version of my Gifmaking Tips & Tricks Guide from back in 2019. I’ve learned a lot more and my style also changed, so I felt like an update was due.
As I stated in the first version, this guide won’t be going over gif making basics. There are already so many tutorials out there, I don’t think there’s that much insight to be gleaned from another step-by-step breakdown. I decided to instead make a “general tips” type guide to help up-and-coming creators, or anyone who wants to spice up their style. I’m not a master gif maker by any means, but I’ve been doing this for 9+ years and I’ve learned a few things along the way that I am happy to share with you all!
Please keep in mind: This guide presupposes that you have a basic knowledge of the gif making process, like how to import footage to Photoshop and use the timeline. With that said, let’s get into it.
I. Capture your own footage. I know this option is not realistic for everyone, but if you have the right device, I recommend recording your own footage and using that instead of taking something from Youtube. Not only will the uncompressed material look better, but you also have a lot more control over things like camera placement, mods, skins, settings, etc.
II. Use 60fps footage instead of 30fps. Record in 60fps, or download videos in 60fps when you can. This contributes hugely to making your gifs look smoother. Keep in mind that it also limits how long you can make your gif, since you’ll be using twice the amount of frames for the same scene, making it a larger file size. It’s up to you to decide whether the tradeoff is worth it. I personally find that 30fps looks perfectly fine in gifs where there’s not a lot of movement, but for character/action shots you’ll generally want to use 60fps. Here is a shot with some movement to demonstrate the difference:
III. Use Video Frames to Layers, not Load Files Into Stack. This is a big one. Video players like KM Player and Potplayer extract video frames as still images (pngs, bmps or jpegs) which always results in compression, meaning the images will look more grainy, pixelated, and less colorful than the original footage.
Using Video Frames to Layers eliminates this problem, since Photoshop simply imports the existing footage, which you can then crop and resize to your desired parameters. Your final result will be completely lossless and perfectly crisp. The difference in quality is noticeable, especially with darker gifs that would normally look jagged and grainy. For absolute best results I also recommend using Avisynth (tutorial linked here).
Note how her skin is blotchier on the right, and the details of her clothes and jewelry are less defined.
IV. Adjust your gif speed. I recommend 0.03 seconds for 60fps, and 0.05 seconds for 30/24fps gifs. I do not recommend going below 0.06 seconds - your gif will start to look slow and choppy.
V. Use gradients and light leaks. I do this a lot, especially with scenery gifs. Adding a lighter gradient to the edges will harmonize the gif and make the colors pop more. Simply paint over the sides with a soft brush and a medium-vibrant color, set the blend mode to screen, and ta-da! The difference is subtle, but your gif will look a million times better. Keep in mind though, that this technique will increase your gif size, since you are adding more color to it.

VI. Delete duplicate frames. This will also help you achieve a “smoother” look. Simply go through all your frames one-by-one and make sure there aren’t any that are exactly the same. It will take a minute, but if you skip this step your gifs might look choppy. Deleting extra frames will also save you some file size & upload time. After a few practices, your eyes will naturally catch on duplicate frames and you won’t have to go frame-by-frame anymore.
VII. Layer your gifs. This style is very popular at the moment for a reason - it looks great! All you have to do is convert your gif into a Smart Object, drag it on top of another gif, set the blend mode to Screen and mess around with the placement until you’re satisfied. Check out these amazingly talented people for inspiration: x, x, x

VIII. Add noise. I especially recommend this for black & white gifs to add an extra layer of depth. Be careful not to overdo it though, as using too much will result in your gifs looking low-quality and lossy.
IX. Don’t use the same coloring for all gifs. Not a hard and fast rule, but usually one single PSD will not suit the lighting of every scene. You can always customize your coloring by either making your own, or downloading someone else’s and tweaking it to your liking. Everyone has their own style and you are not obligated to stick to whatever’s popular at the moment - just make sure you are not lightening the skintone of characters with deeper complexions!
Note that the coloring is the same, I just painted a layer mask around her skin, so the brightness adjustment layer doesn’t affect her skintone.
X. And finally… don’t be afraid to experiment! Photoshop has a lot of buttons and gadgets that can be intimidating at first glance, but don’t be afraid to give things a try; you might discover effects you never knew about and end up with a result that you never would’ve expected. My best edits have resulted from me simply messing around with different blend modes and filters.
Thank you for reading, and I hope you learned something new from this post! If you have any questions, my inbox is always open. And if you implement any of these techniques, please feel free to tag me in your beautiful creations!
#photoshop tutorial#gif tutorial#coloring tutorial#completeresources#allresources#resourcemarket#this tutorial was brought to you by the color purple
220 notes
·
View notes
Text
tanchirou’s coloring tutorial
hello!! i was asked to make a tutorial showing how i color a while ago, so here it is! i’m honestly not the best at explaining at all so i’m very sorry if i lose you somewhere along the way ;; you can always come ask me to clarify anything, my dms are open to everyone :)
also a quick disclaimer: this tutorial will only be focused on coloring, so i won’t be showing you how to redraw lineart. however if you are interested in what programs i use, i use clip studio paint to redraw and photoshop to color
besides this tutorial, i also want to link some others that are great for tips & learning!!
katsuke’s coloring tutorial
sugawara’s coloring tutorial
dicennio’s coloring tutorial
and without further ado, let’s go goooo
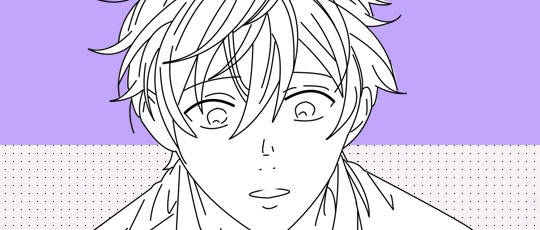
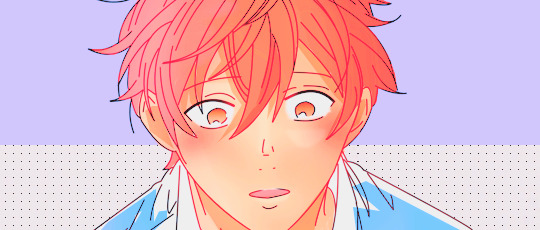
since coloring given is therapeutic for me, i’ll be using this manga cap for the tutorial:
first step: render, sharpening, psd
take your image, resize and sharpen accordingly to your liking! even though i have a lineart here, it is something that i have gotten into very recently and i have been able to achieve nice results in the past even without it.
some tips:
i find it easiest to use the pen tool to erase any background or redraw any lines. the eraser is also helpful for places that are harder to cut out.
play around with the levels adjustment before coloring. this can make your edit look sharper and cleaner if regular sharpening doesn’t do the trick.
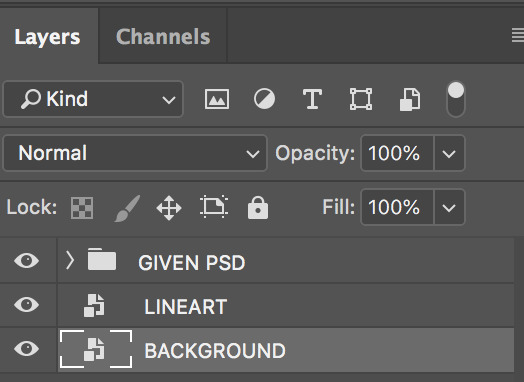
if i ever need to clean something on normal mangacaps, i make a new layer above and then color it with a white brush like so:
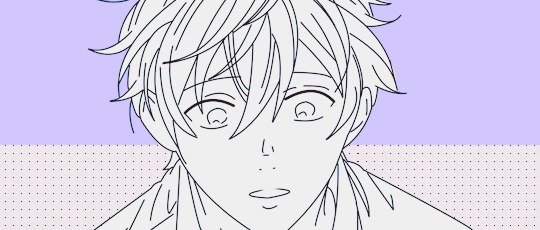
i always like to add my psd before i start coloring, and simply make final adjustments with it later on (but this comes down to personal preferences as well). i have a psd that i’ve made for manga colorings, so the first thing i’ll do is just slap it on top of my panel
after adding my psd:
second step: base colors
fill in your base colors! when looking for what colors i want to use, i usually look for the character’s anime pictures as a reference. for mafuyu, i chose this picture

all my layers are set on top of the lineart as multiply. this is how my edit looks after filling in the base colors:
if at any point you don’t like how a certain color comes out, use the hue/saturation tool to adjust it!!
use a new layer for everything (eyes, hair, skin, etc.) so that it’s easy to fix if you ever need to go back
third step: shadows and blush
add your shadings!
i’m pretty amateur with this, but usually i try to imagine where the light source might be coming from and shade in the part where it seems like the light wouldn’t hit. for this picture, i imagined that the light will be coming from the right side of mafuyu’s face, so everything on the left side will be darker. this process definitely comes more intuitively after a while, so practice lots!
i like to set my shading as multiply on top of my base colors on 50% opacity
use the smudge and/or blur tool for a softer effect on the shading and to blend it nicely with the skin
i also pay close attention to the areas under the hair, neck and around the ears. using the same color that i did for the first shading, i will create a new layer, set is as multiply on 50% opacity, and shade in those parts as well. i won’t take the extra step of blurring it with the rest of the skin this time

next, using a pink color, i’ll color in the cheeks and mouth using a softer brush
fourth step: lighting
using a pastel color that matches the background, i’ll shade the right side of mafuyu’s hair to make it brighter (again, that’s where i imagine the light will be hitting him). this layer is set to soft light.

then to change the color of the lineart and make everything bright and pretty in general, i’ll choose a dark red color and set it to screen on top of everything else.
some tips:
you can try to see what colors work for you on your own edit by using the hues/saturation tool again. aside from red, i saw that orange and brown are also nice to color with
you can also try and set it to lighten instead of screen to see what kinds of effects you can get. go with whichever one you like more
fifth step: extra effects
this part is really fun for me and also gives me a chance to explore my creativity a lot! here i’ll add highlight to his hair wherever i want, to his face, eyes, etc. all of these are done with either the pen tool or the brush tool set at size 1.
the modes that i like to play with the most for this is either soft light or overlay
if you’ve ever seen me stream my colorings in the DailyAnime discord, you would see that i always use a looot of layers to experiment with things. so honestly just go wild with your colors!! don’t limit yourself!! :’)
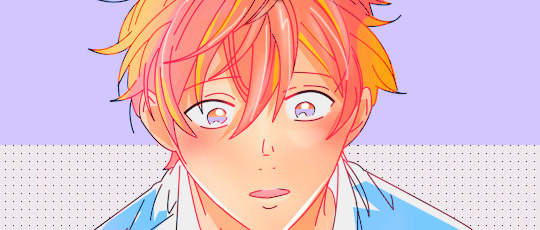
lastly, i’ll be adding any extra things that i want such as speech bubbles and sparkles in his hair. i will also add some noise to the skin and the hair to make it look nicer too. here’s the final product
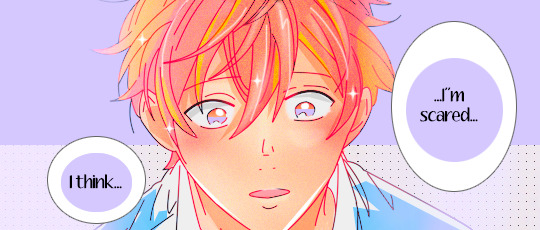
aaannnddd..... that’s basically it! i use the exact same coloring method for posts like these (x), (x), (x). hopefully this tutorial is able to help at least one of you! ^^
(and a quick thank you to narumii @narumii-chan, zebra @reddriot and jaime @itsyuurikatsuki for helping me look over this tutorial ♡ love you all sm )
554 notes
·
View notes
Text
Glitchy Gif Tutorial
I recently learned how to create a simple glitching effect in Photoshop, which involved adapting parts of several different tutorials into something that worked for me. So here’s the simplified version that consolidates all of those! I’ll be walking through creating this gif in Photoshop:

First, create the rest of your image however you like. You should have everything complete before you start, as any changes to your base image will require starting over. This tutorial is designed for an image that’s 540px wide, but it should work with any size with minor adjustments. This one’s mine.

Now, put all of your layers into a group, by selecting all of them and pressing CTRL + G. It’s not necessary, you could just merge it down to a single image, but I prefer keeping it a group in case I have to go back and change something. I’m going to call it Base Image Group.

Make a copy of this group, either by right clicking and hitting Duplicate Group, or by clicking and dragging the group to the New Layer button at the bottom of the layer’s panel.

Then, with the group’s copy selected, press CTRL + E to merge that group into a single layer. I’m going to call this Glitch Image.

Now, make two copies of this Glitch Image, again by right clicking and choosing Duplicate or by dragging the layer to the New Layer button. I’m going to call the new copies Red and Blue, making sure both are on top of the original.

Double click on the Red layer to open the Layer Styles window. Then where it says Channels, uncheck G and B so that only R remains. Then click OK.

With the Red layer still selected, make sure you’re on the selection tool (press V if you’re not), then hold down shift and press the right arrow key. The layer should shift 10 pixels to the right, and create this effect.

With the Red layer still selected, go to Filter > Blur > Motion Blur. Change the Angel to 0 and Distance to 10, then click OK. The red will now have a slight blur to it.

Repeat the process for the Blue layer, except this time uncheck R and G to leave only B, then shift the layer to the left instead of the right. You should now have this effect.

You can play around with different colors and distances and blurs, but most of the time this is my personal favorite look.
Select the Red, Blue, and Glitch Image layers, and press CTRL + E to merge them. Rename it again if you need to.

Now select the Rectangular Marquee Tool (second from the top in the toolbar). Change the Feather in the top bar to 2.

Make a selection across the entire width of your image. It can be as tall as you want.

Hold down CTRL, then use the arrow keys to nudge the selection to the right or left, as far as you like. If you also hold down SHIFT, the selection will nudge by 10 pixels instead of just one, speeding this process up.

Hit CTRL + D to deselect.

Keep repeating this same process across the image, changing the height and direction each time until you have something that’s as warped looking as you want. You’ll probably wind up with something very goofy looking, but that’s alright. This image will be visible for less than half a second in the final gif.

For one last touch! Create a new layer on top of the glitch image, then fill it with solid black. Rename this layer to Static.

With the Static layer selected, go to Filter > Noise > Add Noise. Set Amount to 200, Distribution to Uniform, and make sure Monochromatic is unchecked. Click OK.


Keep the Static layer selected, and go to Filter > Blur > Motion Blur. Set Angle to 0 and Amount to 30. Click OK.


Change the blend mode of this layer to Hard Light and Opacity to 75%.


I’m not a fan of how this looks at the edges. Hit CTRL + T to open up Free Transform.

Hold down ALT and use the center selector on the either the right or left the drag the image outwards until those edges aren’t visible anymore.

Hit ENTER. This is now your glitchy frame.

Now we can start making the glitch animation. Go to Window > Timeline to make sure the animation window is open.

In the layers panel, turn off the Static and Glitch Image layers, by clicking the eye icon next to them. Only the Base Image Group should be visible. Then click Create Frame Animation (if it says Create Video Timeline, use the dropdown next to it find Frame Animation).

This is your animation’s first frame. Click the plus sign at the bottom of the Timeline window to create a copy of the frame.


With this second frame selected, go back to the Layers panel and make the Glitch Image and Static layers visible again. You should now have one frame of the normal image, and one frame of the glitchy image.
On the first frame, open the dropdown that reads 0 sec and change it to 2.


On the second frame, change it to 0.1.

Now select the second frame and click the Tween button. It’s to the left of the plus sign, I think it looks like a comet.

Change Frames to Add to 1 and click OK.

This will add a new frame between the first two that serves as a transition.

Open the timing dropdown on the middle frame and change it to No Delay.

Then click and drag the second frame until its at the end of the sequence.

Click play to preview your gif and make sure you like how it looks. Note that the preview will play slightly slower than the final gif. Also, make sure the dropdown in the bottom left says Forever so that the gif will loop indefinitely.
To export this gif, go to File > Save for Web (or use the keyboard shortcut CTRL + SHIFT + ALT + S). These are my preferred export settings for gifs.

Now you have your finished gif!
There are some variations you can make to this. You could create a second glitchy layer and make it another frame, to have multiple glitches with different timings.

You could add the glitch effect to only a single element, like the subject.

Or the text.

Just play around with it til you have it just the way you like it! I hope this has helped you!
34 notes
·
View notes
Photo


the story of ming lan 知否知否应是绿肥红瘦
psd + coloring tutorial (requested by anon)
i know you asked that i gif my favorite minglan outfits but i really did not the energy to go searching for specific scenes so i just used what i previously giffed, i hope you don’t mind!
download here: night psd | day psd -- please like + reblog if you use or download!
note: this is only a coloring tutorial, you will need to know how to make a basic gif to follow along. this is the tutorial that i learned from when i first started giffing. this is a very image heavy (and quite long) tutorial. sorry in advanced if i’m not very good at explaining myself, i’m currently very sleep deprived lol
also i made these colorings specifically for these scenes so i don’t know how well they work with other scenes. you are more than welcome to try applying them to other scenes in this drama but most likely will have to adjust several layers. in addition, the psds are not exactly the same as to how i colored them in the original gifsets. there’s not a whole lot of a difference but i do think the way i colored the scenes here are improved and better than how they were the first time i colored them.
NIGHT SCENE TUTORIAL:
step one: create your basic gif and add your sharpening to it. the version of photoshop i am using is photoshop cc 2019. if you’re curious, my sharpening settings are below.
what my photoshop looks like now:

sharpening settings:


step two: start off with a color balance layer. i’ve learned for night scenes in minglan that it’s better to adjust the colors first before attempting to brighten it. it’s much harder to manipulate the colors (at least to my liking) after i brighten it.
i can’t really say how much you should manipulate the color balance, it really just depends on you and what looks good for you. for a lot of the scenes in minglan, they have a heavy red and yellow filter so i tend to only manipulate those two but it really depends on the scene and lighting.

step three: now i add a curves layer. i start by clicking on the auto button and then adjust it according to how i like it.
i normally like starting with the auto button for minglan night scenes since when i first started giffing minglan, this drama’s night scenes are so dark that i found it difficult to know where to begin so using the auto function gives me a good starting point. depending on how it turns out, sometimes i end up ignoring what it generates completely or i only adjust it a little bit.

step four: next is a levels layer. again, auto and then adjust to my liking. usually, i only really adjust the left end of the levels (where the black is on the spectrum) in order to ensure that my gifs are not so light and washed out.

step five: another curves layer because i think the scene is still too dark. i don’t brighten it drastically tho, only a teeny tiny bit so that it makes enough of a difference. again, this will totally depend on you and how you like your scenes to look.


step six: now i add a vibrance layer in because i’m just a person who likes a little more vibrancy to their gifs lol. i also want to make sure that i haven’t whitewashed minglan so adding some vibrancy really makes a different.


step seven: i’m adding another color balance layer because giving the gif more vibrancy has brought out a little more of the red/yellows from the drama’s filter. this step is honestly not necessary tho since it’s really only a very small slight change and depends on you and how you like your gifs coloring to look. the small changes with this added layer makes a difference for me but it might not matter to you and that’s completely fine.


step eight: finally, i add an exposure layer! i don’t think the gif needs to be any brighter than what i have it as now so really, the purpose of this exposure layer is to darken certain parts of the gif since i think it still looks a bit too washed out.


DAY SCENE TUTORIAL:
lol don’t worry this part will be much shorter since i just explain the slight differences to my coloring process since the day scenes are much easier to work with than the night ones.
order of my layers:

the way i handle and adjust each layer is pretty much the same as how i explained it for the night scene tutorial. i don’t rely as much on the auto function tho and usually just adjust the curves and levels myself.
the only big difference between the night and day scenes are the order of my layers. instead of starting with manipulating the colors, i start with brightening the scene. after that, i adjust the colors to my liking, add another curves layer in order to make the scene brighter and again, use the exposure layer to ensure that the scene has better contrast.
aaaaaand that’s it to my coloring tutorial. i hope things were explained well enough but if you’re confused about anything or have more questions, feel free to message me!
please like & reblog this post if you found it helpful or save/download my psd, thank you!
#yeahps#chaoticresources#dailypsd#completeresources#知否知否应是绿肥红瘦#the story of ming lan#cdrama#cdramanet#mine*#mine*tutorial#here you go anon!#i hope you find this helpful#lol writing my proposal for my final project was stressing me out too much#so instead i chose to procrastinate and make this tutorial
102 notes
·
View notes
Note
Hi! I'm sorry to bother you but I was wondering if you've ever done an icon tutorial? Your icons are really the most beautiful I've seen, and I'd love to know your secrets 😊. But if you aren't interested in posting them I totally understand. I hope you're having a great day!!
EXTENDED ICON TUTORIAL
Hey sorry this took so long to get around to but I finally felt inspired to make this. A couple things first. I want to give a special shout out to argetnallison cuz I learned how to make icons from her tutorials here. I picked up a few tips and tricks that aren’t included in other tutorials so we’re gonna call this an extended icon tutorial. I’ve also been told I explain things well but if there’s anything from this that needs clearing up later just send me a message and i will be happy to help guide you through it. This Is my first time making a tutorial so bare with me if I ramble.
we will be going from this:
to this
to this

Ok so things you willneed..
photoshop (i personally use the 2014 CC version or something like that but that’s just my preference for layout and stuff)
kmplayer (kmplayer is how i get most of my screencaps. Sometimes I go to google or screencapped.net or other sites that have precapped content when i feel lazy)
Alright so we start off with figuring out which screencap to use.
so basically here i open whatever movie/tv show episode file i want to use and skim in kmplayer till i find a scene that works. Then I hit start and play it until i have the scene i want and then stop,

these are my capture settings for kmplayer.
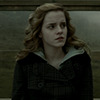
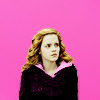
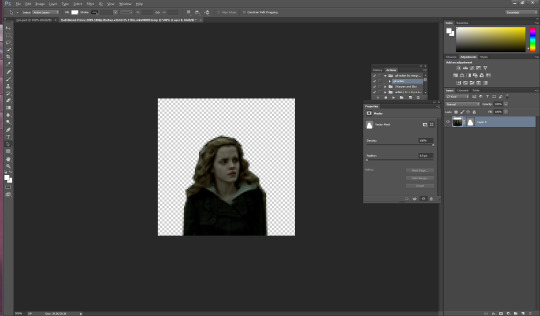
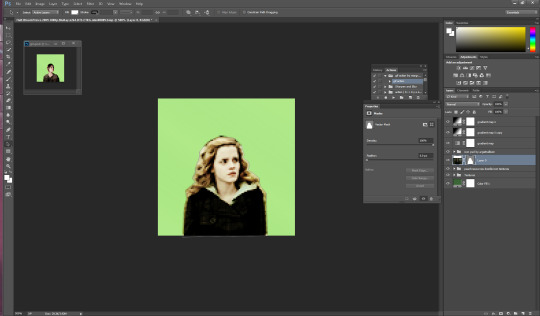
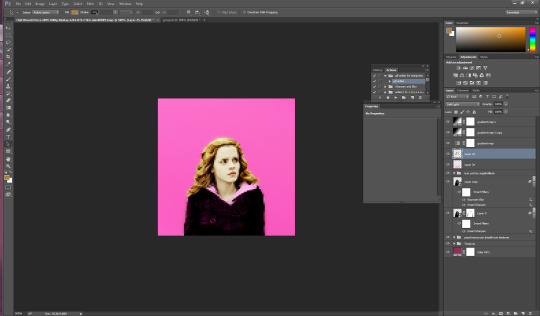
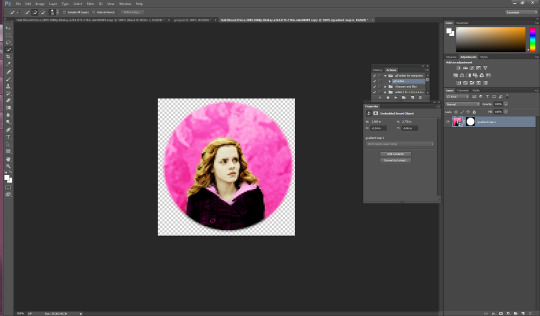
Alright so I picked this scene of Hermione in HBP (aka the hardest movie to color.
Okay disclaimer here, I don’t actually use anything on the left and rely totally on shortcuts on the keyboard so that’ll be how I explain things here.
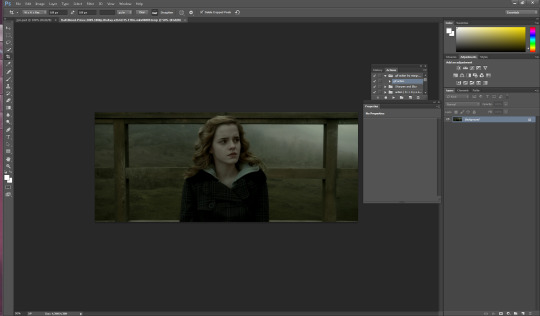
People do this step differently but what i tend to do is crop my image before i mask it. I hit “c” on my keyboard. I set my w x h at the top to 100 x 100. Then what i do is I take my mouse and click on the top bar of the crop box and extend it till Jyn is a more icon like size.
after she is at a size I think is ok for this icon i hit enter and it looks like this

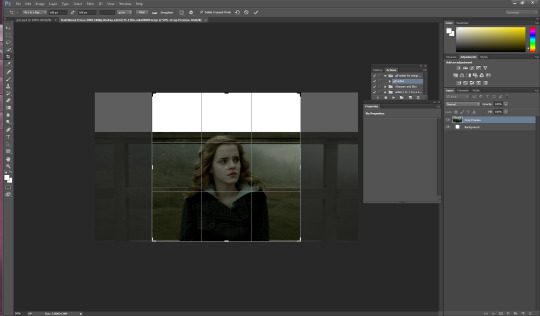
alright now for the fun part. this is honestly the hardest part of icon making, the rest is simple if you’ve used photoshop before. Its time to mask the image and get rid of the background around Hermione. So we start by pressing “p” on our keyboard, p for pen is how i remember, and then we start at one end of her shoulder and work our way around. Basically how this works is u click around the image of her and keep clicking until u have an outline around her like I have below. this does not need to be perfect because we’re gonna have to use the eraser tool anyways.
you should have something that looks like this. Also tip here is that you can use ctrl + and ctrl - to make the image bigger or smaller when doing this part.
ok so now we have a rough outline of hermione and we wanna create this mask so we right click within the image somewhere and we hit “create vector mask” which should be the first option (i donno what its like in other versions of ps sorry)

ur image should now look like this
be sure your starting dot and your connecting dot come together at the end or it won’t let you do this part.
Alright so here is where i add my psd and my fancy textures and things. I use argetnallison’s psd (no claiming as ur own, give her credit if you use this) and adjust it as needed because i am really bad at making my own (seriously props to everyone who makes their own psds its hard and i salute you).
so how I do this next part is i take my psd file (this also contains my textures and stuff to make it easier and quicker to do stuff) I take the jyn file with the psd and i ctrl/alt/a toselect everything quickly like this and then drag it onto the hermione image.
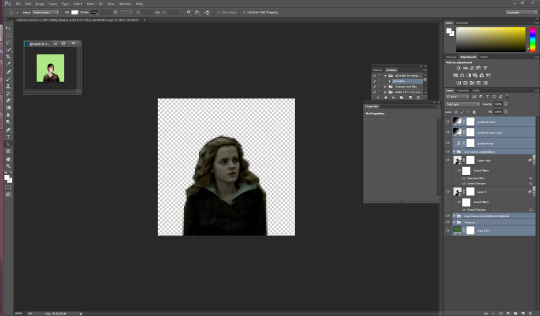
i move some of my layers under the hermione image like the solid color layer and the texture pack so she’s visible again and keep going.
alright so another thing to note is if u click on the mask next to hermione you will get a box that has the vector mask and density and feather
you’re going to want to go to feather and where it says 0.0 make it 0.3 (some people do 2 or 1 just mess with it till it suits you).
so i have set mine to 0.3 and now its time to erase the stuff around hermione that’s still visible. i press e on my keyboard and zoom in on it a little Here it is also really helpful to create another layer mask so that it doesn’t mess with the mask of her you already have (ps weird and it’ll get messy trust me) so i go down to the bottom right and hit add layer mask its the third one from the left

the white square between the hermione picture and the mask is where you’re gonna wanna click and then start erasing.
if you mess up along the way and erase too much you can press b on your keyboard for brush and it’ll bring it back.
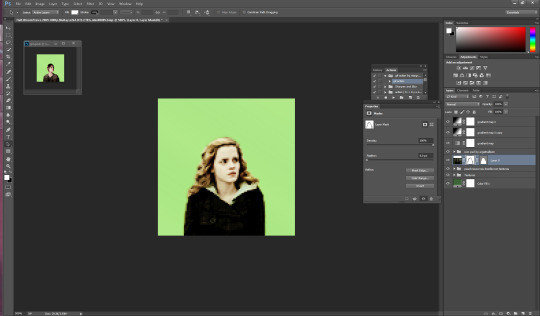
ok now its time to sharpen the image. i have an action i really like but its from a blogger who’s changed user since then and i donno her new one or i’d 100% credit. I will try and find it and add the link here. anyway I convert the hermione picture to a smart object (right click on the hermione picture and its on the left towards the middle) hit play and add the action to the image Mine looks like this now

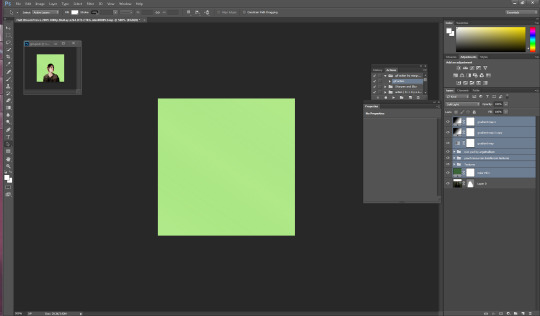
so for this next part i usually have green as my default layer but i wanna change the color so i’m gonna double click on the dark green box

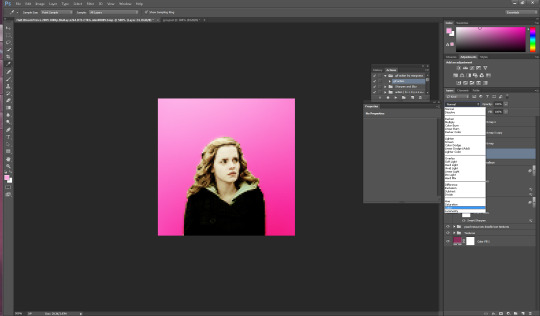
i’ve settled for this pink. Now if you follow my icon making at all you know I like to match my background and clothes together so that’s what i’ll show you next.
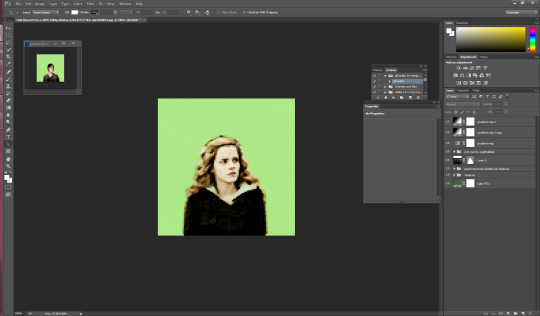
so next its time to use the eyedropper tool (which was very confusing for me initially so if you have questions don’t hesitate to ask). We start by hitting “i” on our keyboard and finding a spot in our picture that we want her to match so I’m going to click some of the lighter pink in the top left corner.

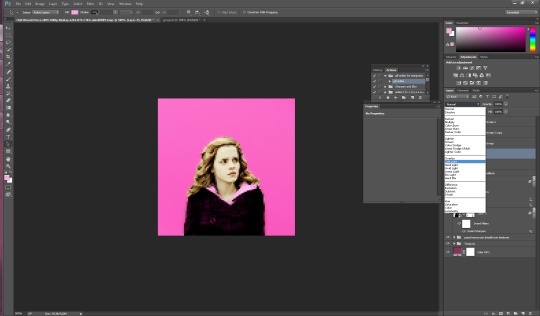
as you can see in mine in the top right it now has that pink we just selected so now we get to add it to hermione’s jacket.I usually do it right above the psd so i make sure i have that clicked and then i make a new layer for the jacket by hitting ctrl/shift/n on my keyboard. with that layer selected, I hit ‘b’ for brush on my keyboard and set this new layer to “color” then i hit enter and begin to brush over the jacket (in my ps its the second to last one down). The default name is “normal” and its right next to opacity”)
now my picture looks like this: (you can use the “e” to erase if you brush over her skin by accident as well)

now its time to do the same with her hair so i do ctrl/shift/n again to create another layer but this time we’re going to set it to “soft light” instead of color.
just like with the jacket we are going to use the eyedropper tool again but we’re gonna click on a lighter part of her hair.
you can change the opacity here if you would like but for this image i am going to keep it at 100%.
You could honestly leave this image here and have a perfectly good icon but a lot of people have asked me how i do the circle ones like my current one so I will take this one step further. (i learned from this tutorial here in case that helps you better).
First i’m gonna add a texture by checking one of the boxes in my texture stash (feel free to hunt on yeahps and deviantart for some seriously amazing textures that’s where i get all of mine from).
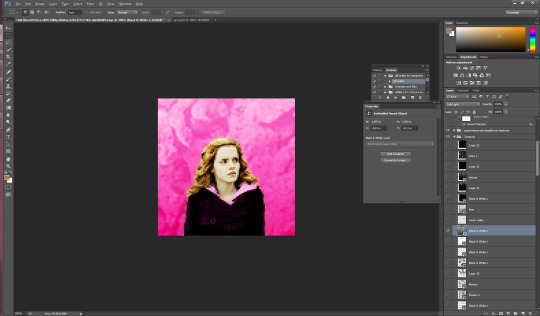
now i’m going to do a duplicate image (so that i can use the original to edit it in different colors). to do this i go to “image” at the top (third option after “file” and “edit” and then i go down to where it says “duplicate”.

i hit ok and then i begin to make my circle icon
What i do here is i convert everything to a smart object so i hit ctrl/alt/a and right click and convert to smart object.

then i hit ctrl/shift/n and create a new layer where we create our circle.i make sure that the circle is white by going to the top right and setting it to white. Then i hit “b” and right click on the hermione picture
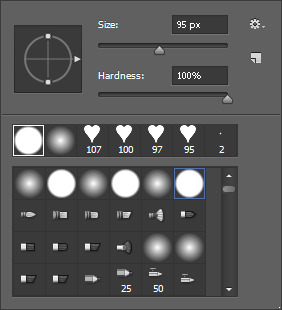
i use the selected brush and have the size at 95 px. Then I click in the middle of the image and it looks like this
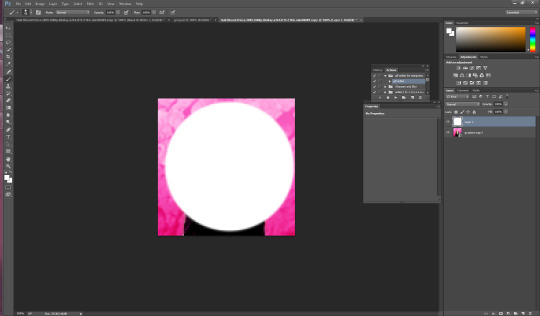
now what I want to do is make sure that the white circle is centered so i’m going to hit “m” on my keyboard Then i wanna right click and hit “free transform” in the middle. you’ll know its in the middle because there’ll be these two purple ish lines that create a plus.

now you hit enter and you have your circle. Now what I do is hit “w” on my keyboard and click your mouse in the circle somewhere (very important to stay clicked on the circle layer here). now that you’ve selected the circle, select the pink hermione image. go to the bottom and click “create layer mask” which again is the third from the left, and you should have a circle next to the hermione picture. You should have something that looks like this

now i just click on the circle layer and delete it and it’ll look like so:
again. you could ctrl/s and save it here and leave as is but i’m a bit on the extra side so we’re gonna take it a step further and add little designs cuz it makes it look more fun.
So what I did in the beginning is I googled a ton of different types of brushes and used search things like “heart brushes for photoshop, deviantart” or “star brushes” or whatever i wanted and i just dug around until ifound what I was looking for. its a fun scavenger hunt but you can deff check out yeahps too or itsphotoshop for resources. Then you go to “edit” and all the way down to “presets” and a drop down will show up and you click “preset manager”. you will see something like this pop up
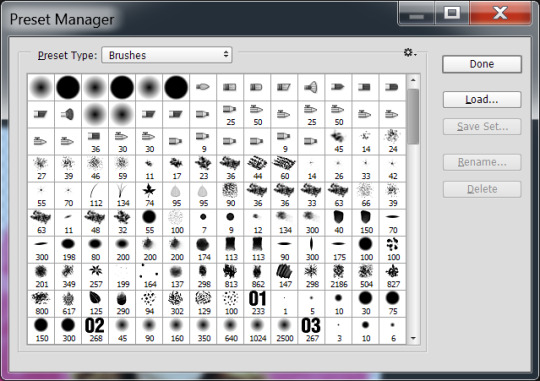
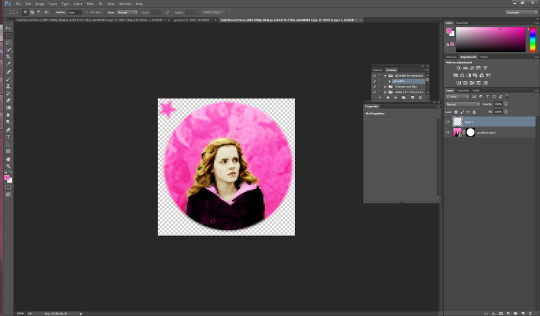
go to the right and hit load and then click on the file you’ve extracted from winrar (if you need help with this part just message me). Ok, once you’ve loaded some brush presets into your ps you can start the next part. once again you have to create a new layer ctrl/shift/n, i then click my star brush and set it to 14 px.

alrighty so before we start clicking and creating stars I want to make them the same color as the background so its time to bring out our “i” for eyedropper again and click somewhere on the pink, then hit “b” again and you should now have pink stars when you click. So Here i go to a transparent corner and i just create my star on the new layer. Sometimes i click it twice so that its more visible ut now i have something like this:

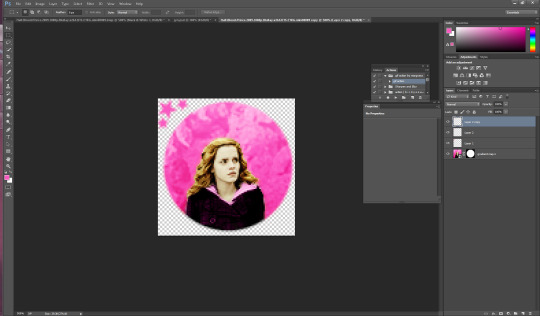
now I’m thinking i want it situated a different way so I use the “m” tool and use “free transform again” to adjust (using the corners like with cropping) to where i want the star to be.
now i have it here and i use the arrows on the keyboard as well sometimes to adjust it. Now what I usually do is create another layer for the smaller stars so i hit ctrl/shift/n again and then i set this new star to 9 px by right clicking on the picture. Then I repeat the steps above and have something like this

Now i just hit ctrl/j and duplicate the little star. then i hit “m” on my keyboard once again and move it to the opposite side of the big star.
now you have this picture:
Now what i do is i select all 3 star layers and right click and convert them to smart object so theyre easier to deal with. Then i hit ctrl/j and duplicate the stars.

now i hit “m” on the duplicate layer and click “free transform once again” now right click and hit “rotate 180″ and the result is like this

move the rotated stars to the opposite side of the picture with the mouse. Now it should look like this
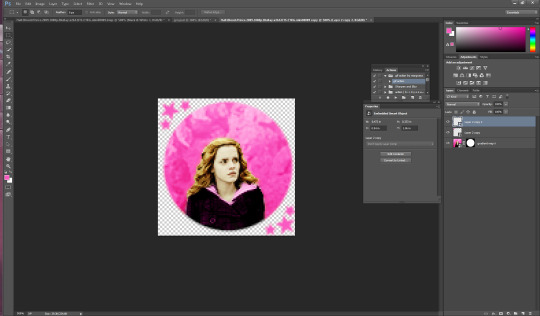
and that’s it! just hit ctrl/s and save as a .png and you have yourself an icon. I hope this helps. If i need to clarify anything please don’t hesitate to ask me. This is my first tutorial so I hope I explained things ok. Feel free to tag me in ur new icons I’d love to see them!
1K notes
·
View notes
Text
EVALUATION
The requirements of the brief were to understand how image manipulation techniques are used in the work of others, be able to digitise source materials, be able to originate work using image manipulation hardware and software and be able to present own design outcomes. There was also to understand the potential of digital media in contemporary art and design practice, be able to select materials for digital experimentation, be able to produce work using digital art and design techniques.
We had to either redesign a book cover or turn a movie into a book cover. I Decided to do The Purge. We had to use some photography in our work however it was a creative piece and we had to manipulate the work to make it indistinguishable as a photograph in the end. Task 1 was to create a Tumblr and start researching. We began with Erik Johansson and had to outline his process and how he created his work. We then had to research 2 more artists of our choice and I chose Luisa Azevedo and Chema Madoz because I thought their work was very interesting and intricate. Next, we had to find multiple examples of different and intriguing digital illustration that have used photography in their work. I found 3 I loved and explained why I chose them on my Tumblr. One of the last things was to experiment with photoshop techniques and I looked on Youtube for this and found examples on how to create fire and text on photoshop and also turn everything cartoon. Lastly, we had to create a small 200 word paragraph and explain how photoshop can help in the creation of art.
Task 2 of the brief was to show evidence and ideas generation which I did in a small sketch book and took photos with my phone and uploaded them onto my Tumblr. I then had to write a proposal with 400 words to explain what I was going to do and why. I personally didn't do a final small sketch with an outcome because to be completely honest I didn't know what I was going to do until it was done. I then finally did a diary entry that was updating what I was going so far and what I wanted to continue doing and what was working.
Task 3 was then just basically creating my final piece and taking screenshots of what I had achieved so far along with sending my final piece for marking. Lastly, we had to create a final diary entry however I am going to include this in my evaluation as I am going to explain how and why I did it.
The creative process I followed was just one big learning curve on how to create things. I wanted to experiment as much as possible so I did a lot of techniques and if they worked with my image I added them in. To create some of my ideas I decided to do a small mind map inside my sketch book and put different ideas on their along with potential options for other book covers. I took inspiration from having a quick look at the movie posters and also from older book covers as I wanted to keep it very simple and effective. The only planning I only really took was creating some mind maps before hand and viewing youtube videos to learn how to create new photoshop techniques. Some new techniques I learnt were how to create fire from nothing and also how to create something a cartoon.
Personally I didn't have a specific meaning for my photoshop final piece I just wanted to use this opportunity for myself to learn new techniques and create something I created myself. To create it I started with a photoshoot of the person of choice including the masks. I didn't do a huge photoshoot as I knew the basic style I wanted to shoot. Once this was done I went to photoshop and opened up my final image. once this was done I edited the shadows and highlights to bring the image out a lot more including the contrast so the image wasn't so flat. I started with just this to begin with as I wasn't too sure what I was going to create. It was at this point I chose I wanted to make it more of a cartoon; I then went onto youtube to learn how to create it. Firstly I opened my image onto photoshop and then copied it onto a new layer then made it invisible by clicking the eye next to it. Next, I went onto the background layer and converted it to a smart object by right clicking and then clicked the selected option, this was so any affect can be separated easily. I then went onto ‘filter’, ‘filter gallery’ and then onto ‘artistic’ and finally ‘poster edges’. I set the edge thickness to 0, the edge intensity to 4 and posterisation to 1. After that I went onto the filter option next to the effect and changed the opacity to 75%, then I went back onto filter gallery and then chose the ‘cutout’ filter. I made the number of levels 6, the edge simplicity 4 and then edge fidelity 2. After applying the effect I double clicked on the same icon and made it 75% again. For another time I went back onto filter and chose pixelate, colour halftone, made the maximum radius 4, and made all 4 channels 45. This created a dotted effect however once again I double clicked and made the opacity 75% but changed the blend mode from ‘normal’ to ‘soft light’. Once this was all done I made the first layer visible again by pressing the eye icon next to the image and chose ‘glowing edges’ from the ‘stylise’ folder. I made the edge width 1, edge brightness 3 and then smoothness 15. For the last time I went to filter gallery, sketch, and then torn edges with the image balance 4, smoothness 15 and the contrast 12. Above all of this there is a drop down arrow and I then changed this to ‘overlay’ which overlaid the images together and merged them nicely and changed the opacity to 40%.
Overall I am very happy with how the editing came out. To create the fire I first got opened a new page in photoshop and made the background black. Using the pen tool I made a random shape using 4 point creating a very simple flame like shape. Once this was done I went onto ‘filter’, ‘render’ and then ‘flame’. I then chose the first option ‘one flame along path’ and then it made a flame. I then copied it onto my actual image and used control + J to make copies and dot them around the page also making new flames so it wasn't too consistent.
For the text I couldn't manage to find any text or any way to create the same effect from scratch on photoshop and therefore I used the pen tool to cut out the actual Purge text and copied it onto the cover.
I am personally very satisfied with my final piece because although I think it could look a lot more professional I am happy that I learnt how to do many new things and think for the first time doing them they turned out really well. My aim was to teach myself new things and although I had less time to do this assignment than others I think I learnt the most in this one. My strength was learning and teaching myself new things and my weakness was that it was my first time doing a lot of these things on photoshop and therefore they may look a little bit amateurish. If I was to do this project again I would maybe plan it out a bit more better and give everything a certain time so I can get certain bits done in certain times instead of winging it.
1 note
·
View note
Text
Organizational Structures Reflection
Project 1: Overview This month’s class covered motion design in detail. There were two major projects worked on regarding our chosen city. The first project was the dynamic vision board. This assignment required us to conduct research regarding motion graphics, history, and trends and apply it to our static vision board from last month’s class. Static into motion was the focus. The project details were pretty broad and general with only the time limit of 30 seconds being a major factor. It was very challenging to figure out how to tell the story of most or all of the vision boards elements within such a short time limit. What helped the process was completing research on the process of motion graphics and then creating storyboards. This allowed me to flesh out all of my ideas and figure how they’d worked together given the 30 second time limit. The text Animated Storytelling we were assigned to read this month also gave great insight on the process from conception to final deliverable.
Project 1: Process The screenshots below highlight the initial draft completed of the storyboards and narrative.

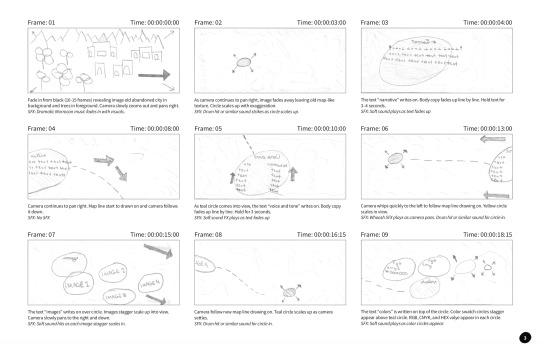
Revisions were completed and the final story was fleshed out. The screenshots below highlight the revisions of the story and the additional research completed.
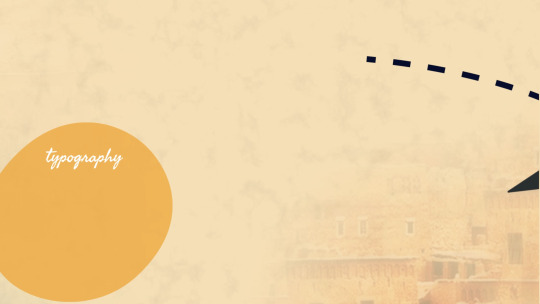
The screenshots below are frames from the final dynamic vision board.


YouTube Link: https://youtu.be/Ynlmh2Snjxg
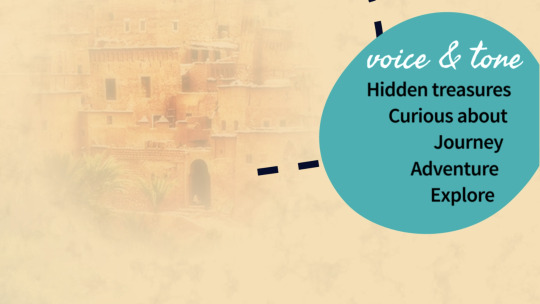
Connecting, Synthesizing & Transforming Correctly timing the text shown throughout the video benefited from research. Taylor emphasizes as a rule of thumb you need to be able to read text three times out loud at a regular pace (Taylor, 2018). Due to the time limitations of the video, this meant that the text shown on the screen should be short and to the point. Aldredge discusses that when working with text in video, you’ll need to make sure the text isn’t obstructing the image behind it (Aldredge, 2018). As a result, I edited the narrative copy and typography section in order to maximize the time limits of those sections while keeping the text on a legible background that didn’t interfere with itself or the background. Utilizing this principle, the text retained maximum legibility and readability normal pace.
Problem Solving The design problem was to position the city of Marrakech so the audience would see themselves as explorers instead of tourists. The work solved the problem by placing the audience in the shoes of an explorer. The motion piece features a map for exploration, map lines, location stops, and local imagery. Using these elements transforms the audience from mere voyeurs of a series of information bits into true explorers who are exploring this motion map and discovering new treasures around every corner.
Innovative Thinking Against similar videos in this style, this animation utilizes movement either by zoom and pan camera moves throughout enhanced by sound effects and background music. Vossen concludes that sound effects should be used to enhance motion graphics (Vossen, n.d.). Combining camera moves and transitions with sound effects throughout the video keep the viewer engaged while providing a novel experience.
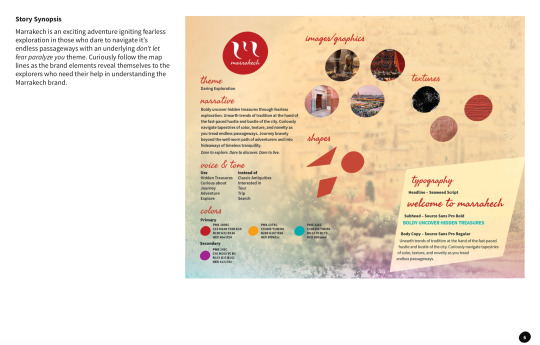
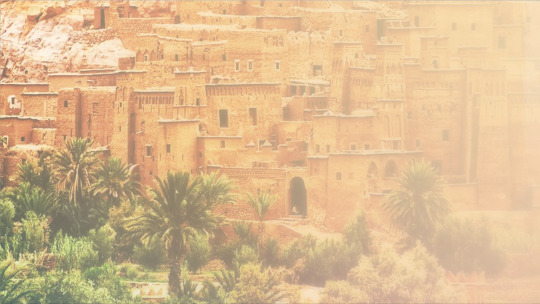
Project 2: Overview The second project this month was a motion piece marketing the chosen. The project offered the opportunity to work with several different motion styles including kinetic typography, cinemagraph, 2.5D parallax imagery, animatic, motion poster, and general motion graphic. The decision was made to use the 2.5D parallax motion style. In this style, the background image usually moves more slowly than images in the foreground, creating the illusion of depth and immersion (Techopedia, n.d.). This depth pulls the viewer that much more into the narrative which allows them to more intimately engage with the brand. Sherbin discusses how the parallax motion style technique is immersive. Sherbin also discusses how using layers gives your viewer the feeling that they’re moving through the page in 3D (Sherbin, 2013). In the case of this motion graphics piece, it is the screen that the viewer is moving through instead of a web page. This style accentuates the authentic depth and intimacy needed to resonate with the target audience, which is millennials. Due to time constraints, only one motion piece was able to be completed. The parallax motion style can easily be transformed into a series of motion pieces.
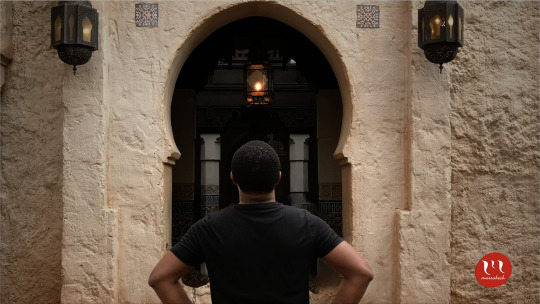
The story the motion piece will convey to the audience is that of daring exploration. As an explorer in Marrakech, there is adventure around every corner. Marrakech is an exciting adventure igniting fearless exploration in those who dare to navigate its endless passageways with an underlying don’t let fear paralyze you theme.
Project 2: Process The screenshots below highlight the storyboards for this motion piece.
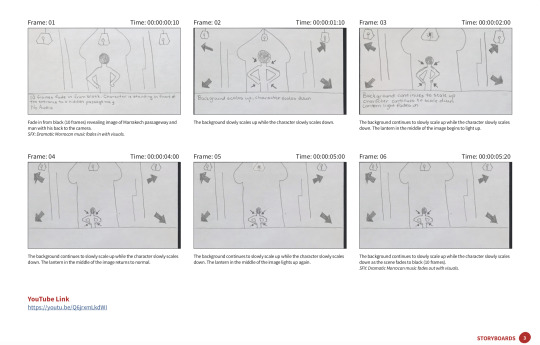
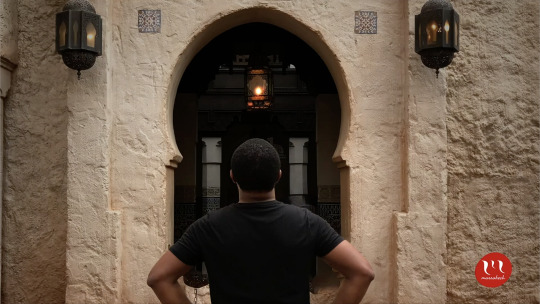
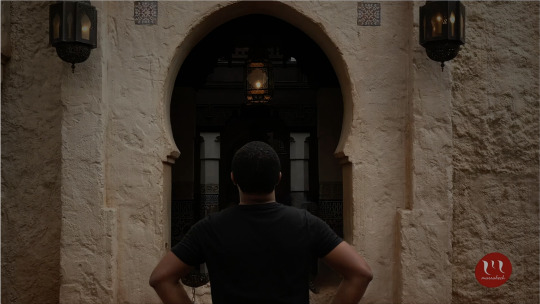
The screenshots below are frames from the final 2.5D parallax motion piece.


YouTube Link: https://youtu.be/Q6jrxmLkdWI
Connecting, Synthesizing & Transforming The researched used to arrive at the design conclusion was to explore the different motion styles presented. The motion styles included kinetic typography, cinemagraph, 2.5D parallax imagery, animatic, motion poster, and general motion graphic. After reviewing all of the styles, 2.5D parallax imagery was chosen to be the motion style for this project. The parallax motion style was selected because it introduces depth into a static image which further engages and immerses the viewer into the narrative. The narrative speaks to daring exploration. The depth really allows the viewer to experience the exploration in an intimate way.
Problem Solving The design problem the motion piece is attempting to solve is to allow the viewer to identify themselves as an explorer in Marrakech and not just a tourist. The motion piece solves this problem by showing a man boldly and confidently ready to daringly explore the unknown passageway he is standing in front of. Because of this, after watching the parallax video, the viewer has an intimate view of what it will be like once they are in that place in Marrakech ready to experience their own adventure and daring exploration.
Innovative Thinking The approach the motion takes is innovative because the secondary motion was introduced through the blinking light of the central lantern. Adding the secondary motion extends the depth of the motion piece beyond simple parallax motion and into a more complex, visually interesting, and defining narrative. Driving innovation in this motion piece using secondary motion will resonate with the audience as it further extends the tone and personality of the city of Marrakech, which is dramatic, exciting, and energetic.
Audio Identity The established brand audio identity has been used to further excite and dramatize the brand’s tone and personality. The music provides an upbeat, melodic backdrop which allows the visuals to be curiously and playfully explored. Using the brand audio in this way helps to create a connection between the feel of the music and message in the visuals.
Acquiring Competencies Throughout this month I leveled up my skillset and confidence using After Effects. By storyboarding the motion piece prior to jumping into After Effects, I was able to conceptualize easy methods of building the projects and Pre-Comping certain elements to make the animation cleaner, smoother, and more engaging. The elements I pre-comped included the text writing effect for the headlines in Project 1 and the ending screen elements in Project 1. I also learned how to animate in Photoshop to produce parallax image animation. I continued learning how to research topics deeply traditional books and Internet sources. I am also continuing to become better at managing my time. I still procrastinate concerning certain assignments but I do it a lot less now. I contribute this to having so many assignments due at once that I am unable to wait until the minute to get everything completed. This has also brought my weekly stress level down consistently.
My Experience In Organization Structures This class proved to be challenging. I associate this with the amount of research needed to be completed in order to make logical and sound design decisions. Graduate-level research for design work continues to prove difficult with certain specific subjects such as 2.5D parallax effect. There were a lot of resources available regarding using 2.5D parallax in web design but very few sources discussing its use in video production.
I also had a difficult time keeping my story journal. I didn’t start it until Week 3. Once I started it, it was fairly easy to keep but the assignment requirements introduced additional work that made it pretty cumbersome. I am grateful that I did not have to learn After Effects during this month because I don’t know how I would have done that and keep up with all of the assignments.
Overall, I feel like my time wasn’t well spent in this class over the month. I would have liked more time to work on the second project. Perhaps splitting the time between the two main projects equally would have provided me sufficient time to get everything done unto perfection. From here, I plan to continue mastering After Effects, 2D, and 3D motion graphic design so that I can offer better creative execution on both graduate and work-related projects.
References Aldredge, J. (2018, April 04). 5 Things You Should Consider When Adding Text to Video. Retrieved from https://www.premiumbeat.com/blog/5-considerations-adding-text-video/
Pettiford, B. (Photographer). (2019, March 1). Bernard at the Moroccon Pavillion, Epcot [photograph]. Orlando, FL.
Sherbin, M. (2013, December 09). The Ups and Downs of Parallax Design for Content Marketing. Retrieved from https://contentmarketinginstitute.com/2013/10/visual-content-potential-pitfalls-parallax-design/
Taylor, A. (2018, June 28). Taylor, A. (2018, May 01). The benefits of storyboards. Retrieved from https://www.lynda.com/After-Effects-tutorials/benefits-storyboards/625942/734737-4.html
Vossen, C. (n.d.). The importance of audio in video. Retrieved from https://www.522productions.com/the-importance-of-audio-in-video
What is Parallax Scrolling? - Definition from Techopedia. (n.d.). Retrieved from https://www.techopedia.com/definition/29141/parallax-scrolling
0 notes
Text
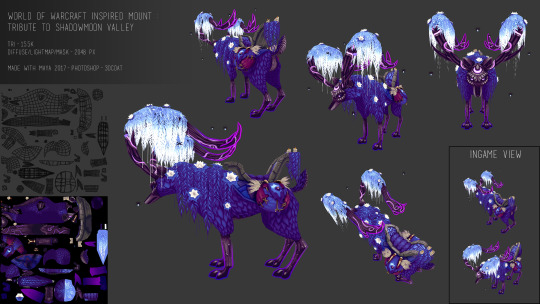
Mount Post-Mortem
Tools Used
First things first, I use pencil and paper to sketch out all of my concepts.
For the modeling part, since I learned to use Maya at school back in 2012, I’ve decided to continue on that way for this project.
Photoshop was a pretty obvious tool choice for me for painting the texture.
During my time working on my project I discovered 3D Coat, and decided to include it in my process since it is super super efficient for uv mapping and texturing.
Finally I used Maya to render some high resolution images of the mount, and then I uploaded the project on Sketchfab.
Complementary tools used :
Huge amount of WoW references : to take inspiration from already existing mounts in the game in order to get closer to Blizzard’s style and to understand how they make textures.
Youtube/CubeBrush : a lot of tutorials about modeling animal anatomy, about painting materials.
ArtStation and Sketchfab 3D-models : to understand better construction of the wire-frame and topology.
Maya plug-in “UV Nightshade” : it could help a lot organizing your uvs in maya.
Process
Concept idea, inspirations and intentions : I have been an avid WoW player for years and am constantly inspired to create artwork based off of the game’s lore. Ever since I started studying game art I’ve always wanted to make assets for World of Warcraft but never took the time or felt ready for it.
This exercise provided me the opportunity to create an asset from concept to final presentation within an art style I have always admired.
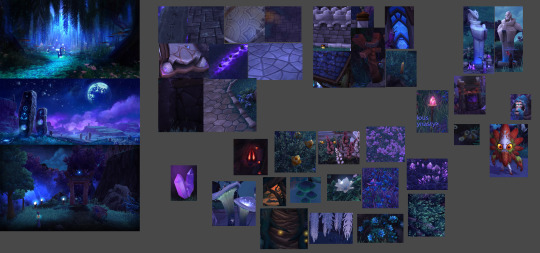
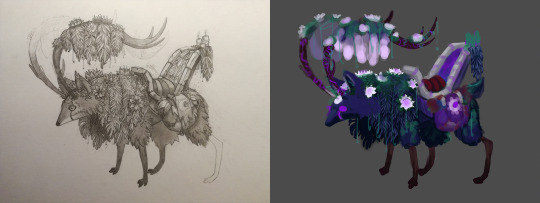
In order to create the best concept I could, I took the time to gather images that I could use as references and draw inspiration from. I gathered images of Shadowmoon Valley (vegetation, Draenei and orcs props), about cartoonish fox illustrations and real anatomy sketch of foxes and deers.
After that I made a reference image with my main inspirations :
Then I started to sketch a bunch of ideas for the mount, trying to not choose the final design too early. The more iteration you make, the stronger your final choice will be.
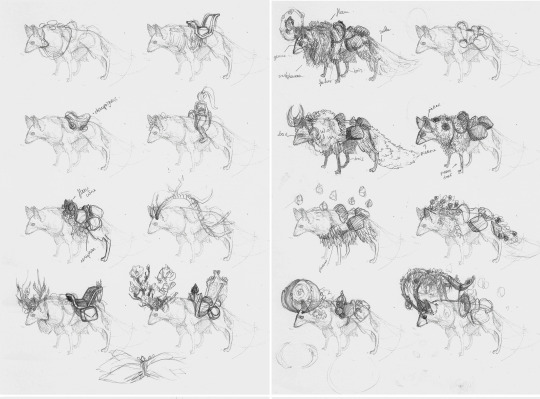
After creating several varied conceptual drawings, I created a more detailed sketch of the chosen drawing, keeping in mind that I could let myself change it if I thought of a better idea afterwards.
After creating the initial sketch, I created a basic colored version to test the composition. I didn’t want to waste time getting bogged down on small details that might change later.
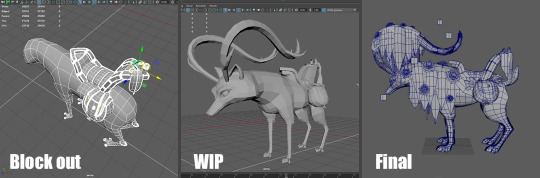
Modeling in 3D : I started by making a block out for the body, and then adding the props on it. I worked on all the pieces a little bit at a time to make sure the proportions matched up well. Watching Youtube tutorials also helped me when creating the body since this was the first time I have modeled something animal related.
What methodology I will use next time :
Make a block out for the entire project
Check volume/sizing according to your modelsheets or your concept reference,
Add Detail once to every part of the model, but keep an eye on your polycount,
If your polycount allows it, add detail a second time on more important parts of the model.
UVs mapping : UV mapping can often be a long and drawn out process for some people. After some testing, I found that using 3D Coat’s UV unwrap tools was definitely the easiest method to use. I switched between 3D Coat and Maya’s UVs editor while painting the texture. At this time I also decided to add the halo part on the horns and the legs (last minute idea).

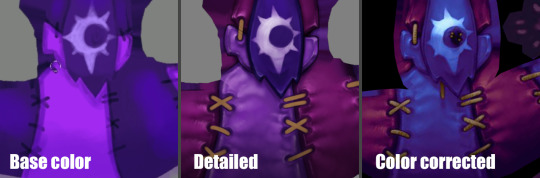
Texturing : The texturing process was a little messy for this project. I spent too much time focusing on the color and details of individual props instead of the harmony of the entire model. After a few missteps I was able to find a process that worked well and completed the texturing. Even after the model completion, I was able to gather the feedback that I had received online so that the next model I create will be even better.
What methodology I will use next time :
Make a greyscaled base,
Insert details (still in greyscale) and check the contrasts,
Add the ambient occlusion,
Add color gradient layers for every distinct materials in the texture,
Add details as beams of lights and reflection on metal material.
Rendering and exporting to Sketchfab : Considering the mount is shadeless (because the lighting and shadow information is painted in the texture), it was pretty quick to set the render up in Maya and in Sketchfab . The final model has the following textures :
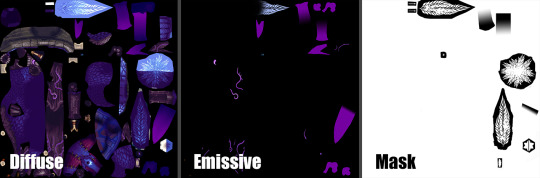
I made a kind of a turn-over thing in Maya in order to have high resolution images of it for my portfolio. Since there were no light and the texture was 2K px, they were quick to do.
Sketchfab viewer link :
https://sketchfab.com/models/0f7d31106f4f44ecb01b04bbd750d811
What went right ?
The final result looks quite well like what I had in mind at the very beginning, even if I changed/added a lot of things along the way.
I was able to get pretty close to the style used in WoW and have high hopes that I will get even closer in future projects.
Since I didn’t give myself a deadline on this project, I can’t say I failed at timing, even if I think this project took me a LOT of time (about few month on it). But regarding the fact that I almost started from scratch (on a knowledge and technique aspect) and that I had to re-learn a lot of thing through the way, it was normal for me to take that much time.
What could have gone better ?
This project was the very first personal work/concept I’ve done after 4 years break, so I forgot a lot about technique, shortcuts and methodology like I said earlier. So in consequence there is a lot of stuff I could have done better/quicker, here are the main stuff that made the journey longer and harder to me :
Time management : at first I was splitting my time between several projects, so I worked only few hours per day on the mount, I think this distract me a little. Sometimes it is better to focus on one thing to be more efficient. I also went back and edited several assets after watching tutorials, which cost me additional time.
Methodology : That is the big black spot in that project, like I said, I forgot a lot about methodology and how to start a project. So it made me lose time on almost every step of the project.
Conclusion and Closing Remarks
This project was a big jump into questioning my skill level, knowledge (or at least what I remembered from school) and capacity to keep going despite the difficulties.
It was a huge learning/re-learning experience and even if there was mixed feelings along the way, and even if at the end there is a lot of aspects about this mount that could be perfected, it was a successful experience for me.
Why ? :
I got back into my habits in Maya. I even learned new shortcuts I didn’t know back at school. Being comfortable with your software is essential.
I learned to use new software which simplified my life so much and will on future projects.
It forced me to search for new techniques of painting and I now understand better how to make textures quicker and more efficiently.
It helped me trust my instincts and taught me that sometimes not all advice is good to follow, and to trust a little more what I’ve learned in school even if this knowledge might be considered old-fashioned now.
It allowed me to meet generous people in the art community, who gave me encouragement, feedback, tips and helped me get through it.
Thanks to all the folks that helped me, followed me, watched my streams along the journey that this project was. I hope this post will encourage some of you to keep going if you encounter difficulties achieving your goal.
The harder, the better the result will be ! Or at least you’ll learn something from it.
Images /Tutorials /Artist I used as references :
Ashleigh Warner’s work on Warlords of Draenor - https://www.artstation.com/artist/ashdoodles
Coloring with gradiant maps by Marc Brunet - https://youtu.be/wUeQsUJTz8I
Model a dog by Jeff Slominsky - https://youtu.be/j5aFJzn-ZYQ
My Pinterest board : https://fr.pinterest.com/mhagnusgame/p-vall%C3%A9e-dombrelune/
You can follow me on and see more of my work on :
Twitter : https://twitter.com/MhagnusGame
Instagram : https://www.instagram.com/mhagnus_pauline/
ArtStation : https://www.artstation.com/artist/paulinep
DeviantArt : http://thegreenchick.deviantart.com/
Sketchfab : https://sketchfab.com/PaulinePouchtajevitch#
2 notes
·
View notes
Text
Adobe Dimension: How to Create Stunning 3D images in Minutes
Adobe is taking all the hard work out of 3D compositing, by marrying stock models with their 3D scene creation and rendering app.
I’ve been working with 3D applications for years now, and I still feel like I’m behind. It’s the single biggest learning curve I’ve undertaken. In fact, it took months before I saw results that I actually liked. Necessary features are hidden behind keyboard shortcuts, even small projects can take hours, and keeping up with various communities takes commitment. If you’re not running a beefy machine, you may need to pay for a render farm to get you the finished goods (on top of paying for applications and plugins).
So it’s without hesitation that I’ve been recommending Adobe’s Dimension CC. It works great on a Macbook Pro, is simple to use, and best of all, creates great looking images without much effort.
Forget Modeling
3D modeling is no small feat. Unless you’re serious about diving into this world, I’d skip it for the moment and opt for stock 3D models instead. You can find these all over the web and it will speed up your workflow by a mile.
The idea is that you find what you want, download it, position it in your application of choice, and then render it out. Usually that can go pretty smoothly, however, that’s assuming you understand the application you’re using. Whether it’s Cinema 4D, Blender or 3DS Max you might find that bringing in somebody else’s model doesn’t automatically make it look beautiful.
As a result, you’ll generally try to find stock models that are specifically made with your application in mind. For Dimension CC, that’s obviously Adobe Stock. When you download a model, it will automatically function perfectly in the app. Its materials will be applied properly, the normals (texture) will fit just right and you can quickly move on.
The Basics of Creating a Composite in Dimension
I’m assuming you already know a little bit about this. If not, check out Adobe’s quick overview of Dimension, and then come back here. You’ll need to know and understand the UI first.
I love the splash models that Adobe has and I want to make something with citrus vibes. I’ll go to Adobe Stock and get an orange, which I’ll then save to my stock folder (no need to download and re-link, it just appears in Dimension CC).
From there I’ll drag my models in and use the tools on the left to place them. You can also control the camera angle from the second group of tools below. There’s nothing here that a beginner wouldn’t be able to do. I find it helps to get everything close enough to where I want it, and then rotate the camera around to make sure it’s all exactly right. I want to leave space on the right for some 3D text later.
Next I’ll want to choose my materials. I picked a yellow glass for one splash and an orange glass for the other. My fruit was already skinned by Adobe so I don’t need to worry there. Adobe Stock has more materials if you need something more specific but I think I’m alright here.
Finally, I’ll want to choose my background and lighting. I made a quick gradient in Photoshop, and then picked Adobe’s “Wooden Studio” preset for the lighting. You can download more backgrounds and lighting setups from Adobe Stock too. Perhaps you’ll want a realistic background (even your own photo). Dimension will ask if it can automatically match the lighting in the background image via its Match Image feature, and I’ve found it to be pretty good. Personally, though I like the surrealistic look, and also find it’s an easier look to achieve for beginners.
From there I can check what it’s going to look like in the render tab on the top right. If I’m happy, I can get the final render exported. I usually like to export a PSD file, and render at the highest quality. Some complex renders will run for hours, but most only take minutes (it’ll depend on your machine). Unlike some other dumbed down 3D rendering systems, Adobe’s isn’t trying to fudge shadows and reflections – you’re seeing the real deal.
The reason I like to export a Photoshop file is that it’s considered good practice to apply a level of de-noising to your final render, and Dimension CC can export a layered PSD that splits the background from the models. If need be you can use the included depth map to create a mask, and only de-noise the blurred background that needs it most.
Apply levels to crush the blacks/whites.
Hit Cmd+A or Ctrl-A to select the entire image, copy it.
Make a new mask for the rendered image.
Copy your depth map to that layer in the channels tab, on the mask’s layer.
Apply de-noising or blurring effects to the masked layer.
Photoshop is also a great place for finishing touches, like color grading. You might want to throw a LUT on top of my renders to bring a more unique feel to the look. Something subtle goes a long way.
Importing Your Branding
So you’ve got your stock assets in place, but need to send a message. You can’t do any modeling in Dimension CC so I like to either add content to a laptop/smartphone screen or bring in some 3D text from Photoshop. It’s a nice way to get your point across without complicating things too much.
Adobe has a bunch of different stock assets for computer monitors and the like, but I’ll just be using the laptop that comes in the asset panel of Dimension CC. After you’ve placed it where you need it, reach over to the laptop folder in the Scene tab. Inside that, you’ll be able to expand the “Screen” part of the model, and see the material. From there you’ll just need to click on the base color and hit the pen icon to edit the texture in Photoshop. Then you can place your custom content in the white box on the canvas. Save it, and it’ll appear in Dimension CC.
If you want to add custom 3D text, then jump back into Photoshop. You’ll need to create your text layer as desired, then in the 3D menu tab select “New 3D Extrusion from Selected Layer”. It’ll bounce you into a 3D view where you can change the bevel and extrusion depth, deform settings and coordinates. You probably won’t need these settings that often.
Go back up to the 3D menu tab and click “Export 3D Layer”. You’ll want to save it as an OBJ, as well as retain the scene and textures. Then over in Dimension CC go to File>Import>3D Model. I like to zero out the coordinates of the object when it’s imported, just in case it’s being placed too far away from my scene.
From here you can choose your texture as normal, place it as you prefer, and render. As you can see Dimension CC is a frictionless way to create 3D renders. It’s a little frustrating if you’re accustomed to more fully fledged apps, but that’s what makes it suitable for newbies.
Feel free to post your own below!
Source: https://bloghyped.com/adobe-dimension-how-to-create-stunning-3d-images-in-minutes/
0 notes
Text
EVALUATION
Describe the process you went through to create your final piece (bold text in detail) (screen shots) 1. What were the requirements of the brief? In this assignment, the brief asked me to create a digitally manipulated final piece. There must have been some photography used to create my piece but the creative process of manipulation may make it indistinguishable as a photograph in the end. We are also allowed to use other media such as art work like paint and illustrations.
2. What was the creative process you followed? 3. How did you develop ideas for this project? Which idea generation techniques did you use? 4. Which sources of inspiration did you use? I started off by researching different Photographers such as Erik Johannsson and Sarolta Ban. Sarolta inspired one of my ideas about lucid dreaming because her work is about her creating dream-like images. I thought of my other idea because I was in my room looking around and thinking of different ideas. I made a mind map of different things I could use in my room to create something. Then I came across my animal figurines and I thought about how I’ve always wanted to go to Africa and see those animals in person and that’s where I thought of the idea to make people the same size as the figurines as if they are really with them.
5. What planning did you undertake? I had to plan what I wanted my image to look like slightly because if I just went into Photoshop with no idea then I wouldn’t know where to start or what I want it to look like at the end. I also needed to book the studio to take picture if my figurines and models.
6. What specialist equipment did you use and why? I only used a studio flash with a hot shoe to connect it to my camera so that every time I pressed the shutter button to take an image, the flash went off. I used this because it was quite dull in the studio, even with the main lights on
7. What post-production techniques (Photoshop) did you use and why? In Photoshop for my final piece I used lots off different techniques. The main one I used was the pen tool. I used this to cut out my individual objects and put them into my final image. I could have used the magnetic lasso tool or others things but in my opinion the pen tool is the most precise tool to use to cut out objects. I also used a lot of colour fill adjustment layers to make the objects into silhouettes. With this I used blending modes so the colour fills blended more with the image below them. One of the most common blend modes I used on my image was multiply. I also turned the opacity down slightly. On my flying elephants I used the puppet warp tool to make them look more realistic. I moved their legs so they were bent a bit more and gave more of an illusion that they were flying. When I got rid of the tree in the background, I selected it with the pen tool and deleted and Photoshop used content aware to fill the space with what it thought I wanted it to. After I did this I used the clone stamp to blend it better and make it seem like there was no tree there in the first place. When I made the tree I used the channels tab instead of layers and edited the colours through there and made sure that the tree was completely black. I got rid of any shadows using the burn tool.
Analyse your final piece in detail.
1. Does it have a meaning that it communicates? 2. Justify your choices and desicions I don’t think that my image really has meaning. To me it just says that you should always give things a second look. This is because in my image the first thing your eye is drawn to is the big flying elephants in the corner but then everything else is normal and then when you look closer you can see the 2 headed giraffe as well. I think it tests people because they may think it’s just a real picture of people petting some animals but then you realise that the proportions are not right so it can’t be real.
Evaluate your performance and final work for this project.
1. How satisfied are you with you final piece? I am very happy with my final piece because it turned out exactly how I wanted it. I even added in things that I didn’t even think about doing such as the flying elephants.
2. What were your strengths and weaknesses? I think that some of the techniques I have used are a bit basic. For example cutting out something with then pen tool and putting it into another image. However I do like my overall idea because although it isn’t that original, it does have aspects that other people have not created such as the made up animals.
3. If you were to do this project again, what would you do differently and why? If I were to do this project again I think I would spend more time thinking about my ideas and I would have tried to do my lucid dreaming idea because that was my first and original idea but I didn’t do it because I didn’t have enough time to think about what scene I wanted to create.
4. What new tools and techniques have you used? A new tool I have used is puppet warp. We were not taught about this tool and it was interesting to learn how to use it. To get the puppet tool you go to edit and select puppet warp tool and with this you can click on your object to create pinpoints and the then move your image around to wherever you want it.
Use CORRECT PHOTOSHOP TERMINOLOGY THROUGHOUT
0 notes