#ORDS installation guide
Explore tagged Tumblr posts
Visit Tumblr Blog
Explore Tumblr blogs with no restrictions, modern design and the best experience.
Last Seen Tumblr Blogs


Fun Fact
Tumblr has been providing a Korean-language service since 2013.
Text
Beginner’s Guide to Installing Oracle REST Data Services (ORDS) | Data Patrol Technologies
Learn how to set up Oracle REST Data Services with this beginner-friendly guide from Data Patrol Technologies. This tutorial covers every step of installing Oracle REST Data Services, making it easy to connect Oracle databases with RESTful APIs. Ideal for developers and database administrators new to ORDS installation.
#Installing Oracle REST Data Services#Oracle REST Data Services installation#ORDS installation guide#Beginner guide Oracle ORDS#Oracle REST Data Services
0 notes
Text
5 Reasons to Buy Polyester Cords Directly from Manufacturers
Whether you’re sourcing cords for industrial use, commercial projects, or custom applications, buying polyester cords directly from manufacturers offers several advantages. From better quality control to cost savings, working with a direct manufacturer gives you more control over what you buy—and how it’s made.
If you’re in industries like construction, electrical, marine, or textile production, here are 5 key reasons why choosing a manufacturer like Shree Anand and Balaji Co. is a smart move.
1. Guaranteed Quality and Customisation
When you work directly with a manufacturer, you’re getting cords that are produced under strict quality control. You can also request custom diameters, colors, or patterns based on your project needs. At Shree Anand and Balaji Co., we ensure every polyester cord meets industrial standards for strength, durability, and weather resistance.
Why it matters:
Custom-made cords ensure better fit, safety, and efficiency in real-world use.
2. Competitive Pricing Without Middlemen
Buying from wholesalers or distributors often means paying extra for handling and storage. Manufacturers eliminate those added costs. When you buy directly from the source, you’re getting factory prices with no hidden markups—ideal for bulk orders.
Why it matters:
More value for your budget, especially on high-volume or long-term supply needs.
3. Direct Communication and Technical Support
Need help choosing between braided cords, nylon cords, or rip cords? When you deal with the manufacturer, you get access to in-house experts who understand the product inside out. They can guide you to the right solution, troubleshoot issues, or even improve product specs based on feedback.
Why it matters:
Faster, more accurate answers without going through layers of customer service.
4. Faster Turnaround and Delivery
Manufacturers typically manage their production schedules, which means quicker processing and shipping. If you’re working on tight deadlines or have urgent industrial needs, this can make a huge difference.
Why it matters:
Less downtime, faster installation, and smoother supply chain operations.
5. Stronger, Long-Term Business Relationships
Establishing a direct relationship with a trusted manufacturer opens doors to long-term benefits like better payment terms, volume discounts, and priority support. It also gives you a more reliable supply partner who can scale with your growth.
Why it matters:
Consistency, reliability, and better pricing over time.
Conclusion
Purchasing polyester cords directly from manufacturers is not just a cost-effective strategy—it’s a smart business decision. Whether you’re in construction, cable manufacturing, textiles, or marine applications, direct sourcing gives you full control over quality, customization, pricing, and delivery timelines.
At Shree Anand and Balaji Co., we combine years of manufacturing expertise with personalized customer service to deliver premium cords—tailored to meet industrial needs across India and abroad.
If you’re looking to streamline your supply chain, cut unnecessary costs, and ensure high-quality products every time—it’s time to go direct.
Frequently Asked Questions (FAQs)
Q1. Can I get custom sizes and colors when ordering directly from the manufacturer?
A: Yes. At Shree Anand and Balaji Co., we offer customization in terms of diameter, color, and cord type. Whether you need 1 mm or 20 mm polyester cords, plain or braided—we can manufacture to your specifications.
Q2. Are polyester cords suitable for outdoor and marine use?
A: Absolutely. Polyester cords are known for their UV resistance, water resistance, and durability in outdoor environments, making them perfect for marine, shipping, and outdoor gear applications.
Q3. What is the minimum order quantity (MOQ) for bulk orders?
A: MOQs can vary depending on product type and customization. However, we accommodate both small businesses and large-scale industrial orders. Get in touch with our team for exact details.
Q4. Do you ship polyester cords outside of India?
A: Yes, we supply to Nepal and are open to inquiries for other international markets as well. We ensure safe packaging and timely delivery of export-quality cords.
Q5. What types of cords do you manufacture besides polyester cords?
A: Along with polyester cords, we also manufacture and supply nylo
1 note
·
View note
Text
A Weekend in Dubai: Where to Go, What to Eat, How to Look Good Doing It

If you’ve only got 48 hours in Dubai, don’t panic — you can still live the luxe life, soak up skyline views, dine in style, and leave with a camera roll full of memories and outfit pics. This city knows how to do weekends right. Whether you’re here for a quick escape, a stopover, or staying in one of the many chic vacation rentals Dubai has to offer, here’s your guide to making it iconic — and looking good while you’re at it.
Friday morning: Elevated brunch
Start your weekend the Dubai way — with brunch. But forget scrambled eggs and a side of toast. Here, brunch is a scene.
Go here:
● CE LA VI — Address Sky View For sky-high views of the Burj Khalifa and a menu that’s as photogenic as the setting. Dress to impress. ● The Maine Land Brasserie — Business Bay Classy, vibey, and perfect for a slightly more low-key (but still fabulous) start to your day.
What to wear:
Tailored shorts or a linen co-ord set for daytime glam. Add statement sunglasses and barely-there makeup for that “I woke up like this” energy.
Friday afternoon: Poolside pause or cultural catch-up
Depending on your mood (or your brunch hangover), choose your Friday afternoon vibe.
Option A — Chill:
● Drift Beach Club — laid-back luxury, sun beds, and a beautiful lunch menu. ● Twiggy by La Cantine — pool meets private lagoon, with Riviera-style energy.
Option B — Explore:
● Al Fahidi Historical Neighbourhood — wander the wind towers, galleries, and cafés. ● Museum of the Future — if you’re in the mood for something a little more out-of-this-world.
What to wear:
For beach clubs, a stunning swimsuit, wide-brim hat, and breezy kaftan. For cultural outings, flowy midi dress or lightweight trousers + sleeveless blouse = chic and respectful.
Friday night: Rooftop drinks & dinner with a view
Time to get dressed up and chase the skyline.
Go here:
● ZETA Seventy Seven — Address Beach Resort Perched at 310m above the ground, it’s all infinity pool views and cocktails. ● Amazonico — DIFC Jungle-inspired interiors, Latin American cuisine, and that see-and-be-seen atmosphere.
What to wear:
This is where you bring out the satin, the heels, the gold jewellery. Think “summer wedding guest in Milan” — but make it Dubai.
Saturday morning: Coffee & concept stores
Start slow. Wander. Browse. Sip.
Go here:
● Comptoir 102 — Jumeirah Organic breakfast, dreamy interiors, and curated fashion finds. ● % Arabica — City Walk or Dubai Mall Minimalist heaven and consistently great coffee.
What to wear:
Floaty maxi dress or co-ord set with trainers. Hair in a claw clip. Tote bag in hand. Main character mode: activated.
Saturday afternoon: Desert or Design District?
Option A — Get out of the city:
● Book a desert safari (morning dune bashing + lunch at a luxury camp = ideal end to your trip)
Option B — Stay urban:
● Dubai Design District (D3) Art installations, homegrown fashion, and independent cafés. Great for a stroll and stylish people-watching.
What to wear:
For the desert: linen trousers, tank top, scarf for dust, and closed shoes. For D3: anything architectural, monochrome, or a touch edgy.
Saturday evening: Sunset & that one last dinner
Don’t leave without one last golden hour moment.
Go here:
● Shimmers — Madinat Jumeirah Beachfront Greek restaurant with toes-in-the-sand dining and Burj Al Arab views. ● Ninive — Emirates Towers Arabian nights meet a chic supper club under the stars.
What to wear:
Neutral tones, breezy silhouettes, soft textures. Dubai is all about elegance without effort — let your final look say, “Yes, I’ll be back.”
Bonus tips:
● Book in advance. Everything gets busy — especially brunch. ● Carry a shawl or scarf for modesty in older areas or air-conditioned interiors. ● Hydrate. Between sun, cocktails, and shopping marathons, your skin will thank you. ● Leave a little space in your suitcase — you’ll shop, trust us.
Your weekend, upgraded
Dubai weekends are anything but ordinary — even on a tight schedule. With a little planning and a good outfit or two, you’ll not only experience the city, you’ll inhabit it. And who knows? Two days might be all you need to fall in love.
#holiday homes dubai#vacation rentals dubai#bnb Dubai#short term vacation homes Dubai#1 bhk for rent in dubai
0 notes
Text
Discover Chicago: A Complete Travel Guide
Chicago, Illinois—known as the “Windy City”—is a vibrant metropolis on the shores of Lake Michigan. From world-class architecture and museums to deep-dish pizza and lakefront beaches, Chicago offers something for every traveler. Here���s your ultimate guide to planning an unforgettable trip.
1. When to Go
Spring (April–June): Temperatures warm up, tulips bloom at Millennium Park, and outdoor festivals kick off.
Summer (July–August): Sun-soaked days perfect for beach time, rooftop bars, and lake cruises—though crowds and humidity peak.
Fall (September–October): Crisp air, colorful foliage along the lakefront, and food festivals like Chicago Gourmet.
Winter (November–March): Brisk weather, festive holiday markets (Christkindlmarket), and indoor cultural experiences—bundle up!
2. Getting There & Getting Around
O’Hare International Airport (ORD): One of the world’s busiest hubs with nonstop global connections.
Midway International Airport (MDW): Ideal for domestic flights, especially Southwest Airlines.
“L” Train & CTA Buses: Extensive, affordable public transit covering downtown and surrounding neighborhoods.
Divvy Bike-Share: Convenient for short trips along lakefront and in the Loop.
Rideshares & Taxis: Readily available—handy for late-night rides or destinations off the train lines.
3. Where to Stay
The Loop: Heart of downtown—steps from Millennium Park, the Art Institute, and riverwalk.
River North: Trendy district with art galleries, cocktail lounges, and high-end dining.
Magnificent Mile (Near North Side): Upscale shopping and luxury hotels overlooking the lake.
Wicker Park / Bucktown: Hip, artsy neighborhoods with boutique hotels, cafes, and nightlife.
Lincoln Park: Residential feel, close to the zoo, park beaches, and leafy streets.
4. Must-See Attractions
Millennium Park & “Cloud Gate” (The Bean): Iconic sculpture, summer concerts, and free art installations.
Architecture River Cruise: Learn about Chicago’s historic skyscrapers from the comfort of a boat.
Art Institute of Chicago: Home to Grant Wood’s American Gothic, Seurat’s Sunday Afternoon, and more.
Skydeck Chicago (Willis Tower): Step onto The Ledge—glass boxes 1,353 feet above the city.
360 Chicago (John Hancock Observatory): Panoramic lake and city views; try the TILT experience.
Navy Pier: Ferris wheel, lakefront walking paths, and seasonal fireworks.
Museum of Science and Industry: One of the largest science museums in the world, with interactive exhibits.
5. Dining & Nightlife
Deep-Dish Pizza: Legendary spots include Giordano’s, Lou Malnati’s, and Gino’s East.
Chicago-Style Hot Dogs: No ketchup—top with mustard, relish, onions, sport peppers, celery salt, and a pickle spear. Try Portillo’s or Gene & Jude’s.
Fine Dining: Alinea, Smyth, and Oriole for multi-course tasting menus.
Ethnic Eats: Authentic Mexican in Pilsen, Polish cuisine in Avondale, and dim sum in Chinatown.
Rooftop Bars: Cindy’s Rooftop, LondonHouse, and the J. Parker for cocktails with skyline and lake views.
Live Music & Clubs: Blues at Kingston Mines, jazz at the Green Mill, and DJs in River North nightclubs.
6. Neighborhood Highlights
Hyde Park: University of Chicago, the Museum of Science and Industry, and quiet lakefront trails.
Logan Square: Trendy eateries, the 606 elevated trail, and laid-back cocktail lounges.
West Loop: “Restaurant Row” on Randolph Street, art galleries, and converted-warehouse hotels.
Ukrainian Village: Charming bakeries, coffee shops, and historic churches.
7. Day Trip Ideas
Oak Park: See Frank Lloyd Wright’s homes and studio just west of the city.
Starved Rock State Park: A two-hour drive for canyons, waterfalls, and hiking trails.
Geneva & St. Charles: Quaint river towns in the Fox River Valley—boutiques, cafes, and historic architecture.
8. Insider Tips
CityPASS: Save when visiting multiple top attractions.
Rush Tickets: Many theaters offer last-minute discount tickets for Broadway shows.
Public Art & Murals: Download the Chicago Greeter Arts app for self-guided street-art tours.
Weather Prep: Layer your clothing—lake breezes can be cool even in summer.
Safety: Stick to well-lit areas at night and be aware of bike lanes when walking.
Chicago’s dynamic energy, architectural marvels, and culinary innovations make it a must-visit destination. Whether you’re marveling at skyscrapers along the river, indulging in a deep-dish slice, or exploring vibrant neighborhoods, every moment in the Windy City is full of discovery. Pack your walking shoes, bring your appetite, and get ready to fall in love with Chicago! Plan your Travel now
0 notes
Text
Python Course: A Comprehensive Guide to Mastering Python Programming
Python is one of the most popular and versatile programming languages in the world today. Known for its simplicity, readability, and wide range of applications, Python has become a go-to choice for developers across various industries. Whether you're an aspiring programmer, a data scientist, or a software engineer, a Python course can equip you with the skills to succeed in the ever-growing tech industry.
In this blog, we will explore why taking a Python course is a smart career move, what you will learn, and how it can help you unlock various career opportunities in programming, data science, artificial intelligence, and more.
Why Should You Take a Python Course?
With its widespread use in fields such as web development, data analysis, machine learning, automation, and more, learning Python has become a critical skill for anyone looking to work in the tech industry. Below are several reasons why enrolling in a Python course is a great decision:
1. Simplicity and Readability
Python is widely regarded as one of the most beginner-friendly programming languages. It has a simple syntax that is easy to read and write, making it an excellent choice for newcomers to coding. A Python course will guide you through Python’s syntax and key concepts in an easy-to-understand manner.
2. High Demand for Python Developers
Python developers are in high demand across various industries. Companies are constantly looking for professionals who can develop web applications, analyze data, and create machine learning models using Python. By completing a Python course, you can improve your chances of landing a well-paid job in tech.
3. Versatility of Python
One of the key reasons for Python’s popularity is its versatility. It is used in multiple domains, including:
Web Development: Frameworks like Django and Flask are built on Python.
Data Science and Analytics: Libraries like Pandas, NumPy, and Matplotlib are used for data manipulation and visualization.
Machine Learning and Artificial Intelligence: Python’s libraries such as TensorFlow, Scikit-learn, and Keras are heavily used for AI and ML projects.
Automation: Python’s simplicity allows developers to automate tedious tasks efficiently.
4. Strong Community and Resources
Python has a large and active community, which means that you’ll have access to a wealth of tutorials, forums, and open-source libraries. By enrolling in a Python course, you’ll be able to tap into this valuable resource and gain insights from other professionals.
5. Great Career Opportunities
With the rise of big data, machine learning, and artificial intelligence, Python is at the forefront of these technological advancements. Completing a Python course opens up career opportunities in areas like:
Software development
Data science and analytics
AI and machine learning
Web development
Automation
What Will You Learn in a Python Course?
A well-structured Python course will take you from beginner-level programming concepts to advanced techniques in Python. Let’s take a look at some of the key areas that a typical Python course will cover:
1. Introduction to Python Programming
The first step in any Python course is to familiarize you with the fundamentals of the language. This includes:
Installing Python on your system
Understanding the Python interpreter
Writing your first Python program
Basic syntax, variables, and data types
Comments and documentation
2. Control Flow and Functions
In this section of the Python course, you’ll learn how to control the flow of your program and make decisions using:
Conditional statements: if, elif, and else
Loops: for and while loops
Functions: how to define and use functions in Python
Arguments and return values: passing data to and from functions
3. Data Structures in Python
Data structures are essential for organizing and manipulating data. In a Python course, you’ll learn about the following key data structures:
Lists: storing ordered collections of items
Tuples: immutable sequences of data
Dictionaries: key-value pairs for storing data
Sets: unordered collections with no duplicates
Arrays: using libraries like NumPy for more advanced array operations
4. Object-Oriented Programming (OOP)
Python is an object-oriented language, meaning it supports concepts like inheritance, encapsulation, and polymorphism. An in-depth Python course will teach you how to:
Create and use classes and objects
Define methods within classes
Understand inheritance and how to extend functionality in Python
Use encapsulation and abstraction to improve code modularity
5. Working with Libraries and Modules
Python offers an extensive standard library that allows developers to quickly solve common problems. Additionally, many third-party libraries make it easier to work with various tasks such as web development, data analysis, and machine learning. In a Python course, you’ll learn:
How to import built-in and external libraries
How to use libraries such as Pandas, NumPy, and Matplotlib for data analysis and visualization
How to work with libraries like requests and BeautifulSoup for web scraping
6. File Handling
In Python, reading and writing files is a common task, especially when dealing with data storage and manipulation. This section of a Python course will cover:
Opening and closing files
Reading and writing text and binary files
Working with CSV, JSON, and other file formats
7. Error Handling and Exceptions
Writing robust and error-free code is essential in programming. A Python course will teach you how to handle errors and exceptions using:
Try-except blocks: handling exceptions gracefully
Raising exceptions when necessary
Using custom exception classes for better error management
8. Web Development with Python
Python is also widely used for web development. In a Python course, you’ll learn about popular Python frameworks such as:
Django: a high-level framework for building full-stack web applications
Flask: a micro-framework for lightweight web applications
How to handle HTTP requests and build RESTful APIs
Working with databases (e.g., SQLite, PostgreSQL, MySQL) using Python’s ORM tools
9. Data Science and Machine Learning
Python’s power lies in its ability to handle complex data analysis and machine learning tasks. If you’re taking a Python course for data science or AI, you’ll explore:
Data manipulation using Pandas and NumPy
Data visualization with Matplotlib and Seaborn
Machine learning basics with Scikit-learn
Building neural networks using TensorFlow and Keras
10. Automation and Scripting
Python is known for its ability to automate repetitive tasks. In a Python course, you’ll learn how to:
Automate web scraping and data collection
Use Python to automate tasks like file management and report generation
Write scripts to interact with APIs
Benefits of Completing a Python Course
There are numerous benefits to completing a Python course that can significantly enhance your career and programming skills. Here are a few key advantages:
1. In-Demand Skill
Python is one of the most sought-after programming languages in the job market. By learning Python, you’re equipping yourself with a valuable skill that opens up a wide range of career opportunities.
2. Broad Range of Applications
Python is used in various industries, from web development to data science, machine learning, and automation. This versatility means that completing a Python course can set you up for diverse job roles in different fields.
3. Job Readiness
A Python course will help you gain the practical skills needed to succeed in Python-related job roles. With hands-on exercises, projects, and real-world applications, you will be ready to take on the challenges in your next job.
4. Higher Earning Potential
Python developers, data scientists, and machine learning engineers are among the highest-paid professionals in the tech industry. By learning Python, you significantly increase your earning potential.
5. Career Advancement
Whether you're just starting your career or looking to advance in your current role, a Python course can give you the edge you need to climb the career ladder.
How to Choose the Right Python Course
With numerous online platforms offering Python courses, it’s important to choose the one that best fits your needs. Here are a few tips for selecting the right course:
1. Instructor Expertise
Ensure the course is taught by experienced instructors with a solid background in Python programming.
2. Course Content
Make sure the course covers all the essential topics like syntax, data structures, object-oriented programming, libraries, and modules.
3. Hands-On Projects
Look for a course that includes practical assignments and real-world projects to help you apply what you've learned.
4. Reviews and Recommendations
Check the reviews and recommendations from past students to ensure the quality of the course.
5. Certifications
Consider courses that offer certifications upon completion, which can add value to your resume.
Conclusion
Taking a Python course is a fantastic way to start your journey into the world of programming, data science, machine learning, or web development. With its simplicity, versatility, and widespread use, Python offers endless opportunities for career growth. By completing a Python course, you’ll gain the knowledge and skills needed to succeed in the tech industry and beyond.
From learning the basics of Python syntax to mastering advanced topics like machine learning and data science, a Python course will empower you with the tools to tackle real-world programming challenges. So, whether you’re a beginner or an experienced programmer looking to expand your skill set, enrolling in a Python course is a step towards a successful and rewarding career.
0 notes
Text
DIY Smart Lock with Facial Recognition
Introduction
Welcome to our DIY project guide on building a Smart Lock with Facial Recognition! In this age of technological advancements, ensuring the security of our homes is more important than ever. This innovative project combines IoT and computer vision to create a smart lock that grants access based on facial recognition, providing enhanced security for your home. Let’s dive into how to build this project step by step!

Why Build a Smart Lock?
Traditional locks can be cumbersome and easily compromised. A smart lock with facial recognition offers a high level of security by allowing only authorized users to enter. Plus, with remote access capabilities, you can monitor and control your door lock from anywhere, giving you peace of mind.
Benefits of a Smart Lock:
Enhanced Security: Only authorized faces can unlock the door.
Convenience: No need for physical keys or codes.
Remote Monitoring: Control access from your smartphone.
Real-Time Notifications: Get alerts when someone tries to access your door.
Key Components and Technologies
To build your smart lock, you will need the following components:
Raspberry Pi: The brain of your smart lock. A Raspberry Pi 3 or 4 is ideal.
Camera Module: For capturing facial images.
Servo Motor or Solenoid: To act as the locking mechanism.
OpenCV: A powerful computer vision library for facial recognition.
Cloudtopiaa Cloud Services: For remote access, data storage, and notifications.
Breadboard and Jumper Wires: For easy connections.
Additional Tools:
Power supply for the Raspberry Pi
A small project enclosure to house the components
Optional: a push button for manual locking/unlocking
Step-by-Step Guide
Step 1: Set Up Your Raspberry Pi
Install the Operating System: Download and install Raspberry Pi OS on your Raspberry Pi. You can use the Raspberry Pi Imager for an easy setup.
Connect the Camera Module: Attach the camera module to the Raspberry Pi. Ensure it’s enabled by running the following command in the terminal:
sudo raspi-config
2. Navigate to Interfacing Options and enable the camera.
Step 2: Install Required Libraries
Open the terminal on your Raspberry Pi and install the necessary librariessudo apt-get update sudo apt-get install python3-opencv
Step 3: Program Facial Recognition
Create a Python script to implement facial recognition using OpenCV. Here’s a basic example to get you started:import cv2
# Load the Haar Cascade for face detection face_cascade = cv2.CascadeClassifier(cv2.data.haarcascades + 'haarcascade_frontalface_default.xml')
# Initialize the camera camera = cv2.VideoCapture(0)
while True: # Capture frame-by-frame ret, frame = camera.read() gray = cv2.cvtColor(frame, cv2.COLOR_BGR2GRAY)
# Detect faces faces = face_cascade.detectMultiScale(gray, scaleFactor=1.1, minNeighbors=5) # Draw rectangles around detected faces for (x, y, w, h) in faces: cv2.rectangle(frame, (x, y), (x + w, y + h), (255, 0, 0), 2)
# Display the resulting frame cv2.imshow('Face Detection', frame)
if cv2.waitKey(1) & 0xFF == ord('q'): break
# Release the camera and close windows camera.release() cv2.destroyAllWindows()
Step 4: Control the Locking Mechanism
Integrate a servo motor or solenoid to act as your locking mechanism. Connect it to a GPIO pin on the Raspberry Pi and update your script to unlock the door when a recognized face is detected.import RPi.GPIO as GPIO
# Set up GPIO for servo motor LOCK_PIN = 17 # Choose an available GPIO pin GPIO.setmode(GPIO.BCM) GPIO.setup(LOCK_PIN, GPIO.OUT)
def unlock_door(): GPIO.output(LOCK_PIN, GPIO.HIGH) # Unlock time.sleep(5) # Keep unlocked for 5 seconds GPIO.output(LOCK_PIN, GPIO.LOW) # Lock again
Step 5: Implement Facial Recognition Logic
You’ll need to create a mechanism to recognize faces. Start by capturing and storing images of authorized users. Modify your script to compare live images with stored images.
Step 6: Cloud Integration with Cloudtopiaa
To enable remote access and notifications for your smart lock, we’ll set up Cloudtopiaa. Follow these steps:
Sign Up for Cloudtopiaa: Create an account on Cloudtopiaa and log in.
Create a New Project: In the Cloudtopiaa dashboard, create a new project for your smart lock application.
Set Up Database: Create a database to store authorized user data (e.g., facial images or user IDs) and logs of access attempts.
Develop API Endpoints:
Create an endpoint to send facial recognition data to the cloud for analysis.
Set up another endpoint to receive access notifications and alerts.
Implement HTTP Requests: In your Python script, use the requests library to communicate with Cloudtopiaa. Here’s an example of how to send data:
import requests
def send_to_cloud(face_data): url = "https://api.cloudtopiaa.com/your-endpoint" # Replace with your actual endpoint response = requests.post(url, json=face_data) return response.status_code
5. Remote Access Setup: Use Cloudtopiaa’s features to allow remote monitoring and control of your smart lock. You can implement webhooks or notifications to alert you whenever someone attempts to unlock the door.
Step 7: Final Assembly
Assemble all components in a project enclosure.
Mount the camera at eye level on your door.
Ensure the servo motor or solenoid is securely attached to the locking mechanism.
Conclusion-
Congratulations! You have successfully built a DIY Smart Lock with Facial Recognition. This project not only enhances your home security but also demonstrates your skills in computer vision, IoT security, and hardware-software integration.
Additional Resources
OpenCV Documentation
Raspberry Pi Documentation
Cloudtopiaa Documentation — For more details on using their cloud services.
#tech4bizsolutins #DIYSmartLock #FacialRecognition #HomeSecurity #SmartHome #TechDIY #InnovativeSecurity #FacialRecognitionLock #HomeAutomation #SmartTech #SecureHome #cloudtopiaa
0 notes
Text
Oracle Apex Download For Windows 10

racle APEX: Rapid Web Development for Your Windows 10 System
Oracle Application Express (APEX) is a powerful, low-code development framework that lets you build sophisticated web applications quickly and easily. It’s included as a feature of the Oracle Database, making it a cost-effective and dynamic solution for businesses of all sizes. If you’re running Windows 10 and want to leverage the power of APEX, this blog is for you!
Understanding Oracle APEX
Before diving into the download process, let’s clarify what Oracle APEX is and why you might want to use it:
Low-Code Platform: APEX minimizes the need for extensive coding. Its visual tools and drag-and-drop components accelerate application development.
Web-Based: Applications built in APEX run directly within web browsers, providing easy user access.
Database-Centric: APEX is tightly integrated with the Oracle Database, allowing you to efficiently leverage your existing data structures.
Secure and Scalable: APEX inherits the robustness and security of the Oracle Database, making it suitable for enterprise applications.
Downloading Oracle APEX for Windows 10
Here’s the step-by-step guide on how to download and get started with APEX on your Windows 10 machine:
Prerequisites: The key thing you need is an Oracle Database. You can meet this requirement in several ways:
Oracle Database in the Cloud: Sign up for a cloud-based Oracle Database service (e.g., Autonomous Database).
Oracle Database XE: Download and install Oracle Database Express Edition (XE), a free, lightweight version of the Oracle Database.
Existing Oracle Database: If you have access to an on-premises or other hosted Oracle Database instance, you can use that.
Download the Latest Release: Get the most recent version of Oracle APEX. You’ll download a zip file.
Extract the Zip File: Unzip the downloaded file to a suitable location on your Windows 10 computer.
Installing Oracle APEX
The ‘installation’ of APEX mainly involves running scripts in your database:
Connect to Your Database: Use a tool like SQL*Plus or SQL Developer to connect to your Oracle Database using the appropriate credentials.
Navigate to the Extracted Files: In your command-line tool, navigate to the directory where you extracted the APEX zip file.
Run the Installation Scripts: Execute the apexins.sql script against your database to install the core APEX components. Follow the on-screen prompts. You’ll likely also want to run apxldimg.sql to load APEX images.
Accessing Your APEX Workspace
Workspace URL: Your APEX instance will be associated with a specific URL, usually following the format: http://hostname:port/ords/apex_admin (ask your database administrator if you’re unsure of the correct URL).
Login Credentials: Use the ‘ADMIN’ account credentials you defined during the installation process.
APEX Development Environment: Once logged in, you’ll enter the APEX development environment where you can begin building your web applications.
Let the Development Begin!
Congratulations! You’ve successfully downloaded and set up Oracle APEX on your Windows 10 computer. The world of rapid web application development is now at your fingertips. Explore the tutorials and documentation on the Oracle APEX website to get started building your first applications.
youtube
You can find more information about Oracle Apex in this Oracle Apex Link
Conclusion:
Unogeeks is the No.1 IT Training Institute for Oracle Apex Training. Anyone Disagree? Please drop in a comment
You can check out our other latest blogs on Oracle Apex here – Oarcle Apex Blogs
You can check out our Best In Class Oracle Apex Details here – Oracle Apex Training
Follow & Connect with us:
———————————-
For Training inquiries:
Call/Whatsapp: +91 73960 33555
Mail us at: [email protected]
Our Website ➜ https://unogeeks.com
Follow us:
Instagram: https://www.instagram.com/unogeeks
Facebook: https://www.facebook.com/UnogeeksSoftwareTrainingInstitute
Twitter: https://twitter.com/unogeeks
0 notes
Text
ORACLE APEX 18.2 DOWNLOAD

Oracle APEX 18.2: Unlocking Low-Code Development (A Download Guide)
Oracle Application Express (APEX) is a powerful, low-code development platform within the Oracle Database. It’s known for creating scalable, secure, and visually appealing web applications with minimal coding effort. While version 18.2 is an older release, it remains relevant for those working with legacy systems or needing specific features from that era. Let’s explore how to download and get started with Oracle APEX 18.2.
Prerequisites
Before you begin your APEX 18.2 adventure, ensure you have these in place:
Oracle Database: Oracle APEX runs within an Oracle Database. You’ll need version 11gR2 or later.
Supported Web Browser: Modern browsers like Chrome, Firefox, or Edge provide the best APEX experience.
Installing Oracle APEX 18.2
The detailed installation process is more involved. Here’s the basic flow:
Extract the Zip File: Unzip the downloaded file to a convenient location on your database server.
Run SQL*Plus: Connect to your Oracle Database as a user with administrative privileges (like SYS).
Execute the Installation Script: Navigate to the extracted folder and run the apexins.sql script. This script will install all the necessary components into your database.
Configure Oracle REST Data Services (ORDS): Instructions for setting up ORDS can be found on the Oracle APEX documentation website (https://docs.oracle.com/database/apex-18.2)
Accessing Your APEX Workspace
Once the installation is complete, you can access your APEX environment:
Determine the URL: The URL format will typically be http://hostname:port/ords/. Replace ‘hostname’ and ‘port’ with the relevant values for your database setup.
Workspace Login: Log in using the ‘ADMIN’ account and the password you defined during installation.
Congratulations! You’ve got Oracle APEX 18.2 up and running.
Important Considerations
Legacy Version: Oracle APEX has evolved significantly. Newer versions have substantial improvements to features, interface, and security. Use 18.2 only if it’s a strict requirement.
Documentation: Thorough installation instructions and helpful resources are available online in the Oracle APEX 18.2 documentation (https://docs.oracle.com/database/apex-18.2).
Let the Low-Code Journey Begin
With Oracle APEX 18.2 at your fingertips, you can embark on rapid web application development. Explore pre-built components, templates, and powerful features to turn your ideas into tangible web forms.
youtube
You can find more information about Oracle Apex in this Oracle Apex Link
Conclusion:
Unogeeks is the No.1 IT Training Institute for Oracle Apex Training. Anyone Disagree? Please drop in a comment
You can check out our other latest blogs on Oracle Apex here – Oarcle Apex Blogs
You can check out our Best In Class Oracle Apex Details here – Oracle Apex Training
Follow & Connect with us:
———————————-
For Training inquiries:
Call/Whatsapp: +91 73960 33555
Mail us at: [email protected]
Our Website ➜ https://unogeeks.com
Follow us:
Instagram: https://www.instagram.com/unogeeks
Facebook: https://www.facebook.com/UnogeeksSoftwareTrainingInstitute
Twitter: https://twitter.com/unogeeks
0 notes
Text
Raspberry Pi, MQTT and RealVNC
When I got Sensecap S2103 LoRaWAN® CO2, Temperature, and Humidity Sensor, I was thinking to integrate it with commercial Scada HMI system. One of the reasons is because Sensecap S2103 is a set of sensors which are applicable in industrial applications. Later, an idea came to me why not to use Raspberry PI with screen - Human Machine Interface together with RealVNC to make Industrial – grade reusable application.
The best thing in this project Remote Access for your Raspberry Pi from Anywhere in the world via VNC connection, meaning you have Scada HMI system anywhere, on any device.
In this post I am going to show how to integrate Sensecap S2103 sensor and display collected data on Raspberry Pi display.
Since picture is worth a thousand words, block schematics below shows architecture of my project.

I will show data from SenseCap S2103 sensor on Home Assistant which is installed on reTerminal . I will not go step-by-step on configuration/installation of Home Assistant on reTerminal, but you can see great guide on seeedstudio wiki here https://wiki.seeedstudio.com/reTerminal_Home_Assistant/.
I used the guides from link above and Home Assistant Supervised installation/configuration method in order to have data displayed on reTerminal LCD.
Home Assistant acts as a central smart home controller hub by combining different devices and services in a single place and integrating them as entities. That means you can integrate various sensors and variouts services in one single place.
Process of installing Home Assistant Supervised on reTerminal is like following:
I am assuming that you already have installed Raspberry PI OS.
Install RealVNC https://www.realvnc.com/en/
Install docker
Visit Home Assistant OS Agent page, and install Home Assistant Agent V1.3.0. and also Home Assistant-Supervised
Install Portainer Docker management platform
On portainer dashboard make sure that Home Assistant primary containers are up and running
On a web browser, type the following URL homeassistant.local:8123
If everything is installed without problems, you can view Home Assistant Dashboard UI on your web browser and proceed with making your account
RealVNC server should come preinstalled no your SD card with Raspbian OS. If, for any reason this is not case with you, below are informations on how to Install the RealVNC for Raspberry pi.
How to Install the RealVNC on Raspberry Pi
Update the system repositories:
Open the terminal if you have direct access. Or, take an SSH session to the Raspberry Pi CLI. $ sudo apt-get update && apt-get upgrade
2. Install the RealVNC server:
$ sudo apt-get install realvnc-vnc-server.
3. Enable VNC server:
$ sudo raspi-config Got to Interfacing options Select VNC Answer Yes Select Finish to quit (or ESC)
Note: VNC runs on port 5900. You should open this port on all the middle devices to work the communication from your PC to the Raspberry Pi.
On PC side, you must install RealVNC Viewer, in ordes to access HMI remotely. Below is how RealVNC viewer loooks after installation.

First big part of the project is finished. Now we are going to configure SenseCAP sensor by using Sensecap MATE Android application. Again, amazing guideline can be followed on Seed's wiki: https://wiki.seeedstudio.com/Cloud_Chain/SenseCAP_Mate_APP/SenseCAP_APP/
The next step is to configure mqtt integration with Home Assistant and subscribe to SenseCAP data.
First, what you need to know is SenseCAP account API ID, Organization ID, and Access API keys. Nice quickstart can be found on sensecap page.
https://sensecap-docs.seeed.cc/data_openstream_quickstart.html
Got to https://sensecap.seeed.cc/portal/#/security, in order to create Access Key and view information about Organization ID.

By clicking on API ID, you can also see API keys information.
So, your important connectivity informations for Home Assistant, which will be important in order to connect to MQTT, are as below:
Host: sensecap-openstream.seeed.cc
User: org-<OrgID> (here you replace OrgID with your Organization id-example for this parameter will be org-428131654987987)
Password: here you insert your Acces Key which is in form XBA6E65464 (a combination of letters and numbers).
Client ID: org-<OrgID>-quickstart (example: org-428131654987987-quickstart)
After this, go to https://www.home-assistant.io/integrations/, which allows integration with a lot of services. You will need, of course MQTT. Enter MQTT in search box, and choose MQTT, as shown below:
In Home Assistant now go to Settings->Devices & Services, Click add integration button and search MQTT. Now you enter the informations from above for MQTT connectivity:
Username= OrgID, password= client ID

Now, in order to test that MQTT connectivity works, click the CONFIGURE button and listen to the topic : device_sensor_data/OrgID/+/+/+/+
(example: device_sensor_data/428131654987987/+/+/+/+).
After few seconds, you will have response: vaule and timestamp in JSON format.
Since we want to show values of temperature, CO2 and humidity, we need to add multiple entities to store aquired sensor data, by editing the Home Assistant configuration file.
Go to the settings, click to Add-ons,search for File Editor, modify the YAML file /config/configuration.yaml by entering:
mqtt:
sensor:
- name: "Air Temperature"
state_topic: "/device_sensor_data/<orgID>/<DeviceEUI>/1/+/4097"
unit_of_measurement: "℃"
value_template: "{{ value_json.value }}"
- name: "Air Humidity"
state_topic: "/device_sensor_data/<orgID>/<DeviceEUI>/1/+/4098"
unit_of_measurement: "%RH"
value_template: "{{ value_json.value }}"
- name: "Air CO2"
state_topic: "/device_sensor_data/<orgID>/<DeviceEUI>/1/+/4100"
unit_of_measurement: "ppm"
value_template: "{{ value_json.value }}"
DeviceEUI is Unique identification of device eg. 2CF7F12000000001, and it can be found on the sensor itself.
Now the last step is create dashboard.
go to overview and find the "Edit Dashboard"

You can add cards as much as you want. I have added Gauge card, and subscribed to entities (temperature, CO2 and humidity).
Finally, the IoT dashboard is shown on your reTerminal Home assistant main screen.
Here below are few pictures for you to see how it looks like:


0 notes
Text
https://www.fanfiction.net/s/13534569/1/Return-of-the-Survivors
Alternate Universe- What if Anakin's mother survived and Anakin never went dark side. Padme has the twins on Tatooine and survives. Anakin tries to help the surviving Jedi, while still keeping his family secret. Meanwhile Darth Sidious has been crowned emperor and is going after the remaining Jedi. Rumors have it he's looking for a new apprentice. Anakin gets to be a daddy.
I've got an update for you on Return of the Survivors. Yeah, I know, Finally. Below is a small selection. Click the link above to read more.
Chapter 65 - Clandestine Strategy
“Thanks Stevie,” Han shouted. “Another, Oh, I better not. We’ve got friends on planet and…”
Chewie bellowed a loud moan “Rooooooaaaaaaaaaargrh.”
“Yeah, we’d better go meet them before they call us late. It was fun. We should do this again.”
“Grrraaaaaaaagrh,” Chewy waved.
Han’s friend Stevie ran the junk yard at Ord Mantell, and though his place wasn’t listed in any tourism guides, It was Han’s favorite place to visit. Not just because his friend had a taste for the real drinks, not that fancy stuff the casino’s serve. But also because Stevie knew how to spot that rare part that to other junk dealers was just another piece of trash, and his collection was the best place to shop. The Falcon wasn’t just any Freighter, no she needed the best parts. So what if some of them weren’t being made anymore. It was still better than an imperial era engine, and nothing would convince Han to change that.
“Now, we won’t be telling anyone where we got the new part.” Han said to Chewy. “The princess might not approve.”
“Rrrrrrrrgrrrrh hrrrrrrrrrrrgah?” Chewy asked.
Han rolled his eyes. “Which princess,” He muttered to himself. Then he laughed. “Leia, of course. If Mara finds out she’d just go ewww, and refuse to touch it. Leia’s the one who’d blame “That trash” for every hiccup the Falcon has.
“Mrrrrrrrrrrrmmmmmmmrgrh.” Chewy rolled his eyes.
“Hey, I’ll have you know, it’s not just a crush. She’s into me too.” Han rushes after the Wookiee. “She spends most rides with me in the cockpit. Why would she do that if not for my company.”
Chewy growls something mocking Han, as he climbs on board the Falcon. Han came behind him and was about to respond, when he noticed the lights were already on in the ship. “Did you leave that on?” he asked Chewy. At the same time he was reaching for his weapon. Chewy gave a low growl denying it. Han pulled out his blaster and crept quietly through the ship.
Then suddenly a small green head popped up. “Gone, the intruders are.”
Han gasped, then took a moment to let his breathing return to normal. He barely managed to not shoot the little Jedi. “Master Yoda. Where are the others?”
Yoda’s expression became serious. “Explains that, the recording does.” He pointed to the nearby table, on which sat a new device. “This for you, the intruders left.”
Han was curious now, so he walked over and pushed a button on the device. A holographic figure appeared above it and started talking.
“Han Solo. I am Skorr of the Bounty Hunters Guild. Christophsis Incorporated has issued a bounty on your head, one I am here to collect. Now, I could come in there guns blazing and try to take you by force, but then I might break a nail.” The holo camera was turned and several other figures took form. Amongst them Han could clearly make out Luke and Leia. They were tied up and kicking, but it was all in vain. Then the holo camera turned again and Skorr’s ugly, half cyborg mug was back on the screen. “If you want your friends to remain free, you will turn yourself in. Travel to these coordinates…” He moved his hand and a set of numbers was displayed holographically above his hand. “Come alone, without your wookiee or Jedi friends, and when you are in bonds, we will release the prisoners. Otherwise I will have to see who else is willing to pay for their pretty little faces.”
Han could taste the bile from his throat. The thought of that man harming Leia, or any of the others, made him mad.
“Clouds the mind, anger does. Help, it does not.” Yoda spoke up.
“Master, I…” Han started, his tone apologetic.
“Unnecessary, this is.” Yoda didn’t listen.
Han still felt it was necessary, so he continued, “He’s right about the bounty. But I looked into it. It was small. It shouldn’t have gotten any attention all the way out here. Leastwise any guild attention.”
Chewy growled and placed a hand on Han’s back. “Rrrrrrgrrrrrrraaaaaaah.”
“Correct, he is. Your fault, another’s greed is not.” Yoda took a few steps closer. “Know where they are being kept, we do. Leave soon, we should. If free them, we are going to.”
“Alright. Chewy, if we are going to get into trouble, take the new part and install it in the gun turret.” Han didn’t look for a reply as he turned to the cockpit. Yoda followed him and it was an unusual sight, the little Jedi making himself comfortable in the larger wookiee’s co-pilot seat. Yoda used the Force to make levers move and push buttons. Soon the craft was prepped and Han took off.
“Okay, there are the coordinates down there,” Han said.
“That warehouse, yes, that’s it.” Yoda said.
“Okay, Chewy and I are going to go in. You stay here and keep this ship running. When we leave, I have a feeling we’re going to need to make a quick getaway.”
Yoda shook his head. “Unfasten force cuffs, you are going to?”
“I’ll find one of his men and get him to do it. I don’t plan on asking nicely.” Han said in a low voice. Then he turned his head and shouted, “Chewy, go get the big toys.”
Yoda shook his head. “Looked for, your assault will be. Stealth, we’ll need.”
“Stealth. Not when you have the bigger guns.” Han said.
Whack! Yoda’s stick came down on Han’s knees. “Always a bigger fish, there is.”
“Oww!” Han rubbed his knees. He imagined for a second what it must be like for Leia, to listen to his prattle as wisdom every day. ‘That must be what being a Jedi is like. Sore knees…’
“Come, I will.” Yoda continued.
“Wait. I have an idea,” Han said. Han leaned forward to whisper his plan to the Jedi Master. Yoda absorbed his thoughts with critical eyes.
“Work, that might. But training you will need.”
Han rolled his eyes, “Yeah, I was afraid of that. Hold on, this gives me the chance to try out this new toy too.” Han reached up to grab the golden dice he kept in his cockpit. Attached to the golden dice was a single button remote, that when pressed, would start up the Falcon’s engines from anywhere and prep her for flight. This would make it a simple matter of running on board and jumping into the pilot chair to take off. Necessary if they were to make a quick run for it.
When Anakin gave him the engine startup remote it had a silver ring attached to it, which puzzled them all.
“What’s that for?” Luke had asked his father.
“Oh, that. I found it in the restoration center. They were going to throw it away, but I thought, maybe he could stick some metal keys on it or something,” Anakin answered.
“Keys! Who keeps metal keys anymore, Dad?” Luke had found that idea preposterous. But Han thanked him anyway.
He did find something to put at the end of the remote. Those gold dice weren’t keys, but they did open up a whole new world to him. They were what won him the Falcon, and he found them the perfect attachment...
#anakin skywalker#Yoda#Han Solo#luke skywalker#leia organa#leia skywalker#mara jade#bounty hunter#chewbacca#milleniumfalcon#jedi training#Jedi Han Solo#Han solo x Yoda#star wars#anakin doesn't turn to the dark side#starwars#starwars fanfic#star wars fanfic#starwars fanfiction#star wars fanfiction#millenium falcon#fanfiction.net#ao3 fanfic#a03 fanfic
5 notes
·
View notes
Text
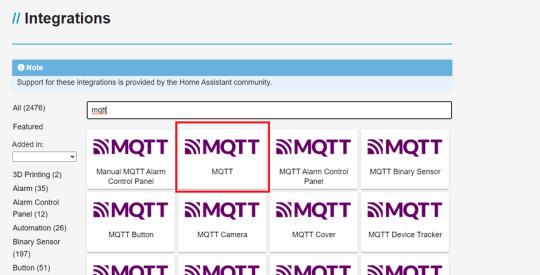
Step-by-Step Guide to Installing Oracle REST Data Services (ORDS)
Introduction
An effective solution for exposing your Oracle Database data as RESTful web services is Oracle REST Data Services (ORDS). By serving as a link between your Oracle database and the modern web, it enables developers to use common HTTP methods, such as GET, POST, PUT, and DELETE, to communicate with the database.
Developing RESTful endpoints without writing complex backend code is easy with ORDS, whether you're building a web app, mobile app, or just need lightweight API access to your data. DBAs, full-stack groups, and APEX developers who want to modernize legacy systems might find it extremely useful. We will walk through each step of ORDS installation in this blog so you can implement RESTful services in your Oracle environment immediately.

1. Prerequisites
Oracle database: An Oracle Database instance (11 gR2 or later recommended). You should have SYS or DBA privileges for configuration.
Java Development Kit (JDK): ORDS requires Java 8 or Java 11 Make sure java is in your system's PATH.
ORDS Software :- Download the latest ORDS .zip from Oracle’s official site Unzip to your desired location.
Web Server (Optional): You can run ORDS in standalone mode, or deploy it using: Apache Tomcat (common in production) Oracle WebLogic (optional, enterprise use)
Network and Port Access : Default ports 8080 for standalone 8443 for HTTPS (if enabled) Ensure your firewall allows traffic on these ports.
Create ORDS Configuration Directory and home (Optional but Recommended) Create a separate configuration directory to manage ORDS files cleanly:
Step-by-Step Guide to Installing Oracle REST Data Services (ORDS)
For More Info: https://www.datapatroltech.com/blog/install-oracle-rest-data-services-ords
0 notes
Text
LED Constant Voltage Power Supply

LED lamps driver
BROUGHT Lighting for Sailboats : How to Choose a new Quality Marine Level GUIDED Bulb Replacement How matros should know before putting in LED Lighting on his or her ship.
What should My spouse and i buy? Must I acquire? My friend acquired LEDs for his motorboat in addition to they all died inside the first month, are they will just about all like that? These are all reputable concerns that our customers get asked. This article must bring clarity on the subject matter.
LED lamps driver
The confusion will take main in the fact that will all very low voltage DIRECTED lighting tools are not produced equal. We have a multitude regarding sources for ENCOURAGED lighting on the market, quite little sincere technical facts is available to them as well as the price range is usually extremely large. The great quantity of products as well as the shortage of precise information features incited us to compose this post. This document is definitely based on info in which comes directly from often the engineers and manufacturer of the product line and is actually complemented simply by our very own experience with BROUGHT Lighting effects in the Marine Surroundings.
This article will consider to spare you the actual physics behind the product or service while performing you enough details to cautiously choose precisely what product you ought to install upon your vessel. I am sorry for you to all the engineers which will not find this file complete and precise, nevertheless the objective is only to help provide all of our fellow ocean adventurers with the simple understanding necessary to make the wise decision when acquiring LEDs for their vessel.
At first, it could seem to us that LEDs were made with any boat at heart. They include a great life span, may mind vibrations, offer off a reduced amount heat when compared with their amoureux or halogen counterparts and also use some sort of lot less electricity rapid about a tenth on the wattage of a halogen instructions for a related output. Therefore , where will be the problem anyone asks? Precisely why don't they work in our boat?
Historically, that was straightforward. The colouring output was NEGATIVE! No person liked the uninteresting, low-output blue color of earlier LED's. Well, that offers improved and LEDs today have the same light production and colour to this of low-wattage halogens all of us find on our ships.
The situation these days is usually different. The maritime setting with its various electrical power sources is very unpredictable toward electronic components, specifically GUIDED lights. Voltage modifications which we witness on our own yachts will be the greatest adversary of LEDs. Being EXTREMELY SENSITIVE TO BE ABLE TO VOLTAGE VERSIONS, MOST LEDs found about the market are CERTAINLY NOT Well suited for use on the boats.
I use promised definitely not to get into the particular physics of powering LEDs, but let me test a number of simple rules that connect with LEDs. Precisely what follows doesn't demand innovative electronics knowledge, My goal is to phone this segment SHIP DIRECTED 101.
All LED's usually are semiconductor diodes. That they generate their light on the passageway of their positive along with negative sides. When electric power is applied to a great ENCOURAGED, the electrons hop from side to typically the other releasing mild inside the form of photons in the process. Several types of semiconductors produce different wavelengths and consequently produce diverse gentle colors. The hot whitened lights that we all prefer throughout yachts is definitely produced by Indium Gallium Nitride (InGaN). Put various other materials, like phosphors and also you get a pleasing amoureux light source color.
Now, what exactly happens once we apply attention to this semiconductor is actually what we really want to check out. Apply often the right voltage -- with our application 12V : and the right sum of existing will traveling through the semiconductor in addition to we get a stunning, energy-efficient, bright light which will glow to get hundreds of hours. But, we require the right voltage, specifically 12V.
You and My partner and i know to get a fact that will boats do not offer you lab quality power! Commence the engine, the creator set or connect in order to banks power and your current environment provides suddenly come to be hostile in your LEDs.
The reason is that? Simple! If the generator, alternator or inverter kicks in, we usually begin to see the voltage reaching up wards of 15V or increased. The higher the résistance, the more current should go through the actual semiconductor, the particular more electrons get via one side to typically the other, a lot more light will be generated plus more HEAT is usually generated. And also, guess exactly what is the enemy primary of LEDs? HEAT! We should either control the temperature developed or dissipate the idea. Utilize a lot involving current to an BROUGHT and you will acquire a very crucial choice with regard to a very short period of time of the time. Apply to very little and you get yourself a gray, useless light. Which just what happened to you friends' LEDs.
In this program of semiconductor physics, many of us know that the latest measured at junction with the materials is proportional into the voltage supplied. Controlling often the brouille and consequently the actual current is very important to be able to the life expectancy connected with your GUIDED.
Most low-cost 12V LED chaos lamps being sold today work with a ballast resistor which bleeds off energy to reduce the current. This ballast resistor limits current based to a straightforward formula: Voltage/Resistance = Existing. In in which world, one can get to the right amount associated with current for an DIRECTED by using a ballast of the proper weight for the Voltage offered. Problem is, on a new boat, the particular voltage is definitely not always the identical, the item fluctuates. Consequently, typically the battle being fixed, if the discorde drops, the current declines, and vice-versa. Conclusion: minimal voltage = dim lighting and high voltage sama dengan fried LED!
The effect is often the disappointment within LED lighting effects that an individual have heard about by your entire cruising friends.
Almost all automobile and inexpensive LEDs are based on the actual ballast resistor model. Many people work fine in auto because the voltage different versions tend to be smaller than these found in the particular underwater environment and also for you to the point that most LEDs inside the car world are usually used for turn signs or brake lights. These kinds of signals are not with for long periods of time and so heat is just not a trouble. One can also make use of the resistor that can handle 14V while keeping an acceptable current stage for the LED create adequate light. This tends to make automotive LEDs inexpensive, although unsuitable for that marine atmosphere.
Now that we realize a ballast resistor is actually not well suited for our surroundings, what do we accomplish next? Let's start using everything we have learned consequently far. We know that your resistor is a inerte system that can't preserve a much current with any changing attention. So, precisely what are our other choices?
What exactly if we had some sort of type of resistor which often could accommodate the transforming voltage? There is these kinds of a gadget, and this is used by several LED area manufacturers. The particular device is called a new Linear Regulator, and that is a tiny step way up in control technology from your primitive ballast resistor. Any Linear Regulator is the low cost control method which will can be regarded as any variable resistor this may differ the resistance in line with the fill up in order to supply a constant outcome résistance to the LEDs. Since it is still a resistive unit, it controls excess strength (above that required from the LEDs) by turning the idea into warmth. But hang on a minute, is not HIGH TEMPERATURE the great enemy regarding LEDs? That's right! Regarding course, having proper design and style one could waste several of the heat, however total, Linear Regulator can easily only benefit small brouille variations, which can be fine regarding some applications, but with, not really suitable for the total involving battery banks, solar power panels as well as generators and also inverters of your electrically dangerous marine planet.
Hopefully typically the above makes it specific why ballast resistor light sources and cheap bulbs have zero place on a ship. From everything you have study in the previous grammatical construction, you are now significantly a great deal better informed than often the average person trying to find ENCOURAGED lighting. Not only which, you happen to be most probably considerably better informed in comparison with most connected with the uninformed merchants on the market selling LED bulbs towards the unsuspecting boater.
So what exactly more is available throughout state-of-the-art LED regulates? The idea seems what we actually need is actually a sort associated with closed-loop device that will appears to be at the incoming discorde and maintains the regular recent feeding the LEDs at the same time the voltage varies, all the while keeping bare minimum high temperature. And, you got the item, the device is present! It's known as DC/DC Profit Power Ripping tools. It will be an expensive way to help source energy to LEDs, nonetheless it has all the actual advantages we are seeking for.
The Buck Strength Converter is a sophisticated minor device, but it is function is usually somewhat very simple. To describe this with layman's terms, that generally takes an energy supply and switches it on / off. During the "on" point out, the actual is stored within an inductor and in the course of the "off" status, the particular inductor releases the in order to the LED. The percentage of "on" and "off" time is called typically the duty-cycle. For example, some sort of 25% duty-cycle would complete to the BROUGHT simply 3V from a 12V source. All we have to have to complete is handle the duty-cycle according to be able to the input voltage and get constant current giving our LED. The Greenback Power Converter controller performs this by monitoring the present for the LEDs through a new current-sense resistor and sets the duty routine both up or to right the current in buy to fit the GUIDED optimal existing requirement. This kind of way we can drive the envelope on often the perfection of the LEDs without being concerned that the actual source voltage variations will probably take us past the particular highest possible rated current regarding the DIRECTED and ending up with a toast LED cluster.
This appearance great, but there is definitely one previous issue for you to deal with before we have the brightest marine level LED replacement bulb: typically the BULB itself, the wrapping!
We should instead package our groups so that we achieve often the maximum result possible inside a real modest deal while ensuring optimum existence expectancy as well. Now i'm sure you remember HEATING! How can most of us package lots of power in a cluster and yet certainly not overheat the bulb?
Nearly all internal marine lighting software start using a 10W G4 lamp, quite compact, so the actual fixtures are generally small while well. The substitute ENCOURAGED cluster bulb has to be incredibly small to serve seeing that the retrofit for the particular original halogen bulb. The item also has to create similar output and shade to the original halogen, nevertheless be able to help dissipate heat. That comes to an end up being quite any challenge.
You can find two techniques to pack a lot of mild in a small offer, with each has its advantages and cons, yet the two are acceptable solutions. The first is to use many little lower-powered through-hole LEDs grouped collectively in a tiny package, and the different is to use merely a few high-powered area mount device (SMD) LEDs arranged on a thermally successful support for highest heating dissipation.
1 note
·
View note
Text
‘Daredevil: Born Again’: Margarita Levieva & Sandrine Holt Join Disney+ Series
‘Daredevil: Born Again’: Margarita Levieva & Sandrine Holt Join Disney+ Series
EXCLUSIVE: Margarita Levieva (The Deuce) and Sandrine Holt (American Gigolo) are set for main roles reverse Charlie Cox and Vincent D’Onofrio in Daredevil: Born Again, Marvel’s upcoming revival sequence on Disney+, sources inform Deadline. Primetime-Panic Your Complete Guide to Pilots and Straight-to-Series orders Written and govt produced by Matt Corman and Chris Ord, the brand new installment…
View On WordPress
0 notes
Text
ORACEL APEX 22 DOWNLOAD

Oracle APEX 22: A Download and Installation Guide
Oracle Application Express (APEX) is a powerful low-code development platform for rapidly creating enterprise-grade, data-driven web applications. Its latest version, Oracle APEX 22, delivers enhanced features and a streamlined user experience. If you’re ready to build scalable web apps, here’s how to download and install Oracle APEX 22.
Prerequisites
Before getting started, make sure you meet these requirements:
Oracle Database: You’ll need an Oracle Database (version 11g Release 2 or later). Oracle XE, Standard Edition, or Enterprise Edition are all suitable.
Web Server: APEX can be used with Oracle REST Data Services (ORDS) or the embedded PL/SQL gateway.
Supported Browser: Modern versions of Chrome, Firefox, Safari, or Edge.
Installation
Connect to Your Oracle Database: Establish a connection to the Oracle Database where you want to install APEX. Use a database administration tool like SQL*Plus or SQL Developer.
Run the Installation Script: From the extracted APEX directory, locate the apexins.sql installation script. Execute this script in your database administration tool.
Follow the Installation Prompts: You’ll be guided through the process with prompts for information like:
Images Directory
Administrator Account Password
Accessing Oracle APEX
After successful installation, here’s how to access your APEX environment:
Web Server Configuration: If using ORDS, you might need to configure your web server for APEX access.
URL: The URL for the APEX workspace will typically follow this pattern:
http://[hostname]:[port]/ords/workspace_name
Replace [hostname], [port], and [workspace_name] according to your setup.
Login: Sign in using the administrator account credentials you created during installation.
Congratulations! You’ve successfully downloaded and installed Oracle APEX 22. Get ready to unleash the power of rapid application development.
youtube
You can find more information about Oracle Apex in this Oracle Apex Link
Conclusion:
Unogeeks is the No.1 IT Training Institute for Oracle Apex Training. Anyone Disagree? Please drop in a comment
You can check out our other latest blogs on Oracle Apex here – Oarcle Apex Blogs
You can check out our Best In Class Oracle Apex Details here – Oracle Apex Training
Follow & Connect with us:
———————————-
For Training inquiries:
Call/Whatsapp: +91 73960 33555
Mail us at: [email protected]
Our Website ➜ https://unogeeks.com
Follow us:
Instagram: https://www.instagram.com/unogeeks
Facebook: https://www.facebook.com/UnogeeksSoftwareTrainingInstitute
Twitter: https://twitter.com/unogeeks
0 notes
Text
Download Oracle Apex 22.1

Downloading Oracle APEX 22.1: Your Guide to Getting Started
Oracle Application Express (APEX) is a powerful low-code development platform for creating scalable and secure web applications. Version 22.1 brings exciting new features and improvements. Let’s dive into how to download and get your APEX journey underway!
Prerequisites
Before starting, ensure you have the following ready:
An Oracle Database: APEX runs within an Oracle Database. You can use a free Oracle Cloud database, an existing on-premises database, or set up a local instance for development.
Web Server (optional): While APEX has a built-in web listener, you might want a more robust web server like Oracle REST Data Services (ORDS) for production environments.
Steps to Download Oracle APEX 22.1
Visit the Oracle APEX Downloads Page: Go to https://www.oracle.com/tools/downloads/apex-downloads/
Find APEX 22.1: Choose the “Oracle APEX 22.1” download.
Accept the License Agreement: Read and accept the license agreement to proceed.
Download the File: Select the appropriate download for your operating system. The download is typically a .zip file.
Installing APEX
Extract the Download: Unzip the downloaded file to a convenient location.
Follow the Installation Guide: Oracle provides a comprehensive installation guide found in the extracted files and on the official Oracle APEX documentation website (https://docs.oracle.com/en/database/oracle/apex/22.1/). The guide covers the installation process in detail, including configuring your database and web server if needed.
You’re All Set!
Once the installation is complete, you can access your Oracle APEX workspace through your web browser and build unique web applications.
Additional Notes
Always Refer to Official Documentation: Oracle frequently updates its documentation for the latest procedures and troubleshooting tips. It’s your best resource!
Explore the APEX Community: The Oracle APEX community is vibrant and welcoming. If you encounter difficulties, don’t hesitate to ask for help on forums or community websites.
youtube
You can find more information about Oracle Apex in this Oracle Apex Link
Conclusion:
Unogeeks is the No.1 IT Training Institute for Oracle Apex Training. Anyone Disagree? Please drop in a comment
You can check out our other latest blogs on Oracle Apex here – Oarcle Apex Blogs
You can check out our Best In Class Oracle Apex Details here – Oracle Apex Training
Follow & Connect with us:
———————————-
For Training inquiries:
Call/Whatsapp: +91 73960 33555
Mail us at: [email protected]
Our Website ➜ https://unogeeks.com
Follow us:
Instagram: https://www.instagram.com/unogeeks
Facebook: https://www.facebook.com/UnogeeksSoftwareTrainingInstitute
Twitter: https://twitter.com/unogeeks
0 notes
Text
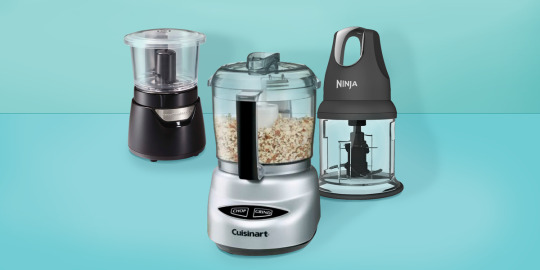
Cuisinart Dlc 8 Plus User Manual

Cuisinart Dlc 8 Plus User Manual Pdf
Cuisinart Dlc 8 Plus User Manual Guide
(eg: dlc-7, dlc-7sp, dlc-8f, dlc-10s, rc-1, cfp5, cfp 9 etc.) For Cuisinart DLC-7, 7E,7P, 8E, 8P or 10E, you may need a new Bowl, Cover, Sleeve and Pusher Include the model number in 'Comments' box at checkoutso we cansupply a modified bowl to fit old Cuisinart DLC-7, 7E,7P and other old models. Cuisinart DFP-14BCWNY 14-Cup Food Processor, Brushed Stainless Steel, White Includes stainless-steel slicing disc, shredding disc, and new chopping blade 720-watt large-capacity food processor with intuitive “on” and “off/pulse” buttons.
Cuisinart parts for food Processor, blenders, coffee makers.
We have genuine Cuisinart parts at low prices. If you do not see the part you need, please e-mail us.
Cuisinart food processor Parts
Cuisinart Dlc 8 Plus User Manual Pdf
Cuisinart food processor parts ,
Please supply the Model number from the bottom of the machine when ordering Cuisinart parts.
(eg: DLC-7, DLC-7SP, DLC-8F, DLC-10S, RC-1, CFP5, CFP 9 etc.)
For Cuisinart DLC-7, 7E,7P, 8E, 8P or 10E, you may need a new Bowl, Cover, Sleeve and Pusher
Include the model number in 'Comments' box at checkoutso we cansupply a modified bowl to fit old Cuisinart DLC-7, 7E,7P and other old models.
Each recent Cuisinart food processor part has a number on it -- look for tiny numbers on the old part,
find the part in the list and then place your order.
Shipping to USA and Canada is about $7 to $13 depending on weight and destination
Cuisinart Part #, Description DLC-020-BTX Sm. Pusher for Cuisinart DLC-7,8 (fits DLC-018BTX Sleeve)Details
DLC-120-BTX Sm. Pusher for Cuisinart DLC-10 (fits DLC-118BTX Sleeve)
Details
DLC-320-B Sm. Pusher for Cuisinart DLC-X
Details
B = Amber
BG= Grey tint
Usewith Cover below
DLC-018BTX Large Sleeve for CuisinartDLC-7/8 *
Details
DLC-018BGTX Large Sleeve for CuisinartDLC-7/8 * Grey
Details
DLC-118BTX Larger Sleeve for CuisinartDLC-10 *
Details
DLC-118BGTX Large Sleeve for Cuisinart DLC-10 *Grey
DetailsDLC-318B Lge Pusher Sleeve for Cuisinart DLC-X /plusDetails
*Some older Cuiosinart DLC-7,7E,7P,8,8E,8F,8P models require new Lge Pusher+Sm pusher also.
B = Amber
BG= Grey
Usewith Lg. Sleeve
andsmall pusher above
DLC-017BTX Cover for CuisinartDLC-7Ser* Amber
Details
DLC-017BGTX Cover for Cuisinart DLC-7Ser* Grey
DetailsDLC-877BTX Cover for Cuisinart DLC-8 Ser* AmberDetails
DLC-877BGTX Cover for Cuisinart DLC-8 Ser* Grey
Details
DLC-117BTX Cover for Cuisinart DLC-10 * Amber
Details
DLC-117BGTX Cover for Cuisinart DLC-10 * Grey
DetailsDLC-317B Cover for Cuisinart DLC-X /plusDetails
*Some older Cuiosinart DLC-7,7E,7P,8,8E,8F,8P models require new Lge Pusher+Sm pusher also.
Bowl
B = Amber
BG= Grey tint
DLC-005ATX Bowl Amber for Cuisinart DLC-7 Series
Details
DLC-005AGTX Bowl Grey for CuisinartDLC-7 Series
Details
DLC-865ATX Cuisinart DLC-8 Series Bowl Amber
Details
DLC-865AGTX Cuisinart DLC-8 Series Bowl Grey
Details
FP-631ATX Cuisinart LC-10 Series Bowl Amber
Details
FP-631AGTX CuisinartLC-10 Series Bowl Grey
DetailsDLC-305-1 Cuisinart DLC-X / plus BowlDetails
NOTE: When you order multiple items, we will automatically apply a lower, combined shipping and handling charge.
DLC-039TX Detachable Stem Cuisinart DLC-7 SerDetailsDLC-839TX Detachable Stem Cuisinart DLC-8 SerDetailsDLC-339TX Detachable Stem Cuisinart DLC-X SerDetailsDLC-139 Detachable Stem Cuisinart LC-10 SerDetailsDLC-001TX Blade. (Cuisinart DLC-7-Ser.)DetailsDLC-861TX Blade. (Cuisinart DLC-8-Ser.)DetailsDLC-301-B Blade: (Cuisinart DLC-X-Ser.)DetailsFP-100TX Blade (Cuisinart DLC-10Ser.)
Also fits RC-1 CFP-5, 9
Details (Please include your Cuisinart Model number on the order)S&H ~ US$7-$9DLC-195TX Bowl w/ lid for Cuisinart DLC1-CDetailsNote : Will NOT fit older model Cuisinart DLC1ADLC-196ATX Blade with Hub Sheath for Cuisinart DLC1-C Clickhere to order S&H ~ US$7 Order (Please include your Cuisinart Model number on the order) S&H ~ US$7-$9Cuisinart 10 cup (DGB-300 & DCC) Black DetailsCuisinart 10 cup (DGB-300 & DCC) White DetailsCuisinart 12 cup (DCC Series) Black CarafeDetailsCuisinart 12 cup (DCC Series) White CarafeDetailsCuisinart DCC1200 Carafe Black DetailsDCC-900 / 1000 Carafe ....White? Black? Details
To place an order, click onDetails...... S&H~ US$7-$9
NOTE : US Dollar amounts may vary slightly with Exchange Rate
Cuisinart Shredding, Slicing, Grating, French Fry Discs are available
PER-12Clear Knob for PER-12 S/Steel PercolatorDetails Cuisinart Smart Power Blender partsforSPB-7, BFP-703, CB-4,5,6,9 Glass Jar for Cuisinart SPB-7 series blender, BFP-703DetailsBlade for Cuisinart SPB-7, BFP-703, CB-4,5,6,9 Details Cover for Cuisinart SPB-7 blender jar ... black or white Details Clear fill cap for SPB-7 blender lidDetailsLock ring for Cuisinart SPB-7 black ? white?DetailsGasket / Seal SPB-7, BFP-703, CB-4,5,6,9 Details
CLUTCH
S&H ~ US$5.99
Clutch # SPB7-20TX**(China) for SPB-7, BFP-703 & CB-4, 5, 6, 9
!
** When ordering the 'Clutch', specify whether your Cuisinart is made in China or USA
Please note : Replacing the clutch (drive coupling) is not a user-friendly task -- you need to remove the brass nut/ bushing, which usually remains attached to the motor shaft, before you can install it.
' width='72' height='22'>
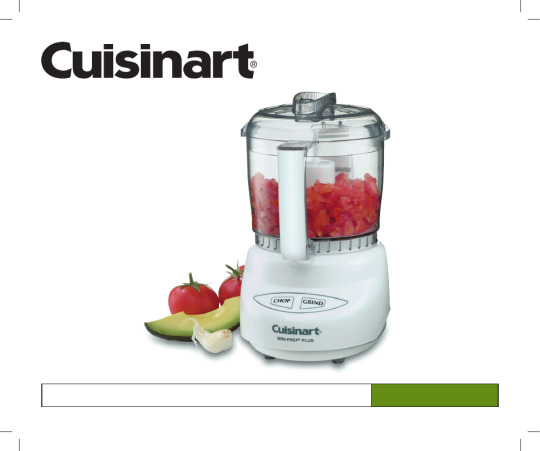
Cuisinart Dlc 8 Plus User Manual Guide
( Shavers) ( Parts) ( Home ) ( Cuisinart) ( InterPlak,Water Pik ) ( Map) ( Info/Contact) ( VoltageConverters )
0 notes