#Scheduled Snapshot Replication
Explore tagged Tumblr posts
Visit Tumblr Blog
Explore Tumblr blogs with no restrictions, modern design and the best experience.
Last Seen Tumblr Blogs


Fun Fact
Tumblr was the first site to host the blog for President Barack Obama in 2011.
Text
Fix Task failed to perform Scheduled Snapshot Replication
Snap Replication provides schedulable, near-instantaneous data protection. This package helps ensure that your business data located in shared folders or virtual machines located in LUNs remain safe and available in the event of disaster. Therefore, with this solution, snapshot Replication will automatically take snapshots at a pre-determined time and frequency. In this article, we shall discuss…
#check Snapshot Replication Status#Scheduled Snapshot Replication#Snapshot Replication#Synology#Synology Active Insights#Synology Diskstation#Task failed to perform Scheduled Snapshot Replication
0 notes
Text
How Digital Twin Technology is Revolutionizing Coil Winding Processes
The manufacturing world is evolving rapidly, and coil winding processes are no exception. One of the most groundbreaking innovations reshaping this industry is digital twin technology. Imagine having a virtual replica of your coil winding machine that monitors every movement and predicts potential issues before they happen. Sounds futuristic? It’s already here — and it’s changing how manufacturers optimize performance and cut downtime.
Let’s dive into what digital twin technology means for coil winding, how it works, and why it’s quickly becoming an essential tool for industry leaders.

What is Digital Twin Technology?
At its core, a digital twin is a dynamic virtual model of a physical asset—in this case, a coil winding machine. This virtual twin continuously receives data from sensors installed on the real machine, replicating its operation in real-time. This means manufacturers don’t just see a snapshot of the machine’s status; they experience a living, breathing model that reflects every twist, tension change, and electrical load.
By linking the physical and virtual worlds, digital twins allow operators and engineers to monitor performance closely, make data-driven decisions, and run simulations without halting production.
Real-Time Monitoring: Keeping a Finger on the Pulse
One of the biggest advantages of digital twin technology is real-time monitoring. Instead of waiting for physical signs of wear or failures, manufacturers get immediate insights into wire tension, motor temperature, winding speed, and other critical parameters. This continuous stream of data ensures quality remains consistent, reducing defects and material waste.
Moreover, by having an always-active digital twin, companies can respond swiftly to anomalies, avoiding costly production stops. This capability is especially valuable in industries where precision and reliability are paramount.

Predictive Maintenance: Fixing Problems Before They Start
Traditional maintenance often relies on scheduled servicing or reactive repairs, which can either be costly or too late. Digital twins enable a smarter approach: predictive maintenance. By analyzing trends and patterns from the data collected, the digital twin can forecast when parts might fail or performance might dip, prompting timely interventions.
This not only extends machine lifespan but also optimizes maintenance budgets by avoiding unnecessary replacements and minimizing unplanned downtime.
Real Success Stories: Productivity Gains in Action
Manufacturers adopting digital twin technology in coil winding have reported remarkable productivity improvements. For example, a recent case involving a leading coil winding facility using digital twins showed a 20% reduction in downtime and a 15% boost in throughput within the first six months. These gains stemmed from enhanced machine visibility and faster troubleshooting enabled by the virtual models.
Such successes highlight the tangible benefits of embracing digital twins for modern coil winding operations.

Overcoming Integration Challenges
Despite its promise, integrating digital twin technology isn't without hurdles. Data accuracy depends heavily on sensor quality and placement, while legacy machines may require upgrades to be compatible. Additionally, analyzing the massive data sets requires advanced software and skilled personnel.
To address these challenges, many companies are partnering closely with equipment manufacturers like ACME Electronics Coil Winding Machine Manufacturer Supplier to develop tailored digital twin solutions that align with their existing infrastructure and capabilities.
Conclusion
Digital twin technology is more than just a buzzword — it’s a transformative tool helping coil winding manufacturers push the boundaries of efficiency and reliability. By providing real-time insights, enabling predictive maintenance, and supporting smarter decision-making, digital twins are setting a new standard for operational excellence.
Are you ready to explore how digital twins could revolutionize your coil winding processes?
#coil winding machine#winding machine#programmable winding machine#coil winder#transformer winding machine#cnc winding machine
0 notes
Text
Mastering The CDS Exam: A Complete Guide For Aspirants

Many young people hope to serve their country in the Indian Armed Forces, and passing the Combined Defence Services (CDS) Exam is their goal. This exam, which is administered twice a year by the Union Public Service Commission (UPSC), provides admission to esteemed establishments such as the Officers’ Training Academy (OTA), Air Force Academy (AFA), Indian Naval Academy (INA), and Indian Military Academy (IMA).
Everything you need to know, including eligibility and preparation advice, will be covered in this book. It will also show you how the correct CDS coaching center might impact your path.
What Is the CDS Exam?
The CDS exam evaluates candidates on their intellectual and physical capabilities. It comprises a written examination, SSB interview, and a medical fitness test. The written exam varies slightly based on the academy you're applying for, but it primarily tests English, general knowledge, and mathematics.
Eligibility Snapshot:
Age: 19–25 years, depending on the academy.
Education:
For IMA/OTA: Graduation in any stream.
For INA: Engineering degree.
For AFA: Graduation with physics and math at the 10+2 level.
Gender: Men and women (only OTA for women).
CDS Exam Structure
For IMA/INA/AFA:
English – 100 marks
General Knowledge – 100 marks
Elementary Mathematics – 100 marks
For OTA:
English – 100 marks
General Knowledge – 100 marks
Each paper is two hours long and contains objective-type questions. Negative marking applies, making precision as important as knowledge.
The Best Methods for Passing the CDS Exam
1. A Well-Designed Study Schedule
Sort your syllabus according to its advantages and disadvantages. Give difficult subjects like GK and math extra time.
2. Take Practice Exams
Regular mock tests help to replicate the genuine exam setting. They boost confidence, accuracy, and speed.
3. Remain Current
Your GK and comprehension abilities will improve if you read newspapers every day and monthly current affairs collections.
4. Enroll in a Reputable CDS Coaching Facility
Professional advice can greatly enhance your performance. Self-study frequently lacks the controlled learning, knowledgeable teachers, and performance tracking that a CDS coaching center provides.
The Significance of Coaching
Self-study may not be sufficient for every candidate due to the intense competition and extensive syllabus. You gain an advantage by enrolling in the best cds coaching centre because
knowledgeable educators with backgrounds in academia and defense
Revised study materials and syllabus
Regular performance analysis and mock exams
Individualized sessions for clearing up doubts
Peer learning environment that keeps you motivated
Iyers Intellect: Pick the Best
Selecting the best teaching center is essential if you're serious about passing the CDS exam. One of the best CDS coaching centers is Iyer's Intellect, which is renowned for its knowledgeable instructors and results-oriented instruction. Iyer's Intellect, regarded by hundreds of successful candidates as the best CDS coaching center, provides a thorough curriculum that combines academic preparation with personality and physical development.
Iyer's Intellect is your reliable success partner, regardless of whether you're just beginning your CDS adventure or trying to raise your score.
It takes a well-defined plan, constant work, and the appropriate guidance to pass the CDS exam. Maintain your focus, put in a lot of effort, and seek professional assistance to realize your goals. Allow Iyer's Intellect to help you at every stage because only the best CDS coaching center will suffice for your future in the armed forces.
0 notes
Text
Should You DIY or Hire a Photographer in Orlando?
Deciding whether to DIY or hire a photographer in Orlando depends on your technical skills, artistic vision, and the quality you need. If you’re confident with camera settings, lighting, and composition, DIY can work, especially for casual projects. However, professional photographers bring technical mastery, artistic insight, and consistent results that elevate your images. Considering costs and time, weigh what matters most to your project’s success—more details await to guide your choice.
Evaluating Your Photography Skills and Equipment
Before deciding whether to do it yourself or hire a photographer in Orlando, you need to honestly assess your photography skills and equipment.
Mastery of camera settings—aperture, shutter speed, ISO—is vital for capturing high-quality images. If you're comfortable adjusting these settings to achieve proper exposure and focus, your technical skills are sufficient for basic photo editing and enhancement.

However, if your images lack clarity or consistency, professional editing might be limited without advanced skills. Consider whether your equipment produces sharp, well-exposed images that require minimal editing or if it hampers your artistic vision.
Your ability to perform precise photo editing and your understanding of camera settings directly impact whether DIY is feasible or if hiring a professional will better serve your project’s artistic and professional standards.
youtube
youtube
Considering the Cost and Time Investment
Evaluating the cost and time involved in your photography project helps you determine whether DIY efforts align with your available resources. Conduct a thorough cost comparison, factoring in equipment, software, and potential reshoots, to understand the financial commitment.
Time management is equally critical; professional shoots often require meticulous planning, setup, and post-processing, which can be time-consuming. If you're juggling a tight schedule or limited budget, attempting DIY may lead to compromised results or burnout.
Conversely, investing in professional photography can save you time and ensure high-quality output, justifying the costs. Carefully weigh these factors against your project’s scope and your personal skill set to decide if the investment of time and money is worthwhile.
Assessing the Importance of Professional Expertise
Professional photographers bring a combination of technical mastery and artistic insight that's difficult to replicate with DIY efforts. Their expertise guarantees precise control over camera settings, composition, and lighting, resulting in consistently high-quality images.
Beyond https://jsbin.com/ technical skills, their creative vision shapes the artistic style of your photos, capturing the mood and personality you want to convey. A professional's understanding of visual storytelling elevates your project beyond simple snapshots, providing images that stand out and resonate.
Their professionalism guarantees reliability, timely delivery, and an ability to adapt to different environments and subjects. Ultimately, investing in professional expertise means securing images crafted with skill, artistry, and purpose, making your visual content memorable and impactful.
Und
0 notes
Text
Day 12: Market Wanderings and a High Speed Train to Veng Vieng

I love markets. The sights, smells, sounds... everything. So I hopped on the lodge's bicycle and excitedly made my way out of town, riding along the already-busy road to a large concrete structure I had been told to look for, apparently some failed Chinese investment. I marveled at my luck that I happened to still be in town for the once-weekly regional market that drew people from all over.


Tens of motorbikes already lined the lot, and as I parked my bike I saw a familiar face- Harps- heading up the stairs with a few purchases. Excited that I actually recognized someone, I wished him a wonderful morning and made my way down the stairs where, behiind the structure, there were hundreds of stalls of all things familiar and unfamiliar.

Set on discovering the unfamiliar, I explored every corner and did my best, rarely with success, to communicate, and took lots of pictures so I could inquire afterwards about all things I was clueless about.
Some sellers were on a spread-out blanket on the ground, others had tables, some were in a covered area. I wished I had someone to tell me what I was seeing, but enjoyed just being, especially with the spectacular mountain backdrop.

After exhausting every corner and row, I returned to my bike and cycled back to town, precisely on schedule.
I showed my snapshots to the woman at reception. She called another woman who was in the kitchen to help explain the different produce and products I saw. She even explained how to cook with some of the ingredients! Knowing I could never find most things in Israel, my mind raced, trying to figure out how, if ever, I could replicate or replace some of the things I saw. What an amazing way to start the day.
So, after coffee and breakast, another travel day. We initially plan our travels in broad strokes and leave details for when we arrive and get the fuller, more accurate picture and feel for the places. So early on we didn't quite know how nor when we would reach Vang Vieng, and had considered first going further north before going southbound. But when we found out the next northern destination was a seven hour minivan journey away, and I received formal confirmation that the Gibbons monkey experience didn't have any cancellations, we simply decided to take the 3.5 hour van back to Luang Prabang and then the fast train to Vang Vieng from there. I'll save ziplining with gibbons monkeys and sleeping in treehouses in a nature reserve up north for when we next return to Laos.
We made our way to the van (front window seat near driver!) on a tuktuk, where we met some wonderful Israelis, our kids' age. They were so impressed that we were backpacking they adopted us as an aunt and uncle of sorts. Though we travelled in separate vans, we exchanged whatsapp numbers and parted ways. Our van was filled with young, French travellers who apparently had missed an earlier van due to a mix-up by their agency and were running late for their train, so we got a free direct ride to the train station from the van drop off point. Nice! We ran into the girls at the station. The train took just two hours, and at its fastest was traveling 158 km/hr. Clean, quick and easy.

Once we arrived, we took a tuktuk together with the girls into town. They told us the place they were staying was highly recommended, so we ended up getting a perfect room there, top floor, amazing view... for a mere $7.
By the time we reached Vang Vieng it was already quite late, so we called it a day and excitedly awaited tomorrow's adventures.
0 notes
Text
High Availability and Disaster Recovery with OpenShift Virtualization
In today’s fast-paced digital world, ensuring high availability (HA) and effective disaster recovery (DR) is critical for any organization. OpenShift Virtualization offers robust solutions to address these needs, seamlessly integrating with your existing infrastructure while leveraging the power of Kubernetes.
Understanding High Availability
High availability ensures that your applications and services remain operational with minimal downtime, even in the face of hardware failures or unexpected disruptions. OpenShift Virtualization achieves HA through features like:
Clustered Environments: By running workloads across multiple nodes, OpenShift minimizes the risk of a single point of failure.
Example: A database application is deployed on three nodes. If one node fails, the other two continue to operate without interruption.
Pod Auto-Healing: Kubernetes’ built-in mechanisms automatically restart pods on healthy nodes in case of a failure.
Example: If a virtual machine (VM) workload crashes, OpenShift Virtualization can restart it on another node in the cluster.
Disaster Recovery Made Easy
Disaster recovery focuses on restoring operations quickly after catastrophic events, such as data center outages or cyberattacks. OpenShift Virtualization supports DR through:
Snapshot and Backup Capabilities: OpenShift Virtualization provides options to create consistent snapshots of your VMs, ensuring data can be restored to a specific point in time.
Example: A web server VM is backed up daily. If corruption occurs, the VM can be rolled back to the latest snapshot.
Geographic Redundancy: Workloads can be replicated to a secondary site, enabling a failover strategy.
Example: Applications running in a primary data center automatically shift to a backup site during an outage.
Key Features Supporting HA and DR in OpenShift Virtualization
Live Migration: Move running VMs between nodes without downtime, ideal for maintenance and load balancing.
Use Case: Migrating workloads off a node scheduled for an update to maintain uninterrupted service.
Node Affinity and Anti-Affinity Rules: Distribute workloads strategically to prevent clustering on a single node.
Use Case: Ensuring VMs hosting critical applications are spread across different physical hosts.
Storage Integration: Support for persistent volumes ensures data continuity and resilience.
Use Case: A VM storing transaction data on persistent volumes continues operating seamlessly even if it is restarted on another node.
Automated Recovery: Integration with tools like Velero for backup and restore enhances DR strategies.
Use Case: Quickly restoring all workloads to a secondary cluster after a ransomware attack.
Real-World Implementation Tips
To make the most of OpenShift Virtualization’s HA and DR capabilities:
Plan for Redundancy: Deploy at least three control plane nodes and three worker nodes for a resilient setup.
Leverage Monitoring Tools: Tools like Prometheus and Grafana can help proactively identify issues before they escalate.
Test Your DR Plan: Regularly simulate failover scenarios to ensure your DR strategy is robust and effective.
Conclusion
OpenShift Virtualization empowers organizations to build highly available and disaster-resilient environments, ensuring business continuity even in the most challenging circumstances. By leveraging Kubernetes’ inherent capabilities along with OpenShift’s enhancements, you can maintain seamless operations and protect your critical workloads. Start building your HA and DR strategy today with OpenShift Virtualization, and stay a step ahead in the competitive digital landscape.
For more information visit : www.hawkstack.com
0 notes
Text
When You’re Busy, You’re Dumb: Redefining Success in a Hectic World

Ever noticed how being busy has become a badge of honor? It’s almost as if we equate jam-packed schedules with success and self-worth. “How have you been?” “Oh, you know, super busy!” We wear our busyness like a medal, but what if this constant hustle is making us…stupid?
Yes, you read that right. Being perpetually busy might just be the biggest mistake we’re all making. It’s time to debunk the myth that busyness equals productivity. In this post, we’ll explore why being busy isn’t something to be proud of, how outsourcing can free up your time, the art of thinking better, and why a less hectic schedule can make you smarter.
Ready to trade your busy badge for a smarter, more fulfilling life?
Being Busy is Not a Badge of Honor
Cultural Perception
In today’s fast-paced world, busyness has become a symbol of status and success. We’ve all heard the phrase “I’m so busy” used as a default response to “How are you?” It’s as if being constantly occupied is a sign that we are important, hardworking, and indispensable. Social media often exacerbates this perception, showcasing meticulously curated snapshots of packed schedules and endless to-do lists. The underlying message is clear: if you’re not busy, you’re not trying hard enough.
Reality Check
However, equating busyness with productivity is a fundamental misunderstanding. Being busy often means juggling numerous tasks without necessarily making meaningful progress on any of them. True productivity is about working smarter, not harder. It involves prioritizing tasks that genuinely move the needle, rather than just keeping ourselves occupied. In contrast to busyness, productivity is strategic and focused, leading to tangible results and a greater sense of accomplishment.
Examples of Common Busywork
Consider the average workday filled with constant email checking, attending endless meetings, and managing minor administrative tasks. These activities often feel urgent but add little value to our core goals. For instance, spending hours crafting the perfect email or sitting in unproductive meetings might keep us occupied, but they rarely contribute significantly to our long-term objectives.
Debunking the Myth of Busyness
Numerous studies and expert opinions have challenged the notion that busyness is synonymous with productivity. Research from Harvard Business Review highlights that constantly being busy can lead to burnout, reduced creativity, and lower overall performance. Additionally, a study by McKinsey & Company found that executives who set aside time for strategic thinking and deep work are significantly more effective than those who fill their days with back-to-back activities.
Experts like Cal Newport, author of “Deep Work,” advocate for the importance of focused, undistracted work. Newport argues that deep work—professional activities performed in a state of distraction-free concentration that pushes cognitive capabilities to their limit—creates new value, improves skills, and is hard to replicate. This is in stark contrast to shallow work, which is often non-cognitively demanding and easily replicated, yet consumes a large portion of our time.
Outsource (Almost) Everything
Importance of Delegation
Outsourcing is a powerful tool that can drastically improve your productivity and overall quality of life. By delegating tasks, you free up valuable time that can be spent on high-value activities that truly matter.
Time-saving: Outsourcing routine and time-consuming tasks allow you to focus on what you do best, leaving the rest to specialists.
Improved focus on high-value activities: When you delegate, you can channel your energy into strategic and creative tasks that drive significant results.
What to Outsource
Outsourcing isn’t just for businesses; it’s for personal tasks too. Here’s a list of tasks you can delegate:
PERSONAL:
Cleaning: Hire a cleaning service to maintain your home.
Grocery shopping: Use delivery services to save time.
Administrative tasks: Personal assistants can handle scheduling, emails, and more.
PROFESSIONAL:
Bookkeeping: Let accountants manage your finances.
Marketing: Hire social media, content creation, and advertising experts.
Routine reports: Delegate data analysis and reporting to specialized services.
How to Outsource Effectively
To make the most of outsourcing, follow these tips for finding reliable help and managing outsourced tasks:
Research & Vetting: Choose providers with strong reviews and recommendations. Interview them to ensure they meet your standards.
Clear Communication: Define your expectations and provide detailed instructions to avoid misunderstandings.
Use Technology: Leverage project management tools to keep track of outsourced tasks and ensure timely completion.
Monitor Performance: Regularly review the quality of work and provide feedback to maintain high standards.
By outsourcing (almost) everything, you can reduce your workload, increase your efficiency, and focus on what truly matters, leading to a more balanced and productive life.
The Art of Thinking Better
Quality Over Quantity
The art of deep, focused thinking often gets overlooked in a world that celebrates multitasking and constant busyness. Yet, it’s this quality of thought truly drives innovation, problem-solving, and personal growth.
Importance of Deep Thinking: Deep, focused thinking allows you to delve into complex problems, generate creative solutions, and make informed decisions.
Contrast with Multitasking: Multitasking, on the other hand, divides your attention and can lead to shallow information processing, reducing overall effectiveness.
Techniques for Better Thinking
To enhance your cognitive abilities and foster deep thinking, consider incorporating these techniques into your daily routine:
Time-blocking: Allocate specific periods during your day exclusively for deep work. Minimize distractions and immerse yourself fully in the task at hand.
Mindfulness & Meditation: Practices that promote mindfulness help reduce stress, improve concentration, and enhance cognitive clarity.
Continuous Learning: Engage in lifelong learning by exploring new subjects, acquiring new skills, and challenging your mind with diverse perspectives and information.
When You’re Less Busy, You Are Less Stupid
Cognitive Benefits
A less hectic schedule isn’t just about having more free time—it significantly enhances mental clarity and decision-making. When you’re not constantly rushing from one task to another, your mind can focus better, leading to sharper insights and more effective problem-solving.
Creativity & Innovation
Downtime and relaxation are catalysts for creativity and innovation. When your schedule allows for moments of reflection and unplugging, you allow your brain to connect ideas, think outside the box, and come up with novel solutions.
Health & Well-being
Maintaining a balanced schedule has profound effects on both physical and mental health:
Reduced stress: A less busy lifestyle reduces stress levels, allowing you to approach challenges with a clear mind and greater resilience.
Better sleep: Improved sleep quality results from reduced mental clutter and stress, leading to enhanced cognitive function and overall well-being.
Enhanced mood & relationships: With more time for self-care and meaningful connections, you cultivate healthier relationships and a more positive outlook on life.
In a world where busyness often masquerades as productivity and success, it’s crucial to rethink our approach. The notion that being constantly busy equates to achievement is a misconception that overlooks the true essence of productivity and personal fulfillment.
Busyness isn’t Productivity: Simply filling our schedules with tasks doesn’t necessarily translate to meaningful progress or success. True productivity involves prioritizing tasks that align with our goals and values.
The Power of Delegation: Outsourcing tasks can free up time for activities that truly matter, allowing us to focus on high-impact endeavors and nurturing creativity.
The Art of Thinking Better: Deep, focused thinking trumps multitasking in fostering innovation and effective decision-making. Techniques like time-blocking and mindfulness can significantly enhance cognitive clarity.
Health and Well-being: A less hectic schedule not only reduces stress but also improves sleep quality, enhances mood, and fosters better relationships—key ingredients for a balanced and fulfilling life.
As we conclude, it’s clear that being less busy doesn’t equate to being less productive or less successful. Instead, it enables us to cultivate a lifestyle that prioritizes quality over quantity, creativity over busyness, and well-being over stress.
Let’s redefine our definition of success. Let’s shift from glorifying busyness to valuing purposeful action and mindful living. By embracing a balanced approach, we can achieve not only professional success but also personal happiness and fulfillment.
So, let’s dare to be less busy and strive to be smarter, healthier, and happier individuals. It’s time to reclaim our time and our lives. Remember, busy should never be the new measure of intelligence—it’s about working smarter, not harder.
Check out the Original Article
0 notes
Text
Achieving Seamless Disaster Recovery: Understanding RTO and RPO with Trilio

In today's dynamic digital landscape, businesses face the ever-looming threat of data loss and system downtime due to various disasters, ranging from natural calamities to cyberattacks. To mitigate these risks and ensure business continuity, organizations must implement robust disaster recovery (DR) strategies. Key components of such strategies are Recovery Time Objective (RTO) and Recovery Point Objective (RPO), which define the acceptable durations for restoring services and the acceptable data loss in case of a disaster, respectively.
In this article, we'll delve into the significance of RTO and RPO in disaster recovery and explore how Trilio, a leading provider of cloud-native data protection solutions, assists businesses in achieving their DR objectives.
Understanding RTO and RPO:
1. Recovery Time Objective (RTO):
RTO refers to the maximum tolerable duration within which a business process or application must be restored after a disruption to avoid unacceptable consequences. It quantifies the time it takes to recover from a disaster and resume normal operations. For example, an organization might have an RTO of four hours for its critical systems, meaning that these systems must be up and running within four hours of a disaster.
2. Recovery Point Objective (RPO):
RPO defines the acceptable amount of data loss that an organization is willing to endure during a disruption. It represents the point in time to which data must be recovered after an incident. For instance, if an organization has an RPO of one hour, it means that data must be restored to a state no older than one hour before the disaster occurred.
Trilio's Approach to Disaster Recovery RTO RPO:
Trilio provides comprehensive data protection solutions tailored to meet the RTO and RPO requirements of modern enterprises. Leveraging Trilio's platform, businesses can achieve seamless disaster recovery with minimal downtime and data loss. Here's how Trilio facilitates efficient DR:
1. Automated Backup and Recovery:
Trilio automates the backup and recovery processes for cloud-native workloads, ensuring that critical data and applications are protected against unforeseen events. By continuously capturing point-in-time snapshots of entire workloads, Trilio enables swift recovery to any desired state, thereby meeting stringent RTO objectives.
2. Granular RPO Configurations:
With Trilio, organizations can define granular RPO policies based on their specific data protection needs. Whether it's real-time replication or scheduled backups at regular intervals, Trilio offers flexible RPO configurations to minimize data loss and facilitate swift recovery in the event of a disaster.
3. Application-Centric Recovery:
Trilio's application-centric approach to recovery allows businesses to prioritize the restoration of critical applications and services based on their RTO priorities. By orchestrating the recovery process at the application level, Trilio ensures that the most vital components are swiftly restored to operational status, helping organizations meet stringent RTO objectives.
Conclusion:
In today's digital era, the ability to recover swiftly from disasters while minimizing data loss is paramount for business continuity. By understanding and implementing effective RTO and RPO strategies, organizations can mitigate the impact of disruptions and maintain operational resilience. With Trilio's advanced data protection solutions, businesses can achieve seamless disaster recovery, meeting their RTO and RPO objectives with ease. Embracing Trilio's platform empowers organizations to safeguard their critical assets and ensure uninterrupted service delivery in the face of adversity.
0 notes
Text
How to create Synology Snapshot Replication
Snapshot Replication delivers an expert solution for data backup and recovery, offering near-instant data protection with flexible scheduling. This package safeguards your business data in shared folders and virtual machines stored in LUNs, ensuring quick access and availability in the event of a disaster. In this article, we shall learn the steps on how to create Synology Snapshot Replication.…
#check Snapshot Replication Status#Create Replication Job#Data Protection and Recovery#Disaster Recovery#Enable Synology Retention Policy#Enable the replication schedule#Perform Snapshot Recovery#Security and Compliance#Set Record Access time to Never#storage#Storage management#Synology#Synology NAS#Synology NAS backup
0 notes
Text
Anand Jayapalan: Three Recommended Storage Products

Here are three data storage products that are the best in the market, according to experts like Anand Jayapalan.
Anand Jayapalan: Data Storage Products Worth Checking Out
In a digital world, data storage has become an essential aspect of any enterprise, according to data storage experts such as Anand Jayapalan. With the amount of data generated every day, it is vital to have a dependable and efficient data storage system. To help you pick, here are three of the most highly recommended products in the market.
1. Kasten K10 V5.0
A favorite of data storage experts like Anand Jayapalan, Kasten K10 V5.0 is a data management platform offering a comprehensive Kubernetes data management solution. It is designed to provide a scalable and reliable data management solution for Kubernetes applications.
Kasten K10 V5.0 uses a unique approach that combines backup, disaster recovery, and application mobility into a single solution, simplifying the management of Kubernetes applications. It also offers advanced features such as application-centric backup and recovery, policy-based automation, and multi-cloud mobility. Kasten K10 V5.0 ensures the efficient management of your Kubernetes data.
2. Druva Data Resiliency Cloud
Druva Data Resiliency Cloud is another enterprise data storage system offering a cloud-based data protection and management solution highly recommended by experts like Anand Jayapalan. It is designed to provide a comprehensive data protection solution that includes backup, disaster recovery, and archiving.
Druva Data Resiliency Cloud uses a unique approach that combines backup and disaster recovery into a single solution. It reduces the complexity and cost of managing multiple systems. It also offers advanced features such as global deduplication, automated backup scheduling, and data retention policies.

3. Infinidat Infiniguard
There is a lot of praise from enterprise hardware and software storage solutions experts like Anand Jayapalan for Infinidat Infiniguard. This data storage system offers high performance, scalability, and reliability. It is designed to handle large data and can scale up to eight petabytes of storage capacity.
Infiniguard uses a unique architecture that combines flash and disk storage to provide high-speed data access and low latency. It also offers advanced data protection features such as snapshots, replication, and encryption, which ensure the safety and security of your data.
In conclusion, according to enterprise hardware and software storage solutions experts like Anand Jayapalan, these three products are among today's best enterprise data storage systems. Each system offers unique features and benefits, making it ideal for different enterprise needs. In addition, these systems offer reliable and efficient data storage solutions that can help enterprises manage their data effectively.
Read more insights on data storage and more by visiting this Anand Jayapalan site.
0 notes
Text
Master Your PTE Exam Preparation with Comprehensive PTE Mock Tests

Preparing for the Pearson Test of English (PTE) can be a challenging journey, but with the right resources and strategies, success is within reach. Among the arsenal of tools available to PTE aspirants, PTE mock tests stand out as an indispensable asset. In this blog, we will explore how comprehensive PTE mock tests can enhance your exam preparation, with a particular focus on the benefits they offer. Whether you're in Melbourne seeking PTE coaching or pursuing online PTE coaching, the power of mock tests is universal.
The Significance of PTE Mock Tests:
Replicate Exam Conditions: PTE mock tests closely simulate the actual exam environment, allowing you to experience the pressure, time constraints, and format of the test. This experience can significantly reduce anxiety on the actual exam day.
Assessment and Feedback: Mock tests provide a clear snapshot of your current proficiency level. The detailed feedback you receive helps identify your strengths and weaknesses, enabling you to fine-tune your study plan.
Time Management: PTE is notorious for its strict time limits in each section. Regular practice with mock tests helps you develop effective time management skills, ensuring you complete each section within the allocated time.
Adaptive Learning: Analyzing your performance in mock tests enables you to adapt your study strategies. Focus more on areas where you're struggling while maintaining your strengths.
Comprehensive PTE Mock Tests for Enhanced Preparation:
Content Alignment: Opt for mock tests that closely align with the actual PTE exam content. This ensures that you're practicing with questions that mirror what you'll encounter on test day.
Varied Difficulty Levels: A comprehensive set of mock tests should encompass a range of difficulty levels. This diversity allows you to gradually progress from foundational to advanced questions, mirroring your evolving skills.
All Sections Covered: PTE comprises speaking, writing, reading, and listening sections. Look for mock tests that cover all these sections, allowing you to comprehensively assess your abilities and improve holistically.
Integrated Skills: PTE assesses your ability to integrate multiple language skills within tasks. Quality mock tests replicate these integrated tasks, preparing you for real test scenarios.
PTE Coaching in Melbourne: Harnessing the Power of Mock Tests:
Structured Approach: Reputed PTE coaching in Melbourne understands the value of mock tests and often integrates them into their curriculum. Their structured approach ensures you cover all sections while receiving expert guidance.
Customized Feedback: PTE coaching in Melbourne provides personalized feedback based on your mock test performance. Trained instructors help you interpret the feedback, suggesting tailored strategies for improvement.
Focused Attention: In-person PTE coaching in Melbourne allows for one-on-one interactions with experienced tutors. They can identify your specific challenges and guide you toward overcoming them effectively.
Online PTE Coaching: Accessing Mock Tests Anytime, Anywhere:
Flexibility: Online PTE coaching offers flexibility for individuals with busy schedules. Mock tests are accessible 24/7, enabling you to practice at your convenience.
Global Expertise: Many online platforms, such as "Vision Language Experts," bring together experienced PTE instructors from around the world. This diverse expertise enhances your learning experience.
Self-Paced Learning: Online coaching empowers you to progress at your own pace. You can retake mock tests as many times as needed to strengthen your skills.
Tips for Maximizing PTE Mock Test Benefits:
Create a Test-Like Environment: When taking mock tests, recreate the exam environment as closely as possible. Sit in a quiet space, use headphones for listening tasks, and adhere strictly to time limits.
Review Thoroughly: After completing a mock test, review your answers and the provided feedback meticulously. Understand why you made certain mistakes and how you can avoid them in the future.
Focus on Weaknesses: Use mock test insights to identify your weak areas. Dedicate extra time to practicing and improving these sections.
Conclusion:
Mastering the PTE exam requires a combination of rigorous preparation, effective strategies, and access to comprehensive mock tests. Whether you're seeking PTE coaching in Melbourne or opting for online coaching, the power of mock tests remains consistent. They provide you with the opportunity to gauge your skills, identify areas of improvement, and build the confidence needed to excel on exam day. With the right guidance and commitment, you can transform your PTE mock test performances into real success on the PTE exam, paving the way for your dreams of English language proficiency and beyond.
0 notes
Text
Strangulating bare-metal infrastructure to Containers
Change is inevitable. Change for the better is a full-time job ~ Adlai Stevenson I
We run a successful digital platform for one of our clients. It manages huge amounts of data aggregation and analysis in Out of Home advertising domain.
The platform had been running successfully for a while. Our original implementation was focused on time to market. As it expanded across geographies and impact, we decided to shift our infrastructure to containers for reasons outlined later in the post. Our day to day operations and release cadence needed to remain unaffected during this migration. To ensure those goals, we chose an approach of incremental strangulation to make the shift.
Strangler pattern is an established pattern that has been used in the software industry at various levels of abstraction. Documented by Microsoft and talked about by Martin Fowler are just two examples. The basic premise is to build an incremental replacement for an existing system or sub-system. The approach often involves creating a Strangler Facade that abstracts both existing and new implementations consistently. As features are re-implemented with improvements behind the facade, the traffic or calls are incrementally routed via new implementation. This approach is taken until all the traffic/calls go only via new implementation and old implementation can be deprecated. We applied the same approach to gradually rebuild the infrastructure in a fundamentally different way. Because of the approach taken our production disruption was under a few minutes.
This writeup will explore some of the scaffolding we did to enable the transition and the approach leading to a quick switch over with confidence. We will also talk about tech stack from an infrastructure point of view and the shift that we brought in. We believe the approach is generic enough to be applied across a wide array of deployments.
The as-is
###Infrastructure
We rely on Amazon Web Service to do the heavy lifting for infrastructure. At the same time, we try to stay away from cloud-provider lock-in by using components that are open source or can be hosted independently if needed. Our infrastructure consisted of services in double digits, at least 3 different data stores, messaging queues, an elaborate centralized logging setup (Elastic-search, Logstash and Kibana) as well as monitoring cluster with (Grafana and Prometheus). The provisioning and deployments were automated with Ansible. A combination of queues and load balancers provided us with the capability to scale services. Databases were configured with replica sets with automated failovers. The service deployment topology across servers was pre-determined and configured manually in Ansible config. Auto-scaling was not built into the design because our traffic and user-base are pretty stable and we have reasonable forewarning for a capacity change. All machines were bare-metal machines and multiple services co-existed on each machine. All servers were organized across various VPCs and subnets for security fencing and were accessible only via bastion instance.
###Release cadence
Delivering code to production early and frequently is core to the way we work. All the code added within a sprint is released to production at the end. Some features can span across sprints. The feature toggle service allows features to be enabled/disable in various environments. We are a fairly large team divided into small cohesive streams. To manage release cadence across all streams, we trigger an auto-release to our UAT environment at a fixed schedule at the end of the sprint. The point-in-time snapshot of the git master is released. We do a subsequent automated deploy to production that is triggered manually.
CI and release pipelines
Code and release pipelines are managed in Gitlab. Each service has GitLab pipelines to test, build, package and deploy. Before the infrastructure migration, the deployment folder was co-located with source code to tag/version deployment and code together. The deploy pipelines in GitLab triggered Ansible deployment that deployed binary to various environments.

Figure 1 — The as-is release process with Ansible + BareMetal combination
The gaps
While we had a very stable infrastructure and matured deployment process, we had aspirations which required some changes to the existing infrastructure. This section will outline some of the gaps and aspirations.
Cost of adding a new service
Adding a new service meant that we needed to replicate and setup deployment scripts for the service. We also needed to plan deployment topology. This planning required taking into account the existing machine loads, resource requirements as well as the resource needs of the new service. When required new hardware was provisioned. Even with that, we couldn’t dynamically optimize infrastructure use. All of this required precious time to be spent planning the deployment structure and changes to the configuration.
Lack of service isolation
Multiple services ran on each box without any isolation or sandboxing. A bug in service could fill up the disk with logs and have a cascading effect on other services. We addressed these issues with automated checks both at package time and runtime however our services were always susceptible to noisy neighbour issue without service sandboxing.
Multi-AZ deployments
High availability setup required meticulous planning. While we had a multi-node deployment for each component, we did not have a safeguard against an availability zone failure. Planning for an availability zone required leveraging Amazon Web Service’s constructs which would have locked us in deeper into the AWS infrastructure. We wanted to address this without a significant lock-in.
Lack of artefact promotion
Our release process was centred around branches, not artefacts. Every auto-release created a branch called RELEASE that was promoted across environments. Artefacts were rebuilt on the branch. This isn’t ideal as a change in an external dependency within the same version can cause a failure in a rare scenario. Artefact versioning and promotion are more ideal in our opinion. There is higher confidence attached to releasing a tested binary.
Need for a low-cost spin-up of environment
As we expanded into more geographical regions rapidly, spinning up full-fledged environments quickly became crucial. In addition to that without infrastructure optimization, the cost continued to mount up, leaving a lot of room for optimization. If we could re-use the underlying hardware across environments, we could reduce operational costs.
Provisioning cost at deployment time
Any significant changes to the underlying machine were made during deployment time. This effectively meant that we paid the cost of provisioning during deployments. This led to longer deployment downtime in some cases.
Considering containers & Kubernetes
It was possible to address most of the existing gaps in the infrastructure with additional changes. For instance, Route53 would have allowed us to set up services for high availability across AZs, extending Ansible would have enabled multi-AZ support and changing build pipelines and scripts could have brought in artefact promotion.
However, containers, specifically Kubernetes solved a lot of those issues either out of the box or with small effort. Using KOps also allowed us to remained cloud-agnostic for a large part. We decided that moving to containers will provide the much-needed service isolation as well as other benefits including lower cost of operation with higher availability.
Since containers differ significantly in how they are packaged and deployed. We needed an approach that had a minimum or zero impact to the day to day operations and ongoing production releases. This required some thinking and planning. Rest of the post covers an overview of our thinking, approach and the results.
The infrastructure strangulation
A big change like this warrants experimentation and confidence that it will meet all our needs with reasonable trade-offs. So we decided to adopt the process incrementally. The strangulation approach was a great fit for an incremental rollout. It helped in assessing all the aspects early on. It also gave us enough time to get everyone on the team up to speed. Having a good operating knowledge of deployment and infrastructure concerns across the team is crucial for us. The whole team collectively owns the production, deployments and infrastructure setup. We rotate on responsibilities and production support.
Our plan was a multi-step process. Each step was designed to give us more confidence and incremental improvement without disrupting the existing deployment and release process. We also prioritized the most uncertain areas first to ensure that we address the biggest issues at the start itself.
We chose Helm as the Kubernetes package manager to help us with the deployments and image management. The images were stored and scanned in AWS ECR.
The first service
We picked the most complicated service as the first candidate for migration. A change was required to augment the packaging step. In addition to the existing binary file, we added a step to generate a docker image as well. Once the service was packaged and ready to be deployed, we provisioned the underlying Kubernetes infrastructure to deploy our containers. We could deploy only one service at this point but that was ok to prove the correctness of the approach. We updated GitLab pipelines to enable dual deploy. Upon code check-in, the binary would get deployed to existing test environments as well as to new Kubernetes setup.
Some of the things we gained out of these steps were the confidence of reliably converting our services into Docker images and the fact that dual deploy could work automatically without any disruption to existing work.
Migrating logging & monitoring
The second step was to prove that our logging and monitoring stack could continue to work with containers. To address this, we provisioned new servers for both logging and monitoring. We also evaluated Loki to see if we could converge tooling for logging and monitoring. However, due to various gaps in Loki given our need, we stayed with ElasticSearch stack. We did replace logstash and filebeat with Fluentd. This helped us address some of the issues that we had seen with filebeat our old infrastructure. Monitoring had new dashboards for the Kubernetes setup as we now cared about both pods as well in addition to host machine health.
At the end of the step, we had a functioning logging and monitoring stack which could show data for a single Kubernetes service container as well across logical service/component. It made us confident about the observability of our infrastructure. We kept new and old logging & monitoring infrastructure separate to keep the migration overhead out of the picture. Our approach was to keep both of them alive in parallel until the end of the data retention period.
Addressing stateful components
One of the key ingredients for strangulation was to make any changes to stateful components post initial migration. This way, both the new and old infrastructure can point to the same data stores and reflect/update data state uniformly.
So as part of this step, we configured newly deployed service to point to existing data stores and ensure that all read/writes worked seamlessly and reflected on both infrastructures.
Deployment repository and pipeline replication
With one service and support system ready, we extracted out a generic way to build images with docker files and deployment to new infrastructure. These steps could be used to add dual-deployment to all services. We also changed our deployment approach. In a new setup, the deployment code lived in a separate repository where each environment and region was represented by a branch example uk-qa,uk-prod or in-qa etc. These branches carried the variables for the region + environment. In addition to that, we provisioned a Hashicorp Vault to manage secrets and introduced structure to retrieve them by region + environment combination. We introduced namespaces to accommodate multiple environments over the same underlying hardware.
Crowd-sourced migration of services
Once we had basic building blocks ready, the next big step was to convert all our remaining services to have a dual deployment step for new infrastructure. This was an opportunity to familiarize the team with new infrastructure. So we organized a session where people paired up to migrate one service per pair. This introduced everyone to docker files, new deployment pipelines and infrastructure setup.
Because the process was jointly driven by the whole team, we migrated all the services to have dual deployment path in a couple of days. At the end of the process, we had all services ready to be deployed across two environments concurrently.
Test environment migration
At this point, we did a shift and updated the Nameservers with updated DNS for our QA and UAT environments. The existing domain started pointing to Kubernetes setup. Once the setup was stable, we decommissioned the old infrastructure. We also removed old GitLab pipelines. Forcing only Kubernetes setup for all test environments forced us to address the issues promptly.
In a couple of days, we were running all our test environments across Kubernetes. Each team member stepped up to address the fault lines that surfaced. Running this only on test environments for a couple of sprints gave us enough feedback and confidence in our ability to understand and handle issues.
Establishing dual deployment cadence
While we were running Kubernetes on the test environment, the production was still on old infrastructure and dual deployments were working as expected. We continued to release to production in the old style.
We would generate images that could be deployed to production but they were not deployed and merely archived.

Figure 2 — Using Dual deployment to toggle deployment path to new infrastructure
As the test environment ran on Kubernetes and got stabilized, we used the time to establish dual deployment cadence across all non-prod environments.
Troubleshooting and strengthening
Before migrating to the production we spent time addressing and assessing a few things.
We updated the liveness and readiness probes for various services with the right values to ensure that long-running DB migrations don’t cause container shutdown/respawn. We eventually pulled out migrations into separate containers which could run as a job in Kubernetes rather than as a service.
We spent time establishing the right container sizing. This was driven by data from our old monitoring dashboards and the resource peaks from the past gave us a good idea of the ceiling in terms of the baseline of resources needed. We planned enough headroom considering the roll out updates for services.
We setup ECR scanning to ensure that we get notified about any vulnerabilities in our images in time so that we can address them promptly.
We ran security scans to ensure that the new infrastructure is not vulnerable to attacks that we might have overlooked.
We addressed a few performance and application issues. Particularly for batch processes, which were split across servers running the same component. This wasn’t possible in Kubernetes setup, as each instance of a service container feeds off the same central config. So we generated multiple images that were responsible for part of batch jobs and they were identified and deployed as separate containers.
Upgrading production passively
Finally, with all the testing we were confident about rolling out Kubernetes setup to the production environment. We provisioned all the underlying infrastructure across multiple availability zones and deployed services to them. The infrastructure ran in parallel and connected to all the production data stores but it did not have a public domain configured to access it. Days before going live the TTL for our DNS records was reduced to a few minutes. Next 72 hours gave us enough time to refresh this across all DNS servers.
Meanwhile, we tested and ensured that things worked as expected using an alternate hostname. Once everything was ready, we were ready for DNS switchover without any user disruption or impact.
DNS record update
The go-live switch-over involved updating the nameservers’ DNS record to point to the API gateway fronting Kubernetes infrastructure. An alternate domain name continued to point to the old infrastructure to preserve access. It remained on standby for two weeks to provide a fallback option. However, with all the testing and setup, the switch over went smooth. Eventually, the old infrastructure was decommissioned and old GitLab pipelines deleted.

Figure 3 — DNS record update to toggle from legacy infrastructure to containerized setup
We kept old logs and monitoring data stores until the end of the retention period to be able to query them in case of a need. Post-go-live the new monitoring and logging stack continued to provide needed support capabilities and visibility.
Observations and results
Post-migration, time to create environments has reduced drastically and we can reuse the underlying hardware more optimally. Our production runs all services in HA mode without an increase in the cost. We are set up across multiple availability zones. Our data stores are replicated across AZs as well although they are managed outside the Kubernetes setup. Kubernetes had a learning curve and it required a few significant architectural changes, however, because we planned for an incremental rollout with coexistence in mind, we could take our time to change, test and build confidence across the team. While it may be a bit early to conclude, the transition has been seamless and benefits are evident.
2 notes
·
View notes
Text
The Reason Why Organizations Opt. For Azure Site Recovery.
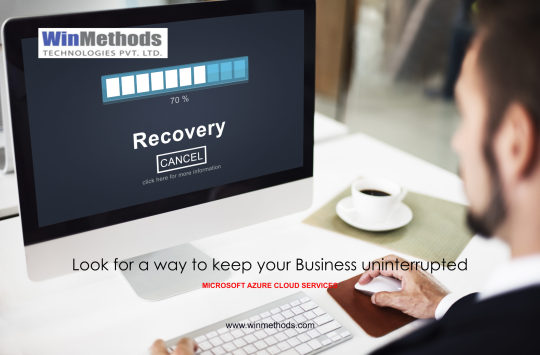
During any uncertain situation (existing pandemic, system outages, malware attacks, etc.) the Microsoft Azure provides a stable environment for your business where it keeps your business uninterrupted.
Tell me, who doesn’t want such solution.
Microsoft’s Azure Site Recovery service has come as a great relief for several organizations. As, it offers easy deployment, cost-effectiveness and reliability. You can deploy replication, redundancies, and recover processes through Site Recovery, which allows you to keep your applications unaffected during scheduled and unscheduled outages caused by unfortunate events and process failures. It ensures very minimal downtime and financial losses.
This blog details about Azure Site Recovery and why it is majorly opted by most of the organizations.
What is Azure Site Recovery?
Let’s see a quick overview on ASR and what it offers?
Microsoft Azure’s Recovery is a Disaster Service as a Recovery offered by Microsoft Azure. This service is designed to function in cloud and hybrid cloud environments. It continuously performs the process of data duplication and ensures whether it is in synchronization.
The snapshot features will allow you to know the status of your data after such fault occurrences. Azure provides this service in a pay-as-you-go model, reducing the cost of additional infrastructure.
Site Recovery handles several functionalities, it duplicates your servers from on-premises and third-party service providers to Azure. It moves Windows and Linux VMs hosted in VMware Hyper-V and Azure Stack, and Windows VMs supported by AWS to Azure.
Find out the reasons why does Organizations opt. For Azure Site Recovery?
Easy maintenance and deployment:
Setting up Site Recovery is a simple process. You can simply duplicate the Azure VM to another Azure region straight away from the Azure portal. It comes with the complete integration which automatically updates Site Recovery with new Azure features at its every release. It performs the multiple operations sequentially running on multiple VMs, reducing the recovery issues.
Keeps track on Recovery plan by doing continuous tests without affecting the production workloads or end users. It makes sure that your applications are keep readily available during any failovers with automatic recovery from on-premises to Azure.
Cost-Effectivity:
Eliminate the cost of building the additional on-premises disaster recovery infrastructure to deploy. You can always opt. For the service or support needed for your applications and pay only for that service.
Minimal Downtime:
Make your compliance easy by following industry regulations such as ISO 27001 which allows you to perform site recovery between Azure environments. It provides coverage to many critical applications as you need, backed by Azure service recovery and service.
Make your recovery easy and fast with Site Recovery.
WinMethods understands your needs, handles your migration process accordingly in a smooth and efficient manner, and ensures your complete satisfaction.
0 notes
Text
Why Family Photography is Like Herding Cats (But Totally Worth It)
The Challenges of Capturing the Perfect Family Photo
Overcoming the Dreaded Group Shot
Let's face it, trying to get a perfect family photo can be a daunting task. Between coordinating schedules, outfits, and moods, it's a wonder anyone even attempts it. But for those brave souls who do, the rewards can be great. A beautiful family photo can serve as a lasting reminder of love and togetherness, a snapshot in time that captures a moment that can never be replicated.
But as any experienced photographer will tell you, taking a great family photo is not for the faint of heart. It's like herding cats. Everyone seems to have their own agenda, and getting everyone to cooperate and smile at the same time can feel like an exercise in futility. But fear not, dear reader. With a few tips and tricks, you too can capture the perfect family photo. In case you can't do these things yourself, a professional family photographer like Artin Photography can do all of this for you.

Selecting the Ideal Location for Your Family Photo
First and foremost, choose a location that is both visually appealing and comfortable for everyone involved. A beautiful park or beach might look great in photos, but if it's a hundred degrees outside and your kids are miserable, it's not going to be a recipe for success. Similarly, if you're shooting in someone's home, make sure the lighting is adequate and there's enough space to move around. A cramped, dark room is not going to be conducive to happy faces.
Timing is Everything in a Family photography session
Next, make sure you choose a time when everyone is well-rested and fed. A hungry, tired family is not going to be in the mood for smiling and posing. If you have young children, consider scheduling your shoot around nap time so that they're refreshed and ready to go. And if you're shooting outdoors, take into account the time of day and the direction of the sun. Harsh midday sunlight can cast unflattering shadows, while the golden hour just before sunset can create a beautiful warm glow.
Have Fun With It
Finally, don't forget to have fun! The best family photos are the ones that capture genuine moments of joy and laughter. Play games, tell jokes, and make silly faces. The more relaxed and happy everyone is, the better the photos will turn out. And don't be afraid to get creative. Try different poses and angles, and experiment with props and wardrobe changes. You never know what will end up being your favorite shot.

In conclusion, family photography can be a challenge, but with a little preparation and a lot of patience, it can also be incredibly rewarding. If you're looking to avoid the hassle of Challenges, We Artin photography is always here to do the expert work for you. We grab the camera, round up the troops, and get ready to capture some memories that will last a lifetime. Just remember, it's like herding cats. But totally worth it.
0 notes
Text
Synology DS 1819+ Review: Pushing storage to the limit


Just like everyone graduated from IDE drives and AGP cards it is time to change how we use home and small office storage. Gigabit Ethernet is still very popular however, it is time to consider the next Ethernet technology. Yes, I am talking about 10 Gigabit (10GbE) enabled devices. Over the years it was nearly impossible to bring 10GbE into your home. With the recent drop in prices, it is starting to become affordable to upgrade your home networking to 10GbE. What is 10GbE you may ask. Your home switch and/or router most likely is Gigabit which means the interfaces of these devices are able to communicate with a speed of 1 Gigabit per second. 10 Gigabit per second is pretty much 10 times as much as 1 Gigabit per second connection. Manufacturers are eager to bring 10GbE devices in your homes and hopefullt very soon you will see a burst of gear on the shelf that offers 10GbE capabilities. We are going to be taking a look at one of the newest products by Synology DS 1819+. The DS 1819+ is a Network Attached Storage device which is based on the Intel Atom Quad Core CPU and has the ability to expand its internal memory up to 32 GB. This NAS device offers 8 drive bays which support 3.5" and 2.5" HDD/SSD. Review Sample Provided by: Synology Product Name: DS1819+ Price at time of review: $ 999.99 USD MSRP Product was given in exchange for work done to produce this review. Packaging Just like every product by Synology DS 1819+ comes in a well-designed and recycle friendly box. As you look around the packaging box you will find related information about the device inside. What jumps out right away is the front facing eight bays in the front of the unit. The device itself is surrounded by a plastic foam that keeps everything in place while shipping. Besides being protected by a thick plastic foam the DS 1819+ has a thin protective bag over it. This helps with any accidental scratches. Included with the device is a small accessory box.

The box includes Two Cat 5e Ethernet cables, One power cable (NEMA 5-15) a set of mounting screws for SSD installation, Two drive security keys, and a Quick Installation Guide. Specifications Hardware Specifications CPU CPU Model Intel Atom C3538 CPU Architecture 64-bit CPU Frequency Quad Core 2.1 GHz Hardware Encryption Engine (AES-NI) Yes Memory System Memory 4 GB DDR4 Memory Module Pre-installed 4 GB (4 GB x 1) Total Memory Slots 2 Memory Expandable up to 32 GB (16 GB x 2) Storage Drive Bays 8 Maximum Drive Bays with Expansion Unit 18 Compatible Drive Type* (See all supported drives) 3.5" SATA HDD 2.5" SATA HDD 2.5" SATA SSD Maximum Internal Raw Capacity 112 TB (14 TB drive x 8) (Capacity may vary by RAID types) Maximum Raw Capacity with Expansion Units 252 TB (112 TB + 14 TB drive x 10) (Capacity may vary by RAID types) Maximum Single Volume Size 108 TB Hot Swappable Drive Yes Notes "Compatible drive type" indicates the drives that have been tested to be compatible with Synology products. This term does not indicate the maximum connection speed of each drive bay. The maximum raw capacity is not limited by the maximum single volume size. Synology NAS models may utilize capacities over the maximum single volume size as long as each volume created is below the limit. (Learn more) Expansion of the internal volume is only supported if the combined single volume size does not exceed the maximum limit of 108TB. External Ports RJ-45 1GbE LAN Port 4 (with Link Aggregation / Failover support) USB 3.0 Port 4 eSATA Port 2 PCIe PCIe Expansion 1 x Gen3 x8 slot (black, x4 link) Add-in-card support M2D18 - Dual M.2 SATA/NVMe SSD adapter card for SSD cache PCIe Network Interface Card (Learn more) File System Internal Drives Btrfs EXT4 External Drives Btrfs EXT4 EXT3 FAT NTFS HFS+ exFAT* Notes exFAT Access is purchased separately in Package Center. Appearance Size (Height x Width x Depth) 166 mm x 343 mm x 243 mm Weight 6 kg Others System Fan 120 mm x 120 mm x 2 pcs Fan Speed Mode Full-Speed Mode Cool Mode Quiet Mode Easy Replacement System Fan Yes Brightness adjustable front LED indicators Yes Power Recovery Yes Noise Level* 22.2 dB(A) Scheduled Power On/Off Yes Wake on LAN/WAN Yes Power Supply Unit / Adapter 250W AC Input Power Voltage 100V to 240V AC Power Frequency 50/60 Hz, Single Phase Power Consumption* 66.96 W (Access) 29.39 W (HDD Hibernation) British Thermal Unit 228.63 BTU/hr (Access) 100.35 BTU/hr (HDD Hibernation) Environment Temperature Operating Temperature 0°C to 40°C (32°F to 104°F) Storage Temperature -20°C to 60°C (-5°F to 140°F) Relative Humidity 5% to 95% RH Certification FCC CE BSMI EAC VCCI CCC RCM KC Warranty 3 Year Hardware Warranty Notes Power consumption is measured when fully loaded with Western Digital 1TB WD10EFRX hard drive(s). Noise Level Testing Environment: Fully loaded with Seagate 2TB ST2000VN000 hard drive(s) in idle; Two G.R.A.S. Type 40AE microphones, each set up at 1 meter away from the Synology NAS front and rear; Background noise: 16.49-17.51 dB(A); Temperature: 24.25-25.75˚C; Humidity: 58.2-61.8% DSM Specifications ( See more ) Storage Management Maximum Internal Volume Number 512 Maximum iSCSI Target Number 128 Maximum iSCSI LUN 256 iSCSI LUN Clone/Snapshot, Windows ODX Yes SSD Read/Write Cache (White Paper) Yes SSD TRIM Yes Supported RAID Type Synology Hybrid RAID Basic JBOD RAID 0 RAID 1 RAID 5 RAID 6 RAID 10 RAID Migration Basic to RAID 1 Basic to RAID 5 RAID 1 to RAID 5 RAID 5 to RAID 6 Volume Expansion with Larger HDDs Synology Hybrid RAID RAID 1 RAID 5 RAID 6 RAID 10 Volume Expansion by Adding a HDD Synology Hybrid RAID RAID 5 RAID 6 JBOD Global Hot Spare Supported RAID Type Synology Hybrid RAID RAID 1 RAID 5 RAID 6 RAID 10 File Services File Protocol CIFS/AFP/NFS/FTP/WebDAV Maximum Concurrent CIFS/AFP/FTP Connections 1,000 Maximum Concurrent CIFS/AFP/FTP Connections (with RAM expansion) 2,000 Windows Access Control List (ACL) Integration Yes NFS Kerberos Authentication Yes Account & Shared Folder Maximum Local User Accounts 2,048 Maximum Local Groups 256 Maximum Shared Folder 512 Maximum Shared Folder Sync Tasks 16 High Availability Manager Yes Log Center Yes Syslog Events per Second 800 Virtualization VMware vSphere 6 with VAAI Yes Windows Server 2016 Yes Citrix Ready Yes OpenStack Yes Add-on Packages (learn more about the complete add-on package list) Antivirus by McAfee (Trial) Yes Central Management System Yes Chat Yes Maximum Users 1,500 Notes The number of concurrent HTTP connections for Chat was configured to the maximum. CPU and RAM usage were both under 80% when the number of maximum users was reached. For tested models with expandable memory, the maximum amount of RAM was installed. Cloud Station Server Yes Maximum Number of Concurrently Connected Devices 1,000 Maximum Number of Concurrently Connected Devices (with RAM expansion) 2,000 Maximum Number of Hosted Files (btrfs) 1,000,000 Maximum Number of Hosted Files (ext4) 1,000,000 Notes The maximum number of concurrently connected devices refers to the maximum number of devices that can remain connected at the same time. The maximum number of hosted files refers to the maximum number of files that can be indexed and hosted by the Cloud Station Server service. RAM expansion was not used during testing. Non-encrypted shared folders were used during the aforementioned testing. Document Viewer Yes Download Station Yes Maximum Concurrent Download Tasks 80 exFAT Access (optional) Yes MailPlus / MailPlus Server Yes Free Email Accounts 5 (Licenses required for additional accounts) Maximum number of concurrent users Up to 150 Maximum Server Performance 1,484,000 emails per day, approx. 45 GB Notes The CPU and RAM usage were both under 80% when testing the maximum number of concurrent users. For tested models with expandable memory, the maximum amount of RAM was installed. Read-write SSD cache was enabled in 5-bay (and above) NAS models with 2 SSDs units installed. The performance of the mail system will slightly decrease in high-availability mode due to data synchronization between the two servers. Functions that were enabled in all of the tests above: anti-spam, anti-virus, DNSBL, greylist, content scan, full-text search (English only). Media Server Yes DLNA Compliance Yes Moments Yes Facial recognition Yes Subject recognition Yes Snapshot Replication Yes Maximum Snapshots per Shared Folder 1024 Maximum of system snapshots 65536 Surveillance Station Yes Maximum IP cam (Licenses required) 40 (including 2 Free License) (See All Supported IP Cameras) Total FPS (H.264)* 1200 FPS @ 720p (1280x720) 960 FPS @ 1080p (1920×1080) 520 FPS @ 3M (2048x1536) 320 FPS @ 5M (2591x1944) 240 FPS @ 4K (3840x2160) Total FPS (H.265)* 1200 FPS @ 720p (1280x720) 1200 FPS @ 1080p (1920×1080) 880 FPS @ 3M (2048x1536) 520 FPS @ 5M (2591x1944) 400 FPS @ 4K (3840x2160) Total FPS (MJPEG)* 560 FPS @ 720p (1280x720) 270 FPS @ 1080p (1920×1080) 190 FPS @ 3M (2048x1536) 110 FPS @ 5M (2591x1944) Notes Surveillance Station throughput is tested with Axis network camera, using continuous recording with live view from Surveillance Station and motion detection by camera. Live view and recording are sharing the same stream from the camera. Synology Drive Yes Recommended Number of Hosted Files 1,000,000 (applies to files indexed or hosted by Synology Drive. For file access through other standard protocols, refer to the File Services section above) Recommended Number of Concurrent Connections for PC Clients 550 (the number of connections that can be maintained when the recommended number of hosted files was reached) Notes For tested models with expandable memory, the maximum amount of RAM was installed. Exceeding the limits above may result in longer response time in file operations. Btrfs file system and non-encrypted shared folders were used during the aforementioned testing. Synology Office Yes Maximum Users 1,800 Notes Multiple files were opened for testing and each file was edited by 30 users simultaneously. CPU and RAM usage were both under 80% when the number of maximum users was reached. For tested models with expandable memory, the maximum amount of RAM was installed. Client performance may affect maximum simultaneous editing users. Client PCs used for testing: Intel Core i3-3220 / 8GB RAM Video Station Yes Video Transcoding Group 1 - Type 1 (See more) Maximum Transcoding Channel Number 1 channel, 30 FPS @ 1080p(1920×1080), H.264 (AVC)/MPEG-4 Part 2 (XVID, DIVX5)/MPEG-2/VC-1 Virtual Machine Manager Yes Recommended Virtual Machine Instances 4 (Learn more) Recommended Virtual DSM Number(Licenses required) 4 (including 1 Free License) Notes Virtual Machine Manager is not supported on hosts running Synology High Availability. The specifications vary depending on system configuration and memory size. VPN Server Yes Maximum Connections 30 Environment & Packaging Environment RoHS Compliant Packaging Content Main Unit X 1 Accessory Pack X 1 AC Power Cord X 1 RJ-45 LAN Cable X 2 Quick Installation Guide X 1 Optional Accessories Surveillance Device License Pack D4NS2133-4G DDR4 non-ECC SO-DIMM* RAMEC2133DDR4SO-16G DDR4 ECC SO-DIMM Expansion Unit: DX517 X 2 VS360HD VS960HD Synology Ethernet Adapter E10G18-T1 Synology Ethernet Adapter E10G18-T2 Synology Ethernet Adapter E10G17-F2 Synology M2D18 M.2 SSD adapter card Notes For more information on memory upgrade limitations, visit here. If multiple memory modules of different frequency are installed in the same system, all memory modules will be operated at the lowest frequency available. Closer Look at the Synology DS 1819+ Just like most of the NAS devices by Synology, the DS 1819+ is an ABS plastic shell with a rolled steel chassis and the backplate. The dimensions of this NAS are 166mm x 343mm x 243mm with a weight of about 6Kg or 12Lb without drives. Most of the weight comes from the steel skeleton and enclosed 250W power supply. Eight drive bays are accessible from the front of the unit. Users have the ability to lock the trays for either security reasons or to keep the drives intact while in transport. Note there is a USB 3.0 connector in the front of the enclosure. There are two cut out Synology logos on both of the sides of the NAS. These cutouts are covers from the inside by a filtered mesh. The entire enclosure sits on four plastic/rubber feet.

There aren’t many buttons here. In fact, there is the only one which is located in the front of the unit. You can also find six LEDs in the front that provide basic status and alarm levels of the device. On the back of the Synology DS 1819+ there are two SATA2 external connectors, a four 1 gigabit RG45 ports, reset pinhole, three USB 3.0 connectors, and a PCIe slot for any addon cards. The DS 1819+ supports multiple external cards including 10GbE cards. Check Synology’s website for a list of supported cards. Our unit came with 4 Gb of RAM (4Gbx1) however, this module can be pulled out and replaced with two 16Gb modules and has a maximum capacity of 32Gb. Right next to the RAM door there is a small service hole with few jumpers. I could not find any information on this so I am guessing this is a Synology service port to be used by Synology technicians.

Once the front trays removed you are able to see the SATA backplane of the NAS. The entire enclosure is being powered by an internal power supply which has a Max Power of 250W and is 80Plus (Bronze) efficiency.

DS 1819+ is actively cooled by two rear-facing 120mm fans. These fans are not PWM enabled however, they do have a low rotational speed. Some custom profiles that can be set from within the OS are Full-Speed Mode, Cool Mode, and Quiet Mode.

The add-on cards for the DS 1819+ could be bought online but only a few are supported by Synology. We have a list of the supported models which would work in the PCIe slot. Model Ports Connector Interface E10G15-F1 1 x 10GbE SFP+ PCIe 2.0 x4 E10G17-F2 2 x 10GbE SFP+ PCIe 3.0 x8 E10G18-T1 1 x 10GbE RJ45 PCIe 3.0 x4 E10G18-T2 2 x 10GbE RJ45 PCIe 3.0 x8 For other supported cards by Synology check their website. Chips and Boards The backplane of DS 1819+ has eight SAS type connectors. We noticed this Synology uses SAS connectors across all of their NAS offerings. Five of the eight connectors are placed on one channel and the rest three on the second channel. Front facing IO board has only one button and a set of micro LEDs. This board connects to the motherboard via a ribbon cable.

CPU of DS 1819+ is powered by Intel Atom c3538. This chip is 64 bit and offers Quad Core clocked at 2.1GHz. It is also worth to mention that c3538 support Hardware Encryption Engine (AES-NI) standard.

USB 3.0 SuperSpeed HUB controller that supports 4 USB 3.0 connections on the motherboard is by Realtek RTS5411.

To support both groups (5 drives and 3 drives) Synology uses two SATA 6Gb/s Marvel controllers 88SE92350-NAA2.

DS 1819+ has 1Gb Flash Memory by Macronix MX30LF1G18AC-TI which is SLC NAND.

Flash CPLC in this device is by Intel/Altera 5M240ZT199C5N.

The onboard Ethernet adapters are supported by Marvel 88E1543-LKJ2 controller. This controller offers 10/100/1000 Mbps speeds.

The Synology DS 1819+ comes with one DDR4 2133 4GB module which has a timing of CL15. This is a NON-ECC unbuffered SO-DIMM 260pin module that runs at 1.2V. Looking to remove this module and replace it with 16GB modules? Consider this ECC SO-DIMM by Synology "RAMEC2133DDR4SO-16G" Synology DiskStation Start-up Wizard After installing the drives, you’ll need open a browser window and go to the IP Address of the DS1819+. To get the IP address of your device you can navigate to (find.synology.com) and the browser will find the device for you.

Next step is to create an administrator account to manage the DS 1819+. A strong password is highly advised here.

If you would like to set up QuickConnect you can do so on this step of the wizard. QuickConnect allows remote access to NAS from outside of your network.

That’s pretty much it. The NAS software will self-configure the basic settings and give you a prompt to log in. The entire process is automated and takes less than 2 minutes.

DiskStation Manager (DSM) User Interface The DiskStation Manager or DSM is the interface you will use to configure the NAS with; the latest version is 6.2.1-23824 and available for download. There are a lot of configuration options in DSM. I am covering what I feel is the most important options in order to get the NAS up and running on the network. After the initial configuration, anytime that you’ll want to log into the NAS, you’ll need to enter the username and password that was set up in the Startup Wizard. After logging in, you’ll be taken to the desktop. The desktop functions in a similar manner to the Windows desktop on your PC. You can create shortcuts to the most used configuration items in the menu. By default, a small monitoring application launches in the lower right side of the page. The application displays quick details on the utilization and health of the NAS. The main application on the menu that will be used to configure the NAS will be the control panel. The control panel has most of the options that will be needed to get the NAS up and running. By default, a lot of the services needed, such as file services have already been turned on. After the disk volume has been created (next section) you’ll just need to create shared folders and assign permissions and the users can start using the NAS. Users and groups can be created to give access to the NAS’s shared files and folders. If no users are created, you will need to give the guest or public account read/write access to the shared files. If you run a Windows Active Directory domain, you can configure the NAS to synchronize user information from your domain. At that point, you will also be able to grant domain users access to shared folders and eliminates the need to create separate users for your domain and your NAS.

The network menu is where all the networking configuration is done. Synology DS 1819+ has four network interface, it can be configured for load balancing or failover. With multiple network interfaces can take advantage of creating a Link Aggregation Group (LAG) and LACP in order to do load balancing (managed switch required). Keep in mind that creating a LAG will not increase bandwidth from a single host. It increases the overall bandwidth the NAS can use on your network to multiple hosts. If you don’t have the ability to cable your NAS, for example in a dorm room, you can install a USB wireless or blue-tooth adapter and get network access that way.

The security tab allows you to configure such items as user interface timeouts, firewall, and certifications. The firewall tab can be used to restrict network traffic to and from the NAS in order to help protect it from network attacks and can help reduce the chance of a network breach. The NAS also offers denial-of-service protection and the ability to install your own certificate to further secure the NAS.

The security tab allows you to configure such items as user interface timeouts, firewall, and certifications. The firewall tab can be used to restrict network traffic to and from the NAS in order to help protect it from network attacks and can help reduce the chance of a network breach. The NAS also offers denial-of-service protection and the ability to install your own certificate to further secure the NAS. Testing Methodology System Configuration Case Open Test Table CPU Intel Core i7 8700K Motherboard Gigabyte AORUS Z370 ULTRA GAMING Ram (2) 8GB Corsair DDR4-3200 CMW16GX4M2C3200C16 GPU EVGA GTX 1080 (8Gb) Hard Drives Corsair Force MP510 NVMe Gen 3 x4 M.2 SSD (480Gb) Network Cards Dual Port Intel Pro/1000 PT Mellanox Connectx-2 PCI-Express x 8 10GbE Ethernet Network Server Adapter Switches MikroTik Cloud Router Switch CRS317-1G-16S+RM (SwitchOS) Version 2.9 Transceivers used: 10Gtek for Cisco Compatible GLC-T/SFP-GE-T Gigabit RJ45 Copper SFP Transceiver Module, 1000Base-T 10Gtek for Cisco SFP-10G-SR, 10Gb/s SFP+ Transceiver module, 10GBASE-SR, MMF, 850nm, 300-meter Power Supply Thermal Take Tough Power RGB 80 Plus Gold 750W 6 Seagate 4 TB 7200 RPM desktop drives were installed and used in the NAS tests. A Single port Mellanox Connectx-2 PCI-Express x 8 10GbE Ethernet Network Server Adapter network card was installed in the test system. The Synology DS 1819+ in all RAID arrays used a Single Static Volume. E10G15-F1 SFP+ (10GbE) adapter was used for all 10GbE benchmarks. Network Layout For all tests, the NAS was configured to use a single network interface. Network cards were used to test 1Gbps (copper) and 10 Gbps (SFP+ (Fiber) connections. For 1Gbps connection one CAT 6 cable was connected to the MikroTik CRS317-1G-16S+RM from the NAS and one CAT 6 cable was connected to the workstation from the switch. Testing was done on the PC with only 1 network card active. For 10Gbps connection one Fiber 10Gb patch cable was connected to MikroTik CRS317-1G-16S+RM from the NAS and one Fiber 10Gb was connected to the workstation from the switch. The switch was cleared of any configuration. Jumbo frames were used (9000 MTU) on the workstation, NAS and the switch. Network drivers used on the workstation are 5.50.14643.1 by Mellanox Technologies. (Driver Date 8/26/2018) (10GbE adapter) and 9.15.11.0 by Intel (Driver Date 10/14/2011) Software All testing is done based off a single client accessing the NAS. To test NAS Performance I used The Intel NAS Performance toolkit and ATTO Disk Benchmark (4.00.0f2). Both pieces software was installed on the RAM Drive by ImDisk Virtual Disk Driver. The Intel NAS Performance toolkit simulates various tasks for storage devices such as video streaming, copying files and folders to and from the NAS as well as creating content directly on the NAS. All options in the Performance toolkit were left that the defaults. The NAS performance test is free to download. You can pick up a copy for yourself here. ATTO Disk Benchmark gives a good insights on the read and write speeds of the drive. In our tests, we used it against the "share" on the NAS. ATTO Disk Benchmark can be download right here. All tests were run a total of three times then averaged to get the final result. RAID 0,5,10 and RAID Hybrid were tested for 1GbE and 10GbE connections. Tests were run after all the RAID arrays were fully synchronized. RAID Information


Images courtesy of Wikipedia JOBD or Just a Bunch Of Disks is exactly what the name describes. The hard drives have no actual raid functionality and are spanned at random data is written at random. RAID 0 is a stripe set and data is written across the disks evenly. The advantage of RAID 0 is speed and increased capacity. With RAID 0 there is no redundancy and data loss is very possible. RAID 1 is a mirrored set and data is mirrored from one drive to another. The advantage of RAID 1 is data redundancy as each piece of data is written to both disks. The disadvantage of RAID 1 is the write speed is decreased as compared to RAID 0 due to the write operation is performed on both disks. RAID 1 capacity is that of the smallest disk. RAID 10 combines the 1st two raid levels and is a mirror of a stripe set. This allows for better speed of a RAID 0 array but the data integrity of a RAID 1 array. RAID 5 is a stripe set with parity. RAID 5 requires at least 3 disks. Data is striped across each disk, and each disk has a parity block. RAID 5 allows the loss of one drive without losing data. The advantage to RAID 5 is read speeds increase as the number of drives increase but the disadvantage is the write speeds are slower as the number of drives is increased. There is overhead with RAID 5 as the parity bit needs to be calculated and with software

RAID 5 there is more of a performance hit. RAID 6 expands on RAID 5 by adding an additional parity block to the array that is distributed across all the disks. Since there are two parity blocks in the array more overhead is used with a RAID 6 array. For a full breakdown of RAID levels, take a look at the Wikipedia article here. RAID configurations are a highly debated topic. RAID has been around for a very long time. Hard drives have changed, but the technology behind RAID really hasn’t. So what may have been considered ideal a few years ago may not be ideal today. If you are solely relying on multiple hard drives as a safety measure to prevent data loss, you are in for a disaster. Ideally, you will use a multi-drive array for an increase in speed and lower access times and have a backup of your data elsewhere. I have seen arrays with hot spares that had multiple drives fail and the data was gone. Benchmarking Results Following Benchmarks were performed via 1GbE connectivity trough the onboard switch. Raid 0 1Gbps Raid 10 1Gbps Raid 5 1Gbps Raid SHR 1Gbps Following Benchmarks were performed via 10GbE connectivity through PCIe card. Raid 0 10Gbps Raid 10 10Gbps Raid 5 10Gbps Raid SHR 10Gbps Synology Hybrid RAID Synology has a RAID array they call Synology Hybrid RAID (SHR). Essentially it is for those users that do not know a whole lot about RAID or those users that don’t want to fuss with setting up a RAID array. There are two options available for SHR, 1-disk (similar to RAID 5) or 2-disk redundancy (similar to RAID 6). The redundant disk basically means you can lose n number of drives (n is the number of redundant disks) and the array will continue to work and data will still be available with no corruption. SHR also allows the use of mixed size drives meaning, that all the drives in your NAS do not have to be the same capacity. You can do the same with a traditional RAID array however, all the drives in the array can only use the amount of space available on the smallest drive. For example, in a 5 drive array the smallest disk is 250 GB. You would create a 5×250 GB raid array. With SHR, the system divides the disks into smaller chunks and creates additional redundant storage. There’s a catch however, you must have two of the largest drives installed. Taking the example above, with 5×250 GB drives, you could swap out 2 of the drives to 1 TB drives and be able to use all of the disk space available.

Image provided by Synology

Conclusion and Final Thoughts Once again Synology produced a fine product. DS 1819+ is a network attached storage device which has the ability to support not only a home office but also small to mid-size businesses. This little scalable storage server will store all of your business files and if needed offload them into the cloud for backup retention. This and other features are all available from the Package Center. Numerous applications are offered free of charge in the Package Center however there are some applications which you might need to purchase if you looking to unlock a full functionality or a special feature. This is true for all NAS products that Synology offers with DiskStation Manager (DSM). The Synology DS 1819+ is powered by Intel Atom C3538 64-bit CPU. This CPU is a quad-core chip that has a clock of 2.1Ghz. This comes in handy if you plan to run virtual machines directly from the NAS. DS 1819+ comes with 4Gb DDR4 RAM that could be upgraded up to 32Gb but prepare to pay a premium price for the 32Gb kit. Currently, a single supported 16Gb RAM module by Synology costs a whopping 333$. It is worth mentioning that 16Gb modules support ECC (Error Correction Code). One of the best features of this NAS is the expansion slot which supports PCIe based network cards. DS 1819+ has built-in 4 port 1Gbps however if you are planning to use this in a multi-user environment, I highly recommend looking at 10GbE solutions for this NAS. In my testing of the Synology DS 1819+, I looked at both 1GbE and 10GbE performance data of the device. For the 1GbE benchmarks, the NAS performed up to par with what I would expect from a gigabit connected device. When 10GbE benchmarks were performed I saw real-life metrics which showed the ability of the NAS to sustain write speed in the upper 700s MB/s and read speed of mid 800s MB/s. Essentially, I was getting SSD speeds over the network. With a large capacity storage device such as DS 1819+, you want to be able to supplement the storage with good transfer speeds. I found no issues with the hardware or the software of DS 1819+. The ease of use of DiskStation Manager and Virtual Machine Manager (downloadable through Package Center) you can easily set up a small Virtual Server environment. The only problem I saw with this NAS is the number of the CPU cores. If you are planning to use this NAS as a storage device the CPU cores (4) is plenty of horsepower to go around, however, if you looking to spin up multiple virtual machines your options are limited to 4 vCPUs. The maximum amount of RAM is also limited. Maximum supported RAM to be used in DS 1819+ is 32Gb.

Overall the device is very well built. I love the internal based power supply, it really gives that server/appliance look and feel. Price of DS 1819+ I found to be a little bit on the high side. Right now, Synology DS 1819+ retails for $ 949 USD (at the time of the review. Some of Synology’s competitors that offer 8 bay NAS devices sell their products about 100-120$ less. I also find that the price of RAM upgrade is high as well. If you are looking for a storage solution that offers scalability and gradual growth in storage then DS 1819+ is the one to consider. When we look for NAS devices we usually have a set of criteria that we look for. Synology DS 1819+ has pretty much everything that I would want for my small-medium business. Features in DS 1819+ are endless and too many to list in this review but if you are looking for a file storage repository with advances shared features, this is it. Read the full article
1 note
·
View note