#VMDK Files
Explore tagged Tumblr posts
Visit Tumblr Blog
Explore Tumblr blogs with no restrictions, modern design and the best experience.
Last Seen Tumblr Blogs


Fun Fact
Average visit duration of Tumblr.com is 10 mins and 25 secs.
Text
Analyse Disks with Treesize: Defragment and Shrink VMware Workstation VM Disks
In this article, we will discuss how to “Analyse Disk with Treesize: Defragment and Shrink VMware Workstation VM Disks”. If you’re looking to improve VM performance, defragmenting is the way to go. If you are trying to free up disk space on the host, compacting (shrinking) or disk clean up will be appropriate. Please see how to Map and disconnect Virtual Disk in VMware Workstation, and how to…
#Analyse Disk with Treesize#Clean up System Files#Compacting a VMDK File#Defragment and Shrink Local Disk#Defragment data drives in Windows#Defragment Virtual Disks#Defragment VMware Workstation VM Disks#Defragmentation of a VMDK File#Free Up Disk Space#Linux#Microsoft Windows#Optimize Drives#Run Disk Cleanup#Shrink VMware Workstation VM Disks#Virtual Disk Files#VMDK#VMDK Files#Windows#Windows 11#Windows Server#Windows Server 2012#Windows Server 2016#Windows Server 2019#Windows Server 2022
0 notes
Text
Linux Life Episode 86
Hello everyone back to my Linux Life blog. I admit it has been a while since I wrote anything here . I have continued to use EndeavourOS on my Ryzen 7 Dell laptop. If I any major incidents had came up I would have made an entry.
However nothing really exciting has transpired. I update daily and OK have had a few minor issues but nothing that couldn't be sorted easily so not worth typing up a full blog just for running a yay command which sorted things out.
However given it's March, which some You-tubers and content creators have been running with the hashtag of #Marchintosh in which they look at old Mac stuff.
So I decided to run some older versions of Mac OS using VMWare Workstation which is now free for Windows, Mac and Linux.
For those not up with the technology of Virtual Machines basically the computer creates a sandbox container which pretends to be a certain machine so you can run things like Linux and MacOS using a software created environment.
VMWare Workstation and Oracle Virtualbox are Type 2 Hypervisors as they are known which create the whole environment using software machines which you can configure. All drivers are software based.
Microsoft Hyper-V, Xen and others such as QEMU are Type 1 Hypervisors which as well as having the various environments have software drivers some can use what they call "bare metal" which means it can see and use your actual GPU meaning you can take advantage of video acceleration. It also can give bare metal access to keyboards and mice. These take a lot more setup but work slightly quicker than Type 2 once they are done.
Type 1 systems like Qemu and Bochs may also allow access to different CPU types such as SPARC, PowerPC so you can run alternative OS like Solaris, IRIX and others.
Right now i have explained that back to the #Marchintosh project I was using VMWare Workstation and I decided to install 2 versions of Mac OS.
First I installed Mac OS Catalina (Mac OS X 10.15) now luckily a lot of the leg work had been taken out for me as someone had already created a VMDK file (aka virtual Hard drive) of Catalina with AMD drivers to download. Google is your friend I am not putting up links.
So first you have to unlock VMWare as by default the Windows and Linux versions don't list Mac OS. You do this by downloading a WMWare unlocker and then running it. It will make patch various files to allow it to now run MacOS.
So upon creating the VM and selecting Mac OS 10.15 from options you have to first setup to install the OS later and then when it asks to use a HD point it towards the Catalina AMD VDMK previously downloaded (keep existing format). Set CPUs to 2 and Cores to 4 as I can. Memory set to 8GB, Set networking to NAT and everything else as standard. Selecting Finish.
Now before powering on the VM as I have an AMD Ryzen system I had to edit the VM's VMX file using a text editor.
cpuid.0.eax = “0000:0000:0000:0000:0000:0000:0000:1011” cpuid.0.ebx = “0111:0101:0110:1110:0110:0101:0100:0111” cpuid.0.ecx = “0110:1100:0110:0101:0111:0100:0110:1110” cpuid.0.edx = “0100:1001:0110:0101:0110:1110:0110:1001” cpuid.1.eax = “0000:0000:0000:0001:0000:0110:0111:0001” cpuid.1.ebx = “0000:0010:0000:0001:0000:1000:0000:0000” cpuid.1.ecx = “1000:0010:1001:1000:0010:0010:0000:0011” cpuid.1.edx = “0000:0111:1000:1011:1111:1011:1111:1111” smbios.reflectHost = "TRUE" hw.model = "iMac19,1" board-id = "Mac-AA95B1DDAB278B95"
This is to stop the VM from locking up as it will try and run an Intel CPU setup and freeze. This is the prevention of this happening by making it think its a iMac 19,1 in this case.
Now you need to create a harddrive in the VM settings to install the OS on by editing the settings in VMWare and adding a hard drive in my case 100GB set as one file. Make sure it is set to SATA 0:2 using the Advanced button.
Now power on the VM and it will boot to a menu with four options. Select Disk Utility and format the VMware drive to APFS. Exit Disk Utility and now select Restore OS and it will install. Select newly formatted drive and Agree to license.
It will install and restart more than once but eventually it will succeed. Setup language, Don't import Mac, skip location services, skip Apple ID, create account and setup icon and password. don't send Metrics, skip accessibility.
Eventually you will get a main screen with a dock. Now you can install anything that doesn't use video acceleration. So no games or Final Cut Pro but can be used a media player for Youtube and Logic Pro and Word processing.
There is a way of getting iCloud and Apple ID working but as I don't use it I never did bother. Updates to the system are at your own risk as it can wreck the VM.
Once installed you can power down VM using the Apple menu and remove the Catalina VMDK hard drive from the settings. It provide all the fixed kexts so keyboards, mice and sound should work.
If you want video resolution you can install VMware Tools and the tools to select are the ones from the unlocker tools.
Quite a lot huh? Intel has a similar setup but you can use the ISOs and only need to set SMC.version="0" in the VMX.

For Sonoma (Mac OS 14) you need to download OpenCore which is a very complicated bootloader created by very smart indivials normally used to create Hackintosh setups.
It's incredibly complex and has various guides the most comprehensive being the Dortania Opencore guide which is extensive and extremely long.
Explore so at your own risk. As Sonoma is newer version the only way to get it running on AMD laptops or Desktops in VMWare is to use Opencore. Intel can do fixes to the VMX to get it work.
This one is similar to the previous I had to download an ISO of Sonoma. Google is your friend but here is a good one on github somewhere (hint hint). In my case I downloaded Sonoma version 14.7_21H124 (catchy I know).
I also had to download a VDMK of Opencore that allowed 4 cores to be used. I found this on AMD-OSX as can you.
The reason I chose this ISO as you can download Sequioa one. I tried Sequioa but could not get sound working.
So for this one create VM , Select Mac OS 14, install operating system later. Existing OS select Opencore VDMK (keep existing format), set CPU to 1 and cores to 4. Set Netwoking as Bridged everything else as normal. Finish
Now edit settings on VM. On CD-Rom change to image and point to downloaded Sonoma ISO. Add Second hard drive to write to once again I selected 100GB one file. Make sure it is set to SATA 0:2 using the Advanced button. Make sure Opencore is set to SATA 0:0 also using same button.
Now Power the VM. It will boot to a menu with four options. Select Disk Utility and format the VMware drive to APFS. Exit Disk Utility and now select Install OS and it will install. Select newly formatted drive and Agree to license.
The System will install and may restart several times if you get a halt then Restart Guest using the VMware buttons. It will continue until installed.
Setup as done in Catalina turning off all services and creating account. Upon starting of Mac you will have a white background.
Go to System Settings and Screen Saver and turn off Show as Wallpaper.
Now Sonoma is a lot more miserable about installing programs from the Internet and you will spend a lot of time in the System setting Privacy and Security to allow things.
I installed OpenCore Auxilary Tools and managed to install it after the security nonsense. I then turned on Hard Drives in Finder by selecting Settings.
Now open OPENCORE and open EFI folder then OC folder. Start OCAT and drag config.plist from folder to it. In my case to get sound I had to use VoodooHDA but yours may vary.
The VoodooHDA was in the Kernel tab of OCAT I enabled it and disabled AppleALC. Save and exit. Reboot VM and et voila I had sound.
Your mileage may vary and you may need different kexts depending on soundcard or MAC OS version.
Install VMTools to get better Screen resolution. Set Wallpaper to static rather than dynamic to get better speed.
Close VM edit settings and remove CD iso by unticking connected unless you have a CD drive I don't. DO NOT remove Opencore as it needs that to boot.
And we are done. What a nightmare but fascinating to me. If you got this far you deserve a medal. So ends my #Marchintosh entry.
Until next time good luck and take care
2 notes
·
View notes
Text
Configuring Storage for Virtual Machines: A Complete Guide
Virtual Machines (VMs) are at the core of modern IT environments — whether in cloud platforms, data centers, or even personal labs. But no matter how powerful your VM is, it needs one key resource to operate smoothly: storage.
This blog will help you understand what storage means for virtual machines, the types of storage available, and how to configure it properly — all without diving into code.
🔍 Why Is Storage Configuration Important?
When you set up a virtual machine, you're creating a digital computer that runs inside another one. Just like physical computers, VMs need hard drives to store:
Operating systems
Applications
User data
Poor storage choices can lead to:
Slow performance
Data loss
Difficulty in scaling
High maintenance costs
Types of Storage for Virtual Machines
Local Storage
Uses the hard drive of the host computer.
Best for personal use, testing, or small setups.
Not ideal for high availability or scaling.
Shared Storage (SAN/NAS)
Shared between multiple servers.
Useful for large organizations or cloud data centers.
Allows features like moving VMs between servers without downtime.
Cloud-Based Storage
Provided by platforms like AWS, Microsoft Azure, or Google Cloud.
Scalable, secure, and accessible from anywhere.
Great for businesses looking for flexibility.
⚙️ Key Elements in Storage Configuration
When setting up storage for VMs, here’s what to consider:
Disk Type
VMs use virtual hard disks (like VMDK, VHD, or QCOW2 files) to simulate physical drives.
Think of it as a "container" for all the VM's files and data.
Disk Size
Choose based on your VM’s purpose. A basic OS might need 20–40 GB, while databases may require hundreds of GB.
Provisioning Method
Thick Provisioning: Full disk size is allocated from the start.
Thin Provisioning: Uses only what’s needed and grows over time.
Storage Performance
High-speed SSDs improve VM performance, especially for apps that use a lot of read/write operations.
Traditional HDDs are more cost-effective for bulk storage.
🧠 Best Practices
✅ Plan Based on Usage A web server VM needs different storage than a database or a file server. Always size and structure your storage accordingly.
📁 Organize Virtual Disks Keep the operating system, application data, and backups in separate virtual disks for easier management.
🛡️ Back Up Regularly Set automated backups or snapshots to recover data in case of failure or changes.
📊 Monitor Performance Use available tools to track how your VM is using the disk. Upgrade or optimize if it becomes a bottleneck.
🔐 Secure Your Storage Use encryption for sensitive data and restrict access to storage resources.
🌐 When to Use Which Storage?
Use CaseRecommended StoragePersonal VM / TestingLocal storageBusiness apps / High uptimeShared SAN/NAS storageCloud-native appsCloud-based storageBackup and recoveryExternal or cloud backup
📌 Conclusion
Configuring storage for virtual machines may sound technical, but with the right planning and understanding of options, anyone can get it right. Whether you're working in a small team or managing a large infrastructure, your choice of storage will directly impact your virtual environment’s efficiency, reliability, and scalability.
For more info, Kindly follow: Hawkstack Technologies
#VirtualMachines #ITInfrastructure #CloudStorage #DataCenters #SysAdmin #VMware #KVM #Azure #AWS #StorageManagement
0 notes
Text
Migrating Virtual Machines to Red Hat OpenShift Virtualization with Ansible Automation Platform
As enterprises modernize their infrastructure, migrating traditional virtual machines (VMs) to container-native platforms is no longer just a trend — it’s a necessity. One of the most powerful solutions for this evolution is Red Hat OpenShift Virtualization, which allows organizations to run VMs side-by-side with containers on a unified Kubernetes platform. When combined with Red Hat Ansible Automation Platform, this migration can be automated, repeatable, and efficient.
In this blog, we’ll explore how enterprises can leverage Ansible to seamlessly migrate workloads from legacy virtualization platforms (like VMware or KVM) to OpenShift Virtualization.
🔍 Why OpenShift Virtualization?
OpenShift Virtualization extends OpenShift’s capabilities to include traditional VMs, enabling:
Unified management of containers and VMs
Native integration with Kubernetes networking and storage
Simplified CI/CD pipelines that include VM-based workloads
Reduction of operational overhead and licensing costs
🛠️ The Role of Ansible Automation Platform
Red Hat Ansible Automation Platform is the glue that binds infrastructure automation, offering:
Agentless automation using SSH or APIs
Pre-built collections for platforms like VMware, OpenShift, KubeVirt, and more
Scalable execution environments for large-scale VM migration
Role-based access and governance through automation controller (formerly Tower)
🧭 Migration Workflow Overview
A typical migration flow using Ansible and OpenShift Virtualization involves:
1. Discovery Phase
Inventory the source VMs using Ansible VMware/KVM modules.
Collect VM configuration, network settings, and storage details.
2. Template Creation
Convert the discovered VM configurations into KubeVirt/OVIRT VM manifests.
Define OpenShift-native templates to match the workload requirements.
3. Image Conversion and Upload
Use tools like virt-v2v or Ansible roles to export VM disk images (VMDK/QCOW2).
Upload to OpenShift using Containerized Data Importer (CDI) or PVCs.
4. VM Deployment
Deploy converted VMs as KubeVirt VirtualMachines via Ansible Playbooks.
Integrate with OpenShift Networking and Storage (Multus, OCS, etc.)
5. Validation & Post-Migration
Run automated smoke tests or app-specific validation.
Integrate monitoring and alerting via Prometheus/Grafana.
- name: Deploy VM on OpenShift Virtualization
hosts: localhost
tasks:
- name: Create PVC for VM disk
k8s:
state: present
definition: "{{ lookup('file', 'vm-pvc.yaml') }}"
- name: Deploy VirtualMachine
k8s:
state: present
definition: "{{ lookup('file', 'vm-definition.yaml') }}"
🔐 Benefits of This Approach
✅ Consistency – Every VM migration follows the same process.
✅ Auditability – Track every step of the migration with Ansible logs.
✅ Security – Ansible integrates with enterprise IAM and RBAC policies.
✅ Scalability – Migrate tens or hundreds of VMs using automation workflows.
🌐 Real-World Use Case
At HawkStack Technologies, we’ve successfully helped enterprises migrate large-scale critical workloads from VMware vSphere to OpenShift Virtualization using Ansible. Our structured playbooks, coupled with Red Hat-supported tools, ensured zero data loss and minimal downtime.
🔚 Conclusion
As cloud-native adoption grows, merging the worlds of VMs and containers is no longer optional. With Red Hat OpenShift Virtualization and Ansible Automation Platform, organizations get the best of both worlds — a powerful, policy-driven, scalable infrastructure that supports modern and legacy workloads alike.
If you're planning a VM migration journey or modernizing your data center, reach out to HawkStack Technologies — Red Hat Certified Partners — to accelerate your transformation. For more details www.hawkstack.com
0 notes
Text

🔍 HI6043 Computer Forensics and Analysis Assignment Help – Get Expert Support Now! 💻🕵️♂️
🚨 Struggling with questions like:
➡️ How would you ensure evidence integrity and maintain the chain of custody?
➡️ What forensic indicators suggest a virtual machine (VM) was installed or recently active?
We’ve got the expert guidance you need! 💡
From ensuring evidence integrity using hash values & write blockers 🔐 to identifying VM artifacts like .vmdk files, registry entries, network traces & system logs—we cover it all with precision. ✅
📘 Why Choose Us?
🔹 100% Plagiarism-Free Content
🔹 Detailed, Step-by-Step Explanations
🔹 Fast Turnaround & Affordable Rates
🔹 Trusted by IT & Cybersecurity Students Worldwide 🌐
📩 Message us now and ace your HI6043 assignment with confidence!
📱 +91-977-207-8620 / +61-872-000-185
#HI6043 #ComputerForensicsHelp #ChainOfCustody #VMForensics #CyberSecurityAssignment #HolmesInstitute #ForensicAnalysisExperts
0 notes
Link
#Automation#cloud#configuration#Dashboard#energymonitoring#HomeAssistant#homesecurity#Install#Integration#IoT#Linux#MQTT#open-source#operatingsystem#RaspberryPi#self-hosted#sensors#smarthome#systemadministration#Z-Wave#Zigbee
0 notes
Text
Sidetrack: ChromeOS Flex... on a Virtual Machine... with Single GPU Passthrough...
the prospect of running ChromeOS on anything more powerful than a microwave oven is unfathomably cursed - wheezus2000 on discord
So... where do we start here... *checks notes* ah! So yeah, last Sunday I showcased a virtual machine running ChromeOS Flex (the most barebones GUI your grandma can only recognize) over to the aptly named r/ChromeOSFlex subreddit. It was a lot of work but it does work somehow.
Anyways, here's a tutorial to get this abomination up and running using virt-manager!
Prerequisites:
You will need:
ChromeOS Flex Recovery Image
A decent hard drive space (around 24GB is enough)
A nice dedicated GPU (because I'm not sure if it'll work with an iGPU)
more than 4GB of RAM (8GB or more is recommended)
IOMMU support
Lots of patience (you'll see why in a moment)
On the software side, you'll need:
KVM and QEMU
libvirtd and virt-manager
GRUB or any bootloader already set-up for GPU passthrough
On the skills necessary:
Having familiarized with the concept of Linux, and basic command line stuff
Having followed instructions precisely
Potentially, having skills in compiling software and/or fiddling with the operating system and the Linux kernel as well
and... not having an attention span of a script kiddie
Process
Visit this link to download the recovery image from Google.
Scroll down to this part of the page. Click on "ChromeOS Flex installer image".
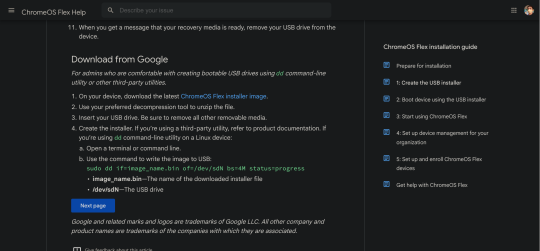
This would then be downloaded.

After that, unzip the file to a convenient place. This would take ~6GB of storage space.
Install the software prerequisites using your favorite package manager.
Once having virt-manager installed, click on the new button.
From there, select "Import existing disk image".

Click on Browse. Then select "Browse Local" to find the recovery image.
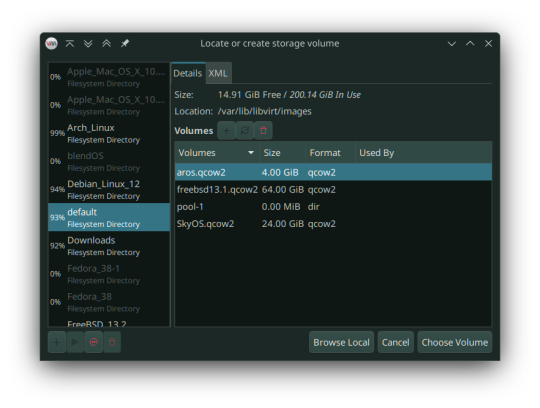
In my case, that'll be in the folder called vmdk, stored in my os folder on one of my hard drives. Select the "chromeos_*_reven_recovery..." file.

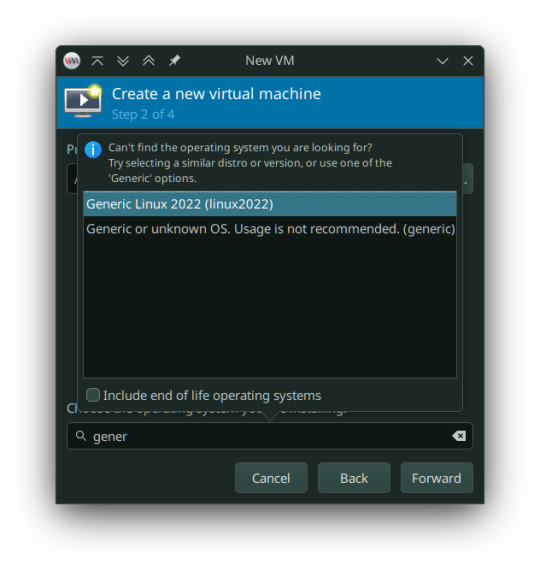
In the "Choose the operating system you are installing" prompt, select linux2022.
In the memory tab, pick 4096MiB and select how many cores you want to be assigned.

You must select "Customize configuration before install" as we tweak some things.

In the prompt that follows, here's what you need to change:
Firmware: BIOS -> UEFI
Disk: VirtIO -> USB
Video: Anything else -> VirtIO
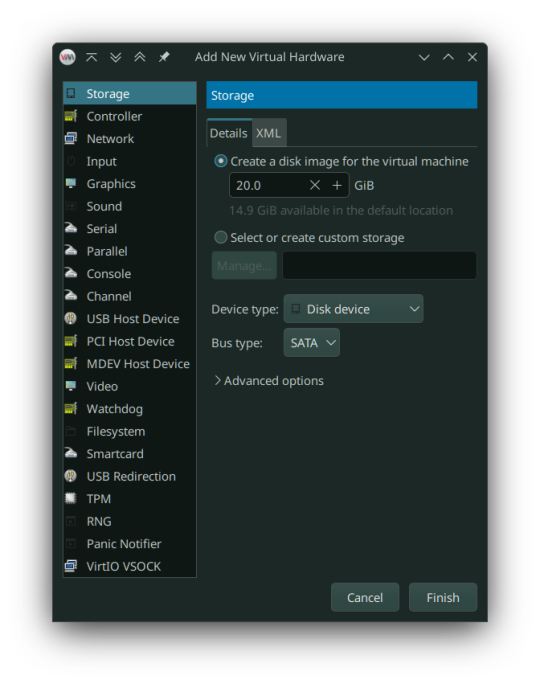
Now add a virtual hard drive by clicking the "Add Hardware" button. It should be 20GB or larger, SATA bus. VirtIO bus doesn't work as it wouldn't be recognized.
Remove any Consoles, RNG and start the install.
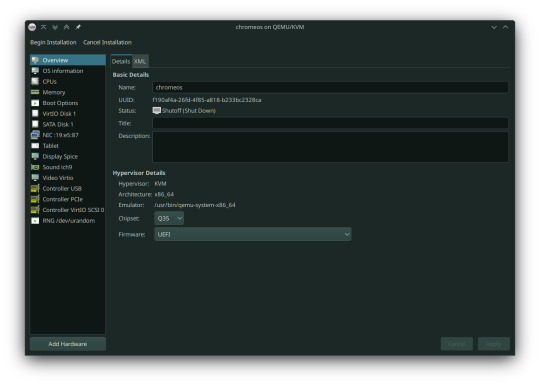
Here's the configuration if you follow these steps:
After starting, you can now follow the steps in installing ChromeOS Flex. It should be straightforward, however the graphics are still glitchy as it seems. It'll be fixed once we added our dGPU.
However, ChromeOS at boot will, and definitely (in my case) crash and bootloop a couple times, even when installed, before landing you to the desktop.
If for some reason, the USB tablet device doesn't work or if you prefer a cursor, switch the USB tablet for a PS/2 or USB mouse.
Once installed, you can see your desktop glitching. If you, somehow can navigate the system, you can now turn it off and set up Single GPU Passthrough. I used this one by risingprismtv. Follow the instructions provided in the wiki, and apply it to your VM. This can (and will) be complicated (especially when dealing with IOMMU groups), as it may break your setup, so please proceed with caution. Any issues with the script can be reported through their Discord server.
After setting the scripts, this is my current VM setup:

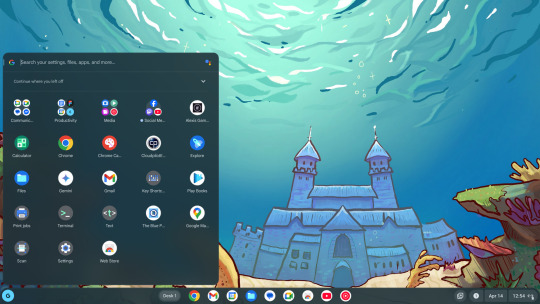
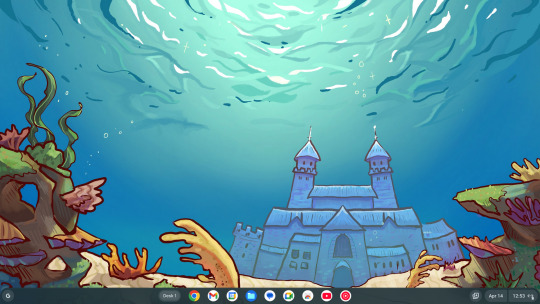
Now it's time to boot the VM, and voila! You can now use ChromeOS Flex while staying under Linux!
Predicaments, and possible issues
No, it does not work under Windows, well, without complications apparently.
Possible VM bootloops, just like I said. Seems related to the graphics, I presume. Though, this only happens multiple times, before working normally.
You can't update the VM, apparently.
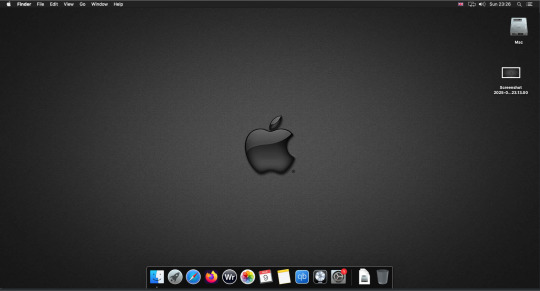
Screenshots
And as always, see ya later!
0 notes

Text
Getting Started with macOS Ventura: Using Virtual Machines and Installation Files
MacOS Ventura is packed with exciting new features and improvements designed to enhance user experience and productivity. For those who want to explore macOS Ventura without committing to a full system upgrade, using a macOS Ventura .ISO or VMDK file to set up a virtual machine is an excellent solution. This blog will guide you through the process and benefits of using these files.
Why Use macOS Ventura .ISO?
A macOS Ventura .ISO file provides a convenient and flexible way to install and test the operating system on various hardware setups. Here are a few reasons why you might want to use a macOS Ventura .ISO:
Testing and Development: Developers can test applications on macOS Ventura without upgrading their primary system.
Compatibility: Users with non-Mac hardware can experience macOS features.
Backup and Recovery: An .ISO file can be used as a recovery tool in case of system failures.
Obtaining macOS Ventura .ISO
To get your hands on the macOS Ventura .ISO file, you can follow these steps:
Official Sources: The safest method is to download it from official Apple channels such as the Apple Developer website or the Mac App Store.
Create Your Own ISO: If you have access to a Mac, you can create an ISO file from the official macOS installer using Terminal commands.
Setting Up macOS Ventura Virtual Machine
A virtual machine (VM) allows you to run macOS Ventura on your existing hardware without replacing your current operating system. Here's how you can set up a macOS Ventura virtual machine:
Using VirtualBox
Download VirtualBox: Install the latest version of VirtualBox from the official website.
Create a New VM: Open VirtualBox and click "New" to create a new virtual machine. Choose "Mac OS X" as the type and "macOS 10.13 High Sierra (64-bit)" as the version.
Allocate Resources: Assign sufficient RAM and create a virtual hard disk.
Mount the .ISO File: Go to the VM settings, navigate to Storage, and add the macOS Ventura .ISO file as a virtual optical disk.
Start the VM: Start the virtual machine and follow the on-screen instructions to install macOS Ventura.
Using macOS Ventura VMDK
A VMDK (Virtual Machine Disk) file is another option for setting up a macOS Ventura virtual machine. It’s similar to an .ISO but designed specifically for virtual machine environments. Here’s how to use a macOS Ventura VMDK:
Download the VMDK File: Obtain the macOS Ventura VMDK file from a reliable source.
Create a New VM in VirtualBox: Follow the same steps as above to create a new VM.
Use the VMDK File: Instead of an .ISO, select the macOS Ventura VMDK file as the hard disk for the virtual machine.
Start and Install: Boot up the VM and proceed with the installation.
Benefits of Using macOS Ventura Virtual Machine
Flexibility: Easily switch between different OS versions and configurations.
Safety: Test new features without risking your primary system’s stability.
Convenience: Quickly set up and dismantle virtual environments as needed.
Conclusion
Follow the steps outlined in this guide to get started with your macOS Ventura virtual machine and enjoy all the new features and improvements. Using a macOS Ventura .ISO or VMDK file to set up a virtual machine provides a flexible and efficient way to explore Apple’s latest operating system. Whether you’re a developer testing new software, an IT professional preparing for deployment, or simply an enthusiast eager to experience macOS Ventura, these methods offer a practical solution.
0 notes
Link
Searching for the unique software that can recover your corrupted and damaged VMDK data files? then, You can opt for this amazing software. This software has amazing algorithms that can recover your corrupted VMDK data files with ease. It can recover VMDK files from moderate & severe corruption. It is designed on a smart algorithm that ensures the safe recovery of email files without harming a healthy database. It has no file size limitations. Users can recover multiple corrupted VMDK files at one go using this software.
0 notes
Link
Looking for solution to VMware change VMDK file location problem. Here is an DIY method that will help you out in getting rid of it.
0 notes
Text
How to Shrink and Compact Virtual Hard Disks in Hyper-V
#Compact Virtual Hard Disks#Compacting a VMDK File#Defragment and Shrink Local Disk#Extend Volume#Extend Volume on Windows#Microsoft Windows#New Simple Volume#Optimize or Shrink the Virtual Hard Disk file#Unallocated Space#Windows#Windows Server#Windows Server 2012#Windows Server 2016#Windows Server 2019#Windows Server 2022#Windows Server 2025
0 notes
Text
❤ How to Open a VMDK File in VirtualBox
New Post has been published on https://is.gd/CMrTKD
❤ How to Open a VMDK File in VirtualBox
Need to open a VMDK file in VirtualBox? This article will show you how to setup and use a VMDK virtual machine file with VirtualBox. This particular tutorial is demonstrated on a Mac, but using a VMDK with VirtualBox this way should work the same on Windows and Linux too.
VMDK is short for Virtual Machine Disk, and VMDK files can be created by VMWare, VirtualBox, Parallels, and other virtualization software. You may have noticed that you can’t simply open a VMDK virtual machine file directly with VirtualBox, nor can you drag and drop it to launch. Instead you’ll create a new virtual machine and use that as the disk, using the steps outlined below.
How to Open a VMDK File with VirtualBox on Mac, Windows, Linux
Open the VirtualBox application, then choose “New” to create a new virtual machine
Give the new virtual machine a name and set the type, OS version, RAM, and then click to choose “Use an existing virtual hard disk file” and click the folder icon to navigate the file system
Click “Add” to add a virtual hard disk file
Navigate to and select the VMDK file and choose “Open”
Confirm the VMDK drive is selected then select “Choose”
Now choose “Create” to create the new virtual machine using the VMDK file
Click “Start” at the VirtualBox Manager screen to boot the VMDK virtual machine
Once you click Start the virtual machine will boot using the VMDK file you selected as the virtual hard disk file.
VMDK files can be made of just about any operating system, including Windows, Linux, MacOS and/or Mac OS X. The VMDK virtual machine files are often made available or transferred around as pre-built configurations of operating systems, making it easy to use or test the same setup on multiple machines or by multiple people.
This is probably somewhat obvious, but if you move the location of the VMDK file the VirtualBox machine will no longer boot until the VMDK file is located again.
If you’re finished using the VMDK file and the related virtual machine, you can delete that VM from VirtualBox like removing any other VM.
You might be wondering if it’s possible to convert a VMDK file to VHD or VDI or another virtual machine disk format, and the answer is yes though it’s not nearly as easy as converting an ISO to VDI, and instead you’ll have to rely on this free tool from Microsoft that runs in Windows.
0 notes
Text
Mac Os X 10.4 5 Myzar Iso Download
Mac Os X 10.4 5 Myzar Iso Download Tool
Mac Os X 10.4 5 Mizar Iso Download 64-bit
Mac OS X 10.4.11. Download mac os x 10.4 iso free shared files. Mac OS X 10.4.8 JaS AMD Intel SSE2 SSE3 with PPF1 & PPF2 iso.torrent Mac OS X 10.4.8. Official way to obtain an OS X ISO file. Then you can download the OS from the Mac App Store. Install Yosemite ISO on VMWare Workstation 11. I am able to get a Maxxus release 10.4.5 to boot in. Open development of select Mac OS X projects. Tools and Technologies Why you'll love to develop on your Mac. Open Source in Mac OS X Learn about the 200+ open source projects that ship with Mac OS X. Darwin Technologies Beneath the easy-to-use interface of Mac OS X is a rock-solid, UNIX foundation. Open development of select Mac OS X projects. Tools and Technologies Why you'll love to develop on your Mac. Open Source in Mac OS X Learn about the 200+ open source projects that ship with Mac OS X. Darwin Technologies Beneath the easy-to-use interface of Mac OS X. Mac OS X Leopard launched on October 26, 2007, replacing Tiger (version 10.4). Contains over 300 Leopard changes and enhancements to its predecessor, Mac OS X Tiger, which covers key components of the operating system, integrated applications and development tools. Download Mac OS X 10.5 Leopard. Download Mac OS X 10.5 Leopard ISO File (6.61GB) Download Mac OS X 10.5 Leopard DMG File (6.41GB) Download Mac OS X 10.4 Tiger. Mac OS X 10.4 Tiger ISO File (2.64GB) Direct Download; Mac OS X 10.4 Tiger DMG File (2.64GB) Direct Download; Final Words. So, that’s all about Download Mac OS X 10.4 – 10.15.
Mac Os X 10.4 5 Myzar Iso Download Tool
Apple release every year a new operating system for there user. Indeed all of theme are currently much successful and attracted their user to be more satisfied. When Apple announces there OS for the public, firstly, they bring in developer mode. Every year Apple bringing huge changes to there operating system. Like macOS X El Capitan, macOS X Yosemite, macOS Sierra, macOS High Sierra, and macOS Mojave is out new and perfectly professionally made. With every feature of macOS Mojave, you are able to make your work easy. Such as after a longtime Apple experimented to bring the dark mode them into there OS. And finally, they did it and brought changes to there look too. Download macOS Mojave 10.14 ISO for VMware & VirtualBox.
Every feature and functionality of the macOS Mojave is outstanding. For example, High Sierra allowed you to change the menu bar and dock to dark color, indeed that changes made the look a bit bright. But during the installation of macOS Mojave on your PC you can choose the dark mode. The included features in macOS Mojave are Dynamic Desktop, Desktop Stacks, Screenshots Markups, Screenshot Utility, Continuity Camera, iOS Apps on Mac, The APP Store, Finder, and others. Well, there’s is more to talk about macOS Mojave goodness’s, but the better way to access its features install it on your PC.
Installing macOS Mojave on Mac or PC – Hackintosh is pretty easy. First, we ready the required files, then creating a Bootable USB, and Post-Installation USB files. Gaining to install macOS Mojave on Windows PC is difficult and impossible. But again to the world developers era for there beneficial tools that they allow the opportunity to install macOS Mojave on Windows PC. In case, there is an easy way to install macOS Mojave on Windows PC. Like you can install macOS Mojave on VMware on Windows PC. Or more than that you can install macOS Mojave on VirtualBox on Windows PC.
Related: Download macOS Mojave Image file for VMware & VirtualBox
Download macOS Mojave ISO For VMware & VirtualBox
When it comes to terms of installing macOS Mojave on VMware or VirtualBox. Using the macOS Mojave VMDK file or image file. As I have provided you the link in the above paragraph. Particularly, there are to main methods of installing macOS Mojave on VirtualBox and VMware. Before we were using for the purpose of installing macOS Mojave on VirtualBox or whether VMware using the exact VMDK “Virtual machine disk file”. But we prepared to install macOS Mojave in another way also.
And that is installing macOS Mojave on VirtualBox and VMware using the ISO file of Mojave. When it comes to VirtualBox, I think these tools of Virtualization are similar. We use ISO file of macOS Mojave for installing on VirtualBox on Windows PC too. We’ve downloaded and created the ISO file of macOS Mojave to install on Windows PC or somewhere else. All the required files of macOS Mojave is ready to download, there is no need again to access to Apple Mac Store for downloading macOS Mojave file. The macOS Mojave ISO file is downloaded, created, compressed, and uploaded on Google Drive. And I think if you follow the installation method that we did, you never face any kind of problem during the installation.

Download macOS Mojave ISO File
Also, you can download macOS Mojave 10.14 ISO file for VMware & VirtualBox latest version. The files are uploaded in MediaFire, which encrypted and compressed with WinRAR. And for the extracting the files you can use whether WinRAR or 7Zip. Indeed while extracting the file you will required the password, and you can find the password below the download links.
When the download is completed, you need to extract the compressed file. To do that use the WinRAR or 7Zip. Again if you faced any problem in the downloading case. Then check the below article on how to download macOS Mojave.
Again you can update macOS Mojave on VirtualBox or VMware on Windows to the latest version. There aren’t any differences between the updating method on VMware and VirtualBox. To that follow the bellow method.
That is the required file of macOS Mojave for installing macOS Mojave on VMware or VirtualBox. I think there aren’t any differences between the installation using the ISO file and VMDK file. But using the ISO file is a bit simple than the VMDK file.
Mac Os X 10.4 5 Mizar Iso Download 64-bit
That’s all about the macOS Mojave ISO file. Now everything is ready. let’s dig into the installation process of macOS Mojave on VMware & VirtualBox. To do that check the below links.
Install macOS Catalina on VMware on Windows PC (New Method)
One of the pretty easy ways of installing macOS Mojave on Windows PC is using VirtualBox. VirtualBox is also, a famous Virtualization tool. To do that installation of macOS Mojave on VirtualBox with a new method then check the below article.
Install macOS Mojave on VirtualBox on Windows PC (New Method)
That’s all about macOS Mojave ISO file, again if you think there is remaining something. Then feel free to share with us in the comment section. If the content was useful for you then your feedback is a big support for us. Also, don’t forget to share the post with your friends on social network platforms.
1 note
·
View note
Text
Migrating Virtual Machines to Red Hat OpenShift Virtualization with Ansible Automation Platform
As enterprises modernize their IT infrastructure, migrating legacy workloads from traditional hypervisors to cloud-native platforms becomes essential. Red Hat OpenShift Virtualization offers a powerful solution by allowing organizations to run and manage virtual machines (VMs) alongside containers on the same OpenShift cluster. To streamline and scale this migration process, Red Hat Ansible Automation Platform proves to be an invaluable tool.
In this post, we’ll explore how to leverage Ansible Automation Platform to automate the migration of VMs to OpenShift Virtualization, reducing manual effort, minimizing downtime, and increasing consistency across environments.
🧩 What is OpenShift Virtualization?
OpenShift Virtualization, built on KubeVirt, extends Red Hat OpenShift to run traditional VM workloads alongside containerized applications. This allows for:
Unified management of VMs and containers
Seamless integration with CI/CD pipelines
A single pane of glass for observability, networking, and security
🤖 Why Use Ansible for VM Migration?
Manually migrating virtual machines is not only tedious but also error-prone. Ansible Automation Platform enables:
Repeatable Playbooks for consistent VM conversion and deployment
Inventory management of existing VMs and target OpenShift clusters
Idempotent operations that reduce risk and human error
Event-driven automation with Red Hat Event-Driven Ansible (EDA)
🛠️ High-Level Workflow of VM Migration with Ansible
Discovery & Assessment
Identify source VMs using dynamic inventory (e.g., VMware, RHV, KVM)
Collect system configurations and workload details
Use Red Hat Migration Toolkit for Virtualization (MTV) if applicable
Pre-Migration Automation
Validate OpenShift Virtualization setup
Configure storage (e.g., Ceph, CSI volumes)
Prepare networking (e.g., Multus, bridges)
VM Export & Conversion
Use Ansible modules to:
Export VM disks (e.g., via ovftool, virt-v2v, or qemu-img)
Convert formats (e.g., VMDK to QCOW2)
VM Import into OpenShift
Create VM manifests in OpenShift (YAML/CRDs)
Automate virtctl commands or use MTV APIs
Attach appropriate storage and networks
Post-Migration Tasks
Run automated smoke tests
Update DNS or service endpoints
Decommission old VMs (if desired)
🧪 Sample Ansible Playbook Snippet
yaml
- name: Create OpenShift VirtualMachine from template hosts: localhost tasks: - name: Create VM from YAML definition k8s: state: present definition: "{{ lookup('file', 'vm-definition.yaml') }}"
You can integrate this into an Ansible Workflow Job Template in Red Hat Ansible Automation Controller, and trigger it via webhooks or Service Catalogs.
💡 Best Practices
Test in Staging: Simulate migrations in non-prod environments before rolling out to production.
Incremental Migration: Start with low-impact workloads to refine your process.
Logging and Auditing: Use Ansible Tower logs and OpenShift audit logs to monitor changes.
Rollback Plans: Always have a plan to revert if something fails.
🎯 Benefits of Using Ansible + OpenShift Virtualization
Centralized automation of hybrid workloads
Faster time-to-value with reusable playbooks
Simplified management for IT Ops and DevOps teams
Integration with existing CI/CD and ITSM platforms
🔚 Final Thoughts
Migrating VMs to OpenShift Virtualization doesn't have to be complex. By combining the power of Red Hat OpenShift with the flexibility of Ansible Automation Platform, organizations can modernize their workloads efficiently and with confidence.
At HawkStack Technologies, we help enterprises design, automate, and execute seamless VM migration strategies using Red Hat technologies. Contact us to learn how we can support your modernization journey.
📞 Need help with automation or OpenShift Virtualization? Let our certified experts at HawkStack guide your migration from legacy systems to a modern cloud-native environment.
For more details www.hawkstack.com
0 notes
Text
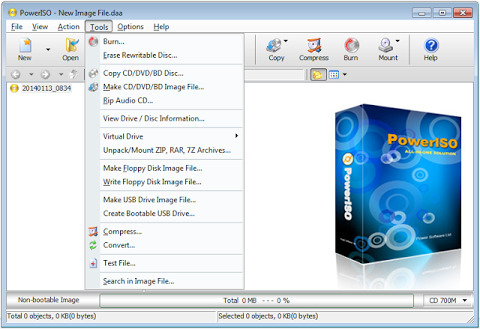
Poweriso Free

free. software download. 7/10 (165 votes) - Download PowerISO Free. PowerISO is one of the best and most complete programs to work with ISO images from your PC. You can create, mount, edit, and burn ISOs on to discs.
PowerISO Full Crack + Activation Key Free Download (Latest)
PowerISO Crack is a powerful disk image processing tool that allows you to modify image files in several ways: opening, extracting, burning, creating, modifying, compressing, encrypting, sharing and converting image files to the internal virtual drive . All common image files on CD, DVD and Blu-ray are supported. Typically, a “file” is a file that contains the complete image of a hard drive.
These files are commonly used when transferring CD / DVD images over the Internet. Depending on your contact, “ISO file” may refer to all disk image files or only to a certain extent. With , you can access virtual drive images for VMware (VMDK), Virtual PC (VHD) and VirtualBox (VDI) just as easily. Just open it and browse the content, edit individual documents, drag and drop files to or from the image, and treat it like any other player.
PowerISO Full Crack
According to the most restrictive definition, a “PowerISO Serial key file” is created by copying an entire hard drive from sector 0 to the end into a file. Since the image file contains “cooked” sectors with 2048 bytes and nothing else, you can only record one data track this way.
Audio tracks, mixed mode discs, CD + G discs, multisession discs, and other unusual formats cannot be displayed. An .ISO file can be edited in several ways: It can be written to a CD or DVD. Mounted as a virtual drive or viewed.
The file is an exact copy of the CD. It can be used to save a CD or to distribute software on the Internet. can not only create ISO files from CD, but also ISO files from local files and folders. An empty compilation is created automatically. By default, the compilation includes the iso9660 and Joliet file systems.
To create a PowerISO DVD Registry key file, click the New button on the toolbar or choose File> New> Image Data CD / DVD and choose DVD-UDF. You can also change the media type by clicking on the appropriate field in the lower right corner of the window.
so you may also like this DaVinci Resolve Crack
PowerISO Crack Key Features:
PowerISO keygen Create an ISO file:
Create an ISO file or BIN CUE file from files on the hard drive. Create an ISO file or BIN CUE file from a CD / DVD / BD disc.
creates a bootable ISO image file. Automatically detect various CD / DVD / BD image files. Supports ISO9660, Joliet and UDF file systems.
Supports Unicode file name. Optimize file arrangement to save space. Edit the ISO file:
Add files to the ISO file. The ISO file is an exact copy of a CD. can copy the entire contents of the disc to an image file.
Delete the files from the ISO file. If the source disc is a single track data disc, you can save it in ISO, BIN / CUE format. or DAA format.
PowerISO Registration code Rename files to ISO files. However, whether the source disc is a multitrack disc or not, it can only be recorded in BIN / CUE format.
copy sector by sector when copying the disc. All information is copied to the image file. Change the date and time of the file in the ISO file.
Add boot information to the ISO file to create a bootable ISO image file.
PowerISO Key Free Download Extract ISO File:
Support ISO file and other popular disc image file, such as BIN / CUE, DAA, UIF, DMG, MDF / MDS, ASHDISC, BWI / B5I, LCD, IMG, CDI, CIF, P01, PDI, NRG, NCD, PXI, GI, FCD, VCD, C2D, BIF and so on.
Support the multi-session disc image file.
Extract files from ISO file.
View and run files contained in the ISO file.
Poweriso Free Download With Crack
PowerISO Portable v8 Version Burn ISO File:
Moreover, Burn ISO file and another image file to CD-R, CD-RW, DVD-R, DVD-RW, DVD+R, DVD+RW, DVD-RAM, DVD-R DL, DVD+R DL, BD-R, BD-R DL, BD-RE, BD-RE DL.
Burn Apple DMG files directly to CD / DVD / BD discs.
however, Burn files and folders to CD / DVD / BD discs on the fly.
Burn Audio CD from MP3, WMA, APE, FLAC, WAV, or BIN files.
Burn Video image file to CD / DVD disc.
Support two erasing modes for rewritable discs: Full Erasing and Quick Erasing.
PowerISO 7.8 Registration Key:
Mount ISO file and another popular image file as a virtual drive.
Support up to 23 virtual drives.
Make Audio Disc
Create standard Audio CD.
Create a mixed-mode CD.
Support Audio CD-TEXT.
Burn mp3, WMA, Wav, FLAC and ape files to CD.
Burn bin / cue, mp3 / cue, wma / cue, wav / cue, flac / cue and ape / cue audio image files to CD.
Edit existing Audio CD image files.
Support Playing Audio Tracks within the Audio CD image file.
PowerISO Crack Patch Audio CD ripper:
Rip audio CD to mp3, WMA, Wav, FLAC and ape files.
Rip audio CD to bin / cue, mp3 / cue, wma / cue, wav / cue, flac / cue and ape / cue audio image files.
ISO and BIN Converter
Convert ISO to BIN.
serial key Convert BIN to ISO.
Moreover, Convert Apple DMG files to ISO file.
Convert all popular images files to ISO file.
HOwever, Convert all popular images files to BIN file.
Open / Extract /Edit disk image file
Support all popular virtual disc image files, such as VMWare Virtual Disc Images(*.vmdk), VirtualBox Virtual Disc Images(*.vdi), Virtual PC Virtual Disc Images(*.vdi).
Create Bootable USB drive Using PowerISO Fully Licensed:
Poweriso Free Registration Code
Create a bootable USB drive for Windows XP, Windows Vista and Windows 7.
Support USB-FDD, USB-ZIP, and USB-HDD.
Supported CD/DVD disc image types
ISO (Generic CD images)
Support drag and drop.
Moreover, Support clipboard copy and paste.
Support multiple languages.
However, Support operating system: Windows NT 4.0, Windows 2000, Windows XP, Windows 2003, Windows Vista, Windows 2008, Windows 7
Support both 32-bit and 64-bit windows.
System Requirements:
supports the following operating systems:
Windows98 / Windows Me/ Windows NT 4.0 / Windows 2000 / Windows XP / Windows 2003 / Windows Vista / Window 7 / Windows 8 / Windows 10 operating system or above.
Intel Pentium 166MHz or above.
64MB memory.
At least 128MB hard disk space.
What’s New?
Can create a bootable USB FreeDOS and MS-DOS drive.
In addition, Can open 4kn hard disk image files.
Can convert it to iso file.
Supports the ext4 file system.
Improve support for the NTFS file system.
Some bugfixes and minor improvements
How To Install PowerISO Crack:
Start by downloading the installation file via the following link.
Extract the configuration file and run it.
Now press to install.
When the installation is complete.
Open the “Patch” folder.
Double-click Activator.exe.
Made! Enjoy the full version of PowerISO.
1 note
·
View note