#Wavlink router setup wizard
Explore tagged Tumblr posts
Visit Tumblr Blog
Explore Tumblr blogs with no restrictions, modern design and the best experience.
Last Seen Tumblr Blogs


Fun Fact
Tumblr Inc. has $15.1M in annual revenue.
Text
WavLink Mesh Wifi Setup
Get top best solutions for WavLink Mesh Wifi Setup @ https://bit.ly/3kI05a1
#Wavlink support#Wavlink router login#Wavlink router setup wizard#Wavlink Router Login Page#Wavlink Range Extender
2 notes
·
View notes
Text
Wavlink AV500 Powerline Setup
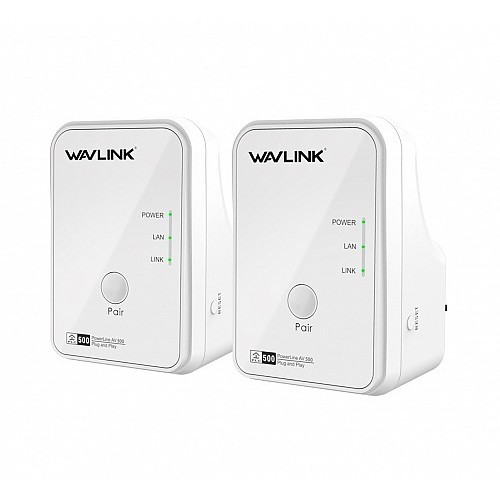
A strong internet connection is offered by the Wavlink AV500 Powerline setup of the wireless range extender, which may be extended using your Wi-Fi router/AP setup. It's ideal for frequent internet usage, including surfing, online gaming, video chats, buffer-free 4K HD video streaming, and more. It enables you to provide your mobile, computer, laptop, and other devices access to a high-quality wireless network. Starting with the Wavlink AV500 Powerline setup
Installation of Wavlink AV500 Powerline
This page contains instructions for setting up a Wavlink AV500 extender as an access point. One by one, the process is explained, and you won't need any further information.
Connect your AV500 repeater's power source to the wall outlet.
Switch on the access point and attach the Ethernet wire from the router to the LAN port of the extender.
Now that the Wi-Fi list is open on your computer, connect the Extender to the default Wi-Fi network.
Open any tab on the connected computer, type "http://wifi.wavlink.com or ap.setup" in the address box, then press Enter.
Request the login and password to open the web tab. Type "admin" as the choice in both locations, then click "Login."
To access the subsequent Wavlink Extender setup menu, select Wizard -> Select Access Point.
Create a new SSID, password, and protection from.
Once the progress meter is filled, wait an additional 60 seconds before requesting more.
After configuration changes and a reboot, the Wavlink AV500 repeater may now work as an access point.
Wavlink AV500 Powerline wps setup
Setting up a Wavlink AV500 extender using WPS:
You must carry out these actions one at a time if your Wavlink setup employs WPS.
Hold your Wavlink AV500 extender close to your router when it is connected to the power source to avoid disruptions.
An LED indication begins flashing after roughly 45 seconds of startup time.
When the router's light blinks to indicate it's ready to attach, press the WPS button to unlock it.
Before a flickering light indicating that it is connected to the router appears, press the WPS button.
Until the blinking light stops, you won't know the Wavlink AV500 extender setup is connected to the router.
Web browser setup for Wavlink Extender
The Wavlink AV500 powerline Extender may be configured via a web browser. You may finish the setup procedure using these steps.
Make sure your Wavlink extender and router are close to the power source when you plug them in.
After connecting the device to the socket, wait around 45 seconds for the LED light to begin blinking.
Go to the default network for Wavlink, Wavlink 2.4 GHz, in your mobile device's or computer's Wi-Fi list, and connect to it.
On the same computer or mobile device that you are connected to, launch the new web browser.
The Wavlink extender setup interface will launch. Please use the default username and password of "admin."
Select a language. Login Press.
On the following tab, you will be prompted to select your nation, time zone, and new password. The most recent password will be used when you log in again.
Open the Wavlink Web UI, choose the Wizard option, then choose Repeater mode. Next, find and choose your Wi-Fi host network.
Wait around 40 to 60 seconds until the progress metre is full before trying again.
When the flashing LED light returns to solid, the setup is sound.
0 notes
Text
How to Perform wifi.wavlink.com Login?

After installing a Wavlink range extender, the time to tweak its settings arrives. However, a lot of users face issues doing so because of their inability to perform wifi.wavlink.com login. The reason is lack of knowledge. Are you also unable to log in to your Wavlink extender? Nodding yes? Well, you are on the right post right now. All you have to do is read the steps discussed in this post and follow them carefully to log in to the Wavlink wireless extender.
Steps to Do wifi.wavlink.com Login
First and foremost, get access to a power socket and connect your Wavlink WiFi range extender to it. The extender must perfectly fit the socket. Thereafter, press the Power button located on your extender’s periphery to switch it on.
The moment the lights on your Wavlink device come to life (start glowing), consider grabbing a network cable and with its aid, connect your extender to the main router. In case you are unable to get your hands on the cable, continue with the wifi.wavlink.com login process with the help of a wireless source.
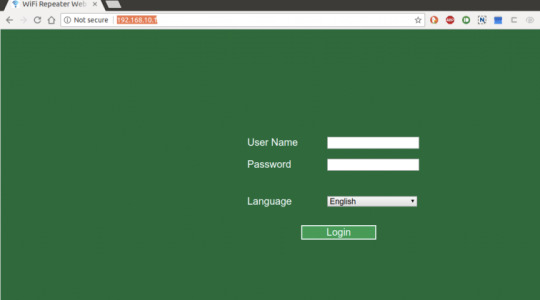
Now, the time to take the help of a computer or a laptop has come. So, switch on the device, whatever you prefer to use. Thereafter, load a web browser on it. Move the mouse cursor to the URL field of your browser as the next step. Done? Great! Key in the default Wavlink extender web address into it. Hit the Enter key to move ahead.
What’s that welcoming you? It is the login window of your Wavlink wireless range extender. Do you know what to do here? Here, you are required to input the default password of your Wavlink device. So, enter the same into the designated field and click Login.
The appearance of the dashboard of your Wavlink wireless device will be an indication that you have achieved wifi.wavlink.com login success. In case you fail to make it to the Wavlink extender setup wizard, check out the next section in order to do away with the hurdle that is stopping you from getting success.
Fixed: Can’t Do wifi.wavlink.com Login
If you are not able to get into the management page of your extender, then its first reason might be the incorrect entrée of the Wavlink password. Therefore, check the password you key in on the extender’s login screen. Is it correct? No? Well, in that case, mend your ways and see if the extender’s dashboard makes an appearance.
Did you even fail to make your way to the login page? This might happen if there is a mistake in the web address entrée. By entrée mistake, we are referring to the typos and the location where you input the extender’s web address. Do not enter the web address into the browser’s search field in any situation. Additionally, cross-check the web address before hitting the Enter key.
Another thing that might be preventing you from doing wifi.wavlink.com login and tweaking the settings of your range extender might be an improper extender-router connection. Wondering how? Well, the strength of the extender-router connection determines the internet connection's steadiness. If you are using an Ethernet cable for connecting your devices, then see to it that it is damage-free. Otherwise, you will keep facing the issue.
In case a wireless source is holding a connection, then ensure that your Wavlink extender and router are not too far. If they are, it is time to pull them a little closer. However, do not make the mistake of making the distance zero.
Are you sure that the web browser you’ve used in order to perform Wavlink WiFi extender login is updated? FYI, using an outdated web browser for accessing the wifi.wavlink.com login window can also drag you to login issues. Thus, upgrade your internet browser. In addition to that, consider navigating to the settings of your web browser to delete its cache, cookies, and search history.
The Conclusion
With that, we’ve reached the end of the post revealing the information to do wifi.wavlink.com login. Hopefully, the information mentioned in the post will be helpful for you and you will gain access to the web-based management utility of the range extender. Once you reach there, do not forget to get the firmware of your device updated. It will ensure that your device is performing well.
#wavlink extender#Wavlink WiFi Extender Login#wavlink extender setup#wavlink wifi extender#wavlink setup#http//ap.setup#how to set up wavlink wifi extender#wifi.wavlink.com login
0 notes
Text
Wifi.wavlink.com
Wifi.wavlink.com connects you to the 192.168.10.1 IP address. The default web addresses for signing in or customizing the wavlink wifi extender are http://wifi.wavlink.com or http://ap.setup. The IP address 192.168.10.1 is redirected by wifi.wavlink.com. Go to http://wifi.wavlink.com or http://ap.setup to reach the Wavlink extender setup page.
How do I log into wavlink?
With http://wifi.wavlink.com, logging into your Wavlink router is easier and less stressful. This is your Wavlink router’s default web address for logging in. Follow the instructions below to access the wifi.wavlink.com login page.
On a computer, open a web browser of your.
Type wifi.wavlink.com into the address bar and hit Enter.
The Wavlink router’s login screen will now appear.
Enter the username and password for your router.
This will take you to the Wavlink router’s setup page.
Is it possible to log in to Wavlink using an IP address?
Yes, users have the ability to do so. 192.168.10.1 is the default IP address for the Wavlink router setup. Follow the instructions below to log into your wavlink device.
Use a wireless or cable connection to connect to the wavlink network.
Type the URL into a web browser of your choosing.
Hit the enter key after typing 192.168.10.1.
Once the wavlink login box displays, enter your credentials.
By pressing the ‘Login’ button, you may access the wavlink router setup page.
What is the procedure for setting up a wavlink?
You may easily set up wavlink by following the steps below.
Connect a power supply to your wavlink device.
Allow the power light to harden before proceeding.
With an Ethernet connection, connect the modem to the wavlink device.
Connect your laptop to the Wavlink network using an Ethernet cable or a wireless connection.
Exit the wavlink router configuration wizard.
How do I connect the Wavlink router to my wireless network?
The most critical step in installing the Wavlink Router in your home network is to connect it to your Wi-Fi. To connect to the Wavlink ‘s Wi-Fi, a user can use the default credentials listed on the Wi-Fi setup card or in the instructions.
Connect the power source to the Wavlink range extender. Activate the power switch.
Allow the Power LED to turn on for a few seconds.
Go to your computer or mobile device’s Wi-Fi settings.
Select the Wavlink network name and enter the default Wi-Fi password to connect.
How to reset the wavlink router?
When your Wavlink router is powered on, press and hold the reset button for 30 seconds.
While still holding the reset button pressed, unplug the power of the router and hold the reset button for another 30 seconds
While still holding the reset button down, turn on the power to the unit again and hold for another 30 seconds. When your Wavlink router is powered on, press and hold the reset button for 30 seconds.
While still holding the reset button pressed, unplug the power of the router and hold the reset button for another 30 seconds
While still holding the reset button down, turn on the power to the unit again and hold for another 30 seconds.
0 notes
Text
Learn To Do Wavlink WiFi Extender Setup In A Simple Way
Wavlink extenders are always known for their better signal strength. The range that they cover are more than the other extenders. Therefore, in order to use this, you need to complete the wavlink wifi extender setup with wifi.wavlink.com. Though, when the wifi.wavlink.com is used for the setup, then it is the basic web browser method. But, if your WiFi router is WPS supported, then you can complete the wavlink wifi extender setup with WPS method. In this blog, you will get to know about the steps for both the methods. By the end of this blog, you will get your Wavlink WiFi extender working for the extension of this network. So, let’s check out the steps for both the methods in the following sections.
Steps To Complete The Wavlink WiFi Extender Setup
As you know there are two different methods to complete the setup for the Wavlink WiFi extender. Therefore, one by one, you will get to know about the steps for the extender setup using different methods.
Method 1: Using wifi.wavlink.com For Extender Setup
The very first method for the Wavlink WiFi extender setup is the web browser method. It is the very basic method that will help you to complete the Wavlink WiFi extender setup. This method is useful for everyone whether you have the WPS feature or not. So, following are the steps to complete the Wavlink WiFi extender setup with wifi.wavlink.com:
Step 1: Make sure you have connected the Wavlink extender to the power source.
Step 2: Now, press the power button to turn on the Wavlink extender.
Step 3: Then, you need to connect your system to the Wavlink extender’s network using the ethernet or wireless method.
Step 4: Launch Google Chrome or any other web browser of your choice to continue with the setup.
Step 5: Enter the web address as wifi.wavlink.com in the browser.
Step 6: This will open the setup wizard for the Wavlink extender on the screen.
Step 7: First, select the language of your choice from the drop-down menu.
Step 8: Then, enter the default login information for the Wavlink extender, and click on the Login button.
Step 9: The Wavlink extender will automatically detect the nearby WiFi router, and will connect to it.
Step 10: If the connected network is not the one you want to extend, then choose the name from the list.
Step 11: Then, enter the security password for that particular network as well to get connected to it.
Step 12: With this, your network will now be extended.
Step 13: Unplug the Wavlink WiFi extender in order to place it near to the dead zone.
Therefore, with this the Wavlink WiFi extender setup is complete with the web browser method i.e. wifi.wavlink.com. In this way, you will be able to cover up the maximum range for your network. If your main router has the WPS feature, and you want to save some time, move to the next section.
Method 2: Using WPS For Extender Setup
If your main router has the WPS feature, then the Wavlink extender setup can be completed in a few seconds. To do so, just go with the following steps:
Step 1: Make sure both your router and extender are connected to the power source and are powered on.
Step 2: Then, press the WPS button of your main router and keep it pressed till the WiFi light starts blinking.
Step 3: Now, instantly you need to press the WPS button on the Wavlink extender as well.
Step 4: Wait for the LEDs to get stable in solid green color for the devices.
Step 5: When the LEDs for both the devices become stable, it means your main network is extended with the Wavlink extender.
Step 6: Now, place the Wavlink extender at the location near to the dead zone but in the main WiFi’s range.
With this, the Wavlink Wifi extender setup is also complete using the WPS method. Now, you can connect any device to the extender’s network. You just need to search for the available WiFi networks from your device, connect it to the Wavlink’s extender network.
Connect With Extended Network!
Wrapping up! There is no need to worry if you are not in the range of the main WiFi network. Moreover, there is no need to change your location in order to access the network. The only thing you should do is the completion of the Wavlink WiFi extender setup with wifi.wavlink.com. With this, your network will get extended, and you can access the network from anywhere in your home. In case you got stuck somewhere with the setup process, then feel free to talk to our experts. They will identify the cause of the issue, and will help you to complete the Wavlink WiFi extender setup. Therefore, with this blog, get ready to connect with the extended network, and access the network at your desired location.
Visit Us: https://wifiwav.com/
#wavlink ac1200 setup#wavlink wifi extender setup#wifi.wavlink.com#wavlink setup#wavlink ac1200 router setup
0 notes
Text
Wavlink AC1200 Repeater Setup- WPS and Web-Browser Method
Gone are the days when one had to worry about slowed-down internet speeds, distributed bandwidths, and like issues. Adding a range extender/repeater to your network device hierarchy will go a long way in ensuring all-around network coverage. If you are looking to extend the network coverage of the existing router in your home/office, having a Wavlink AC1200 repeater will be an advantage. You can ensure improved coverage and 24/7 access to high-speed internet around your location. However, until you have mastered the steps to the Wavlink AC1200 repeater setup, realizing this goal can be difficult.
This blog will walk you through the steps to access the repeater’s setup page so you can complete the Wavlink AC1200 repeater setup process easily.
Things you would need for Wavlink setup
Before you begin with the Wavlink AC1200 setup, you will need to ensure that you have some essential details and equipment ready. These may be-
● The main router’s SSID and network key,
● Your extender’s default login credentials,
● Ethernet cable(s),
● The default repeater login web/IP address, and
● A working internet connection.
Default Wavlink Repeater Login Address
Web Address: https://wifi.wavlink.com
IP address: https://192.168.10.1
Login Credentials for your Wavlink Repeater
Default login username and password: admin
Beginning with the Wavlink AC1200 Repeater Setup
Setting up your Wavlink AC1200 as a repeater would require you to connect it to the main router wirelessly. You can follow the steps as mentioned, for the Wavlink repeater setup process:
● Connect your Wavlink AC1200 to a power outlet near your wireless router. Switch on the power supply and allow the device to come to a stable functioning state. You’ll see the LEDs on the front panel glow-up and the Power LED turn solid.
● When they do, open the wireless network Settings on your smartphone/computer and then connect to the Wavlink network. You will see the Wavlink SSID with the model number or the network band as a prefix. Click on the same and click on the connect button.
● Now, open a web browser and you will be redirected to the web-based setup page automatically. If you are not, you can manually enter the web address “wifi.wavlink.com” or the IP address 192.168.10.1 in the address bar of the browser and then press Enter.
● When the Wavlink login page appears, type in the default username and password of the Wavlink repeater and then click on the login button.
Modifying the Wavlink network settings
● On the setup wizard, you will be asked to select the main router network to connect to. A list of available networks will be shown. Select the SSID that belongs to the main router and type in the log-in password to connect to it.
● In the next screen, you can configure your network by assigning an SSID and a network protection key. Assign the same to the 5GHz network band as well.
● Once done, assign a new username and password for the login details.
● The final screen will show you a summary of the network configuration you have just changed. Review the same and you can click on the Finish button.
Relocate your Wavlink AC1200 now, to a location of your choice and connect your wireless-enabled devices.
Wavlink AC1200 Repeater Setup using WPS
WPS means “Wireless Protected Setup”. Using the WPS button present on the devices, you can sync them to work together and extend the signals further. If you are looking to set up your Wavlink AC1200 repeater using the WPS method, here are some steps you can follow:
● Locate the WPS button on your wireless repeater and the wireless router. Keep them close so they can communicate easily.
● To start with, press the WPS button on the main router. You’ll see the WPS LED glow.
● Within a duration of two minutes, press the WPS button on the extender as well.
● The two minutes duration is allotted so that you can get done with the complicated setup procedures which some devices entail.
● Now, you will need to wait until the Signal LED on the extender device changes to solid blue. This change in color will indicate that the WPS connection is successful and you can now proceed with surfing the internet.
The extended network will have the same network SSID as that of the main router network.
You can now connect your wireless devices and enjoy uninterrupted internet access.
Need more help with the Wavlink AC1200 repeater setup? Get in touch with the team now!
0 notes
Link
if you are not able to do the wavlink router login using the web address, you can use the IP address instead. Once you are done with the login process, you can go to the setup wizard and configure your device. For further details give us a call.
0 notes
Link
Are you getting frustrated with the error of wifi.wavlink.com not working but you still not find the solution of wifi.wavlink.com working. so don't be upset here we discuss some instruction which is used to solve this error. For this you have to find reset button and hold it approximately 8 seconds. However still wifi.wavlink.com is not working then you can visit our site here you find all customized settings of wavlink which is used to solve the error.
(https://www.wifiwav-link.com/)
#wifi.wavlink.com#Wavlink router setup wizard#wavlink repeater setup#wavlink extender setup#wifi.wavlink.com not working
0 notes
Text
Ap Extender Setup
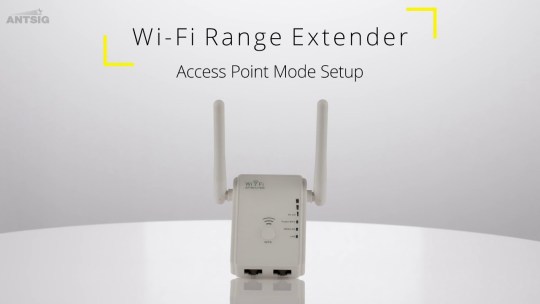
Would you want to see the WiFi router's current range increased? Do you have problems with your internet connection's connectivity? If so, a WiFi range extender can help you discover a fix for these issues. Having trouble accessing the ap.setup website? Do you want to set up your AP via the wizard? In essence, the web URL that is most frequently used to set up the WiFi extender is ap.setup. We've provided step-by-step instructions for the ap.setup for your device on this page. Starting here, let's examine the Ap Extender Setup login processes.
Simple Steps to Login to ap extender setup
You may easily complete the setup by entering the setup application web URL when the login page appears.
Basically, you have to log in to the web-based interface of your new WiFi extender.
The setup wizard will appear following a successful login.
The setup wizard for the extender will display the current network list.
Clicking on the dominating network you wish to maximise is the next step.
Then, on the applicable password screen, the Wi-Fi password must be typed.
Pick the Connect tab to complete the new extender setup with /ap.setup.
Congratulations! For http /ap.setup/, the new extender setup has been successfully completed.
Note:- If you need any help regarding your wifi extender so contact our technician or visit the official website that is ap.setup.
Want to use the ap.setup wizard to install a new extender?
You must first create an app setup login before connecting your WiFi Range Extender to a local web address. To discover how to log in, just read the information below.
You must press the extender's power button before the power LED sets.
Then, your phone and operating system must access the extender's network .
Now that your operating system has been successfully updated, you must choose a browser.
Then, carefully type in the ap.setup login after selecting the address portion rather than the search field, and press the enter key.
A login wizard is now shown on your operating system.
You may easily get in by using the admin password for the ap setup.
How to setup new extender via wps method?
You may setup your new extender without logging into the repeater wizard by selecting the Wi-Fi Protected Setup option.
The plug of the extender must first be merged with the AC wall socket.
A WiFi router should also be placed near to the new extender.
The WPS button on your new extension must now be visible and pushed for 5 to 6 seconds.
Find and simultaneously hold the WPS button on your home wifi router.
The connection has started to take shape when the extender's LED light begins to flicker green.
Wait until your new extender's LED lights are stable or solid green before using it.
How can I set up a Wavlink WiFi Extender using ap.setup?
Using the ap.setup wizard, you may easily set up your WiFi repeater, extender, or signal booster. You may easily set up your extender using this URL address. You must decide which extender may be set with this web address before installing the extender. Below is a list of extenders. The following Wi-Fi range extenders may be set using the ap setup.
Wavlink Extender Setup
comfast wifi range extender setup
Victony WiFi AC1200 Extender Setup
Wavlink AC1200 WiFi Extender Setup
Wavlink AC1200 Extender Setup
Re.rockspace.local Extender Setup
Brostrend Extender Setup
#Wavlink Extender Setup#comfast wifi range extender setup#Wavlink AC1200 WiFi Extender Setup#Victony WiFi AC1200 Extender Setup#Re.rockspace.local Extender Setup#Brostrend Extender Setup#ap.setup#ap setup#ap extender setup
0 notes
Text
Wavlink WiFi extender setup | wavlink extender setup | wavlink wifi extender
Would you like to set up a Wavlink WiFi extender? Are you unfamiliar with how to install the Wavlink extender? Not to worry! Everything you require to successfully set up Wavlink is covered on this page. Today every step is described, from where to put the Wavlink extender to how to connect it to the client devices. So without further ado, check out the sections below to discover how to easily set up a Wavlink WiFi extender.
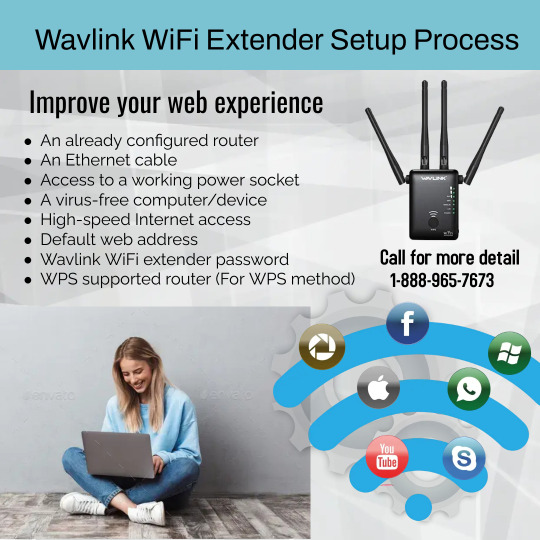
Two techniques can be used to set up a wavlink. For making things happen, you can either utilize the WPS button or go to http//ap.setup wizard. Make sure you have the following items on hand before beginning the Wavlink extender setup process:
a router that has previously been set up
a network cable
presence of a functioning power outlet
a machine/computer devoid of viruses
access to the Internet quickly
Standard web address
WiFi extender password for Wavlink
WPS-compatible router (For WPS method)
#wavlink extender#Wavlink WiFi Extender Login#Wavlink login#wifi.wavlink.com login#wavlink extender setup#wavlink wifi extender#Wavlink WiFi extender setup
0 notes
Text
How to Do Complete Wavlink AC1200 Setup?
Are you struggling with the Wavlink AC1200 router setup? Don’t know how to do Wavlink ac1200 setup? Well, don’t panic! You have reached the right spot. The Wavlink ac1200 router is a fantastic device that helps in getting the wireless coverage of the internet connection in all around the home or office. It delivers up to 1200 Mbps WiFi speed in order to support the multiple connected devices to the home network. There are several users who complain that they are facing trouble while performing the Wavlink ac1200 router setup on your device. The process is very easy to set up the Wavlink ac1200 router by using the web browser method. You just need to follow the steps as mentioned in this blog. You can get enough speed and WiFi coverage for gaming and streaming by using dual-band WiFi and high-performance antennas. With this device, you can such features like parental controls and security features. Let’s get started with the Wavlink AC1200 router setup process.
Step-by-Step Instructions for Wavlink AC1200 Setup
Go through the below guidelines for Wavlink ac1200 router setup through wifi.wavlink.com or IP address 192.168.10.1:
Step 1: To start the Wavlink ac1200 router setup, the first thing that you need to do is to plug in the router into the nearest power outlet.
Step 2: After that, turn on your router.
Step 3: Next, connect your Wavlink router to any of your wireless devices by either using the Ethernet cable or WiFi.
Step 4: Once you connect successfully Wavlink network, launch any updated web browser of your choice from your computer or laptop whatever you are using.
Step 5: Type wifi.wavlink.com or 192.168.10.1 IP address in the address bar of the web browser. Click on the enter button.
Step 6: In the next step, you have to enter the username and password for the Wavlink router in the respective field. Fill “admin” as the username and “password” in the password field.
Step 7: Once you logged in successfully to the Wavlink ac1200 router, you will be able to set your router device. After that, you can change the Wavlink network settings by browsing through some other section of the setup wizard.
Procedure to Configure Wavlink AC1200 Router
Look at the below instructions to know how to configure the Wavlink ac1200 router setup for your device:
Step 1: Firstly, visit to the Wavlink setup wizard by entering the 192.168.10.1 IP address or wifi.wavlink.com in the address bar of the web browser. At this web address, you can access the home page of your router device and can proceed with the configuration.
Step 2: Thereafter, you need to select the internet connection of your preference. You can also use the setup wizard to search for the internet connection type.
Step 3: In the next step, you have to configure the wireless settings of your Wavlink router. You need to provide the username and passkey for the wireless network.
Step 4: Once you make all the changes, tap on the Save button. After that, hit on the Close button to complete the Wavlink ac1200 router setup.
Congrats! With the above-mentioned instructions, you can easily complete the Wavlink AC1200 router setup on your device without any hassle. All the steps are simple and easy to follow. You just need to focus on following all the steps carefully as mentioned. However, if you have any issues during the Wavlink ac1200 setup then you can contact our expert team through our helpline number or live chat.
Visit Us: https://wifiwav.com/
#wavlink ac1200 setup#wavlink wifi extender setup#wifi.wavlink.com#wavlink setup#wavlink ac1200 router setup
0 notes
Text
Learn Easy Steps for Wavlink Router Login via wifi.wavlink.com
Want to enjoy buffer-free internet in your home or workplace? Do you want to configure the basic and advanced settings of your Wavlink router according to your preference? Well, by accessing wifi.wavlink.com you can easily complete the wavlink setup and wavlink router login. If you don’t know the steps then scroll down to learn the simple guidelines for wavelink router login through wifi.wavlink.com. Let’s get started.
Wavlink wireless setup is an amazing device that provides WiFi coverage all around the home or office. Anyone can enjoy high-speed internet without buffering once they complete the wavlink setup. It helps in resolving interruptions and buffering during streaming and playing online games. The wavlink WiFi setup offers a range of ultimate devices that provide wireless network coverage all around your place. To enjoy the wireless network coverage, you just need to complete the wavlink setup on your device.
Procedure for Wavlink Router Login by Using wifi.wavlink.com
Look at the below steps for wavlink router login by accessing wifi.wavlink.com from your system. All the steps are simple and easy to perform with which you can set up the wavlink within 10 minutes. Here’s are the steps:
Step 1: Firstly, open a web browser of your choice. Make sure that the web browser that you are using is updated to the latest version.
Step 2: Type wifi.wavlink.com or 192.168.10.1 in the address bar of the web browser. Click on the enter button.
Step 3: After that, the wavlink router login webpage displays on the screen. To go further, you need to enter the login credentials details.
Step 4: Enter the correct login credential detail in the appropriate fields i.e., the username and password.
Step 5: Once you entered the login button, you are navigated to the wavlink router setup wizard.
Step 6: Thereafter, the smart setup wizard will try to detect the internet connection type by itself. In case, if it fails to detect the internet connection then you need to select your internet connection manually.
Step 7: Now, you can move to the other step to configure the wireless settings of the wavlink router.
Step 8: In the next step, you need to enter the wireless network key or SSID and network passphrase of your WiFi network. Also, change the security type.
Step 9: After making the appropriate changes, then click on the Save button to apply the settings.
Step 10: At last, click on the Finish button to complete the wavlink setup.
Step 11: Once you logged in successfully into the wavlink web interface then you can easily configure the basic as well as advanced settings of the wavlink router.
That’s All! Hopefully, with the above-mentioned steps, you are able to complete the wavlink setup for your router device by using wifi.wavlink.com. Once you complete the wavlink setup, you can enjoy a buffer-free high-speed internet connection on your device. However, if you face any difficulty in the wavlink router setup then you can contact our professional expert team for better guidance and fix the issue immediately. Our professional experts are available 24×7 to listen and resolve your queries.
Visit Us: https://wifiwav.com
#wifi.wavlink.com#wavlink setup#wavlinkwifiextendersetup#wavlinkac1200setup#wavlinkac1200routersetup
0 notes