#delete website from cloudflare
Explore tagged Tumblr posts
Visit Tumblr Blog
Explore Tumblr blogs with no restrictions, modern design and the best experience.
Last Seen Tumblr Blogs


Fun Fact
Total funding amounts to $125.3M.
Text
A free image hosting solution for AO3 and elsewhere - A Tutorial (mobile-friendly!)
See the demo site made from this template IN ACTION: https://hotlink-archive-template.pages.dev/
This guide is for an easy, mobile-friendly way to host files for hotlinking on AO3 or elsewhere, using github and cloudflare pages.
I've encountered far too many dead links in fanfics and forums simply because a hosting service decided to dump older files, or they decided to change their TOS to no longer allow hotlinking or certain kinds of content (nsfw, fictional graphic content). See Optional Steps for even more options.
This is an easy, barebones way to permanently host images that you don't want deleted unexpectedly or that you can't host elsewhere. (Emphasis on barebones. This will not be a nice portfolio style site. Unless you decide to code that yourself!) You can follow the link above for an example of this type of site.
It is also EASY to upload and use on mobile devices after initial setup!
Tools you will need:
Cloudflare Pages is a free to use static site hosting service. This will publish your files and make them available online. This will publish your files and make them available online. There is a limit to the amount of data you can upload for free, but you can pay for proper hosting if you want to exceed it.
Github is a code sharing/storage platform. Your files will go here first before being published on Pages. You can edit and upload files through your browser at github.com, or through Github Desktop, a program you install on your computer. There are limits to Github repositories, but they are also generous (suggested 1GB to 5GB per repo).
Basic Setup
1. Create a github account
2. Copy this template repository hotlink-archive-template
Your website will be contained in a repository, a place where all the files and the revision history for your project are stored.
This template repository uses an "Action" (using python) to automatically create a "home" page with an Index of all the files in your repository every time it is updated.
NOTE: I recommend you set your repository to Private. Github's history feature is extensive, so if you have sensitive content or think you might want to delete something later, it will be hard to get rid of it completely once it's been committed and publicly available.
3. Enable Action permissions
In order for the Action script to work, you need to give Actions permission to read and write in your repository.
Within your repository, go to the tab Settings > Actions > General > Workflow Permissions

4. Create a Cloudflare account
5. Create a Pages project and link it to your Github repository
Your Pages project will create the front end of the site where the images will be displayed. You will be able to link those images to other platforms like AO3.
You can create a Pages project by going to Add > Pages. Name your project WISELY! This name will be your site's URL.
You will be prompted to import an existing Git repository. You will need to give it access to your Github to do this.

Select the repository on your Github you made for your project, then hit "Begin Setup".
Name your project WISELY! This name will be your site's URL.
You do not need to change any settings on the next page, so hit "Save and Deploy". Your image hosting site will now be live!
The URL will be "https://ProjectName.pages.dev". It may take a few minutes to become accessible.
Now you're done with the basic setup!
How to Add files
You can add any files you want to link to on AO3/elsewhere through mobile, desktop browser, or the Github desktop program!
Here is how to do it on Github.com:
Open up the repository that you made (it can be found at github.com/username/repositoryname). You will see a list of folders and files that are in that repository.
Click into the folder "fan-stuff".
In the top right, go Add file > Upload files and drag in the images you want added. You will need to name the images BEFORE you upload them, as there is not an easy renaming feature within Github's browser interface.
In the Commit changes box, choose a title for what action you are doing. This will help you backtrack uploads if needed.
For example, it could be "Uploaded Batman Art". Make sure it's set to "commit directly to the main branch", then commit those changes. This will upload the files.
Now, if you visit your site, you will see your uploaded image under the "fan-stuff" folder!
To embed/link your image, navigate to your file on your Pages site and copy the URL in the address bar. This URL is what you will use to embed your photo (using HTML or "add image as URL" tools some sites have).
Continue onto More Setup to customize your site and implement more advanced settings. See Tips/Troubleshooting if you're running into problems.
More Setup
Perform site customization/advanced setup with Github Desktop on your PC
Github’s web UI is great, but it has major limitations. I highly recommend that you use Github Desktop during the initial setup, as well as when you want to make major organizational changes to your files/site. Once you have everything set, though, you can use Github in your browser to upload whatever files you want to hotlink at the moment.
Download Github Desktop and “clone” (download a copy of) the repository you made.
This is the best time to rename/rearrange folders + files, etc.
There are other methods in the Troubleshooting section if you need, but Github Desktop is by far the easiest way
see Adding/Renaming Folders for important info on how to properly rename/add folders
see About the Index Page for how to customize your Index pages
Once you’re done editing, “push” (upload) all the changes you made to your online Github repository.
Having some sort of text editor like Notepad++ is useful for editing any code, the automatic color-coding is very helpful. You can edit in plain old Notepad as well, it just won’t look as nice.
About the Index Page
The template repository uses a python Action to automatically create an HTML "home" page with an Index of ALL the files in the folder every time it is updated.
This is particularly convenient for mobile use, as you can upload a file, and the python action automatically updates the Index page.
Note that if you wish to change any of the content on your Index pages, you must edit the "create-index.py" file, not the "index.html" file. The "index.html" file gets re-written every time the "create-index" Action is run in order to keep the file index up to date.
If you don’t want this to automatically generate, just disable the “create-index” Action and delete the .py files. You can just type in the direct address to get to each file, or you can manually maintain an home/Index page yourself.
Hiding Files/Folders
Feel free to delete files and folders you don't need, but be careful not to delete anything important (Don’t delete “index.html” or “create-index.py” or “.github/workflows”!)
You can hide files and even entire folders without deleting them! This will create "invisible" files/folders. Any files/folders included in the "exclusions" list in "create-index.py" will not be listed on the Index page, however they can still be found through the direct URL to the file.
On the flipside, this means simply hiding the file/folder from the Index page does not get rid of the file from your site. Anyone who has the URL will be able to find that file unless you remove it, or move its location to change the URL
Add the folder or file name to the “exclusions” list at the top of the "create-index.py" file so that it doesn’t show up on your Index page (highlighted below)

Tips/Troubleshooting
(Re)name your files before uploading
It’s not possible to rename image/media files on Github’s web UI (it is possible with the local Git program). The "create-index" Action lists out the names of your files exactly, so you will end up with ugly strings of numbers and letters on your Index page if you don't rename them, which is terrible to look at and also plain old CONFUSING to navigate.
So if you're uploading on mobile or through Github on browser, name your files with easy to remember and distinctive filenames before you go ahead and upload them. This makes everything much easier, and it makes your Index page look nice :)
My website isn’t updating when I edit my Github repository!
Check to see if your Pages is retrieving from the correct branch, and if it has automatic deployments enabled.

Can’t see your Github repository when trying to link it on Cloudflare?
Check your Github applications Repository Access settings. Go to your ACCOUNT Settings > Integrations - Applications > Cloudflare > Repository Access

Index action is failing!
Go back to step 3 in Basic Setup and check if you’ve given Actions permission to read and write. If that’s not the issue, Go into your Action History and check the error message to find the specific problem.
How do I rename a folder (or move a file) in Github’s web UI?
It isn’t possible to directly rename a folder in Github’s web UI, doing it using Git on your computer is the most foolproof way to do it. But there is a way (except for media files).
Go into the folder you want to rename and select a file such as “index.html” and enter the “edit” mode.
Go to the file name and backspace until you can edit the parent folder name as well. This will create a new folder with the new name.
You’ll have to do this to every file in the folder until they’re all in the new folder.
Unfortunately, you can’t do this with media files like png/jpg/etc, because entering the “edit” mode on a photo “breaks” it somehow, and bye-bye image :’) (Don’t worry if this happens, just don’t commit the change or roll it back in your history).
Optional Steps
Storing Locally instead of on Github
Although this guide is written with Cloudflare's Github integration in mind, particularly for easy online/mobile access, you can also keep your files locally on your PC and directly upload your assets onto your Pages project. This gives you full control over what happens to your files. (Keeping backups is a good idea. You can still use Github Desktop to do this, just keep your repository on your PC.)
Simply clone/download the repository as it is, customize it as you like, and create a NEW Pages project on Cloudflare, using "Direct Upload" to upload your files
Once you have connected a Pages project with Github, there is no way to change the deployment method to Direct Upload or vice versa.
One thing that will NOT work the same is the "create-index" Action that only works on Github.
I have made a "create-index.exe" that will execute the "create-index.py" files in the exact same way as they would work with the Action. You do not have to install python for this to work (if I did everything right). Simply run "create-index.exe" whenever you make a change and want to update the "index.html" files
Remember, this is EXACTLY THE SAME as the "create-index" Action, meaning you have to edit each "index.py" file when you rename folders, add a folder, want to exclude a file from the Index page, etc. (See Adding/Renaming Folders for how to do this)
Make deployment (semi-)Manual
You can play with cloudflare and github to make deployment of your site a manual step you have to trigger, instead of automatic with each commit (default setting). This is a safeguard in case you accidentally make a change or delete something from your github, it won't affect your website.
Deploy w/ Branches
You could do a semi-automatic deployment with a "Production" branch on your github that is separate from the branch you edit. This creates an extra step before anything is published on Cloudflare. A safeguard against accidental changes/deletion of sorts :)

Go to Settings > Build tab > Branch Control
Choose your Production Branch (MAIN or CLOUDFLARE) and enable (or disable) automatic deployments
If you choose MAIN, every change you commit to MAIN will be published to Pages
If you choose CLOUDFLARE, any changes you make to MAIN will not show up on your Pages site until you Pull from MAIN to CLOUDFLARE
To Pull changes from MAIN to CLOUDFLARE, go to your github repository
Above your files on the Left, you will see a toggle to choose which branch you are on.
Choose Cloudflare. There will be a message like "This branch is 7 commits ahead of, 2 commits behind main." Click "2 commits behind"
Click "Create a Pull Request". Then click "Merge Pull Request". If everything is correct, this should trigger a build on your Cloudflare
Deploy w/ Github Actions
Or you can create a manual command that you have to enter on github to trigger a deployment on cloudflare. If you're paranoid about anything happening to your site due to a mishap on the Github side, this is a safe choice. Unless you manually trigger the command, your Pages site will be completely untouched no matter if something happens to your repo.
This can be done in many ways, I think the most straightforward is with Deploy Hooks (maybe in conjunction with Actions if you want to make it mobile-friendly), and might be a bit complicated, but not too hard to figure out with some Google-fu.
Here’s some links I think will be useful (note: I don’t use this method, so these haven’t been tested)
Manual trigger action tutorial
How to configure Github webooks
Find me on Bluesky. Or if you have a problem, open an Issue on this project :)
I'll try to answer your questions as best I can! But really, I am the most amateur of amateurs and figured this all out using Google, so I might not be of much help ^^;
I also recommend Squidge Images (an offshoot of Squidge.org) as a fairly trustworthy alternative. However, Squidge Images does have some additional rules that Squidge does not, and what crosses the line is at their discretion.
I also posted this over on AO3!
5 notes
·
View notes
Text
Found another odd tag — keyed off the word "hiding" — and this time it's a long one!

So, the full tag is:
#blac chyna is hiding true feelings about her ‘rebirth’ makeover – her ‘lip clamps & droops’ are the proof
This sounds like a celebrity gossip headline! And sure enough, this tag is full-to-bursting with this article exclusively.

I got this from the desktop site, because it's wild to see. It's just a wall of the same article, all the way down, for multiple pages.
They're all from early November 2023, and all from blogs with names that end in *-polycom, *-mag, or *news. It seems fairly self-evident that this is the work of some kind of tabloid, but I'm a curious cat. I want to dig deeper.
Digging Deeper
Most of these posts tell you (they don't provide links!) to go read the full article on POLYCOM. Ok, what is a POLYCOM? I don't think it's Poly Inc., maker of video- and teleconferencing appliances, but a few cursory Google and DuckDuckGo searches yield no evidence of anything else.
The most recent post tells us to go track down the article ourselves on "IN TREND", but provides no URL or link. Searching around for "IN TREND" on the web is fairly difficult, returning results for well-known fashion publications, trend analytics, and a brand of clothing called "Intrend". Searching for "In Trend Today" returned more interesting results, including an InTrendToday YouTube Channel and Facebook page. The Facebook page seems to have stopped posting in late 2018, but the YouTube Channel last posted a video on Dec 18, 2023. I'll talk more about the YouTube Channel under the cut at the end of this post.
Some of these posts do have "read more" links pointing to posts on Wordpress, all of which claim to be "on MAG NEWS". Each *-mag blog links out to a separate Wordpress account which seems to be re-uploading the same story. All of these Wordpress Accounts are deleted (for violating Wordpress ToS), and all of these linked posts are gone (here are two examples):

Somehow, I doubt this is some covert arm of the Maricopa Association of Governments newsroom.
Digging down into the results on Tumblr, I found a copy of this post made by the blog vouxsportsnews. They link a Wordpress article from another dead Wordpress account:

BUT, their most recent post on their blog (a gossip article about Zendaya posted on Jan 5, 2024) does have a working Wordpress link, to vouxsportsnews.wordpress.com (clever 🙄):

This is an archetypal internet-based gossip rag. I didn't know these still existed! I guess Wordpress is hunting them down for sport?
The "Read More ..." link in the article goes to a website called top.neotrends.today, which is a sketchy link I will not be clicking on. The "full article" is apparently hosted on www.primesky.media, which I also will not be directly navigating to. I did manage to get a screenshot of the front page of primesky today (Jan 8, 2024) using a webtool:

I blurred the article shown on this page to preserve the privacy of the person it featured.
Primesky is hosted on a Cloudflare virtual private server, and no public info is available on who owns the primesky URL. A search for "redroads amag" on DuckDuckGo leads back to primesky. A search of the same on Google leads to a website at www.clickhere.world, which is immensely sketchy and looks identical to primesky. At this point, I'm going to end my search for a culprit.
Conclusion
I thought I could find the tabloid hydra's body, but I just found more heads. I'm not surprised the operators of a gossip rag bot network on Tumblr are also playing dirty on Wordpress, and covering their digital tracks well. Sometimes it's best to just report spam and go on with your day.
It should go without saying, but DO NOT NAVIGATE to these websites! At worst, they will give you every virus. At best, they will mine crypto in the background of your browser (and rot your brain).
The YouTube Channel Digression
The YouTube channel intrendtoday was created on Oct 4, 2017, and it has more than 53,000 subscribers as of my posting this post (Jan 8, 2024). However, the earliest video on the channel was posted on Nov 7, 2023. That is suspiciously close to when all of these Blac Chyna spam articles went up.
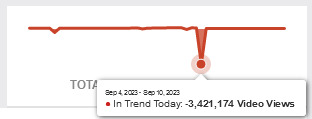
Given that the videos posted get less than 50 views on average, I think the grossly-out-of-proportion subscriber count is evidence of bot subscribers. Maybe the channel re-branded and deleted a prior back-catalog? Archive.org has no snapshots of this YouTube channel, but SocialBlade claims they lost nearly 3.5 million video views in early September of 2023 (indicating they deleted a lot of videos).
SocialBlade also indexes this channel under the name "demattradinginfo", not "intrendtoday". Archive.org doesn't have records of a YouTube URL for the channel demattradinginfo, but a Google search of that name shows results for Demat Accounts, which are a type of financial account commonly used in India to hold securities and trade stocks.
It's possible that whomever is behind the gossip news spam is also in control of this YouTube channel. I wouldn't be surprised, given how frequently people offering financial advice on social media are either scammers or spammers (and sometimes both!). However, I have no proof that the people behind this YouTube channel are the same people behind this social media gossip spamming.
#adventures in tagging#tumblr#search#google search#duckduckgo#tabloids#spam#blogging#wordpress#subterfuge#internet safety#youtube#fintech bros#social media
9 notes
·
View notes
Text
How can I Optimize Website Speed?

Website performance plays a vital role in SEO, user experience, and conversion rates. One of the most common questions from site owners is: How can I optimize website speed? A fast-loading website not only enhances user satisfaction but also improves rankings on search engines like Google. In today’s digital age, even a delay of a few seconds can lead to a noticeable drop in engagement and sales.
In this article, we’ll explore the most effective strategies to optimize your website speed and keep visitors—and search engines—happy.
Why Website Speed Matters
Before diving into tactics, it’s essential to understand why website speed optimization is important:
Better SEO rankings: Google considers page speed a ranking factor.
Improved user experience: Visitors expect fast-loading pages.
Higher conversion rates: Faster sites lead to more leads and sales.
Lower bounce rates: Slow sites push users away quickly.
How Can I Optimize Website Speed? Key Steps to Follow
To answer the question how can I optimize website speed, let’s look at proven strategies categorized into core areas.
1. Measure Your Current Website Speed
Start with a performance analysis to identify slow-loading elements.
Tools to Use:
Google PageSpeed Insights
GTmetrix
Pingdom Tools
These tools provide a speed score and actionable recommendations.
2. Optimize Images
Images often account for the bulk of a page’s load time.
Best Practices:
Use modern formats like WebP.
Compress images using tools like TinyPNG or ImageOptim.
Set appropriate image dimensions.
Implement lazy loading to delay off-screen images.
3. Minimize HTTP Requests
Each element on your page (scripts, stylesheets, images) makes an HTTP request.
Ways to Reduce Requests:
Combine CSS and JavaScript files.
Use CSS sprites for icons and small graphics.
Eliminate unnecessary plugins or third-party scripts.
4. Use a Content Delivery Network (CDN)
A CDN stores copies of your site’s files in servers worldwide, reducing latency for global users.
Popular CDN Providers:
Cloudflare
Amazon CloudFront
BunnyCDN
This step is especially important for sites with international traffic.
5. Enable Browser Caching
Browser caching allows users’ browsers to store files locally, so they don’t have to reload everything on repeat visits.
How to Enable:
Set caching rules in your .htaccess file.
Use a caching plugin if you’re on WordPress (like WP Rocket or W3 Total Cache).
6. Minify CSS, JavaScript, and HTML
Minification removes whitespace, comments, and unnecessary characters from code files.
Tools to Use:
UglifyJS (for JavaScript)
CSSNano (for CSS)
HTMLMinifier (for HTML)
This can significantly reduce page load times.
7. Upgrade Your Hosting Provider
Your web host plays a huge role in load speed. If you're on shared hosting and experiencing lags, it might be time to upgrade.
Options to Consider:
VPS (Virtual Private Server)
Dedicated hosting
Managed WordPress hosting (e.g., SiteGround, Kinsta)
8. Reduce Redirects
Redirects create additional HTTP requests and delay page rendering. Audit your site and remove unnecessary redirects, especially redirect chains.
9. Keep Your Website Clean
Outdated themes, unused plugins, and bloated code slow down your site.
Action Steps:
Regularly delete unused themes/plugins.
Update your CMS and plugins frequently.
Streamline your database using tools like WP-Optimize.
Learn More: In-Depth Optimization Guide
Want to explore more answers to “how can I optimize website speed” with visuals, step-by-step tutorials, and expert advice? Visit this comprehensive website speed optimization guide to dive deeper.
Final Thoughts
A slow website is more than just an inconvenience—it’s a conversion killer and a ranking risk. By understanding how to optimize website speed, you can deliver faster load times, improve your search visibility, and create a seamless user experience.
0 notes
Text
Tips for WordPress That Every Webmaster Should Know
1. Optimize Website Speed for Better Performance
Website speed is vital for user experience and SEO rankings. Slow-loading sites often lose visitors quickly. To improve speed, webmasters should minimize the use of large images. Compress images using tools like TinyPNG or Smush. Use caching plugins such as W3 Total Cache or WP Rocket. Reduce the number of plugins to avoid unnecessary bloat. Enabling lazy loading for images and videos can also enhance performance. Choose a reliable WordPress Development Agency for faster server response times.

2. Use SEO Plugins to Boost Visibility
Search engine optimization (SEO) is essential for driving traffic. WordPress offers several powerful SEO plugins. Yoast SEO and Rank Math help optimize content. They offer real-time suggestions on keyword usage, readability, and meta descriptions. Set proper permalinks with relevant keywords. Add alt text to all images for better indexing. Use internal and external links to strengthen the content’s relevance.
3. Strengthen Website Security
Webmasters must prioritize security to prevent hacking. Install security plugins like Wordfence or Sucuri. Use two-factor authentication (2FA) to protect admin accounts. Regularly update WordPress core, themes, and plugins. Use strong passwords and avoid using 'admin' as a username. Backup your website regularly using plugins like UpdraftPlus or Jetpack. Set up a firewall to block suspicious traffic.
4. Choose a Mobile-Responsive Theme
Most users access websites on mobile devices. Ensure your WordPress theme is mobile-friendly. Select a responsive theme like Astra or GeneratePress. Test your website on different devices and screen sizes. Use Google’s Mobile-Friendly Test tool to verify compatibility. Avoid using large pop-ups that may block content on smaller screens.
5. Regularly Update Plugins and Themes
Outdated plugins and themes are security risks. Always update to the latest versions. Updates often include bug fixes and performance improvements. Before updating, back up your website to avoid data loss. Use the ‘Enable auto-updates’ feature in WordPress. Deactivate and delete unused plugins.
6. Use Custom Permalinks for Better Navigation
Default WordPress URLs are not user-friendly. Use custom permalinks with clear keywords. Go to Settings > Permalinks and select ‘Post Name’. WordPress SEO Services make URLs readable and SEO-friendly. For example, use yoursite.com/tips-for-wordpress instead of yoursite.com/?p=123.
7. Leverage Content Delivery Networks (CDN)
A CDN speeds up content delivery by using multiple servers. It reduces loading times for global visitors. Popular CDN services include Cloudflare and BunnyCDN. CDNs also enhance website security by blocking malicious traffic. They reduce server load and prevent downtime during traffic spikes.
8. Optimize Images for Faster Loading
Large images slow down websites. Use image compression tools like Imagify or ShortPixel. Choose the correct image format: JPEG for photos, PNG for graphics. Use WebP format for smaller file sizes without losing quality. Enable lazy loading to delay image loading until users scroll.
9. Create Backups Regularly
Backups protect your website from data loss. Use backup plugins like UpdraftPlus or BackupBuddy. Store backups on external platforms like Google Drive or Dropbox. Schedule automated backups weekly or daily. Test the restoration process regularly to ensure backups work.
10. Enable Automatic Database Optimization
Over time, WordPress databases accumulate unnecessary data. This slows down the website. Use the WP-Optimize plugin to clean up revisions, spam comments, and transients. Optimize your database regularly to maintain performance.
11. Use a Staging Site for Testing
Never make direct changes to a live site. Use a staging site to test updates, plugins, or design changes. Staging sites are replicas of your live website. WordPress Consultant allow safe testing without affecting the live version. Many hosting providers offer one-click staging environments.
12. Optimize Your WordPress Dashboard
A cluttered dashboard slows down the workflow. Remove unnecessary widgets and plugins. Use the Screen Options menu to simplify the view. Organize frequently used tools for easy access.
13. Use Strong Call-to-Actions (CTAs)
Effective CTAs increase user engagement. Use clear and actionable language. Place CTAs strategically, like at the end of blog posts or on landing pages. Use contrasting colors to make CTAs stand out. Keep the CTA text concise, such as "Get Started" or "Learn More".
14. Integrate Google Analytics for Tracking
Google Analytics provides insights into website traffic. It helps track visitor behavior and popular content. Install the Google Site Kit plugin for easy integration. Use analytics data to improve content and marketing strategies.
15. Optimize Comments Section to Reduce Spam
Spam comments affect website credibility. Use anti-spam plugins like Akismet or Antispam Bee. Moderate all comments before publishing. Use CAPTCHA to prevent automated spam bots. Disable comments on older posts to reduce spam.
16. Use Schema Markup for Better SEO
Schema markup helps search engines understand your content. Use the Schema & Structured Data for WP plugin. Add schema types like articles, reviews, or FAQs. WordPress Expert improves rich snippets in search results.
17. Set Up Google Search Console
Google Search Console tracks your website’s SEO performance. It identifies indexing issues and broken links. Submit your sitemap for faster indexing. Monitor search queries and optimize content accordingly.
18. Optimize for Voice Search
Voice search is growing rapidly. Use conversational keywords and phrases. Optimize content with FAQ sections. Use schema markup to enhance visibility in voice search results.
19. Use Lightweight Themes for Better Speed
Heavy themes slow down websites. Use lightweight, fast-loading themes like Neve or Hello Elementor. Avoid themes with too many built-in features. Test your site speed with tools like GTmetrix or Pingdom.
20. Improve Internal Linking
Internal links boost SEO and keep visitors on your site longer. Link to related posts and pages naturally. Use descriptive anchor texts with relevant keywords. Ensure all internal links are functional and relevant.
By following these tips, webmasters can enhance their WordPress website's performance, security, and SEO. Consistent optimization and regular updates will ensure a smooth and efficient user experience.
1 note
·
View note
Text
Speed Optimization Strategies Used by Website Maintenance Company India

Website speed plays a critical role in user experience, search engine rankings, and overall business success. A slow-loading site can lead to high bounce rates, decreased conversions, and lower SEO performance. This is why businesses seek the expertise of a website maintenance company in India to implement effective speed optimization strategies. In this blog, we'll explore the key techniques these companies use to enhance website performance.
Why Website Speed Optimization Matters
Before diving into strategies, let's understand why website speed is crucial:
Improved User Experience: Faster websites offer better navigation and engagement.
Higher Search Engine Rankings: Google prioritizes fast-loading websites.
Increased Conversions: Studies show that even a one-second delay can reduce conversions by 7%.
Lower Bounce Rates: Users are more likely to stay and explore a fast, responsive site.
Website Maintenance Company India employs cutting-edge tools and techniques to optimize speed while ensuring long-term performance.
Key Speed Optimization Strategies
1. Image Optimization
Images significantly impact page load time. Website Maintenance Services India uses various methods to optimize images without compromising quality.
Techniques Used:
Compressing images with tools like TinyPNG and ImageOptim
Implementing next-gen formats like WebP
Using responsive images with adaptive sizing for different devices
Pro Tip: Properly optimized images can reduce load time by up to 40%.
2. Caching Techniques
Caching stores frequently accessed resources to minimize server response time.
Caching Strategies:
Browser Caching: Stores static files like images and CSS for repeat visitors.
Server-Side Caching: Reduces server load by serving pre-generated content.
CDN Caching: Distributes content across global servers for faster access.
Did You Know? A reliable website maintenance company often integrates advanced caching solutions like WP Rocket and LiteSpeed Cache.
3. Content Delivery Network (CDN) Integration
A CDN distributes website content across multiple servers worldwide, ensuring users access the site from the nearest server.
CDN Benefits:
Reduces latency by minimizing the physical distance between the user and server
Balances traffic loads to prevent server overload
Enhances website security with DDoS protection
Popular CDNs: Cloudflare, Akamai, and StackPath are frequently implemented by website maintenance companies.
4. Minimizing HTTP Requests
Every element on a webpage (e.g., images, scripts, and stylesheets) requires an HTTP request. Reducing these requests significantly speeds up loading times.
Optimization Techniques:
Combining CSS and JavaScript files
Using CSS sprites to consolidate multiple images
Removing unnecessary plugins and scripts
Expert Insight: Streamlining website resources can decrease load time by 20% or more.
5. Implementing Lazy Loading
Lazy loading defers the loading of non-essential content (e.g., images and videos) until the user scrolls to it.
Advantages:
Reduces initial page load time
Conserves bandwidth
Enhances performance on content-heavy websites
Tools Used: WordPress plugins like a3 Lazy Load and WP Rocket simplify lazy loading implementation.
6. Database Optimization
Over time, website databases accumulate unnecessary data, slowing down performance. Wordpress Maintenance Service regularly cleans and optimises databases.
Optimization Steps:
Deleting expired transients and spam comments
Removing redundant post revisions
Optimizing database tables using tools like WP-Optimize
Pro Tip: Scheduled database cleanups ensure consistent performance.
7. Code Optimization
Clean, efficient code directly impacts website speed.
Best Practices:
Minifying CSS, JavaScript, and HTML files
Eliminating render-blocking resources
Adopting asynchronous loading for scripts
Insight: Experienced Indian developers use tools like Autoptimize and UglifyJS to streamline code for maximum efficiency.
Why Choose a Website Maintenance Company in India for Speed Optimization?
India has become a hub for high-quality, cost-effective website maintenance services. Companies here combine technical expertise with innovative strategies to deliver outstanding performance improvements.
Key Advantages:
Cost-Effective Solutions: Competitive pricing without compromising quality.
Advanced Tools and Techniques: Access to the latest performance optimization tools.
Global Expertise: Extensive experience working with international clients.
Ongoing Support: Regular performance monitoring and proactive maintenance.
Conclusion
Website speed is a critical factor in ensuring a positive user experience, better SEO rankings, and higher conversion rates. Partnering with a professional website maintenance company India gives businesses access to advanced speed optimization strategies that keep their websites running smoothly. If you're looking to enhance your site's performance, consider consulting with experts who can tailor solutions to meet your business needs.
#websitemaintenanceservicesindia#websitemaintenancecompanyindia#wordpresswebsitemaintenanceservices#wordpresswebsitemaintenancecompany#wordpressmaintenanceservice#wordpressmanagementservices
0 notes
Text
Prevent Subdomain Takeover in Laravel: Risks & Fixes
Introduction
Subdomain takeover is a serious security vulnerability that occurs when an attacker gains control of an unused or misconfigured subdomain. If your Laravel application has improperly removed subdomains or relies on third-party services like GitHub Pages or AWS, it may be at risk. In this blog, we will explore the causes, risks, and how to prevent subdomain takeover in Laravel with practical coding examples.

A compromised subdomain can lead to phishing attacks, malware distribution, and reputational damage. Let’s dive deep into how Laravel developers can safeguard their applications against this threat.
🔍 Related: Check out more cybersecurity insights on our Pentest Testing Corp blog.
What is Subdomain Takeover?
A subdomain takeover happens when a subdomain points to an external service that has been deleted or is no longer in use. Attackers exploit this misconfiguration by registering the service and gaining control over the subdomain.
Common Causes of Subdomain Takeover:
Dangling DNS Records: A CNAME record still points to an external service that is no longer active.
Unused Subdomains: Old test or staging subdomains that are no longer monitored.
Third-Party Services: If a subdomain was linked to GitHub Pages, AWS, or Heroku and the service was removed without updating the DNS settings.
How to Detect a Subdomain Takeover Vulnerability
Before diving into the fixes, let’s first identify if your Laravel application is vulnerable.
Manual Detection Steps:
Check for dangling subdomains: Run the following command in a terminal: nslookup subdomain.example.com If the response shows an unresolved host but still points to an external service, the subdomain may be vulnerable.
Verify the HTTP response: If visiting the subdomain returns a "404 Not Found" or an error stating that the service is unclaimed, it is at risk.
Automated Detection Using Our Free Tool
We recommend scanning your website using our free Website Security Scanner to detect subdomain takeover risks and other security vulnerabilities.
📷 Image 1: Screenshot of our free tool’s webpage:

Screenshot of the free tools webpage where you can access security assessment tools.
How to Prevent Subdomain Takeover in Laravel
Now, let’s secure your Laravel application from subdomain takeover threats.
1. Remove Unused DNS Records
If a subdomain is no longer in use, remove its DNS record from your domain provider.
For example, in Cloudflare DNS, go to: Dashboard → DNS → Remove the unwanted CNAME or A record
2. Claim Third-Party Services Before Deleting
If a subdomain points to GitHub Pages, AWS S3, or Heroku, ensure you delete the service before removing it from your DNS.
Example: If your subdomain points to a GitHub Page, make sure to claim it back before deleting it.
3. Implement a Subdomain Ownership Validation
Modify Laravel’s routes/web.php to prevent unauthorized access:
Route::get('/verify-subdomain', function () { $host = request()->getHost(); $allowedSubdomains = ['app.example.com', 'secure.example.com']; if (!in_array($host, $allowedSubdomains)) { abort(403, 'Unauthorized Subdomain Access'); } return 'Valid Subdomain'; });
This ensures that only predefined subdomains are accessible in your Laravel app.
4. Use Wildcard TLS Certificates
If you manage multiple subdomains, use wildcard SSL certificates to secure them.
Example nginx.conf setup for Laravel apps:
server { listen 443 ssl; server_name *.example.com; ssl_certificate /etc/ssl/certs/example.com.crt; ssl_certificate_key /etc/ssl/private/example.com.key; }
5. Automate Monitoring for Subdomain Takeovers
Set up a cron job to check for unresolved CNAME records:
#!/bin/bash host subdomain.example.com | grep "not found" if [ $? -eq 0 ]; then echo "Potential Subdomain Takeover Risk Detected!" | mail - s "Alert" [email protected] fi
This script will notify administrators if a subdomain becomes vulnerable.
Test Your Subdomain Security
To ensure your Laravel application is secure, use our free Website Security Checker to scan for vulnerabilities.
📷 Image 2: Screenshot of a website vulnerability assessment report generated using our free tool to check website vulnerability:

An Example of a vulnerability assessment report generated with our free tool, providing insights into possible vulnerabilities.
Conclusion
Subdomain takeover is a critical vulnerability that can be easily overlooked. Laravel developers should regularly audit their DNS settings, remove unused subdomains, and enforce proper subdomain validation techniques.
By following the prevention techniques discussed in this blog, you can significantly reduce the risk of subdomain takeover. Stay ahead of attackers by using automated security scans like our Website Security Checker to protect your web assets.
For more security tips and in-depth guides, check out our Pentest Testing Corp blog.
🚀 Stay secure, stay ahead!
1 note
·
View note
Text
How to Fix and Speed Up Your Slow WordPress Site

Dealing with a slow website can be frustrating and detrimental to your business. If you're wondering how do I fix a slow WordPress site?, you’re in the right place. Addressing site speed is essential for improving user experience and search engine rankings. For more insights on why your site might be slow, check out this useful guide: Why is My WordPress site so slow?.
Identify Performance Issues
How to know if your WordPress site is slow or not? Utilize tools like Google PageSpeed Insights, GTmetrix, or Pingdom to analyze your site's speed. These tools provide a detailed breakdown of areas needing improvement.
Optimize Your Images
Large image files are a common cause of slow websites. Compress your images using plugins like Smush or EWWW Image Optimizer to ensure they load quickly without losing quality.
Implement Caching
Caching can significantly reduce load times by storing static versions of your pages. Plugins such as WP Rocket or W3 Total Cache are highly effective in implementing caching for your WordPress site.
Minify CSS, JavaScript, and HTML
Minifying your CSS, JavaScript, and HTML files reduces their size and improves load times. Plugins like Autoptimize can help automate this process, removing unnecessary characters and spaces from your code.
Use a Content Delivery Network (CDN)
A CDN distributes your site’s static content across multiple servers worldwide, reducing load times for users regardless of their location. Popular CDN services include Cloudflare and StackPath.
Upgrade Your Hosting Plan
Your hosting provider plays a crucial role in your site's speed. If your site is slow, consider upgrading to a hosting plan that is optimized for WordPress, such as those offered by SiteGround or WP Engine.
Optimize Your Database
Over time, your WordPress database can become cluttered with unnecessary data, slowing down your site. Use a plugin like WP-Optimize to clean and optimize your database regularly.
Reduce the Number of Plugins
Having too many plugins can slow down your site. Regularly review your plugins and deactivate or delete any that are unnecessary or causing performance issues.
Keep WordPress Updated
Ensure your WordPress core, themes, and plugins are always up to date. Updates often include performance improvements and security patches that can help keep your site running efficiently.
Enable GZIP Compression
GZIP compression reduces the size of your files before sending them to the browser, speeding up your site. Most caching plugins offer an option to enable GZIP compression, or you can enable it through your hosting provider.
Choose a Lightweight Theme
Heavy themes with too many features can slow down your site. Opt for a lightweight, performance-optimized theme like Astra or GeneratePress to ensure faster loading times.
In summary, understanding how to fix a slow WordPress site involves a combination of optimizing images, leveraging caching, minifying files, using a CDN, upgrading your hosting, and more. By addressing these factors, you can significantly improve your site’s performance.
For more detailed tips on improving site speed, refer to this comprehensive guide: Why is My WordPress site so slow?.
By implementing these strategies, you can effectively address how can I speed up my WordPress site? and ensure a better user experience and improved search engine rankings. Regular maintenance and continuous optimization are key to keeping your WordPress site performing at its best.
Conclusion
Understanding what slows down WordPress is essential for effective optimization. Implement these steps to ensure your site runs efficiently, provides a great user experience, and maintains good search engine rankings. Regularly review and update your site to keep it performing at its peak.
0 notes
Text
NVIDIA's GeForce Experience is a powerful tool designed to optimize your gaming experience. However, users sometimes encounter the frustrating issue of a failed driver download. This article aims to provide a comprehensive guide to understanding and resolving the "GeForce Experience Driver Download Failed" problem.
Understanding the Issue
The failure to download drivers through GeForce Experience can stem from several factors, including network issues, software conflicts, and corrupted files. Identifying the root cause is the first step towards resolving the problem effectively.
Common Causes and Solutions
Network IssuesNetwork problems are one of the most common causes of driver download failures. An unstable or slow internet connection can interrupt the download process.Solution:
Check your internet connection: Ensure that your internet connection is stable. Restart your router or try connecting to a different network.
Disable VPNs and Proxies: VPNs and proxies can sometimes interfere with downloads. Disable these services temporarily and attempt the download again.
Software ConflictsOther software on your system might conflict with GeForce Experience, leading to download issues.Solution:
Close Background Applications: Applications like antivirus programs, firewalls, and other network-related software might block the download. Temporarily disable these programs and try the download again.
Update GeForce Experience: Ensure you are using the latest version of GeForce Experience. Older versions may have bugs or compatibility issues with the latest drivers.
Corrupted FilesCorrupted installation files or a broken GeForce Experience installation can prevent successful driver downloads.Solution:
Clear Temporary Files: Sometimes, the temporary files used by GeForce Experience can become corrupted. Deleting these files might resolve the issue. Navigate to C:\ProgramData\NVIDIA Corporation\NetService and delete the contents of this folder.
Reinstall GeForce Experience: Uninstall GeForce Experience via the Control Panel, then download and install the latest version from the official NVIDIA website.
Driver Installation IssuesSometimes the problem lies with the driver installation process itself.Solution:
Manual Driver Installation: Download the driver manually from the NVIDIA website. Install it by running the downloaded executable file and following the on-screen instructions.
Use Display Driver Uninstaller (DDU): If manual installation fails, consider using DDU to completely remove all existing NVIDIA drivers. After using DDU, try installing the driver again.
Advanced Troubleshooting Steps
If the above solutions do not resolve the issue, you might need to delve into more advanced troubleshooting.
Check for Windows UpdatesEnsure that your operating system is up to date. Outdated system files can sometimes cause conflicts with driver installations.Solution:
Navigate to Settings > Update & Security > Windows Update and check for updates. Install any available updates and restart your computer.
Adjust DNS SettingsSometimes, the default DNS settings provided by your ISP can cause issues with downloading files.Solution:
Change your DNS settings to use a public DNS server like Google’s DNS (8.8.8.8 and 8.8.4.4) or Cloudflare’s DNS (1.1.1.1).
Check System File IntegrityCorrupted system files can lead to various issues, including driver download failures.Solution:
Open Command Prompt as an administrator and run the command sfc /scannow. This command will scan and repair corrupted system files.
Contacting Support
If you’ve tried all the above steps and still face issues, it might be time to contact NVIDIA support. Provide them with detailed information about the steps you’ve taken and any error messages you’ve encountered.
Conclusion
The "GeForce Experience Driver Download Failed" issue can be frustrating, but it is often solvable with some patience and methodical troubleshooting. By addressing potential network issues, software conflicts, and corrupted files, you can typically resolve the problem and get back to enjoying your optimized gaming experience. If all else fails, don't hesitate to seek help from NVIDIA support or community forums where fellow gamers and experts can offer additional insights.
0 notes
Text
Guide to Debugging SEO Issues in WordPress
Why SEO Debugging Matters for WordPress Websites
Alright, mate, let’s talk about SEO debugging in WordPress. Imagine you’ve spent ages building your site, pouring in all your best content, and still, your site isn’t getting the love it deserves from search engines. Frustrating, right? That’s where SEO debugging comes in. It’s like being a digital detective, identifying and fixing those pesky issues that keep your site from shining in search results. Not only does it help boost your rankings, but it also ensures a smoother experience for your visitors. Let’s dive in and uncover the secrets of effective SEO debugging in WordPress.
Common SEO Issues in WordPress
Indexing Issues
One of the most common SEO issues is indexing problems. If your pages aren’t getting indexed, they won’t show up in search results. This can be due to a misconfigured robots.txt file, a missing sitemap, or noindex tags where they shouldn’t be.
Broken Links
Broken links are like dead ends on a map. They frustrate visitors and send negative signals to search engines. These can occur when URLs change or content is deleted without proper redirects.
Slow Load Times
A slow website is a major turn-off for users and search engines alike. Factors contributing to slow load times include large image files, poorly optimised code, and unreliable hosting.
Duplicate Content
Duplicate content can confuse search engines about which page to rank. It often happens when there are multiple versions of a page, such as with and without “www” or “https”.
Meta Tag Issues
Meta tags, like the title and description, are crucial for SEO. Problems arise when these are missing, duplicated, or not optimised with relevant keywords.
Step-by-Step Debugging Process
Step 1: Identify the Issues
First things first, you need to pinpoint what’s wrong. Use tools like Google Search Console, SEMrush, and Ahrefs to scan your site for common SEO issues. These tools can help you spot indexing problems, broken links, slow pages, and more.
Step 2: Fix Indexing Issues
Check Your Robots.txt File
Ensure your robots.txt file isn’t blocking important pages. Open your robots.txt file (found at yoursite.com/robots.txt) and look for lines that disallow indexing of crucial parts of your site.
Create and Submit a Sitemap
Generate a sitemap using plugins like Yoast SEO or Google XML Sitemaps. Once created, submit it to Google Search Console to ensure all your pages are indexed properly.
Remove Noindex Tags
Sometimes, noindex tags are used during development and then forgotten. Use a tool like Screaming Frog to crawl your site and find pages with noindex tags that shouldn’t be there.
Step 3: Fix Broken Links
Use a Broken Link Checker
Plugins like Broken Link Checker can scan your site and highlight all the broken links. This plugin runs in the background and notifies you when it finds a broken link.
Redirect or Update Links
For each broken link, decide whether to update the URL or set up a 301 redirect. A 301 redirect tells search engines that the page has permanently moved, preserving your SEO juice.
Step 4: Improve Load Times
Optimise Images
Large images are a common culprit for slow pages. Use plugins like Smush or ShortPixel to compress images without sacrificing quality.
Minify CSS and JavaScript
Minifying CSS and JavaScript files can reduce their size and speed up load times. Plugins like Autoptimize can help with this.
Use a Content Delivery Network (CDN)
A CDN distributes your site’s content across multiple servers worldwide, reducing load times for visitors. Cloudflare and StackPath are popular options.
Step 5: Resolve Duplicate Content
Use Canonical Tags
Canonical tags tell search engines which version of a page to index. Plugins like Yoast SEO can add these tags automatically.
Implement 301 Redirects
If you have multiple URLs for the same content, set up 301 redirects to point them to a single URL.
Step 6: Optimise Meta Tags
Unique Titles and Descriptions
Each page should have a unique title and meta description. Use relevant keywords naturally within these tags. Yoast SEO can help you manage this effectively.
Avoid Keyword Stuffing
While it’s important to include keywords, avoid stuffing them in your meta tags. Write naturally and focus on providing value to the reader.
Case Studies: Real-World SEO Debugging Success Stories
Case Study 1: Boosting Rankings for an E-commerce Site
Jane’s E-commerce Boutique was struggling with visibility despite having great products. A thorough SEO audit revealed multiple issues: slow load times, duplicate content, and missing meta tags. By compressing images, setting up 301 redirects, and optimising meta tags, Jane saw a 50% increase in organic traffic within three months. Her site started appearing on the first page of Google for key product searches, proving the power of effective SEO debugging.
Case Study 2: Improving User Experience for a Blog
Mark runs a popular tech blog but noticed a high bounce rate and declining traffic. An SEO audit identified broken links and slow load times as the main issues. By fixing the broken links and leveraging a CDN for faster content delivery, Mark improved his site’s performance. Visitors started spending more time on his site, and his search engine rankings improved significantly, demonstrating the impact of addressing SEO issues head-on.
Regular SEO Maintenance: Keeping Your WordPress Site Healthy
SEO debugging isn’t a one-time task. Regular maintenance is crucial to keep your site in top shape. Schedule monthly audits using tools like Google Search Console and SEMrush. Stay updated with SEO best practices and make necessary adjustments. Remember, a healthy website is a successful website.
Conclusion: The Path to a Well-Oiled WordPress Site
In conclusion, SEO debugging is essential for maintaining a robust and visible WordPress site. By addressing common issues like indexing problems, broken links, slow load times, and duplicate content, you can significantly improve your site’s performance. Remember to use the right tools, follow best practices, and keep up with regular maintenance. Your site’s health and success depend on it.
For those looking to take their SEO efforts to the next level, consider reaching out to an AI SEO Services agency. They offer specialised services to help you navigate the complexities of SEO and ensure your WordPress site ranks high in search results. The AI SEO Services agency provides comprehensive support, from initial audits to ongoing optimisation, ensuring your site remains competitive in the ever-changing digital landscape. AI SEO Services agency services around this keyword: AI SEO Services.
Whether you’re dealing with complex SEO issues or need help optimising your site for better performance, AI SEO Services can assist. Their expertise in SEO debugging, keyword optimisation, and overall site health makes them a valuable partner for any website owner looking to improve their online presence. With AI SEO Services, you can trust that your site is in capable hands, ready to achieve its full potential.

0 notes
Text
does cloudflare vpn log reddit
🔒🌍✨ Get 3 Months FREE VPN - Secure & Private Internet Access Worldwide! Click Here ✨🌍🔒
does cloudflare vpn log reddit
Cloudflare VPN logging policy
Cloudflare, a prominent company known for its content delivery network services, has recently introduced a VPN service aimed at providing users with secure and private internet browsing. However, many individuals are concerned about the logging policy of Cloudflare's VPN service.
Cloudflare has been transparent about their logging policy, stating that they do not log user activity or traffic data while using their VPN service. This means that your browsing history, websites visited, and any online activities conducted through the VPN are not stored or monitored by Cloudflare.
Moreover, Cloudflare has emphasized that they do not sell user data to third parties or advertisers, ensuring that your online privacy is protected while using their VPN service. With a strict no-logging policy in place, users can trust that their internet activities remain confidential and secure.
It's important to note that while Cloudflare doesn't log user data, they do collect some information such as account information and payment details for billing purposes. However, this data is kept separate from user browsing activity and is subject to Cloudflare's privacy policy.
In conclusion, Cloudflare's VPN logging policy offers users peace of mind knowing that their online activities are not tracked or recorded. By prioritizing user privacy and security, Cloudflare aims to provide a reliable VPN service that protects internet users from potential privacy breaches and cyber threats.
Reddit privacy concerns
In recent years, Reddit has faced growing scrutiny over its approach to privacy and data protection. As one of the largest social media platforms, Reddit boasts millions of active users engaging in discussions on various topics. However, concerns have arisen regarding the platform's handling of user data and privacy.
One of the primary concerns revolves around Reddit's data collection practices. Like many online platforms, Reddit gathers information about its users, including their browsing history, interactions, and preferences. While some data collection is necessary for providing personalized experiences and targeted advertising, Reddit's transparency and user consent mechanisms have been questioned.
Another area of concern is Reddit's handling of user information and security breaches. Over the years, Reddit has experienced several security incidents, resulting in the unauthorized access or exposure of user data. These breaches raise doubts about the platform's ability to safeguard user information effectively.
Moreover, Reddit's approach to privacy features and controls has also been criticized. Users have expressed frustration over the limited options for managing their privacy settings and controlling the visibility of their personal information. Additionally, Reddit's policies regarding data retention and deletion have been subject to scrutiny, with some users calling for greater transparency and accountability.
In response to these concerns, Reddit has taken steps to enhance its privacy practices and address user feedback. The platform has rolled out updates to its privacy policy, introduced new features for managing personal data, and bolstered security measures to protect against cyber threats.
However, despite these efforts, Reddit continues to face challenges in balancing the demands of privacy-conscious users with the realities of operating a social media platform. As the landscape of digital privacy evolves, Reddit will likely need to remain vigilant and proactive in addressing privacy concerns to maintain user trust and confidence.
Data retention practices
Data retention practices refer to the policies and procedures that organizations put in place to manage the storage and deletion of data. This practice is crucial for businesses as it ensures compliance with legal regulations, protects sensitive information, and optimizes storage resources.
One key aspect of data retention practices is determining what data needs to be retained and for how long. Different types of data have varying levels of importance and sensitivity, requiring different retention periods. For example, financial records may need to be retained for several years to comply with tax regulations, while customer contact information may only need to be kept for marketing purposes temporarily.
Implementing data retention practices also involves setting up secure storage systems to protect data from unauthorized access or loss. This may include encryption, access controls, and regular backups to prevent data breaches or system failures. By safeguarding data through proper storage measures, organizations can maintain the integrity and confidentiality of their information.
Furthermore, data retention practices help streamline data management processes by decluttering storage systems and improving searchability. By regularly purging outdated or unnecessary data, organizations can optimize storage resources and enhance operational efficiency.
In conclusion, data retention practices play a vital role in ensuring data security, compliance, and operational efficiency for businesses. By establishing clear policies and robust infrastructure for managing data storage and deletion, organizations can mitigate risks, improve data management processes, and uphold the trust of their stakeholders.
User anonymity assurance
User anonymity assurance plays a crucial role in today's digital age where online privacy is becoming increasingly important. As internet usage continues to grow, ensuring user anonymity has become a top priority for individuals and organizations alike.
When it comes to user anonymity assurance, there are several key factors to consider. One of the most important aspects is the protection of personal information. Users should have the confidence that their data is being handled securely and that their identity remains anonymous when interacting online.
Encryption technologies play a vital role in ensuring user anonymity. By encrypting data, sensitive information such as login credentials, financial details, and personal messages can be protected from potential cyber threats and unauthorized access. Additionally, the use of virtual private networks (VPNs) can help users browse the internet anonymously by masking their IP addresses and location.
Another crucial aspect of user anonymity assurance is transparency. Online platforms and service providers should clearly communicate their policies regarding data collection, storage, and sharing practices. Users should have full control over their privacy settings and be informed about how their information is being used.
Overall, user anonymity assurance is essential in maintaining trust and confidence in the digital world. By implementing robust security measures, respecting user privacy, and promoting transparency, online platforms can ensure that users feel safe and empowered while navigating the internet.
Transparency reports
Title: Understanding the Significance of Transparency Reports
In today's digital age, transparency has become a cornerstone of trust between companies and their users. One notable tool in fostering transparency is the transparency report, a document that provides insight into a company's policies, practices, and interactions with governments and users.
Transparency reports serve multiple purposes, foremost among them being accountability. By publicly disclosing information about government requests for user data, content removals, and other legal demands, companies demonstrate their commitment to protecting user privacy and free expression. This transparency allows users to assess how their data is handled and whether the company adheres to its stated principles.
Moreover, transparency reports promote trust and credibility. When users see that a company openly shares details about its operations, they are more likely to trust it with their personal information and engage with its services. Conversely, companies that are opaque about their practices risk eroding user trust and facing backlash.
Another benefit of transparency reports is their role in promoting dialogue and accountability among stakeholders. Governments, advocacy groups, and users can analyze these reports to evaluate the impact of laws and policies on freedom of expression and privacy. This information can inform public discourse and advocacy efforts aimed at improving legal frameworks and corporate practices.
In conclusion, transparency reports play a vital role in fostering trust, accountability, and dialogue in the digital ecosystem. By providing detailed insights into their operations, companies demonstrate their commitment to respecting user rights and upholding democratic values. As users become increasingly conscious of privacy and data protection, transparency reports will continue to serve as an essential tool for promoting transparency and accountability in the digital age.
0 notes
Text
Improve WordPress Website Speed – New Optimization Technique
Why Website Speed Matters?
Website speed affects user experience. A slow site frustrates visitors. They leave quickly. This increases the bounce rate. Speed is also important for WordPress SEO. Search engines rank fast websites higher. Faster websites improve conversion rates. A new technique can help improve WordPress speed.

The New Optimization Technique Explained
A new method can boost WordPress speed. It uses advanced caching and script optimization. This technique reduces load times. It optimizes images, code, and databases. It also uses smart lazy loading. These steps ensure a smooth user experience.
Using Advanced Caching for Faster Loading
Caching helps load websites quickly. The new technique improves it further. It stores data efficiently. This reduces server processing time. It speeds up page delivery. Caching plugins like WP Rocket help. They optimize browser caching. This improves speed significantly.
Optimizing JavaScript and CSS Files
Large JavaScript and CSS files slow websites. The new method reduces their size. It removes unnecessary code. Minification and compression help. Combining files reduces server requests. Plugins like Autoptimize help. WordPress Support optimize scripts and improve performance.
Smart Lazy Loading for Images and Videos
Images and videos take time to load. The new technique delays loading them. It loads only visible content first. This is called lazy loading. It improves initial page speed. Users experience faster loading times. Plugins like Smush enable lazy loading. They also optimize images automatically.
Database Optimization for Improved Speed
A bloated database slows websites. The new technique cleans it regularly. It removes unnecessary data. Spam, drafts, and revisions are deleted. This improves efficiency. Plugins like WP-Optimize clean databases. WordPress Consultant improve speed without manual effort.
Using a Content Delivery Network (CDN)
A CDN speeds up websites. It stores website copies in different locations. Users get content from the nearest server. This reduces load times. The new technique enhances CDN performance. It improves caching and reduces latency. Popular CDNs include Cloudflare and StackPath.
Enabling Gzip Compression for Faster Loading
Gzip compression reduces file sizes. Smaller files load faster. The new technique improves compression. It works on HTML, CSS, and JavaScript files. It speeds up website delivery. Gzip can be enabled through plugins. WP Rocket and W3 Total Cache help with this.
Choosing a Lightweight WordPress Theme
Some themes slow websites. Heavy themes have excess code. The new technique suggests lightweight themes. Astra and GeneratePress are good options. They load faster. Simple WordPress Website Design improves performance. Minimalist themes work best.
Reducing External HTTP Requests
External requests slow websites. Ads, fonts, and analytics cause delays. The new technique limits these requests. It optimizes external scripts. It reduces third-party dependencies. This improves load speed significantly.
Regular Monitoring and Speed Testing
Speed testing is important. The new technique recommends regular monitoring. Tools like Google PageSpeed Insights help. They identify performance issues. Websites should be tested frequently. Optimization should be ongoing.
Conclusion
Website speed is crucial. A slow website loses visitors. The new technique improves speed. It uses caching, lazy loading, and compression. Database optimization and CDN help. Lightweight themes improve performance. Regular monitoring ensures speed remains optimal. A fast website leads to better user experience and higher rankings.
#WordPress SEO Services#WordPress Consultant#WordPress Support#WordPress Website Design#WordPress Expert
0 notes
Text
does 1.1 1.1 replace vpn
🔒🌍✨ Get 3 Months FREE VPN - Secure & Private Internet Access Worldwide! Click Here ✨🌍🔒
does 1.1 1.1 replace vpn
1.1.1 compatibility with VPN
1.1.1 is a popular DNS resolver service known for its privacy-focused approach and fast internet browsing experience. Many users wonder about its compatibility with VPN services and how the two can work together seamlessly.
Using a VPN alongside 1.1.1 can enhance your online privacy and security. When you connect to a VPN, your internet traffic is encrypted and routed through a secure server, masking your IP address and location. By combining this with 1.1.1 DNS resolution, you can further protect your browsing data from potential eavesdroppers, such as your ISP or malicious actors.
One of the key advantages of using 1.1.1 with a VPN is the potential for faster internet speeds. 1.1.1 boasts a network of servers designed for high performance, reducing latency and speeding up the time it takes for your devices to connect to websites. When coupled with a VPN, which might sometimes slow down your connection due to encryption processes, 1.1.1 can help offset any speed reductions and maintain a smooth browsing experience.
Overall, the compatibility between 1.1.1 and VPN services is excellent. Users looking to bolster their online security, protect their privacy, and enjoy fast internet speeds can benefit from using these two services together. Whether you are accessing geo-restricted content, working remotely, or simply browsing the web, leveraging the combination of 1.1.1 and a VPN can offer a comprehensive solution for a safer and more reliable online experience.
Differences between 1.1.1 and VPN
When it comes to browsing the internet securely and maintaining privacy, two popular tools that come to mind are 1.1.1.1 and VPN (Virtual Private Network). While both serve the purpose of hiding the user's online activities from prying eyes, there are key differences between the two.
1.1.1.1 is a free Domain Name System (DNS) service offered by Cloudflare. DNS is responsible for translating domain names into IP addresses, allowing users to access websites using easy-to-remember names instead of numerical IP addresses. By using 1.1.1.1, users can experience faster browsing speeds and improved privacy as it prevents ISPs from tracking their online activities and serves as an additional layer of security against cyber threats.
On the other hand, a VPN encrypts the user's internet connection and reroutes it through a remote server, masking their IP address and location. This not only enhances privacy but also allows users to access geo-restricted content and secure their data when using public Wi-Fi networks. VPNs are widely used by individuals and businesses to ensure online security and anonymity.
While 1.1.1.1 primarily focuses on speeding up DNS queries and protecting privacy at the DNS level, VPNs offer comprehensive encryption and anonymity features for all internet traffic. VPNs are recommended for users looking to secure their entire internet connection and bypass censorship restrictions, while 1.1.1.1 is suitable for those seeking faster DNS resolution and enhanced privacy protection at the DNS level.
Benefits of using 1.1.1 over VPN
Using 1.1.1 over VPN offers numerous benefits for internet users seeking enhanced privacy and security. 1.1.1 is a DNS resolver service provided by Cloudflare that aims to improve internet performance and privacy. One of the primary advantages of using 1.1.1 is its fast and reliable DNS resolution, leading to quicker website loading times and improved browsing experience.
Additionally, 1.1.1 helps to maintain user privacy by not logging IP addresses for more than 24 hours and committing to regular deletion of all logs to ensure anonymity and data protection. This feature is particularly beneficial for individuals who prioritize their online privacy and wish to limit the collection of their personal data by third parties.
Compared to traditional VPN services, which may slow down internet speeds due to routing traffic through remote servers, using 1.1.1 does not typically result in significant speed reductions. This makes it an attractive option for users who require fast and secure internet connections without compromising their browsing experience.
Furthermore, 1.1.1 is free to use and easy to set up, making it accessible to a wide range of users who may not have the technical expertise to configure a VPN service. By simply changing the DNS settings on their device or router to point to 1.1.1, individuals can enjoy improved internet performance and privacy without the hassle of installing and managing a VPN client.
In conclusion, utilizing 1.1.1 over VPN presents a convenient and effective way to enhance online security, privacy, and performance for internet users of all levels of technical proficiency. By leveraging the benefits of 1.1.1, individuals can enjoy a safer and faster browsing experience without the complexities associated with traditional VPN services.
Limitations of 1.1.1 compared to VPN
When it comes to safeguarding your online privacy and security, both 1.1.1 DNS and VPN (Virtual Private Network) services offer valuable features. However, each has its own set of limitations that users should be aware of.
One significant limitation of 1.1.1 DNS is its inability to encrypt internet traffic. While it can provide faster domain name resolution by connecting users to the nearest server, it does not encrypt data like a VPN does. This means that while your browsing history may be hidden from your ISP (Internet Service Provider), it can still be visible to other entities, such as hackers or government agencies, especially when using unsecured connections.
On the other hand, VPNs offer robust encryption, ensuring that all data transmitted between your device and the VPN server is secure and private. However, VPNs can sometimes be slower due to the encryption process, leading to potential decreases in internet speed.
Another limitation of 1.1.1 DNS is its lack of IP address masking. Unlike VPNs, which can hide your true IP address by routing your internet traffic through servers located in different regions, 1.1.1 DNS does not provide this feature. This means that websites can still track your real IP address, potentially compromising your anonymity.
Additionally, while 1.1.1 DNS is free to use, many VPN services require a subscription fee for access to their full range of features and servers.
In conclusion, while both 1.1.1 DNS and VPNs offer benefits for enhancing online privacy and security, they also come with their own limitations. Users should carefully consider their specific needs and priorities when choosing between these two options.
Implementing 1.1.1 alongside VPN
When it comes to ensuring privacy and security online, many individuals and organizations turn to Virtual Private Networks (VPNs) as a go-to solution. VPNs work by creating a secure and encrypted connection between the user and the internet, protecting sensitive data from prying eyes. However, with the emergence of tools like the 1.1.1 DNS service provided by Cloudflare, there is an opportunity to further enhance online security when used in conjunction with a VPN.
Implementing the 1.1.1 DNS service alongside a VPN can provide users with an extra layer of protection and improved performance. While a VPN encrypts the traffic between the user and the VPN server, DNS resolver like 1.1.1 ensures that the websites visited are resolved securely and efficiently. By using a fast and privacy-focused DNS resolver like 1.1.1, users can prevent third parties from monitoring their internet activity and improve their browsing speed by utilizing Cloudflare’s vast network infrastructure.
Furthermore, combining a VPN with 1.1.1 DNS can help bypass certain censorship measures put in place by internet service providers or government entities. The DNS resolver can assist in resolving blocked websites, while the VPN encrypts the traffic, making it difficult for the censors to track user activity. This powerful combination offers enhanced online freedom and privacy, making it a valuable asset for individuals seeking to safeguard their data and maintain unrestricted access to information online.
In conclusion, implementing 1.1.1 alongside a VPN can provide users with a robust and comprehensive solution for enhancing online security, privacy, and performance. By leveraging the strengths of both technologies, individuals and organizations can create a more secure and reliable internet experience.
0 notes
Video
youtube
Correct way to remove your website from CloudflareFor more useful tutorials; %BAVisit Our Website : https://www.ecomhardy.com To delete a website and its associated domain in Cloudflare, follow these steps: Log in to your Cloudflare account. Select the website you want to delete. Go to the "Overview" tab. Scroll down to the bottom of the page and click on the "Delete Website" button. Confirm the deletion by entering the domain name and clicking on the "Delete" button. Note: The process of deleting a website and its domain in Cloudflare may vary depending on your account and configuration, so it's always a good idea to consult Cloudflare's official documentation or support channels for up-to-date information. How to Delete Website & Domain In Cloudflare | Remove Website From Cloudflare 2022 | How to Delete Website from Cloudflare | delete website from cloudflare | cloudflare ssl how to remove
#wordpress#woocommerce#elementor#dropshipping#ecommerce#ecomhardy#remove website from cloudflare#how to delete website & domain in cloudflare#how to delete website from cloudflare#delete website from cloudflare#cloudflare ssl how to remove#how to remove website from cloudflare
0 notes
Text
500 followers! 🥳
Holy crap, 500 followers on this tiny ass blog dedicated to a game I haven't even played since Flight Rising banned me for making this at the end of 2019.
Thank you everyone for the support!
After the break will be some statistics for the site.
In total there are 13.165* skins uploaded. That's about 11 skins uploaded per day since the skin tester went live!
For all those skins there were a whopping 177.309** previews generated, averaging just over 13 previews for each skin and about 146 previews generated daily.
People have created 249 pinglists to manage their @ spamming for their posts, with a total of 2.426 users on those lists. Making it just under 10*** average on every pinglist.
I've tracked a total of 141 news posts since I created the newsreader to catch mods deleting stuff in the news posts for no reason. In total I found 862 posts deleted****.
I've kept track of the past 121 dominances. Of which Earth has 1st place 32 times, Plague and Water 15 times and Light with 11 times.
The discord bot has seen 153 discord servers. A total of 23.138 commands have been executed since.
* There are a substantial amount of doubles, not every skin uploaded is a unique entry. ** Every skin generates at least 1 preview on a dummy, which is counted here. Every skin on a real dragon that has apparel generates 2 previews counted here. *** There are pinglists with hundreds of entries, but also lots of pinglists with no entries. **** There were quite a few posts that users probably deleted themselves, like double posts.
-------------------------------
Some nitty gritty stuff here:
On average the site has cost about €86 in uptime monthly (based on the past 12 months). I won't bother with the total because especially in the start I was running a webserver that was way overkill that nearly doubled the monthly cost for a while.
The site is getting well over 400.000 web requests a month, from nearly 9.000 unique visitors. Totaling just over 8 GigaByte of data transferred. I don't have a paid CloudFlare subscription so I can only see the past 30 days, so that's all I can see. But previous months looked the same, just slightly less each month.
Most of the visitors from the site are from the United States, followed by the United Kingdom and Canada taking third place.
If you want to help support the website financially you can buy me a Kofi or sign up for a monthly tip on Patreon. Any little bit is appreciated but nothing is required.
#fr tools new#fr tools#frtools#flight rising#flightrising#fr#fr skins and accents#fr skins#fr accents#fr stuff#fr resources
18 notes
·
View notes
Note
Hey that masterpost abt the RT discourse you made a while back had a bunch of inactive links from kiwi farms, is there any backup of that website's links? Ty for that post btw, its the most detailed ive seen abt what happened back then.
hi, i really appreciate u letting me know (and thank u for the compliment)! unfortunately, i didnt even think to back those kf links up - it just never crossed my mind (which, with the benefit of hindsight, was definitely a mistake since i think everyone kind of knew that kiwi farms as a website was dancing on a knifes edge well before the keffals stuff kicked off).
i did make concentrated efforts to use links other than kf wherever possible - primarily to direct less traffic to it - but a lot of the tweets/posts in question were deleted by the original posters and archived BY kiwi farms, so for those, i had no choice.
i havent looked into it in a while but it seems like kf is having a really hard time keeping their domain registered after losing cloudflare support, as i think theyve now been dropped by 3 (?) different hosting services, and like. good. joshua moon can rot (LMAO) but barring usage of the wayback machine (which i tried and it didnt work for me), theres no way for me to restore those links without kf coming back online. so on the off chance that kf does manage to find another domain registrar willing to host them, just send me a message n let me know so i can grab those screenshots & posts while theyre available
2 notes
·
View notes
Text
Privacy Tools Master Post
This post is a supplement to this YouTube video.
The Easy Stuff
1. Get these browser addons. They work silently in the background and improve security without you having to care.
HTTPS Everywhere – Automatically encrypts the connection of every website you visit.
Privacy Badger – Blocks all tracking cookies
ClearURLs – Rips out tracking information from links.
Facebook Container - Blocks the Facebook tracking network.
2. Enable “Do Not Track” on your browser – some websites ignore this so it won’t make you immune but do it anyway.
3. Turn off personalised ads on Facebook, Google, et al.
Google
Facebook
Twitter
Amazon
4. Switch off all the tracking settings in your computer/phone’s operating system
Windows 10
Mac
Android
iPhone
5. Switch your DNS to Cloudflare
The Less Easy Stuff (but it isn’t hard)
1. Get a good VPN (virtual private network) – So long as its running nobody can tell who you are on the internet*
Mullvad
ProtonVPN
Windscribe
2. Get a Good Browser – Google Chrome and Safari track your activity and send it to Google/Apple respectively. They’re also bloatware and slow your PC down.
Mozilla Firefox
Vivaldi
Brave
A word on TOR:
The TOR browser is another perfectly good pro-privacy web browser, but is also very slow because the Onion Network it runs off of to provide the high level of anonymity is quite limited in size. It is used by many people in authoritarian countries to bypass web restrictions so I’d recommend using the TOR browser sparingly to give these people more access.
3. Use a good Search Engine – One that doesn’t log your searches to provide better ads like Google.
Searx
Ecosia
DuckDuckGo
Startpage
4. Switch to a good email provider – one that encrypts your emails and doesn’t read the contents like Gmail or Outlook.
Protonmail
Thunderbird
5. Talk on a good messaging app
Signal
This app encrypts your messages and does not read them, unlike Facebook Messenger et al. Used by governments & politicians to keep official state secrets, so you know it’s good.
6. Delete your Facebook account if possible.
7. Consider changing operating systems, but realistically you’re going to stick with Windows 10, so here’s how to minimise the tracking on that. You can also use Ubuntu or any other type of Linux - but don’t expect to play Steam games or use photoshop on it because Linux is crap.
Missed anything? I probably did. Here’s an even more extensive list of pro-privacy tools to replace other tools like calendar apps or whatever.
I will probably continue to update this blogpost from time to time so check back once in a while if you like.
*You are still identifiable to the sites you visit because of browser fingerprinting – but with a VPN, nobody outside of you or the website can tell who you are.
No company or organisation paid me to promote any of these services or products. There is no guarantee you are completely anonymous on the internet.
256 notes
·
View notes