#easy eyelash tutorial for beginners
Explore tagged Tumblr posts
Visit Tumblr Blog
Explore Tumblr blogs with no restrictions, modern design and the best experience.
Last Seen Tumblr Blogs


Fun Fact
Kazakhstan’s Minister of Communications and Informatics has blocked the Tumblr site because it contained 60 sites of terrorism, extremism, and pornography in 2015.
Note
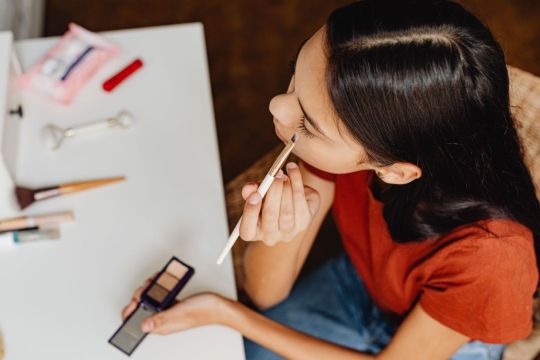
What’s up girl, I was wondering if you could do that trendy 2010s female tv protagonist makeup look post! inspired by elena gilbert, aria montgomery, and tori vega 🖤💋
2010s Female Tv Protagonist Makeup Tutorial ♡
Ah, this is super easy! Beginner friendly and completely drugstore!! <33

Okay, after analyzing each of their makeup looks, here’s what they have in common:
Brown smokey eyeshadow
False lashes
Pinky blush
No lip liner
Rosy/mauve sheer lips
Filled-in eyebrows
So that’s exactly what you’re going to do! Let’s get on to the products and tutorial!

(Optional) do (a) foundation with a moist beauty blender or foundation brush
Conceal your under eyes and/or blemishes with (b) concealer with a concealer brush
(Optional) fill in your eyebrows with an (f) eyebrow pencil
Brown smokey (h) eyeshadow with small eyeshadow brushes. Start with a light shade all over your lid, a medium shade in your crease and outer corner of your eye, then lastly a dark brown shade on the outer corner of your eye but slightly smaller than the medium shade
Put on (d) false lashes with eyelash glue. Or (e) mascara if you don’t want to wear false lashes
(Optional) tight-line your waterline
Put on (c) lip gloss
Swipe on (g) blush with a blush brush
Set with (optional) pressed powder and/or setting spray
*The underlined pink text are links to the products!
I hope this is what you asked for! Let me know if it isn’t and I’ll gladly redo it! 💕 If you have any questions, let me know in the comments! 🫶

🎀 My inbox
👩🏻💻 Personal blog
⭐️ Previous post: How to grow a successful Tumblr
💌 Like, comment and reblog if you enjoyed today’s post! ♡
#blog post#makeup#aria montgomery#elena gilbert#tori vega#2014 makeup routine#2014 makeup#makeup routine#early 2010s#early 2010s aesthetic#early 2010s makeup#elena gilbert makeup#tori vega makeup#aria montgomery makeup#2014 aesthetic#i miss 2013#2013 aesthetic#2014#rosy blog#2014 tumblr#2013#2013 tumblr#2015#tumblr 2014#2014 nostalgia#2014 revival#bring back 2014#beauty#2014 vibes#2014 girl
47 notes
·
View notes
Video
youtube
HOW TO FIND A VENDOR (lashes, jewelry, hair, etc)
0 notes
Text
IwaOi Youtuber AU
As a disclaimer, I don’t know anything about make up, I have a poor track record with fitness videos and I don’t actually watch a lot of Youtube. But these hcs just slammed into me a couple of days ago and I was talking it out with @thewhiskingpot but I’m juggling a few too many WIPs so I’m just gonna get it out here.
Oikawa is fitness vlogger extraordinaire. He does pilates, yoga, ten minute home workouts, tabata in the streets, easy stretches for work from home aches. You name it, he’s done it. All with that same peppy charm and winsome smile.
Ridiculously popular? check. Super hot? check. Extremely charismatic? check.Probably makes you feel like punching him in the face when you’re gasping on the floor like a dying fish after the 6th rep but also like you wanna do it again cause he’s so bloody encouraging.
Iwaizumi is a beauty vlogger that gives no nonsense reviews and accidental life advice while doing his make up .
He’s the one make up youtuber you can Trust.
Especially after the time a big brand sent him their samples and he tried it for the first time on a live stream, applied it for all of 30secs before he went ‘Nope’ and removed it. I C O N I C
Oikawa doesn’t really do make up, but he needed to learn eyeliner for an event after casually making a remark in a video, was pointed to Iwaizumi’s vids by fans of both.
He is shook
He thinks about the super buff guy with a straight face dabbing glitter on his lower lashes in the middle of the night, while getting his groceries, in the shower
He binge watches aLL of Iwa’s videos
He rewatches the one when Iwa says, “ Someone who can't see the opponent before them can't see the opponent lying beyond.” while he does his eye shadow, a lot
Then he makes a direct shout out to Iwa in his next video asking him for a tutorial on eyeliner
Iwa has no clue who Oikawa is but watches a couple of videos and definitely falls into the ‘want to punch his face’ category.
He briefly mentions the shout out in his next video and then includes the link to an older eyeliner tutorial. That’s it.
Oikawa is Not Having It. Goes on the offensive (if you’re gonna it it, hit it till it breaks right)
Does a video of him trying one of Iwa’s tutorials and shows just how badly he messes up. Cue pouting into the camera (I need personal assistance!)
Iwa wants to smash his face so bad
Another deadpan video, another link to a tutorial for beginners
Comments are INVESTED is this a fight? Is there sexual tension? Are we picking sides? Is this what flirting looks like??? No one knows
Oikawa proposes a bet: If Iwa can’t do three of Oikawa’s killer ab workout videos without taking a break, he has to come and help Oikawa learn make up
Iwa takes the challenge, films it, breaks the internet when footage of him all sweaty and shirtless goes viral
Probs breaks Oikawa for a while too. He defs blue screens when he sees the thumbnail
Iwa is surprised because only when he does the workouts does he come to realise Oikawa is hella strong. the heck? He does all these workouts, smiling, chatting like he’s at afternoon tea?? What are his core muscles made of?
Grudging respect from Iwa
HE WON THE BET THO fans are like :((( No more Iwaoi content?? BUt the ship was just sailing...
He feels like he’s dying doing 3 Oikawa videos back to back but he gets it done
Then he PMs OIkawa for his home address and then goes over to help him with his make up
Is extremely amused to discover Oikawa is scared of the eyelash curler
And eyeliner on his waterline
And falsies
And does NOT understand the concept of a lip liner
The video that goes up eventually is ‘Boyfriend does my make up challenge’
Oikawa tries, he really does
At least he scored a bf tho ;)
#iwaoi#youtuber! au#beauty vlogger! iwa#fitness vlogger! oikawa#redwrites#if someone wants to add please do#can u imagine iwa taking questions while expertly doing his mascara#dump him#not worth your time#blinks with those sinfully thick lashes#listen you need a certain few basics if you're gonna live alone#here's a list#while he dabs on the point colour of an eye shadow#also there are video compilations of Oikawa's enouragements#just 1 hour of Oikawa saying 'i believe in you' on loop for people having a bad day#and compilations of all the times iwa has smiled during a video
47 notes
·
View notes
Link
Easy Makeup Tips That Literally Anyone Can Follow
By
Brit + Co, Contributor
Brit + Co connects you with innovative ideas, apps, and products that add creativity and simplicity to your everyday life.02/08/2016 05:15pm EST | Updated December 7, 2017
This post was published on the now-closed HuffPost Contributor platform. Contributors control their own work and posted freely to our site.
Don't get us wrong: We love a show-stopping makeup look as much as the next girl. But makeup basics are important. They're what help you with your base makeup routine that gets you ready in just five minutes flat every. single. day. and the hacks that can take you from office to date in just a few simple steps. We spend a lot of time breaking beauty down to the essentials, but here, we're going even further into 101 territory: we're talking a what's what of your makeup kit. Whether you've glossed over the nitty gritty of each product or are just learning how to build a routine that fits your personality or schedule, consider this your guide to keeping makeup simple and approachable. This foundation of knowledge can also be your stepping stone into the more advanced, creative ways to use makeup. Here's everything you need to know about makeup basics and how to use them.
Foundation + Concealer
Foundation: Beyond your skincare routine, foundation is what makes your skin appear flawless; it evens out your skin tone and conceals any subtle blemishes or discolorations on your face. The most important aspect of foundation to consider is coverage. Generally speaking, there are two ways to go. If you want lighter coverage then opt for a tinted moisturizer, a slightly colored cream that you can swipe on with your fingers to give your skin a wash of color. This is the lazy girl's M.O. If you're interested in more coverage then liquid foundation -- the classic form of foundation -- is your best bet. This foundation is best applied with either your fingers, a flat synthetic foundation brush or a sponge blender.
Take it to the next level with concealer: When you really want to be sleuthy, add concealer to your routine. It's your go-to for things like covering blemishes and more apparent skin discolorations, and can also be used to brighten and even out your under eye area. Concealer comes in different mediums like creams, sticks and liquids. Similarly to foundation, you'll pick your product based on the level of coverage you need for your skin type.
Bronzer + Highlighter
Bronzer: Imagine bronzer as sunshine in powder form. When you apply foundation to your skin you even out your skin tone, but you're also getting rid of the natural shadows and highlights on your face. Think of the bronzer as your way to use shadow to create depth or to give the illusion of moving a part of your face back. This is the first step to adding warmth and dimension back into your face. The "right" bronzer for your skin tone should look like a naturally tan version of you, not too orange and not too dark.
For extra illumination use highlighter: Highlighter is essentially the opposite of your bronzer. Rather than making a part of your face look smaller, you will use the brightness of a highlighter to bring out areas of your face (When you see images of a gal who has that glowing dewy-looking skin, there is a very good chance that she is wearing highlighter. Secrets revealed!). You can get highlighters that are golden, pearlescent and opalescent. There are also other variations, such as matte highlighter, which gives you the brightness without the shimmer. Finding a highlighter that works well on your skin tone and for your personality is pretty simple.
Blush + Cream Blush
Blush: When you're not wearing any makeup, you'll be able to see a natural flush of color on your cheeks. But again, after applying a little foundation, you're covering that up in attempt to get a more even base to work with. Enter blush, the product that adds life to your features (um yeah, you can wear blush on more parts of your face than just your cheeks). Because blush comes in so many hues, you can take it literally and match your natural flush or use a more playful hue to make your look more vibrant. Typically, beginners will wear powder blush because it's usually easier to apply for a more natural finish.
Pump it up with cream blush: Cream blush is a really fun way to take wearing blush to another level -- it's more pigmented, and therefore a bolder way to wear blush. To take it even further, you can apply a cream blush as your base and set it in place with a powder blush for an even brighter punch of color that will last all day.
Eyeshadow + Smokey Eye
Eyeshadow: When it's used on its own as a single shade, eyeshadow is purely cosmetic. As a minimalist or beginner, you can apply a sweep of a single shadow across your eyelid for a subtle pop of color.
Get your blend on with a smokey eye: For a more advanced gal who wants to take eyeshadow to the next level there's the smokey eye. The concept here is to create dimension using a base shade, highlight shade and contour shade just like you would do on your face, but focusing on your eyelids only. You can use endless color combinations as long as you keep the basic approach the same. To build a dramatic look, use a neutral color on your eyelids, a deeper medium hue in your creases and a brighter shadow on your brow bones and the inside corners of your eyes.
Eyeliner + Brow Pencil
Eyeliner: Eyeliner is all about enhancing the shape and color of your eyes. There are several techniques you can use, but beginners should keep application simple by using a pencil along their lower lash line to create definition and along the upper lash line to make eyelashes look fuller. Simple as that.
For further definition use a brow pencil: The idea of filling in your eyebrows can be a little intimidating for the gal who has never gone there, but once you're ready to accentuate your eyes further, this is the way to go. Eyebrow enhancement can actually change the entire look of your face -- this is why we're considering it a more advanced makeup route. You can try powders, creams and other variations of mediums, but the easiest way to fill in and shape your eyebrows tends to be an eyebrow pencil that you can get in a hue to complement the natural color of your eyebrows.
Mascara + Eyelash Curler
Mascara: This was actually my gateway to makeup; I wore mascara before anything else. Mascara is a great way to give your entire face a little extra pop without having to learn all the other techniques. I recommend that you pick a mascara that's not waterproof to start because it will be much easier to take off later. The formulas are typically designed to enhance length or volume and the biggest actual difference is usually the shape of the brush. Try to find a mascara that has a smaller application brush so you can have more control when putting it on.
Turn up the volume with an eyelash curler: This device looks scary as heck (I always make sure to be gentle with this little contraption), but it's totally clutch when it comes to getting va-va-voom lashes. It's a must for certain looks, but you have to make sure you use it correctly or else you can -- eek! -- break or rip out your eyelashes. Be sure to watch a tutorial that offers tips and tricks as to how to use it properlly before you get on this train!
Lip Color + Lip Liner
Lip Color: We're not just talking color -- the choices are endless -- but we're also talking types of lip color. There's lip balm, gloss, tints, creme sticks and stains. The main difference you should be aware of is that each one carries a different level of pigment, aka the amount of color that will show up on your pout; this can vary from brand to brand. The easiest intro to lip color is to start off with the less pigmented options and work your way up to the bolder hues that take more effort to apply and maintain.
For an even more perfect pucker use lip liner: While lip liner is a next-level product, it's one that I highly recommend using whenever you choose to wear any type of lipstick or darker pigmented lip color. Lip liners essentially create a barrier to keep the lipstick on your lips and prevent the color from bleeding or feathering onto the perimeter of your mouth. In other words, it's the secret to totally kissable lips.
For more beauty + DIY tutorials, check out brit.co!
130 notes
·
View notes
Text
INFJarts’ art tutorial #3: flat color
Alright nerds, imma teach you how to color well! Today I’m gonna show you how to do a simple flat color piece! I’ll be using autodesk sketchbook pro as the program.
Lots of beginners choose very saturated colors for their pieces. This isn’t a good idea unless you’re well experienced with coloring, enough that you know when to use saturation. For beginners, I suggest not using anything right of this line:

Okay, now that that’s cleared up, let’s get into the process!

I start with a sketch! I’m drawing Phoenix here. For this particular piece, I want to go with a nice warm palette centered around the color orange. I pick a soft peach color for the background, not too saturated so it’s not distracting. I also put an airbrush on the eyes to plan out some initial color choices.

Now we do line art! My lines aren’t the cleanest, they’re not really the focus of my pieces. For this, I fill in the eyelashes with a bold black. This is so that I minimize the amount of black I use in the coloring stage, since black and white are no-nos in coloring. My eyes usually overlap the hairline, but it won’t be distracting in the final product, you’ll see.

Next I start the coloring. I like using diversity in my characters, and Pheonix has a very tan skin tone. the amount of layers I use while coloring depends on the piece, but in this one I used three. I don’t pay much attention to coloring inside the lines, because later I’ll clean it up with the eraser tool.
You’ll also notice I changed the background to a darker brown. This is because after the initial colors were down, I realized the background was too bright. Colors all affect each other in a piece, they will look different depending on the colors around them. That’s why it’s so important to make sure your colors aren’t too saturated, they won’t look good with the colors around them.

As you can see, I’ve cleaned it up now! Looks a lot better, huh? For shaded pieces, now would be the time I would combine the color layers to make shading easier. However, we aren’t going past that stage, so I’ll leave the layers be. Besides, that makes the next stage a whole lot easier.

Now I start tweaking colors! If you look closely, I’ve slightly muted the colors to an even less saturated state to be even easier on the eyes! Warm palettes are easy to mess up if you use too much saturation, because they’re already so bright.

And there she is! Phoenix gorl in all her cuteness! If you have any questions, just ask!
Patreon
Commissions
#art tips#art#artists on tumblr#my art#my tutorials#artists#coloring advice#color tutorial#color tips#coloring tips#coloring tutorial#art advice#illustration#flat color#digital art#autodesk sketchbook#sketchbook tutorial#sketchbook#autodesk sketchbook tutorial#autodesk#digital drawing
4 notes
·
View notes
Text
25+ Summer Makeup ideas For Beginner
If you find yourself a newbie to the make-up, you try to make use of the eyeliner in no a couple of go. Pale nude eyeliner may be used alongside the underside waterline to supply the attention seem wider and extra awake. Alongside highlighter, eyeshadow is my favored make-up product, simply because it is available in so many numerous colors and finishes, and may be utilized in such all kinds of the way!
It’s attainable to additionally make the most of eyeliner to line the waterline if you happen to’d prefer to make your eyelashes look thicker. If it comes to tug make-up, it’s essential to know what it’s that you’re doing. Buy the very best brushes you’ll be capable of afford. Stick with the Tutorial Doing Make-up isn’t a difficult job. Nicely, you can be contemplating the required materials for these Horns and Make-up. Eye make-up is this type of simple and naturally an fulfilling job to do.
30 Summer Makeup Ideas For Brunettes With Dark Skin – BelleTag
LA Beauty Guide’s Summer Must Haves. | cake face | Beauty makeup …
23 Bold and Beautiful Summer Makeup Ideas | StayGlam
Summer Makeup Ideas | 12 Fun Looks This Season
cool summer makeup idea with red lips | Beauty | Makeup looks, Red …
55 Amazing Summer MakeUp Ideas That You Must Try – outfitmax.com
Summer Makeup Ideas Hotter Than The Weather | Fashionisers©
27 Easy Pretty Makeup Ideas For Summer | A Myriad Of Modish Makeup …
summer makeup ideas by Tashaly Gonzalez – Musely
23 Bold and Beautiful Summer Makeup Ideas | StayGlam
Summer Makeup Ideas | 12 Fun Looks This Season
5 Prettiest Summer Makeup Trends for 2018 – Hot Weather Beauty Looks
24 Inspiring Trends 2018 Spring And Summer Makeup Ideas | DONT’S …
Summer Makeup Ideas | 12 Fun Looks This Season
31 Beauty Looks To Try This Summer | maquillage | Summer makeup …
Summer Makeup Ideas For A Pool Party… on Stylevore
30 Perfect Summer Makeup Ideas – Outfits
25 Easy Makeup Ideas for Summer Parties | StayGlam
Natural makeup is perfect for Summer! – Makeup Ideas
89 Best Spring & Summer Makeup Trends and Ideas Images on Stylevore
Latest Summer Makeup Ideas & Trends 2019-2020 Beauty Tips
3 Easy and Beautiful Summer Makeup Looks – My Makeup Ideas
60 Best Summer Makeup Ideas For 2019 – BelleTag
37 Casual Spring and Summer Makeup Ideas for Beginner – looksglam.com
Summer Festival Makeup Looks To Smolder In From Morning To Sun-Down …
25+ Summer Makeup ideas For Beginner
1 note
·
View note
Text
Me: I’m feeling comfortable with my makeup routine. Maybe I’ll try adding eyeshadow or look at the fancy tutorials.
Beginner eye makeup video: Here’s 7-10 products, with liquid eyeliner and fake eyelashes. Easy, right?
Me: Please...I am but a simple gremlin...
2 notes
·
View notes
Text
Anime eyes drawing

Anime eyes drawing how to#
Anime eyes drawing professional#
These can be used on pretty much anything you want and look great on more realistic cartoon characters.Ĭourse has easy steps to Draw Anime Characters.
Anime eyes drawing how to#
You can't stick to drawing flat dresses forever, so it's best to learn how to draw clothing on anime girls. With a little practice, you can draw easy anime or manga eyes. 2) It does not really matter what angles you decide because it will be your original, so take your time and be easy about it. However, it can be difficult to move past the basics of clothes that lie flat on the person's body - and it's made more difficult when drawing girls, as their bodies tend to have a curvature to them and makes the fabric rest differently. 1) Begin to draw with the outlines of eyelid first. It's typical of people to wear clothes, whether they're real people or drawn on paper. It simply requires a little tweaking of the features of the face and body. In this course, you will learn how to draw an anime school girl, an anime girl in swimwear, a teenage anime girl, and a younger/child anime girl.Ĭreating hot anime or manga guys is no harder than trying to create any other anime or manga character. Most anime drawings include exaggerated physical features such as large eyes, big hair and elongated limbs. Color the pupils in black and color the rest any color youd like. When drawing them on the face, you can reverse the shapes for the opposite eye. How to Draw Female Anime Eyes Tutorial Step 1 Draw the Outer Shape of the Eye Step 2 Draw the Shape of the Iris Step 3 Draw the Pupil Step 4. These are the core anchors to drawing anime eyes well. Use markers, liner pens, or digital inking brushes for a clean look. To draw large eyes, draw two round circles and then a small pupil at the top. We can now clean up our rough drawing by retracing our drawing with cleaner and darker lines. First, draw the round circle for the head and draw a line in the middle for reference of where the eyes will go. You should visit 20+ Easy Eye Drawing Tutorials for Beginners - Step by Step. When an anime eye is drawn, the externally visible part of the eye, the orbit, the eyelid, and the eyelashes are depicted.Īnime is a style of animation/drawing originating from Japan. In this video, we learn how to draw anime eyes in MS Paint. Learn to Draw Manga Men A Beginners Guide (With Over 600 Illustrations). Anime eyes are very different from natural eyes, but still tend to communicate personality. Color the face around it and then add in the facial. Then, burn the shadows and add in white to the top. Then, color the whole eye black and give it color. For the girls eye, draw the outlining of the eyes and then the eyebrows. Anime is a drawing style that originates from Japan. In this video, we learn how to draw 10 different types of anime eyes in GIMP. Drawing an anime character is just like the adventure the character travels through. With a little patience and practice, following these steps in course will help you to achieve your desired anime drawing style.
Anime eyes drawing professional#
Welcome to the course on ''Learn anime drawing (for beginners)''ĭrawing an anime face in the same way that a professional does is something that you can learn to do at home too.
0 notes
Text
Introducing Makeup to Teens — A Teenager Makeup Tutorial
When you’re new to makeup, a teenager makeup tutorial will help to learn the best application techniques.
A teenager makeup tutorial will help the beginners learn ways to apply makeup to achieve a more natural look.
A beginner makeup kit for a teenager is a great gift idea!
I hesitate writing this because I don’t think teenagers need makeup at all, but I also am not naïve enough to think that they won’t eventually want to wear it. And really, there isn’t anything wrong with a little makeup. The whole “less is more” mentality applies here. Introducing your teen to a lighter application of makeup and embracing their interest might be the way to go. That way, you can teach them about applying makeup to achieve a more natural look. In this case, you need a teenager makeup tutorial. Purchasing your teen a beginner makeup kit is a great gift idea. Plus, you’ll be choosing the products so you can ensure the colors are not too bold.
Makeup kit storage container
Help your teen organize their products with a beginner makeup organizing container, caddy, or makeup case. They’ll enjoy arranging their new products in the container, and it will give you peace of mind that their products are in a safe place.
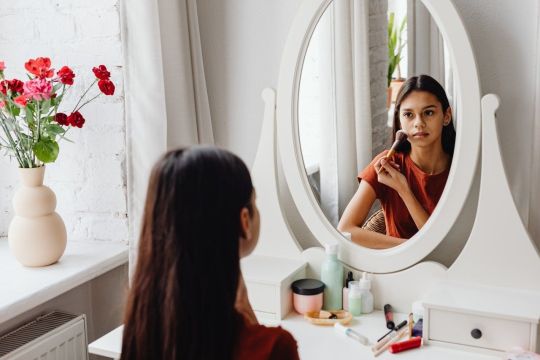
Makeup mirror
A good makeup mirror is a must for being able to get the application technique down pat. Choose a mirror with lights so your teen is applying their makeup in optimal lighting. You might even want to purchase a makeup manual for tips on how to apply it.
Makeup brush
If you go for a set of brushes, it is best to go “less is more” here, too, and choose a set with the least amount of brushes for your teen. Anything beyond that can be a bit overwhelming. Plus, you’re going for a natural look, so there’s no need for 10-15 makeup brushes.
Cleanser and moisturizer
It is very important that your teen knows how to wash their face thoroughly before applying makeup and at the end of the day. We all know teens struggle with acne due to their rapidly changing hormones, so cleaning their face and using moisturizer should take precedence over the makeup products. Get them a terry cloth headband so they can pull their hair back for optimal cleansing.
Makeup essentials
Concealer is important to cover up blemishes — just make sure you choose the right color for your skin tone. A light powder to seal in the concealer is also a great tip to tell your teen. Plus, it can sometimes appear more natural than a foundation.
A touch of mascara
Make sure you get a mascara that is light, easy to apply, and won’t run. Have your teen watch a video to learn the correct application. They might also need a tutorial on how to use an eyelash curler!
Blush options
There’s nothing wrong with adding a dab of color to your cheeks. However, blush is commonly overused, so just make sure they don’t add too much!
Eyeshadow
Definitely opt for the neutral shades as a teen. Remember, less is more! Plus, neutral doesn’t mean “lack of color.” You’ll definitely notice your eyelids will brighten up a bit, even with a more natural tone.
Lip gloss for beginners
Your teen will probably want to have a say on the color of lip gloss, so get a few shades for their beginner makeup kit. There are even tinted shades of lip balm you could add in there for a less dramatic look. Lip gloss is the one item that your teen will go for every time, even if they aren’t wearing any other makeup, so I would say this is the most important item in the kit.
When teaching your teen to apply makeup, make sure to tell them that it takes practice, and what looks good on others may not look good on them. The social media trend of filming yourself applying makeup can actually be a great teenager makeup tutorial. As long as they adhere to the “less is more” mentality, a little makeup can go a long way!
For makeup stylists, go to the MOBILESTYLES App and search for the best PROs in your area — they would be an excellent resource for helping teenagers learn to apply the makeup that looks right on them. Download the MOBILESTYLES App now: https://mobilestyles.com/download.
0 notes
Text
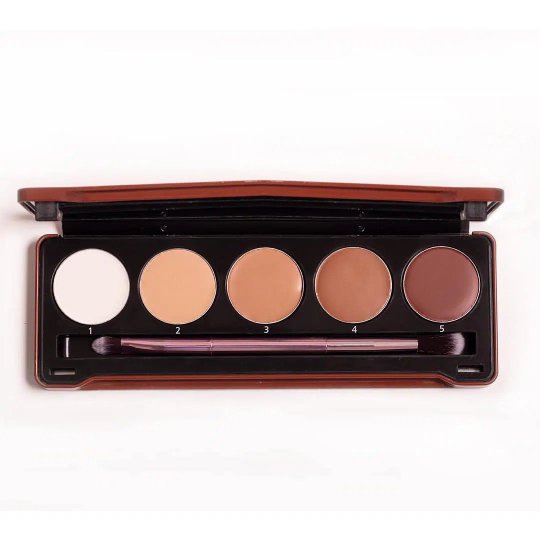
The Palette Contour: How To Get An Amazing Smokey Eye
There are many steps involved in creating content for your blog post or website - planning out the topic you want to cover, researching related topics so that you have sources lined up in advance, and structuring your article so that it flows from point to point. While all these tasks might seem complicated, find out in this article how AI-powered software can make them much easier on you!
The 5 Steps for the Best Eye Makeup
Looking for a unique smokey eye? Check out the palette contour! This easy tutorial will show you how to create the perfect smoky eye look. First, start by mixing a dark brown and black eyeshadow. Use a light hand when applying these colours to avoid looking too harsh. Next, use a white eyeshadow to highlight your brow bone and inner corner of your eye. Finally, use a navy blue eyeshadow to create the gradient effect in your crease. If you want to add more depth to your smoky eye, you can use black eyeliner to line your upper waterline and lash line. You can also add a dramatic false eyelash accent for extra glamour.
Tools and Products for a Palette Contour
In this blog post, we will be discussing how to get a smokey eye using a palette like matte lip gloss. A smokey eye is an essential look for any woman and can be done in various ways. You can create a natural-looking smoky eye by using neutral eyeshadows and blending them until you achieve the desired effect. Or, you can use darker shadows to create a more dramatic look. Whichever method you choose, use a good primer and base to help your shadows stay put all day long. Here are some of our favourite products for creating a contour: An eyeshadow palette: This is the best way to have all the colours you need to create a smoky eye without carrying around multiple products. We love the Urban Decay Naked 2 Palette because it has neutrals and darker shades that can be used for contouring. A contour brush will help you apply your shadow evenly, which is critical for creating an effective smoky eye. Our favourite brush for contouring is the Zoeva 237 Contour Brush. A brow powder: For added definition and realism, apply a light dusting of brow powder over your eyebrows
The Under Eye Trick
The perfect smokey eye starts with the perfect contour like highlighter drops! This under-eye trick will help you achieve that alluring look in minutes. If you want the perfect smokey eye, you must know how to contour. Contouring is the art of adding depth and dimension to your face with a light dusting of powder or a brushstroke. The key to a great contour is carefully selecting the right shade and type of product and following the steps below.
Conclusion
Whether you're a beginner or an experienced makeup artist, one of the essential skills you can possess is a great eye shadow palette. This tutorial will teach you how to create a unique smokey eye using just a few essential products. By following our step-by-step instructions, you'll be able to achieve that sexy and sultry look in no time at all!
0 notes
Video
youtube
Super easy tufted eyelash tutorial - For beginners
0 notes
Text
How to choose a suitable eyelash curler
Our Lash readers tell us they have read many lash curler tutorials online and will do whatever they want to do with their makeup, except eyelash curler. As soon as the cold clip touched the eyelid, it began to tense and shake hands, afraid to clip eyelids. Over time, it becomes a psychological barrier.
The problem, again, is that with the right curler, all risks can be avoided.
So how do you do that?

1. Choose the transverse length of the splint.
There are a lot of portable eyelash curlers out there, like the Muji folding ones. Their splints have shorter transverse lengths. This makes it easy to accidentally injure an eyelash curler. Definitely this kind is not suitable for beginners.
2. Choose the correct plywood material.
Some people prefer to use plastic eyelash curler, some people prefer to use metallic eyelash curler, so what's the difference? The strength of the metal and radian is better, so clip is roll become warped and unity, and the plastic is relatively good stability and clip because width is better control, and it is not easy to clip to the eyelids.
Personal experience, because I have swollen eyelids, so I prefer metal material. Because plastic splints are usually thin and brittle, in the process of use, splints need to push up the eyelid, plastic material strength is not enough, eyelashes are difficult to fully exposed, as a result, the effect of clamping is not good enough.
3. Have a look at the tightness of the eyelash curler
The clamps were too loose for the trembling hands to control, and the clamps trembled and wobbled to no avail.The clamps are too tight for the fainthearted to handle, and the pulling of eyelashes hurt and makes for a poor experience. Choose the lash curler with proper tightness.
In addition, Our Lash came up with several criteria to judge the quality of an eyelash curler.
Check the eyelash curler pad
As everybody knows, eyelash curler pad is directly force to our eyelash, so first to check if the eyelash curler pad is in proper hardness, high quality eyelash curler pad is moderate and with some toughness, but is more soft, back and forth clamp can feel its flexibility is good, such lash curler is easy to clip warped and not easy to cut off your lashes curler.
Check if the eyelash curler fits your eyes
Place the curler of the clip toward your eye and see if it is similar to the curve of your upper eyelid and fits as well as possible. The size of your eye and the amount of bulge in your eyeball will determine whether your lashes curler will fit you.
If the fit is enough, then the clip will take care of the radian of the inner and outer corners of the eyelashes. Although we usually want to clip at least three times, the more the fit, the easier it is to unify the radian and curler of the eyelashes and not easy to clip the eyelids.
Check the spring of the eyelash extensions curl
As we all know, the spring of eyelashes curler is a good way to check its life. The handle and spring of this eyelash curler are an intuitive method for us to check its quality directly. When pinching, we should feel that the spring is strong and elastic, not rigid, and it does not cost effort when clamping.
After we choose the eyelash curler, we must pay attention to cleanliness and hygiene when using it, and regularly check the elasticity and cleanliness of the pad on your lash curler. When you clip your eyelashes, you should pay attention not to exert too much force and master the angle and strength.
Wish everyone can draw a nice makeup!
0 notes
Text
How To Draw Closed Eyes 15
Capturing that expression can seem an insurmountable task. Draw the line of your eyes.
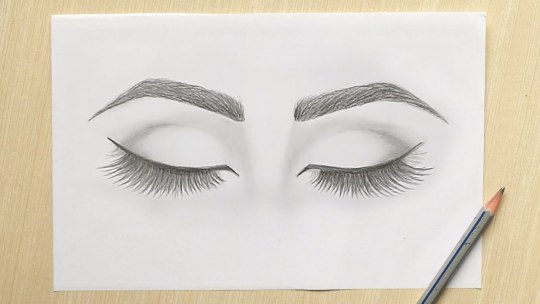
CLOSED EYE DRAWING How to Draw Closed Eye for beginners
If you’re drawing a different eye, in which the lids cover some part of the iris, leave that part unfilled.
How to draw closed eyes. A tutorial on drawing anime and manga eyes in different styles including common, realistic and chibi. Easy animals to draw by pencil for beginners and everyone. All you need to do is follow the steps and for sure you will be able to create a realistic drawing.
How to draw closed eyes for beginners. In both cases, the charcoal can get stuck, and that can damage. Anime drawing for beginners :
See more ideas about cartoon eyes drawing easy manga drawings and easy eye drawing. Using a much darker shade, define an outline of the iris. Make that line pretty thick.
Learn how to draw closed eyes. Don’t worry, you can break the whole process down into a series of relatively simple steps. This short tutorial explains how to draw anime and manga eyes to show a characters personality.
Learning to draw with a pencil is basic: How to draw closed eyes by pencil for beginners easy eye drawing pencil drawings for beginners closed eye drawing. It’s the second factor defining the contrast.
Draw the curves around what would be the vertical middle area of the eyes if they were open. The first thing to do is to look past the mouth, to the shapes and tones. Learning how to draw closed eyes is as easy as a,b,c.
Cartoon characters can be very colorful and detailed and can be fun to draw. To draw the eyes closed just draw the upper eyelids like you normally woulda downward curving line for female anime eyes or a horizontal line with a slight curve for male anime eyes. Similar to the previous example in this one you can see the positioning of the eyelids in relation to the iris as the eyes squint.
As with drawing eyes and hair, drawing the lips and mouth can be a challenge. In the downward gaze, the eye leaves open a. Make it the brightest element of your eye drawing.
How to draw a pencil easy. For fully closed squinted eyes simply draw each eye as a single curve with a hint of eyelashes. Pencil drawing tutorial for beginners and everyone.
When the eyes simply close, the iris and pupil are covered in the process; Leave the light reflection white. Draw a node in the form of a circle;
0 notes
Video
Grab your makeup bags and head to my IGTV. Let’s get started with the makeup tutorial. EASY makeup for BEGINNERS! This look can be worn with or without false eyelashes. We are going to have so much fun 😘💋 #makeupforbeginners #easymakeup #easymakeuptutorial #easymakeuplooks #easymakeuplooksforsummer https://www.instagram.com/p/CPWQE86hU0E/?utm_medium=tumblr
0 notes
Text
Step By Step Makeup Tutorial For - BEGINNERS | Makeup Under 500 Rs. | Super Style Tips
New Post has been published on https://skin-care-routine.com/makeup-tips/step-by-step-makeup-tutorial-for-beginners-makeup-under-500-rs-super-style-tips/
Step By Step Makeup Tutorial For - BEGINNERS | Makeup Under 500 Rs. | Super Style Tips
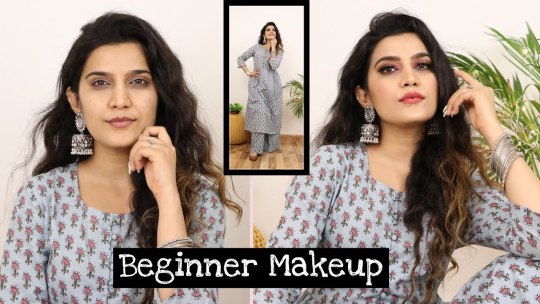
Hi guys, welcome back to my channel, in today’s video i will share with you all easy makeup tutorial which is super easy to recreate , also the products i have used atre under 500 rs only which makes this even affordable i hope you will enjoy this video. . . . Start your journey to healthy skin at thedermaco.com and use code super25 for 25% off
Link: Retinol Serum: https://bit.ly/2P9VbEh 10% Niacinamide Serum: https://bit.ly/3gdXDWj
*Coupon code not valid on combo as they are already discounted price.
products mentioned Wet n wild primer: https://amzn.to/31KUGHM L’oreal infallible foundation shade 104: https://amzn.to/3gLt5dS Maybelline fit me concealer: https://amzn.to/31Qlkzn Pac beauty blender: https://amzn.to/31LeH0X Maybelline fit me compact: https://amzn.to/2QDMbIq Wet n wild eyebrow pencil: https://www.amazon.in/Wet-Wild-Pencil-Brunettes-Better/dp/B011LMR9TU/ref=sr_1_1?dchild=1&keywords=Wet+n+wild+eyebrow+pencil&qid=1598945106&s=beauty&sr=1-1 Wet n wild eyeshadow palette: https://amzn.to/2Dky7R2 Colorbar eyeliner: https://amzn.to/3gG1pqU Pac false eyelashes: https://amzn.to/3hOu9Pp Miss clair eyelash glue: https://amzn.to/3bdrQ60 Maybelline lash sensational mascara: https://amzn.to/2EN24tz Wet n wild face pallet: https://amzn.to/3bhrkUw Faces glam on blush: https://amzn.to/31LK0sH Wet n wild highlighter precious petals: https://amzn.to/32N8vVL Maybelline master chrome highlighter molten gold: https://amzn.to/2EQf8hx Maybelline liquid matte shade sensationally me: https://amzn.to/3gUw97P Wet n wild setting spray: https://amzn.to/3lArmvJ Miss clair setting spray: https://www.amazon.in/Miss-Claire-Makeup-Setting-Spray/dp/B077RFCHGB/ref=sr_1_1?dchild=1&keywords=miss+claire+setting+spray&qid=1598944997&sr=8-1 Kurta Set: https://www.myntra.com/apparel-set/anouk/anouk-women-blue-printed-kurta-with-palazzos/8500725/buy Curling Iron: https://amzn.to/3lJVhSn Earrings: https://www.instagram.com/oshri.accessories/?hl=en Bangles: GT Local Market
#affordable makeup#beginner makeup tutorial#beginner makeup tutorial in hindi#beginners#by step#easy makeup#For#for beginners#how to#makeup#makeup for beginners#makeup tutorial#makeup under 500 rs#products under 500#step#step by step#step by step indian makeup tutorial#Style#Super#super style tips#super style tips komal#tips#Tutorial#under 500 rs
0 notes
Text
Mascara and Liner Combo: Get Camera-Ready
Do you want to know how to use eyeliner and mascara to make your eyes pop? Read on to find out the secret and use it to get camera-ready.
Not all of us are blessed with big eyes, to enhance the beauty of your eyes there are a variety of makeup tricks we can use along with mascara eye makeup to make them look bigger. Making your eyes look big and beautiful is easy, right from buying eyeliner online to a couple of products and the right makeup techniques. Have a look at these tips to help you make the best use of your eye makeup and look camera ready.
There is no better product for your eyes than buying online eyeliner. Eyeliner or a Kajal pencil gives a dramatic bold look to your eyes, all you need to do is line your waterline with eyeliner or Kajal and then soften it a little with a brush. Check the quality before you buy online eyeliner, it should be smudge-proof, waterproof, and long-lasting.
Curling your lashes make your eyes look bigger and brighter. When you buy mascara online ensure that you buy one that defines your lashes and makes them look longer. Begin at the root of your eyelashes and curl gently – don’t overdo it as it can clump and make your lashes look bumpy. A smooth even line of mascara eye makeup is all you need. With several tutorials online, you can always learn how to apply mascara for a beginner and use a couple of new tools in the bargain. Try to buy mascara that complements your eye makeup and gives your lashes the desired curl. The same should be kept in mind when you buy eyeliner online.
Your eyebrows make all the difference, it’s okay to have slightly bushy eyebrows but try to keep them maintained at all times. Big eyebrows will bring all the attention to your eyes so try to invest in a good brow definer that lasts long and will be able to give you the dramatic look you need.
Invest in a good color eyeshadow for your eyes, nudes and light color eyeshadows can highlight your eyes and you can use them on the areas you want for an illusion of bigger eyes. Along with this, highlighter if used in the right way can make your eyes look awake and draw attention to them. Use a light-colored Kajal pencil on your waterline or a nude one also works; this makes your eyes look more dramatic. This done along with mascara can give you that bold look you want without making your look seem too unnatural.
In Conclusion
Always keep in mind that the better the quality of the products, the easier the application will be and the better for your skin. Once you apply makeup, always blend it in as demarcation lines can stand out on camera. A reliable and trustworthy makeup brand will sell your products that go well with your skin, are tested and safe, the last longer, are more efficient, and seamlessly blend in with your makeup. Finding the right eye palette colors will take time, you need to experiment with lots of different ones and find the one that you love.
Resource box: Daily Life Forever52 mascara and eyeliner help you to avoid clumpy lashes and can easily be fixed by a makeup remover. They come with several options that lengthen, curl, strengthen, and add volume to your lashes enhancing your look – it is flake-proof, water-proof, smudge-proof, and easy to maintain.
0 notes