#gimp scale image
Explore tagged Tumblr posts
Visit Tumblr Blog
Explore Tumblr blogs with no restrictions, modern design and the best experience.
Last Seen Tumblr Blogs


Fun Fact
Tumblr has been banned in Indonesia for providing people with access to pornographic content.
Text
People underestimate just how many things photoshop does
#there should be a scale of how ridiculous someone is being when they say xyz software does anything photoshop can do#at least gimp is actually trying to be the same category of image software it's just also Incredibly Bad
49 notes
·
View notes
Note
hi tumblr wip! is there anything that can be done about images stretching to the full width of a tumblr post? i make art and images that are sometimes under 540px, and there seems to be a point where they will stretch automatically to 540px. it makes things like pixel art or otherwise small images look terrible!
Answer: Hi there, @moxley!
We’re really glad you asked this question, as we love getting the opportunity to share the tips and tricks that are applicable in this area.
First off, here are the rules of our image stretching:
On mobile apps and mobile sites, we always stretch images to the full width of the post—since a small image on a small screen doesn’t make for an easy viewing experience.
On the desktop site, we only stretch images to the full width of the post if the image is at least 300px wide and/or 600px tall.
Any images that are placed side-by-side are always stretched to fit their frames, no matter the image’s dimensions or the viewer’s platform.
However, the vast majority of devices and browsers use antialiasing in their default image scaling algorithms. This, as you point out, doesn’t play nicely with pixel art at all. Boooooo!
So, how can you preserve your sharp pixels with 100% consistency for your viewers? The answer is simply to upscale the image yourself before uploading. To keep the pixels square, you’ll need to resize by factors of 100% (200%, 500%, etc.) and use a simple upscaling algorithm that doesn’t use antialiasing. For example, in Paint.NET’s image resize dialog, you can use “Resampling: Nearest Neighbor”, or in GIMP’s, “Interpolation: None”.
The trick here is to resize your pixel art to dimensions above 540px wide so that every viewer’s device is actually forced to downscale the resultant image instead. That way, instead of the resizing algorithm making up details by blurring the pixels, each original pixel is preserved as a perfect square.
We really hope this helps you and the other pixel artists out there. Please, have a great day, week, and month. No, in fact—a great rest of your Tumblr experience, however long it may last. Of course, if you have any other questions on this subject, we will be happy to answer those too!
466 notes
·
View notes
Text

Create Your Own Main Menu for The Sims 4 - Tutorial
Hey folks!
This tutorial will walk you through creating your own main menu override for The Sims 4 based on my custom repository.
_________
What is required:
JPEXS Free Flash Decompiler
Sims 4 Studio
Raster graphics editor (e.g. Photoshop, Gimp, Photopea)
Your Own Main Menu repository
_________
Step 1: Download and unzip the Your Own Main Menu repository
It's available on my Patreon page for free.
_________
Step 2: Prepare your custom images
There are two images that you need to customize:
SimMattically_YourOwnMainMenu_MainBG.pngThis is the main background image, where you want to put the desired graphic.Size: 1440px x 1200px
SimMattically_YourOwnMainMenu_BarBG.pngThis is the second background for the navigation bar on the right.Size: 480px x 1200px
Prepare your own images based on these templates. Do not change the size of the images.
Tips: If you're using a more complex background, such as a screenshot from your game, I recommend blurring the Bar_BG with a Gaussian Blur (~60px). Additionally, I suggest adding a white overlay with ~50% opacity and a 5-pixel wide white bar on the left edge with ~10% opacity. This helps improve the readability of the navigation bar buttons and adds an extra layer of detail to your menu design.

The repository also contains the optional file "SimMattically_RefreshedMainMenu_ScenarioButton.package" from my other mod, which replaces the Scenario button icon with a semi-transparent white version. It's up to you whether you want to use it.
_________
Step 3: Import the images to the .GFX file
Firstly, open JPEXS Free Flash Decompiler and then open my SimMattically_YourOwnMainMenu_Template.gfx with it.


Select "No to all" when prompted.

On the left, choose "images" and scroll to the bottom where you will see the images you just edited in their original form. Right-click on each and select "Replace." Select the custom images you prepared in step 2.


Save the file.
_________
Step 4: Import the .GFX file into the .package file.
Open Sims 4 Studio, then click on "My Projects" and open SimMattically_YourOwnMainMenu.package. Select "Scale Form GFX" (the one with the "gameentrylauncher" description) and click on "Import." Select the modified .GFX file and import it. On Windows OS, you need to switch from .binary to all file types to see the file.


Save the .package file via File -> Save As... Give it a custom name and place it in The Sims 4/Mods folder.
That's it! Enjoy!
_________
IMPORTANT INFORMATION/TERMS OF USE:
Main menu overrides can become outdated with some game updates, causing them to break the game. You will have to remake your custom main menu with a new, updated template in this case. Always make sure you are using the latest available template and that it's not outdated.
Since these mods can break the game, I do not advise sharing your custom main menus with other players. You are free to do so, but be aware that since you're relying on this repository to create your own version, you most likely won't be able to update the mod and resolve issues for other players on your own, so you take responsibility for breaking their game.
If you decide to share your version with other players, please credit my repository and link to my Patreon post.
Do not put your custom main menu based on this repository behind any paywall or early access. I made this repository and tutorial free for everyone, so keep it fair.
I do not take responsibility for people misusing this repository or breaking your game with incorrectly modified files. I do not provide support for custom main menu overrides created by other creators using this repository.
_________
#sims#thesims#thesims4#sims4#sims 4 mods#sims 4 custom content#simblr#s4cc#ts4#main menu override#sims tutorial
317 notes
·
View notes
Text
Gaming GIF Tutorial (2025)
Here is my current GIF making process from video game captures!

PART 1: Capturing Video
The best tip I can give you when it comes to capturing video from your games, is to invest in an injectable photomode tools - I personally use Otis_Inf's cameras because they are easy to use and run smoothly. With these tools, you can not only toggle the UI, but also pause cutscenes and manually change the camera. They are great for both screenshots and video recording!
As for the recording part, I personally prefer NVIDIA's built-in recording tools, but OBS also works well in my experience when NVIDIA is being fussy.
PART 2: Image Conversion
Do yourself a huge favour and download PotPlayer. It is superior to VLC in more ways than one in my opinion, but is especially helpful for its Consecutive Image Capturer tool.
Open the video recording in PotPlayer, and use CTRL + G to open the tool. If this is your first time, be sure to set up a folder for your image captures before anything else! Here are the settings I use, albeit the "Every # frame" I change from time to time:
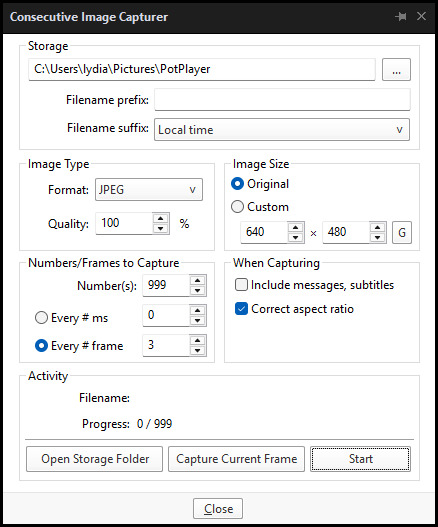
When you're ready, hit the "Start" button, then play the part of the video you want to turn into a GIF. When you're done, pause the video, and hit the "Stop" button. You can then check the images captured in your specified storage folder.
(TIP: Start the video a few seconds a head and stop a few seconds after the part you want to make into a GIF, then manually delete the extra images if necessary. This will reduce the chance of any unwanted cut-offs if there is any lagging.)
PART 3: Image Setup
Now, this part I personally always do in GIMP, because I find its "Open as Layers" and image resizing options 100% better and easier to use than Photoshop. But you don't have to use GIMP, you can do this part in Photoshop as well if you prefer.
Open the images each as an individual layer. Then, crop and/or scale to no more than 540px wide if you're uploading to Tumblr.
(TIP: This might just be a picky thing on my end, but I like to also make sure the height is a multiple of 10. I get clean results this way, so I stick to it.)
If you use GIMP for this part, export the file as .psd when done.
PART 4: Sharpening
If you use GIMP first, now it's time to open the file in Photoshop.
The very first thing I always do is sharpen the image using the "Smart Sharpen" filter. Because we downsized the image, the Smart Sharpen will help it look more crisp and naturally sized. These are the settings I mostly use, though sometimes I change the Amount to 200 if it's a little too crunchy:

Here's a comparison between before and after sharpening:


Repeat the Smart Sharpen filter for ALL the layers!
PART 5: Timeline
First, if your timeline isn't visible, turn it on by click on Windows > Timeline. Then, change the mode from video to frame:

Click "Create Frame Animation" with the very bottom layer selected. Then, click on the menu icon on the far-right of the Timeline, and click "Make Frames from Layers" to add the rest of the frames.
Make sure the delay should be 0 seconds between frames for the smoothest animation, and make sure that the looping is set to forever so that the GIF doesn't stop.
Part 5: Editing
Now that the GIF is set up, this is the part where you can add make edits to the colours, brightness/contrast, add text, etc. as overlays that will affect all the layers below it.
Click on the very top layer so that it is the one highlighted. (Not in the timeline, in the layers box; keep Frame 1 highlighted in the timeline!)
For this example, I'm just going to adjust the levels a bit, but you can experiment with all kinds of fun effects with time and patience. Try a gradient mask, for example!
To test your GIF with the applied effects, hit the Play button in the Timeline. Just remember to always stop at Frame 1 again before you make changes, because otherwise you may run into trouble where the changes are only applied to certain frames. This is also why it's important to always place your adjustment layers at the very top!
Part 6: Exporting
When exporting your GIF with plans to post to Tumblr, I strongly recommend doing all you can to keep the image size below 5mb. Otherwise, it will be compressed to hell and back. If it's over 5mb, try deleting some frames, increasing the black parts, or you can reduce to number of colours in the settings we're about to cover below. Or, you can use EZGIF's optimization tools afterwards to reduce it while keeping better quality than what Tumblr will do to it.
Click on File > Export > Save for Web (Legacy). Here are the settings I always use:

This GIF example is under 5mb, yay! So we don't need to fiddle with anything, we can just save it as is.
I hope this tutorial has offered you some insight and encouragement into making your own GIFs! If you found it helpful, please reblog!
135 notes
·
View notes
Note
can i ask what tool you use to compress?
also could you perhaps compress this image :)
Compressed!
116KB -> 8KB ( 6.9% )
Sure. I'm going to be answering @slugcat-in-gundam's ask too because they sent it at a similar time with a similar question:

I use GIMP for all image editing, besides occasional Lunapic.com usage. I did an FAQ on this on another gimmick blog a while back but I do different things here sometimes so I'll redo it anyways.
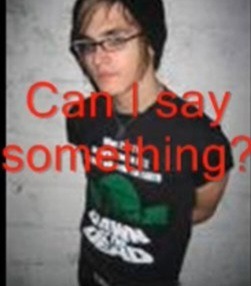
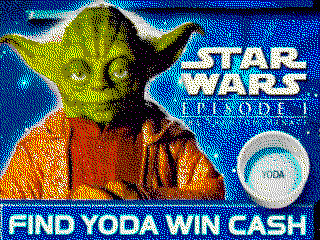
I got a higher quality version of your picture so the compression will be more noticable:

All the compression done on this blog favors aesthetics over functions, which is why there's extreme dithering on everything: dithering isn't really something that's used at all anymore but I like how it looks.


The main process is really just scaling the image down with linear interpolation to something between 64-256 pixels on the short side, and using Gimp's feature of letting you clamp an image to indexed colors, specifically with Floyd-Steinberg dithering on. If there isn't dithering, the picture will look like this:

Then I just check the sizes they export at and post the image and that's it.
If I want to make the image comically small and impossible to discern, I'll keep it as a jpeg and turn the quality way down at a tiny size:

Which will end up looking like this.

There are other techniques used sometimes, mainly on the #win98 pictures and #gba pictures.
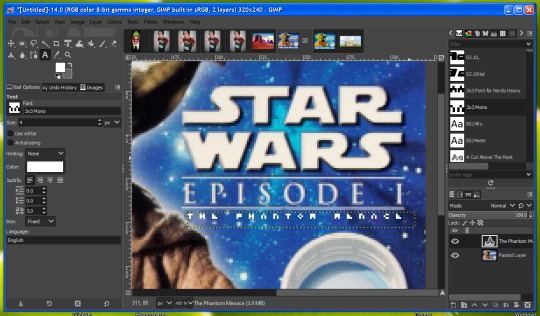
With the win98 pictures, I scale them down to 320x240 or 160x120 every time and clamp the colors to the windows base palette, usually saturating the image before since the dithering doesn't look great otherwise. Look how this picture looks without vs with extra saturated colors:

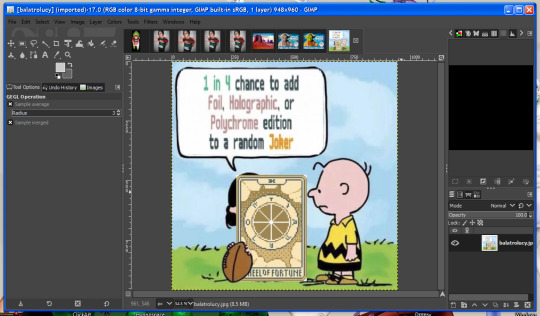
I forgot to mention before so I'm just jamming it here, but I'll also replace text in the font 3x3 mono if it's too small to be readable to keep the image legible sometimes. You'll notice this being done with fine print and watermarks sometimes:
Here's the runthrough of that:


Lastly, with the GBA pictures, it's about the same process but I just clamp the colors down to a number that the dithering is noticeable while the image is at the gba resolution. I never noticed until making this tutorial, but there's a positioned option for dithering too which I'll probably start using for these gba posts.


That's about it. Here's the big version of the image you sent by the way:
92 notes
·
View notes
Text
How I make gif stamps in GIMP!
Hi! So I thought I would make a tutorial on how I personally make my animated stamps in GIMP! With images to help!
Firstly, have your stamp base, I use old stamp templates I found or from my own stamps. Then you want to add your gif as a layer.

Once you've opened it as a layer, all the gif layers will appear! You want to first resize the background layer by scaling the layer.

This stamp has an interior width and height of 95x50 pixels, so I make sure to scale the layer to fit. Make sure width and height aren't linked because not all gifs will fit that size naturally.

Then it is very important to merge the background layer with the stamp template layer, this way when you make the gif it looks like a stamp!

Once that's done scale all your other layers to the same width and height so that they too will fit in the stamp! Then what you want to do once that is finished is to open filter > animation > optimise (for gif).

Then once you've done that you can click playback to see if the gif is all right!


Once that's done it is time to export it by going export as, now I always have to change my file to a .gif type in order for it to work. Once you've done that hit export.


Then it will show a pop up window, it is very important you hit check on animation! Otherwise it won't work!

Once that is done, you can now hit the final export and your gif stamp will be made! See my final product below!

#should work the same on a windows computer as well!#tutorial#gimp tutorial#image editing#stamp#stamps#blinkies#web#old web#webcore#old webcore#myspace#heyspace#edit#editing#page decor#help guide#guide
74 notes
·
View notes
Text
A year in illustration (2024), Part four

If you'd like an essay-formatted version of this post to read or share, here's a link to it on pluralistic.net, my surveillance-free, ad-free, tracker-free blog:
https://pluralistic.net/2024/12/07/great-kepplers-ghost/art-adjacent
Part one
Part two
Part three
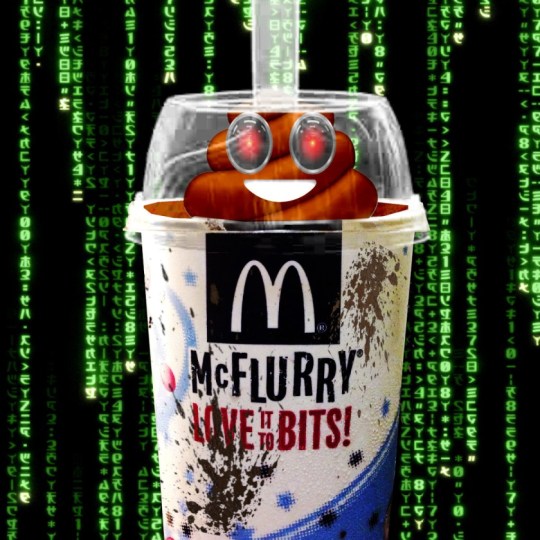
The US Copyright Office frees the McFlurry
Figuring out how to illustrate the problems of DRM in McFlurry machines took some doing, but I'm super happy with how the HAL 9000-eyed poop emoji inside a spattered McFlurry cup (fair use of a McDonald's promo image) worked out.
https://pluralistic.net/2024/10/28/mcbroken/#my-milkshake-brings-all-the-lawyers-to-the-yard
(Image: Cryteria, CC BY 3.0, modified)

Keeping a suspense file gives you superpowers
Another Keppler classic: originally, this was FDR being offered a helping hand to cut through his paperwork. I added in one of the elephant heads I'd cropped out for election illustrations, and used it to represent "not forgetting."
https://pluralistic.net/2024/10/26/one-weird-trick/#todo

The housing crisis considered as an income crisis
The underlying image is another Keppler, showing death flamboyantly dicing with a millionaire. I added in an official (hence public domain) Reagan portrait, some monopoly houses, and a vintage aerial photo of Levittown, halftoned to disguise scaling artifacts.
https://pluralistic.net/2024/10/24/i-dream-of-gini/#mean-ole-mr-median
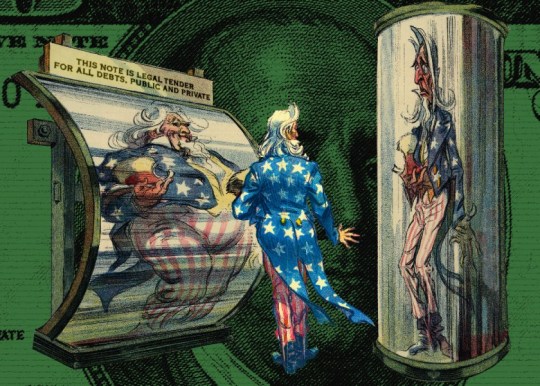
Retiring the US debt would retire the US dollar
More of Keppler's outstanding Uncle Sams! Add in a super-rezzed-up US $100 (all that intanglio looks great at high mag) and you've got an instantly arresting image.
https://pluralistic.net/2024/10/21/we-can-have-nice-things/#public-funds-not-taxpayer-dollars
Penguin Random House, AI, and writers' rights
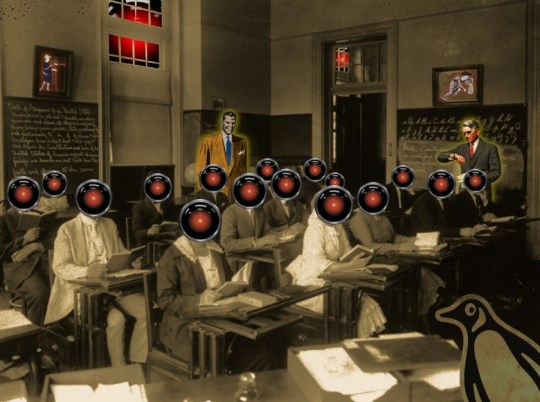
The impatient guy makes another appearance in this WPA image of an adult literacy class; he's joined by another "business man" type, this one from a midcentury ad for a multi-level marketing scheme selling…business suits! The pupils' heads are all HAL 9000 eyes, natch, but don't miss all the little Easter Eggs, like the reeve and peasants in the frames on the walls.
https://pluralistic.net/2024/10/19/gander-sauce/#just-because-youre-on-their-side-it-doesnt-mean-theyre-on-your-side
(Image: Cryteria, CC BY 3.0, modified)
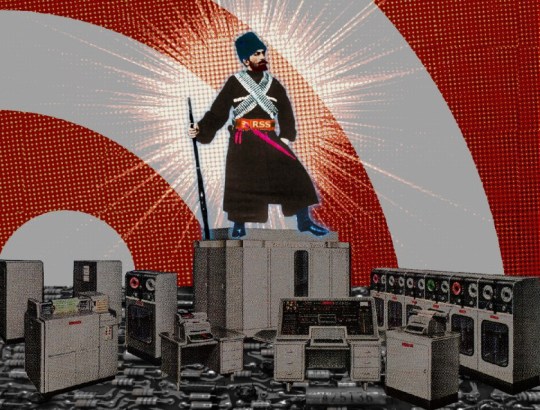
You should be using an RSS reader
The guerrilla fighter is back, this time standing atop some mainframe equipment ganked from a Univac ad. The halftoned RSS logo in the background really works, especially with a partially blended GIMP "supernova" effect behind the rebel.
https://pluralistic.net/2024/10/16/keep-it-really-simple-stupid/#read-receipts-are-you-kidding-me-seriously-fuck-that-noise
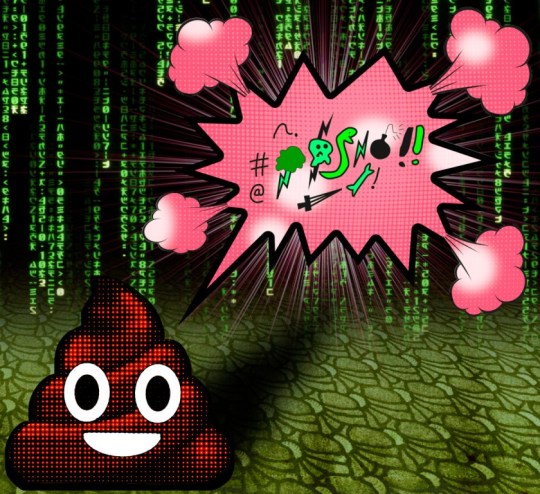
Dirty words are politically potent
I spent a bunch of time experimenting with different ways of making emphatic speech bubbles and it paid off here; that poop emoji's gawlix is in a good home. Halftoning the foreground element (the poop) works surprising well here. I should do more of that.
https://pluralistic.net/2024/10/14/pearl-clutching/#this-toilet-has-no-central-nervous-system
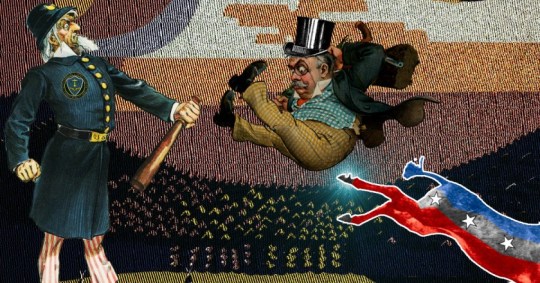
Lina Khan's future is the future of the Democratic Party – and America
Keppler's Uncle Sam Cop is back, along with another Keppler – a carpetbagger flying through the air after getting a kick in the pants. I got good use out of one of my Democratic Party donkeys here. The background is a half-tones WPA travel poster for Montana.
https://pluralistic.net/2024/10/11/democracys-antitrust-paradox/#there-will-be-an-out-and-out-brawl
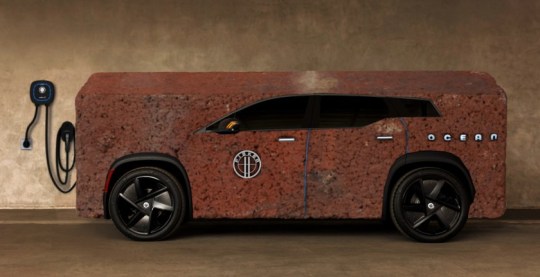
Cars bricked by bankrupt EV company will stay bricked
I actually made this brick by hand: first I rescaled a box image until it had the right proportions, then I found a public domain texture that was the right kind of brick and used the perspective tool to put it over each face of the box. I told you public domain bricks are hard to find.
It was very satisfying overlaying all the elements of the Fisker car I cropped out onto the brick.
https://pluralistic.net/2024/10/10/software-based-car/#based
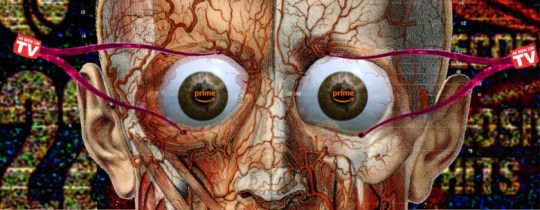
Prime's enshittified advertising
Nothing exceeds like excess! The flayed face with eyeballs comes from a 19th century book of French anatomical drawings. The calipers' handles just didn't look right (I referred to stills from Clockwork Orange to try and get 'em to work), but then I hit on the idea of using the "As Seen on TV" logo, which worked perfectly. The halftoned K-Tel ad-card background doesn't quite work, I think.
https://pluralistic.net/2024/10/03/mother-may-i/#minmax
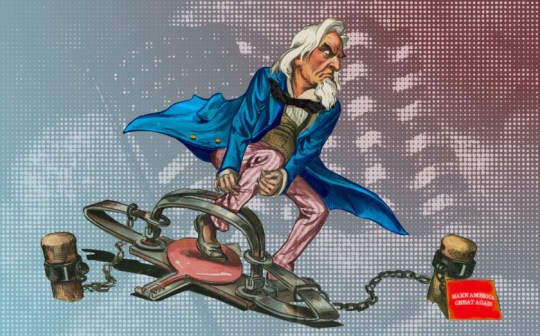
"That Makes Me Smart"
This is actually two Kepplers; the original guy in the leg-hold trap is some lost-to-history politician embroiled in a lost-to-history scandal. But once I added (yet another!) of Keppler's Uncle Sam heads to his body (recoloring his coat and converting his trousers to red stripes), it became a perfect visual representation of America, trapped. The halftoned US flag is my favorite background yet.
https://pluralistic.net/2024/12/04/its-not-a-lie/#its-a-premature-truth
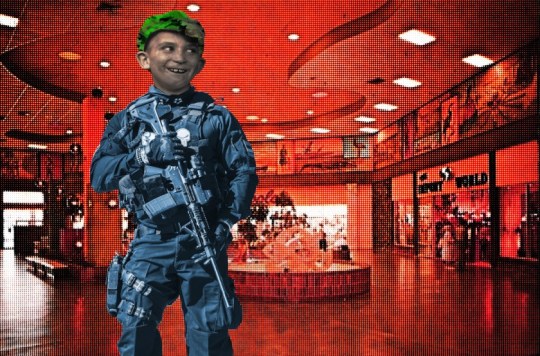
The far right grows through "disaster fantasies"
When it came to finding heavily armored and armed weirdos, I was spoilt for choice; same goes for grainy photos of vintage malls that look good after halftoning. Add in the goofy, grinning newsie's head and overlay his hat in camou, and it's perfect.
https://pluralistic.net/2024/11/24/mall-ninja-prophecy/#mano-a-mano
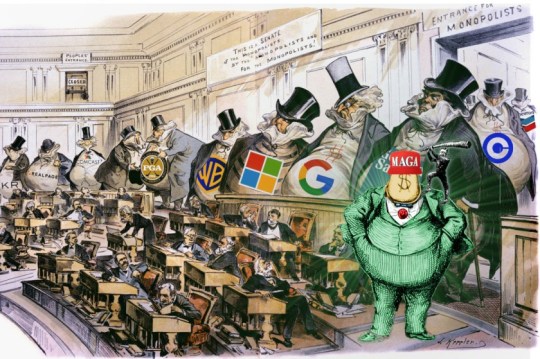
Boss politics antitrust
Finally, I got a chance to use Keppler's "Capital Controls the Senate!" I agonized over which corporate logos to use. Boss Tweed is back, with a Trump wig and MAGA hat.
https://pluralistic.net/2024/11/12/the-enemy-of-your-enemy/#is-your-enemy
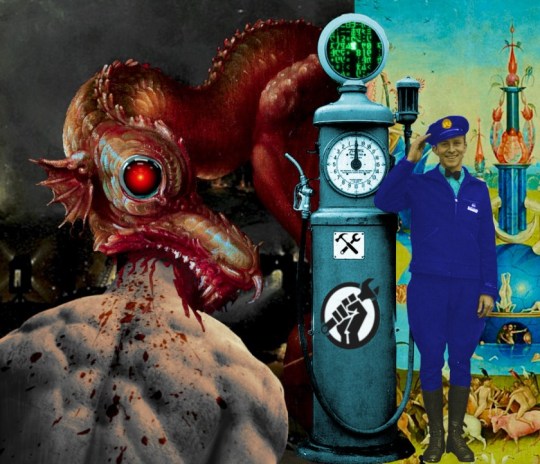
Antiusurpation and the road to disenshittification
A diptych! Both sides' backgrounds come from Bosch's "Garden of Earthly Delights" – hell on the left, heaven on the right. The happy gas-jockey's old-fashioned ethyl pump divides the scene. The head-devouring dragon (with HAL 9000's eye) is a delightfully gory detail from Goltzius's 1183 painting of a couple guys having a hard time indeed.
https://pluralistic.net/2024/11/07/usurpers-helpmeets/#disreintermediation
(Image: Cryteria, CC BY 3.0, modified)

Bluesky and enshittification
I know, canonically the sirens who tempted Ulysses were merfolk, not half-woman/half-birds, but all the merwoman versions have a ton of naked breasts in them, and frankly, Waterhouses's 1891 "Ulysses and the Sirens" just rips. It took a lot of fiddling with the perspective tool and the clone brush to swap their bodies for the Bluesky butterfly wings, but it still looked weird until I mapped in a kind of scaly, butterfly wing texture.
https://pluralistic.net/2024/11/02/ulysses-pact/#tie-yourself-to-a-federated-mast
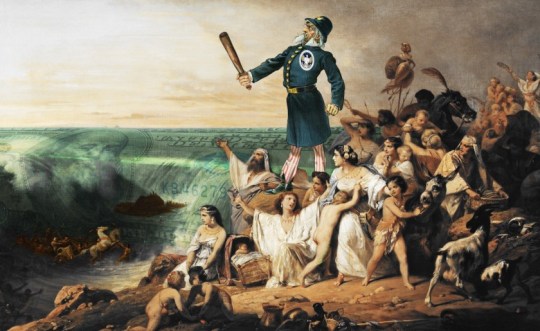
Shifting $677m from the banks to the people, every year, forever
I replaced Moses parting the Red Sea with Keppler's Uncle Sam Cop, but something still wasn't right. Then I figured out how to turn the Red Sea into a giant, aquatic US $100 bill (loooove that intaglio!) and it was awesome.
https://pluralistic.net/2024/11/01/bankshot/#personal-financial-data-rights
#art#collages#public domain#creative commons#cc#fair use#copyfight#visual communications#illustration#pluralistic illustratons 2024
31 notes
·
View notes
Text
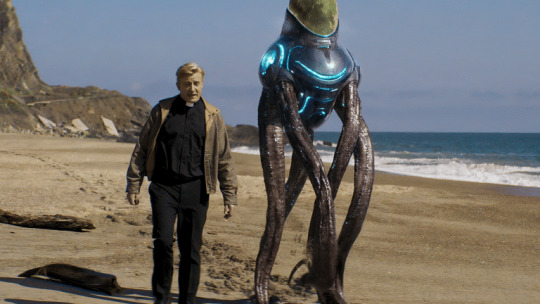
Love, Death and Robots Volume 4
Back again, baby! Let's get to it. I'm taking notes as I go along, and while I might go back and make some modifications, I want my thoughts to be honest yet refined. ¡Vamanos!

"Can't Stop"
...puppets? Weird choice, but that's to be expected. I was tapping my foot and nodding my head when the music started up, so I was ready to get into it, but unfortunately this short is just "That's it?" in full. I appreciate that the mechanics of puppetry were a part of this world and not just a gimmick, but ultimately this is just a music video (or a live concert in a world where everyone is a puppet), and I find those mostly just fine.

"Close Encounters of the Mini Kind"
I loved the mini episode from last time, even though it was zombies, for the sheer over-the-top energy it brought. I wonder if it will do the same here.
After opening with a biting satire of modern policing, we really get into the plot. There's some bits that are kinda grotesque (almost nothing with the anal probing is anything more than an uncomfortable rape joke, although the guy in the gimp suit caused my nose to exhale) but the sheer escalation even by halfway makes me wonder where the hell they can go from here. And yet somehow, it persists.
Ultimately, the scale of the alien invasion and the audacity thereof is the point. I respect it more than I like it, but I did have fun.
(♫Black hole gun/won't you come♫)
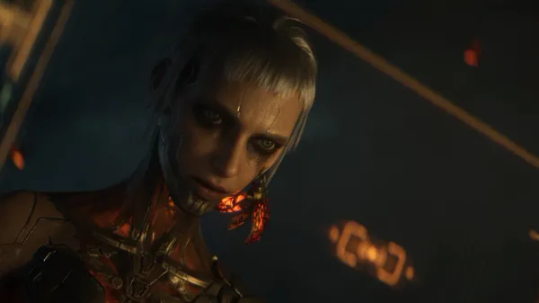
"Spider Rose"
The technology here is very fun, on first viewing: based heavily on insects and other creepy-crawlies, with the spider motif being very literal for our main character.
Spider Rose is a broker for rare meteors, but she has something rarer in mind: revenge on a grand scale. She is left with a little pet as a trial period for a potential deal, and learns to get along with it... but also learns it's far more than meets the eye.
I keep waiting for the other shoe to drop on this one. It's realistic animation, which for this series usually means there's some dark twist to it. It's ostensibly about the healing power of having a pet and I dearly want that to be true.
I won't get into spoilers here, but I am satisfied with the direction this story went in the end. I didn't particularly enjoy it, but the core thesis about pets changing you and your priorities does hold true throughout, so it earns my respect here.

"400 Boys"
...very weird title, very weird image. I had someone tell me this was the best episode this season, but he's a very weird guy so we'll see if I agree.
Giants invade London! The gangs fight back!
Halfway through, and this episode is very weird. The giants, AKA the 400 Boys (that's the name of the block they invaded, not their number) seem to be the thing that changed everything, but it seems like everything was already different to start with, as there are psychic powers and roller-blading warriors. It's almost an exercise in New Weird.
The exact appearance of the giants is a bit of a spoiler so I went with an image that doesn't spoil too much, but their design is highly unusual, almost non-threatening were it not for the buildup we get for the first ten minutes. I do feel they oversold the threat based on the fight we got at the end, but even still it's harsh and brutal enough to be familiar to fans of Attack on Titan.
I think it's only pretty good. There's a bit of an arc for the characters involving gang warfare, but it's not much. I feel like this whole thing is laced in metaphor and I'm just taking the metaphor literally.

"The Other Large Thing"
A pair of humans who own a cat get a robot that can do their chores. The cat, Sanchez, learns the robot can understand him, and thus world domination begins...
This one is almost unnecessarily grotesque from beginning to end. I first noticed it regarding the designs of the humans, which are ugly and play into the ugly=stupid=evil false analogy, and atop the photo of Sanchez after being neutered, his true name (an important plot point) turns out to be a crude joke. I don't like this one; there are some things to like (John Oliver turns in an excellent performance, Chris Parnell is, as always, wonderful, and having the humans speak nonsense really puts us in the cat's head) but it's a fun idea in theory played too seriously, too grossly.
"Golgotha"
A priest is sent to speak to an alien priest (called Lupos) about a miracle he supposedly witnessed, and is doing his level best not to "fuck it up".
I don't mind live-action in this series, but I am annoyed when an animation series has live-action elements. The Lupo design is very cool, however, so I can't be too mad. And the idea of religious aliens always interests me, considering my background.
This one is blunt, and not in a way that really helps its overall message. And while there is one conversation about faith it quickly turns into a punchline of the blackest comedy. I neither respect it nor like it, and I think I might actually hate it; there are two theses at work here, those being a pro-environmental message and an anti-religious-nationalism message. The bad guys hold both of them quite dear; either this story is satirizing religious extremists by saying they hold "go green" beliefs, or because of the way we treat our sea life (which is, I will say, horrendous) we all deserve to be killed by crusade.
I can't even be happy about any of the actors I know here, I hate it that much. Truly one of the worst episodes I've ever seen.

"The Screaming of the Tyrannosaur"


Even atop the disgust I feel for his business practices and exploitation, he's not even that good. It's inspired casting, for sure, but if I am to be tortured with his presence I would prefer not to recognize he's there.
The worst part is, the worldbuilding surrounding this episode is full of inspired choices. A space ring as a location for a race? I'm surprised nobody else has thought of it. And of course dinosaurs make everything better. The bodysuits and some of the haircuts are absolutely ridiculous and hard to take seriously, but once we get into the actual race and can focus on that, it's exciting and brutal.
And this T-Rex? SCARY. I don't think I've ever been quite so worried for any hero's safety as I have been here, even after it gets gored.
I don't think this was meant to be high art. It's meant to be a setting where you can race/fight dinosaurs on a space ring. And this aspect I greatly enjoyed. The fact Mr. Beast appeared therein complicates my enjoyment, but the parts of it that were good were not made good by his hand.

"How Zeke Got Religion"
A single bomber is tasked with a dangerous mission into France during World War II. The goal: bombing a single church. The leader: a man named Coombs with some mysterious background. The problem: Zeke, an atheist who has no problem saying so.
As can be imagined, the core premise is about Zeke learning a thing or two about the faithful, but surprisingly for such a schlocky premise and execution it's a lot more respectful of religion and faith than "Golgotha", which was technically all about it. Not to mention the action is exciting, going from action movie to action horror in about five seconds. And the creature design! The Fallen is an exceptional display of creature creation, and while I won't get into it here for spoilers, the usage of hands was consistent and creepy.
Of all the episodes so far this one is my favorite. I don't know but can hope the next two may yet top it.

"Smart Appliances, Stupid Owners"
In hindsight, it was bound to happen. A whole short about smart appliances and the people who can't use them feels like something that should've existed already, but in the style of a tell-all documentary is new, fresh.
This one is not as grotesque as "The Other Large Thing" but it's close. Necessarily so, given the premise. Each smart machine has a delightful design that is capable of giving each of them two eyes and a mouth, one after the other, and still look like a normal appliance, so that's a pro.
But it's just... we're already aware of how gross people can be. People are weird, for sure! This short just revels in in for seven minutes (four without credits) and then ends. There's a light satirical edge of smart appliances not making people better on their own, but the focus is less on the companies that make these smart machines than the people who own them. It feels misanthropic to the max.

"For He Can Creep":"
Is that the devil? From the Bible?
In a madhouse asylum, a tortured poet is coerced to write a poem for the devil (Satan) which will allow him to destroy the Earth. It is up to the cat Jeoffry and his companions Polly, Tom and Nighthunter Moppet to stop the devil!
The designs in this are beautiful, being mostly 3D animated forms with cross-hatching for details, which is consistently interesting to watch, in stillness or in motion, mostly. The characters are a little stiff, but remain expressive.
Satan also has a fun design, switching back and forth between his devilish form in a red suit and a white Englishman with a cane and wig, in a red suit. In particular, his accoutrement are important, as they become his weapons later.
The story isn't much to write home about. It's about cats fighting the devil, and that's about what happens. No twists and turns for this one, just a straightforward tale of the bond between cat and their pets.
And so we come to the end of this experiment. Feels like a lot of floundering this time, a lot of trying things that don't quite succeed, that nonetheless remain compelling. I don't think there's anything that'll blow your tits clean off this season, but at least one episode I liked quite a lot. Below find my tier list and fight me about it (as a friend).
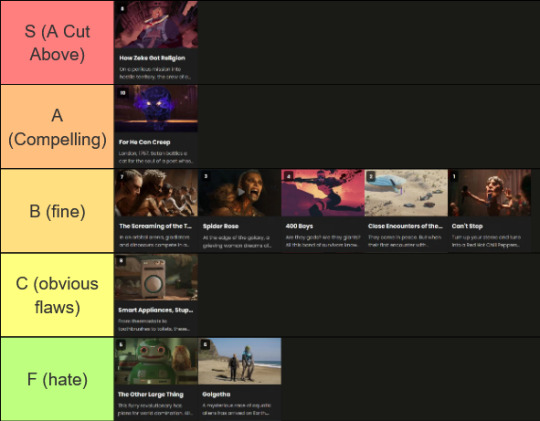
#love death and robots#love death and robots volume 4#sci-fi#fantasy#speculative fiction#anthology series#can't stop#close encounters of the mini kind#spider rose#400 boys#the other large thing#golgotha#the screaming of the tyrannosaur#how zeke got religion#smart appliances stupid owners#for he can creep#netflix#tier list
16 notes
·
View notes
Note
about the GIMP resizing issue, it's because your interpolation setting is not on "none"/"nearest neighbor." the image > scale image dialog has a dropdown menu for it at the bottom, you can use that setting to switch between pixel perfect upscales and sharpened versions for "regular" artwork
also sorry if this sent twice my browser shit itself trying to attach a screenshot of the dialog window lol
oh nice
@konizumi this might help
8 notes
·
View notes
Text
Tidbit: Persnickety About Posters
If you want to avoid overly dark or blurry posters in your fan adventures, then follow my lead:
1) Download JPEG off of Google Images.
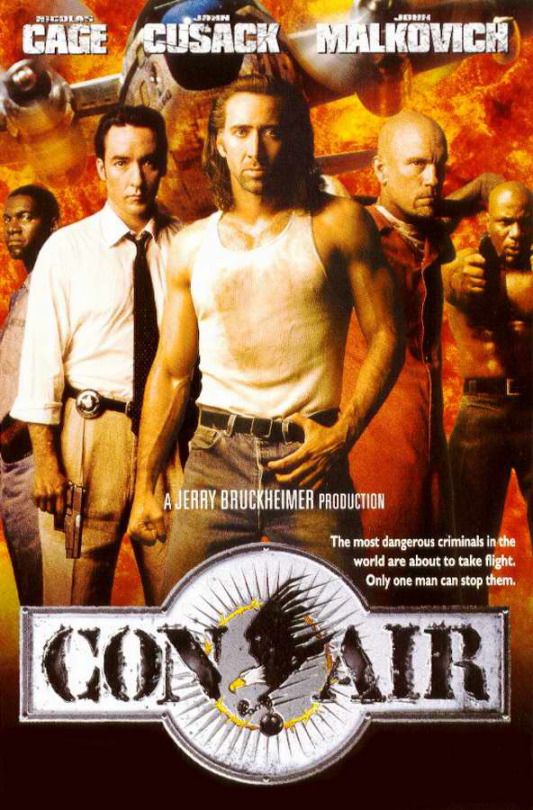
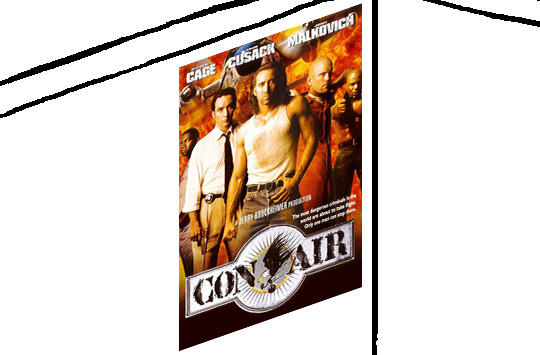
2) Import, scale down, and skew/shear it. Use an interpolation method such as Bilinear or Bicubic Sharper. Doing both transformations at once is better than repeatedly transforming the image (i.e. resizing it, applying the transform, and then skewing it), as it helps prevent the image and edges from becoming too blurry. This will be important later.
You can hold down Ctrl + Shift to constrain the Move tool along a single axis so it won't go out of alignment as you're skewing it. If you don't see the Transform Controls by default, enable it in the tool options bar at the top, or go to Edit>Free Transform.
3) Desaturate it. Desaturate means to turn color grayer, until it becomes black and white.

4) Adjust the brightness and contrast using the Levels adjustment tool. It's much too dark as it is! In Photoshop, it is located under Image>Adjustments>Levels..., but I recommend creating an adjustment layer from the bottom of the layers tab instead. Doing so will allow you to make edits non-destructively, meaning you can go back and change any parameters until it looks right.

You could use a Brightness/Contrast adjustment with "Use Legacy" enabled instead to achieve a similar effect, but it won't clip the shadows and highlights as easily. You would have to create an additional duplicate adjustment and turn the brightness and contrast way down on the first one to do so. It's somewhat easier to use but less efficient than Levels in this case.
5) Apply a simple sharpen to the image as it is still too blurry for our purposes. In Photoshop, it is located under Filter>Sharpen>Sharpen... Do not use any other filter, such as Unsharp Mask, unless you absolutely have to in lieu of a basic one. If you must, turn down the radius a bit and the threshold all the way to 0.

6) Make a selection around the image. Ctrl + left click on the layer's thumbnail to make a selection around it. Doing it this way makes it inherit the level of transparency any pixels have. If you can't, use the Magic Wand tool with "Anti-alias" enabled to select the transparent area outside, then invert it using Shift + Ctrl + I, or go to Select>Inverse.
Create a new layer above the image, then go to Edit>Stroke... and add a black stroke with a width of 2px located Outside. Leave everything else at the default. Doing it this way will create a stroke with anti-aliasing based on the selection you made. This should generally turn out pretty sharp if you follow my advice from Step 2. If you had used the Stroke Effect available from the Blending Options' layer styles, it will always result in a very smooth outline instead. You do not want this.
Voila, and Bob's your uncle, you're done!

The instructions above are Photoshop specific, but it should still be pretty software-agnostic. Here is the recreation PSD, and below the read-more link are additional notes, such as transferring the steps to something like GIMP.
ADDENDUM
You may be questioning why I deliberately made the stroke anti-aliased. "Isn't that an MSPArt cardinal sin??", I hear you clamoring. Well, my dear readers, let me briefly elucidate you on why your ass is wrong. Exhibit A:
The clearly semi-opaque pixels that can be found in every poster outline, which is especially pronounced here in the Little Monsters poster. I can also see that Hussie actually created a stroke on the same layer as the poster and merged it down into the white background like a dumbass. I omitted this in step 6 for the sake of convenience (and also the fact that you can't add a stroke to a smart object in Photoshop without rasterizing it first).
He had to use the magic wand tool in order to extract it from the layer for this panel, and then fill it in with the paint bucket tool. I can even tell he had the color tolerance set up very high on the magic wand to grab all those near-black and very light gray pixels, AND he had anti-alias enabled and the tolerance on the bucket tool set to be at least higher than 0 to tint similar colors. Exhibit B:

I also didn't address exactly how to desaturate something in Photoshop. Honestly it was because I was feeling pretty lazy. I would have had to rewrite step 4 to not include redundant information about adjustment layers. You can add either a Black & White adjustment layer or a Hue/Saturation one and turn the saturation all the way down to 0. The resulting tones will be slightly different from each other but I'll explain why that is in another tutorial.
Speaking of another tutorial, read this one if you believe this post is missing the step of using a posterize filter.
Now onto applying some steps to GIMP.
RE: step 2) In GIMP, there is a dedicated Unified Transform tool separate from the Move tool, unlike in Photoshop where both features are combined into one. This is how you scale and skew (AKA shear in GIMP) both at the same time, among other things such as rotating.
You'll also find that instead of any interpolation methods labeled "Bilinear" or "Bicubic", there are only ones named "Linear", "Cubic", "NoHalo", and "LoHalo". Basically, Linear and Bilinear are the same, so are Cubic and Bicubic, naturally. I guess NoHalo would be similar to Bicubic Smoother and LoHalo would be kind of similar to Bicubic Sharper as well. It's not an exact 1:1, though.
Honestly it doesn't really matter what you use to reduce the size as long as it isn't None/Nearest-Neighbor. You're going to have to sharpen it no matter what. This applies to Photoshop as well.
RE: step 3) Go to Colors>Hue-Saturation... and repeat turning the saturation down to 0, or go to Colors>Desaturate>Desaturate... and select the Lightness (HSL) method.
RE: step 4) Go to Colors>Levels... or Colors>Brightness-Contrast... The Brightness-Contrast adjustment tool already functions almost exactly like in Photoshop with "Use Legacy" enabled.
RE: step 5) In GIMP 2.10, the developers squirreled away the basic Sharpen filter, making it inaccessible from the Filters menu. To use it, hit the forward-slash (/) key or go to Help>Search and Run a Command... to bring up the Search Actions window and type in "sharpen". Select the option that just reads "Sharpen..." and has a description of "Make image sharper (less powerful than Unsharp Mask)". I find that using a sharpness value of around 40 to be similar to Photoshop's sharpen filter.
RE: step 6) Instead of holding down Ctrl, you hold down Alt and click on the layer thumbnail to make a selection around it. Make a layer underneath the image this time since there isn't an option to place the stroke outside the selection rather than the middle. Go to Edit>Stroke Selection... and create a stroke using these settings:

I recommend keeping anti-aliasing disabled however, as GIMP produces lines that are a little too smooth for my taste.

With "Antialiasing" enabled
Without
If you're using a program that doesn't have a stroke feature available, you could draw a straight 1px thick line across the top of your poster, duplicate it, and move it down 1px. Merge them together, duplicate it again, and move it all the way down to the bottom of the poster. Then repeat the exact same process for the sides. I used to do this before I even knew of the stroke feature, haha.
Another reason I had to do it this way was because my dumb ass did the thing I said not to in step 2, scaling down the image with the scale tool, and then shearing it separately with the shear tool. This caused the edges to become too blurry to be used for a stroke automatically. Oh well, live and learn.
148 notes
·
View notes
Text
how i make gifs with only free software
this is adapted from what i did on macOS for years; i now run desktop linux due to planned obsolescence / apple's addiction to waste. if you use macOS, homebrew was my real introduction to using the shell and linux-like package management, and look at me now. every single gif i've made here (#spicagif) and on my sides @chongmiz and @buwanbyul use this method.
three programs mentioned here are command line-only, but optional; all this actually takes is VLC and GIMP.
acquire video 🏴☠️. my bittorrent client of choice is transmission, and yt-dlp (cli) is great if what you want is on youtube or vimeo
take screenshots in vlc by holding down the snapshot hotkey (sft+s is default); i tend to reduce playback speed for action sequences. you can also extract frames with ffmpeg (cli) which is a vlc dependency that should install automatically with any package manager, but it only makes sense if you've exported a clip of the part you want. both options are annoying.
open these screenshots as layers in gimp and edit away. my order of business is usually scale -> crop (save .xcf) -> sharpen -> color. this will give me a repetitive strain injury because i have not found a solution other than clicking every layer and hitting ctl+f
if you need subtitles or a watermark, which i do more on my k-pop side @buwanbyul, i recommend @animstack (yes an actual official linux-adjacent blog!)
i do not actually export gifs, they are webps:

honorable mentions
sshfs: i don't keep video on my laptop or like attaching external storage to it, so i torrent straight into my headless server over ssh. i realize normal people do not have this but this is how i "stream" from my own media library
pcmanfm: i browse files with ranger, but handling that many images without thumbnails is foolish. pcmanfm is very lightweight and is meant to replace more established file browser GUIs like thunar and dolphin
edit 2025/02/26: just mentioning @vlc-official @gimp-official
15 notes
·
View notes
Text
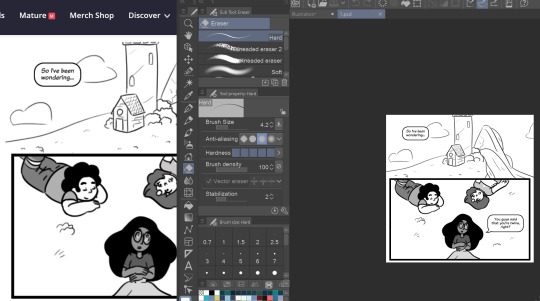
So I finally work on my comic, right? And everything's going well, I'm working at a nice big size for quality... so I don't notice until I put it in my drafts...
The images in my programs, csp/gimp/etc...
Appear way way smaller than they did at the same size on my old computer, which displayed all of my work at the same size as they would show up on Firefox.
Now, on the new computer, Firefox is still displaying the same size as the old computer but my programs are not. So when I try to preview it I can't see how it will actually look online because it will scale up online now and I just. UGH. I want a nice, good computer without the bs. I can't go back to the old computer and I can't figure out how to fix this problem... I've tried a lot of stuff and I'm exhausted...
I just want to work on my fucking comic
Here's a screencap of what I'm talking about. On my old computer the sizes of both images would be exactly the same. (the smaller one is at 100% in the program, but much smaller in appearance.)
37 notes
·
View notes
Text
One of my friends liked the screenshots I edited for my Vocaloid Halloween Playlist video, and wanted to know if I'd upload them separate from the video! I don't have a version of the edited images before I added the text on it, so I hope that's ok, credits will be under the 'read more'!

The thumbnail

The warning

Black Cats of Halloween
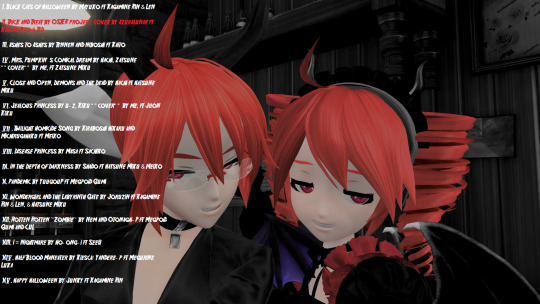
Trick and Treat

Ashes to Ashes

Mrs Pumpkin's Comical Dream

Close and Open, Demons and the Dead

Jealous Princess

Twilight Homicide Song

Disease Princess

In the Depth of Darkness

Pandemic
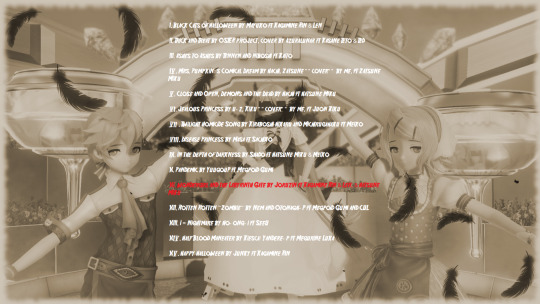
Wonder Girl and the Labyrinth Gate

Rotten Rotten ~Zombie~

I = Nightmare

Halfblood Maneater

Happy Halloween
Face tex edits, and self module: me
Eyelashes: emsterchu
Watermark Remover: M&M
Arv's lip sync, Juon Kiku, Acme Iku(outfit was used on Gumi), Teto, CUL: Arvo
Eye tex and Luka and Miku characters lashes: Disneyloid
Project Diva X song pack: CoolChar, Skyth, samyuu, korenkonder, Keikei14, Yukikami, jaykthx, Fresk/empa_nadas, jorj, jhonny
F2nd Song Pack: korenkonder, LimitedLime7, Keikei14, Jay, Fran, skyth, samyuu and Coolchar
Eden Module pack: Widuchan, MizMiz!, Silpher, JohnJan, Disneyloid, Stewie1.0, Sangabc, testsnake, lavverso, Palmtree_Freak, Anonymous Eden Fan
Eden Edit PV Pack: Hisokeee, Palmtree_Freak, Stewie1.0, sachbo, testsnake, Sangabc, The Zacc, Jay6_9, Cube, Fireyy, Deathblood, Bevellon, spaghetti2222, Bryntae, Blue Star, KageAruki, EgguTastesGood, Seb, Kyle, Fran, N1tr0t0m, Boku Boku, Razero6, Starbeat, Blizzin, JadefenMidori, Inky, Kominsach, TenTen, Utamote, Hatsune Elise, Volk, 晴希, ZoetjeTippie, Miyuto, Fable, himesaka, Tanjiro Taidana, FREDsooM, suzie, Ryusouta, Ciol, Adam Edmond, Meta X, ToriTeru, Lovrboy, Lucifer, Sykth, Samyuu, Flatz, Thatrandomlurker, nastys
XHD module pack: Azuki3, R.L., DavidMax, Nono_Minnyel, Stewie1.0, Silpher, Enomoto
Synchronize Skin Color: Azuki3 and R.L.
Zatsune Miku: V--R, Icy Wings, Platonic_Diva
Megpoid Gumi module pack: lavverso, Matymatiasmaty, ThisIsHH, FlyingSpirits, MusicRevU, Harryshibainu, Nanase7247, YoshiwaraMekaio, Kaykay, royer27, yendeena, doatz, nemmie, Wiggletums, Holiday, AWaffleBird, SourGummyes, kola*, GenoX, ElChicoEevee, Mimi-YA (Supurreme), NadaPD, ch6rlezAylen.h.m, CoolChar, korenkoder, samyuu, Skyth
Extra Sakine Meiko mods(outfit used on Gumi) : SourGummyes, Zero_V4x, Epic Games
SeeU and Sachiko: sho_thatsit
Mayu (outfit used on Zatsune) : earthwyrm
Kinzokunaga Neru(Used outfit on Cul) and Hagane Luka: Xamemey
Rin and Len cat MikuPa: Platonic_Diva
Kasane Ted: emsterchu, wolfloid, Eucalyptus, ch6rlez
sunz's Old Song Lighting Edits: sol_pregnantguy
Disable hand scaling: DeathChaos
Miku symphony module pack: Alamichu
Remove large hair spike: mxi9302
Anything else was edits done in gimp or game's stickers.
#Vocaloid#Hatsune Miku#Halloween#music#Happy Halloween#Megurine Luka#Kagamine Len#Kagamine Rin#Meiko#Kaito#Sachiko#Vocaloid CUL#Megpoid Gumi#game screenshot#video game#horror#spooky#Kasane Ted#Kasane Teto#Juon Kiku#Zatsune Miku#Utau#Utauloid#Fanloid#3D#Project Diva Megamix#Project Diva Megamix+#Project Diva#SeeU
16 notes
·
View notes
Text
Options Instead of AI
So I feel like instead of shaming someone and saying "you're bad for using AI" I want to instead propose options for alternatives to using AI. I try not to use it in my every-day life but I see it more and more throughout every aspect of my online life and it's just not something we can avoid by choice anymore. This also means though that my ideas about *why* someone would want to use AI might have some gaps. So I'd love for this to turn in to a something others reblog with their own suggestions for alternatives
DO NOT shame people please. Yes I absolutely hate how GENERATIVE AI is used to steal from artists and is an environmentally destructive force and will be for years to come and how it is literally getting rid of people's jobs. But shame doesn't actually work and I'm tired of people just shaking their fingers and not addressing the why of people who are using AI for their practice.
🙏 🙏 🙏 You want to use AI to help generate images for your deity/spirit partly because you haven’t seen artists who make art the way you see your deity/spirits and so you go to AI for help.🙏 🙏 🙏
🙏Commission an artist! I know this sounds a little like a cop-out because AI is free and all and most people can’t afford some of the steep prices for commissioning art from artists, but if this is something important to you (which I’m assuming it is because it’s for a spirit or deity you’re trying to have an image of in our world), then you should be willing to put aside some money. There’s plenty of artists who are relatively cheap (deviantart, instagram, tumblr, twitter are all FILLED TO THE BRIM with artists who will do full body and full color for under $20) and will work with you to help your vision come to life.
🙏Picrew! https://picrew.me/en/ type whatever pantheon or aesthetic + picrew into your search engine of choice and you’ll probably find one. Your mileage will vary as some have more customization options than others.
🙏If you’re a gamer and computer savvy there’s so many games that have mods that allow you to create custom characters where you can do everything from change how skinny or fat your character is, to what genitals they have, to what hairstyles they have, to if they have a tail or pointed ears or scales or scars or almost anything you can think of. If you heavily mod skyrim or sims 4 you can create some absolutely stunning characters who can look basically any way you want them to. Do you see your deity as being fat and short and having a prostetic leg? I’m pretty sure there’s mods that allow you to make that look happen because I’ve created several fat characters in skyrim and sims 4. You could even ask a friend to do it all for you if you aren’t computer/gaming savvy yourself.
🙏Download gimp and do an oldschool photobashing job. At the end of the day the type of generative AI that most of us have access to is going to be like old school photobashing on steroids. Generative AI is making art from other art, and good news is you can do that too!
🙏Literally just trace pictures and change them a little. Teach yourself how to draw. This may sound harsh because hey I suck at drawing too (all my faces look very uncanny) but the good thing is that this isn’t for other people, this is for your own practice.
🎴🎴🎴One of the first times I saw someone use generative AI in their practice was them making oracle cards with dall-e. They said that they had tried other oracle cards and the process of making their own was too hard to do and they couldn’t handle it for various reasons. I also see people say they can’t afford their own tarot decks or they really want to “make their own”.🎴🎴🎴
🎴https://archive.org/details/rider-waite-tarot You can download the original raider waite deck for free from archive.org.
🎴 https://acelioncards.com/10-free-printable-tarot-cards/ https://www.reddit.com/r/tarot/comments/fwlpor/printable_tarot_decks/
🎴There’s also SO so so many apps now that will let you do a virtual spread for both tarot and oracle cards. You don’t have to have physical cards.
🔮🔮🔮 You’re using something like Chatgpt to help you write a spell.🔮🔮🔮
🔮Good news is that there’s SO many spells out there you literally NEVER have to come up with your own spell template if you want to. Sneeze in any direction on tumblr and you’ll find someone who has posted a spell that you want to do. They will even walk you step by step through how they did the working, why they chose the herbs, and how you can troubleshoot anything that might go wrong. The biggest thing to remember about things like Chatgpt and other LLM AI (Large Language Model AI) is that they are using often times stolen textual sources that you already have access to! Say you’re looking for a money bowl spell and so you ask chatgpt to help you figure out how to make one without basil or something, well type into tumblr or instagram or tiktok or https://udm14.com/ “money bowl spell” and it will show you what other people have done and it’s the same stuff chatgpt has access to. When it comes to magical stuff chatgpt just trolled every available public post on the internet (and probably some not so public ones) and used it to train itself. It isn’t giving you anything novel or anything you can’t find yourself. It isn’t helping you think of something new or showing you something no one else would have thought of because it isn’t capable of that.
🔮Join a discord! There’s so many magic/witchy discords out there specifically open to beginners and willing to help you formulate what you want. There’s ones that have whole beginner forum sections where they link a mad libs style fill in the blank of whatever you want to say/do for your particular working. There’s probably even people in the server who will talk you through everything because they just enjoy it. At the end of the day instead of resorting to asking chatgpt to help you, why not try to find a community who will help you instead?
At the end of the day the best thing you can do when you’re thinking about whether or not to use AI in your practice is ask yourself if it’s for convenience or because there’s really no other options. In my own practice and my life as a whole I try really hard to remember that just because I’m used to convenience at every turn (thanks amazon and streaming and food delivery and and and) doesn’t mean I’m owed it. Just because you can do something doesn’t mean you should. I know I said shaming and all that, but at the end of the day moving away from AI is going to be something you have to do through mindful engagement with changing your belief structure.
Most people who use AI believe they are owed the convenience of it. “I’m disabled so I can’t sit and make a whole oracle deck on my own and I don’t have the money.” “I work so many hours so I can’t afford to spend hours researching a spell.” “I don’t know any other witchy people so I can’t ask for help.” These are all things that are actually not barriers to your magic and they are still a matter of convenience. AI is not the field leveling tool that big tech wants us to believe it is. It won’t make you have a more rich experience with magic. You can do tech magic without AI because people have been doing it since computers were a thing. Literally Buffy had an episode about tech magic back in the 90s so you can do techno magic without AI. You can use an oldschool thoughtform instead of AI to do things.
Am I open to the idea that there’s a one off niche reason why someone could use generative AI for their life/magic? Sure, I’m open to it because then we can brainstorm reasons not to use it together. I want to hear all the ways people use generative AI in their practice because then we can all go “hmm well this way is just as easy and it has all these other benefits” and we can only do that if we don’t make posts that go “You’re a shit shit shit person if you use AI in your practice and you’re not a real witch.” We gotta start combating this in a more understanding and collaborative way.
4 notes
·
View notes
Text

steel towers grow like corals at the edge of the end of the world
detailed process breakdown under the cut:
this is a location from silversea, the (inhales) work-in-progress troika-compatible post-apocalyptic science-fantasy TTRPG slash worldbuilding project i'm developing + running for a few of my friends. i've posted a drawing of this landscape before! someone asked for me to go into my process for digital collage in gimp, so i made sure to document the creation of this piece.
usually i start by gathering a bunch of images from wikimedia commons and by searching on duckduckgo images & filtering for creative commons licensed images. i wanted to start with a surreal landscape that looked more wrong the longer you inspected it, so this time i started by generating a background with commoncanvas (the stable diffusion model trained entirely on creative commons images, more on that here)
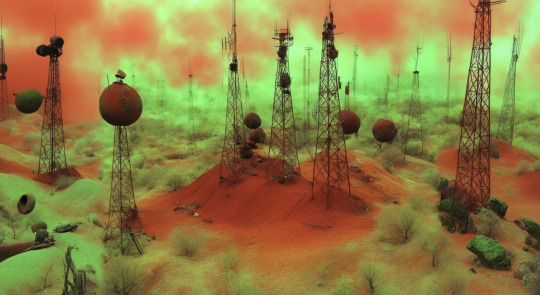
this was the final result. i didn't tweak it too much because i wanted the geometry to look unrealistic and warped. through the upscaling process it lost some of the early cgi look, which was sad, so i'll have to work more on trying to retain that.

interesting tangent: at 20% desert and 80% coral reef, a smooth cone briefly turns into a pyramid.
anyway, i decided i wanted it to look like you were on the edge of this environment, not in the middle, so i made some terrain in blender:
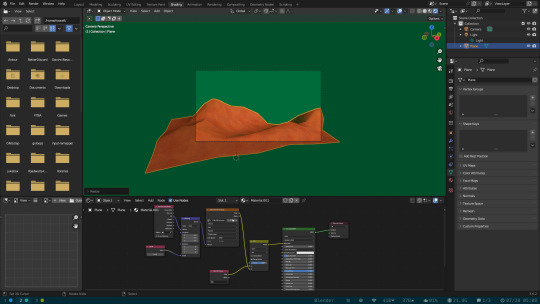
this was just a plane that i subdivided a bunch, pulled some vertices around with proportional editing to make dune shapes, and then decimated the faces to get back to a low poly look. i prefer that method to staying low poly the whole time, i feel as though i have more control over the shape.
the texture is a free tiling sand texture i found online, recolored and scaled down to make it pixelated, and then blended with vertex colors to add a little variation. it's very simple and took me maybe 30 minutes of actual work (the rest of the time spent trying to remember how to use material nodes).

this is the point where i took it into gimp and flipped & scaled the terrain until i liked the composition. i'm not bothered about the shadows not matching up, it just adds to how out of place the surreal terrain looks.

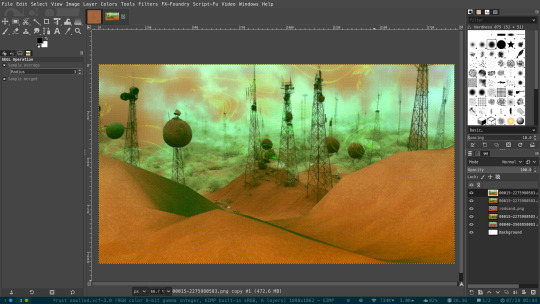
next is color correction, but i forgot to take a screenshot of that before adding the next part. gimp has a little fractal generator hidden in the filters tab, and i used that to make a swirling pattern that i overlaid over the sky, masking it selectively so it looked like it was getting thicker with distance. going for an "annihilation" look to the whole thing.
at this point i'm happy with the image and i go on to post processing. this is the part where tumblr's image compression is not doing me any favors, but oh well. when i make glitch art, there are a bunch of filters that are my favorite, but i don't usually use all of them on an image.
first off, i scale the image to 50%, add dithering (3-4 colors per channel looks nicest to me), then scale back up to the original resolution with no interpolation.
then i add "wind" (under the "distorts" option). it makes a cool pixel-sorted effect. at high levels it looks super cool...


but i keep it pretty subtle for this one.

the "video degradation" effect makes the image either too bright or too dark. i like the lcd screen look though. so i use a mask to turn it into a vignette.
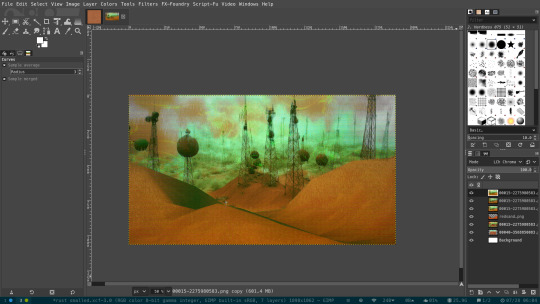
i also added bloom at some point during the process, but i don't remember when. i also took the original image before all the glitch effects and overlaid it with the "chroma" blending mode to bring back some of the color that had been lost.
this was a pretty simple collage, but i didn't want to make the post too long. most of my collages involve a lot of moving things around, testing different compositions and images before i decide on a final product.

this image took like 8 hours to make, for example. most of it was spent perfecting the grainy filter.
other gimp effects i didn't use here but i like include deinterlace (which you can use on a non-interlaced image to add deinterlacing artifacts), sample colorize (lets you use another image as a color source to gradient map onto an image), alien map (can't explain. just use it. move the sliders very slowly if you are sensitive to strobing lights), and value propagation (like a very small radius blur that you can tweak in interesting ways to soften an image without losing graininess or pixelated-ness)
i hope this was helpful/informative!
#silversea#digital collage#glitch art#science fantasy#my art#surreal#behind the scenes#another long ass post... im having fun
15 notes
·
View notes
Text

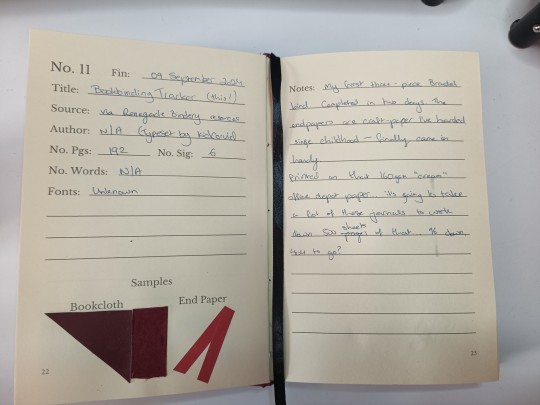

Bookbinding Tracker
This blog is meant to serve as my finished project tracker, but there's something about creating and holding a physical record that gives me dopamine 🐞
This is my first attempt at a three piece bradel. It was trickier to execute than a more conventional casebinding... but ohhh, it's pretty. I wanna make more.
Typeset is by KidCorvid, as shared through the Renegade Bindery Discord.
Paper is more "cream" orange paper, 160gsm this time. I have 400+ sheets of the stuff to use up somehow...
Cover bookcloth is red bonded leather from a local supplier (shout out to Liberties Papers); spine bookcloth is red faux velour stuff from Amazon.
Ladybird deco is layered HTV in the order red-white-black. I ordered glitter vinyl recently and had to try it out. I don't have Cricut Access, so the image was put together in layers in GIMP, each layer exported as a separate PNG, then scaled together in the Cricut Design Space canvas. The black is slightly bubbled but it's prone to that regardless of surface.
You can't see clearly in these images but the 'white' HTV is actually holographic silver. (can you tell I'm actually a magpie)
Cover font is Strange Dreams, in black HTV.
9 notes
·
View notes