#hair rendering tutorial
Explore tagged Tumblr posts
Visit Tumblr Blog
Explore Tumblr blogs with no restrictions, modern design and the best experience.
Last Seen Tumblr Blogs


Fun Fact
The total number of visits Tumblr.com received during January 2021 is 327 million.
Note
Can you do a tutorial on how you draw hair?
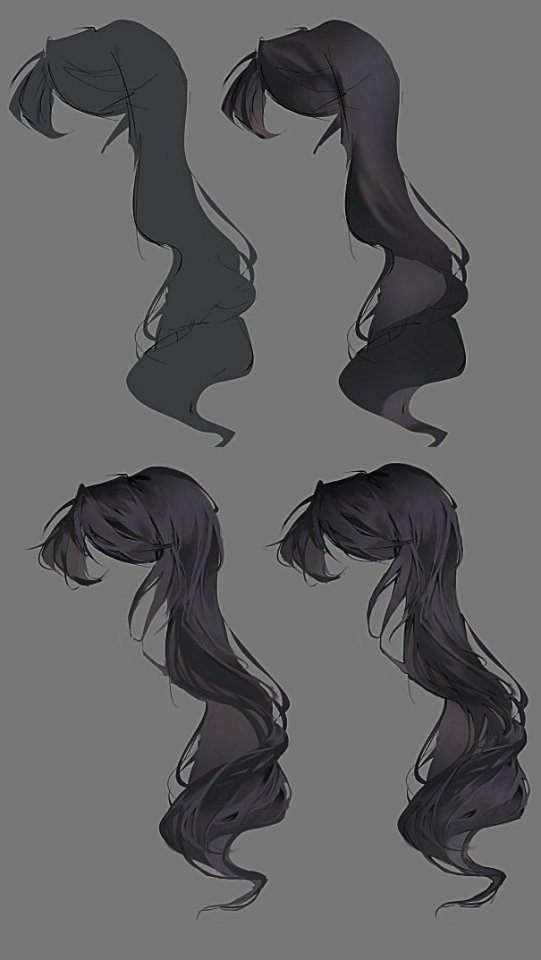
let's use vere to show how i do hair from start to finish! 🦊


disclaimer that this is *technically* out of order from how i drew it, but the way i've shown is able to highlight where you put in the blackwork for the hair without the flats or additional rendering distracting it ^_^
i hope this answers any of your questions anon 🙏🏻 lmk if you have any more!!
58 notes
·
View notes
Text
Ice's sigma TWST hair shading tutorial 🔥🔥🔥
Since like I feel a lot of ppl would like to know how I shade my hair in the twst style so well (mostly my friends lwk) here's a half-assed tutorial yayayayya /silly
ALSO I USE IBISPAINT IN CASE ANY1 NEEDS TO KNOW THAT
I'll be using uhhh Layla's hair for this soooo blah
Anw step 1: Line art !!! This isn't the best but like who gaf this is jst for a tutorial anw

Step 2: Base colours !! I usually ahh colourpick from other twst characters who have the hair colours I need but you can use your own colours if you want HAHA

Step 3: This was taught by a friend of mine but get a darker ver of the base colour and airbrush it at the ends of the hair ! (From this step on, all layers should be clipped ,,, or not, that's jst how I do it lol)

There's also the this at the back ig ? Idek ,,, LMAO

Step 4: Sharp shading / cell shading !!! "Ice, how do I do that?" You may ask ! ,,, unfortunately I have no tips to give you for that for I just draw in random lines and pray to whatever god there may be up there that it looks not horrible so uh good luck soldier 🫡🫡🫡

Step 5: Making the thingies softer and fainter or however you describe them -,,, I get the eraser tool and set it to an opacity in the 8-10% range and abuse the HELL out of it :3 Anw I jst erase at the ends jst enough so that the general shape is still mostly intact but the ends seem to get fainter (+ Erase some parts at the bangs to make the bottom ends curved ,,,? IDK HOW TO DESCRIBE IT GAH)

Step 6: Make another layer and set it to an opacity of abt in the 30-35% range, and use the exact same colours you used for the sharp / cell shading layer ! Try to uhhh fill out any leftover space

Step 7: Repeat step 5 but on the new low opacity layer !

Step 8: HAIR SHINIESSSS !! I personally jst like make vaguely diamond shaped blobs and then use an eraser (full opacity) to chip away at it until it become a sharper diamond ! When it comes to curves / the far ends of the hair make only one side of the diamond be pointed and make the other more like a half circle ,,, if you get it LOL

ANYWAY THERE'S THE FINISHED PRODUCT !!!
Ty for listening to my dumbass yap hopefully it was understandable LMAOOO
If any1 wants the whole speedpaint here it is under the cut
#Snowflakes#Freezer Thoughts#twst#twst art#twst oc#twst fanart#twst yuu#disney twst#twst wonderland#disney twisted wonderland#twistedwonderland#twisted wonderland#art#render#rendering#hair shading#art tutorial#tutorial
31 notes
·
View notes
Text

i love them so much
#gonna sit here and watch tutorials on how to render hair now cause dayum idk what im doing#inside out tickles#fluff#im too afraid to tag their names in any way lol
131 notes
·
View notes
Text
Did some hair practice!
34 notes
·
View notes
Text


@pinterestmom5 Heres the hnk hair rendering tut!!!
Firstly, im using a generic color. You can choose every color you like! Just make sure the lineart is separated from the color layer
Use "multiply" and "add" layer to define the first shadows and light of the hair. Generally, the shadow is closer to the gem's head and the light is more distant
Add a detail inside simmilar to the hair sillouete. This step defines more the gem's volume. You can use "multiply" layer on this as well
Add highlights! Yippee! (use add layer mode)
add a spray light close to the hair highlights, and if you want, add a little glitter
Aaaand done!! Hnk hair!! Yippee!! Reminder that is how I do my hnk rendering. You don't need to do the tut if you don't want. I did this more because an artist was curious on how i made Padparadscha's hair in this post
another reminder: not all gems follow these rules. Rutile and Bort are examples that not all gems are transluscent and very shiny
#art#digital art#drawing#tutorial#rendering#rendering tut#hnk#houseki no kuni#houseki no kuni hair tutorial#hnk hair tutorial#drawing tips#rendering tips
29 notes
·
View notes
Photo

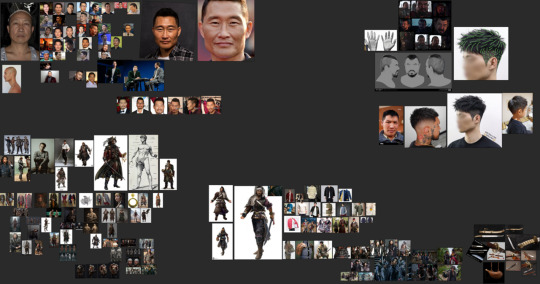
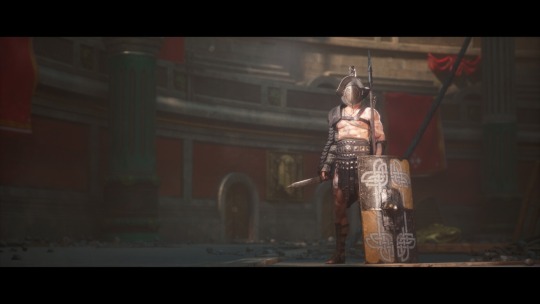


Damien Meulemans
Character Artist @AsoboStudio
artstation linkedin
More from «Artstation» here
#artist#hair#snow#semi-realistic#indian#sword#drawing#Lighting#jewel#roughness#eyes#winter#normal#eyelashes#realistic#belt#Warrior#boots#smoke#Unlit#albedo#tutorial#fullbody#render#lookdev#pirate#Xgen#pose#daniel#cold
6 notes
·
View notes
Text

here's what the og sketch was

also tried a more weathered and discolored version for fun. ah, blending modes my friends! ^v^
#danganronpa#danganronpa art#danganronpa fanart#danganronpa makoto#makoto naegi#gave him freckles cus why not#looked up a tutorial for the clouds#gotta practice a bit more but it's a nice start#also trying some new hair rendering techniques
13 notes
·
View notes
Text
the most annoying thing is when you’re first learning how to do something and there’s this one step that everyone who’s been doing it for a while thinks is so obvious that they don’t need to explain it so every tutorial has this “draw the rest of the fucking owl” cut and you’re just sitting there like wait a second you did some things between those steps that you did Not mention
#there are so many tutorials on setting up particle fur and hair dynamics#but how do you like. make it look realistic in the render??
13 notes
·
View notes
Note
Could you please upload a speedy process for rendering hair? 💋
I once thought about it, but I do so much trial and error that I don't know if I would be good doing tutorials. Sounds fun anyway, and a good challenge to paint something without doubting if it looks ok and erasing it 50 times.
1 note
·
View note
Text
OK TWST FANDOM
We as artists and writers like having sources for stuff, right? And we like giving credit to other artists for their work, right? Well, I've compiled a collection of resources I've personally used and thoroughly believe would benefit others.
[NOTE: THIS LIST IS UNDERSTANDABLY GOING TO BE INCOMPLETE. IF YOU HAVE OTHER RESOURCES TO ADD, PREFERABLY BY A PRIMARY SOURCE, PLEASE ADD IT IN REBLOGS]
Alchemivich's collection:
Ripped Assets Backgrounds SD Sprites (navigate via Excel Sheet) Login Font (free download site)
Robo-Milky: (Info Pulled from TWST Discord server)
TWST Game Font list
MonstroLoungeOfficial (HD Card uploads/limited sprite assets)
Stestylius-arts:
Blank OC Assets Magical Archive Profile Blanks
WolfLover10's Transparent Heartslabyul Uniform
TheDoughWorks (Twitter) Fanslated Prefect Profile (Original via DisneyJPGames)
TwiwOnCrackPopcorn's similar Prefect Profile fanslation
Twisted-Tech's Hair rendering tutorial
SilvyPretty_ (Twitter) Color Rendering guide (photos from Official Visual Books)
Szynkaaa's Pomefiore uniform lining
RubyPearl31's Club Badges:
Equestrian Pop Music Club Magift Science Film Studies Track/Field Gargoyle Research Society Basketball Mountain Lovers Board Game
Unfinished-Projects-Galore:
Blank Intro Cards OC Profile Template Birthday Jacket Card Blanks
AraRoseheart's Broomquet Card Blank
Fumikomiyasaki's Platinum Jacket Card Blank
TomatoWar (Twitter) 妄想 Ramshackle Dorm Floorplan
Estcaligo's Cleaned Dorm Bedrooms
(my own Ramshackle 'cleaned' room)
Fanslations:
OtomeAyui Shel_BB Ekala
TAGLIST: (lemme know if you want added/removed)
@ceruleancattail @squidwen @thecosmicjackalope @vaporvipermedia@writing-heiress
@oya-oya-okay @k-looking-glass-house @thehollowwriter @rainesol @cyn-write
@heartscrypt @honey-milk-depresso @br3adtoasty @jackiecronefield @ruggiethethuggie
@hoboyherewego @achy-boo @oreoskys @oseathepebble @oathofoaks
@tunabesimpin @hamstergal @fumikomiyasaki@valse-a-mille-temps
@hallowed-delights @kimikitti @plutos-hell @thetwstwildcard @atwstedstory
@comingyourlugubriousness @ice-cweam-sod4 @twst-the-night-away @nammanarin
#Trinket's Rattlin' Bones#art resource#art reference#twst wonderland#twisted wonderland#twstファンアート#disneys twisted wonderland
2K notes
·
View notes
Text
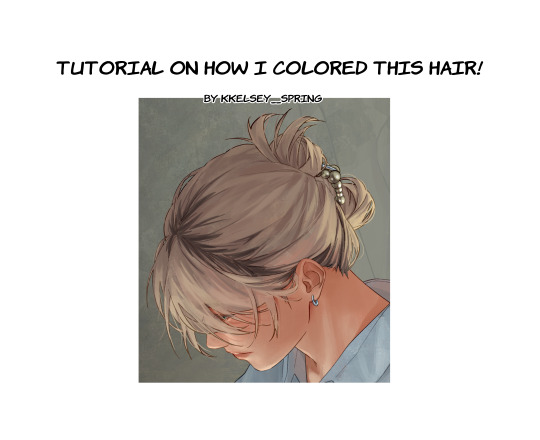

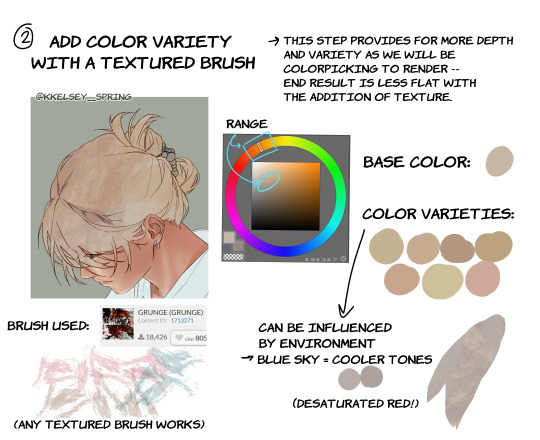
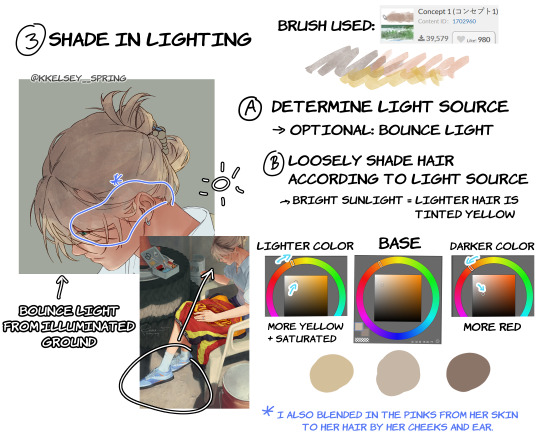


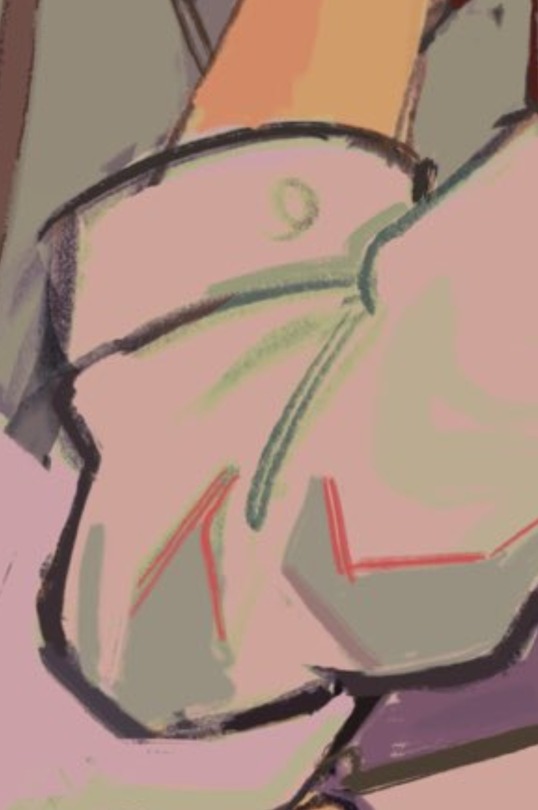
A little tutorial on how I render hair! this process is essentially the same with clothes and skin. hope this helps!!
#kkelseysart#my art#art tips#art tutorial#clipstudiopaint#hair#hair tutorial#artists on tumblr#art help#digital art
1K notes
·
View notes
Note
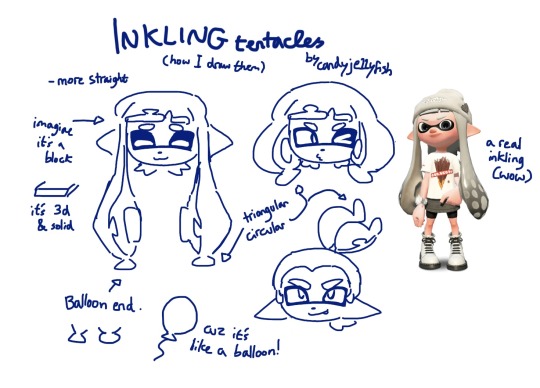
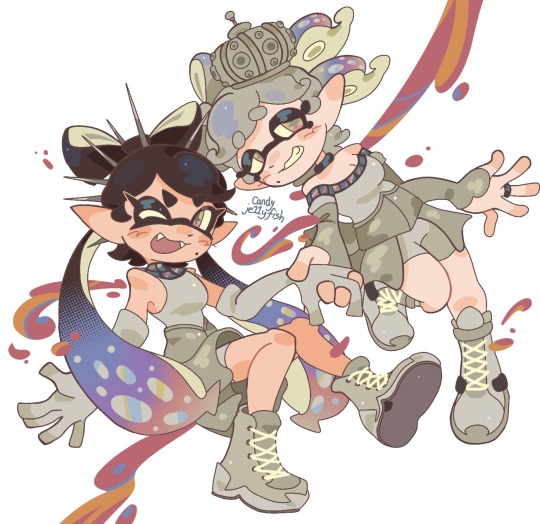
Can you teach us how you draw inkling and octoling hair
of course sure!! made a little guide thing.
i always say imagine it's a balloon. balloon hair!!!! This is because it is a frequent comment i get Lol i love it
colouring;
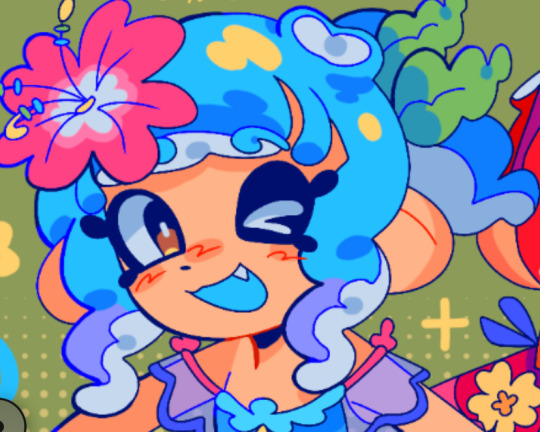
step 1 base colour. i always use an off-white for the whites, usually green or blue! nice & vibrant for the main ink colour.
step 2 halftone png clipping mask, alpha lock to change colour! or a normal gradient will work too!
step 3 shine & shade. v simply. i have done a rendering tutorial post if ur interested
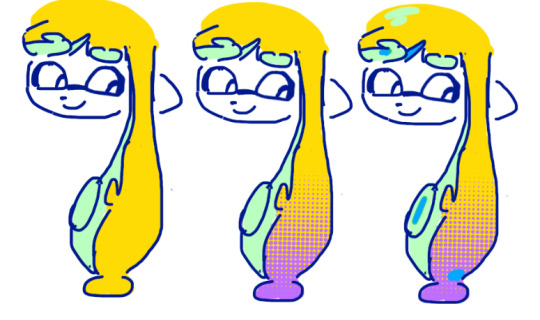
examples ^_^ ⬇️
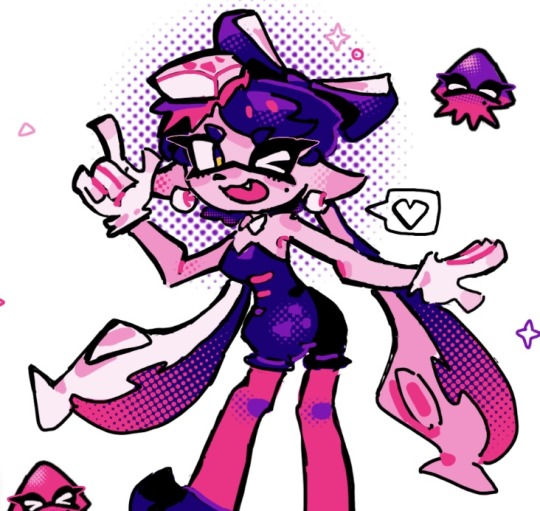

octolings now!
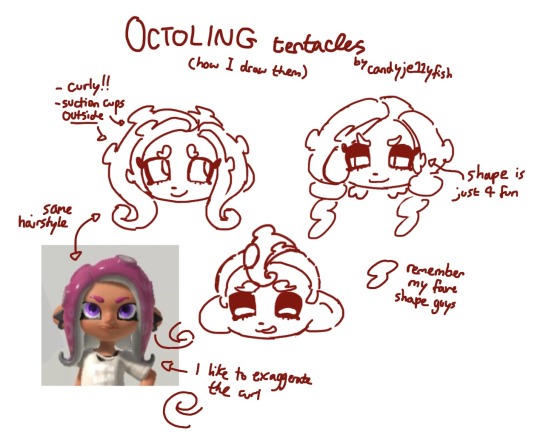
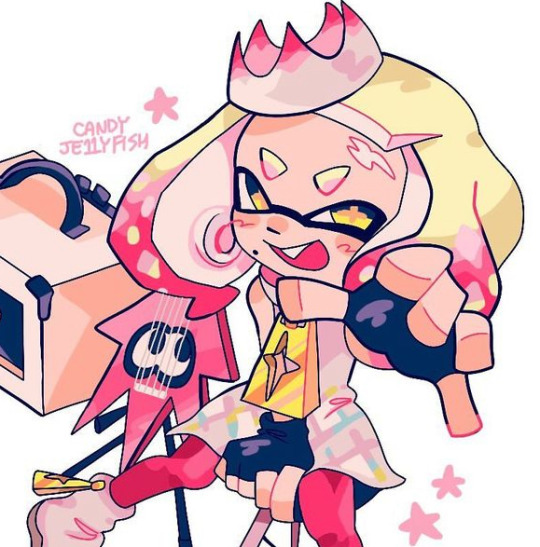
and examples! ⬇️

hope this helps a bit 😉
262 notes
·
View notes
Note
could you share how you paint hair and skin? your art is so nice to look at
thank you so much!
maybe one day I'll make a more detailed post with screenshots as I render... but honestly my painting process is really pretty simple. I usually use a textured brush or something with hue jitter turned up 1-2% to put down base colours, and then I go in with a medium hard airbrush for shadows and for adding warmer colours where blood flows (nose, ears, cheek, around mouth sometimes, eyes).
after that i merge all my layers and basically draw on top of everything. bunch of refining details and texture and LOTS of cross hatching. hatching is a really good way to transition between colours i find!!
(another tip I use for skin rendering is adding gradients within shadows, anddd ofc I add hatching when I do that too)
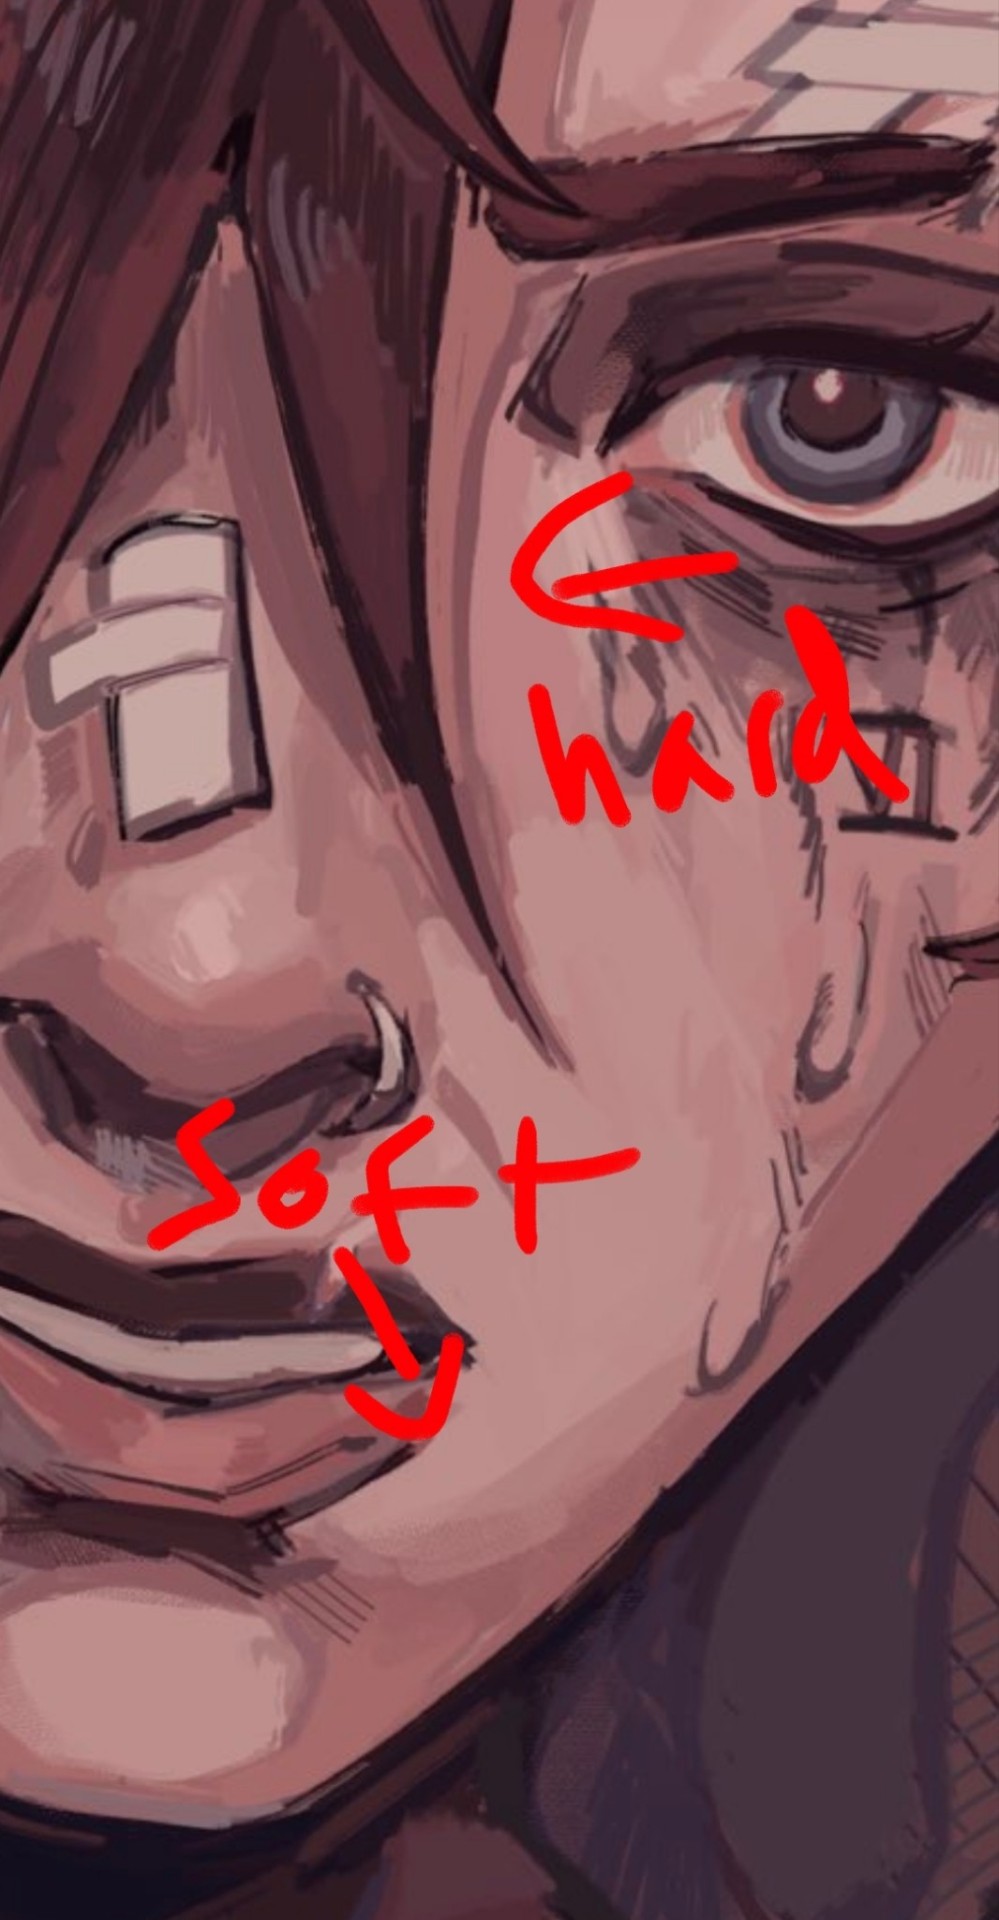
I wish I could offer more technical advice but I really don't know what I'm doing in the slightest I just throw colours on there and hope for the best😭 I guess other good things to keep in mind for skin are the planes of the face (im rly bad at this one, but basically just look up planes of the face on pinterest and use that as a guide for shadows and form) as well as hard vs soft shadows!!
im also. Not good at this one. So don't take my word for it but i guess it's good to have a variety of shadows that end harshly vs shadows that are softer and blend in more? if that makes sense? you just need to think about 1. what is casting my shadow 2. what is it being cast on (or idk maybe its not. that's just kinda what I do) and render from there!
I like to outline my harsher shadows but thats rly just cause I love to outline everything. OOH THATS ANOTHER THING. use harmonious colours and outline shit it looks soooo good.
i do that shit all the time.Like don't be shy about grabbing colours that don't make sense being in your drawing. it's a drawing who gaf if vi arcane's hair is outlined in turquoise. NOBODY! and it looks fire!
for hair I just bullshit it and add hatching I really don't have a clue how to draw hair. I guess figure out where the hair strands are coming from and then draw them coming out from there (This is some real expert advice here damn) and then add shadows underneath the hair tuft clump things ?? no clue. someone make a tutorial for me im kinda the one that needs it in this situation.
uh I hope that helped at all!! Please watch YouTube videos and stuff by actual professionals take everything I say with a grain of salt because seriously I don't know how to do any of this I probably should study art more but I am LAZY
#art#digital art#art tutorial#painting tips#digital painting#art tips#tutorial#artist#ask#art advice
126 notes
·
View notes
Note
I found your Tumblr recently and omg I love your art style., it's so inspiring :D I just subscribed to your patreon because I need more haha.
I was wondering if you have any tips for colouring your artwork?
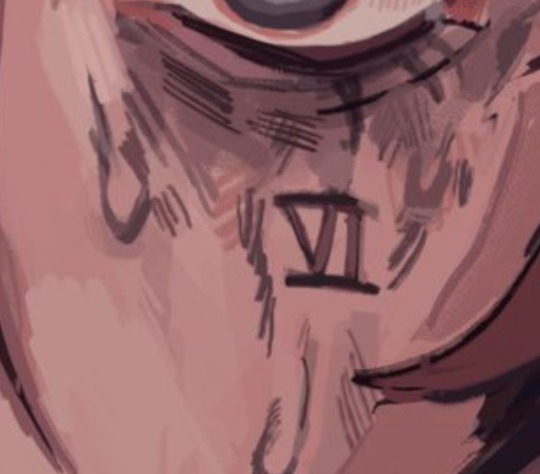
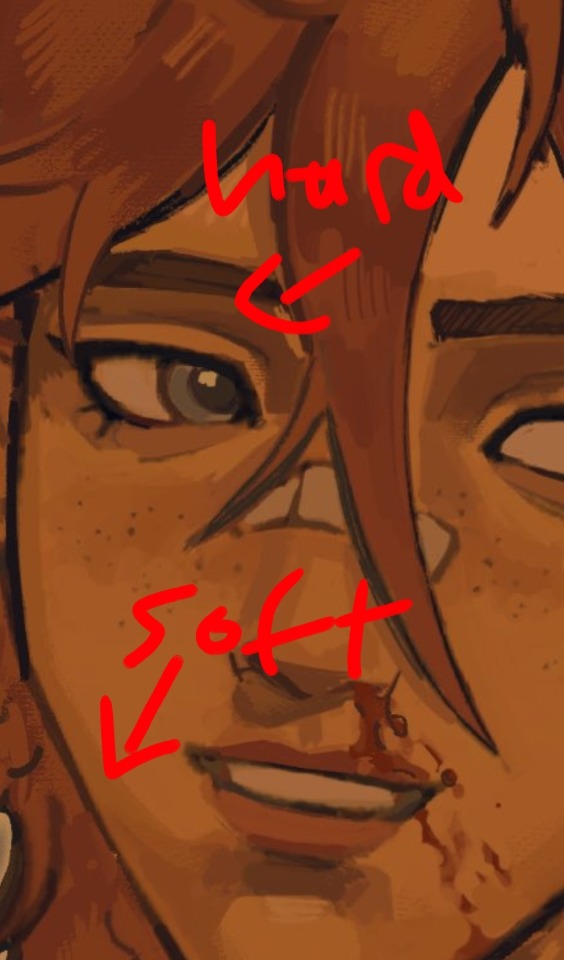
Thanks so much for the extra support! I’ll go into rendering a face with a reference pic below (because I think that’s what people practice/look at the most) with an absolutely quick and dirty breakdown
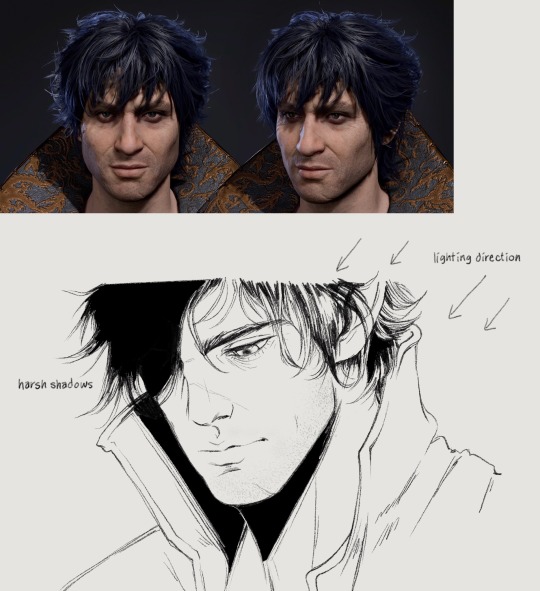
I already incorporate the heaviest shadows into my lineart a lot of the time, but I still have to think about shading where the light hits when coloring happens

Since this is coming from top right, the left half of his face will also be heavily shadowed. Understanding 3d planes and how it affects a shadow assists with getting lighting down correctly. I’ve outlined the obvious quadrants that I’ll typically shade with the darkest color. But before that you have to lay down a flat, a color I grabbed from the front of Gortie’s cheek- I think this is a very mid tone. Using a mid tone first is how I think most everyone colors/shades. I can’t say this is how I always do it, sometimes I like to work dark to light, sometimes I start coloring from the top or bottom or side, it depends on what feels good and I get distracted very easily. If I rewatch my timelapses I can see where I got bored of an area for a while and jump somewhere else/come back later

If I know I want to fully render something I don’t bother with cell shading. Not saying this is a good practice, in fact don’t do this until you have lighting practice under your belt.
Colors- go with the reference picture and grab colors from the areas of the face that you’re shading, but increase or decrease the saturation as needed
Forehead- I darken the hairline and add shadows for the loose strands of hair. This is something simple I’ve found elevates the 3d aspect
Eyes- look at eye makeup tutorials, no joke. It’ll show you where to add highlights to make the eyes pop. This is a stylistic choice, but I like my characters looking like they walked out of Sephora. I’ll give them eyeshadow and add a highlight to the upper lid and the inner tear trough. For the actual iris I shade really simply just making the lower part brighter than the top
Nose- bring the bridge forward with the lightest color, add a shine to the tip, darken the side and carry that to the cheek
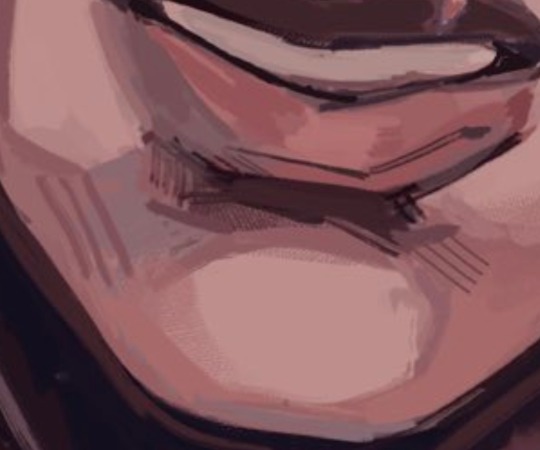
Lips- upper lip dark, lower lip not, add a shine, I dunno what else to say about this sorry 💧
Chin- shade under the lip and bring the shadow down in a crescent shape
Everything else is sticking to the personal character’s features, like shading his cheekbone and laugh line. I also add a blush tone over the cheeks and nose (again stylistic)
Link to Timelapse: https://youtube.com/shorts/q7E-g05W0m4?si=shZFpHQwNuyO6Qt1
youtube
I’ll try to do an actual infographic later when I have time because I keep getting asked about coloring. Just know that I’m still learning new stuff every day and these things should be taken as a “this is what I’m doing now” sort of thing!
153 notes
·
View notes
Note
hello i love ur art <3 may i ask how you shade/render? or if you can share any helpful tutorials you learned from ^^


Unhinged Art Tutorial
Well, anon and @merlucide! I'm not sure if I'm the best person to learn from (I'll attach some video links at the end to people who I personally look to for art advice) but I happen to have a series of screenshots for how i render with a strawpage drawing I did recently(at the time I drafted most of this a month+ ago), so I'll go over what I do, at least in this case.
Warning: A bit rambly. Not sure if intelligible.
Tutorial..? Explanation? under the cut.
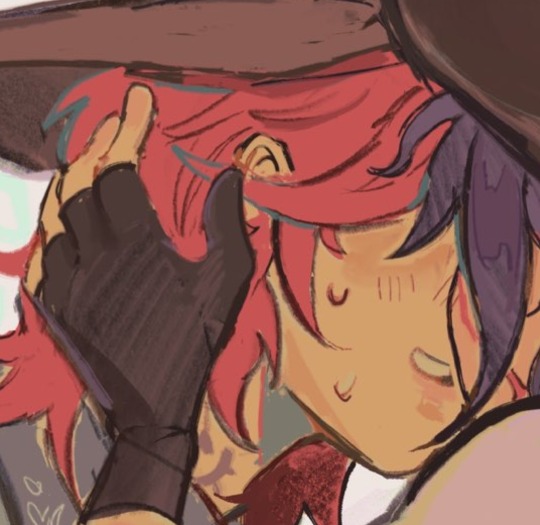
I have a few different shading styles based on ease of program usage and effort level, but in this case i had to individually streak the shadows. I'll be focusing on hair and skin for the most part here.
My sketches are pretty poor, because I'm hasty:


Honestly I find the better the initial sketch, the easier the final profuct will come. So take your time, use layers when sketching to be clean. The airbrush layering shows vaguely how I tend to shade hair.

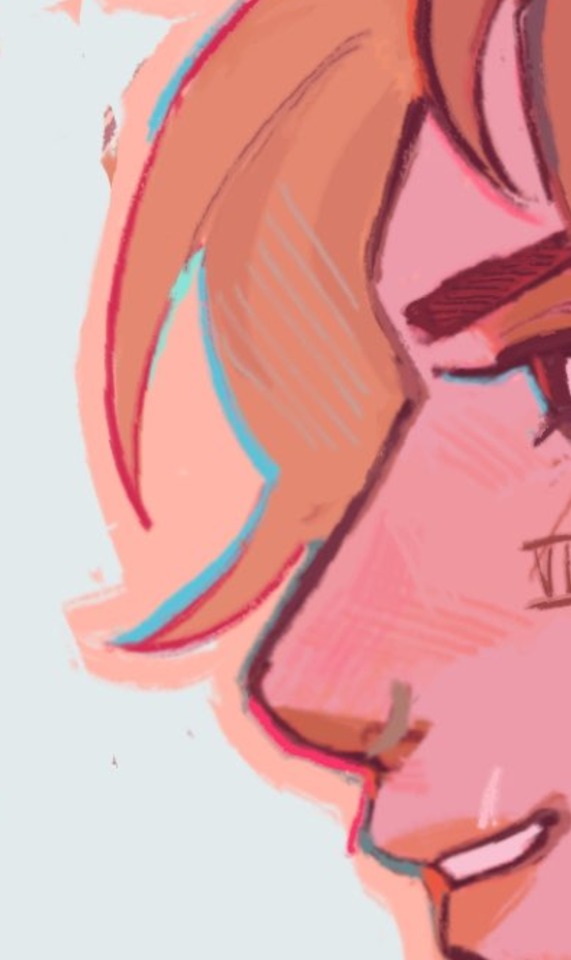
Backlighting *Applicable mostly when there is a bright background, light behind the subject, or in neutral lighting.
The 'underside'/inside I tend to use a peachier, brighter tone closer to the skin color (for tanned skinned characters I'd use a shade closer to a rosy orange, since that's just a more saturated peach. For darker skinned characters, I'd recommend a slightly redder & brighter version of their skin tone. This works pretty well with dark hair+dark skin, but in the case that your character's hair color is a lot lighter compared to their skin tone [also in the case of a fair skinned character with WHITE hair] it's totally fine to ignore the natural undertone of the character and shade it with a pinkish white.) This works for any hair texture but can be more time consuming for coily hair textures. (2c-4c)

Lineart when I take my time / Old rendering video


It looks more stable if you start off with a solid lineart base because you won't struggle with big-picture placement issues.
"Lineart" when I just try to pump out a drawing

I first did a rough sketch, kept it as an overlay layer and drew over it.

(Chickenscratching is valid though, honestly. I think it has a look to it!) I usually block out base colors, and vaguely where I want the shading to go, unless I need a special type of lighting, which then I'd do the base colors and either choose to wait until I'm finished rendering or do light processing* (*will discuss this later in this post) with different blending modes and layers.
For example if I'm doing the colors mostly FIRST (Choosing a grayed out palette) and then rendering, it'd look a little something like this: Left (Trackpad, on FireAlpaca) / Right (iPad, on Clip Studio & Procreate)


Sometimes, I'll shade with a dark, grayed out tone and then fill it in with something slightly more vibrant. This kind of gives it a bounce-light feel? Also with a lot of pieces I do recently I try to block out entire parts as white because lighting especially on white background pieces looks better if you pretend that it's white behind the character due to an intense sunlight.

Also, I use gradient layers to tweak with the colors. It's pretty useful and looks nice!!!! Gradient maps are available in every software I use: Procreate, FireAlpaca and Clip Studio Paint.

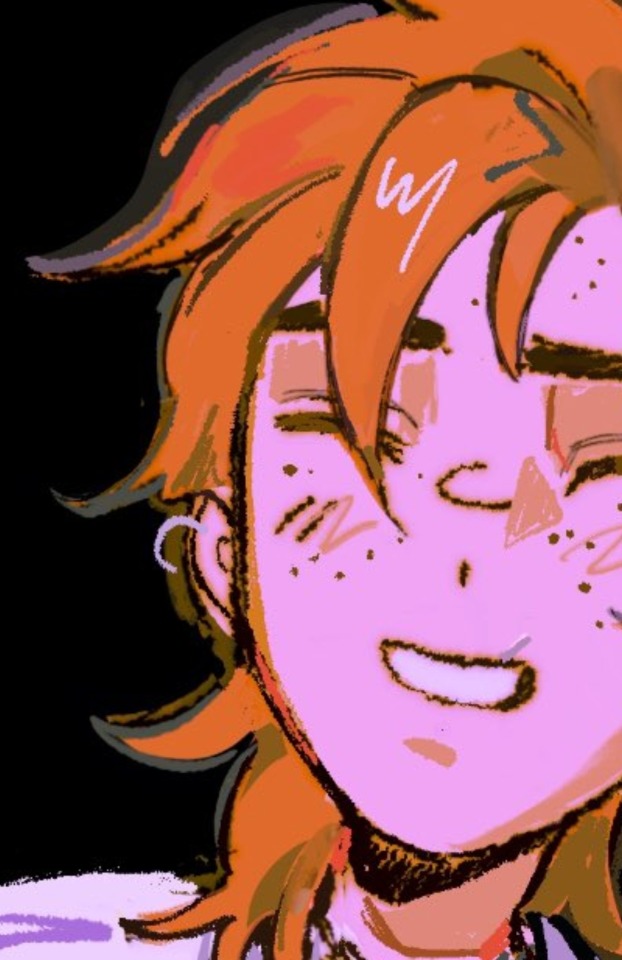
I find that the more intense the light (but not scattered, as in the source is either very bright or it's very close) the darker the shadows usually look? And if there's a brightness coming from behind the figure and the hair is splayed out in some way, it will appear semi translucent because it's just a bunch of strands made of keratin and collagen, something like that....


Anyway this is all very messy but I hope it helped

Here's a process photo for how I shade if that helps too.


More examples..

I broke down my thought process in my lighting so here's a close up of that.
i totally forgot about the video links so here's my idol the one and only:
And I think this guy makes quick but concise tip videos:
Finally I really like the in depth professional explanations from a long time illustrator:
I've personally taken advice from all three's videos and used them to improve my own art, so take a peek!!!!
81 notes
·
View notes
Note
Meg how do u draw curly hair I'm begging for help I feel so inadequate
you're not inadequate!! :)
first I want to say that drawing curly hair is a huge subject because there's a thousand types of curls and even more ways to render them. BUT. You asked how I draw it so I can help with that!


Basically I draw the hair in using lots of squiggles and being mindeful of the overall shape, then I block in color, then I add in blobs of darkness (almost randomly tbh), then I add highlight (being consciousous of where the light is coming from), then I go back to the base color and add some more curls for definition, then the same thing with the highlight color. I realize this is kind of a choppy tutorial but I hope it helps shed some light on how I do things!
#like I said theres a ton of curls and I could sit here all day showing how I do each type 😅#but this is usually how I approach it#my art
126 notes
·
View notes