#how to etch glass with Cricut
Explore tagged Tumblr posts
Visit Tumblr Blog
Explore Tumblr blogs with no restrictions, modern design and the best experience.
Last Seen Tumblr Blogs


Fun Fact
Tumblr is used by 21% of adults online aged 18-29 years.
Text
How to Etch Glass with Cricut: A Stepwise Guide for Beginners
Have you ever wondered how to etch glass with Cricut? If no! Then, prepare yourself as you are about to be a part of a fantastic ride. The day after tomorrow, my husband Richard Spouse is turning 40, and I am going to surprise him by designing an etched wine glass for his special day. It's been a while since I have been creating various DIY projects, but glass etching is my personal favorite.
One of the features of etching glass is that it instantly adds a spark to the material, making it look more eye-catching and unique. No doubt, it's compulsory to have certain supplies that will help me shape the craft. If you are new to Cricut? So, this tutorial is going to be beneficial for you. Here, you will also learn about the supply list and process.
What Materials Will You Need for Cricut Etch Glass?
Intending to make you learn about how to etch glass with Cricut; I will make you aware of the materials that will help me during the glass etching process. You are personally advised to choose the materials correctly and use them correctly without damaging the project. Have a look at the list below:
● Any model of Cricut machine
● Design Space software
● Cricut cutting mat
● Cricut vinyl
● Transfer tape
● Etching cream
● Paintbrush
● Cricut weeding tool
● Cricut scraper tool
● Alcohol-free wipe
● Glass project blank
How to Etch Glass with Cricut Machine?
As an expert in etching glasses for various events, I highly recommend you go through this section. The below steps will help you in creating a design on the glass in no time. You might be thinking that it's going to be a little complicated task, but don't worry, as I've explained the process in simple words.
Step 1: Create Your Design on Cricut Design Space
In the first step, you need to log in to your Cricut Design Space. After that, press the New Project option, and press the Upload button on the canvas. Next, choose your design from the Recently Uploads section and then change its size depending on your choice.

Afterward, tap the Text symbol, enter your text inside the box, and change its font, colour, and size. Once you are done finalizing the text, place it inside the design and tick the Weld button. After pressing the option, your whole design will instantly become a single piece and will fill in all the blanks.

Now, measure your glass blank and change your design by unlocking the Height and Width dimensions. Apart from that, you can also make changes in size or design before the cutting process.

Step 2: Cut Vinyl and Weed Out Your Design
After completing the design, you have to cut a specific portion of my Cricut vinyl with a scissor or trimmer. Then, place the vinyl on the upper left side of your mat with your hands or scraper tool to avoid any gaps or bubbles.

Furthermore, tick the Make It button in the top right corner of your screen. Next, you have to wait till your devices are getting connected. After the connection is complete, tap the Vinyl option from the materials list and then tick the Continue option.
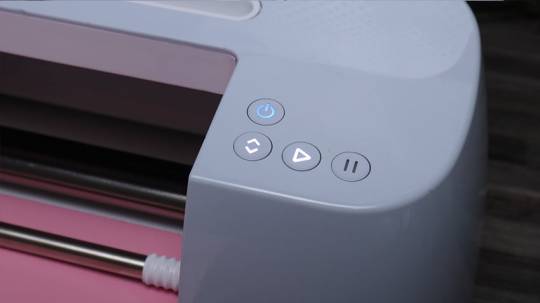
Further adding to the how to etch glass with Cricut step, press the Up & Down blinking button and then the blinking C button. After a few seconds, the machine will begin cutting your cutting mat and then unload it. With the completion of the cutting process, remove the extra material from the design with your Cricut weeding tool.

Step 3: Transfer the Design to Glass
After finishing up the above two steps, unwrap your glass blank and clean it with alcohol-free wipes. Ensure that you are using a clean wipe and gently move the wipe in a circular motion, covering the whole area of the glass. If your glass is too dirty, then clean it two or three times with new wipes.

When the glass is spotless, let it dry for a few minutes, and place the transfer tape of the same size on your design. Now, flip your design upside down and peel off the backing with the weeding tool. Following this, place the transfer tape on your glass and use the scraper tool for proper alignment.

Step 4: Apply Etching Cream
Further adding to the how to etch glass with Cricut blog, peel off your transfer tape and then paint your design with the etching cream. Ensure that you are wearing gloves and use compatible etching cream that won't affect your glass quality or harm your skin. Now, you need to wait three minutes and keep your glass under the cool water.

Step 5: Reveal Your Final Cricut Etch
Following this, peel away the extra vinyl sticking on the glass after cleaning the etching cream. However, you can also clean your paint brush and then remove the small particles of the cream with it. Now, start peeling the remaining material with the weeding tool with gentle hands, ensuring that it does not break the glass. Also, clean the glass blank with the alcohol-free wipe, and your glass is ready to be gifted as a present to your loved one.

Summing up, you might be wondering about the caring process. Since the design is permanent on the glass, you aren't supposed to seal it with anything while washing it or putting it into the microwave for heating any food item. Apart from etching mugs, you can also design your cookie plates, wine glasses, candle holders, and many more.
#Cricut New Machine Setup#Cricut Design Space Login#cricut software app#cricut.com sign in#cricut design space#cricut.com/create#cricut explore air 2#How to etch glass with Cricut
0 notes
Text
How to Etch Glass With Cricut? [Step-by-step Guide]
Are you looking forward to a budget-friendly wedding with each item in its place? Today, we will be making you learn about how to etch glass with Cricut. Simply put, etching is a simple method of forever spreading the glass’s outer layer with design. After learning about glass etching, you will really do tons of DIY projects for your friends, family members, and house.
Before starting glass etching with Cricut, all the DIYers need to carry some supplies by their side. The supplies are as follows:
Cricut Machine
Design Space Account
Wine Glass
Scraper Tool
Paint Brush
Gloves
Transfer Tape
Self-Adhesive Vinyl
Glass Etching Cream
Rubbing Alcohol/ Baby Wipes
The following tutorial is going to help you out in grabbing details revolving around etching glass with Cricut.
Step 1: Create a Design on Cricut Software
First, open a new canvas on your Design Space and tick the Upload button.
Now, press the Upload Image and choose the image from the Cricut library or by dragging the image from the system Downloads folder.
After choosing the image, click the Simple option given under Select Image Type and select Continue.
Now, remove the image background and float the mouse over the area that you want to remove.
Below, we’ve shared the image that you will come across after removing the background.

Following this, always tap the Preview Cut Image to ensure that you’ve clean lines to ensure that you got the design of your choice.
You can also tick the Hide Cut Image to make any changes to your image.
After getting happy with the design, press the Apply & Continue and outline the image by adding the Cut Image on the page.
Following this, tick the Upload option and then Add to Canvas, given under the Recent Uploads folder.
Step 2: Create Your Glass Stencil
After uploading the final design, go back to the canvas and tap the Text toolbar.
Next, change the font and resize it along with the color of your choice.
Afterward, choose the shape, right-click, and then tap Send to Back to move the design to the top of the shape.
Further, press the padlock to unlock the proportions so that you can change the square size.
Now, start resizing the shape to ensure that there is enough space around the complete design.
Further, choose and drag to highlight everything in its place and press the Attach option.

Step 3: Cut and Print Your Design
Following this, tap the Make It option and select Without Mat or With Mat, then tick the Continue option.
After this, choose your base material and load it inside the machine by pressing the Play button flashing on the machine.
Now, you need to wait till your cut-die machine is doing the cutting and printing process on the mat.
Lastly, click the Unload buttonto remove the mat from the machine to proceed towards the next step.
Step 4: Weed Out Design
Further, start removing the inside parts from the design by using the weeding tool with gentle hands.
Next, cross-check that you’ve got rid of all the extra bits from the design.
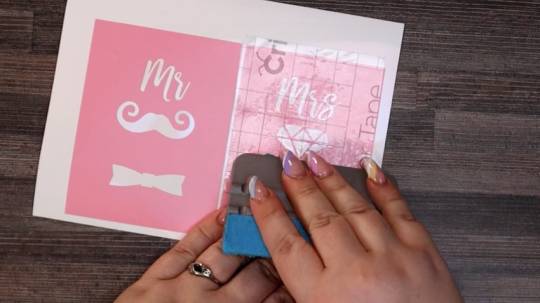
Now, use the Transfer tape on the design and scraper tool to apply the tape properly.
Step 5: Apply Stencil on Glass
Now, flip over the design and remove the mat, leaving the sticky side on the surface.
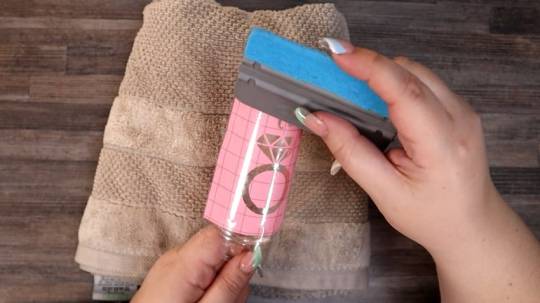
Next, clean your glass with steady use of baby wipes/rub alcohol covering the whole glass.
Following this, hold on to the wine glass and place the material backward, allowing for an easy line-up.
Also, use the scraper tool to place the design on the glass while doing glass etching with Cricut process.
Step 6: Spread Etching Cream
After completing the above-said steps while performing how to etch glass with Cricut, wear gloves and empty the etching cream in a disposable bowl.
Next, start spreading the thin area of the cream across the entire area, adding more cream.
Now, let the cream set for at least five minutes, and use the alcohol rub or baby wipe to remove the cream.

Following this, if the cream has dried up, then place the glass under the tap and rinse it off.
Step 7: Disclose the Final Etch Glass
At this point, carefully remove the material from the material once the wine glass gets completely dry.
Now, you’ve learned how to etch glass with Cricut or a similar machine.
Congrats! You have successfully finished the Cricut etching on glass and show it off to your guests.
Thank you so much for staying with us to grab content in regard to etching glass with Cricut cutting machine. Besides, you need to be very careful as etching glass with a cut-die machine can be very addictive.
Frequently Asked Questions
Question: Which is the Perfect Glass for Glass Etching Process?
Answer: To get the perfect result out of Cricut, the DIYer needs to ensure that they are using a non-tempered glass. It simply means the glass shouldn’t get scratched very easily and last for many years. Plus, these glasses are resistant to the type of acid that the etching cream is made of. Besides, the glass won’t have any side effects if we leave the cream for hours during the process.
Question: Is Cricut Glass Etching Permanent?
Answer: Yes, the designs etched on the glass are completely permanent. However, it completely depends upon the user which type of etching cream you are using during the process. Apart from that, you need to ensure that you place the design in its correct position without any bubbles. Once the final product is made, you won’t be able to make any changes in the future.
Question: How Can I Clean My Cricut Etched Glass With Dishwasher?
Answer: Here you will learn about the tips that will help you learn about cleaning the custom etched glass via dishwater:
First, use a distilled white vinegar to remove fingertips or any spots from the glass.
Besides, take the help of acetone, and don’t forget to clean with baby wipes or cotton cloth.
Next, mix a small amount of toothpaste with baking soda, apply it to the glass with your finger, and then clean it with a soft cloth.
Visit: – Cricut.com/setup Install cricut design space app Cricut Design Space Cricut.com setup mac glass etching with Cricut
#Cricut.com/setup#cricut.com/setup mac#cricut.com/setup windows#cricut explore air 2#cricut design space login#design.cricut.com#cricut new machine setup#glass etching with Cricut#Cricut etching on glass#how to etch glass with Cricut
1 note
·
View note
Text
What Can I Do With a Cricut Machine: A Complete Overview
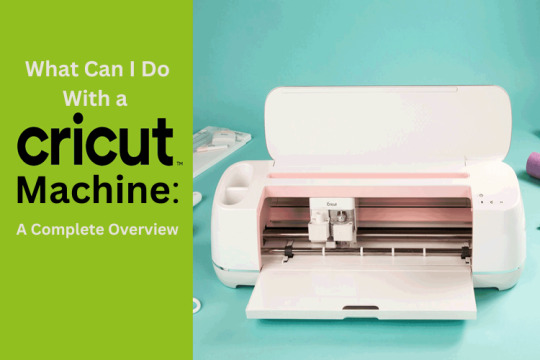
Whether you are an expert or a beginner, one question always comes to mind: “what can I do with a Cricut machine“ It can be clearly said that investing money in buying this craft plotter isn’t a wrong decision. Right from the beginning, this cut-die machine has had the same vision of motivating crafters to make new crafts from its models, tools, and accessories. By operating a Cricut cutting machine, you can make plenty of personalized crafts and projects in just a few minutes.
Before crafting, all DIYers must download Cricut Design Space on their devices (PCs and mobile devices). It is an easy-to-use app that allows them to create projects digitally. You will get the app for free of cost and support all craft plotter models. Besides, it has unlimited images, fonts, and ready-to-use projects for its users. Carry on by reading what Cricut is and how it can be used for various purposes.
What Is a Cricut Machine?
Cricut is an electronic cutting machine known as a cut-die machine or craft plotter. At this point, it is available in four different models that can accurately cut all kinds of fabrics. Its sharp blades and tools can form any design on vinyl, cardstock, paper, and wood. This craft plotter gives proper shape to your design during the cutting process.
On the other hand, this craft plotter can also cut, write, and draw as per the crafter’s need. It also comes with various supplies that make it easier for them to form the project quickly without making any mistakes. Apart from the cutting machine, the company has also launched Heat Presses in various ranges and prices.
What Can I Do With a Cricut Machine?
As the above paragraph of the blog shares, the cut-die machine can cut tons of fabric and comes with various supplies. With such unique features, versions, dimensions, and designing software, it can form uncountable crafts. To make your work easier, look at the names of projects that can be made from this electronic cutting machine.
Leather earrings
Etch glass
Cupcake toppers
Car decals
Stockings
Birthday banner
Wood sign
Custom wine bag
T-Shirt
Organization labels
Wall decals
DIY mugs
Greeting cards
If you want to do any DIY crafts, then collect supplies from Cricut’s official portal. Other than that, you can also buy it from nearby stores at a reasonable price range. You should also be thoroughly knowledgeable about operating and creating projects from a craft plotter without damaging anything.
How to Use a Cricut Machine for Making Paper Flowers?
After collecting essential content, I must learn how to create personalized paper flowers. The following steps will surely help me answer the question of what can I do with a Cricut machine. While going through the process, you should be aware of it without skipping any section. Have a look at the below steps and learn about the process:
Step 1: Cricut App Sign In and Draw a Design
Start your craft by getting Cricut Design Space from Cricut’s official website or Play Store/App Store. After that, create your account by entering the required details and clicking on the New Project option. Now, press the Images toolbar and enter the image you will use inside the Search section. Next, select the image from the gallery appearing in front of your screen and hit the Add to Canvas box.
Open your canvas and resize the flower image as per your choice. Now you need to check whether you’ve chosen the correct machine or not. If you have chosen the wrong machine, then press the Optimize experience for section and choose your machine from the drop box. Take a step further and click the Make It option. Afterward, press the Continue box given at the bottom right of the new page.
Step 2: Pick Your Material and Insert Tools
With the finalization of the flower design, while learning about making customized flowers, choose the material from the list, check the pressure, and then select the tools & materials. After doing that, hit the Go option.
Step 3: Load the Material Into Your Cricut Machine
Now, unbox your Cricut cutting mat and place the material on it using the brayer or scraper tool. After the material is properly stuck on the mat, gently hold the mat and put it inside the Cricut machine. Next, press the Go button on the right side of the machine and hold on until the machine cuts down the material.
After that, stop your Cricut and put the compatible blade inside the Clamp correctly without damaging anything. After loading the blade, hit the Go button again, and your cut-die machine will begin cutting the material. Then, you will see the status on your screen and instantly unload the mat from your Cricut machine.
Step 4: Remove the Material and Peel Off Your Design
At this stage, what can I do with a Cricut machine? You are supposed to fold your cutting mat and slowly remove the material. Now, keep the extra material safe for future purposes. Following this, gently remove the flower design from the mat in a circular manner.
Step 5: Paste Your Flower With Cricut Glue
In the final stage of making custom-made flowers out of the electronic cutting machine, fill in your Cricut gun with strong adhesive. Now, put a small amount of glue on the sides of the flower and stick them gently. Finally, you will get a final custom-made flower made out of Cricut machine & its supplies.
Give yourself a pat on the back. You have become capable of designing various custom-made flowers. With the help of this process, you make this craft by choosing the correct supplies and handling them appropriately.
Conclusion
Summing up what can I do with a Cricut machine blog, it’s crystal clear that you must have understood what exactly a cutting machine is, its capabilities, and how to make a DIY project from it. In order to start this craft plotter, you need to connect with PCs and mobile devices and download the Cricut app. Once it is done correctly, no one can stop you from making various customized crafts.
Frequently Asked Questions
What Supplies Do I Need to Create Flowers With Cricut?
In order to get the perfect formation of flowers, it’s compulsory for all the DIYers to carry certain supplies. It will help them efficiently design the craft, and the list is as follows:
Cricut cutting machine
Design Space software
Cricut Fine Point blade
Cricut cutting mat
Medium Cardstock
Strong adhesive glue
Cricut glue gun
Is It Worth Buying a Cricut Access Plan?
It isn’t a concern whether you are a beginner or an expert in creating customized crafts; it’s going to be best if you get Cricut Access. It is a monthly or yearly plan that offers an ever-growing library with images, fonts, and customized projects. You will also get a specific percent discount while buying any material from Cricut’s official portal. Also, you will get extra benefits after buying its plan.
How Can I Install Cricut Design Space on My Android Device?
In order to get the Cricut software on your Android device, read the below steps:
Start the process by turning on your smartphone and then go to the Play Store app.
Next, search for Design Space & hit the Install button given on the right side.
Now, open the installed app and create your account by filling in your credentials.
Finally, your app will be installed on your device, and you can create projects on your device.
What Are Some Projects That Can Be Made Out of Cricut?
As Cricut can cut 100+ materials with its tools, the crafter can create customized projects easily. The names of the projects are:
Greeting card
Christmas ornaments
Valentines cards
T-Shirts
Sublimation mugs
Stickers
Source: What Can I Do With a Cricut Machine
#cricut machine setup#cricut design space download#cricut design space login#cricut account login#cricut maker setup#install cricut design space#cricut login
3 notes
·
View notes
Text
How to Make a Monogram on Cricut: A Step-by-Step Guide
Isn’t it amazing to always be eager to learn how to make a monogram on Cricut? Then, you will be a part of the journey where you will get all the information, from basics to the end. I have done thousands of DIY projects over the past few months, but designing custom-made monograms is close to my heart. From wine glasses to hats, you can combine them, making them look more casual and trendier.
There are many models of Cricut machines that you can customize to your liking. Besides the cutting machine, essential supplies will make this project more manageable. Apart from that, you can also create and sell your respective monograms in the market and start your own business.
To get the best results out of the Cricut machine, keep reading this blog until the end and avoid jumping into any section while going through it.
Step 1: Start By Designing a Monogram Design
Begin by choosing the Text toolbar and entering your initial inside. Afterward, go to the Fonts section, press System, and type monogram inside the Search box. Now, click the monogram system you want to choose, and it will directly appear on your canvas.
Following this, increase your monogram size and select the Ungroup option. Afterward, tick the Shapes tool and choose anyone from the list. Next, put the shape on top of your monogram design, select both, and then tap the Slice option at the bottom side of your screen. Then, repeat those steps and slice down the remaining monogram designs.
Once the first step of your how to make a monogram on Cricut is finished, tick the Make It button present at the top right side of your canvas. After a few seconds, you will connect to the preview page and check that the design and the alignment are perfect on the mat. Now, choose the compatible material and tools for the cutting process and tick the Continue button.
Step 2: Cut Your Monogram Design
At this point of the process, unbox your Cricut products and then turn on your cut-die machine. After that, remove the plastic sheet from your material and place it on the Cricut cut mat with the scraper or brayer tool. Following this, start loading your cutting material into your craft plotter.
Step 3: Weed Out the Monogram Design
After the cutting process, in this section on how to make a monogram on Cricut ends, unload your mat from the cut-die machine. Now, remove your weeding tool and remove the extra material from the design. However, you need to be very careful while using the tool because small mistakes can damage your design.
Step 4: Transfer the Design to Your Glass
At completing this step, clean your glass with baby wipes in a circular motion. After adequately clearing the design, shift it to the glass and cover it with the transfer tape. To properly change the design on the glass, use a scraper tool to remove any space between the glass and the design.
Step 5: Cover Your Design With Etch Cream
In this step, while performing how to make a monogram on Cricut, remove the tape from your design and cover it correctly with the etching cream. Now, you must wait at least 05 minutes and clean it with baby wipes or keep it under the cold water. You must ensure the water isn’t too hard; otherwise, it might inappropriately clean the cream.
Step 6: Show Your DIY Monogram
Finish making this do-it-yourself monogram by removing the remaining pieces of the cream with tweezers, baby wipes, or an alcohol-free wipe. Next, you need to wait for a few minutes, and your monogram is all set to be used for various purposes. Moreover, you can also upload your project images on an online platform and share your creativity with people worldwide.
Frequently Asked Questions
Question: What Are the Different Types of Monograms That Can Be Made With Cricut?
Answer: Since Cricut is a multi-tasking cutting machine, the various monogram projects are as follows:
Question: What Are Some Styles of Monograms Available in Cricut Design Space?
Answer: While using the Cricut Design Space app, you will come across various monogram styles that will be available for DIYers. The names of the styles are as follows:
Question: How to Make a Monogram on Cricut Design Space?
Answer: Read the below steps to know about the steps of making monograms with Design Space:
Visit: cricut.com/setup www.cricut.com/setup login install cricut design space app cricut.com setup mac design.cricut.com/setup
Source: https://cutting-setup.com/how-to-make-a-monogram-on-cricut-a-step-by-step-guide/
#cricut.com/setup#cricut.com/register#cricut.com design space#cricut.com sign in#cricut.com/create#cricut.com setup mac#cricut.com setup download#install cricut design space app#install cricut explore air 2#cricut design space app#cricut explore air 2 setup#cricut create connect to computer#cricut new product setup#setting up your cricut maker#cricut explore air 2
0 notes
Link
How to Etch on Glass With Cricut: Step-by-Step by cricutdesign
0 notes
Text
How to Make a Stencil on Cricut: A Step-by-Step Tutorial
Are you wondering how to make a stencil on Cricut? You are probably already familiar with the term stencil, but it is super easy to make one on Cricut! For making stencils with Cricut you need to have some items, which I will discuss later in this blog.
Besides these, I recently finished creating a stencil-based project for one of my clients. I used a simple stencil to etch my client’s glass in that project. They were specifically looking for a pro result because they wanted to describe these glasses to their employees. Similarly, I will walk you through each step of making a stencil using a Cricut stencil vinyl.
I will begin with the essential supplies needed to create stencils in this guide. Then, I will navigate to the Design Space, where I will show you how to create. Finally, you will learn how to cut stencils with Cricut. So look no further than this blog and learn more by reading this post!

Having the right materials and tools makes the project easier for everyone. Therefore, I am providing you with some common items that you must have before you learn how to make a stencil on Cricut.
Here are the supplies needs for supplies:
Cricut stencil vinyl
Cricut Maker (you can also choose the Explore and Joy series)
Weeding tools, such as a scraper tool and brayer
In the next step, I am teaching you how to create a stencil on Design Space.

So, the first thing I’ll do is select a design for my stencil. I have a subscription to Cricut Access library, so I chose one stencil SVG file.
However, if you are making it for the first time, you can also make a simple stencil for trial, such as a letter, a short quote, or an illustration. In addition, you must ensure that your stencil elements are touching or connected. As a result, you can cut it as a whole.
After choosing the design, I upload it to my Design Space. Once you understand how to make a stencil on Cricut, move further to learn how to cut stencils with Cricut.

Now, you have to navigate to the Design Space and send the file to your connected Cricut machine. To send the file to the Cricut machine, follow the steps given below:
First, click on Make It (the green button) in the upper right corner.
On the next prepare screen, you will need to confirm the errors present in the design. If everything is okay, you can click on Continue to proceed.
The next screen is the Make screen, where you must select Browse All Materials and click Stencil.
After following the steps mentioned above, you will be ready to cut stencil designs quickly. Ensure that you have installed the Fine-Point blade on the Cricut machine, and then click the blinking Go button to begin cutting.
Subsequent to cutting the design, you should unload the mat. Afterward, you will want to weed the design. I recommend you use a weeding tool only if required. Otherwise, stenciling with a simple design does not require weeding.
But what if your designs are intricate? No worries! You can use the weeding tool to remove the negative pieces from the stencil carefully. Once done, you are ready to apply and transfer the design to the desirable blank.
Now, you might have understood how to make a stencil on Cricut. I am sure you are going to make something extraordinary using this stencil! All the best!
FAQs
Question 1: What materials should I use to make stencils?
Answer: You can cut many materials on Cricut to make a stencil. These include Cricut stencil vinyl, Mylar stencil film sheets, and regular removable vinyl. But there are some of the best materials you can try for your stencil. For example, I love using freezer paper, cardstock paper, and many more.
Question 2: Which Cricut machine should I use to create stencils?
Answer: You will want to know that all Cricut model cutting machines can cut stencil vinyl, Mylar sheets, and freezer paper. In addition, you can stencil up to 11.5” x 11.5” with a standard-size cutting mat. You can also use the larger mat to create a stencil that measures up to 11.5” x 23.5”.
Question 3: Do I need to weed stencil vinyl?
Answer: It is not necessary to weed the stencil vinyl; however, it depends on your design type. For example, if your stencils have fine or intricate cuts, you might need a weeding tool to weed the excess material. In addition, Cricut stencil vinyl is usually thicker and also stronger than regular vinyl. As a result, you can easily peel it off from its backing, and you do not need to stretch the design. In simpler terms, the simplest stencil design does not need to be weeded.
Final Words
Coming to the end of this blog, I want to summarize how to make a stencil on Cricut. So, making stencils with Cricut required me to use some items such as stencil vinyl and a Cricut Maker machine. Although I used a Maker machine, you can also use the Explore or Joy series. Besides, weeding is optional and only recommended for intricate stencil design. Hence, throughout this blog, I have only focused on how to make this easy stencil using Cricut Maker.
Source Url :- how to make a stencil on Cricut
0 notes
Text
Cricut Ideas for Christmas Gifts You Can Create
Christmas is almost here, and there’s no better time than now to start making gifts with the Cricut machine. Making Christmas gifts with a Cricut machine is very easy if you have the right supplies and instructions. In this guide, I will show you a list of Cricut ideas for Christmas gifts.
My name is Alice, and I’m your DIY tutor or friend for this guide, where I’ll get you into the holiday spirit faster than anything else. I created these Cricut Christmas projects with my friends this year. Well, it’s been eight years since I’ve been crafting with the Cricut, and every year, I’m making Christmas projects with different designs and styles. There are 10 projects for this year I find you will love to create; let’s see them.
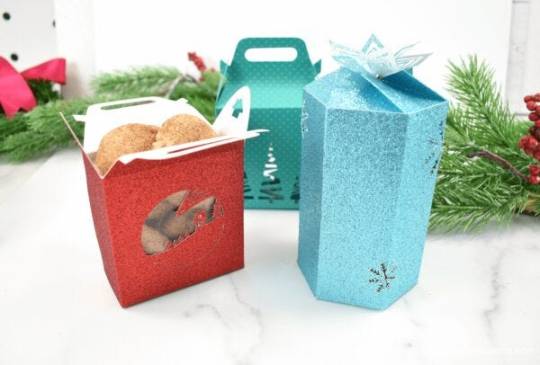
1. Easy Christmas Cookie Boxes
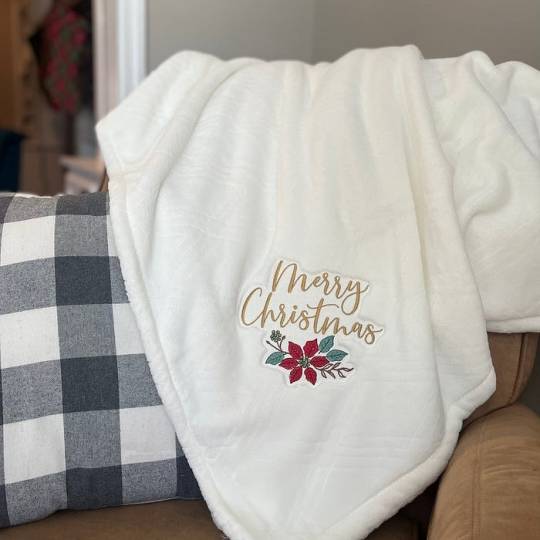
2. DIY Christmas Blanket
3. Personalized Boot
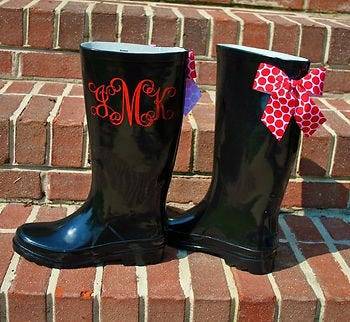
Making this Christmas gift is almost a free project; you only have to pay for the new plain boot. Once you have your boot, you can use the removable vinyl to make a sticker after making stickers and paste them on the boot.
4. Christmas Stockings
If you are gifting shoes to someone special, then you can combine them with a gift of stockings as well. You can also gift stockings in pairs of 2, along with cookies. To personalize a plain stocking with the Cricut machine, you will need the following materials.
First, you will need a combination Cricut cutting and heat press machine, and second, you will need HTV non-removable vinyl with the right instructions.
5. Handmade Jewelry
6. Christmas Apron
I’ve seen people spend a good amount of dollars from outside and get aprons, even though they have a Cricut machine. If you are doing the same, now is the perfect time to create the Christmas apron you desire using the Cricut machine. To make this, you will need a plain apron, a Christmas design, a Cricut cutting machine, a heat press machine, and iron-on vinyl.
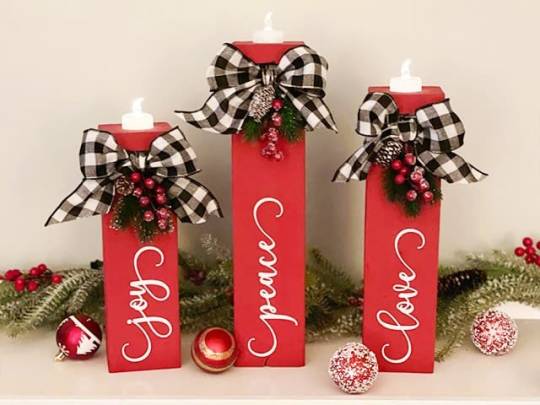
7. Wood Block Christmas Candles
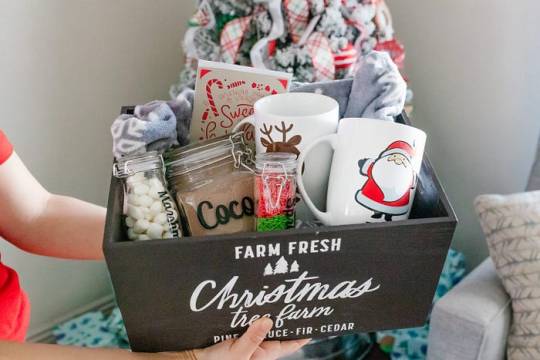
8. Hot Cocoa Holiday Gift Basket
9. Holiday Pillows and Tumblers
If you are looking for a gift that you will use the most as a Christmas gift, you should make your personalized pillows and tumblers using the Cricut machine. This project could be a way to give a Christmas gift this year. To make this, buy a plain tumbler and pillows in bulk and then use your Cricut machine and the right materials to decorate them.
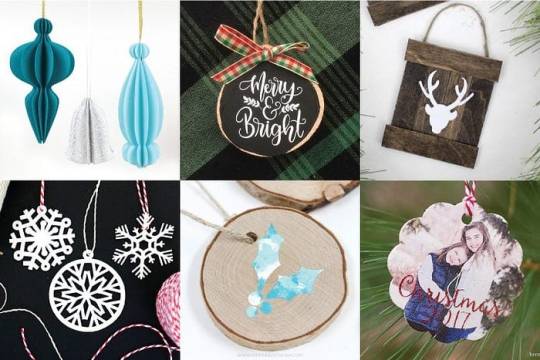
10. Christmas Decoration
Final Thoughts
In summary,these Cricut ideas for Christmas gifts can create unforgettable memories during this festive season. And the process of making Christmas gifts with the Cricut machine is exciting and curious for a crafter. In this guide, we’ve discovered 10 Christmas gift ideas to make your Christmas unique and memorable. And every idea can be turned into reality with your Cricut machine and the suitable materials.
Frequently Asked Questions (FAQ):
What Christmas gifts can I sell with Cricut?
Following are some Christmas gifts you can make and sell with Cricut:
Firstly, you can make ornaments in the desired size and material and sell them for a good profit.
Secondly, you can create unique and personalized wall decor for homes
Furthermore, Cosmetic bags are versatile DIY projects that you can create with your Cricut.
Last but not least, you can make a large number of home decor items, for example, banners, signs, garlands, and more.
What are the best Cricut ideas for Christmas gifts?
There are many ideas for making Christmas gifts with the Cricut machine.
DIY Advent calendar
Holiday Farmhouse sign
DIY holiday pillows
Etched glass gifts
Christmas treat boxes
Cricut engraved acrylic keychain
Christmas Starbucks Cup
Wine gift bags
3D paper snowflake
Easy Christmas cookie boxes, etc.
How to make Christmas gifts with a Cricut machine?
You can use your Cricut machine to personalize store-bought items by following the instructions below.
First of all, complete the setup of your Cricut machine and purchase the necessary raw materials.
After that, open your Cricut application and create Christmas designs in the desired shape and size
Furthermore, cut the design by following the on-screen instructions from Design Space
After cutting out your designs, weed them thoroughly and apply them to your desired object.
Read more: cricut.com/setup mac
Cricut design space
install cricut design space app
how to setup cricut explore
Source: Cricut ideas for Christmas gifts
#Cricut ideas for Christmas gifts#how to setup cricut explore#install cricut design space app#Cricut design space#cricut.com/setup mac
0 notes
Photo
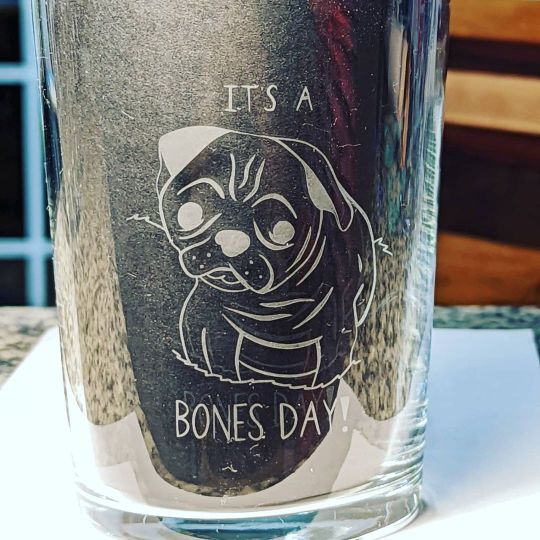
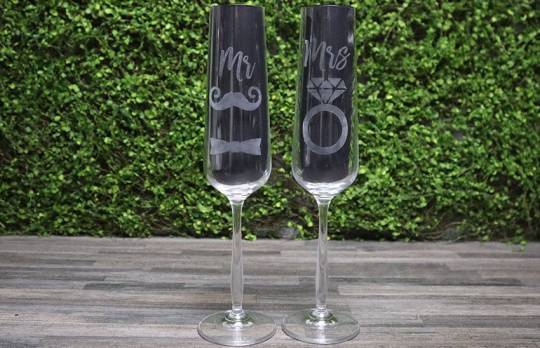
I can finally post these since they were a Christmas present. Drew up some designs to create vinyl masks with the Cricut and used glass etching cream to make some custom glassware. Pretty excited for how well they turned out. (at Richmond, Virginia) https://www.instagram.com/p/CX_hiWJF-1w/?utm_medium=tumblr
0 notes
Text
#PDF~ Unofficial Book of Cricut Crafts Fun Easy Projects for Your Electronic Cutting Machine E.B.O.
#PDF~ Unofficial Book of Cricut Crafts: FunEasy Projects for Your Electronic Cutting Machine *E.B.O.O.K$
Unofficial Book of Cricut Crafts: FunEasy Projects for Your Electronic Cutting Machine

[PDF] Download Unofficial Book of Cricut Crafts: FunEasy Projects for Your Electronic Cutting Machine Ebook | READ ONLINEhttp://read.ebookcollection.space/?book=1510757147
Author : CrystalAllen Publisher : ISBN : 1510757147 Publication Date : -- Language : Pages :
To Download or Read this book, click link below:
http://read.ebookcollection.space/?book=1510757147
Read Online
Synopsis : #PDF~ Unofficial Book of Cricut Crafts: FunEasy Projects for Your Electronic Cutting Machine *E.B.O.O.K$
The ultimate Cricut how-to book that covers everything you need to know to purchase a Cricut and use it like a pro! Are you new to Cricut crafting? Returning after a hiatus and desperate for a refresher? Perhaps you're an old pro looking for brand-new ideas, tips, and tricks for your crafts? Look no further than The Unofficial Book of Cricut Crafts. Throughout the pages of this book, author Crystal Allen will not only present you with craft ideas that embrace every awesome element of this popular cutting machine, but, perhaps most importantly, she'll start you at the very beginning of your Cricut journey with loads of information about the different Cricut machines (Cricut Explore Air 2 and Cricut Maker) so you can determine which is best for you before you buy. After you unbox your Cricut and have a general understanding of the parts of your machine, Crystal will teach you how to connect to Cricut Design Space and Cricut Access, and then you'll be presented with projects that use the most common materials your Cricut can cut. These include fabric (cotton, felt, and fleece); basswood and chipboard; leather; vinyl; paper; and heat transfer vinyl. Crystal even tackles infusible ink! Projects meant to inspire you will include step-by-step instructions and photos. They include:Leather key chain for MomRag quilt20-minute makeup bagsPlanner stickersEmoji stress ballsPersonalized file foldersDIY etched glass casserole dishes'Color Me In' zipped pouchesNo-sew hoodiesInspirational signs for your homeAnd more!The Unofficial Book of Cricut Crafts is perfect for the first-time Cricut user, the small business owner who has been using Cricut for years, and everyone in between!
0 notes
Photo
How to Etch Glass with Your Cricut | Etching a Glass Baking Dish – Better Life Blog https://ift.tt/3s1D70k
0 notes
Text
How to Etch on Glass With Cricut: Step-by-Step Guide
I receive many questions about decorating and personalizing glasses, especially ones that are dishwasher and microwave-safe. One of the best ways to achieve this is by etching the glass instead of applying vinyl to it.
Wondering how to etch on glass with Cricut? You are in the right place! In this blog, I have provided step-by-step instructions on everything you need to know on this topic. From selecting the right supplies to creating and cutting out the design, applying etch cream, and beyond, I have covered it all.
Follow the steps to add your personalized touch and style to your glassware through etching. Let’s start without further delay.
Tools and Materials for Etching Glass With the Cricut Machine
Similar to other Cricut projects, you need a few supplies to etch glass with Cricut. Here’s what you need to etch glass with a Cricut Maker.
Step 1: Create or Upload a Design
To learn how to etch on glass with Cricut, you must create the design in Cricut Design Space. There are some ways to etch glass in the Cricut app, but I prefer to upload the design.
Uploading Images
Personalize Your Design
When the design is on the canvas, it is the perfect time to personalize it using the functions in Design Space to learn how to etch on glass with Cricut.
Step 2: Cutting the Vinyl
The following are the steps to cut stencil vinyl to learn how to etch on Glass with Cricut.
Step 3: Etch Your Glass With the Cricut Vinyl
Let's learn to etch on glass with your Cricut cutting machine, as given below.
Final Words
The Cricut machine is useful for turning ordinary glass into upcycled glass, offering a cost-effective solution for glassware. To achieve this, you'll need to learn how to etch on glass with Cricut, which is the focus of this blog post. Gather all the essential tools and materials, such as etching cream, a beautiful design, vinyl, and blank glass. The remaining instructions are detailed in this guide.
Frequently Asked Questions
What is the difference between glass etching and engraving?
Etching and engraving are crafting techniques used to decorate timepieces by making desired marks on the material. However, they differ in terms of the depth of the marks. Etching typically creates shallow marks, while engraving results in deeper ones. Both techniques can transform surfaces and bring to life simple to complex designs.
What kind of vinyl do you use for glass etching?
When etching glass, you initially use vinyl to create stencils, thus requiring vinyl. As for the type of vinyl to use, both removable and permanent adhesive options are suitable. However, I prefer removable vinyl for its ease of removal.
What types of glass can I etch with Cricut?
If you intend to etch glass with Cricut, it is important to ensure that your glass object is not tempered glass. What does this mean? Tempered glass is a special type of glass that is resistant to scratches. So, you can use shot glasses, tumblers, certain types of Pyrex, and wine glasses, among others, for etching on colored glass.
Visit: cricut.com/setup cricut design space setup design.cricut.com/setup www.cricut.com setup login install cricut design space app cricut new product setup
Source: https://cricutdesignapp.wordpress.com/2024/02/26/how-to-etch-on-glass-with-cricut-step-by-step-guide/
#design space setup#digital design#install cricut design space app#install cricut explore air 2#cricut.com/setup#cricut setup#cricut explore air 2#cricut#cricut explore air 2 setup#cricut.com design space#design#design.cricut.com/setup#cricut.com/create#cricut design space download#cricut.com/register#cricut new product setup#www.cricut.com setup login#cricut design space login#cricut create connect to computer#setting up your cricut maker
0 notes
Text
6 Hair Raising Best Uk Home Decor Stores Miraculous Ideas
Natural Home Decor Learn how to etch glass using a Cricut stencil. Watch how to cut a stencil of any kind and use it as a guide for easy glass etching. #craft #cricut
0 notes
Text
New, Random Questions
Rules: answer 20 questions then tag bloggers you want to get to know better. I’m switching it up with a new set of questions.
Thanks for the tag! Genuinely wasn’t expecting that.
0) Name/Nickname? If ya wanna share it.
Bri.
1) If you could bring any two fictional characters (from books or film/tv) into the same world who would they be, what world would you put them in, and what would their relationship to each other be?
I could bring Kylo and Zuko so people knew what a good redemption arc looks like. Also they are both fictional crushes of mine. You don’t have to tell me why, I figured it out.
2) If you could drop yourself into any fictional world from books or film/tv, which would it be?
Well. If there was a contingency where I wouldn’t die, I’d say Westeros. It’s brilliant and creative and really just dragons. Ramsay if he wasn’t currently gutting someone would be awesome to see. And I’d go looking for those ice spiders we were promised.
3) What’s your spirit animal?
So I took a quiz, but it didn’t seem committed enough, so I read through and it said I suppose what you’d expect. There’s a connection and you see them often (more poetically than that of course). So I clicked on cat because I just approached one in our yard a few days ago. I’ve been looking for it since. It was actually respectful. Accurate I suppose.
https://www.spiritanimal.info/cat-spirit-animal/
4) What is the most unpopular opinion you hold?
I don’t know if I’d call it unpopular, but I love villains. For the fact they are villains. So yeah Ramsay’s hot (a sex god?), but I also love Joker. They enjoy themselves while doing horrible things and I love it because it’s fiction. But this is Tumblr and I’m a bitter person, so Ben Solo is dead and I’m glad.
5) How do you like to style your hair most often?
Style? I brush my hair, leave it down, and can’t do anything about the same middle part I’ve had my entire life.
6) I always love this overdone question - you’re allowed three books on a desert island, what do you bring? (Note: Survival Guides don’t count).
Jurassic Park, Carry On, and Harry Potter and the Prisoner of Azkaban.
7) Something new you’ve learned in quarantine/lockdown/corona times?
I finally opened my Cricut and I’m learning everything I can about that.
8) Favorite alcohol? (Or non-alcoholic beverage if you don’t drink!)
I don’t drink, so lemonade.
9) Music you can’t stand? Music you love?
Well I’m not a fan of modern country, but if I had to hate something, I guess super inappropriate music that swears every second. It’s pointless. And I love emo. Obviously. Also anything sweet like Ed Sheeran or Shawn Mendes.
10) Have a favorite herb?
...can’t say I do.
11) What kinds of cups/glasses/bottles do you prefer to drink out of?
Glass mugs. I’m hoping to get into glass etching with my new Cricut.
12) Preferred mode of communication: texts, phone calls, emails, letters?
Texting. I’ve been told I’m a fast texter, but I don’t notice it.
13) What is your favorite weather?
High 60s, sunny. No significant breeze. Just a nice spring day.
14) What kind of lighting do you like?
Warm, natural lighting. I love sitting in front of our glass door in the sunlight with my dog.
15) What is the best thing you cook?
I don’t cook, but I love baking. Not even for myself more often than not. But I’ve been told I make a good strawberry pie. I prefer my cinnamon and walnut cookies.
16) Do you have a favorite font to write in?
No. I write on my phone in the notes app. It’s less commitment, I guess.
17) What is something you’ve always wanted to write in a fic, but you’ve been too afraid to? Or, what is something that you were afraid to write, but then you did and it ended awesome?
Afraid to write? I don’t know if I’m scared to do anything in writing. I guess maybe… I have a few scenarios I go through. I wouldn’t say I’m afraid to write them, but they’re niche. Like reader scenarios honestly akin to Batwoman. Villain/hero dynamics.
18) If you were in your favorite fantasy world, what would your weapon of choice be?
Easy answer is a sword, but I’d be so into knife throwing. Or can I cheat? Magic. No wands. The Force. But cooler.
19) Is there a commonly used expression/saying that you can’t stand?
I hate the word “selfie” and I’m judgy, but 420 and stuff really upsets me.
20) What is something that you would like people to know about you?
I don’t appreciate the notion of a “fake fan.” Just because I could beat any fanboy at a Thrones trivia contest doesn’t mean I think you can’t enjoy something in moderation. I would say I like Doctor Who and I’ve only seen Nine and Ten. You can like 3 songs by a band and still be a fan. You don’t have to know who Ryan Ross is, but I will judge you on your music tastes if you only like Brendon with Taylor Swift. Just enjoy what content you want.
Tagging: @moony-you-fold-your-socks @lesdoublesll @biahdv @gaybystander @set-in-fire @the-chosen-half-of-one @cherrybaz @crashingintosimon and anyone else who wants to do these!
New, Random Questions
Rules: answer 20 questions then tag bloggers you want to get to know better. I’m switching it up with a new set of questions.
Thank you for the tag @ezziesworld :) Ima tag you back with these new questions.
0) Name/Nickname? If ya wanna share it.
I’m Nat.
1) If you could bring any two fictional characters (from books or film/tv) into the same world who would they be, what world would you put them in, and what would their relationship to each other be?
Sherlock Holmes (Benedict Cumberbatch version obvi) + The Joker (Ledger), in our modern day world let’s say in NYC, and they would be arch nemesi (is that the right plural?). Like it’s fun to watch Batsy + J, but I want to see more of J’s genius mind, so I feel like pitting him up against SH would be crazy fun.
Keep reading
20 notes
·
View notes
Text
How To Inscribe Glass In The Home

I like inscribing glass, and also it's amazingly simple! Etched glassware is an excellent individualized gift that is perfect for weddings, birthdays, holiday seasons, or even any sort of occasion, and it only takes regarding ten minutes. Today I'm mosting likely to show you how to engrave glass in the home utilizing inscribing lotion, a paintbrush, and also a stencil!
Exactly How To Etch Glass In Your Home
You can easily create therefore a lot of traits once you understand just how to etch glass! Make an effort etching drinking glasses, wine glasses, or bubbly glasses as a tailored wedding ceremony present. Or an engraved bottle or covered dish skillet makes a terrific personalized holiday gift; feel free to obtain completely imaginative!
I really love purchasing ordinary glass wares coming from thrift stores and taking them residence to upcycle all of them into something even more awesome!
Tools
a Cricut device or Shape device (or scissors or even an X-acto knife).
little paintbrush.
Materials.
an item of glasses to engrave.
inscribing cream.
a sticky pattern; you may make your personal with pattern vinyl fabric (if your concept is complicated as well as possesses a number of items, transmission paper will assist secure the assemble, or even you may use washi strip, concealing tape, or artist's strip).
First you ought to wash your glass. It needs to be free of dust and also oil to ensure that the stencil adheres to it, otherwise the inscribing cream will certainly crack under the sides of the stencil.
When your glass is actually clean, cut out your pattern. I as if to reduce my patterns away from stencil vinyl fabric utilizing a cutting equipment considering that it can easily laugh at and complex reduces easily, but if you possess a set of scissors or an X-acto knife, and also a stable palm, you can reduce your very own patterns by hand! You can easily additionally make use of call newspaper, however I find the pattern plastic adheres far better and also the inscribing lotion does not obtain under the pattern and blur the edges of the concept. To discover more info on glass, you must check related items here.
You may utilize transmission newspaper to effortlessly transmit the pattern from the sticky backing onto your glass without losing any of the parts if your pattern possesses several different pieces. Simply pull the backing off the move newspaper, argue the sticky pattern, and also weigh down properly everywhere.
At that point peel off the support off of the adhesive stencil, leaving behind the transmission newspaper in place. Stick the pattern, transfer newspaper plus all, onto your glass. Push the pattern vinyl fabric down onto the glass really effectively, making sure the edges of your design are actually really stayed with the glass to ensure that engraving lotion doesn't permeate under the edges.
Help make certain to leave a good amount of stencil product around the outdoors sides of your layout, thus that the engraving lotion does not get away over the sides of the pattern. If needed, you can make use of washi strip or even artist's tape to include a little bit of additional component at the advantages.
The moment your stencil is stuck to the glass, paint a strong level of etching cream over each one of solitary confinements in the stencil. See to it it is actually a good strong layer that covers almost everywhere!
Permit the illustration cream remain on the glass for some time; check out the paths that featured your illustration cream, however I often let my own sit for about five mins. When the time is up, rinse the glass in the sink to eliminate the etching cream. You may need to have to scrub at it a small amount to get it all off the glass. Strip up your sticky pattern, completely dry off the glass, and also you possess your incredibly personal etch glass!
0 notes
Text
How to Etch Glass Using a DIY Vinyl Stencil
How to Etch Glass Using a DIY Vinyl Stencil
How to Etch Glass Using a DIY Vinyl Stencil
I love etched glass and just realized that I can easily do it myself using my vinyl cutting machine. This process will work with any cutting machine including Cricut, Silhouette, and Brother Scan n Cut. I am using a Scan n Cut for this project. Believe it or not I have had this machine for years and have never used it. It was an impulse buy from a…
View On WordPress
0 notes
Text
DIY Etched Glass Casserole Dish Made With The Cricut + Cricut Giveaway
DIY Etched Glass Casserole Dish Made With The Cricut + Cricut Giveaway
I still remember waiting for my very first Cricut Explore to arrive in the mail. As someone who loves Pinterest I had been seeing the awesome projects that people were creating with their Cricuts and I was positive it would quickly become a craft room staple for me. As I counted down the days, waiting for my Fed Ex lady to make the delivery, I took to YouTube, researching how to use the machine…
View On WordPress
#craft#cricut#cricut project#diy#eat drink be merry#etched glass#handmade gift#housewarming#kitchen#wedding gift
0 notes