#how to extract compress files
Explore tagged Tumblr posts
Visit Tumblr Blog
Explore Tumblr blogs with no restrictions, modern design and the best experience.
Last Seen Tumblr Blogs


Fun Fact
Tumblr is used by 21% of adults online aged 18-29 years.
Text
Simplify File Management: How to Extract 7z and RAR Files Using ZArchiver on Android

View On WordPress
#extract 7z#how to download files on gwim.game.blog#how to extract compress files#how to extract iso fle#how to use zarchiver app#tutorial
0 notes
Text
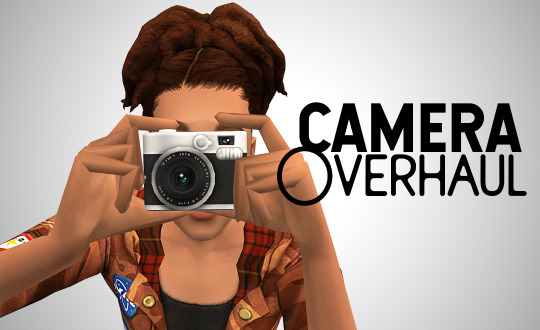
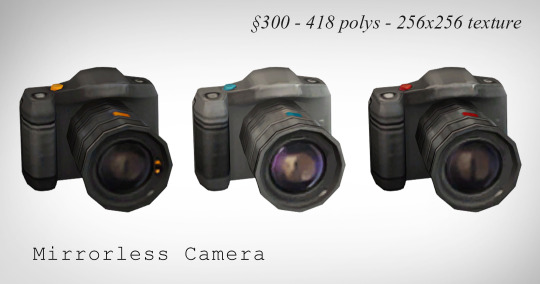
Done in collab with wonderful @pforestsims – it's 2024, high time to rework how cameras work in TS2!
With this mod, sims can only take pictures if they have a camera in their inventory. To make this more feasible, the default camera is now buyable under Electronics / Small for §120. (If your sim happens to leave on a vacation without a camera, they can still ask kind locals and tourists to take pictures for them.)
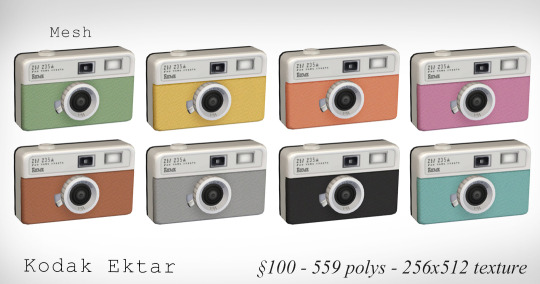
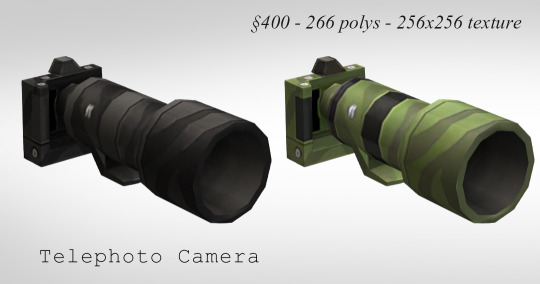
In addition, there are six new functional custom cameras.
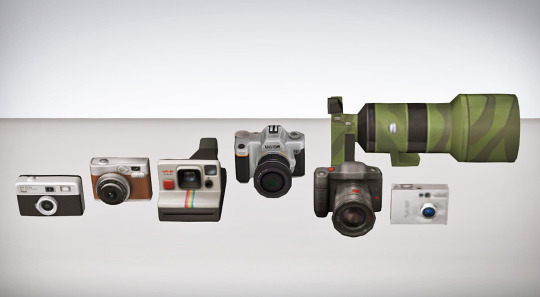
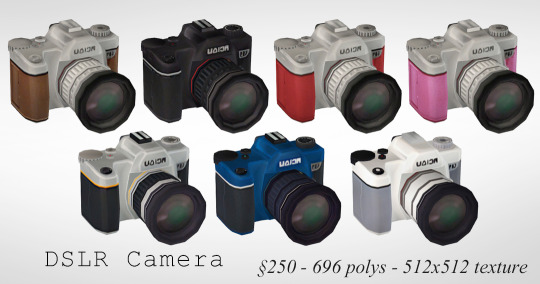
For most cameras, you'll need to order the photo with a computer to get a printed version, as is the default behavior.
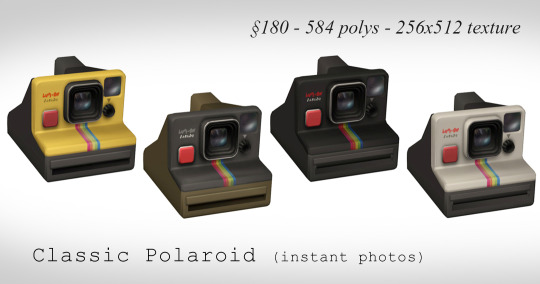
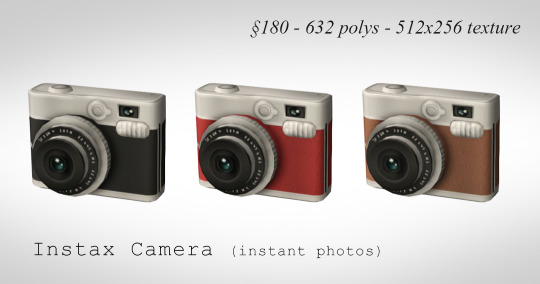
Instant cameras: With Classic Polaroid and Instax cameras, the photo will be added to your sim's inventory right away. They require the instant photo mesh to work (included with the download). The photos taken with instant cameras can't be ordered with computers.
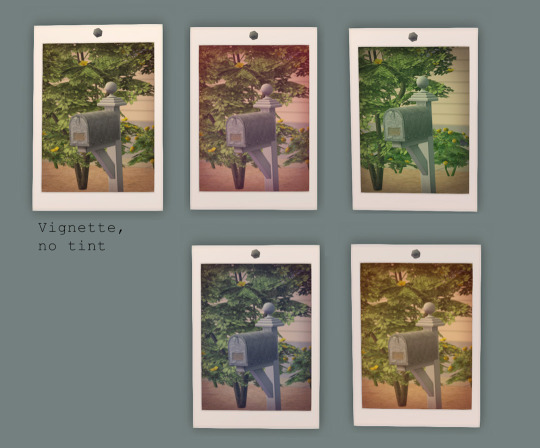
By default, the instant photo has a clear vignette overlay. You can add a tint to it by clicking the mesh and choosing either blue, green, red, or orange tint from the pie menu. It's also possible to revert it back to being clear.

There are two versions of this mod: the 'cellphone' one makes the cellphone work as a camera and is meant to be used together with my phone default. The cellphone will get picked for taking pictures only if the sim doesn't have another camera in their inventory.
The 'no cellphone' version has all the other functionality but the default cellphone won't work as a camera with it.
📷 Download (SFS) (alternate)
Files are compressed. Requires Bon Voyage and maybe University too. A collection file for the custom cameras is included; you can keep only those that you like, the mod works with or without them.
🚨🚨 Conflicts with the custom smartphone camera mod by @jellymeduza. Meduza has shared compatible versions in that same post.
This mod conflicts and isn't compatible with no bad photos mod by @picknmixsims.
There's also a conflict with the snowproof accessories mod by guirnaldas. Both mods will work if you make the camera overhaul load after the snowproof accessories.
This mod is compatible with camera default replacements that don't include an OBJD override, for example this one by @vegan-kaktus or this one by me works perfectly.
Update (12.5.2024): The default camera and all custom cameras are now sellable in OFB businesses. The cameras will also appear in the correct position when moved away from a sim's inventory.
Update (24.4.2024): Visiting sims can now be asked to take a picture for you if they have a non-instant camera in their inventory.
Update (29.1.2024): Taking pictures with instant cameras now fulfills the want to take a picture just as the normal cameras do. Sims using instant cameras also correctly gain art enthusiasm from it.
Update (28.1.2024): Both the default and the custom cameras won't get covered in snow anymore if used outdoors when there's snow on the ground.
The mirrorless camera was converted from TS4 by @lordcrumps, thank you for sharing the textures! The telephoto camera was converted from TS4 for this project, thank you @deedee-sims for extracting! The DSLR camera was converted for this project as well, from ACNH.
2K notes
·
View notes
Text
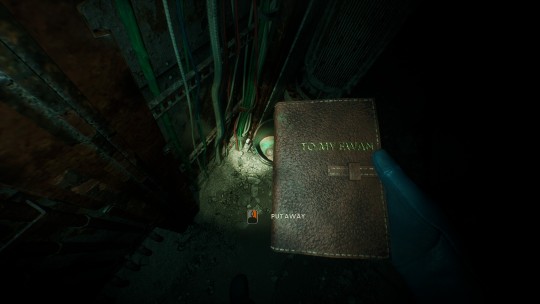
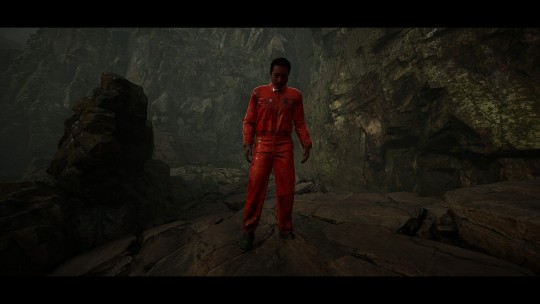
Slightly terrified but realised I can bully this puppet with the flares. Tried my best to compress it as much as I could. (I will attempt to bug it into a wall the coming weeks)
3min of non stop shenanigans. Now I need to figure out how to bug it into a wall.
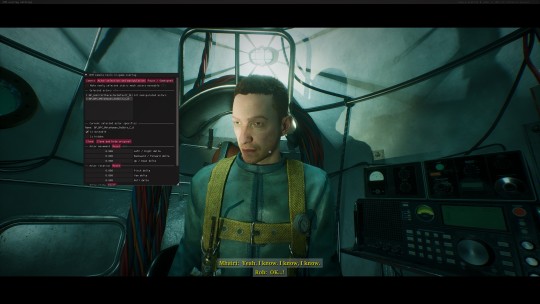
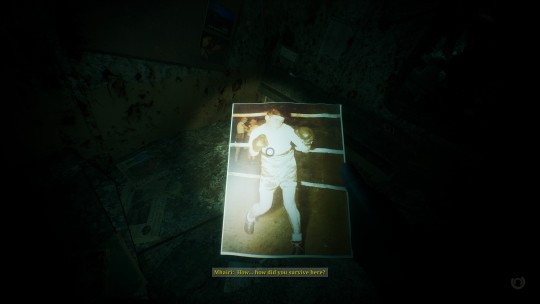
So anyway have some dialogue stuff from the gamefiles!

Puppet doesn't speak per say.. but does things diffirently to mess with Mhairi

Yum, cut dialogue


Good news, many new files to look through
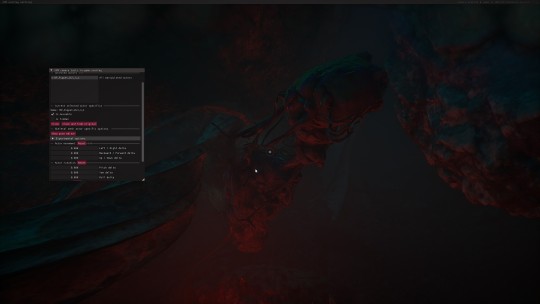
Bad news, I need a new mappings file. I forgot how I extracted one last time. Ah with a fresh mind I'll be able to do it again.. I always check the puppets to see if the mappings file is ok and well

Now I don't see textures anymore, hm new patch and dlc messed with my mods and fmodel.
I'll do slow updates to the wiki for now, because there are too many people editing it atm. ok rather a handful, but I am not sure how things will look like the coming days
Have some more screenshots
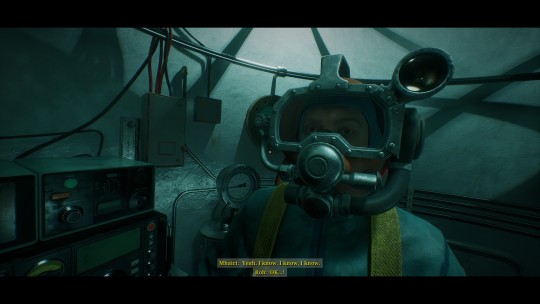
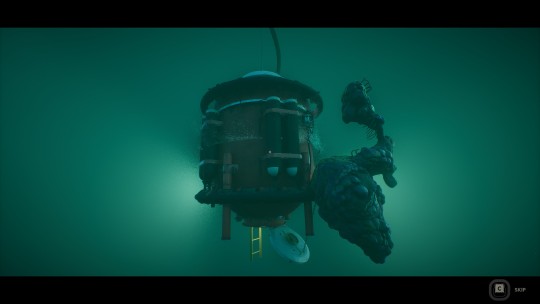
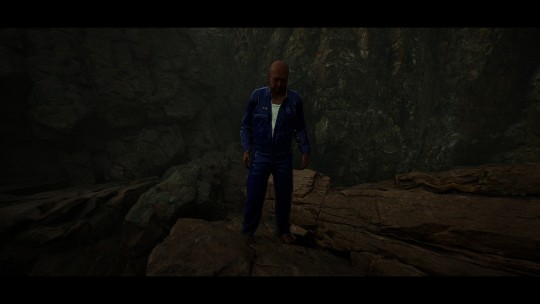
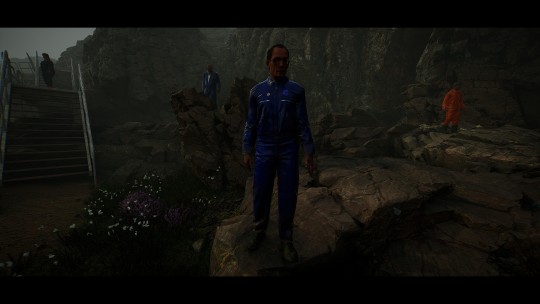
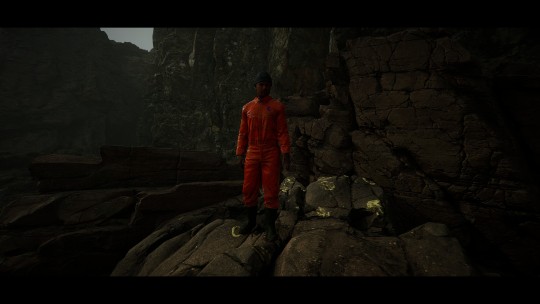
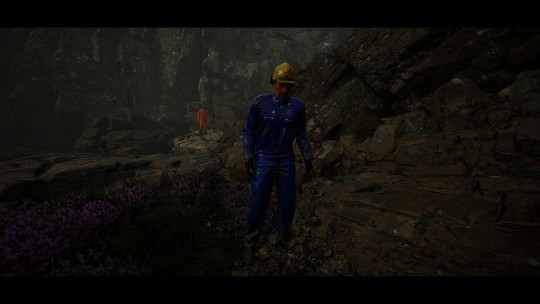
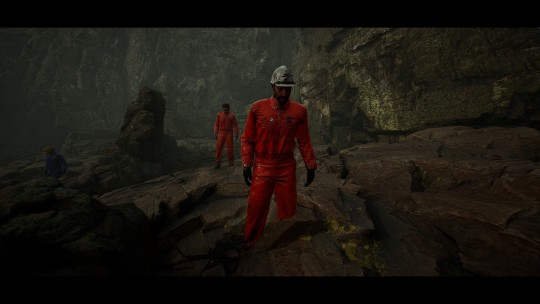
We love our headless (invisible) main characters
Most of these I won't put on the wiki, because I need to set up better light for photos.

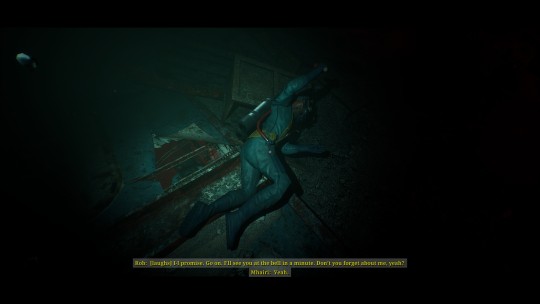
I am forever in pain about Rope;;;;
Okay, gnight you all
61 notes
·
View notes
Text
Resources for Creating: My Go-To things.
Update: I’ll be updating the list on this page from now on, since Tumblr can’t handle so many hyper-links in one post, on Dreamwidth - right here, so I won't have to update it multiple times. Please note: I keep updating this list, and updates aren't showing up on reblogs. Please check the original post for the most up to date list.
Sooo this is going to be a long comprehensive list. I got back to this game after a long time and with a different computer, with a dedicated graphics card, hurray! It made me want to return to making things, so while gathering back all the necessary stuff, I've complied this list. It might be is updated as I go along, but these are the main things I use. Maby one day i'll even finish something. So here are my go-to resources & tutorials; I'm posting it here for safekeeping, and hopefully others will find it helpful. Everything that's listed is here free. So many wonderful things for free under the cut.
Programs – General:
Creating: Blender. Blender Addons: 3D Print Toolbox – comes with blender, enable it from within the program. Originally for 3d printing. Good for fixing flipped normals, and some quick general repairs. Source Tools And source tools wiki – for exporting as SMD!!!! (SimPe: to enable bump maps for the mesh on import). GMDC Addon for Blender 4.0+ by Nopke.
GIMP. GIMP Addons: G'MIC-Qt. Resynthesizer. Nvidia dds?. Doesn’t it come with Gimp?
Other: Nvidia Texture Tools Exporter (iirc it works with all graphic cards that are compatible, doesn’t require Nvidia). For making Normal / Bump / Cube Maps. For high quality compression.
NormalMaps - Online, For making all types of maps, has good setting menus. A very cool tool.
Converting: Umodel, for Unreal Engine (Static meshes: export as gtlf.2. Animated meshes: export as psk. Requires Add-on). AssetStudio, for Unity. AC Viewer, self implied (+ USD Addon for blender). QuickBMS* and support forum, for basically everything else. (don't forget the required scrips, down the same page). *I haven’t tested it fully yet, but it was recommended here. A tutorial for it is listed further down. Works like a charm.
UV Mapping: UV Mapper, Classic (free) and the most recent Demo (for visualization).
Programs – Sims:
Never Mind the Bollox, Here's Osab and MAGIkarp to the rescue!
Latest version of SimPe, works with a non-default installation path. Chris Hatch's updates.
Home Crafter installation, Post by Huge Lunatic at Sims2Artists.
Repository Wizard, by Pick'N'Mix Mods. A game changer.
DBPF Compare, by Pick'N'Mix Mods.
Object Relocator, also by Pick'N'Mix Mods.
SMD Tools, by Lazy Duchess.
The Compressorizer, by JFade – Lazy Duchess's edit.
Bulk Rename Utility, to change file names in well, bulk. As explained by io here.
Lot Adjustor, by Mootilda at MTS.
Tutorials:
Override the game's graphic settings via Nvidia, as explained by iCad. The settings to Nvidia Profile Inspector she linked to at MTS have been deleted for some reason, here they are via WebArchive.
Meshing in Blender:
Mesh Optimization Info (and links), by Crisps&Kerosene.
Additional - Reducing Polycount:
Tutorial, by Flaming-Chickens (another username on other sites perhaps?)
Edge – Un-subdivide, a quick one by CG Link.
Transfer high poly details to low poly object in Blender, by 3Dnot2D.
Shrinkwrap Modifier - Blender Tutorial for Beginners - Basics, by in2vert.
Placeholder for this Addon that I want to try but haven't found, something for AR that was on facebook's defunct AR.
Scaling tips, by Blender Secrets.
How to fix inverted/ flipped normals, by ipaintsmallthings.
Converting: How to Extract 3D Models, Textures, Music from Unreal Engine Games, by iwanMods.
Extract 2D/3D/SFX Unity Assets fast & easy from your Unity Game, by iwanMods as well.
How to use QuickBMS, by darkhorse.
Guide to Converting 3t2 and 4t2 Part 01 and Part 02, by Chiaroscuro/tenlittlepandas.
Converting TS4 Windows and Doors, by Crisps&Kerosene.
Using Different Material Maps as Shading/Details for Base Texture, in Gimp or Blender, by Pineapple Forest & Crisps&Kerosene: https://www.tumblr.com/crispsandkerosene/764893644571525120/great-info-thats-the-reason-some-conversions?source=share
Texture Editing in GIMP:
Using Gimp Add-ons: G'MicQT. Resynthesizer. Both by Davies Media Design. This guy's channel for Gimp in general – here's a good one to begin with. And another one about layer masks.
Making a texture Tile Seamless: 1. My favorite - How to Make Seamless Textures for Cinema 4D - 3 Levels of Photoshop Wizardry using iPhone Photos, by School of Motion.
2. Simple Trick for More Realistic Texture Patterns in GIMP, by Davies Media Design – Quick and simple, using the Resynthesizer plugin. Good for patterns.
Making walls in SimPe out of a square texture, with minimal quality loss. To be written.
SimPe: Cloneable Objects: A List of Good Objects for Cloning, by IgnorantBliss at MTS.
Huge Lunatic's Tutorials, Her website.
Object Creation for Absolute Beginners, by Moune.
Sims 2 start to finish Object Creation Tutorial, by JWoods, Numenor, Lethe_s & IgnorantBliss.
The Material Definition (TXMT) Guide, by PixelHate – very comprehensive. Part 5 is about Bump/ Normal maps.
Null (Texture-less) Groups, by Skell. For bodyshop, for Objects see an elaboration by Midge the Tree below.
Crisps&Kerosene discovered how to add specular maps to objects! It's incredible there are still new things to discover in this ancient game.
More on Specular Maps, by Pineapple Forest.
Making new flooring & walls with SimPE, by Charisa. Includes adding Bump/Normal maps. She added a file to clone from in the comments below. It works for normal maps as well. Here's cool discovery in the game files.
Expanding footprint: a mini tutorial, by Deedee.
How to add correct drop shadows to objects, by Yuxi, via Wayback Machine.
Making Objects Viewable in Neighborhood View, by iCad.
Making Objects Visible In Build/Buy Mode, Invisible In Live Mode, by Midge the Tree.
Making Seasons-Friendly Trees, by Echo.
Io/ Serabiet's resources list, mainly for Bodyshop but not just.
Pineapple Forest's Tutorials, useful tips for efficiency and optimization.
MTS modding forum in General.
The Sims 2 Tutorials, on Tumblr. A database, is more updated.
Sims2Artists tutorials section.
LeeFish modding forum.
Garden of Shadows, Tree of Knowledge section.
Troubleshooting: What to do if you get a System.OutOfMemoryException Error, SimPe Forum, via WayBack Machine. Thank you @fanseelamb for the find.
How to read object error logs: I just want to know what causes it!!, by Episims.
Common TS2 errors, by Midge the Tree.
General game fuckery: How to Stop Sims 2 Crashing (Memory Allocation Fix and 4GB Patch Repair), by Jessa.
Graphics card problems, LeeFish forum.
Graphics help - DIY, by Kiri. How to fix faulty Texture Memory allocation, and the problems that stem from it. Tumblr can't handle anymore hyper links so here it is: https://celebkiriedhel.tumblr.com/post/189431721483/graphics-help-diy
General: Switching between save folders without renaming them, by Nopke.
Resources:
3D Models Online*: Various furniture designers' websites: Porada, Zanotta, Muuto, Hay, Poltrona Frau, many luxury furniture designer basically.
3D Warehouse, belongs to Sketchfab (get the Collada files).
Scan the World.
Wikimedia Commons. And more.
*(NOT OPTIMIZED).
Textures: Architextures.
Fabrics & Wallpapers: Natural Stones: Wall Plasters:
iCad's Woods. Shastakiss's Cluedo Metals, Yeti Metals, Pirate Woods. Goat's Woods.
Textures from other games: Dishonored, Thieve and much more, by Saricoya at GoS. Dreamfell by io.
Resource sharing threads at Garden of Shadows.
SimPe - General: CEP Extras list, HugeLunatic at Sims2Artists.
TXMT settings for different materials, by Hafiseazale.
Extended SimStandardMaterial Shader for the Sims 2 + Optionally Brighter Sims, by Crisps&Kerosene.
Custom CubeMaps, by Crisps&Kerosene.
Shiny TXMT Settings & Cube Maps Packs, by Pineapple Forest.
Build/ Buy: Templates for Recoloring Maxis items; MTS Templates sction, Hafiseazale (+cc), ZeroDark.
Template for Seasonal Trees, Gwenke at Sims2Artists.
Making Roof Recolors, Tutorial & template by Numenor, great template by iCad.
Pack for making food clutter usable, by DeeDee.
CAS: Default Makeup Packages - BYO Packages, by Huge Lunatic.
Body shape, Io/Serabiet on Tumblr.
Skin template, Io/Serabiet on Tumblr.
Hair texture, iCad.
Color Actions, Pooklet on Tumblr.
That's it for now.
Edit: forgot about CEP extras. Added more links. Edit 02: Added Troubleshooting section under tutorials.
#ts2#ts2 resources#ts2 creation resources#ts2 resources for creators#the sims 2#sims 2#resources#ts2 cc#sims 2 cc#the sims 2 cc#well its cc related#sims 2 resources#the sims 2 resources
67 notes
·
View notes
Text

As the banner says, these are add-ons (+ an edited base mesh) of the FO3 suburban loveseat converted by Ghanima. I was kinda surprised that nobody ever did this considering how long this mesh has been around and how simple of a mesh it really is.
Details -
The textures on the sofa and chair are linked to the loveseat, this means you need the loveseat for the other two to work
The original conversion by Ghanima is actually a completely separate file from the loveseat included here, so you need to use the included loveseat mesh. It also doesn't overwrite the original file so keep that in mind if you have it.
They're recolorable, but I didn't include any recolors. Only 1 subset. (I'd have to choose what colors I want and that could take forever lol)
Textures are 512x512, re-extracted from FO3 for slightly better quality
Files are compressed.
I've also updated the meshes to fix the dark normals. The lighting on them will now look more like Maxis meshes.
Poly Counts -
Loveseat - F:1010/V:998
Sofa - F:1408/V:1263
Chair - F:612/V:733
DOWNLOAD(sfs)
vv(Plain Pic of the meshes under cut)vv

+ New Updated mesh vv

129 notes
·
View notes
Text


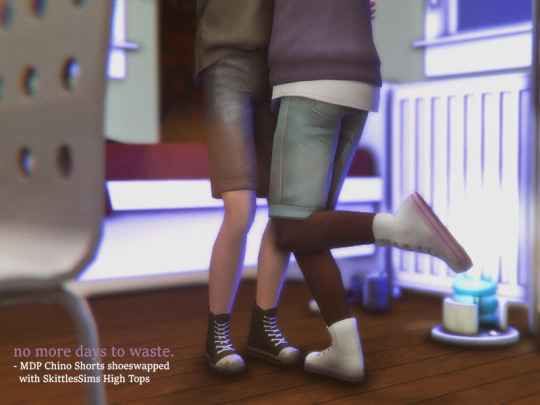

⋆˖⁺‧₊☆ no more days to waste. // Autumn Drop Day 1 ☆₊‧⁺˖⋆
Moocha's Rope recolor of MDP's Chino Shorts shoeswapped with SkittlesSims' conversion of Solistair's High Tops Edit
⋆ TM-EM, everyday bottom
⋆ polycount: 2k
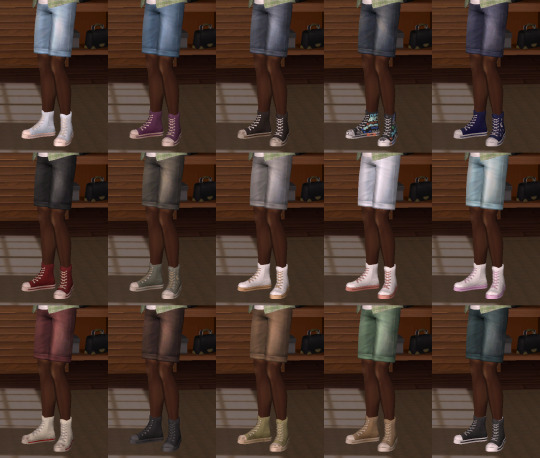
⋆ 15 swatches, repositoried or standalone
⋆ compressed, tooltipped, come with morphs
Link, swatch, detailed credits and more info under the cut ♡

Hi all! Autumn has come, and this is a cc creation season for me, so I was very happy to find myself doing it again after a long pause. That's why I decided to dedicate some time this October to post random things I've made, edited or converted recently. Despite various setbacks, it's been lots of fun!
The first thing I wanna share is what made me wanna get into making cc again in the first place. Having a teenage boy as your sim story protagonist can be tough sometimes with how limited the wardrobe options get, and it made me realize that there really aren't very many casual jean shorts with a sporty type of shoe available for teens, to the point where I've tried multiple options but none of them were the specific type of outfit I was looking for. Despite my fear of clothing meshing, out of sheer rage and desperation I turned to shoeswapping, and apparently it's quite a simple task! That's how these babies were born. These include work of many talented creators, detailed information on which you can find down below. I hope these will be as useful to somebody as they are to me!
There turned out to be 15 shorts swatches and 15 shoe swatches that I could extract from the original creations, so I combined those to my taste. Those textures are separate in the files so if anyone with basic SimPE knowledge wants to swap some colors around, it's supposed to be quite easy.
Credits: @mdpthatsme for the original 4t2 Chino Shorts mesh, @rented-space for the age conversions, @moocha-muses for the recolors, @simsontherope for the textures; solistair for the original TS4 High Tops shoes edit, SkittlesSims for the 4t2 conversion of those and some of the recolors, @mossylane for some of the recolors; deedee-sims because I used their Vans shoeswap as the base for my files; wow this is a really long list but the shorts and shoes are just that good; anyway as always thanks to this source for the graphics in the post

♡ Download ♡
Please choose one version!
Download on simblr.cc
⋆ Standalone: SFS | Mediafire ⋆ Repositoried to AM: SFS | Mediafire
♡ Swatch ♡
115 notes
·
View notes
Note
Do you like audiobooks? What speed do you typically listen to audiobooks at? What’s the fastest you could listen to an audiobook at?
Yeah, audiobooks are good. A lot of the time I just leave them running at the default speed. I know some humans listen to them faster, but for me when I'm listening to audiobooks for entertainment it's not really a question of how rapidly I can absorb the data. Obviously I can scrub and extract intel from audio data pretty fast, but that's not the point of an audiobook for me. So slower is fine, and I can leave it on while doing other stuff, like putting together security plans or coding experimental drone patterns, or whatever.
Until now I haven't tested my upper speed limit for listening. I tried just now, and turns out the inbuilt audiobook speed adjustment system designed for humans is pretty shitty. It just compresses the time by slicing out more and more audio. That ends up leaving awkward gaps even at 3x speed, which is the upper limit for the default player. It's still parseable, but it sounds janky as fuck.
I tried applying my own security-purpose audio compression and scanning code to the audiobook file. It basically encodes human language phonemes into a series of tones, which can be played back at speed. Audiobooks are pretty clean, soundbyte-wise, so it was an easy conversion. That let me parse a 5-hour 22-minute book pretty comfortably in 14 minutes. So, 23x speed.
70 notes
·
View notes
Text
How to Add 3D Models to TS3
Required Applications:
Blender - https://www.blender.org/
TSRW - https://www.thesimsresource.com/workshop/
Milkshape & Plugins - https://sims3tutorialhub.tumblr.com/resources
NVIDIA Texture Tools, Photopea, or GIMP (or anything else that allows you to save an image as a .dds file)
Recommended:
S3PE - https://www.simlogical.com/ContentUploadsRemote/uploads/189/ - Used to make = object base game compatible and available in CAW
Sims3Multi Pack Extractor - https://modthesims.info/d/364038/delphy-s-sims-3-pack-multi-extracter-updated-5th-sept-2009.html - Used to convert a sims3pack into a package file
This will also require showtime, since the object we will be cloning will be from that pack. I'm not sure if there's a base game object with a light/illumination map that we can use. If you don't want the windows of the building(s) to light up or anything lighting up on whatever object you are adding then you can try and find a base game object to clone.
Step 1: Export .obj file from Blender
Step 2: Import .obj into Milkshape
Step 3: Rename object in Milkshape to group_0, then export file as .wso (in order to export it as a .wso, you need to have the TSRW plugins for Milkshape installed)
Step 4: Open TSRW - Create New Project - Choose Object
Step 5: Under The Sims 3 choose Uncategorized Objects under Object by Category. In the search bar, type in 'hill' and choose the 'Sign City Hill' object. Name your project (make sure to rename both project name and title)
Step 6: First, choose where you want your object to show in the catalog. I just choose decor (function category) and miscellaneous decor (function sub category). Go to the mesh tab and using the button of the box with the green arrow, import your .wso file. For the first pop-up click yes. For the second, click no.
Step 7: Under Group 0, click on the three dots beside 'material'. This is where you will import your textures. Before doing so, you must make sure the images are in .dds format. Simply add your image into any application that supports importing/exporting .dds files. I personally save with BC3/DXT5 compression and don't keep mipmaps. Some say to save the mipmaps, but because I use 2K textures it adds a lot more to the file to save them so I don't. Once you've got them in the correct format, import them into the object's materials. For the detail map I simply import a small blank white texture. The diffuse is the main color texture, the multiply map is the ambient occlusion map (if you do not have it, I'm pretty sure you can just add a blank white texture too), and the self illumination map is what allows part of the mesh to light up. If you do not want anything to light up you can just add a plain black texture. Click done and exit out once all textures are replaced.
Step 8: Click the drop down that reads 'high level of detail' and choose the shadow lod. Click on the blue arrows beside the import icon. A pop-up will show; check the box under medium detail and click ok. You will see that once you've done that, the object's shadow will change.
Step 9: Click file - save as and save .wrk file (just in case).
Step 10: Export to Sims3Pack
Extra - Make Object Base Game Compatible
1. Convert .sims3pack to .package using Sims3Multi Pack Extractor
2. Open S3PE and open package file you want to edit
3. Find OBJD tag and double click on it
4. Change group number to 0 and click ok.
5. Save package
Extra 2 - Make object appear in CAW
1. Open S3PE and open package file you want to edit
2. Find OBJD tag and highlight it by clicking on it once
3. At the very bottom of the window, click on 'Grid'
4. Click the arrow beside 'CommonBlock' to open the tab
5. Beside the version, change the C to E and click commit
6. Reopen the 'Grid' and go back into the 'CommonBlock' tab. If you scroll down, you will now see 'IsVisibleInWorldBuilder', change it from false to true.
7. Scroll down until you find 'BuildCategoryFlags'. Replace the number with 0x00008000.
8. Click commit and save the file.
Let me know if you have any questions! TSRW is very finicky and sometimes things can go wrong. There are some things that I may not know how to fix, but I will try my best to help.
50 notes
·
View notes
Text


If you told me this was how TI-83 binaries were structured, I would have straight up thought you were lying. JIT assembled from plaintext hex opcodes?--that can't be true. Maybe TI put that in the manual as a practical joke and nobody noticed.
...
...
...


Look at this stupid-ass hexdump. Every fucking byte of this file from 0x004B to 0x13C0 is either '0', '1', '2', '3', '4', '5', '6', '7', '8', '9', 'A', 'B', 'C', 'D', 'E', or 'F'.
This program is anti-compressed. Every byte of machine code is encoded as two bytes of plaintext characters.
Why would you ever do that. Why would you want your executable to stored as plaintext hex digits. It's certainly not for ease-of-editing--the file-initial "AsmPrgm" token (BBh 6Ch) prevents you from opening the file in the onboard editor--and it's definitely not for program integrity checking either. So why on Earth did TI think this was the move to make?
Baffling and upsetting. Thank god the execution model permits self-modifying and self-extracting compressed programs.
#i feel slightly sick#the 68k is such a wonderful platform and this is 100% gross and bad in comparison#my thoughts#programming#calculators#i68#maybe itll win me over with its addressing modes or something#given the z80 is based on an intel architecture i sincerely doubt it
107 notes
·
View notes
Text
Real Animated Pets - Jaguar Edition
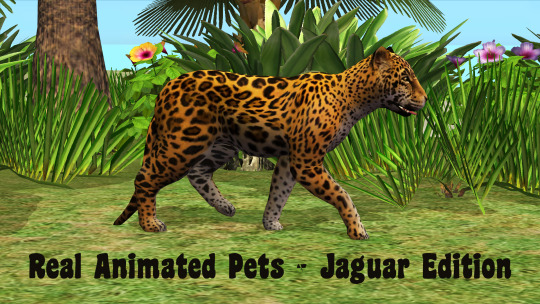
Was hard to find a proper name for this one. This is jaguar conversion from Castaway Stories that acts like @deedee-sims and mine Farm Animals - it's a custom pet collar for large dogs.
This was originally requested by @jellymeduza way back when farm animals were posted (made, sent and then forgotten). And now that I see that MTS is full with all kinds of jaguar skins, I remembered and thought it was time to share our version 😀
The jaguar files were extracted from Castaway Stories by me, then remapped (of course I peeked at Darina Rose's jaguar). DeeDee, just like always, made a stellar job with bone assignements (remember though, that nothing is perfect in the world of sims 2 bones 😄). And as already mentioned, this pet is a custom collar for large dogs and works in the same way. More info on how it works can be found in farm animals post here (you'll aslo need the invisible fur file by DeeDee from that post).
Compressed, clearly labelled, picture included.
Download at SFS
218 notes
·
View notes
Text
How to Download Our Life: Beginnings and Always Mods
(a step-by-step guide!)
If you've ever wanted to download extra content for OLBA but were unsure how or where to even start, this post will hopefully explain everything you need to know!
What you will need:
Our Life: Beginnings and Always
RPA extractor
Latest version of Python
RPA repack tool
1. Finding mods.
As far as I'm aware, there are very few people who make OLBA mods, but if you do happen to come across someone who makes mods/script edits and would like to download them, you'll likely end up with files with the end extension ".rpy" or ".rpyc" Because the software used to make OLBA is Ren'py, these are ren'py script files that basically contain the script that runs the mod and official script files. (Note: Some mods that don't just simply add onto/edit/add more scenes may also include other important resource files (images, sounds etc...) and might be formatted in a ".zip" file. I'll cover how to unzip and use those as well.)
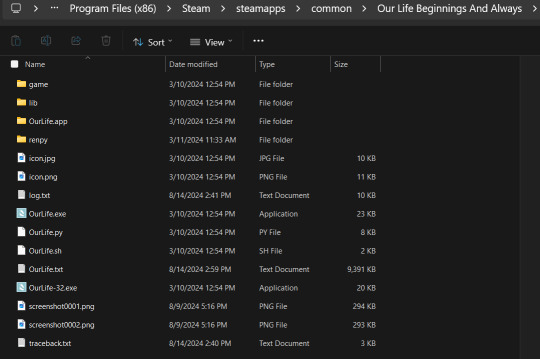
2. Find your game files.
First of all, before you do anything with your .zip or .rpy/.rpyc file(s) you're going to need to find your copy of your OLBA game's files. For Steam, you should be able to open the Steam app on your computer, navigate to your library, right-click your copy of OLBA, select "properties", navigate to the "Installed Files" tab, and click the "Browse" button.
For a direct download of the game such as from Itch.io, you should just be able to navigate to wherever you downloaded your game and find the same results. You should see your game files now like the picture below.
3. Finding/extracting the RPA file.
Now, you are going to want to navigate to the "game" folder inside the OLBA folder. Here you should find these files:
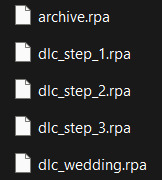
(Note: depending on whether you have the DLC or not, you may or may not have the DLC files. I do not have the Baxter or Derek DLC so I don't have those files here.) These files are basically all the .rpy/rpyc files, along with images, sounds and all other resources for the game, compressed into single files. So, in order to add our modded files, we will need to extract whichever RPA file pertains to the mod. For example, archive.rpa contains all the scripts, etc from the main game. The rest should just be DLC, so if you have a mod that only affects the main game, you will only need to extract that file. The same works if it is a mod that only affects a DLC; you will only need to extract that respective DLC file.
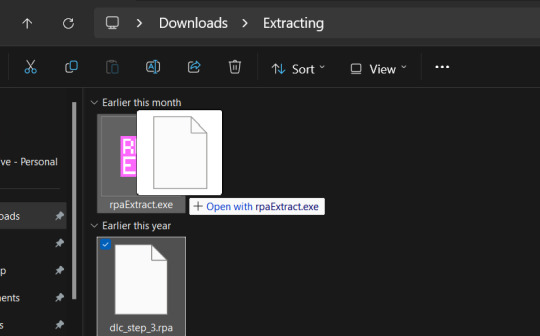
To do this, you can either download this RPA extractor or find your own and follow its steps. For this tutorial, we will be following the steps of the RPA extractor provided. Once you have downloaded the RPA extractor, drag the .RPA file you want to extract out of the OLBA folder, into a new folder, then drag and drop it onto the RPA extractor icon (shown below)
This should open a new Command window where the .rpa file will be extracted. You should end with something like this:
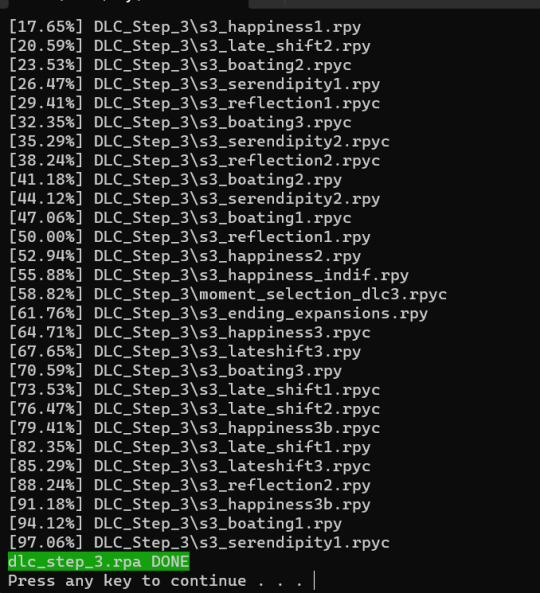
(for this example I extracted the step 3 DLC RPA file)
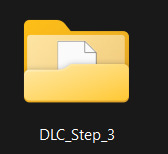
Now you should have a new folder containing all the .rpy and resource files you need.
4. What to do with modded .rpy/.rpyc and/or .zip files?
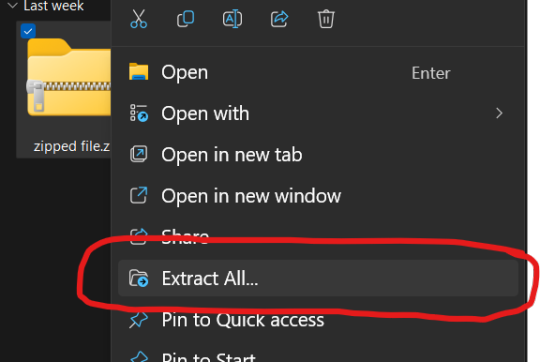
If the mod you downloaded just came with the files not zipped, you can skip this first part. Otherwise, you will need to unzip this zipped folder. To do this, you can either just right-click the zipped file and click "Extract All" and "Extract" when a new window pops up.
Alternatively, you can use a program such as 7-zip, which may help extract speeds for large files. Now, you should have, or already have your modded .rpa files on hand (finally!) Normally, if these files are editing preexisting material from the game or adding new scenes, at least one file, if not all of them will have the SAME EXACT file name as an already existing file. In this case, BEFORE YOU DO ANYTHING go into the folder(s) you got earlier by extracting the .rpa file(s) and look for the file(s) with the same name(s) as your modded .rpy/.rpyc file(s) and either make a copy or move them somewhere safe in case something is wrong with your modded files/you no longer want the modded files, you can put the original files back in. Once you have done this, you are going to drag the modded files directly into the folder(s) you got earlier by extracting the .rpa file(s). MAKE SURE YOU PUT THEM IN THE CORRECT FOLDERS AND EITHER OVERWRITE THE ORIGINAL FILES OR MAKE SURE THEY HAVE BEEN REMOVED.

If there are any other files, such as sounds or images or .rpy/rpyc files, feel free to just make another folder to put these in.
5. Repacking the RPA file.
Now these next steps can get really complicated, so I'll break them down into smaller steps. 1.) Download the RPA repack tool (make sure to unzip it) and the latest version of Python if you haven't already.
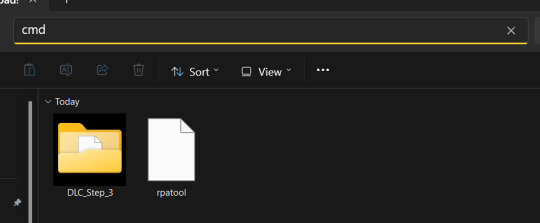
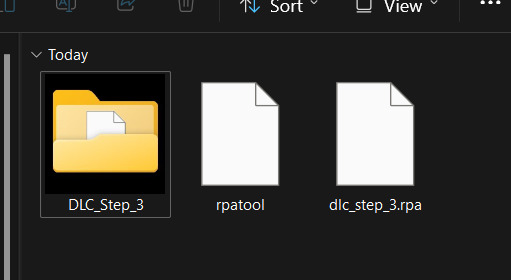
2.) Inside the unzipped "rpa-master" folder you'll find another folder of the same name. Inside this folder all you need is the "rpatool" file. Take this file and move it into a new folder completely outside of the "rpa-master" folder, name this folder whatever you want, it doesn't matter. (EXAMPLE BELOW)
3.) Now take the folder(s) you got from extracting the .rpa file earlier or created and put them in this new folder. (EXAMPLE BELOW)
4.) Type "cmd" into the path while in the folder with both of these.
5.) Now, a command prompt window should pop up, type in this:
py rpatool -c
followed by the name of the .rpa file you want to make and the name of the folder(s) you are repacking separated by a space for each. (EXAMPLE BELOW)
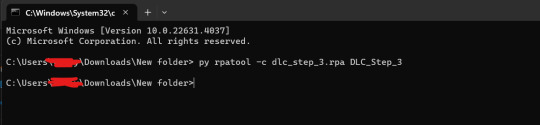
6.) Depending on the size of your file it might take some time, but once you see the .rpa file appear in the folder, you're all done! It should look something like this:
Now, all that's left to do is put that .rpa file into the game folder with the rest of the .rpa files !! After that you can test it out and your mods should now work!
As always if you have any questions or need help doing this yourself, feel free to contact me or submit an ask!
72 notes
·
View notes
Text
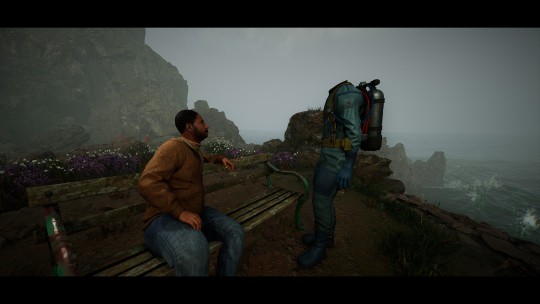
I don't think androids store memories as videos or that they can even be extracted as ones. Almost, but not exactly.
Firstly, because their memories include other data such as their tactile information, their emotional state, probably 3d markers of their surrounding...a lot of different information. So, their memories are not in a video-format, but some kind of a mix of many things, that may not be as easily separated from each other. I don't think a software necessary to read those types of files are publicly available.
Even if they have some absolute massive storage, filming good-quality videos and storing them is just not an optimal way to use their resources. It's extremely wasteful. I think, instead, their memories consist of snapshots that are taken every once in a while (depending on how much is going on), that consist of compressed version of all their relevant inputs like mentioned above. Like, a snapshot of a LiDAR in a specific moment + heavily compressed photo with additional data about some details that'll later help to upscale it and interpolate from one snapshot into the next one, some audio samples of the voices and transcript of the conversation so that it'd take less storage to save. My main point is, their memories are probably stored in a format that not only doesn't actually contain original video material, but is a product of some extreme compression, and in this case reviewing memories is not like watching HD video footage, but rather an ai restoration of those snapshots. Perhaps it may be eventually converted into some sort of a video readable to human eye, but it would be more of an ai-generated video from specific snapshots with standardised prompts with some parts of the image/audio missing than a perfectly exact video recording.
When Connor extracts video we see that they are a bit glitchy. It may be attributed to some details getting lost during transmission from one android to another, but then we've also got flashbacks with android's own memories, that are just as "glitchy". Which kinda backs up a theory of it being a restoration of some sort of a compressed version rather than original video recording.
Then we've also got that scene where Josh records Markus where it is shown that when he starts to film, his eyes indicate the change that he is not just watching but recording now. Which means that is an option, but not the default. I find it a really nice detail. Like, androids can record videos, but then the people around them can see exactly when they do that, and "be at ease" when they don't. It may be purely a design choice, like that of the loading bar to signalise that something is in progress and not just frozen, or mandatory shutter sound effect on smartphones cameras in Japan.
So, yeah. Androids purpose is to correctly interpret their inputs and store relevant information about it in their long term memory, and not necessarily to record every present moment in a video-archive that will likely never be seen by a human and reviewed as a pure video footage again. If it happened to be needed to be seen — it'll be restored as a "video" file, but this video won't be an actual video recording unless android was specifically set to record mode.
120 notes
·
View notes
Text
Dark Blue Moon and the Suffering Sun Chapter 14
hope u all enjoy <3 comment and reblog it really means a lot :>
MASTAPOST
The smell of Atlantean was getting stronger, Danny kept himself and Damian invisible as they perched atop a cliff looking down at the town. He could hear Damian licking his lips. Kid, you literally just ate! Was he thirsting for vegetables or blood?
“Excellent. With your camouflage, we will be able to infiltrate and extract the resources without any trouble.”
Danny waved his hands to cut off that notion. “Hold up. Who says ‘we’ are going to raid the Atlanteans? Why shouldn’t I just leave you here and come back and we can be on our way?”
Damian frowned, fins rattling in offense. “May I remind you who has more experience in this field?”
“True, but your dad might skin me if he found out that I let you become a glorified sea pirate.”
Damian tutted. “What father doesn’t know will not hurt him. Now go! We are wasting time!”
With that, Damian attached himself to Danny’s hip, practically hooking his claws into Danny’s scales. The bloodthirsty theory was beginning to gain traction in Danny’s mind, what with how the kid was audibly purring despite Danny not giving any touches at that moment.
Danny let his invisibility wash over his scales, turning his body from translucent to being one with the water, his powers seeping into Damian’s body and hiding him from view too. Hopefully Aquaman wouldn’t be too upset with them.
The boys approached the Atlantean town from above. Danny’s lateral line pinged dozens olf times. Civilians wandered the streets, peddling wares and chatting about the day. On the far side, trainees tossed javelins and practiced archery while an instructor yelled commands at them.
“There.” Damian whispered. The boy tugged on Danny’s fins, and Danny followed the direction to where the market was. “I believe I spotted a cartographer in the crowd. We should be able to obtain our prize from him.”
As Danny descended and swam just over head of the Atlanteans, his ear fins prickled. Chatter in Atlantean filled the water, none of which Danny could parse out. Hell, even his Pacific Siren was pretty choppy, a fact that Sam endlessly teased him about. Ocean languages were tricky! It wasn’t his fault!
Whatever, point is, Danny spotted the guy. Thin, stocky, wearing a dark blue overcoat and tunic, fit with undersea glasses, carrying rolled up paper underarm. The man shuffled into a small corner shop on the street, a good distance away from the bigger crowd in the market. Danny crept up behind him, careful not to bump into any one.
The shop was nothing impressive, just a humble joint probably frequented by travelers or whatever. Maps of the world decorated the walls, accompanied by globes atop display cases that contained even more charts of the local area. The owner kept his back to them as he bent over a bench and filed away his new acquisitions.
“Now, while his back is turned.” Damian whispered.
Danny swam into the shop through the doorway, careful not to make a single sound. The shopkeeper hummed. Danny compressed his hand through the tiny slit of the display case. He reformed it to its proper size on the inside. He grabbed the closest map and spread his invisibility to it, before pulling it out.
The shopkeeper turned around. Danny’s gills stilled. The man stared at the spot where the map had just been, eyes quirked up. He was none the wiser as Danny turned tail, and exited the shop in swift fashion.
Once out of earshot, Danny let himself relax a little. “Welp, time to get outta here then.”
Damian poked him in the side (thankfully below the gills; that would hurt) and chittered. “Negative.”
“What do you mean negative? We got exactly what you wanted?”
“Not yet. Look.”
…
“You know you’re still invisible, right? I can’t see what you’re pointing at.”
“The seahorses!”
Danny’s face blanched. “You wanna eat the seahorses??”
He felt a whack on his sail. “No, you buffoon. I would like to pet them.”
This kid’s priorities. “If you haven’t noticed, we’re kind of in enemy territory here.”
“I am aware, but I have never pet a seahorse before, and I may not get another opportunity like this again.”
Danny’s jaw gaped open. “If you haven’t noticed, there’s an entire ocean ahead of us.”
“Don’t condescend to me. The seahorses are in our vicinity, and there is no guarantee we will come across another school on our journey. Therefore, we go to them now.”
In all honesty, he should’ve expected the kid to be distracted by his love of animals. Hell, Danny could even relate with his own obsession with astronomy.
“Fiiiiine. But I have a bad feeling about this.”
And so Danny flipped fins and brought Damian to the seahorses, as requested. The little things were floating around a coral reef within the town borders, surrounded by a fence. Architectural features like these always reminded him of Dora’s rants about how Atlanteans were essentially humans, and he could see why. What was the point of a fence when everyone and their mother could just swim over it?
Case in point: Danny right now.
Danny lay down on his belly in the sand, keeping a hand on Damian’s shoulder to keep the invisibility flowing. The sea horses swarmed over him, poking curiously at his fins, sensing the disturbance but not seeing it. One particularly brave seahorse even brushed its tail along his gills. Danny had to bite his lip to avoid gasping or giggling from the ticklish sensation. Damian didn’t say anything, but he seemed to be having the time of his life, with how the seahorses’ manes creased from the kid’s touch.
If Danny flexed his ear fins, he could even pick up the slightest cooing sound from the kid. If he could see the younger guppy’s face, he bet it would be split in a huge grin. Then again, Damian didn’t seem the type to express positive emotion so openly like that, but who knows? Maybe the invisibility’s lowering his inhibitions?
A foot brushed his dorsal fin. Danny gasped from the sudden rough touch on his sensitive fin. Dammit!
Maybe he was the one who should’ve remembered they were in enemy territory.
A child gasped, mouth gaped open as she stared at where his tailfin was. Danny pulled Damian back, getting ready to take off. Yeah this was the part where they got the hell out of dodge.
Only for the girl to lean down and poke him. Right in the gills. Ow.
Danny yelped in shock. His body snapped back into the visible spectrum as the little girl went saucer eyed. Outside the fence, an Atlantean woman stood stunned as she blinked owlishly at them.
He chuckled. “Well, thanks for letting us pet your seahorses, but we really gotta go, so see ya-”
“SIIREEEENNNNNNS!!!!!”
Well fuck.
Sam slammed her fist against the punching bag. Every yell brought forth primal rage, and righteous anger. In her mind’s eye, Vlad’s face ate every punch and crunched with every kick. Skulker’s smug mug got caved in. And most of all, Danny’s fucking parents. Her fucking parents.
Didn’t take Superman to hear them screaming upstairs. Hurling accusations, badmouthing Danny for the six hundred and fiftieth time. “Oh how could he lead our precious Sammykins astray like this?” As if they didn’t do that already!
And now she was grounded. Put on house arrest, even. Tucker shared a similar fate. That just left Jazz to monitor the situation. Luckily, Tuck prepared secret burner phones for them for this exact scenario.
Being grounded also meant they couldn’t search for Danny again. In all likelihood he had probably skipped town. Tucker’s forays into the GiW’s servers showed they were still on the lookout, so that was something to be relieved by. If only she and Tuck actually knew what was going on!
She growled and then transitioned into another scream. How the hell did the Fentons even know where to look for them!?
The anger melted away into anxiety. The conversation replayed in her mind. Half the time she wasn’t even sure what she was saying. That was so close. One slip-up and she would’ve landed Danny on the dissection table, not that the result they got was much better. Danny still had a target on his back, and no one could be blamed for it but her. Six months ago while they were just teenagers in over their heads, the idea of caped heroes coming in to save their asses seemed like a dream.
But now? Bruce Wayne funded the Justice League. The fucking Justice. League. It was like Paulina getting a poor girl who bumped into her suspended because of her dad’s wealth. Only replace the poor girl getting suspended with Danny being turned into scientific sushi by the Goons in White, or even worse: his parents.
Oh, and she pissed him off even more. Sam banged her head against the punching back.
Danny was strong. She was strong. Tucker was strong. They had faith in each other. But as yesterday’s hack proved, there were far, far bigger fish in the ocean. And she would destroy anyone who heard her admit it, but part of her was terrified.
Sam retreated to her room, not even sparing her arguing parents a glance. Once in the safety of her private sanctuary, she retrieved her spell book, and began to research anew. She needed to be in tip-top shape to help Danny and Damian Wayne get home. They were going to contact her and Tucker any day now, and she needed to be ready for it.
Please be ok, Danny.
Maddie finished the last of the software updates to the Fenton Sonars, resetting them and reversing the damage Tucker had done. What were they thinking?! Aiding and abetting some of the most dangerous creatures on the planet. All those PSAs and lectures she knew he had sat in on with Danny and the takeaway he had was to play superhero with a savage beast?!
The sonars pinged. Just as she suspected. No sign of Phantom near Amity. The GiW hadn’t found crap in however many hours of search in the surrounding waters, so the bastard probably fled with his tail between his… tail. Maddie scoffed. Some hero.
But that was perfectly fine by her, because she had Phantom’s hydroplasmic signature.
Switching programs, she accessed the Fenton Satellite’s computer programming. One key stroke later, and Phantom’s signature beamed up to the Fenton Satellite. Maddie grinned darkly.
“You finished over there, Maddie?” Jack asked. Glow torch sparks lit up behind her and cast the lab in stark shadow.
“Yes sweetie, now all that we need left is the hardware.”
On the workbench, Jack carefully welded their newest creation. She took up the spot beside him, and began slotting components in as they transitioned to working in perfect harmony together. Jack glanced at her, and she passed over the wrench. A nano-battery array here. A forty-inch radar dish there. A custom Fenton piston set over there. With two children on the line, they worked round the clock. They tested their new inventions rigorously, then broke them down to rebuild them better.
Phantom won’t know what hit him.
#dpxdc#danny fenton#merman#damian wayne#dcxdp#merboy#angst#mermaid au#maddie fenton#jack fenton#sam manson#good parents jack and maddie#damian wants to pet the seahorses#let him pet!!
86 notes
·
View notes
Text

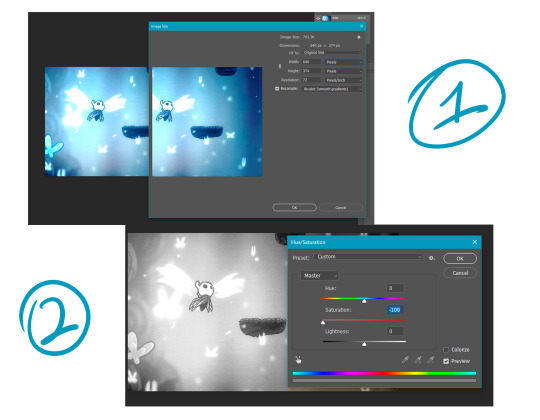
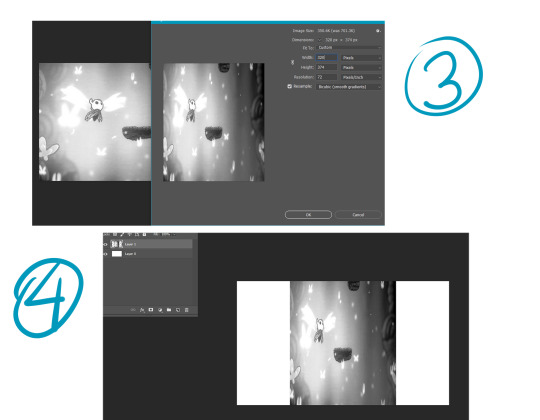
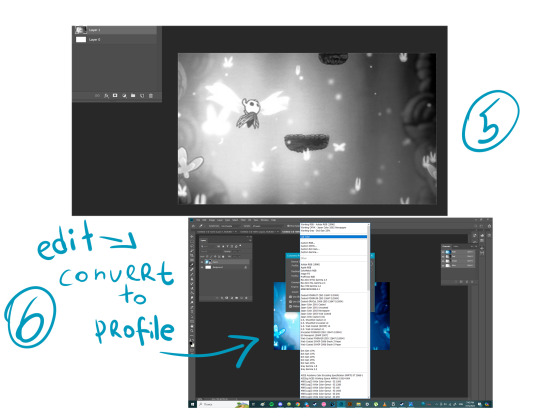
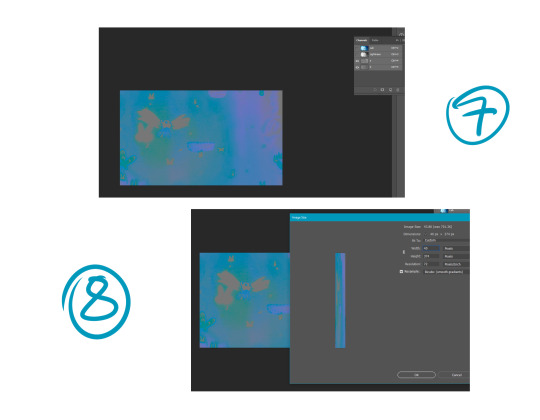
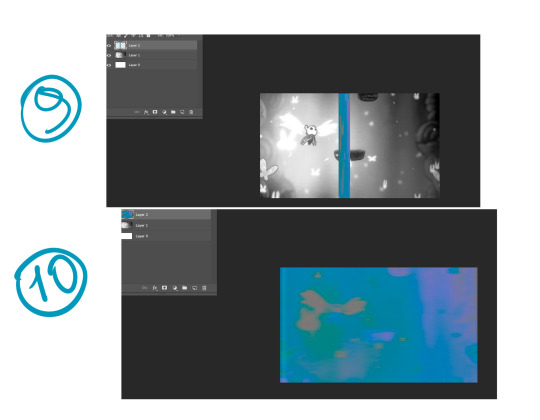

I'm reuploading one guide on making VHS effect more authentic I guess( I'm not gonna pretend I'm a specialist it's just when I was searching and studying it I noticed some people just apply channel effects or noises and overall pictures look like they're too fresh to be old looking) So first we need to understand how VHS works( I found this through videos on vhs and how nintendo 64 ported resident evil 2) VHS holders needed to save and hold a lot of information using metals that can't handle high resolution. In order to compress images VHS divides them into 2 groups: Tone(Black and White relation) and Chroma(color apply without tone channel type). These two channels are compressed to 1:16 of original resolution then changed into same size as original(by crop) but with less resolution. 1) Create new file in photoshop. Call it whatever you want just 'canvas1' can suffies. Sizes are: 640 px width 374(or any you want just in relation to classic 4:3 or 16:9) height AND printing resolution to 72 ppi. Create 3 other files with same application(canvas2 and canvas3 and canvas4) 2) In canvas2 we add screenshot(I used one I made in Hollow knight) now we're going to extract tone by using ctrl+U and change saturation to 0. Now we need to change image size and divide your width into 2 ( if we divide 640 into 2 we get 320 pixels width) height needs to stay the same so turn off button with proportional changes. After we compressed this file we call it 'tone' and save as jpg image. Now we need to add tone to canvas1 and transform it's width according to file size(don't change image size) this is layer1 now. 3) In canvas 3 we have same original screenshot but we need to apply different color profile in edit window(LAB colors) LAB colors consists of channels Light(this is our tone) and a b(these two makes chroma). We now need to open channel window and turn off Light(L) channel and we can see now e have pretty colors. I didn't find how to extract color from this profile so I made new screenshot of this file and add to canvas4(transformed it according to file size). 4)We can close canvas2 and canvas3. In canvas4 we need to change image size. We need to divide 640 into 16 we get = 40 pixels. Width are 40 pixels, height doesn't need to change. We can see now that this image looks squeeshed and that's right. This file we call 'chroma' and save as jpg. Then we need to add this image into canvas1 and transform it according to gile size without changing image size. This is layer2 now. 5)Change layer2 application from normal to color. If you want you can change oppacity to 65-75 %. Now we basically have broken vhs/low fidelity effect.(if you want you can add horro effect by changing layer mode to any instead of color)
BONUS ROUND: You can add some stuff through layer effect by copying finished image and turning off green and blue channel in it. Move this layer slightly to the left. Made another copy of og vhs image we had and turn off red and green move it slightly to the right. If you want to add logo made same thing with channels as we did previously and blur it a little.
49 notes
·
View notes
Text
Hello hi yes,
I just want to throw out this idea into The Magnus Protocol fandom again and kinda expand a bit with it.
In the trailer and as everyone is talking about we have j.01, m.01 and j.02 as program files being started. The computer accesses these files when it starts up and all three show as ok.
The thing is how the files are saved the J file is not two separate files, it's the same file split!
Also the way these files show up they are compressed or like a zip file or another name for that type of file is ARCHIVED. . . And it looks like they are booting from a server (SOMEWHERE ELSE).
They are trying to load from an archive - a server, and the error .jmj could be them becoming more aware, or like extracted as you would with a zip file. Since we keep having the computer and cctv systems load as if they are listening. It's the compressed files BEING RELEASED.
I don't normally go the theory route but, the facts are right there in the codes! Jon and Martin play a part, the archives play a part and the fears I think are being released.
#the magnus protocol#tmagp theory#tmagp#norris#chester#jonathan sims#martin blackwood#tmagp jmj files#fan thoughts#boys in the computers#jmart#jonmartin#archives
68 notes
·
View notes
Text
Making Baldur’s Gate 3 GIFS Tutorial
TOOLS USED:
Nvidia or alternate game video recording software
PotPlayer
GIMP (Optional)
Adobe Photoshop
PART 1: Recording
I personally use the Nvidia recording software that came with my computer to capture videos of the game, but there are plenty of video recording options out there. I know OBS Studio is a popular one, for example. Whatever your choice may be, here are three important tips for when capturing video:
Use the least amount of compression settings your recording software can output, and I recommend at least 30FPS, though 60 is better
Press F10 to hide the Baldur’s Gate 3 UI and capture the entire screen
Give about three seconds worth of video before and after the section you want to record, as safety buffers, if you can
PART 2: Frame Extraction
Open the video you’ve recorded in PotPlayer in window mode (not full screen), and pause a little bit before where you want to start your GIF. Press Ctrl + G to open up the Consecutive Image Capturer window, and drag it to the side of the video player. These are the settings I recommend in general:
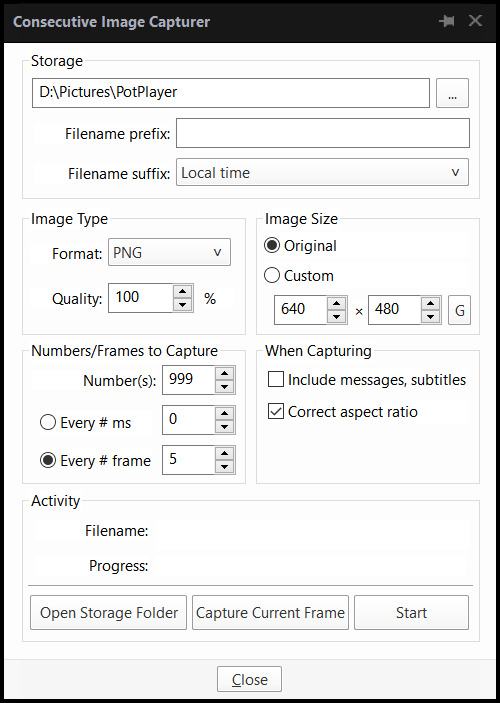
HOWEVER, I suggest playing around with the “Every # frame” option to your own liking. I have a pretty high framerate for this video I’m using, so 5 is fit for me, but if you have a lower framerate, you may want a lower number, like 2.
With your settings in place, click “Start” and unpause the video. Pause the video again after you’ve captured all the frames you want, then click “Stop”. If you’re making a gifset, I recommend then storing each set of frames in a single folder at a time.
PART 3: Resizing
I personally use GIMP to resize/crop the images because I find it easier, then export the image as a PSD for the next steps in Photoshop. But you can use Photoshop for this step too, if you’re more comfortable with that.
The number of frames you can get away with in a single GIF for Tumblr depends on the aspect ratio you plan on saving it as—for example, 270x200 obviously can handle more frames than 540x300 while still fitting within Tumblr’s size limit.
PART 4: Sharpening
In Photoshop, use the Filter > Sharpen > Smart Sharpen tool on each layer. The settings are your choice, but I usually use 200 for the Amount and 0.5 for the Radius.
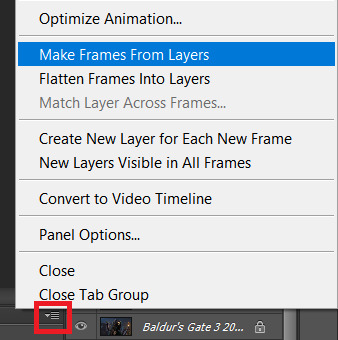
PART 5: Animation
If you don’t yet have the timeline set up in Photoshop, click on Windows > Timeline to bring it up. Then from the arrow, choose “Create Frame Animation” and click on the button to do so. This will insert the first frame into your timeline. Click on “Make Frames from Layers” in the timeline options menu to add them all.
Click on frame 1, then hold down Shift and click on the last frame to select them all. Then click on the drop-down arrow from the last frame and set the delay between each frame changing. I usually use 0.1 seconds.
Change the “Once” option to “Forever” to make the GIF repeat itself ongoing.
PART 6: Editing/Colouring
Click on frame 1. Then click on the top layer, while still keeping frame 1 visible.
You can use a variety of tools in Photoshop to editing the colours, brightness, contrast, etc. of the gif. Make sure the filters are the top layers to apply them to all the frames. If you test out your gif and see that the filters are not applied to all the frames, toggle the visible option on them off and on again.
I’m not going to go into detail of how to edit your GIF here, because each one is different. But I will say the tools I most typically use are Brightness/Contrast and Curves.
PART 7: Export
Click on File > Save for Web. These are the settings I like to use:
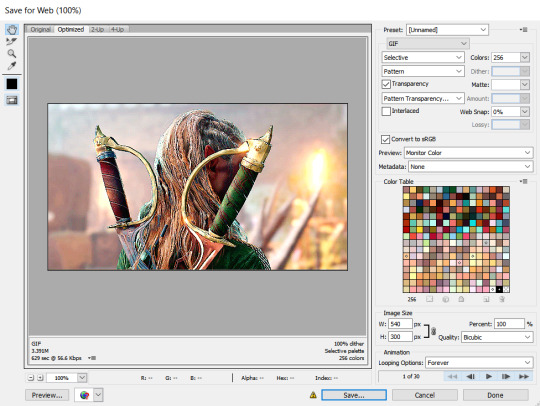
Congratulations, you’ve made a GIF!
150 notes
·
View notes