#how to useradd
Explore tagged Tumblr posts
Visit Tumblr Blog
Explore Tumblr blogs with no restrictions, modern design and the best experience.
Last Seen Tumblr Blogs


Fun Fact
The Tumblr office adopted Tommy, an 11-year-old Pomeranian.
Text


HOW TO LOSE A GUY IN 10 DAYS (2003) dir. Donald Petrie
#how to lose a guy in 10 days#*gifs#howtoloseaguyin10daysedit#filmedit#filmgifs#usergiu#usermimsi#usereerie#tuserhol#userrebekah#userrin#tuserambs#userarrow#singinprincess#userbunneis#usershreyu#userwintersoldado#useradds#tuserheidi#bladesrunner#usercats#userelio#userdanahscott#usersalty#userrobin#fourteenthofaugust#useraish
1K notes
·
View notes
Text


As a Cucumber Game Changer
#dropoutedit#game changer#katie marovitch#brennan lee mulligan#this moment has single-handedly taught me sm about how to deal with mansplaining#dropoutsource#usermimsi#usertreena#usercamena#janielook#userholloway#userhella#usernolan#usertj#usermagic#userholtz#usermadita#userarrow#userfaiths#useradds#emstuff#emgifs
2K notes
·
View notes
Text


Imogen keeps on sending me couples costume ideas.
#heartstopperedit#heartstopper#nick x imogen#tvarchive#tvandfilm#useranne#userelliee#userrjoana#userrlaura#userives#userkimmy#usersnat#tuserlucie#userjake#useradds#gifs*#this kills me bc he could easily have come up with a ken costume 😭#also so cute and sweet how she wanted to include nick in a costume 🥺
415 notes
·
View notes
Photo


@yellowjacketsnetwork event 05 — growth @lgbtqcreators creator challenge — past event (growth) — aaron schwartz, on the other side of grief with ocean vuong (insp)
#yellowjackets#tv#yellowjacketsedit#yjedit#tvedit#userlgbtq#yellowjacketsnetwork#mystuff#userallisyn#tusermiles#userspacey#antlerqueen#userriel#usercleo#tuserheidi#useradds#userbecca#userlindsay#tusercj#'im healed' shauna says while actively hallucinating her dead best friend that she cannibalized when she was like 17#i heard growth and all i could think about is how shauna's grief about jackie refuses to let her grow out of her bad habits#so have a gifset about it
225 notes
·
View notes
Text
How To Add Users in Ubuntu 24.04 LTS
Adding users is a fundamental responsibility of system administrators, crucial for maintaining secure access and efficient resource allocation. Regular users need accounts for their daily operations, and administrators require robust ways to manage these accounts seamlessly. Effective user addition ensures that each user has the appropriate access and permissions for their role.
How To Add Users in Ubuntu 24.04 LTS
Ubuntu 24.04 LTS offers diverse methods for adding users, accommodating various preferences and needs. Whether you prefer the precision of terminal commands, the convenience of a graphical interface, or the efficiency of automation scripts, this guide covers it all. In this comprehensive guide, we will explore multiple methods for adding users in Ubuntu 24.04 LTS, including:
Using the Command Line: Employing powerful commands like adduser and useradd for detailed and controlled user creation.
Using the Graphical User Interface (GUI): Managing user accounts through Ubuntu’s intuitive settings interface.
Adding Users Temporarily: Creating users with expiration dates for specific tasks.
Automating User Creation with Scripts: Streamlining bulk user creation with custom scripts.
Each method is detailed with step-by-step instructions to ensure you can add users effectively and effortlessly, enhancing your Ubuntu experience.
Method 1: Adding a User Using the Command Line
This method is ideal for administrators who prefer using terminal commands.
Using adduser
An easy-to-use, high-level command for adding users is the adduser. It provides a guided process to set up a new user, including setting a password and additional user information.
Step 1: Open the Terminal
To access the terminal, simultaneously depress the Ctrl, Alt, and T keys. Alternatively, search for "Terminal" in your application menu.
Step 2: Add a New User
Execute the following command:
sudo adduser newuser

Substitute newuser with your desired username.
The password must be entered when prompted.
Take Note:
Make sure the password satisfies the following requirements:
Minimum of 8 characters.
Includes both upper and lower case letters.
Contains at least one number.
Includes special characters (e.g., !, @, #, $, etc.).

Enter the password and press Enter.
Type the password one more time and hit Enter to confirm it.
Some details will be asked while adding a new user like full name, room number, work phone, and home phone.

Any field can be skipped by pressing Enter.
After entering the information, you will see a summary of the details.

Confirm the details by typing Y and pressing Enter.
Step 3: Verify User Creation
Execute the below given command to check the new user's addition:
getent passwd newuser
If the command is successful in creating the user, the user's details will be shown like this:

Using useradd
A low-level utility for creating new users is the useradd command. It requires more specific options but offers greater control over the user creation process.
Step 1: Open the Terminal
The terminal can be opened by simultaneously holding down the Ctrl, Alt, and T keys.
Step 2: Add a New User
Run the following command, and substitute new_username with the username you prefer:
sudo useradd -m new_username
Making sure the user's home directory is created is ensured by the -m option.
Step 3: Set Password for the User
The new user can be assigned a password by using:
sudo passwd new_username

Type the password one more time and hit Enter to confirm it.
Step 4: Verify User Creation
Execute the below given command to check the new user's addition:
getent passwd new_username
If the command is successful in creating the user, the user's details will be shown.

Additional Steps (Optional)
Adding the User to a Specific Group
Use the below given command to add a new user to a certain group:
sudo usermod -aG groupname newuser
Replace groupname with the desired group (e.g., sudo, admin, docker).
Execute the below given command to check the new user's addition:
groups new_username
This command will list all the groups that the user belongs to, including the new group.

Method 2: Adding a User Using GUI (Graphical User Interface)
For those who prefer a graphical interface, Ubuntu provides an easy way to manage users through its settings. Here's a step-by-step guide to adding a new user using the GUI.
Step 1: Open Settings
To access the terminal:
Search for "Settings" in your application menu.

Step 2: Access Users Section
In the Settings window, go to the search bar at the top and type "Users."

As an alternative, move to the sidebar's bottom and select "System."

Click on "Users" from the options available in the System settings.
Step 3: Unlock User Management
Select the "Unlock" button by moving to the upper right corner.

Enter your administrative password and click "Authenticate."
Step 4: Add New User
Click the "Add User" button.
Input the required data, including your username and name.
You can choose to keep the toggle button inactive by default to designate the new user as a "Standard" user.
Then insert password.
Step 5: Confirm and Apply
Click "Add" to create the user.
Now the new user will appear in the user list.
Take Note
User Management:
Once the user is created, click on the username in the Users section to manage its settings.
Method 3: Adding a User Temporarily
For certain tasks, you might need to add a user that expires after a specified period. This method outlines how to create a user with an expiration date using the command line.
Step 1: Open the Terminal
The terminal can be opened by simultaneously holding down the Ctrl, Alt, and T keys.
Step 2: Add a User with an Expiry Date
Execute the following command:
sudo useradd -m -e YYYY-MM-DD temporaryuser
Replace YYYY-MM-DD with the desired expiration date and temporaryuser with your desired username.
Step 3: Set Password for the User
The new user can be assigned a password by using:
sudo passwd temporaryuser
Enter the password, when prompted.
Type the password and press Enter.
Type the password one more time and hit Enter to confirm it.
Step 4: Verify User
To verify that a temporary user has been created successfully, use the below given command:
sudo chage -l temporaryUser
Substitute the temporaryuser with the username you want to verify.
Method 4: Automating User Creation with Scripts
The method outlined here demonstrates automating user creation with scripts, particularly useful for bulk user creation tasks.
Step 1: Open the Terminal
The terminal can be opened by simultaneously holding down the Ctrl, Alt, and T keys.
Step 2: Create a Script
Any text editor will work for writing the script. Using nano, for instance:
nano add_users.sh
Step 3: Add Script Content
Add the following content to the script. Modify the usernames and other details as needed.
#!/bin/bash
sudo adduser user1 --gecos "First Last,RoomNumber,WorkPhone,HomePhone" --disabled-password
echo "user1:password1" | sudo chpasswd
sudo adduser user2 --gecos "First Last,RoomNumber,WorkPhone,HomePhone" --disabled-password
echo "user2:password2" | sudo chpasswd
Replace user1, user2, etc., with the desired usernames.
Modify the --gecos option to provide additional information about the user (optional).
Replace the password with the desired password.
Adjust the script content as needed, adding more users or customizing user details.
Save and close the file.
Step 4: Make the Script Executable
To enable the script to run, use the chmod command.
chmod +x add_users.sh

Step 5: Run the Script
Run the script to create the users.
./add_users.sh

Conclusion:
User management in Ubuntu 24.04 LTS is a critical task for system administrators, providing security, efficient resource allocation, and smooth system operation. With various methods available, from command-line interfaces to graphical user interfaces and automation scripts, Ubuntu 24.04 LTS ensures that adding users can be tailored to different needs and preferences. By following the comprehensive steps outlined in this guide, you can effectively manage regular users.
2 notes
·
View notes
Text

SYSTEM ADMIN INTERVIEW QUESTIONS 24-25
Table of Content
Introduction
File Permissions
User and Group Management:
Cron Jobs
System Performance Monitoring
Package Management (Red Hat)
Conclusion
Introduction
The IT field is vast, and Linux is an important player, especially in cloud computing. This blog is written under the guidance of industry experts to help all tech and non-tech background individuals secure interviews for roles in the IT domain related to Red Hat Linux.
File Permissions
Briefly explain how Linux file permissions work, and how you would change the permissions of a file using chmod. In Linux, each file and directory has three types of permissions: read (r), write (w), and execute (x) for three categories of users: owner, group, and others. Example: You will use chmod 744 filename, where the digits represent the permission in octal (7 = rwx, 4 = r–, etc.) to give full permission to the owner and read-only permission to groups and others.
What is the purpose of the umask command? How is it helpful to control default file permissions?umask sets the default permissions for newly created files and directories by subtracting from the full permissions (777 for directories and 666 for files). Example: If you set the umask to 022, new files will have permissions of 644 (rw-r–r–), and directories will have 755 (rwxr-xr-x).
User and Group Management:
Name the command that adds a new user in Linux and the command responsible for adding a user to a group. The Linux useradd command creates a new user, while the usermod command adds a user to a specific group. Example: Create a user called Jenny by sudo useradd jenny and add him to the developer’s group by sudo usermod—aG developers jenny, where the—aG option adds users to more groups without removing them from other groups.
How do you view the groups that a user belongs to in Linux?
The group command in Linux helps to identify the group a user belongs to and is followed by the username. Example: To check user John’s group: groups john
Cron Jobs
What do you mean by cron jobs, and how is it scheduled to run a script every day at 2 AM?
A cron job is defined in a crontab file. Cron is a Linux utility to schedule tasks to run automatically at specified times. Example: To schedule a script ( /home/user/backup.sh ) to run daily at 2 AM: 0 2 * * * /home/user/backup.sh Where 0 means the minimum hour is 2, every day, every month, every day of the week.
How would you prevent cron job emails from being sent every time the job runs?
By default, cron sends an email with the output of the job. You can prevent this by redirecting the output to /dev/null. Example: To run a script daily at 2 AM and discard its output: 0 2 * * * /home/user/backup.sh > /dev/null 2>&1
System Performance Monitoring
How can you monitor system performance in Linux? Name some tools with their uses.
Some of the tools to monitor the performance are: Top: Live view of system processes and usage of resource htop: More user-friendly when compared to the top with an interactive interface. vmstat: Displays information about processes, memory, paging, block IO, and CPU usage. iostat: Showcases Central Processing Unit (CPU) and I/O statistics for devices and partitions. Example: You can use the top command ( top ) to identify processes consuming too much CPU or memory.
In Linux, how would you check the usage of disk space?
The df command checks disk space usage, and Du is responsible for checking the size of the directory/file. Example: To check overall disk space usage: df -h The -h option depicts the size in a human-readable format like GB, MB, etc.
Package Management (Red Hat)
How do you install, update, or remove packages in Red Hat-based Linux distributions by yum command?
In Red Hat and CentOS systems, the yum package manager is used to install, update, or remove software. Install a package: sudo yum install httpd This installs the Apache web server. Update a package: sudo yum update httpd Remove a package:sudo yum remove httpd
By which command will you check the installation of a package on a Red Hat system?
The yum list installed command is required to check whether the package is installed. Example: To check if httpd (Apache) is installed: yum list installed httpd
Conclusion
The questions are designed by our experienced corporate faculty which will help you to prepare well for various positions that require Linux such as System Admin.
Contact for Course Details – 8447712333
2 notes
·
View notes
Text
How To Setup Elasticsearch 6.4 On RHEL/CentOS 6/7?

What is Elasticsearch? Elasticsearch is a search engine based on Lucene. It is useful in a distributed environment and helps in a multitenant-capable full-text search engine. While you query something from Elasticsearch it will provide you with an HTTP web interface and schema-free JSON documents. it provides the ability for full-text search. Elasticsearch is developed in Java and is released as open-source under the terms of the Apache 2 license. Scenario: 1. Server IP: 192.168.56.101 2. Elasticsearch: Version 6.4 3. OS: CentOS 7.5 4. RAM: 4 GB Note: If you are a SUDO user then prefix every command with sudo, like #sudo ifconfig With the help of this guide, you will be able to set up Elasticsearch single-node clusters on CentOS, Red Hat, and Fedora systems. Step 1: Install and Verify Java Java is the primary requirement for installing Elasticsearch. So, make sure you have Java installed on your system. # java -version openjdk version "1.8.0_181" OpenJDK Runtime Environment (build 1.8.0_181-b13) OpenJDK 64-Bit Server VM (build 25.181-b13, mixed mode) If you don’t have Java installed on your system, then run the below command # yum install java-1.8.0-openjdk Step 2: Setup Elasticsearch For this guide, I am downloading the latest Elasticsearch tar from its official website so follow the below step # wget https://artifacts.elastic.co/downloads/elasticsearch/elasticsearch-6.4.2.tar.gz # tar -xzf elasticsearch-6.4.2.tar.gz # tar -xzf elasticsearch-6.4.2.tar.gz # mv elasticsearch-6.4.2 /usr/local/elasticsearch Step 5: Permission and User We need a user for running elasticsearch (root is not recommended). # useradd elasticsearch # chown -R elasticsearch.elasticsearch /usr/local/elasticsearch/ Step 6: Setup Ulimits Now to get a Running system we need to make some changes of ulimits else we will get an error like “max number of threads for user is too low, increase to at least ” so to overcome this issue make below changes you should run. # ulimit -n 65536 # ulimit -u 2048 Or you may edit the file to make changes permanent # vim /etc/security/limits.conf elasticsearch - nofile 65536 elasticsearch soft nofile 64000 elasticsearch hard nofile 64000 elasticsearch hard nproc 4096 elasticsearch soft nproc 4096 Save files using :wq Step 7: Configure Elasticsearch Now make some configuration changes like cluster name or node name to make our single node cluster live. # cd /usr/local/elasticsearch/ Now, look for the below keywords in the file and change according to you need # vim conf/elasticsearch.yml cluster.name: kapendra-cluster-1 node.name: kapendra-node-1 http.port: 9200 to set this value to your IP or make it 0.0.0.0 ID needs to be accessible from anywhere from the network. Else put your IP of localhost network.host: 0.0.0.0 There is one more thing if you have any dedicated mount pint for data then change the value for #path.data: /path/to/data to your mount point.
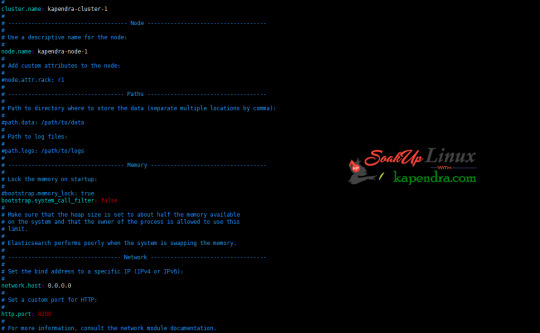
Your configuration should look like the above. Step 8: Starting Elasticsearch Cluster As the Elasticsearch setup is completed. Let the start Elasticsearch cluster with elastic search user so first switch to elastic search user and then run the cluster # su - elasticsearch $ /usr/local/elasticsearch/bin/elasticsearch 22278 Step 9: Verify Setup You have all done it, just need to verify the setup. Elasticsearch works on port default port 9200, open your browser to point your server on port 9200, You will find something like the below output http://localhost:9200 or http://192.168.56.101:9200 at the end of this article, you have successfully set up Elasticsearch single node cluster. In the next few articles, we will try to cover a few commands and their setup in the docker container for development environments on local machines. Read the full article
2 notes
·
View notes
Text
Chimera-Linux with btrfs
Chimera Linux is a rather new from the ground up Linux Distribution built with LLVM, MUSL, BSDUtils and dinitit comes with GNOME and KDE Plasma. It, however doesn't come with a installer so here's how to install the KDE flavour with btrfs root and home directories plus a swap partition for use in Linux KVM with UEFI.
Step 1. Get a Chimera live image from https://repo.chimera-linux.org/live/latest/
I use the chimera-linux-x86_64-LIVE-XXXXXXXX-plasma.iso image with KDE Plasma 6 and the following steps assume you do the same.
Step 2. Boot the live image
Step 3. Prepare the target disk with KDE Partition Manager
/dev/vda /dev/vda1, vfat, EFI System, 500 MB /dev/vda2, btrfs, Root FS, subvols @ & @home , rest of the disk /dev/vda3, swap, SWAP FS, 2x RAM Size
Step 4. Open Konsole and do the following
doas -s mkdir -p /media/root mount -t btrfs /dev/vda2 /media/root chmod 755 /media/root btrfs subvolume create /media/root/@ btrfs subvolume create /media/root/@home btrfs subvolume set-default /media/root/@ umount /media/root mount -t btrfs -o compress=zstd:5,ssd,noatime,subvol=/@ /dev/vda2 /media/root mkdir -p /media/root/home mount -t btrfs -o compress=zstd:5,ssd,noatime,subvol=/@home /dev/vda2 /media/root/home mkdir -p /media/root/boot/efi mount -t vfat /dev/sda1 /media/root/boot/efi
let's bootstrap our new chimera system
chimera-bootstrap -l /media/root exit
time to chroot into our vergin system
doas chimera-chroot /media/root
time to bring everything up to date
apk update apk upgrade --available
if something is iffy
apk fix
we want our swap to show up in the fstab
swapon /dev/vda3
Let's build a fstab
genfstab / >> /etc/fstab
install the latest LTS Kernel
apk add linux-lts
install the latest released kernel
apk add linux-stable update-initramfs -c -k all
time for EFI GRUB
apk add grub-x86_64-efi grub-install -v --efi-directory=/boot/efi update-grub
install KDE, Firefox, Thunderbird
apk add plasma-desktop flatpak smartmontools ufw firefox thunderbird qemu-guest-agent-dinit spice-vdagent-dinit
Set root password
passwd root
create main user
useradd myuser passwd myuser
add user to relevant groups
usermod -a -G wheel,kvm,plugdev myuser
Set hostname
echo chimera > /etc/hostname
set timezone
ln -sf /usr/share/zoneinfo/Europe/Berlin /etc/localtime
Configure some services
syslog-ng
dinitctl enable -o syslog-ng
sshd
dinitctl enable -o sshd
KDE Login Manager
dinitctl enable -o sddm
only needed when in KVM VM
dinitctl enable -o spice-vdagentd dinitctl enable -o qemu-ag
network time client
dinitctl enable -o chrony
network manager defaults to dhcp client on first ethernet interface
dinitctl enable -o networkmanager
optional: enable firewall if installed
dinitctl enable -o ufw
see the firewall status
ufw status
configure flatpak
flatpak remote-add --if-not-exists flathub https://dl.flathub.org/repo/flathub.flatpakrepo
just to be sure
update-initramfs -c -k all update-grub
exit from chroot
exit
umount drive
doas umount /media/root/boot/efi doas umount /media/root/home doas umount /media/root
Step 5. Reboot the System
1 note
·
View note
Text
A Beginner's Guide to Red Hat Enterprise Linux (RHEL)
Red Hat Enterprise Linux (RHEL) is a powerful and versatile operating system widely used in enterprise environments. Known for its stability, security, and robust support, RHEL is a popular choice for businesses and IT professionals. Whether you are stepping into the Linux ecosystem for the first time or transitioning from another operating system, this guide will help you understand the basics of RHEL and how to get started.
What is RHEL?
RHEL is a Linux-based operating system developed by Red Hat, Inc., designed specifically for enterprise use. It offers:
Reliability: Known for its stability, RHEL is the backbone of many critical applications.
Security: With built-in SELinux and frequent updates, RHEL prioritizes system protection.
Support: Comes with professional support and extensive documentation.
Why Choose RHEL?
Here are some reasons why organizations and professionals choose RHEL:
Enterprise-Grade Performance: RHEL is optimized for servers, cloud environments, and containers.
Long-Term Support: Each RHEL version offers years of support, making it a reliable choice for long-term projects.
Certification and Compatibility: Works seamlessly with a wide range of enterprise software and hardware.
Getting Started with RHEL
Obtain RHEL:
Visit the Red Hat website to download RHEL. You can start with a free developer subscription.
Installation:
Create a bootable USB or DVD and follow the intuitive installation wizard. During installation, you’ll configure the disk, timezone, and create an admin user.
Basic Command Line Operations:
Familiarize yourself with basic Linux commands. Examples include:
ls: List files in a directory.
cd: Change directories.
yum or dnf: Manage software packages in RHEL.
User Management:
Add users with useradd and set passwords using passwd.
Networking Basics:
Check network status with ip a.
Configure networks using NetworkManager or editing configuration files.
Essential Tools in RHEL
System Monitoring:
Use tools like top, htop, and vmstat to monitor system performance.
Firewall Configuration:
Manage firewall rules using firewalld.
Package Management:
Install, update, and remove software using dnf or yum.
Resources to Learn RHEL
Red Hat Training and Certification:
Courses like RHCSA and RHCE provide a structured learning path.
Documentation:
The official RHEL documentation is comprehensive and beginner-friendly.
Community Support:
Engage with the Linux community through forums and social media groups.
Conclusion
Red Hat Enterprise Linux is a cornerstone of modern IT infrastructure, powering everything from servers to cloud applications. By mastering RHEL, you open doors to a range of opportunities in system administration, cloud computing, and DevOps. Start small, practice consistently, and leverage the wealth of resources available to become proficient in RHEL.
For more detailed information visit: www.hawkstack.com
0 notes
Text
Automating RHEL Tasks with Shell Scripting
Introduction
Red Hat Enterprise Linux (RHEL) is a powerful and versatile operating system used widely in enterprise environments. One of its greatest strengths lies in the ability to automate repetitive tasks using shell scripting. This article will cover the basics of shell scripting, how to write and execute scripts, common use cases for automation, and tips for creating efficient scripts.
Basics of Shell Scripting
Shell scripting allows you to automate commands that you would normally run in a terminal. The most common shell used in RHEL is Bash (Bourne Again Shell).
1. Creating a Shell Script
To create a shell script, start by creating a new file with a .sh extension:
nano myscript.sh
2. Writing the Script
Begin your script with the shebang (#!) followed by the path to the shell interpreter:
#!/bin/bash
echo "Hello, RHEL!"
3. Making the Script Executable
Before you can run your script, you need to make it executable:
chmod +x myscript.sh
4. Executing the Script
You can run your script by typing:
./myscript.sh
Common Use Cases for Automation
1. System Monitoring
Automate system monitoring tasks to keep an eye on resource usage, disk space, and running processes.
#!/bin/bash
# Check disk space
df -h
# Check memory usage
free -m
2. Backup and Restore
Automate backup processes to ensure your data is safely stored and easily retrievable.
#!/bin/bash
# Backup important files
tar -czvf backup.tar.gz /path/to/important/files
3. User Management
Automate the creation and deletion of users, as well as setting permissions.
#!/bin/bash
# Add a new user
useradd newuser
# Set a password for the user
echo "newuser:password" | chpasswd
4. Software Installation and Updates
Automate the installation and updating of software packages.
#!/bin/bash
# Update all packages
yum update -y
# Install a specific package
yum install -y httpd
Tips for Creating Efficient Scripts
Use Comments: Comment your code to explain what each part of the script does. This makes it easier to understand and maintain.
# This script checks disk space and memory usage
df -h
free -m
2. Error Handling: Implement error handling to make your scripts more robust.
if [ $? -ne 0 ]; then
echo "An error occurred"
exit 1
fi
3. Variables: Use variables to store values that are used multiple times in your script.
# Define variables
BACKUP_DIR="/path/to/backup"
tar -czvf $BACKUP_DIR/backup.tar.gz /path/to/important/files
4. Loops: Use loops to perform repetitive tasks efficiently.
# Loop through a list of directories and create backups
for DIR in /home /var/log /etc; do
tar -czvf $DIR-backup.tar.gz $DIR
done
5. Functions: Use functions to organize your code into reusable blocks.
# Define a function
check_disk_space() {
df -h
}
# Call the function
check_disk_space
Conclusion
Shell scripting is a powerful tool for automating tasks in RHEL, making it easier to manage systems and perform routine tasks efficiently. By understanding the basics, common use cases, and best practices, you can harness the full potential of shell scripting to streamline your workflows and improve productivity.
For more details www.hawkstack.com
#redhatcourses#docker#linux#container#information technology#containerorchestration#kubernetes#containersecurity#dockerswarm#aws#hawkstack
0 notes
Text
These days, graphical user interfaces rule our screens. As such, the command line may appear to be a thing of the past. It is still a powerful tool, though, for anyone who wants to fully utilise a computer's potential. Greetings from the Linux command line universe. Here, we will uncover the tips and tricks that can transform you from a casual user into a command line maestro. Essential Command Line Basics for Linux We'll lay the groundwork for your exploration of the Linux command line in this article. In order to make sure you are comfortable using the terminal and carrying out commands successfully, we will start with the fundamentals. Open a Terminal You can use the terminal application that comes with most Linux distributions. Usually, you can locate it by looking for "Terminal" in the Applications menu or using the system search bar. Basic Commands: ls: List files and directories in the current directory. bashCopy code ls cd: Change the current directory. bashCopy code cd Documents pwd: Print the current working directory. bashCopy code pwd mkdir: Create a new directory. bashCopy code mkdir NewFolder touch: Create an empty file. bashCopy code touch myfile.txt Navigating the File System: Using cd to navigate through directories. bashCopy code cd .. Using ls to list the contents of a directory. bashCopy code ls /home/user/Documents File Manipulation: cp: Copy files or directories. bashCopy code cp file.txt /path/to/destination/ mv: Move or rename files or directories. bashCopy code mv oldfile.txt newfile.txt rm: Remove files or directories. bashCopy code rm myfile.txt Viewing File Content: cat: Display the entire content of a file. bashCopy code cat myfile.txt less or more: View file contents one screen at a time. bashCopy code less myfile.txt head and tail: Show the first or last few lines of a file. bashCopy code head myfile.txt File Permissions: Use chmod to change file permissions. bashCopy code chmod 755 myscript.sh chown changes the owner of a file or directory. bashCopy code sudo chown user:group myfile.txt File Searching: find: Search for files and directories. bashCopy code find /path/to/search -name "*.txt" grep: Search for text within files. bashCopy code grep "keyword" myfile.txt Managing Users and Permissions: passwd: Change your password. bashCopy code passwd sudo: Execute a command with superuser privileges. bashCopy code sudo command useradd and userdel: Add and delete user accounts. bashCopy code sudo useradd newuser sudo userdel olduser Help and Manuals: To get help for a command, use the --help option. bashCopy code ls --help Use the man command to access comprehensive manuals. bashCopy code man ls Keyboard Shortcuts: Up and Down arrow keys for command history. Tab key for auto-completion. Package Management: For Debian/Ubuntu systems (using apt): bashCopy code sudo apt update sudo apt upgrade For CentOS/RHEL systems (using yum): bashCopy code sudo yum update These examples should help you get started with the Linux command line and understand how to perform basic operations. How to Use the Linux Command Line Productively We're going to look at some methods and resources that will help you work with the Linux command line environment more effectively and efficiently. Therefore, mastering these abilities is crucial to optimising your workflow and developing your command-line skills. Tab Completion in Linux command line By pressing the "Tab" key, you can quickly and efficiently complete file and directory names, command names, and other arguments in the Linux command line thanks to a powerful feature called tab completion. It saves you time and prevents you from manually typing lengthy and possibly mistake-prone names. Here's how tab completion functions and some advice on how to use it efficiently: File and Directory Names: When you start typing the name of a file or directory, you can press the "Tab" key to autocomplete it.
If there's a single matching option, it will be completed for you. If there are multiple matching options, pressing "Tab" twice will display a list of all possible matches for you to choose from. For example, if you have files named "file1.txt" and "file2.txt," and you type cat f and then press "Tab," it will complete to cat file. Command Names: Tab completion also works for command names. When you start typing a command, pressing "Tab" will attempt to complete it. If you press "Tab" twice, it will list all available commands that match what you've typed so far. For example, if you start typing su and press "Tab," it might complete to sudo or sum. Pressing "Tab" twice will show you all available commands that start with "su." Directory Paths: Tab completion works with directory paths as well. You can start typing a directory path, and it will complete both directory names and the path itself. For example, if you want to navigate to the "/var/www" directory, you can type cd /v and then press "Tab" to autocomplete to cd /var/. Options and Arguments: Tab completion can also help you complete command options and arguments. For example, if you type ls -l /ho and press "Tab," it can autocomplete to ls -l /home/. Custom Tab Completion: You can create custom tab completion scripts or functions for specific commands or tasks. These scripts can provide tab-completable options and arguments based on your needs. Custom tab completion scripts are typically stored in files like /etc/bash_completion.d/ or loaded in your shell's profile configuration (e.g., .bashrc or .zshrc). Escaping Spaces: If you have spaces in your file or directory names, you can use backslashes or quotes to escape them. For example, if you have a file named "my file.txt," you can type cat my\ file.txt or cat "my file.txt" to use tab completion. Linux Command History and Recall Ever use a command only to find yourself in need of it again a short while later? Command history and recall allow you to quickly access commands that you have already run. A list of recent commands, each with a number attached, is displayed by the history command. An exclamation point (!) followed by the command number can be used to rerun a command (e.g.,!42 will rerun the 42nd command in your history). By pressing Ctrl + R and then entering a keyword from the command you're looking for, you can also search your command history. By using this feature, you can avoid typing lengthy, intricate commands again. Using Aliases in the Linux Shell Aliases are like custom shortcuts for your commands. You can create your own shorthand for frequently used or complex commands. For example, if you often find yourself typing ls -l to list files in long format, you can create an alias like this: bashCopy code alias ll='ls -al' After creating the alias, you can use ll instead of ls -al to list files. Linux Command Line Shortcuts Command line shortcuts are quick key combinations that help you navigate, edit, and control your terminal more efficiently. Here are a few essential shortcuts: Keyboard Shortcut Description CTRL + A Moves the cursor to the beginning of the line. CTRL + E Moves the cursor to the end of the line. CTRL + U Deletes text from the cursor to the beginning of the line. CTRL + K Deletes text from the cursor to the end of the line. CTRL + L Clears the terminal screen. CTRL + C Interrupts (stops) the current command. CTRL + D Exits the current shell or terminal session. CTRL + Z Suspends the current command (resumable with the fg command). Pipelines and Redirections in Linux command line Pipelines and redirections are powerful features in the Linux command line that allow you to manipulate input and output streams of commands, enabling you to perform complex tasks efficiently. Here's some examples of pipelines and redirections: Pipelines (|): Pipelines allow you to chain multiple commands together, passing the output of one command as the input to another.
This can be incredibly useful for processing and transforming data on the fly. For example, let's say you have a list of files in a directory, and you want to find all the files that contain a specific keyword: bashCopy code grep "keyword" *txt In this example, grep searches for the keyword in all txt files in the current directory. However, if you want to narrow down the results to only show the filenames containing the keyword, you can use a pipeline: bashCopy code grep -l "keyword" *txt | xargs -I basename Here, the grep command searches for the keyword and uses the -l option to list only the filenames. The | symbol passes this list of filenames to xargs, which then extracts the basename of each file, giving you a cleaner list of matching filenames. Redirections (>, >>, : Redirects the output of a command to a file, overwriting the file if it already exists. bashCopy code echo "Hello, world!" > output.txt >>: Redirects the output of a command to a file, but appends it to the file if it already exists. bashCopy code echo "Appended text" >> output.txt and 2>>: Redirects standard error (stderr) output to a file, overwriting or appending as needed. bashCopy code command_that_generates_error 2> error.log command_that_generates_error 2>> error.log Combining Redirection and Pipelines: You can combine redirection and pipelines to perform more complex operations. For instance, you can redirect the output of a command into a file and then use that file as input for another command. For example, you can sort the lines in a file and save the sorted result to another file: bashCopy code sort < input.txt > sorted_output.txt These are just a few Linux command line examples for pipelines and redirections. These facilitate data manipulation and process automation by enabling you to carry out an extensive array of tasks with efficiency and flexibility. Searching and Manipulating Text in the Linux Terminal Let us look at powerful tools and techniques available in the Linux command line for searching and manipulating text. These skills are useful in parsing log files, extracting specific information, and performing various text-related tasks efficiently. Searching for Text: grep: grep is a versatile command-line tool for searching text in files. It's often used with regular expressions for more complex searches. Basic usage: bashCopy code grep "pattern" file.txt Using regular expressions: bashCopy code grep -E "pattern1|pattern2" file.txt find: The find command is used to search for files and directories based on various criteria, including text content. Searching for files containing a specific text: bashCopy code find /path/to/search -type f -exec grep -l "pattern" \; ag (The Silver Searcher): An alternative to grep, ag is faster and more efficient for searching large codebases. Install it if it's not already available on your system. Basic usage: bashCopy code ag "pattern" /path/to/search Text Manipulation: sed (Stream Editor): sed is a powerful tool for text manipulation and transformation. It can be used to replace text, delete lines, and perform other operations. Replace text in a file: bashCopy code sed 's/old_text/new_text/g' file.txt awk: awk is a versatile text-processing tool that allows you to perform operations on text data, including filtering, formatting, and calculations. Print specific columns from a file: bashCopy code awk 'print $1, $3' file.txt cut: The cut command is used to remove sections from lines of files. Extract specific columns from a file: bashCopy code cut -d' ' -f1,3 file.txt sort: The sort command is used to sort lines in text files. Sorting a file alphabetically: bashCopy code sort file.txt uniq: uniq is used to remove duplicate lines from a sorted file. Removing duplicate lines from a sorted file: bashCopy code sort file.txt | uniq tr (Translate): tr is used for character-level text manipulation, such as translating or deleting characters.
Translate characters to uppercase: bashCopy code tr '[:lower:]' '[:upper:]' < file.txt cut and paste: The cut and paste commands can be used together to manipulate columns of text. Combining columns from two files: bashCopy code cut -f1 file1.txt > col1.txt cut -f2 file2.txt > col2.txt paste col1.txt col2.txt > combined.txt These are just a few examples of the many text-processing commands available in the Linux terminal. Depending on your specific needs, you can combine these commands and use them in scripts to perform more complex text manipulation tasks. Linux System Information and Troubleshooting In this chapter, we will explore essential tools and techniques for gathering system information, troubleshooting common issues, and monitoring resource usage in a Linux environment. These skills are convenient for maintaining system health and resolving problems effectively. Checking System Information (uname, df, free) To gain insights into your system’s configuration and resource utilization, you can use a variety of commands: Command Description Example uname Displays basic system information such as the kernel version and system architecture. Uname -a df Shows disk space usage, including information about disk partitions and their available space. df -h free Displays memory (RAM) usage information, including total, used, and available memory. free -m Linux System Logs and Troubleshooting (journalctl, dmesg) Troubleshooting system issues often involves examining logs and messages. Two key commands for this purpose are: – journalctl: The journalctl command provides access to the systemd journal, which contains logs for various system services and events. This tool enables you to view and filter log entries, making it invaluable for diagnosing system issues. To display recent system logs: bashCopy code journalctl -xe – dmesg: Additionally the dmesg command displays kernel ring buffer messages, which can be useful for diagnosing hardware-related problems. It specifically shows messages related to hardware detection, driver initialization, and system boot. To view kernel messages: bashCopy code dmesg | less Monitoring Resource Usage (htop) htop is an interactive and feature-rich process viewer and system monitor. Furthermore, it provides a real-time overview of system resource usage, including CPU, memory, and processes. It looks like this: To install htop use the following command: Debian/Ubuntu: bashCopy code sudo apt update sudo apt install htop CentOS/RHEL: bashCopy code sudo yum install epel-release # This is needed for EPEL repository on CentOS/RHEL 7 and earlier. sudo yum install htop Fedora: bashCopy code sudo dnf install htop htop is an excellent alternative to the basic top command. In addition, it offers a more user-friendly interface and additional features for monitoring and managing processes and system resources. How to Customize the Linux Terminal (color schemes, fonts) Customizing the Linux terminal can make your command-line experience more enjoyable and efficient. Here are several ways to customize the terminal to suit your preferences: Customizing the Prompt (PS1): To customize your command prompt, you can modify the PS1 environment variable in your shell configuration file (e.g., .bashrc for Bash). Here's an example of a custom Bash prompt: bashCopy code # Add the following line to your .bashrc file PS1='\[\e[32m\]\u@\h\[\e[m\]:\[\e[34m\]\w\[\e[m\]\$ ' \u displays the username. \h displays the hostname. \w displays the current working directory. \[\e[32m\] and \[\e[m\] change text color (in this case, green for the username and blue for the directory). Customizing Terminal Colors: Most terminal emulators allow you to customize text and background colors in their preferences. For example, in GNOME Terminal, you can navigate to "Edit" > "Preferences" > "Profiles" and click the "Edit" button for your profile. There, you can customize colors under the "Text" and "Background" tabs.
Aliases: Create aliases for frequently used commands or command sequences. Here's an example: bashCopy code # Add the following line to your .bashrc file alias ll='ls -al' After adding this alias, you can use ll in the terminal to list files and directories in long format with hidden files. Customizing Tab Completion: You can create custom tab completion behavior for specific commands. For example, let's create a simple completion for a custom script named my_script: bashCopy code # Add the following lines to your .bashrc file _my_script_completion() COMPREPLY=($(compgen -W "option1 option2 option3" -- "$COMP_WORDS[COMP_CWORD]")) complete -F _my_script_completion my_script This completion script suggests options ("option1," "option2," "option3") when you tab-complete my_script in the terminal. Customizing Key Bindings: You can customize key bindings in your shell by adding entries to your shell's configuration file. For example, to bind the Ctrl+L key combination to clear the terminal screen: bashCopy code # Add the following line to your .bashrc file bind -x '"\C-l": clear' After adding this line, pressing Ctrl+L will clear the terminal screen. Using Oh My Zsh or Powerline: If you're using Zsh, you can install Oh My Zsh or Powerline to customize your prompt and add plugins. Here's how to install Oh My Zsh: bashCopy code sh -c "$(curl -fsSL https://raw.github.com/ohmyzsh/ohmyzsh/master/tools/install.sh)" After installation, you can change the Zsh theme and customize plugins in the ~/.zshrc file. Using a Custom Terminal Font: You can change your terminal font through your terminal emulator's settings. For example, in GNOME Terminal, go to "Edit" > "Preferences" > "Profiles" > "Text" to select a custom font.
0 notes
Link
Today you will learn how to create users in Linux using the useradd command.
As a Linux administrator, it is your responsibility to create users and groups, manage password policy and its aging, look at account expiries, and so on.
I believe that user and group management is one of the tasks that a Linux administrator has to do every day, that is why he has to have complete knowledge of commands like useradd, usermod, userdel, groupadd, gpasswd, id Command, and so on.
Suggested Read: How to use the id command in Linux
In this article, I am explaining the complete features of the useradd command and in future articles, I will publish the article above other user and group management commands.
So let’s get to the topic.
Linux is a multipurpose operating system. This means that you can log in with as many users as you want and do your work.
Key features of useradd command:
Create new users
Set Specific User ID (UID) and Group ID (GID)
Can set specific expiry date
Change default user configuration
Create a new user with a changed Home Directory
Create a new user without Home Directory
Add user to multiple Secondary/Supplementary groups
Create a new user with Specific Login Shell
Can set custom comments
Syntax:
You must follow the syntax given below to use the useradd command.
useradd [OPTIONS] USERNAME
1 note
·
View note
Text
Mainframe Community / Mattermost
So, last night I ‘launched’ a MatterMost instance on https://mainframe.community. To summarize MatterMost (via wikipedia) it is: an open-source, self-hostable online chat service with file sharing, search, and integrations. It is designed as an internal chat for organisations and companies, and mostly markets itself as an open-source alternative to Slack[7][8] and Microsoft Teams. In this post I wanted to quickly explain how and why I did this. Let’s start with the why first. But Why? Last week, while working for one of my clients, I discovered they are starting to implemen MatterMost as a cross-team collaboration tool. And I discovered it has integrations, webhooks and bots. Being the Mainframe nerd I am, I quickly whipped up some lines of REXX to call CURL so I could ‘post’ to a MatterMost channel straight from The Mainframe. It was also quite easy in the wsadmin scripts to have jython execute an os.system to call curl and do the post... Now I wanted to take it a step further and create a “load module” that did the same, but could be called from a regular batch-job to, I donno, post messages when jobs failed, or required other forms of attention. Seeing as I was going to develop that on my own ZPDT/ZD&T I needed a sandbox environment. Running MatterMost locally from docker was a breeze, yet not running as “https” (something I wanted to test to work from the still to be made load-module. So, seeing as I already had the “mainframe.community”-domain, I thought, why not host it there, and use that as a sandbox....turned out that was easier done than imagined. But How? The instructions provided at https://docs.mattermost.com/install/install-ubuntu-1804.html were easy enough to follow and should get you up and running yourself in under an hour.
Seeing as there already ‘some stuff’ running at the local datacenter here I already had an nginx-environment up and running. I started with creating a new VM in my ProxMox environment (running Ubuntu 18.04) and made sure this machine got a static IP. From there on I did the following:
sudo apt update sudo apt upgrade sudo apt install postgresql postgresql-contrib
That then made sure the VM had a local database for all the MatterMost things. Initializing the DB environment was as easy as;
sudo --login --user postgres psql postgres=# CREATE DATABASE mattermost; postgres=# CREATE USER mmuser WITH PASSWORD 'x'; postgres=# GRANT ALL PRIVILEGES ON DATABASE mattermost to mmuser; postgres=# \q exit
Of course the password is not ‘x’ but something a bit more secure...
Then, make a change to the postgres config (vi /etc/postgresql/10/main/pg_hba.conf) changing the line
local all all peer
to
local all all trust
Then installing mattermost was basically these next commands:
systemctl reload postgresql wget https://releases.mattermost.com/5.23.1/mattermost-5.23.1-linux-amd64.tar.gz mv mattermost /opt mkdir /opt/mattermost/data useradd --system --user-group mattermost chown -R mattermost:mattermost /opt/mattermost chmod -R g+w /opt/mattermost vi /opt/mattermost/config/config.json cd /opt/mattermost/ sudo -u mattermost ./bin/mattermost vi /opt/mattermost/config/config.json sudo -u mattermost ./bin/mattermost vi /lib/systemd/system/mattermost.service systemctl daemon-reload systemctl status mattermost.service systemctl start mattermost.service curl http://localhost:8065 systemctl enable mattermost.service restart mattermost systemctl restart mattermost
Some post configuration needed to be done via the MatterMost webinterface (that was running like a charm) and then just a little nginx-config like specified at the MatterMost docs webpages and it was all up and running. Thanks to the peeps at LetsEncrypt it’s running TLS too :) Curious to see how ‘busy’ it will get on the mainframe.community. I’ve setup the VM with enough hardware resource to at least host 2000 users. So head on over to https://mainframe.community and make me ‘upgrade’ the VM due to the user growth :)
1 note
·
View note
Text
Crear y Eliminar usuarios en Slackware 14.2
Crear y Eliminar usuarios en Slackware 14.2
Buenas tardes, vuelvo con otro mini how to de como crear un usuario en la distribución más longeva de GNU/Linux, Slackware 14.2.
Comencemos! Aclaración: voy a crear dos usuarios “ice” y “linuxeros” para mostrar exactamente lo que sucede. 1 – Una vez logueados como root, vamos a crear el usuario con el siguiente comando:
# useradd -m -g users -G audio,video,storage,games,power,wheel -s /bin/bash…
View On WordPress
#Blog#como crear y eliminar usuarios en slackware#como crear y eliminar usuarios en slackware 14.2#crear y eliminar usuarios en slackware#crear y eliminar usuarios en slackware 14.2#GNU/Linux#How To#how to add user slackware#how to linux#how to slackware#how to slackware 14.2#how to useradd#how to userdel#Linux#Terminal#TIPS#tty#Tutorial#Tutorial Linux#Tutoriales#tutoriales slackware#tutoriales slackware 14.2#Wordpress
0 notes
Text
How To Create a Sudo User on Linux (CentOS)

The sudo command is designed to allow users to run programs with the security privileges of another user, by default the root user.
In this guide, we will show you how to create a new user with sudo privileges on CentOS. You can use the sudo user to perform administrative tasks on your CentOS machine without a need to logging in as the root user.
Creating Sudo User
By default on CentOS, users in the group wheel are granted with sudo access. If you want to configure sudo for an existing user, just add your user to the wheel group, as shown in step 4.
Follow the steps below to create a sudo user on your CentOS server:
1. Log in to your server
Start by logging in to your CentOS server via ssh as the root user:
ssh root@server_ip_address
2. Create a new user account
Create a new user account using the useradd command:
useradd username
Replace username with the user name that you want to create.
3. Set the user password
Run the passwd command to set a password for the new user:
passwd username
You will be prompted to confirm the password. Make sure you use a strong password.
Changing password for user username. New password: Retype new password: passwd: all authentication tokens updated successfully.
4. Add the new user to the sudo group
By default on CentOS systems, members of the group wheel are granted with sudo access. Add the new user to the wheel group:
usermod -aG wheel username
How to use Sudo
Switch to the newly created user:
su - username
To use sudo, simply prefix the command with sudo and space.
sudo [COMMAND]
For example, to list the contents of the /root directory you would use:
sudo ls -l /root
The first time you use sudo from this account, you will see the following banner message and you will be prompted to enter the password for the user account.
We trust you have received the usual lecture from the local System Administrator. It usually boils down to these three things: #1) Respect the privacy of others. #2) Think before you type. #3) With great power comes great responsibility. [sudo] password for username:
Conclusion
That’s all. You have successfully created a sudo user on your CentOS system. You can now use this user to perform administrative tasks on your server.
Feel free to leave a comment if you have any questions.The sudo command is designed to allow users to run programs with the security privileges of another user, by default the root user.In this guide, we will show you how to create a new user with sudo privileges on CentOS. You can use the sudo user to perform administrative tasks on your CentOS machine without a need to logging in as the root user.Creating Sudo UserBy default on CentOS, users in the group wheel are granted with sudo access. If you want to configure sudo for an existing user, just add your user to the wheel group, as shown in step 4.Follow the steps below to create a sudo user on your CentOS server:1. Log in to your serverStart by logging in to your CentOS server via ssh as the root user:ssh root@server_ip_address2. Create a new user accountCreate a new user account using the useradd command:useradd usernameReplace username with the user name that you want to create.3. Set the user passwordRun the passwd command to set a password for the new user:passwd usernameYou will be prompted to confirm the password. Make sure you use a strong password.Changing password for user username. New password: Retype new password: passwd: all authentication tokens updated successfully. 4. Add the new user to the sudo groupBy default on CentOS systems, members of the group wheel are granted with sudo access. Add the new user to the wheel group:usermod -aG wheel usernameHow to use SudoSwitch to the newly created user:su - usernameTo use sudo, simply prefix the command with sudo and space.sudo [COMMAND]For example, to list the contents of the /root directory you would use:sudo ls -l /rootThe first time you use sudo from this account, you will see the following banner message and you will be prompted to enter the password for the user account.We trust you have received the usual lecture from the local System Administrator. It usually boils down to these three things: #1) Respect the privacy of others. #2) Think before you type. #3) With great power comes great responsibility. [sudo] password for username: ConclusionThat’s all. You have successfully created a sudo user on your CentOS system. You can now use this user to perform administrative tasks on your server.Feel free to leave a comment if you have any questions.
1 note
·
View note
Text
Apache Server Optimization
Apache HTTP Server is a free software which is fast and secure and runs over half of all web servers around the globe. By customizing the Apache configuration, you can improve Apache performance without adding additional hardware such as RAM, CPU, etc.
Keep Apache Updated
Even though security bugs are seldom found within the web server, apache update is important in order to take advantage of the latest security features available.
Click here to server management company
Optimize Apache settings
In order to optimize web server performance, several apache settings can be tweaked.
MaxKeepAliveRequests: The maximum number of requests accepted per connection is set out in this directive. The higher this value, the better the server performance. The recommended value is 500.
KeepAlive: This directive helps to display a webpage with reduced load time. Creating many connections may reduce the loading time but it also utilizes the resources on the server. Enabling keep-Alive directive helps to overcome this issue. Transfer all those files through a single connection rather than repeatedly opening and closing a new connection.
KeepAliveTimeout: The amount of time apache will wait before closing the connection for the subsequent request. Setting keepAliveTimeout to a high value can cause high load server performance problems.
Disable Unnecessary Modules
To extend the functionality and security of Apache you can add an unlimited number of modules. There are numerous Apache modules by default which are actually not needed. You could divert the modules to elsewhere, which makes the loading time longer and occupy dedicated server resources. To make our server less susceptible to threats it is important to disable the unnecessary modules. Mod_imap, mod_include, mod_info, mod_userdir, mod_autoindex are some of the modules that are usually not needed.

Run apache as separate user and group
With the default installation, Apache runs its process with user nobody or daemon. Create Apache User and Group and make an entry in apache configuration file, so as to tell Apache to run with this new user and restart the service.
groupadd apache useradd -d /var/www/ -g apache -s /bin/nologin apache
Configure MULTI-PROCESSING Module
One of the reasons for Apache’s slow performance may be its inability to handle the load. A multi – processing module will be helpful in such cases. MPM prefork module is part of CentOS 7 and is enabled by default. If mod deflate is enabled, MPM prefork module (shared) will be displayed for better performance. You can set this in the httpd.conf file.
You can add the following lines in the file considering the CPU and RAM allocated for the server.
<IfModule prefork.c> StartServers 5 MinSpareServers 5 MaxSpareServers 10 MaxClients 150 MaxRequestsPerChild 3000 </IfModule>
StartServers: This sets the number of child server processes created at startup. This can initially be kept as a small number and increases gradually on a high payload server. This helps ensure the correct use of server resources.
MinSpareServers: This sets the minimum number of idle child server processes and can be configured for high payload servers.
MaxSpareServers: This sets the maximum number of idle child server processes. If this value is exceeded by the number of idle child server processes, the idle processes are killed
MaxClients: This is the maximum number of requests that Apache can handle simultaneously. The connection will be queued once this limit is reached.
MaxRequestsPerChild: This shows how many requests a child process handles before it ends. The child process will die once this limit has been reached. If the value is set to 0, the process will never die.
DNS Lookups
The main reason for slowing down the Apache web server is the time it takes to perform DNS lookups. In its access.log file, Apache records the full host name of each incoming client connection. Resolving each one takes a long time. The HostnameLookups option allows the DNS lookup to log hostnames instead of the IP address. HostnameLookups is Off by default in Apache.
For more info visit here: digitalocean server management
You can verify this by editing the configuration file of Apache. Make sure that the line HostnameLookups reads:
HostnameLookups Off
When you’re done, save and close the file and restart Apache to reflect changes.
Use Allow and Deny to Restrict access to Directories
We can restrict access to directories in the httpd.conf file with the options “Allow” and “Deny.” In this example, we will secure the root directory by setting the following in the httpd.conf file.
</Directory> Options None Order deny,allow Deny from all </Directory>
Options None: This option prevents users from enabling any optional features.
Order deny, allow: This is the order in which the directives “Deny” and “Allow” are handled. Here it will first “deny” and then “allow.”
Deny from all: This denies everyone’s request to the root directory, no one can access the root directory.
Tweak MySQL and PHP settings
Web servers seldom work alone. In most cases, a database server such as MySQL and scripting language support such as PHP to accompany the Apache web server. We have realized why optimizing the database server is equally important to avoid bottlenecks in it, which can slow down the web server. We also improve the performance of PHP pages using a caching or accelerator mechanism such as Zend OPcache.
MySQL is further tweaked by options such as table fragmentation and configuration settings – maximum connections, buffer size, size of the query cache, pool size, etc.
Conclusion
It is very easy to configure Apache for maximum performance. You can experiment with different options and measure the performance of the web server using various tools. We at Skynats have large experience in apache server optimization and you can contact us via Live Chat to know more details.
1 note
·
View note