#might look up a different tutorial to
Explore tagged Tumblr posts
Visit Tumblr Blog
Explore Tumblr blogs with no restrictions, modern design and the best experience.
Last Seen Tumblr Blogs


Fun Fact
Tumblr has 4 main sources of revenue.
Text
its almost 11pm why do i want to try masculinizing makeup again
#ive tried it before and it just looked. bad#perhaps its bc i do not know how to makeup#im pretty sure you can use eyeshadow for contouring tho right. like it doesnt matter#might look up a different tutorial to#but No. Not Tonight. Is Beditme#chaos chitters
3 notes
·
View notes
Text
okey im awakey wakey eggs n bakey now
#yawn yawn#not mr staying up watching s Minecraft house building tutorial#buy tbh the sounds r so relaxing !!!#and well.. it didnt turn out the same pc the model packs or something is probably different#but still very oretty. . .#posts.nae#i might look for another one#but first !!!!!!!!!!!!!! tea :3
0 notes
Text
Needle Felt Siffrin Build Log: (oct 6 - nov 20, 2024)


Credits goes wholely to @insertdisc5 for creating ISAT and siffrin's design! I am just here to attempt to make cool fanart (and get more people to play isat.. my devious plans are going great so far :3) As always, this isn't a tutorial- it is just a log about how i go about approaching a sculpture and I hope this collection of resources can help others make their own sifs!!
PSA: this has some spoilers for endgame CGs/sprites on my references image board ( also might see it in the backgrounds of my process pics). And bc this is needle felting, you will see some sharp needles! beware!
my inspiration was the intro cutscene where Sif eats the star, so my main goal was to adhere to the style of ISAT as closely as possible while transfering it to 3D space. And I knew i also wanted to try making the cloak for stopmotion purposes, so my process was tailored towards having control over the fabric with wire inlaid within the cloak (more on that later).
I ended up not sticking eyebrows on top of siffrin's bangs lol but anyways, first order of business is Gather Reference! v important. pureref is free and an awesome program. I also do some sketches to visualize the pose and important details i wanted to include in the sculpt.
behold the isat wiki gallery page! tawnysoup wrote an awesome ISAT style guide that absolutely rings true in 3d space too!! adrienne made a sif hair guide here!! (sorry i couldnt find the original link, but it's on the wiki). It says ref komaeda hair so that's what i looked at, along with other adjacent hairstyles! I also like doing drawovers on in progress photos to previs shapes n stuff to get a better idea of the end result.
Also if you're like me and struggle with translating stuff into 3D space, take a look at how people make 3d models and figurines! sketchfab is also a great resource! I looked at the link botw model by Christoph Schoch here for hair ref. (I used Maya, but there's a blender version too ! you can pose characters too if your model has been rigged!)


Face:
Started off blocking out the main shapes of eyelids and iris, and then filling in the colour details in the iris and the star highlights before moving onto adding thin black outlines and eyelashes. I didn't take many in-progress photos cause i kept ripping stuff out to redo them many many times, sorry!! This eye took about 3 hrs bc i just wasn't happy with it!! Sometimes it do be the vibe to give up, go to bed and see how it looks in the morning (more often than naught, it looks fine and it was the "dont trust yourself after 9pm" speaking)

The Mouth:
Couldn't decide if i even wanted to add a mouth as per usual with all my humanoid sculptures.. but i did some drawover tests first to see what expression i liked and to try to visualize it from multiple angles. (I was also testing the placement of stars on the hat brim here)

And then I redid the mouth like 3 times cause the angle just wasn't right (this went on for about the course of a week yay!)
Hair: woe baldfrin be upon ye


I made the hair strands individually first, and then since Sif has some of the hair at the back dyed black, i covered some of the tips with black wool (manually) (I think it would go much faster if i just took a marker to it, but hahaha i love pain and detailing!! )
And then the rest of it was positioning strands with sewing pins layer by layer, always looking at it from different multiple angles- sometimes tailoring the angle or swoop of individual hair flippies. At one point I thought the back looked too cluttered, but the hat covers a lot of it anyways!! yay for hiding mistakes! (imo this is a similar process to how cosplayers style wigs, but on a smaller scale and the same level of time consuming)
As always, look to your reference for guides, and I always do a whole bunch of drawovers over in progress photos to ascertain what was working and what wasn't.
Hat:
A trick to get a super pointy tip, make another tip seperately while keeping the connection point unfelted, and then combine the two to make super pointy hat!! (this also helps if you made the hat too short and need it to be taller. ask me how i know)

The embroidery on the hat brim was done in a hoop and then invisible stitched to the felted top portion. Technically you don't need a hoop but it helps keep the fabric tension, so you avoid puckers in your embroidery. You can also use iron-on stabilizer if your fabric is loose weave or particularly thin. this is the tutorial i used for the stars embroidery! particularly the fly stitch one, french knots, and the criss-cross stitches. highly recommend needlenthread for embroidery stitches and techniques! i learned all my embroidery from this single site alone.

For fabric, I think I used a polycotton i had in my stash,, unsure of the actual fiber content bc i bought it a long time ago. I used DMC Satin floss which was nice and subtle shiny but frayed a lot so it was kind of a pain to stitch with... but keep a short thread length and perservere through it!! After the embroidery was done, I folded up the raw edges and invisible sewed it to the top portion of the hat.
General shape:
Ok general structure of the body is this: wire armature body covered with black wool -> cloak lining & wire cage -> edge of lining is invisibly sewn to the main cloak at the hem -> head

Don't be afraid to mess around with the pattern, it's essentially a pizza with a slice taken out of it to form a steep cone shape!! Use draft paper before cutting into felt to save material! (i think i made like 3 cloaks before i was happy with the shape lol).
You can also hide the seam of the cloak and collars by gently messing up the fibers of the felt with your fingers or a felting needle btw! you can also sandpaper the seams according to Sarah Spaceman in this vid (highly recommend them for their in depth cosplay/crafting builds holy smokes), though since sif cloak is at such a smol scale, I just blended the seam with my felting needle.
For the lining wire cage section, I sewed in wire around the cloak, so the main rotation point is at the top neck area under the collar. These paddles are used to keep whatever pose I need the cloak to be in for stopmotion purposes. Then after the wire is done, I invisibly sewed the lining to the cloak at the hem (same technique as the hat brim to the lining there).
In hindsight, I should've used a thinner fabric for the lining, but i only had sheer white in my stash so had to go with double felt, thus resulting in a really bulky lining but oh well!

Heels:
started with the general boot shape, then tacking on the diamond shape heel stack and also diamond shape sole bc we're committed to the bit here. I skewer the boot onto the armature which also conveniently hides the connection point into the base to keep the whole thing upright and also I can rotate the boot to tweak the angle if needed.

Pins:
I kinda just trial and error'd jewellery wire with pliers into the pin shapes. They're itty bitty!! had a whole bunch of fails before i got two nice ones. A hot tip is to use needle nose pliers and wrap the wire around the tip to get a smooth circle shape!

Base:
I smoothed out the edge of a circular wood base with a dremel, and then used wood stainer to get the black colour. It ended up kinda looking like I took a sharpie to it, but whatever.... now i have a whole ass can of black wood stainer........ I then made a rough mountain of black wool and stuck the feet armature in. And now he's standing!!

Normally at this point when I'm done felting everything, to get a smooth finish, I'd take a small pair of scissors and carefully snip away any flyaway fibers, but this time, I just left them fluffy cause i think that's what sif would do :3c
Photoshoot:
Normally I do shoots using daylight but it was winter so the sun was nonexistent. So I broke out the home lighting setup aka dollarstore posterboard for a nice smooth background, and then hit it with the overhead Fill, side Fill 2, and Rim light, and use white paper/posterboard for bounce light if one side feels too dark. But if things are overexposed, you can move the light sources away until the harshness dims down. I'm using a Olympus mirrorless camera (handed down to me by my sibling so i dont remember the model exactly), which can connect to my phone as a remote so I can avoid shaking the camera when i take photos. Pretty nifty for stopmotion purposes! (yes my camera stand is a stack of notebooks, a tissuebox and some eva foam under the lens, don't judge me)


Stopmotion animation:
I'm still figuring stopmo out on my part, but my process was straight ahead animation ... move the cloak a cm, take a pic.... move another cm, click.... and repeat until i get a version I was happy with. My ref was the cloak animation from Gris (beautiful game btw). The 2d star animation was also done straight ahead using procreate, exported in png with a transparent background, and finally stitched together with the stopmotion footage in photoshop.

My turnarounds are also stopmotion! also secret hack, the turntable is a fidget spinner sticky tacked to a cake platter.
And i think that's all! i mainly wanted to share how I go about thinking about taking a 2d concept and moving it to 3D. I also didn't go in depth into how to actually do the needle felting bc I don't think I''d be very helpful I'm a very good teacher by telling yall to just keep stabbing until it looks right (i'm self taught for this hobby),,, if anyone wants it though, i can share a bunch of tutorials and other felters' process that helped me learn more needle felting!
Hopefully this was helpful to someone! Feel free to send asks if ya got any questions or if anything needs clarification! Or show me your works! I love seeing other people's crafts :3
here have a cookie for making it this far 🥐
#in stars and time#siffrin#isat#isat siffrin#isat fanart#needle felt#soft sculpture#know that i am devouring all the nice words yall leave in the tags/comments of my posts :holding back tears:#I hesitate to call this a tutorial bc this is just how i fumble my way through crafting anything lmao#the only reason I know how long I worked on a project are timestamps on wip photos and however long the day's video essay or letsplay is#sorry time is immaterial when i get into crafting mode#reason why this log is so late is bc after i finish a project i'm perpetually hit with the ray of 'i dont ever want to look at this again'#hence why photos never get edited#AND THIS POST SAT IN MY DRAFTS FOR 2 MONTHS DUE TO BLOODBORNE BRAINROT SORRY#done is better than perfect!!!#sorry i dont control the braincell#sorry for using a million exclaimation points! i am not good at this.. conveying my anxiety in written form!!! my toxic trait
1K notes
·
View notes
Text
*.˗ˏˋ Use DEILD to enter the void in secondsˎ˗.*
~featuring a lucid dreamer’s unintended success story I found on YouTube~


Incoming Topics..
*PART 1 <RECAP: What is Deild? >*
*PART 2 < The success story >*
*PART 3 < How to use DEILD for the Void >*
*PART I < What is the DEILD method? > *
If you haven’t read my original post on DEILD I have linked it down below towards the end of this one. I recommend checking it out for an in depth tutorial on the method, but I’ll give a quick explanation here as well-
To put it simply, it is a technique that is traditionally used to get fast and easy lucid dreams. Upon waking you lie still and keep your eyes closed, tricking your body into thinking that you never woke up and then within seconds the dream reforms except now you’re aware in it! You can also create a new dream or you might enter a false awakening which becomes a lucid dream. This method works SO QUICKLY it’s seriously like a LD method shortcut!
I’ve heard of lucid dreamers talking about the void before but after watching a YouTubers video about a lucid dream he had, I realized he actually used the DEILD technique to go straight to the void in SECONDS, unintentionally! Which is something I hadn’t thought about doing before-merging the lucid dream technique WITH 👏🏼 THE VOID 👏🏼 TECHNIQUES!! 👏🏼 So for those of you attempting to enter the void state from a lucid dream, this can be used as a SHORTCUT on top of a SHORTCUT! 🙌🏼 Yes ma’ammmm y’all seriously need to come try this one out because when I say SECONDS I’m talking secondsss-no more waiting 20 minutes for your left brain to turn off, no more long breath work exercises or reality checks or hours of lying still, affirming, no more battling with creating portals-the void can be EFFORTLESS and induced in under a minute.
*PART 2 < The lucid dreamer’s success story> *
There’s this lucid dreamer on YouTube called TIGER123 who posts about lucid dreaming techniques and his own lucid dream experiences- he actually has a video tutorial on DEILD as well (which is linked in my OG DEILD post)
So, I was at work looking for something to watch and saw he posted a new video about a lucid dream he had recently. Well, I can tell you wasn’t expecting him to literally open the video by talking about how he woke up from a regular dream, realized it was the perfect opportunity to perform DEILD and get lucid, and then. AS HE’S PERFORMING DEILD. He enters the void! Just like that. While he was in the void he visualized the dream scene he wanted to be in and he said he was there within 10 seconds. Aka he instantly manifested entering the exact lucid dream he wanted to be in, from the void state.
This is someone who doesn’t believe in shifting or astral projection, wasn’t trying to enter the void, thinks the void is just an unformed lucid dream space that can be used to form a new lucid dream, doesn’t know you can manifest from that state and yet STILL got in and STILL manifested. Since he viewed the void as a place he can form a new lucid dream thats what he did. He still manifested instantly, he just MANIFESTED going from the VS to being in a lucid dream. This should just go to show you guys how REAL the void state is, because someone who doesn’t even know about it and wasn’t trying to get in STILL did it. (SO CAN YOU btw)
The void isn’t a concept created on tumblr. Lucid dreamers have experienced it for years, meditators experience it, yogis, followers of Neville Goddard and multiple religious practices do too; It’s just called by different names and defined differently, but all the experiences describe the same thing. So if tumblr success stories aren’t trustworthy enough to you, or motivating enough-expand your research and find hundreds of stories similar to this one-lucid dreamers thinking it’s just an unformed dream and yogis thinking it’s just a really relaxing deep meditative state etc…
*PART 3< How To Use DEILD to enter the VS> *
I linked the video at the bottom, he doesn’t really talk about the void much or deild because the video is about the actual contents of the dream he had, but the part he does talk about it is right at the beginning, the first 30 seconds or so, if you’re curious in checking it out but this is pretty much what he said about it, written out-
“First I was in a space dream and then I woke up and kind of realized I had just woken up from a dream and was able to stay still and kind of reenter into it and fall back asleep and I ended up in the void. You know that like complete blackness where it’s really easy to reform the dream and since I was there I figured I would just try to go to the beach because when I’m in this void state I can really go anywhere I want. I just reformed the beach and I ended up on the exact beach I was imagining in like 10 seconds.”
So boom. Thats’s it thats ALL. That simple. So here’s the exact steps to do if you want to enter the void through DEILD too and be the next success story:
Before bed: affirm “I will remember to stay still upon awakening. I will effortlessly enter the void using DEILD” or some variation of this (optional)
Visualize yourself waking up, staying still, and entering the void state (optional)
Go to sleep, with the calm certainty that this will work.
Wake up. Keep your eyes closed and lie still
You can keep a blank mind and wait, trusting that your subconscious will induce the void automatically, since you already set the intention the night before
5a. Or right after waking, with your eyes closed you can begin affirming that you are pure consciousnes and imagine yourself already in the void, or imagine yourself sinking gently down into the void state until you are truly there. This method is so effective you should be in the state within a minute or less.
And remember, the void state can’t be forced, just like sleep can’t be forced. All you can do is create the right conditions for it to occur naturally. It’s okay if you don’t get it right away. Focus on trust, not control. Avoid over analyzing whether it’s working while you’re performing the technique, just allow it to flow and happen. You saw he just literally lied still waiting for the dream to form and then he was in. It’s that effortless. Give it a go and report back in the comments 🫶🏼 Happy enteringgg
youtube
2K notes
·
View notes
Text
── .✦🩰˚˖✧˚Daddy Bakugo, Master of Ponytails
˚🎀༘⋆ || husband katsuki bakugo x wife reader, pure fluff
It’s a lazy Saturday morning, the kind where you’re sitting on the couch, a cup of coffee in hand, just watching your family go about their morning routine. Bakugo is grumbling around the house, doing whatever it is he does when he’s not blowing things up (figuratively, of course), but today’s different. Today, he’s got a mission.
"Daddy!" your daughter’s voice calls from the hallway, and you look up to see her standing at the door, wide-eyed and determined. "I want you to do my hair."
Bakugo freezes mid-step, and you can see the gears turning in his head. He glares at her, like the very thought of brushing hair is a battle he’s not prepared to fight. “What? Why can’t your mom do it?”
Your daughter’s eyes widen further, and she crosses her arms over her chest in that adorable way she picked up from him. “Because I want you to do it.”
Bakugo stands there for a moment, his face twisted in that classic scowl, trying to think of an excuse. But you know that look. That “I’ve been defeated by my adorable child” look.
“Fine, fine,” he mutters, stomping toward the bedroom where he knows you keep all the hair ties and brushes. “I’ll do it. But this better not take forever.”
You watch as he sits down on the edge of the bed, your daughter bouncing beside him, practically vibrating with excitement. He grabs the hairbrush, eyes scanning the mess of YouTube tutorials on his phone. “Okay, let’s see how to do this,” he grumbles, face scrunching in concentration as he follows the video step by step.
You can’t help but chuckle from the couch, watching him fumble through the tutorial, muttering things like, “What kind of stupid hairstyle is this?” and “Who needs that many steps for a ponytail?”
Your daughter giggles, clearly loving every second of his frustration, but she sits still, trusting him with her hair as if he were a professional. After what seems like an eternity of him trying to follow the tutorial, he finally gives up with a deep sigh.
“There. Boom. Style explosion,” he declares proudly, pushing her hair away from her face.
You glance over and bite your lip to stop from laughing. Her hair is... well, it’s certainly unique. Three crooked ponytails stick out in every direction, each one at a different height, but the pride on Bakugo’s face says it all.
She beams up at him, and you swear you can almost see his heart melt right there. “Thank you, Daddy! I love it!”
Katsuki huffs, but there's a softness in his eyes now. “Don’t ever ask me to do your hair again. But… you look great. For real.”
Your daughter jumps up and hugs him tight, and even though he initially stiffens, he slowly wraps his arms around her. “I think they look awesome,” you say with a teasing smile.
“Yeah, yeah,” he mutters, ruffling her hair in that way he does when he’s trying to hide the affection in his gruff voice. But you can see it in the way he holds her, the way his hand gently pats the top of her head. The “Master of Ponytails” has officially been defeated by the power of his little girl’s smile.
She runs off to show you her new “hairstyle,” and Bakugo sinks into the bed, letting out a loud sigh of relief.
“You know,” you say, walking over to him, “she might’ve looked better if you followed the tutorial properly.”
“Shut up,” he grumbles, but there’s a slight smile tugging at his lips. “She liked it. And that’s all that matters.”
You watch him for a moment, a soft fondness filling your chest. It’s moments like these that remind you of how far he’s come from the rough-and-tumble hero. He might be gruff, he might act like he’s the last person in the world who would know how to do a ponytail, but in the end, he’s her dad. And she adores him—crooked ponytails and all.
And when he catches you watching him with that soft smile, he huffs again, but this time, it’s not out of annoyance. “Don’t get used to it,” he mutters, but the affection in his eyes says more than words ever could.
#bakugou katsuki#bnha bakugou#katsuki bakugo x reader#bakugou x reader#boku no hero academia#katsuki x you#mha fluff#bnha bakugo katsuki#katsuki fluff#katsuki x reader#boku no hero acedamia#bnha#bakugou imagine#mha bakugou#katsuki bakugo mha#my hero academia#bakugo fluff#fluff
579 notes
·
View notes
Text
had to wait for a few mods to be updated but canon val appearance has been more or less secured
#there are only two things im unhappy with#which are the sudden lack of white eyebrow and eyelash options#like. why did they remove those???#and also the lack of a specific skin tone that i was looking for#but they are both so minor#that i just worked around them#im pretty happy with how he looks#will draw / screenshot him tomorrow and show him off#also made a really cute tiefling that i might play at some point#*thumbs up*#now lets hope i can get out of the tutorial area#without constantly restarting to change things once i see them under different lighting#truly reminds me of the cc dai experience#tho better in most ways#but unfortunately worse in others#*pensive face*#personal
0 notes
Text

I've noticed in the selfship community we don't talk a lot about ita bags and other DIY fan culture things much! To some extent it makes sense, as it might feel strange to some to have a lot of merch of someone you're viewing as a partner? But I've personally found it fun and wanted to share some video tutorials and inspiration for anyone else that might want a craft or project to dedicate to their f/o or comfort character!
links in this post go to tutorials/videos/templates!

Bags for displaying official or fanmade pins, keychains, and merch! There's a million ways to do this, but here's a couple to use as jumping off points.
using a standard premade ita bag!
using a nicer bag!
Making an ita bag out of a cheap PVC tote bag!


"But I can't afford merch/there's no official merch/etc!"
No problem, lets talk about how to diy that too!
You can use shrink plastic to make your own keychains!
You can also make pins in lots of different ways!
Using epoxy stickers
Using hot glue
Using a traditional can badge without a button maker
There are also Etsy sellers who will make custom badges from art as long as you have permission by the artist! If you have your own fanart, or can ask an artist you've commissioned, this would also be an accessible way while still looking more "official."
Finally, I believe these are usually used on Uchiwa fans (see later section), but I've used these paper letters alone as ita bag decorations! Name boards combine the letters or kanji of a character's name (or a different word relevant to the character) with their picture!
youtube

Do you have one standout badge that you'd like to highlight on your bag, or maybe you just want to make it into a keychain? Rosettes are great for that, and there's a million ways to make them. Here's a few!
1, 2, 3 , 4


Do you have paper goods such as photo cards or mini prints that need a safe but stylish way to be stored and displayed? Photo card holders are the way to go! There's a lot of different styles people like to use:
Resin Deco method
Lace and Ribbon method
Fake Cream (Decoden) method
Sticker method


Tutorials for photo cards do exist, and I will link them, but it's worth noting that it's a lot of work and the quality you get depends a ton on the quality of your printer. If you have access to an art printer, these will turn out great! If you're using a regular printer, however, you may be unsatisfied with the quality. Buying prints from small artists or having regular photos printed would be other alternatives.
Photo card tutorial focused on drawn art
Photo card tutorial focused on photos

Fans that are often printed with your favorite idol to use at concerts! While it originates there, people have started making them for their fictional favorites as decor too. You can create a full size fan (they sell blanks on amazon) or create a mini keychain version for an ita bag!


These can be quite complicated, but you can make your f/o as a plushie! Especially great for f/os who have no official plush merch.
This tutorial goes very fast, but it looks easy enough. This is only one example tutorial. There's also this pattern you can work with if you mostly understand sewing.
A more approachable plush like project would be these felt "plushies"!
You can also buy plushie bases like these , and then all that's left is the face, hair, clothes, etc.! You would probably approach it like in this video but the style would be up to you. I love how this creator embroiders faces!


I hope this gives you all some ideas to work with! 🩷
#self shipping#self ship#yumeship#yumeshipping#f/o stuff#f/os#fictional other#self ship art#self ship ideas#oshikatsu#yumedanshi#selfship#f/o community#mine
668 notes
·
View notes
Text
Big Awful Texture Locator

Download the latest version here
Find any texture in The Sims 2 that is too big, or is 'awful' (suboptimal texture format)
Features:
Find textures in any folder you choose
Filter by width, height, memory size, texture format, or number of mipmap levels
Preview and show details of textures the tool found
Remember 'known good' textures, which are optionally excluded from being shown in the list
Look up the path of the package, and the group and instance of the resource
Copy texture/resource details (right click)
Open the package in the default package editor (double click)
Dark mode/light mode and UI scale adjustable
Native on both Windows and Linux
Why?
The Sims 2 has had a long-standing problem known as 'pink flashing' or 'pink soup' when using too much custom content. The Sims 2 is a 32-bit program, which means that it normally has a maximum memory limit of 2GiB (2048MiB) and by using a so-called '4GB patch' you can raise this limit to -you guessed it- 4GiB, this limit might seem pretty large, but due to how the game works you might hit this limit sooner than expected!
Let's say you have 1024x2048 textures (which is the default for Sims 4 textures, and thus also often for 4to2 cc) in RGBA format, these textures will EACH take up 8MiB of texture memory! This means you could possibly only have only a MAXIMUM of 512 textures loaded in memory before you run out of memory completely. In practice, this limit will probably be lower due to other factors.
This tool will help you find textures that take up too much texture memory, and thus (hopefully) help alleviate some amount of pink flashing.
Tutorial
First, download the program from the link above and follow the instructions to open the program.
Now let's get the program looking the way you want: click on the sun/moon button on the top left of the program to switch light/dark mode and click the "UI Scale" number next to it and enter a new number to change the size of the interface.
Set the folder we want to search: at the top bar, search for the 'Downloads:' bar, then at the end click the button with the folder icon and select your folder. Once you've selected a folder the program will instantly start scanning, if you want to restart this scan then at any time you can click the text in the Downloads bar and press enter.
Currently this list will show all textures in the scan folder, which is probably not very interesting. To find some more interesting textures we can add some filters to the texture list. On the top bar, click on the 'Filter' button: this will open the filter list and it will be empty if you haven't added any filters previously.

These filters filter the texture list one by one, each filter removing more textures from the displayed list of textures. To add a filter, click the plus button, and to remove it click on the trashcan button at the start of the line.
To edit a filter, click on the first box to choose the filter type, click on the second box to choose the type of comparison, and select the number in the last box to set the number to compare with.
The comparison type can be < (smaller than), <= (smaller or equal), > (greater than), >= (greater or equal), == (equal), or != (not equal).
The Format filter is different: make a format filter, then click on the 'choose' button and choose the texture formats that you want to show in the texture list.

Let's edit some textures!
In the texture list, find a texture that you think is too big, and either double click on it to open it in the default package editor or right click on it to show a menu to copy the details of the package.
Finally, once you have the package opened in your favorite package manager, edit the texture to be smaller and/or a better texture format, save and ta-da! your game will now use less texture memory.
435 notes
·
View notes
Note
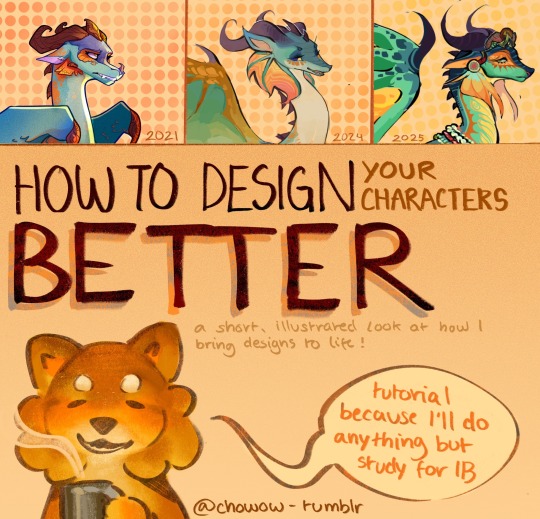
oh i just LOVE your style!!!! if you wouldn't mind, could you explain how you go about designing and what your artistic process is with dragons specifically?? I love your lady jewel design the most!!!!!!
Of course, and thank you so much! @aldershadows also asked this question, and I hope I can give you a comprehensive answer, and will be taking this oppurtunity to create a one-and-done design tutorial to answer any similar questions that may come up in the future.
Bear in mind that I'm not a professional, and I'm not looking to dissuade people from following traditional techniques or other advice. This is purely a discussion of MY process, and what I consider to be good/bad design technique.
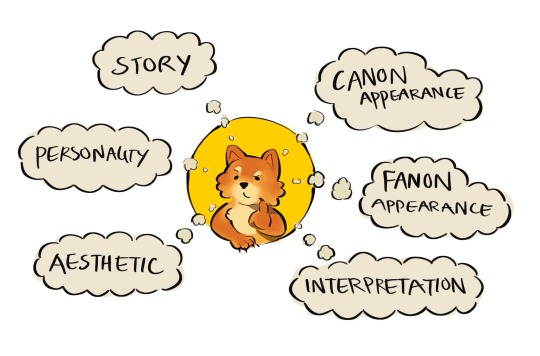
Where to Start
There are six important conceptual 'principles' I like to consider when in the initial stages of (Re)designing a character: Story, Personality, Aesthetic, Interpretation, and canon/fanon appearance. Fully understanding these principals can help you understand a character, which will make both your life and design better.
Story: What is this character's actual story? What's their lore? Where do they start, and where do they end up - and most importantly, where does your design fit into that timeline? When I design characters, I try to be clear on exactly what part of their journey they are on. (Ex: blaze and the coat -> sandwing succession war)
Personality: This one is pretty easy - what is your character like, and how do they present themselves to the outside world? When you make a character and show them to the world, everything in the canvas is interpreted by the audience: even down to simple details like posture or background. Treat it like an opportunity to show off as much of your character's personality as you can.
Aesthetic: Aesthetic plays the most important role of all: it's job is to make sure your design is cohesive. It can be a common theme, pattern, color pallet or shape - as long as it reoccurs throughout a design, it's good. Use aesthetics to amplify the other principals, and figure out how to make it *look* nice as a secondary goal.
Interpretation: This one is specific to redesigns, but could also be applied to OCs - I like to consider my personal interpretation of a character: the media I see, the opinion I have... Multi-animator projects, other fanart pieces and personal quirks make up my interpretation of most WoF characters. You don't always need to incorporate your interpretation, but it's good to have in mind.
Canon/Fanon appearances: If you want to design and OC, ignore this. If you're redesigning an existing character, it's useful to consider how your audience views them - for example, most of us collectively agree on a few key design aspects of most characters. That doesn't mean you have to follow those conventions, but keep in mind that they may make your character more or less recognizable. You can also call on the other principles of design to make up for any leap-of-faith redesign choices you make.
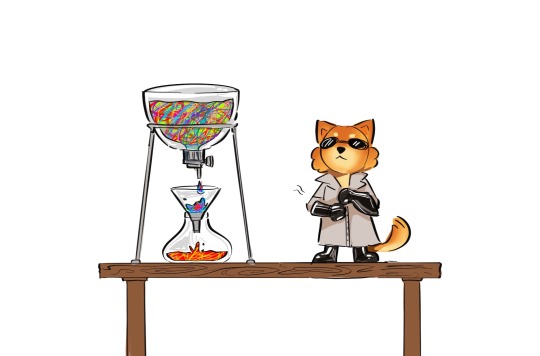
Narrow It Down
Now that you're thinking, it's time to narrow those ideas down! Be aware that sometimes, less is more: you might have a ton of cool concepts, but your design will look BAD if you can't stay cohesive. The number of different ideas that can co-exist in one design varies a lot by preference and similarity, so be evaluative when doing this. If you follow my blog, you might notice I tend to walk the line between detailed, cohesive design and overwhelming animator repellent. To combat this, I try to step back often and consider if I've gone too far.
At this stage, it's good to make notes or small sketches - anything to get your ideas down.
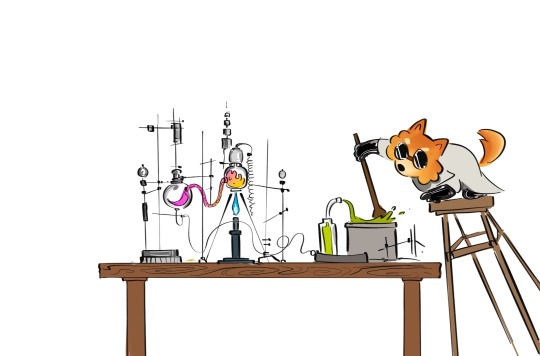
Experiment
Test your ideas out with more sketches - alter, add, subtract... whatever your heart desires. Experimentation is the best way to discover your specific design tendencies, as well as breaking new ground and stepping out of your comfort zone. The more you experiment, the quicker you'll improve. This is usually the point where I start testing out different patterns, since those are the main highlight of most of my redesigns. Pertaining to dragons, it's always a good idea to test out different shapes - especially wings, spikes, arms and tails, which are generally the most customizable features of a character. Looking to other artists for advice/inspiration is also a great tactic, but be sure to follow the 80/20 rule of originality within your designs!
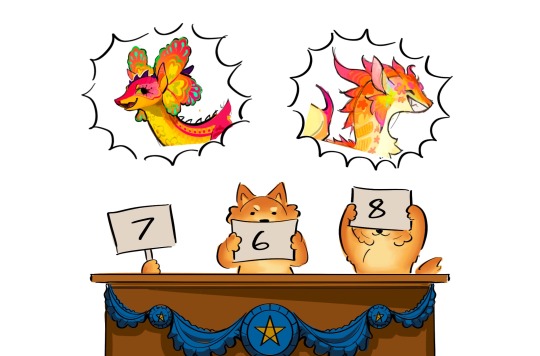
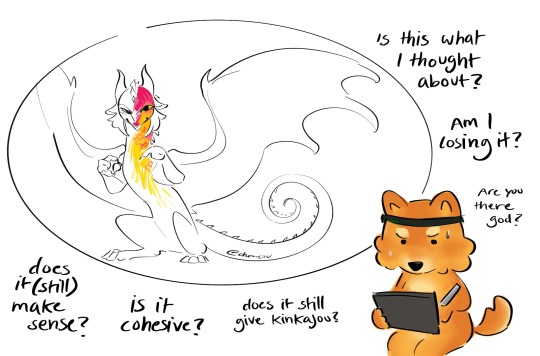
Judge yourself (not literally)
Evaluating your designs as you make them is always a great idea, but sometimes you need multiple tests/sketches in order to know what you REALLY want. Compare your experiments - what do you like about them? What do you dislike? Which are more faithful to the character, and which ones confuse you? understanding the flaws in your design can help you to overcome even the biggest challenges.
I've used Kinkajou to show how important evaluation is: despite being my favorite character, she has proved exceedingly hard to redesign (to my satisfaction,) even with multiple attempts from this year and the last. She might not even be released by the time this post airs - but with the power of critical thinking and good evaluation, her design has gradually improved over my last few attempts.
Stay on your toes
Did you think you were done? Did you think it was over? NO. Life doesn't get easier just because you made it past the idea stage. When you have your final thoughts and want to get chugging with your reference page/illustration, make sure to stay alert! Keep evaluating, keep experimenting, and make sure to stay mindful of what you do! One of the more common issues I have is that I turn my brain off while I draw, and then slowly my designs drift further and further away from the idea I actually wanted to put down. Asking yourself questions along the way can help to sharpen your design, and train your mind to think more artistically.
It's always good to take a once-over of your final product: check for errors you might have made, and think about whether or not your design still looks good. Does it show personality? Is it consistent?
If you do find that your end product isn't what you really imagined, don't despair - there are plenty of lazy tricks you (And I) can pull to string things back together again. Using gradient maps is a great way to fix your colors, and simple filters like 'overlay' (procreate) can help to neutralize your pallet. My favorite trick is to use the 'curves' tool (procreate) to make certain colors darker, in the case that I feel my design doesn't use a wide enough range of light and dark shades. I also like to turn saturation down if I think there's a color problem, to see if it's actually my pallet or if I'm using too many colors with the same tone.

Keep Going
My design strategy relies on confidence. You won't be able to improve if you doubt that you can! So, my most important piece of advice is to keep going, no matter how fast or slow you seem to make progress. My second most important piece of advice is not to compare yourself to other artists - focusing on their progress is neglecting your own.

To everyone who made it this far, thank you so much! Posting here truly is an amazing experience and I adore you guys. Sorry if this got a little out of hand. I hope this was helpful to you and anyone else with the same question, as well as being a useful resource to other artists in the future! As always, my askbox is open to any and all questions + requests for redesigns!
( ´ ω ` )ノ゙
448 notes
·
View notes
Text
Random Beauty Big Sister Advice 💐💋🪩

Here are my random big sister beauty advice! Enjoy!!!
Fix your posture
Some of you did not get pinched in the shoulder blades when you were slouching growing up and it shows
Every time you sit or stand up take the time to roll your shoulders back. Just do it as a little reminder everyday (multiple times) and your posture will improve.
If you can’t hold it without it becoming uncomfortable or tiring you need to do some core workout (a lot of inner core specifically) because that means you muscles aren’t strong enough to keep your spine strong. Which also means you can be more susceptible to injuries.
As much as you hate it healthy is 100x prettier than unhealthy.
Almost all the beauty standards are based on your health.
Proper diet and exercise will make your skin glow and your hair shiny.
Under eating or eating junk shows on your face and hair.
Muscles are sexy
I swear to you there is no way for you to become “bulky” by picking up weights.
You need to strengthen train for that toned look.
In order for your muscles to get really bulky you have to be in a pretty heavy calorie surplus be hitting a very high protein level. You also have to have the gene to build bulky muscles and the bone structure which is not as common in women. You can’t really do it on accident.
Even women who can put on muscles really fast are not bulky they are built. It’s giving she hulk and it’s hot.
To look put together you have to do the 2/3rds rule.
Only one part of your outfit can you neglect. Either your hair, makeup, or outfit. But it should never be your hair.
Learn to do really quick easy hairstyles and you will never have bad hair. I am almost always in Dutch braids because they are simple and I can do them quickly.
Also adding jewelry always gives your outfit more flare.
Learn how to alter clothes always have cute clothes.
You can find really simple tutorials to turn that body tank top into a fitted tank so easily.
Usually you just need a needle thread and scissors but if you have a machine you can do so much.
Do your nails
If you don’t like color or fake nails make sure they are always filled and clean.
Nails can be extremely cheap or extremely expensive you just gotta find what works for you.
Get a good nail oil as well for extra care.
Your body is not the problem you just don’t know how to dress and compliment her.
Stop looking at girls whose body is nothing like yours for outfit inspo.
Depending on your proportions things can look vastly different on different people.
Figure out your body type and shopping gets so much easier.
That’s all for now I might continue this series slowly but I just ended my spring break and classes have started so if I disappear don’t worry I’m just being an academic weapon.
Xoxo💋
#that girl#it girl#girlblogging#glow up#self care#self love#coquette#becoming that girl#healthy#healthyliving#big sister advice
429 notes
·
View notes
Text
Casually calling them "daddy" LADS

Word count; 1,913
Themes; slightly barely there suggestive content, fluff, established relationship
Warnings; mention of "daddy" ofc, fluff
Notes; So these turned out more fluffy than I originally intended...honestly, thought they'd be more smutty, but I've learnt that it's really difficult for me to write smut. Or at least, smut with little to no context before it all goes down. I might eventually write some smuttier drabbles, but regardless of smut, I hope you enjoy this little thing I wrote!

You saw that there was an old trend about calling your boyfriend “daddy” and videoing their reaction so, obviously, you wanted to give it a try…
Xavier
It's been almost a year since you and Xavier started dating– and it was a wonderful eleven months! He told you everything about himself. What his future with you was like, all of his feelings throughout the centuries, and you listened. You wholeheartedly believed him, because it would be one hell of a lie if it wasn't true…and you didn't think Xavier had the time or energy to come up with a complex lie like that.
But even if you now know, time moves on. There's not much you can do about your future self, so you can't really change the future in that way though…Xavier's here now, in the past, and that's all that matters to you.
Anyway, today was just a normal day as any.
You were sitting at the counter, keeping a close eye on Xavier– who was attempting to follow, yet another, cooking tutorial. The man was desperate to cook a decent meal for you. His heart dead set on making you something edible for your upcoming year anniversary…and while that was cute, you also wanted to mess with him.
You push your cup just out of your reach and make a big show of trying to reach for it, before sighing loudly.
“Daddy, can you pass me my drink please?”
You can hear the clang of a spatula hitting the floor and you watch Xavier’s body comically whip around to face you.
“What?” His head cocks to the side as his wide eyes were set on your face. “Say that again..”
“Hmm? I said ‘Xav, can you pass me my drink, please’.” You copy his head tilt and he quickly shakes his head.
“No, no you didn't.” He takes a few steps toward you before grabbing your hand in-between both of his. “Say it again.”
You couldn't resist his sweet puppy dog eyes, so you hold back a smile as you meet his eyes. “I...called you daddy.”
“Really?” He seems unusually excited. “So are we…?” His gaze lowers to your stomach and you can’t help the giggle that slips from your lips.
Gosh, he was so cute.
“Baby– no, no. We're not pregnant.” You run your fingers through his hair with a smile on your lips. “Are...you disappointed?”
“Mmh..” Xavier hums thoughtfully for a moment before he shakes his head. “No. We can just make it a reality later. No need to rush.”
Zayne
You and Zayne have only been dating for six months, but it felt like much longer. Having known each other since you were little, you both had always been close– well, your definition of close and his were probably different. You always thought of him as a friend while he tried to keep a distance and thought you hated him. But time brought you both back together with him as your primary care physician.
The two of you had been flirting up until his birthday and finally made it official once he blew his candles out on the cake you made for him. It was a sweet time, but that was six months ago.
Now, though, you really want to fluster the man.
He always embarrasses you and makes you feel nervous, but you never get to see him that way. Sure, his ears will turn red and sometimes he won't meet your eyes when you get too intense with him, but you've never seen him absolutely shocked. And you just wanted to see one look of surprise from him.
So, what did you decide to do?
You decided to casually call him "daddy” as a joke.
That should definitely go over well.
Zayne is seated behind his desk at the hospital, sorting through papers as you longue on his sofa. Your eyes continuously glancing toward the windows to make sure the door was shut and the blinds were closed.
“If you keep staring at the door, you just might burn a hole through it.” Zayne says, though he didn't even look up from his paperwork. He was attentive like that and probably already knew you wanted something or you were ready to go home. And he was right.
“When are we going home…daddy?” You ask as you kick your feet in the air behind you. You were on your stomach, resting your cheek against your arms as you watched his expression…which didn't change at all.
"Just give me a few more minutes, angel, and I'll be done.” Zayne pushes his glasses up with his index finger and clicks his pen, jotting down a few notes.
“I–” You puff your cheeks out with a small sigh and decide to keep going with it. “I want to go home now, daddy.”
“Didn't I just tell you to be patient?” Now Zayne finally looks up at you with one of his brows raised. “I'll deal with you when we get home.”
Rafayel
It's been four months since Rafayel asked you out. Four months since you tugged Rafayel down into the bath with you, which set off a chain reaction of a steamy night, followed by him asking you out the next morning; he also complained that you both went out of order, but he wasn’t too upset when you continued where you left off…
Now, though, you moved out of your apartment and to Rafayel's home, ‘Mo Art Studio’ at Whitesand Bay.
It was definitely odd at first, but it was a good change of pace. Always being by the ocean, able to take your morning walks together on the beach and collect seashells. You had a whole collection on your desk at work. He'd always give you the most unique and prettiest shells, saying “only the best for his cutie”.
He was also so easy to fluster.
You immediately knew you had him wrapped around your finger every time his ears would turn red. That same crimson slowly made its way from his ears to his cheeks, all the way to his whole face. So you assumed your little ‘prank’ would also have the same effect.
You were sitting on a beach towel in the sand with an umbrella blocking your eyes from the bright sun. In front of you was Rafayel, painting your visage, with an easel. His hand deftly moves across the canvas as he sketches the outline for his new painting.
Lately, you are the only thing he can paint. Always asking you to stop what you're doing so he can run and get his sketch pad. You could be doing something so normal and mundane, but he'd be struck with the inspiration to record your very image.
As much as you loved it and thought this was very sweet, after almost two weeks of this…You wanted some form of payback.
“Hey, daddy, can we take a break for a second? It’s really hot out here.” You squint your eyes to try and see Rafayel's face, your hand fanning at your body because you, seriously, are hot out here.
“Huh?”
It's like Rafayel is frozen in time, or buffering. He's just blankly staring at you with a confused expression on his face until his pencil drops into the sand. That's when he quickly stands up and makes his way toward you.
“Again.”
Now, it's your turn to be confused.
“Raf, what–”
“Not that, say the other word again.” His ears were red as he crouched down in front of you, a look of determination in his eyes.
“No– you're making it weird!” You put your hands on his shoulders, trying to put some distance between him as your face turns red.
“Please, I really need to hear you say it again! I'm seriously going to die if you don't.” There's your overdramatic fishy.
“Fine, but just this once.” You grumble, turning your head to look away from him. “Daddy…” Though you say it as low as you can and Rafayel groans, tilting his head back.
“Louder.” He rests his forehead against yours. “Come on, cutie. If you don't…I might want to change that to my new nickname.”
Sylus
It's been about…a year? Yes, definitely a year since you and Sylus started dating. Well, you both have differing opinions on when exactly you started dating. Sylus claims it was the moment he laid eyes on you in the N109 Zone, while you claim it was only about six months ago– which is when you and Sylus made a bet.
It was a bet where if he came back safely from his mission, he'd leave you alone. He wouldn't bother you anymore, wouldn't talk to you, contact you, anything of the sort…and you won, but you didn't realize he'd actually do it. So whenever you seeked him out to make sure he was safe, and he ignored you, you realized that maybe you did want him in your life.
This led to you running across the street to him and jumping into his arms like this was a hallmark movie, and you claim this was when you officially started dating Sylus.
But between us, you just agree with Sylus when he says a year, because if you don't, he'll pout for the whole day.
...And today was one of those ‘pouty Sylus’ days.
You went on a mission that was probably way too dangerous, even though you told Sylus you were going to slow down on your Hunter's work. But you couldn't just ignore endangered civilians. If any of them would have died, that would've been too much for your sympathetic heart to handle.
And even if Sylus understands your reasoning, he's still upset that you left without telling him– having woken up to a cold bed without you by his side sent him spiraling into a panic.
So, when you got home, you noticed he was sulking in the kitchen as he made dinner.
“Sy…” You take your shoes off by the door, nervously fiddling with your fingers as you tentatively walk into the kitchen. Standing behind the counter, you sigh, “I'm reeaally sorry...”
“If you're reeaaally sorry, then help me make our dinner.” He says, not looking up at you and that doesn't make you feel any better.
“Okay..” You finally step past the counter and you look around. “So…what do you need?” You were trying to figure out something– anything that could make Sylus feel better when a thought comes to your mind.
Most guys probably like it when their girlfriend calls them daddy…right?
“In the cabinet, top shelf. I need a bottle of garlic powder.”
Okay, you got this.
You take a deep breath and open the cabinet, straining your arm to try and reach the seasoning bottle, but your fingertips barely brush it and knock it over. “Shit…” You swallow back your nervousness before continuing, “Daddy, can you grab it for me?”
The room fills with silence for a moment, but then you hear Sylus chuckle.
“Sure, kitten.”
Your back suddenly feels warm as a firm chest presses against it and Sylus reaches up from behind you to grab the bottle.
“I ask you to do one simple thing and you can't even do that.” Sylus chides, clicking his tongue as he pops the bottle open to pour some into the pan on the stove.
“Da–”
“If you think a few empty words will make me feel better, kitten…you've got to try a lot harder than that.”
I'd like to say, this is definitely one of my better drabbles��� one of my favorites, in fact!
I have like...six more ideas for drabbles and then I'll need to come up with some more. Like these new cards and Rafayel's student photoshoot event really had me thinking of how seriously the LADS men would take roleplaying– and that spawned a whole different drabble idea, so you can definitely look forward to that!
I'm trying to come up with new ways to do my drabbles, so that's why I did a little prelude before I started writing for the guys. Please let me know any feedback yall have for me! Especially with the coloured dialogue, I'm not too sure if I like it, but it seems really pretty and probably makes it easier to tell who is talking apart. (I won't use it for my fic though, only the drabbles!)
Anyway, I have a small personal project I'm working on this weekend so I probably won't be able to write any chapters for my 'Divisa' fic, but I'm still going to post chapter nineteen of 'Twist of Fate' and try to write at least two more chapters since I'm only on twenty-three or so.
I hope you all enjoyed these drabbles and I hope yall have a great night/day! 🩷
#lads#love and deepspace#love and deepspace x reader#lads x reader#lads sylus#lads xavier#lads zayne#love and deepspace sylus#love and deepspace xavier#love and deepspace zayne#lnds xavier#lnds x reader#lnds zayne#lnds#lnds sylus#lnds rafayel#lads rafayel#sylus x reader#zayne x reader#xavier x reader#lads xavier x reader#love and deepspace rafayel#rafayel x reader#zayne love and deepspace#lads sylus x reader#lads drabble#lnds drabble#love and deepspace drabble
970 notes
·
View notes
Text
KNOTS AND GRACE

It started the same way most things did for Simon: silently.
No declarations. No dramatic moment of revelation. Just a lingering glance in the low hum of early morning, the way your shoulders curled in on yourself like tired wings, the deep sigh you exhaled as you stared at your own reflection with dread.
You didn’t say it out loud, but Simon could feel it. How the strands of your hair—once lively and part of your expression—now hung like a weight. Too much to manage. Too much everything.
He watched you tie it back with a trembling hand, loose and lopsided, then abandon the brush entirely when your fingers snagged in a tangle near the nape. The irritation in your eyes made his chest ache. Not because you were angry—but because he could tell you’d been doing it for weeks. Too tired, too overstimulated, too worn down to untangle one more thing.
You didn’t ask for help.
You never did.
But that didn’t stop him.
⸻
He bought the wig online.
A perfect match—length, texture, density. The same subtle wave, the same specific sheen of your real hair. It had taken hours of scrolling and three different sample orders, but eventually, Simon found it.
He didn’t tell you. Not when he signed for the box and quietly slipped it into his office, not when he pulled it out that first night and stared at it like it might grow fangs.
It felt ridiculous at first.
He’d cleaned weapons with his eyes closed. Assembled rifles blindfolded. But this?
A wig. A brush. A comb with teeth so fine it made him squint.
This was intimate. And fragile. Terrifying in ways combat never touched.
But you were worth it.
⸻
He watched YouTube videos in the dark.
Hours of tutorials whispered through his headphones while you slept beside him, limbs heavy with exhaustion. Women and men and animated hands showing how to detangle without ripping strands, how to deep-condition and twist hair for sleeping, how to style with care.
He paused. Rewatched. Practiced with gloves first—then without.
He started simple: washing the wig in the sink with the recommended shampoo. Rinsing gently. Letting it drip dry like something sacred. The first time he brushed it wet, he almost cried when a clump came out.
“Too rough,” he muttered to himself, adjusting his grip.
The next time, he took it slower.
Eventually, it became a ritual.
⸻
Some nights, you’d find him staying up late with a notebook in his lap, scribbling what looked like tactical planning—except the scribbles were sketches of braid patterns and product names underlined twice.
“Work stuff,” he grunted if you asked.
But you knew something was different.
He smelled faintly like argan oil. There were towels missing from the bathroom. And once, you found a tiny butterfly clip in his shirt pocket.
Still, you didn’t push.
Simon would tell you when he was ready.
⸻
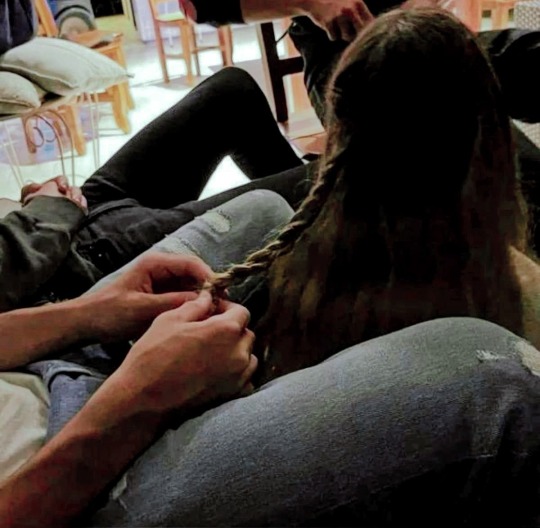
The first time he touched your hair with intention, it was gentle.
You’d had a hard day—he could tell before you even walked through the door. Your jaw was tight, your voice low, your hands twitching as you peeled off your coat and sank onto the couch like a puppet with its strings cut.
He didn’t ask what was wrong. He just moved behind you quietly, sat on the arm of the couch, and murmured, “C’mere, love.”
You blinked up at him, eyes already glassy.
He nodded once, opening his hand.
It held a wide-tooth comb.
“I practiced,” he said, voice rough.
And you melted.
⸻
He started slow. One section at a time. Hands firm but careful, tugging gently to detangle, using the exact oil you always ran out of.
You didn’t speak—not because you didn’t want to, but because your throat tightened up the moment his fingers slid through your hair.
He knew how to part it. How to twist without pulling. How to ease out knots with a patience that made your chest ache.
“How long’ve you been doing this?” you whispered.
Simon didn’t answer right away. His breath was steady, his focus deep.
“Long enough,” he said at last. “Just didn’t want to do it wrong.”
Your lip trembled.
He pressed a kiss to your temple without pausing his work.
“I wanted to make it easy for you.”
⸻
After that, it became part of your rhythm.
He washed your hair in the kitchen sink, draped you in towels, and massaged your scalp like he was unraveling tension with his bare hands. He air-dried it with care, fanned it out across your shoulders while he braided or twisted it with methodical grace.
Sometimes, you’d fall asleep like that, half-draped over his legs while he worked in silence. His fingers always steady. His attention never straying.
He never said much when he did it.
Didn’t need to.
Because this was the language Simon Riley spoke best: quiet hands, careful preparation, devotion stitched into the smallest of routines.
⸻
One night, you caught him mid-process.
Not with your hair—but with the wig.
He was hunched at his desk in his office, shirtless, the back of his neck damp with sweat as he twisted section after section under the dim light. His hands were slick with leave-in conditioner, his brow furrowed in quiet concentration.
You didn’t mean to interrupt.
But when you stepped in, he didn’t startle.
He just looked up.
Held your gaze.
And said, “Didn’t want to forget how to do it right.”
The wig sat on a stand. Nearly identical to your own head of hair—except this one wore a loose, intricate braid.
Your throat closed up.
“Simon…”
He set the comb down gently, stood, and stepped close.
“I wanted to be good at it,” he said, voice hoarse. “You shouldn’t have to do it yourself when you’re too tired to hold your arms up.”
You blinked hard. The wig. The research. The oils he’d restocked without asking.
“You learned all this for me?”
He tilted his head. “Of course I did.”
And that was it.
No big speech. No theatrics.
Just Simon, standing in the soft light, love slick on his palms and patience carved into every callus.
⸻
He became your stylist after that.
Not professionally. Not loudly.
But intimately.
He brushed your hair before bed. Wrapped it in silk. Untangled it after long days without complaint. You started to leave your products out on purpose, just to see if he’d notice when something ran low.
He always did.
He even kept a tiny drawer organized by your hair type in the bathroom now—deep conditioners, scalp oils, leave-ins, brushes marked for wet or dry.
Simon Riley: war machine, tactician, lieutenant… and the only man you’d ever trust with your scalp.
And god—he was good at it.
Better than you’d ever dared to be with your own hair.
Because where you rushed, he lingered. Where you winced, he soothed. Where you’d given up?
He learned.
⸻
One morning, you woke up tangled in his arms, hair still wrapped tight and perfect in a protective scarf.
You hadn’t put it on.
He had.
Your heart cracked open a little wider in your chest.
You turned, pressed your face into his throat, and whispered, “You take care of me.”
Simon didn’t open his eyes. Just pulled you closer.
“Always, love.”
⸻
In public, no one knew.
But your hair always looked effortlessly done. Styled. Clean. Braided neatly, edges touched with care.
People complimented you.
You just smiled and said thank you.
You never told them your husband spent nights studying curl patterns or secretly whispered affirmations under his breath as he twisted sections to perfection.
You never told them he kept a small folder labeled “hair refs” on his encrypted hard drive—right next to blueprints for field operations.
You didn’t have to.
Because every brushstroke, every soft rinse, every quiet hand pulling through your curls spoke for him.
A silent language.
Of devotion.
Of protection.
Of love that never asked for recognition.
#cheeseatlantic#call of duty#cod modern warfare#cod#cod mw3#cod mw2#cod x reader#cod mwii#simon ghost riley#cod fluff#simon ghost fluff#ghost call of duty#ghost x reader#ghost cod#ghost#simon ghost x you#simon riley x you#simom riley x reader#simon ghost x reader#simon riley x reader#simon riley#simon riley cod#simon riley imagine#simon riley x y/n#simon riley fluff#simon riley fanfic#cod fanfic#oneshot fanfics#fanfic#cod oneshot
361 notes
·
View notes
Text
How to OC post without being an artist (or spending money)!

As much as I yelled about OC-posting, some people said that they struggled to know what exactly they should be posting. Obviously the answer is whatever you feel like but if you’re already aimless, that answer isn’t very helpful. Additionally, not everyone knows how to draw (which I think is an obvious method of OC-posting) so I wanted to give some ideas for what people could post for their OC! This will be split up into different sections.
Creating visual representations of your OC
Disclaimer: I will not suggest nor support the usage of generative AI. OCs are about creating something yourself, not allowing a computer to do it for you.
Outside of commissioning someone else for art, it can be disappointing and frustrating to not have any visual representation for your character. An easy way to get a representation of your character is to use Picrew, Meiker and other similar sites. There’s a large number of art styles, types of fashion, species, that can all be used to make your OC and that amount only grows by the day. Many of these websites can be accessed on PC and mobile and take very little processing power.
However, this can be limiting at times since you might not find exactly what you’re looking for, especially if your OC has a unique combination of features. For something with more customisation, you can use video games with character creation to make a version of your character. I personally would recommend games like The Sims or Skyrim as both have very active modding communities. This way, if a certain type of clothing or facial feature isn’t present in the base game then you can often find someone who has created a mod that adds it in instead. This does require you to have access to a computer that can run not only the game but the mods as well.
Another option would be using a program like Vroid Studio to make your character from a base model. This has both a mobile and PC version, although I will primarily be speaking from a PC perspective. The mobile app, while able to create a character from scratch, is a lot more limited than the PC version. The great thing about Vroid is that there’s a lot of user-made content that you can often get for free through websites like Booth, as well as many tutorials for beginners to follow along with. Again, this requires a computer that is able to run it. I would recommend against using Vroid on a laptop as it will likely be too intensive for it.
My final suggestion for character visuals is to take a character from anime or cartoons and simply edit them. This was actually how I first got into making original characters! You can recolour their hair or outfits with an editing program (with some free examples being FireAlpaca, Krita or GIMP) and even edit different images together to create something more unique. Please only do this with characters from existing media and avoid using fanart for this.
Other OC visuals
Other than just what your OC looks like, there are other ways to visually put together your OC. Moodboards are the most obvious example of this, but you can also edit other things such as putting together outfits for them or finding pictures of items they would keep in their bag.
If you have multiple OCs, you can create fake text conversations between them using a number of websites. These can be as silly or as serious as you like!
Finally, you can always build them a pinterest board. I am a massive pinterest enjoyer and not only can you use pins that others have posted to pinterest, you can add your own from off the site.
Writing
Beyond writing out your characters’ story, there are numerous other things you can write. Keeping in line with what you’ve already written, you can re-write scenes from alternative perspectives. These can add context to what is seen in the main story, as well as flesh out background or side characters and their relationship to your other OCs.
Another fun thing to write is non-canon scenes. Write a beach episode! Write about a character getting sick and someone else having to take care of them! There are countless ways to draw your OCs interacting with their world or other characters that wouldn’t necessarily ever fit into the “main” story.
Next is genre changes. If you had to categorise the genre of your OCs’ current story, what would it be? Now image what if the genre was something completely different? Romance to mystery… Slice of life to horror… Part of the challenge is figuring out what story beats remain the same and what gets changed, including character dynamics! And of course… Alternate Universes. There are too many types of AUs to list but some of my favourites are superpowers, mafia, zombies, time loops and time-travel-fix-its. These are similar to genre-changes but often include a number of AU specific tropes. If you’re struggling to figure out the staples of a certain AU or what kind of AUs exist, there’s a really good page about alternate universes on Fanlore.org!
Other ideas
These are ideas that didn’t quite fit into the other categories.
First is music playlists! There are two types of these. The first is a playlist of songs that describe a character and their story while the second is a playlist of songs that the character would listen to. Some people like to combine the two as well! There are no rules to this, simply have fun listening to music and picking out songs that remind you of your OCs.
Second is incorrect quotes. I remember these used to be beloved by fandom and now they can be beloved by you and your OCs! The concept of incorrect quotes is that well-known and funny quotes from pop culture (such as memes or movies) get written out and your characters are assigned a line of dialogue. While there’s a website that’ll generate these incorrect quotes for you, I personally find more fun in coming across quotes organically while scrolling social media and realising that they fit my OCs almost perfectly.
Finally, ask games. These typically take the form of lists of questions or prompts with emojis or numbers next to them. People can send in the relevant emoji or number and you then answer the corresponding prompt. There used to be a kind of “ask game etiquette” where if you reblogged an ask game from someone, you sent an ask from the list to them as well. This way, it allows the game to continue circulating and you can spread the joy of OC-posting with others! It can also lead you to making friends within the community.
And that’s it for my post! If you have other suggestions for kinds of OC-posting then I would love to see them!
#oc posting#oc#original character#unrelated to this post but when looking for a gif to go with this post#i nearly yelled AZUNYAAAAAAAAAN when i saw azusa. i used to be a big k-on girlie. it was the first manga i purchased!#it's 3am and i should have posted this earlier but i watched more re:zero with my partner today#he is loving rem so far.... he doesn't know what happens to her...... he might cry.......
659 notes
·
View notes
Text
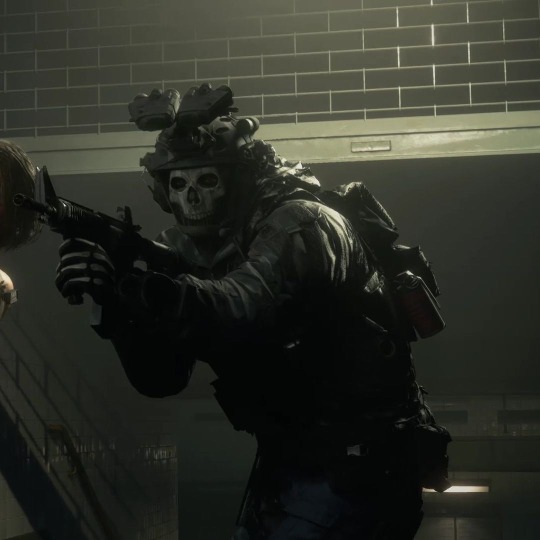
omega!soldier gets their call sign and shows the base what a badass they are
--
previous
The next two weeks are a blur of training. You feel like you're back in basic except instead of being with a class of rookies, it's you and one of the other members of the 141.
Ghost has you on the shooting range each morning working a number of different weapons. He starts you on the Glock 17, the SA80, and the L129A1, the three weapons you said you were proficient with. He grunts after each clip, pulling your targets before you get a good enough look at them. On the first morning your targets are set at 500 yards. By day three, he's pushed the targets past the end of the standard 1000 yard limit.
By the end of the week, Ghost has you on the L115A3 and the L7A2 GPMG. He offers a quick tutorial on how to shoot each new weapon before pointing you at the target down the range. Because they're new-to-you weapons, he gives you three days before pushing the distance. Day after day, the targets come off the line before you're allowed a good look at them.
Between the range and lunch, either Soap has you on the field or you're still with Ghost in the gym.
When Ghost has you in the gym, he starts you on the speed bag, counting hits until your arms shake, then he moves you to weights. You alternate between free weights and machines but hit every muscle group you knew and some you didn't. Just when you feel pushed to your limit, Ghost sets you up in the mat to grapple.
You begin with rookies, and Ghost comments on your form. "Y'll never take down a bigger target wi' tha' 'old," he says as you wrap your arms around your opponent's torso. Against another opponent, he barks a sharp, "No!" when you get low. "Ya start down there, y'll stay down there." When he pits you against a few alphas, he gives a similar warning to the one he'd heard you give all those weeks ago. "Wi' us, any 'and ta 'and is gonna be 'gainst a bigger target, a beta or an alpha, who's going to underestimate ya fer yer size and yer secondary gender." He teaches you new techniques for taking down bigger opponents. "Ya need ta get 'em flat on their back quick if ya wanna survive."
By the end of week two, you're up against Ghost himself, who warns you he won't go easy on you. He promises he won't hurt you too badly, but he makes sure there's a first aid kit nearby. You pull out everything he's taught you and everything you know and any dirty trick you can think of. It's several long minutes of defensive maneuvers and hits before you're able to, for the briefest moment, get Ghost on his back underneath you. You can tell from how his mask moves he's smiling. "Good. Now's when ya go fer the kill: kidneys, throat, groin." You don't hide the flicker of fear in your eyes quickly or mask the disgust in your scent fast enough because Ghost continues and tells you, "It doesn matter if ya've never taken a life before, ya have to be prepared to do it."
It's not cruel, but it is bluntly honest. Never before has it been so clear that your job is to serve Queen and country by honing yourself into a weapon.
If Soap has you on the training field, he's timing your runs. You know what the qualifying physical fitness is to join up, but the task force qualifications must be different because every time Soap clocks your 2K, he'll look at the stopwatch for a moment while you breathe and call out, "Again, but a might faster, yeah?" Or he'll start the beep test and see how many reps you get on pace. After the fifth round, you lose count of how you're doing.
When you're not running, you're putting the weight training to good use. Soap starts you with the 2kg ball on an unmarked field, at least from your perspective. You assume there's some sort of distance indicators where he stands, but he never tells you how far you've thrown anything. You watch divots of grass pop up farther and farther away before Soap switches you to the 3kg ball, then the requisite 4kg ball, then on to a 5kg ball. Each one pockmarks the field in front of you, Soap making notes each time.
He has you pull the fixed weight bar over and over, recording the force off a screen he won't let you see. He'll look at the force, then as you and say, "Brace more wi' your back. Let's have another go."
Sometimes he has you on the pull up bar, alternatively calling out either your time while you count or your counts as you watch the stopwatch he dangles from the end of his clipboard. Or he'll hang the stopwatch from his neck as he sits at your feet while you do situps, calling out each correctly formed situp and fixing you when your posture slips. He doesn't count them - or the pull ups where your chin doesn't clear the bar - as done.
You're grateful all the hard physical work happens before lunch. Ghost or Soap will give you just enough time to haul ass back to your bunk to get cleaned up for the meal. Like on the first official day, you usually sit quietly, listening, while clearing two or more servings of food.
After lunch, Gaz or Soap has you in a classroom. On day one, Gaz stands in front of you with a folder open in his hands. "Impressive A Levels," he says by way of greeting.
You pull up short. "How do you have my A Levels?"
Gaz smirks. "Ya signed Adam's forms, yeah? Gives us permission to pull all your data. And these scores are...somethin' else."
You look at the table in front of you. "I like to learn," you admit softly.
"That'll make our time together easier, then." He gestures to the table and its stacks of books. "Yer gonna get a crash course in as much as Soap an' I can cover."
They give you a crash course indeed. Nothing close to Phase 3 training, but you've been through 2A. They take that basic officer knowledge and increase the rigor of everything. Soap covers demolitions, infiltrations, and target elimination. Gaz tackles surveillance and covert ops. You can't match the 141's training in these crash courses, but you absorb more than you thought possible. By the second week, both Gaz and Soap are in the room with you, running simulations and recording your responses and decisions.
Two and a half weeks after officially joining the 141, you find yourself in front of Price's intimidating desk, made more imposing by his seat on the other side, ringed by the team. There's papers spread all over his desk. Clearly there's an order to it, there must be, but you can't fathom what it is. From your position, you see only a handful of familiar markings: targets from the shooting range, PT ranges dotted with dated peaks and valleys, the letterhead from your secondary school.
"Well," Price says, steepling his hands in front of him. He glances at his pack team behind him. "The lads have had quite a lot to say about you." The pause feels heavy, expectant, but you've learned to keep quiet when faced with such a conversational opening, especially from an alpha.
Price looks at the papers on his desk again. "Excellent weapons quals," he says, briefly pulling up one of your targets. "Apparently hit what Adam needed on day one."
You gape at Ghost. "But...I thought...you kept having me change weapons and moved the targets."
Ghost snickers. "Wan'ed ta see wha' ya could do."
Price continues, "Ghost also said you took him to the mat last week." Ghost nods, and you see the surprise cross Soap's face as Gaz cuts his eyes to the leftenant. "An' Soap says ya likely set some records with yer PT: beep test and 2k speed's impressive. Ya run?"
"Er, yessir. Between 5 and 10k a day, sir."
Price pauses in his perusal and looks at you directly. "S'tha so?" He waves a hand before you can respond. "Pull ups and push ups and the ball toss all well above quals."
You look at Soap over Price's shoulder. "You pushing me, too?" He grins sheepishly.
"Ye caught me."
"And the boys showed me how you reacted to the scenarios. Handled 'em like a seasoned operator," Price finishes, sitting forward, leaning his arms against the desk.
"Yer a real Renaissance soldier," he tells you. He chuckles to himself. "Maybe we should call ya Ren."
You don't know what to make of this. "Sir?" you ask.
"'m glad those other alphas were too pompous to see how amazin' ya are," Price says. *Ren, yer worth more 'en half the base. Them idiots didn' know wha' ya do wi' ya, but wi' us, yer gonna shine. If these reports are accurate," he looks at the team who are all nodding, "all ya need is a little more trainin' to be damn near perfect."
The gleam in his eye at the last statement borders on avaricious, but you write it off as his pride at getting you on his team.
next
series masterlist | main masterlist
#cod#poly!141#poly!141 x reader#tf 141#tf 141 x reader#omegaverse#omegaverse 141#omegaverse tf 141#a/b/o#a/b/o 141#a/b/o tf 141#john price#kyle garrick#johnny mactavish#simon riley#nerdygirl says#fierce wars and faithful loves
909 notes
·
View notes
Text
QoL as Kindness: ISAT's diagetic tutorials
This is the hopefully first of a series of posts I'll be doing reinterpreting ISAT's Loop through the lens of START AGAIN: a prologue's context. As such....
Major spoilers for both ISAT (all acts, including optional content) and SASASAP (all endings).
One of the biggest differences between ISAT and SASASAP is it’s QoL – it’s Quality of Life. QoL refers to all the little things that make a game just that little bit more playable; quick to navigate menus, quicksaving… tutorials.
It’s not really a surprise that SASASAP is as RPGmaker as RPGmaker gets. This isn’t a criticism, just an observation, and also a compliment to how much Adrienne’s skills with the engine improved between releases. Still, there’s some things that ISAT has over SASASAP.
ISAT’s QoL is absolutely essential to making it bearable. Anyone ever watch an ISAT playthrough where the player sighed in relief as the tutorial on picking where you loop came up?
SASASAP lacks a lot of ISAT’s QoL because it’s an earlier project without a studio backing it, but what impresses me is how this change ties into narrative.
Because the greatest chunk of ISAT’s greatest QoL is provided by Loop.
Even before you ever meet them, they’re already over your shoulder. Loop is the tutorial, speaking to you inside your brain. It’s genius, in that no player is ever going to question this. Hell, SASASAP’s movement tutorial is the exact same thing with less flavoring
This reframes what the QoL is – it’s not just a convenience to the player, it’s a convenience to Siffrin, too. It’s diegetic. It’s not something the game is giving you, it’s something Loop is giving you. Let’s look at what Loop gives you, and more importantly, why.
Zone Out
The first of the QoL features I want to talk about is the Zone Out function, the absolute bread and butter of not making this game a total slog.
The Zone Out feature as is did not exist in SASASAP (because Adrienne didn’t know how to do it yet) – instead, some doubled scenes let you just skip them entirely outright. There’s only two extremes: listen to all of it again, or none of it.
ISAT’s zone out system is much more dynamic, since it fast forwards dialogue line by line, letting you zone in whenever you’d like, and forcing you to zone in whenever a) something notably new happens, or b) whenever Siffrin speaks.
The way this feature is introced by Loop is kind of genius. Because Loop’s tutorial is about one thing – it’s okay to skip.
“You might miss what your party is saying, but who cares, right? If you make them mad, you can always loop back and they'll have forgotten all about it!”
It’s a cruel joke, or at least it seems that way on the surface. It’s also genuine advice. And a cruel joke at the same time. For Siffrin, freshly starting the loops, this is scandalous, but for Loop, who’s long since desensitized, it’s the same old same old.
What Loop’s doing here, by joking about Siffrin not listening to the party, is alliviate Siffrin’s guilt when they inevitably take Loop up on the offer. Because, even though Loop loves their party members…
From SASASAP, when sitting outside the bathroom:
(Will you get farther this time?) (Will you live this time?) (Or are you stuck listening to the same lines forever?) (…) (Stars, you’re so tired.)
Loop knows intimately well that Siffrin is going to drive themself insane trying to be a people pleaser every single loop, so this joke is telling the outright – don’t bother.
At first, Siffrin (and the player) still might. I really enjoyed reading the same conversations five times minimum because they’re fun and I’m deranged, but at some point I did start skipping them. And it was a relief to know there wouldn’t be anything new.
Siffrin: “Should I check everything again?” Loop: “You mean, should you check the same barrels, the same closets, the same objects on tables every loop?” Loop: “I mean, you can, but… You know things won’t change, right?” Loop: “If you really want to get a certain item again, or listen to your friends repeat something funny, you should!” Loop: “I personally would only check two or three things every loop, and ignore the rest.” Loop: “It will just make you crazy to expect something to change, when nothing will.” Loop: “All that might change is your reaction to it!”
The game is telling you, Loop is telling Siffrin, don’t drive yourself insane playing, please. The characters aren’t going to remember if you skipped something.
In the course of my script wizard activities, I’ve gotten an in-depth view of just how much that actually holds up. Pretty much all major differences are by Act, unrelated of how often you’ve done something. Minor variations apply for other things, but… those variations are minor.
And this also points out what all those variations are. Siffrin’s reactions!
Loop’s pre-empting Siffrin’s guilt, cuz they probably felt it themself. Hell, we do know they felt the pressure to perform and make sure nobody notices anything’s wrong, in SASASAP! Right up until the finale, Loop was driving themself up the wall.
(You have to act, you can't crack, you have to fake it and play it exactly as you did the first time for the whole way through so your friends don't find out anything is wrong) (You don't want to know what would happen if they knew their quest was in vain) (If they knew their quest for justice and change always ends in stillness and death!)
Acting everything out perfectly is one of the ending paths for SASASAP, which results in… complete and utter failure. Obviously.
(You acted perfectly normally, didn't you?) (Nothing out of place, nothing weird, every line the same as it might've been the first time?) (Ah…That was your mistake, wasn't it…?) (Because… Didn't your very first time… end exactly like this?) (The King throws the Housemaiden's body onto the floor again.)
Zoning out for too many conversations actually awards weird points in SASASAP, locking you out of the Perfect Ending. On the other hand, acting “perfectly” in ISAT… has no awards whatsoever. No special scene or or optional event or anything at all. You get nothing for paying attention!!!
So spare yourself the pain already, m’kay?
(On that note: I don’t think Loop not being sarcastic about it would’ve like… worked. At the start of ACT 2, Siffrin isn’t going to believe Loop when they say “Stop forcing yourself to relive the same thing over and over because you’ll start seeing your friends as disposable actors and lose touch with reality.” That all comes later, when Siffrin can look back on Loop’s words and see how right they were.)
Loop Back
The second biggest sigh of relief in any given ISAT playthrough is probably this specific tutorial.
Loop graciously shows you that you don’t need to loop back all the way to the beginning every single time. You can pick and choose where to go, even going forward by paying up with Memories of Skirmish.
This is a feature SASASAP does not possess, for the reason that it is much, much shorter, only covering about as much as one floor of ISAT’s three floor House.
But… since this is a character showing this to you, Loop showing this to you, we can ask… when did Loop learn this? After all, START AGAIN, Loop’s loops, do not have this feature.
“It'll save you time, so it's important, so listen up!”
This feature not existing in SASASAP means this is a thing that Loop did not know exists during their own time as Siffrin.
And that’s just the thing, isn’t it? SASASAP’s Siffrin does not know how to do this. They cannot pick and choose where they end up, as demonstrated wonderfully by SASASAP’s True Ending. There’s an even more wonderful implication, though –
On SASASAP’s Perfect End path, when exiting the final room before the King, Isabeau says this:
Isabeau: “…I'm glad you're feeling better, though!” Siffrin: (…?) “What do you mean…?” Isabeau: “Oh!!! Um, you were…” Isabeau: “Well! You were acting a little weird when we were way closer to the Castle's entrance……” Isabeau: “You weren't really listening to us, you were kinda smiling the way you do when you're actually not happy…” Isabeau: “…and you like, almost acted like you knew exactly where you were going?” Isabeau: “But clearly you're feeling better now! You're acting just like normal!!!”
SASASAP’s Siffrin knew how to do this, somehow managed to lock themself into the House’s last floor… and then forgot how to get back. By making this tutorial, Loop is ensuring that Siffrin never will.
“What can I do next?” – SASASAP’s greatest flaw
So, if you’ve had the pleasure of playing START AGAIN START AGAIN START AGAIN: a prologue yourself (as you should), then you’ve probably faced this scenario, or some variation of it:
I got to the end, I died to the King, but… what do I do next? The game tells me to go for the extremes, but how do I do that?
(edit: apparently some of yall just managed to speedrun sasasap in two loops. You're gonna need to stay with me here, please. Suspend your disbelief a bit, because a lot of people [including me] were dumbasses about it)
Maybe you try another loop, but just get the same ending again (or a differnet one, depending on a coinflip). You’re getting frustrated. Getting the Perfect Ending demands pinpoint precision to avoid everything weird, the True Ending demands good memorization of every single damn key in the game, and the order you do everything in. (Though, to be fair, the requirements on that one are actually more merciful than one might expect.)
Point is, in SASASAP, it’s incredibly easy to get stuck in that endless loop of “What the fuck do I do now?” It’s not uncommon to think you got it right only to get the same result anyways. What does one do in this situation?
They consult a guide, obviously.
START AGAIN’s ending requirements are frustrating. They are. When I tried to go for either the Perfect or the True Ending, I saved inside every single room, just so I could get right back to it when I inevitably fucked up five times minimum. This is both criticism… and praise. Because Loop is the major reason that ISAT does not suffer from this same problem.
Whenever you’re stuck in ISAT, Loop is just a single loop or call away at any times. And besides that, no plot requirement in ISAT demands nearly as many moving pieces all at once as SASASAP does – the “Sus Route” has been relegated to an optional ACT 4 exclusive event, instead of the game’s True Ending.
Instead of consulting an external guide on how to progress, you have one right there in the game, always ready with the next tip. They’re not infallible, mind you – enough time in Isatcord’s #game-help proves that, but Loop solved all of the moments I got stuck and frustrated in ISAT for me.
(Primarily that one time you need to figure out that a photo is similar to being stuck in time. That moment in particular is actually commendable, as you need to ask Loop about it twice before they tell you, leaving you a last shot to try and figure it out on your own.) Loop is a feature that nullifies SASASAP’s greatest flaw in its successor, and they choose to do so.
Memory of Keys
In my humble opinion, Loop does this because… they do not want Siffrin to suffer as they did. They want Siffrin to escape. And there is no greater example of their kindness than how Loop treats keys.
First of all, all keys in the game have a sparkling effect on them if you’ve picked them up at least once before, making it immediately clear where in the room they are. This means you don’t need to search every single room top to bottom for them, as you had to do for any keys and Star Crests in SASASAP. It’s some nice QoL that just means you don’t have to re-search the same area if you happened to forget which specific cupboard the key was in.
Key point being: SASASAP did not have this feature. In SASASAP, you did have to memorize where all the keys are, and doing so is expected if you want the True Ending.
Loop does not want Siffrin to have to do this. Because…
From SASASAP’s True End:
(The torch in the infirmary? That’s important!) (The key in the book? Soooo important.) (The names of your friends, that have been by your side throughout this entire adventure?) (Not worth remembering.)
Compared to ISAT’s ACT 2:
Siffrin: “How come I can see where the keys are?” Loop: “Whaaaaat? You caaaaaan? How can that beeeeeee?” Siffrin: “Is it thanks to you?” Loop: “Maybe.” Loop: “I figured you'd have other things to worry about than where a stupid key is.” Loop: “No need to thank me.”
To Loop, that they memorized the House’s layout over their friends’ names is a defining moment to their own failures. After all, in all likelihood, the True End of SASASAP is the last loop before they called it quits. It’s a traumatic experience from them, one that came from having to remember all the dumb fucking keys.
They do not want Siffrin to experience this. They do not want Siffrin to have to memorize the House, to push away what actually matters in favor of efficiency. So Loop is directly, personally, giving them a boon, so that Siffrin does not have to.
Conclusion
There’s probably more tutorial things I could talk about, but I feel like you’re seeing the pattern now, even if I don’t bring up saving level ups or keeping equipment or the “You’re stuck” signifier, least of all cuz they don’t have direct points of comparison with SASASAP like my other examples do (SASASAP has no changeable equipment, and saving levels doesn’t matter if you only have one floor, and you can’t softlock either.). So.
Loop’s tutorials all belie a fundamental kindness to their character. Everything that made their own experience trapped in the timeloop just that bit worse, they’re choosing to do away with it for Siffrin. They are choosing to make Siffrin’s time here easier.
Zoning out too much lead to them never paying attention to their friends, forgetting their names, so they make sure that Siffrin can still zone back in whenever something new happens.
Loop trapped themself for years on the final floor, locking themself out of progress that might lie further back, so they’re ensuring Siffrin knows exactly how to loop forwards and backwards so it doesn’t happen again.
Loop lets Siffrin keep equipment across loops to cut down on time spent doing the exact same thing over and over.
They are saving Siffrin time, and they are giving Siffrin comfort. At every single turn, Loop is saving Siffrin from the same pitfalls they fell into without anyone to guide them out.
It's honestly incredible to transform an increase in skill into an actual narrative element. Yes, SASASAP sucks more to play. But ISAT sucks less, because Loop wants it to. It's the perfect marriage of real world circumstance and storytelling. I could... probably pull another comparison here, saying it's like a game and its remake - overhauled graphics, expanded story, and loads and loads of QoL, because the makers of the remake realized something. They love the original, but parts of it do suck, and there's so much that can be done to make a new player's experience smoother. Metanarrative commentary,,,, woah,,,,,
Every single one of these QoL elements I’ve mentioned function as a crutch for a player’s failing memory, but also Siffrin’s (similar to what I talked about in my previous essay on ISAT’s ludonarrative - the player and Siffrin are always in sync, even in how tutorials benefit them). Loop doesn’t know the player exists though (only the Change God does), so they do everything for Siffrin.
To keep Siffrin from forgetting. To help Siffrin focus on what’s important. To make Siffrin’s journey just a little bit less miserable. Loop directly improves ISAT’s QoL. For you. For Siffrin.
From Loop’s introduction:
Loop: “See, I’m useful! I’m very useful! That’s why I’m here, helpful Loop.” Siffrin: “Why are you helping me?” Loop: “…” Loop: “Because I think you should be helped.” Loop: “I won’t always have the answers, but… I think having someone on your side to talk to is better than dealing with this alone.” Loop: “Right?”
From Loop’s hangout:
“But it’s fine.” “Whether you believe me or not, I’m here to help you.” “So you can escape this loop.”
And finally, from the start of ACT 3:
Siffrin: “Are you really here to help me?” Loop: “Stardust…” Loop: “…” Loop: “Yes.” Loop: “If you can believe anything, believe that.” Loop: “I asked to be here, so I could help you.”
And I do believe them. Loop’s feelings on Siffrin are… complex, to say the least. They love Siffrin, and they hate him in equal measure. They’re jealous, and spiteful, but underneath everything…
In SASASAP, if you die to a Sadness thrice, you get this monologue:
(Sometimes, when you loop back here…) (In the corner of your eye, you can sometimes see someone that looks just like you.) (Is it a you from another loop? Remnants of your past failures?) (Are you going crazy?) (May they succeed where you cannot.)
#feli speaks#in stars and time#isat spoilers#start again: a prologue#sasasap#LOOP TIME BABEYYYYYYYYYYYYYY#WATCH OUT IT'S FELI TALKING ABOUT LUDONARRATIVE AGAIN
1K notes
·
View notes
Text
tutorial — changing the background color in a gif
sofia & remy asked for this tutorial so here it is :)
note: i pay for photoshop and currently own the most recently released version of april 2025 - some things might be different if you're working on earlier versions of photoshop
i've made several gifsets (x, x, x, x) where i've isolated the gif subject so i can change the background into a bright, colorful background or into b&w backgrounds - in this tutorial i'll explain how i do that :)
in this tutorial we'll be going from this:
to this:

putting the tutorial under a read more!
step 1 — open your gif
i usually tend to make my gif beforehand, fully colored and sharpened and everything else, and save it before reopening it (as a gif) in photoshop cause i find it's the easiest way!
you'll have to work in frames mode when isolating the background color (because as said, you'll have to do this frame by frame) and it's important to always have the same frame and layer selected, otherwise you might run into some issues

for the purpose of this tutorial my premade gif (eddie<333) has not been colored, only sharpened
step 2 — selecting your subject
next up we're going to select our subject by going to the select category up top and clicking subject

↓ you'll now have a marching ants line around your subject ↓

sometimes photoshop will be silly and select either too much or too little, and you'll have to manually make sure (for every frame) that your subject is correctly selected - but i'll get back to that later!
step 3 — adding a solid color (/gradient color) layer mask
once you have your subject selected the way you want it, we're going to add a solid color (or gradient color) layer mask by clicking this half filled circle icon in your layers tab - from here on out you can choose whether you want to add a solid color or gradient (for this tutorial - we'll go with a solid color)
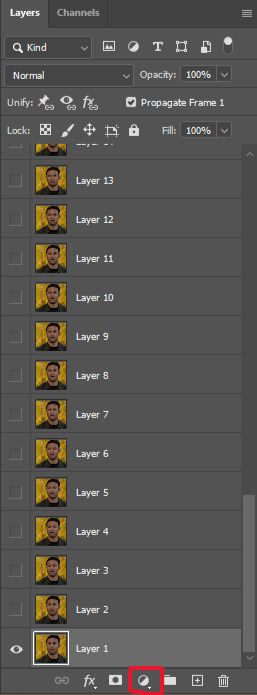


photoshop will ask you to pick a color (or gradient) so just go ahead and pick whatever color you wish to make your background! the lighter your color the brighter your background, and the darker your color the duller your background (for b&w backgrounds you can use black or white, it makes no difference) - once you're happy with your color, just press ok :)
step 4 — create a clipping mask
this might seem like nothing, but is actually an important step in the process! you want to make sure that the color fill layer you just created is clipped to the corresponding frame like so:


you can do this by pressing cmd/ctrl + alt + g or clicking right on your color fill layer and selecting create clipping mask

by clipping your color fill layer to the corresponding gif layer, you avoid this happening:

the color fill layer for the last gif layer has been applied on all gif layers before that, which will make it so that your subject will move in and out of the colored background and makes your gif look silly ↓

obviously this is what we want to avoid so clipping your color fill layer to your gif layer is an essential step!
step 5 — invert the layer mask of your color fill layer
next up we're going to select the layer mask and invert it by pressing cmmd/ctrl + i


this way we go from this

to this

step 6 — changing the blend mode of your color fill layer
the final step (!) is changing the blend mode of your color fill layer - i tend to just use the blend mode color on most of these as this mode tends to give the brightest results but you can definitely mess around and see what you prefer :)


(for this set i actually put the blend mode to soft light to create a duller background, for a gradient background just follow the exact same process but in step 3 choose gradient instead of solid color)
and you're done! now you only have to repeat this process for every. single. gif. frame. :)
and that's all there is to it really, so happy creating <3 see more tips/comments below and if you have questions, my askbox is always open!
tips / comments
1.- record this entire process into an action (tutorial on how to create actions) – this way you'll only have to select the correct frame/layer combo before pressing play and letting photoshop do the work for you! i made two general actions;
bw with subject select: use this action when photoshop can select your subject without issues!
bw without subject select: use this action when you need to manually edit the selection of your subject! (see 2.-)
feel free to download and use these actions! they will turn your background b&w - you can change the background color by clicking this square;

sofia @sadgayeddie made an action to select next frame + layer so you don't have to move your cursor around as often and graciously allowed me to share it <3 you can find it here
2.- (circling back to step 2) make sure photoshop correctly selects your subject – when using the select subject feature, photoshop may fuck up the selection of your subject, as such ↓

i don't want the lady in the background included in my subject - you'll have to use the quick selection tool to manually unselect whatever you don't want in your subject and/or manually select what you do want in your subject
from personal experience i know photoshop tends to fuck up with;
hair (especially when it moves around a lot)
blurry subject (eg eddie dancing in 8x06
one or more colors in your subject being too close to the background color(s) (such as bobby's suit in this example)
hands (the smaller the hands, the more photoshop makes a mess)
this is what the subject looks like without the lady in the back selected:
it's a bit more work if you have to edit the subject selection for every frame (and you might make small mistakes), but it's worth it! we want the gif looking like this in the end (sneak peek for my bobby set!!)

#resources#tutorial#itsphotoshop#usergif#i say tutorial but it's just me rambling sjkfhskdf#i hope this makes at least a little sense :') otherwise i'm always ready to answer questions!
237 notes
·
View notes