#raspberry pi pico 2
Explore tagged Tumblr posts
Visit Tumblr Blog
Explore Tumblr blogs with no restrictions, modern design and the best experience.
Last Seen Tumblr Blogs


Fun Fact
Tumblr has 16.74 million mobile monthly users in the US.
Text
#raspberry pi#Raspberry Pi Pico 2#Raspberry Pi Pico 2 Wi-Fi#Pico 2 Wi-Fi board#RP2040 microcontroller#IoT development board#DIY electronics
0 notes
Text
Pi Pico 2
A quick post about the #RaspberryPiPico2 (I was offline for most of the day when it was launched!) #Blaugust2024 #100DaysToOffload
I was busy and offline for most of today, and by the time I checked “the feeds” I’d missed the excitement about the Raspberry Pi Pico 2 / RP2350. I’m somewhat excited – the RP2040 and the Pico have been staples of my electronics tinkering over the past few years – I used one in a plotter project, for example; I used one to add remote-controlled lighting to my Bambu X1C 3D printer; I’ve hacked…
View On WordPress
#Blaugust2024#100DaysToOffload#hacking#hardware#microcontroller#micropython#Raspberry Pi#raspberry pi pico 2#Technology
0 notes
Text

Fruit Jam RP2350B credit-card mini computer with all the fixin's 🍓🍇💾
We were catching up on a recent Hackaday hackchat with Eben Upton (https://hackaday.io/event/202122-raspberry-pi-hack-chat-with-eben-upton) and learned some fun facts: such as the DVI hack for the RP2040 was inspired by a device called the IchigoJam (https://www.hackster.io/news/ichigojam-combines-strawberry-and-raspberry-to-deliver-a-raspberry-pi-pico-powered-educational-micro-66aa5d2f6eec). We remember reading about this back when it was an LPC1114, now it uses an RP2040. Well, we're wrapping up the Metro RP2350 (https://www.adafruit.com/product/6003), and lately, we've been joking around that with DVI output and USB Host support via bit-banged PIO, you could sorta build a little stand-alone computer. Well, one pear-green-tea-fueled-afternoon later we tried our hand at designing a 'credit card sized' computer - that's 3.375" x 2.125", about the same size as a business card (https://hackaday.com/2024/05/07/the-2024-business-card-challenge-starts-now/) and turns out there's even a standard named for it: ISO/IEC 7810 ID-1 (https://www.iso.org/standard/70483.html).
Anyhow, with the extra pins of the QFN-80 RP2350B, we're able to jam a ridonkulous amount of hardware into this shape: RP2350B dual 150MHz Cortex M33 w/ PicoProbe debug port, 16 MB Flash + 8 MB PSRAM, USB type C for bootloading/USB client, Micro SD card with SPI or SDIO, DVI output on the HSTX port, I2S stereo headphone + mono speaker via the TLV320DAC3100 (https://www.digikey.com/en/products/detail/texas-instruments/tlv320dac3100irhbt/2353656), 2-port USB type A hub for both keyboard and mouse or game controllers, chunky on-off switch, Stemma QT I2C + Stemma classic JST 3-pin, EYESPI for TFT displays, 5x NeoPixels, 3x tactile switches, and a 16-pin socket header with 10 A/D GPIO + 5V/3V/GND power pins. The PSRAM will help when we want to do things like run emulations that we need to store in fast RAM access, and it will also let us use the main SRAM as the DVI video buffer.
When we get the PCBs back and assembled, what should we try running on this hardware? We're pretty sure it can run DOOM. Should that be first? :) We also need a name. Right now, we're just calling it Fruit Jam since it's inspired by the IchigoJam project.
#fruitjam#rp2350b#raspberrypi#microcomputer#hackaday#diyelectronics#retrocomputing#creditcardpc#hardwarehacking#usbhost#dvioutput#psram#retrogaming#makercommunity#opensourcehardware#homemadecomputer#minipc#embeddeddevelopment#techinnovation#electronicsproject#tinkering#cortexm33#doomport#custompcb#hacktheplanet#hardwaredesign#diytech#retroconsole#handheldgaming#fruitjampc
34 notes
·
View notes
Text
Sooo, I'm continue working on 3D engine for Raspberry Pi Pico 2. I have Gouraud, Quaternions, ZBuffer, all that stuff. Everything in C.
5 notes
·
View notes
Text
funny thing with retro PC hardware is how the further back in history you go, the less you can really expect the mainboard to do for you.
you take a modern mainboard and it'll likely have most functions and features you're likely to need already integrated by default, be it sound, network, WiFi... there's usually even going to be video out from whatever barebones GPU is very likely integrated into the CPU by default, as well as a plethora of USB ports for whatever peripherals or other devices you might possibly want. It's basically almost a complete system in and of itself - just add a CPU, RAM, and some kind of storage medium and off you go. Plenty of boards of today will even have built-in support for plugging in fancy chassis RGB lighting straight into the mainboard itself.
Not so with older mainboards - the one I'm looking at using for my retro build project supports basically the typical two channels of IDE/Parallel ATA for a total of four main drives of whatever combination of hard- and optical, a single floppy drive, two PS/2 ports, one keyboard one mouse, a parallel LPT port, a few serial COM ports, an old AT DIN-5 keyboard port, and - shockingly - two USB ports that I'm guessing are ancient 1.0 standard. And that's it. There's no sound, no graphics, no networking - that's all stuff you have to add via expansion cards. You basically cannot use this computer at all without adding at least a graphics card - the Power On Self Test (or POST) will fail and straight up refuse to boot the system if no graphics card is detected. You go back far enough in history to the original IBM PC and it won't even have integrated hard drive support, necessitating an expansion card just to add fixed storage space.
And this is basically why the PC is such an inherently flexible platform - it was and is built pretty much grounds up to be extensible, providing the option to add just about whatever functions and features you might require via expansion slots built on open standards, allowing pretty much anyone with the prerequisite know-how and manufacturing capabilities to build their own. With the relative ease and low cost of circuit board manufacture of today combined with the ready access to powerful microcontrollers like the Raspberry Pi Pico, there's a good number of hobbyists making expansion cards that can more or less be programmed to do pretty much whatever.
Though this is technically still possible to do on modern PCs, the relative speed and complexity involved with modern PCI Express interfaces makes it far less accessible than making your own ISA expansion cards.
8 notes
·
View notes
Note
WARNING: LONG ASK INCOMING
For hobby electronics there’s two major kinds of processors: Microcomputers and Microcontrollers. Microcomputers are small full computer systems like the Raspberry Pi, they typically run a general-purpose OS (typically some flavor of Linux) and are useful for the kinds of projects that require basically a full computer to function, but not necessarily individual sensors. They’re a great place to start for people who don’t know a whole ton about programming or working with individual components because they typically can output a true GUI to a screen and have the capabilities of a regular desktop computer. They have a main processor, true RAM, and either large on-board storage space or a way to read a storage device, like an SD card.
Microcontrollers are less complicated (component wise) than microcomputers, but as a result are more difficult for total beginners to begin working with. They’re typically primarily a SoC (System on a Chip) processor without discrete RAM modules and a very small EEPROM (on-ship storage space) and need to have components wired and configured to them to be able to do much more than being a fancy calculator. They’re used for when you need something to carry out electronic functions or get sensor readings, but not necessarily a full operating system, so they’re best suited for small/integrated applications. Your helmet uses a microcontroller to control the LEDs you used in the Cunt Machine post.
I build high-power model rockets as a hobby and with my university team, so I work with both kinds of processor as part of designing payload systems. I typically prefer microcontrollers in these as most of what we do doesn’t need an actual OS to run, and they’re smaller/lighter than microcomputers. One of the advantages of a microcontroller is that it runs a Real-Time OS (RTOS) which forgoes all the user-friendliness of things like windows and linux to instead be the bare minimum backend necessary to run code uploaded into the processor.
The main advantage of using a microcontroller is really that they’re typically a lot cheaper than microcomputers are and are plenty powerful for really embedded applications. They also make other parts of whatever system is being built cheaper/easier to integrate because they require less overhead to function - the raspberry pi needs a minimum of 5 volts of power to work, while a chip like an ESP32-PICO can run at 1.8V.
The main way you make sensors/buttons/peripherals work with a microcontroller is via digital communication busses. There’s a few protocols, the most common being I2C, SPI, and UART. I’ll talk about I2C since that’s generally the most common. With I2C each component is assigned a 2-byte “address” that they’re identified by. When the controller sends a request signal on the I2C data bus, every sensor along the line will return their own signal, marked with their address so that they can be identified. It allows for a large number of devices to be put on the same lines and you can daisy-chain them through each other to the microcontroller.
I’ll be honest I really can’t think of a good way to say much more on the subject as like a starting message because I’ve been working with computers so long all the tech stuff for me is second nature, but if you have any questions ask away I can probably answer them or google them.
.
#AAAAAAAAAAAAAAAAAAAA TY INFORMATION#no yeah this is either really beginner friendly or. friendly to how much i have learned so far#tysm!!!! your insight is consistently so helpful <3#ask#lobsterbitches
27 notes
·
View notes
Text
January 19th, 2024 - Entry #2

I passed the "Electronic devices" exam with a score of 26/30. I'm satisfied and I have to start preparing for the "Game Design" exam.
I received three wonderful gifts. The first is the book above, the autobiography of Shirley Temple.
Then an advanced kit with Raspberry Pi Pico, for electronic projects.

And in the end, "The last of us Part 2 Remastered" (all what I had to do was pay for the upgrade from the PS4 version).

And finally I can get the med for ADHD people!
#neodiary#shirley temple#the last of us#the last of us part 2 remastered#raspberry#university#neurodivergent#neurodiversity#autism#autistic#dislexia
1 note
·
View note
Text
Raspberry Pi Pico W als WLAN-Hotspot mit Weboberfläche – Geräte im Netzwerk anzeigen

Mit dem Raspberry Pi Pico W lassen sich erstaunlich vielseitige Projekte realisieren – und das trotz seiner geringen Größe und des günstigen Preises. In diesem Beitrag zeige ich dir, wie du den Mikrocontroller in einen eigenen WLAN-Hotspot verwandelst, über den sich andere Geräte verbinden können. Sobald ein Gerät mit dem Netzwerk verbunden ist, wird es in einer übersichtlichen Weboberfläche angezeigt. Das Ganze wird komplett in MicroPython programmiert und kommt ohne zusätzliche Module oder Libraries aus – ideal also für Einsteiger und Bastler, die einen einfachen Einstieg in Netzwerkanwendungen mit dem Pico W suchen. https://youtu.be/jOVtYf6iNjY Hinweis aus der Community: Die Idee zu diesem Projekt stammt aus einem Kommentar von JoKa – vielen Dank an dieser Stelle für den spannenden Impuls! Ich freue mich jederzeit über Feedback, Ideen oder Anregungen zu meinen Projekten. Du kannst mir gern einen Kommentar hinterlassen oder direkt ein Support-Ticket über Support-Anfragen & Rückmeldung erstellen – ich nehme Vorschläge gerne auf und lasse sie in zukünftige Beiträge einfließen.
Ziel des Projekts
In diesem Beitrag verwandle ich den Raspberry Pi Pico W in einen einfachen WLAN-Hotspot (Access Point) mit einer integrierten Weboberfläche, auf der du sehen kannst, welche Geräte sich mit dem Netzwerk verbunden haben.
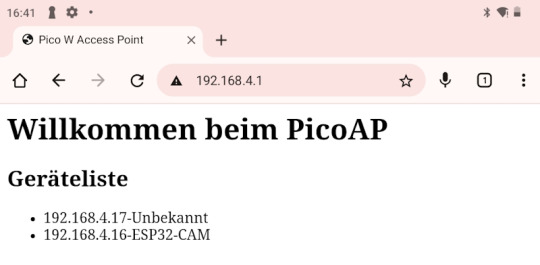
PiPico2W - AccessPoint Weboberfläche mit Geräteliste Das Projekt eignet sich ideal als Grundlage für eigene Anwendungen – zum Beispiel zur Konfiguration von Geräten im lokalen Netz oder zur Visualisierung von Statusinformationen. Die Umsetzung erfolgt komplett in MicroPython, sodass du den Code leicht anpassen oder erweitern kannst. Was ist ein Access Point? Ein Access Point (AP) ist ein Gerät, das ein eigenes WLAN-Netzwerk bereitstellt, mit dem sich andere Geräte verbinden können – ähnlich wie ein Router, nur ohne Internetverbindung. In unserem Fall übernimmt der Pico W diese Rolle und ermöglicht es z. B. einem Smartphone oder einer ESP32-CAM, sich direkt mit ihm zu verbinden. Was ist ein Webserver? Ein Webserver stellt Inhalte – meist HTML-Seiten – über das Netzwerk zur Verfügung. In diesem Projekt zeigt der Pico W eine einfache Webseite an, sobald ein Gerät im Browser seine IP-Adresse aufruft. Diese Seite listet z. B. die IP-Adressen aller verbundenen Geräte auf. Grenzen des Projekts Auch wenn der Pico W erstaunlich viel kann, gibt es technische Einschränkungen, die man kennen sollte: - WLAN-Reichweite: Die integrierte Antenne des Pico W reicht in der Praxis nur für kurze Distanzen. Für größere Reichweiten ist ein WLAN-Router oder ein ESP32-Modul mit externer Antenne besser geeignet. - Datenübertragung: Der Pico W eignet sich nicht für große Datenmengen, er reicht aber für kleine Geräte wie einer ESP32-CAM. - Mehrere Verbindungen: Der Pico W kann nur eine begrenzte Anzahl an gleichzeitigen Clients verarbeiten – perfekt für kleine DIY-Projekte, aber nicht für ein ganzes Smarthome-Netzwerk.
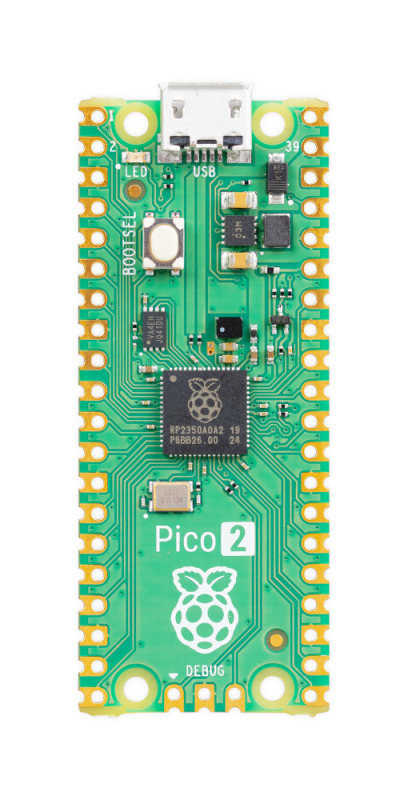
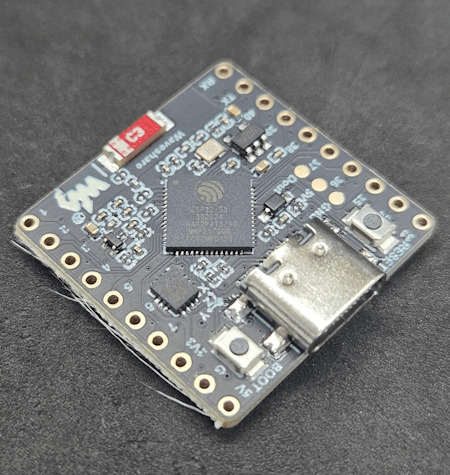
Technische Daten des Raspberry Pi Pico W
Der Raspberry Pi Pico W basiert auf dem bewährten RP2040-Chip und ist dank integrierter WLAN-Funktion ideal für einfache IoT- und Netzwerkprojekte geeignet. Hier ein Überblick über die wichtigsten technischen Merkmale: - Mikrocontroller: RP2040 (Dual-Core ARM Cortex-M0+ @ 133 MHz) - RAM: 264 KB SRAM - Flash-Speicher: 2 MB - WLAN: 2,4 GHz WiFi (802.11n), integriert über CYW43439 - GPIOs: 26 nutzbare Pins - Spannungsversorgung: 1,8–5,5 V über USB oder VSYS - Schnittstellen: I²C, SPI, UART, PWM, ADC, USB (Device)

Raspberry Pi Pico W verpackt

Raspberry Pi Pico W

Raspberry Pi Pico W

Rückseite des Raspberry Pi Pico W

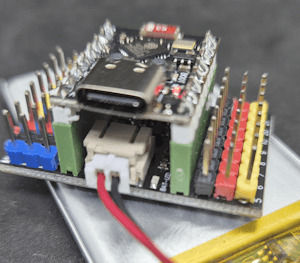
WisdPi - ArduPico mit Raspberry Pi Pico W

DIY Extensionboard für den Raspberry Pi Pico Der Pico W eignet sich hervorragend für MicroPython-Projekte, bei denen WLAN eine Rolle spielt – z. B. als Access Point mit Weboberfläche, wie in diesem Beitrag gezeigt. Hinweis zum RP2350 Die Raspberry Pi Foundation hat mit dem RP2350 einen Nachfolger des RP2040 vorgestellt. Erste Boards mit integriertem WiFi und dem neuen Chip sind inzwischen erhältlich. Da sich der RP2350 in mehreren Punkten vom RP2040 unterscheidet, werde ich in einem separaten Beitrag ausführlich auf die technischen Unterschiede, Vorteile und Einsatzmöglichkeiten eingehen.
Benötigte Bauteile
Für dieses Projekt ist die Materialliste angenehm kurz, denn der Raspberry Pi Pico W bringt bereits alles mit, was wir brauchen – inklusive WLAN-Chip. Du benötigst lediglich: - 1× Raspberry Pi Pico W* - 1× USB-Datenkabel* (USB-A auf Micro-USB) – wichtig: kein reines Ladekabel! - Die Entwicklungsumgebung Thonny zur Programmierung mit MicroPython Hinweis von mir: Die mit einem Sternchen (*) markierten Links sind Affiliate-Links. Wenn du über diese Links einkaufst, erhalte ich eine kleine Provision, die dazu beiträgt, diesen Blog zu unterstützen. Der Preis für dich bleibt dabei unverändert. Vielen Dank für deine Unterstützung! Die Einrichtung von Thonny sowie die ersten Schritte mit dem Raspberry Pi Pico habe ich bereits in einem separaten Beitrag beschrieben: 👉 Raspberry Pi Pico (1): Vorstellung und erste Schritte Damit bist du bestens vorbereitet, um mit dem Projekt zu starten!
Firmware-Update des Raspberry Pi Pico W
Da ich meinen Pico W längere Zeit nicht verwendet habe, aktualisiere ich zunächst die MicroPython-Firmware – von Version 1.20.0 auf 1.25.0. Ein Firmware-Update kann nicht nur neue Features mitbringen, sondern auch wichtige Bugfixes enthalten – daher ist es sinnvoll, vor Beginn eines neuen Projekts zu prüfen, ob eine aktuellere Version verfügbar ist.
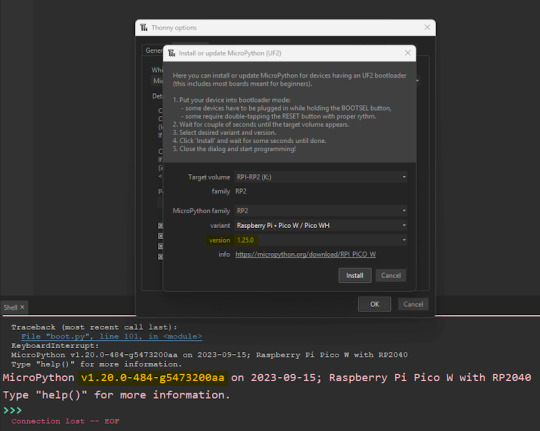
aktualisieren der Firmware des Raspberry Pi Pico W mit der Thonny IDE Die aktuelle MicroPython-Firmware für den Raspberry Pi Pico W findest du hier: 👉 https://micropython.org/download/rp2-pico-w/ am einfachsten ist es jedoch wenn du die Thonny IDE verwendest, hier sind es nur wenige klicks. Wichtiger Hinweis: Beim Flashen der Firmware wird der komplette Speicher des Boards gelöscht. Alle Programme, Dateien und Einstellungen auf dem Pico W gehen dabei verloren! Stelle also sicher, dass du wichtige Skripte vorher gesichert hast.
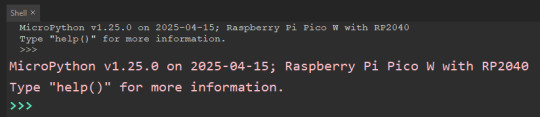
Output MicroPython v1.25 Hinweis zur Firmware-Version (Stand: 25.06.2025) Beim Test mit der Firmware v1.25.0 trat auf meinem Raspberry Pi Pico W der folgende Fehler auf: Failed to start CYW43 In diesem Fall konnte der WLAN-Chip nicht korrekt initialisiert werden, wodurch sich der Access Point nicht starten ließ. Nach einem Wechsel auf die Vorgängerversion v1.24.1 funktionierte alles problemlos, und der AP wurde wie erwartet erstellt. 👉 Mein Tipp: Wenn du diesen Fehler ebenfalls bekommst, probiere es mit der Firmware v1.24.1, die du ebenfalls auf der offiziellen MicroPython-Seite findest: https://micropython.org/download/rp2-pico-w/ Ich beobachte das Verhalten weiter und aktualisiere diesen Beitrag, sobald es dazu neue Erkenntnisse oder eine Lösung gibt.
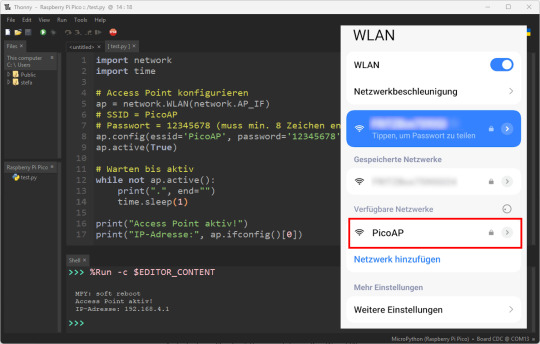
Access Point mit dem Pico W einrichten
Nachdem alle Vorbereitungen abgeschlossen sind und die Firmware auf dem aktuellen Stand ist, können wir mit der eigentlichen Programmierung beginnen. Im ersten Schritt richten wir den Raspberry Pi Pico W als WLAN-Access Point (AP) ein. Dadurch erzeugt der Mikrocontroller ein eigenes WLAN, mit dem sich beispielsweise ein Smartphone oder ein anderes WLAN-fähiges Gerät verbinden kann. Beispielcode: AP mit SSID „PicoAP“ und einfachem Passwort import network import time # Access Point konfigurieren ap = network.WLAN(network.AP_IF) # SSID = PicoAP # Passwort = 12345678 (muss min. 8 Zeichen enthalten!) ap.config(essid='PicoAP', password='12345678') ap.active(True) # Warten bis aktiv while not ap.active(): print(".", end="") time.sleep(1) print("Access Point aktiv!") print("IP-Adresse:", ap.ifconfig()) Wenn das kleine Script gestartet wird, wird ein AP mit dem Namen (SSID) PicoAP aufgebaut und man kann sich mit einem Handy, Table oder PC mit diesem verbinden.
aktiver AccessPoint vom Raspberry Pi Pico Webserver mit Liste der IP-Adressen Der folgende Code richtet einen einfachen Webserver im Access-Point-Modus ein. Er listet alle Geräte auf, die sich zumindest einmal mit dem WLAN verbunden und die IP-Adresse 192.168.4.1 im Browser aufgerufen haben. Denn genau dann sendet das Gerät einen HTTP-Request an den Pico W – und dieser wird vom Server erfasst.
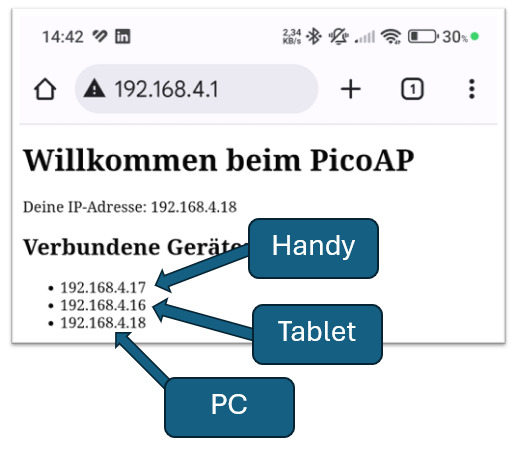
Webseite mit IP-Adressen von verbundenen Geräten import network import socket import time # Access Point einrichten ap = network.WLAN(network.AP_IF) ap.config(essid='PicoAP', password='12345678') # Passwort muss min. 8 Zeichen sein ap.active(True) while not ap.active(): time.sleep(1) print("Access Point aktiv. IP:", ap.ifconfig()) # Set zur Speicherung der bekannten IP-Adressen clients = set() # Webserver starten addr = socket.getaddrinfo('0.0.0.0', 80) s = socket.socket() s.bind(addr) s.listen(1) print("Webserver läuft auf Port 80...") while True: conn, addr = s.accept() client_ip = addr print("Verbindung von:", client_ip) clients.add(client_ip) # HTML-Inhalt generieren html = """ Pico W Access Point
Willkommen beim PicoAP
Deine IP-Adresse: {}
Bekannte Geräte:
""".format(client_ip) for ip in clients: html += " - {}n".format(ip) html += """ """ # Antwort senden response = 'HTTP/1.1 200 OKrnContent-Type: text/htmlrnrn' + html conn.send(response.encode('utf-8')) conn.close()
Geräte automatisch identifizieren per HTTP-Header
Wenn du Zugriff auf den Code eines Geräts hast – etwa bei einer ESP32-CAM, die sich mit dem Pico-WLAN verbindet – kannst du direkt nach der Verbindung automatisch einen HTTP-Request mit einem benutzerdefinierten Header absenden. Dieser Header enthält z. B. den Gerätenamen, den der Pico W auswerten und anzeigen kann. Das hat den Vorteil, dass du auf dem Pico nicht nur die IP-Adresse des Geräts speichern kannst, sondern auch direkt einen zugeordneten Namen. So entsteht eine übersichtliche Geräteliste im Format:
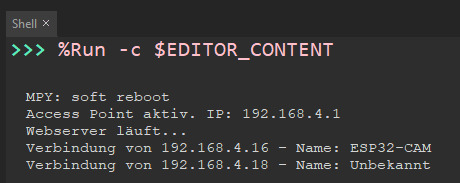
Ausgabe - Verbundene Geräte Beispielcode für die ESP32-CAM in der Arduino IDE Damit das funktioniert, musst du im Code der ESP32-CAM die Library HTTPClient einbinden und am Ende der setup()-Funktion einmalig einen HTTP-Request an den Pico W senden: #include void sendDeviceHeader() { HTTPClient http; // IP des Pico W http.begin("http://192.168.4.1/"); // Gerätekennung http.addHeader("X-Device-Name", "ESP32-CAM"); // Senden des Requests int httpCode = http.GET(); // Verbindung schließen http.end(); } void setup() { ... // Direkt nach erfolgreicher Verbindung aufrufen sendDeviceHeader(); } Auswertung im MicroPython-Code Da du auf dem Webserver des Pico W ebenfalls den Code selbst kontrollierst, kannst du den Header sehr einfach im Request auslesen und zuordnen. In deinem Webserver prüfst du dazu jede eingehende Verbindung nach dem Header X-Device-Name: for line in request.split("rn"): if line.startswith("X-Device-Name:"): device_name = line.split(":", 1).strip() Damit ordnest du der IP-Adresse zuverlässig den Gerätenamen zu – ideal für Projekte mit mehreren bekannten Teilnehmern wie Sensoren, Kameras oder Aktoren.
Fertiger Code: Pico W als WLAN-Hotspot mit Geräteliste
Im folgenden Abschnitt findest du den vollständig lauffähigen MicroPython-Code für dieses Projekt. Er verwandelt deinen Raspberry Pi Pico W in einen eigenen WLAN-Hotspot und stellt eine einfache Weboberfläche bereit.
PiPico2W - AccessPoint Weboberfläche mit Geräteliste Sobald sich ein Gerät mit dem WLAN verbindet und einen HTTP-Request an http://192.168.4.1 sendet (z. B. automatisch durch einen Mikrocontroller oder manuell im Browser), wird dessen IP-Adresse zusammen mit einem benutzerdefinierten Gerätenamen angezeigt. Der Gerätename wird dabei über den HTTP-Header X-Device-Name übermittelt. # ------------------------------------------------------------ # Titel: Raspberry Pi Pico W – WLAN-Hotspot mit Weboberfläche # Beschreibung: # Dieser Code verwandelt den Raspberry Pi Pico W in einen Access Point (AP), # der eine einfache Webseite ausliefert. Alle Geräte, die sich mit dem WLAN # verbinden und einen HTTP-Request senden, werden mit ihrer IP-Adresse # und einem benutzerdefinierten Gerätenamen (per HTTP-Header) geloggt # und auf der Webseite angezeigt. # # Autor: Stefan Draeger # Blogbeitrag: # https://draeger-it.blog/raspberry-pi-pico-w-als-wlan-hotspot-mit-weboberflaeche-geraete-im-netzwerk-anzeigen/ # ------------------------------------------------------------ import network import socket import time # WLAN Access Point konfigurieren ap = network.WLAN(network.AP_IF) # AP_IF = Access Point Interface ap.config(essid='PicoAP', password='12345678') # WLAN-Name und Passwort (mind. 8 Zeichen) ap.active(True) # AP aktivieren # Warten, bis der Access Point aktiv ist while not ap.active(): time.sleep(1) print("Access Point aktiv. IP:", ap.ifconfig()) # Dictionary zur Speicherung von verbundenen Clients # Format: { "IP-Adresse": "Gerätename" } clients = {} # Webserver einrichten addr = socket.getaddrinfo('0.0.0.0', 80) # IPv4-Adresse, Port 80 s = socket.socket() s.bind(addr) s.listen(1) # Max. 1 gleichzeitige Verbindung (ausreichend für einfache Anzeige) print("Webserver läuft...") # Endlosschleife zur Verarbeitung eingehender Verbindungen while True: conn, addr = s.accept() # Verbindung akzeptieren request = conn.recv(1024).decode() # HTTP-Request empfangen ip = addr # IP-Adresse des Clients device_name = "Unbekannt" # Standardwert # HTTP-Header nach dem benutzerdefinierten Feld "X-Device-Name" durchsuchen for line in request.split("rn"): if line.startswith("X-Device-Name:"): device_name = line.split(":", 1).strip() break # Nur ersten passenden Header verarbeiten # IP-Adresse und Gerätename im Dictionary speichern oder aktualisieren clients = device_name print("Verbindung von {} – Name: {}".format(ip, device_name)) # Dynamisches HTML für die Antwort generieren html = """ Pico W Access Point
Geräteliste
""" # Alle bekannten Clients auflisten for ip, name in clients.items(): html += " - {}-{} n".format(ip, name) html += """ """ # HTTP-Antwort senden (Statuscode 200 OK) response = 'HTTP/1.1 200 OKrnContent-Type: text/htmlrnrn' + html conn.send(response.encode('utf-8')) # Antwort übertragen conn.close() # Verbindung schließen Read the full article
0 notes
Text
Raspberry Pi Pico Pico 2 Pico W Pico WH Pico H Pico 2 W RP2040 RP2350 Chip con placa de desarrollo WiFi inalámbrica, MicroPython
0 notes
Video
youtube
Kaleidoscopico (A Demo for the Raspberry Pi Pico 2)
0 notes
Text
#Built-in Wi-Fi for Raspberry Pi Pico#IoT development board#Raspberry Pi for IoT projects#Wi-Fi-enabled microcontroller#DIY electronics with Raspberry Pi#Robotics with Raspberry Pi Pico#Home automation with Raspberry Pi
3 notes
·
View notes
Text
🎉New Pico 2 W just dropped - and CircuitPython is ready to go!🎉
We just got the OK to put the Pico 2 W in the shop. You can pick it up at
, and you might be wondering: hey, do you have CircuitPython built for it? The answer is YES! We have secretly added support, and v9.1.2 has a build ready. We'll be adding it to the
downloads page shortly, but if you've got one in hand before launch somehow, you can check out the builds in the Absolute Latest S3 Bucket
the pico 2w is a great upgrade with twice the speed, twice the SRAM and twice the flash memory, solving many frustrations folks had with the original Pico W.
#pico2w#raspberrypi#circuitpython#techupgrade#adafruit#makercommunity#electronics#opensource#devtools#embeddedsoftware#pythononhardware#newrelease#microcontrollers#codingfun#diyelectronics#hardwareprojects#smarthardware#techinnovation#tinkering#twicespeed
12 notes
·
View notes
Text
シンセ開発ログ 2025-03-29: シンセカイリアル エキシビションでPRA32-U2を演奏/Synth Maker Popup #1に参加/NT京都2025に出展/音と電気のワークショップに参加
■シンセカイリアル エキシビションでPRA32-U2を演奏(2025/02/21)

PRA32-U2は、Raspberry Pi Pico 2(RP2350)を使った、誰でも自由に作れるシンセサイザー(MIDI音源)です。まだプロトタイプですが、前モデルの機能を一通り持っています。v0.2.0では、「複数のノコギリ波が重なった波形(Super Sawモドキ)」のMulti Sawを使えるようになりました。
PRA32-U2にはいくつかのバリエーションがありますが、コントロールパネル統合版のPRA32-U2 with Panelにはステップシーケンサーが搭載されています。
これをヤマハSEQTRAKにシンクさせて、2/21に池袋LIVE INN ROSAで開催された、Yasushi.Kさん主催のシンセカイリアル エキシビションのステージで演奏してきました。
ライブハウスのステージでの2度目の演奏、何とかやり遂げました!
会場には遅刻して到着、慌ててしまって練習通り動けず、特にエフェクト(コーラスとディレイ)をかけ忘れたのはご愛嬌、という感じでしたが。前日にシンセカイリモオトを視聴して、「もう少しチャレンジしよう!」とスケールをメロディックマイナー(ジャズマイナー)に変えたりしたことも慌てた一因でした。しかし、楽しかったのでOKです! 反省は次に活かします。
参加者のCAIEさんに動画を撮っていただきました。とても嬉しいです!
https://x.com/CAIExxxx/status/1895520895453839496
他の参加者の方の演奏を聴けて、交流もできて、本当に楽しかったです。ありがとうございました! 次回、4/28に開催されるシンセカイリアルも楽しみです。
■Synth Maker Popup #1に参加(2025/02/22)

池上C4R(Channel for Rent)で開催された、電子楽器の展示即売会Synth Maker Popup #1(Synth Popup #1)に遊びに行ってきました。
SYNTHERNET ParipiDestroyerを「my new gear…」しました。
私はSynth Maker Popup #1の少し前にSynth Maker Communityに参加しました。以前から存在を知っていましたが、Synth Maker Meetup(Synth Meetup)に一度も参加できていないこともあり、様子を見ていました。しかし、2月のリニューアルが参加のきっかけになりました。
2025/05〜06 Synth Maker Meetup #4(浜松予定)
には、ぜひ参加したいです!
■NT京都2025に出展(2025/03/23)

NT京都2025に、PRA32-U2のPWMオーディオ版(1500円くらいで作れます)を出展しました。NT京都への参加は7年ぶりでした。
多くの方にISGK Instrumentsブースにお越しいただき、ありがとうございました! 前日打上げには参加できませんでしたが、来場者や出展者の方と交流でき、とても楽しい一日でした。
PRA32-U2は、正式リリースに向けて改善を続けていきます。
■音と電気のワークショップに参加(2025/03/28)

SYNTH DIY TOKYOの(天才楽器デザイナー)ながさわさんが月1回浜松で開催している音と電気のワークショップに初参加しました。
「かんたんコース」に申し込み、久しぶりのハンダ付けでしたが、THE SOUND GENERATORS 2025が無事に完成しました! 材料費1000円で作れる、とても面白いシンセです。シンセ作りの参考にもなります。
0 notes
Text
28 marca 2025

◢ #unknownews ◣
Zapraszam do lektury dzisiejszego zestawienia.
Dziś po ponad 2 latach przerwy rusza sprzedaż szkolenia ze scrapowania danych organizowanego przez "Informatyka Zakładowego". Rzuć okiem na agendę i przykładową lekcję. Koniecznie zobacz też bardzo nietypową cenę szkolenia.
1) Domowe studio nagraniowe i biuro w jednym – jak to zorganizować? https://michael.team/office25/ INFO: Szef firmy Nozbe, "od zawsze" pracujący zdalnie, z domu, prezentuje swoje biuro i studio nagraniowe w jednym. Jak zorganizował swoje stanowisko pracy, oświetlenie, setup do wideokonferencji itp. Sporo drobnych, ale i inspirujących usprawnień, które mogą ułatwić Ci życie, jeśli także pracujesz z domu. Warto podążać za linkami do kolejnych artykułów, ponieważ rozbudowują one niektóre ze wspomnianych tematów (np. dokładniejszy opis setupu do nagrań wideo czy podcastów).
2) Stacja pogodowa IoT oparta na Raspberry Pi Pico (film, 17 min) https://www.youtube.com/watch?v=swiEMNu57ig INFO: Autor zbudował własną stację pogodową, wykorzystując wspomniany mikrokontroler, różne czujniki oraz elementy wydrukowane na drukarce 3D. Dane pogodowe są przesyłane do internetu i wizualizowane na stronie WWW. Film pokazuje proces budowy, wybór podzespołów oraz wyzwania związane z takim projektem. Jeśli interesują Cię projekty 'zrób to sam', to warto także rzucić okiem na inne filmy na kanale.
3) 5 najtrudniejszych typów pracowników i jak sobie z nimi radzić https://newsletter.canopy.is/p/the-5-most-difficult-employees-and INFO: Jeśli jesteś menadżerem, to wcześniej czy później spotkasz się z wyjątkowo trudnymi pracownikami, którzy mogą być niemałym wyzwaniem dla Ciebie i dla całego zespołu. Autorka tego wpisu opisuje pięć typowych archetypów trudnych pracowników, takich jak 'kulturowy filar' opierający się zmianom czy 'pasożytniczy geniusz', który osiąga świetne wyniki kosztem relacji w zespole. W artykule znajdziesz konkretne porady, które pomagają skutecznie zarządzać takimi osobami, minimalizując ich negatywny wpływ na firmę i pomagając im lepiej funkcjonować w organizacji.
4) Jak Google podchodzi do inżynierii oprogramowania – kluczowe zasady i praktyki https://addyo.substack.com/p/applied-software-engineering-at-google INFO: Google dostosowało swoje praktyki inżynieryjne do pracy na ogromną skalę, ale wiele z nich można dostosować do potrzeb dowolnej organizacji. Artykuł przedstawia najważniejsze zasady opisane w książce "Software Engineering at Google", takie jak kultura testowania, skuteczna weryfikacja kodu, dokumentacja techniczna, dzielenie się wiedzą, zarządzanie zależnościami czy zasady wdrażania zmian. To nie poradnik kopiowania Google, ale przewodnik po tym, dlaczego ich metody działają i jak można je dostosować do własnych potrzeb. W pierwszym akapicie znajdziesz link do pełnej (darmowej) wersji książki, na której bazuje ten wpis.
5) Kupuj produkty od europejskich firm — katalog i wyszukiwarka https://www.goeuropean.org/ INFO: Masz ochotę korzystać z aplikacji XYZ, ale niestety zbudowana jest ona w USA i nie za bardzo spełnia unijne regulacje, których wymaga Twoja firma. Użyj wyszukiwarki na tej stronie i zdefiniuj, czego potrzebujesz, a szybko dowiesz się, czy istnieje jakiś europejski odpowiednik tego, czego szukasz. Z ciekawości możesz kliknąć opcję "Digital" i ustawić kraj pochodzenia produktu na "Poland". Być może poznasz w ten sposób kilka ciekawych produktów (jest tam Albicla!).
6) Sztuczne światło słoneczne z LED-ów? - projekt DIY https://victorpoughon.fr/i-tried-making-artificial-sunlight-at-home/ INFO: Autor projektuje i buduje własną wersję domowego źródła światła imitującego słońce, opierając ją nie na dużym reflektorze parabolicznym, a na siatce małych soczewek i LED-ów wysokiej jakości. Ciekawe i użyteczne np. w świecie fotografii rozwiązanie. Może zainteresować majsterkowiczów i fanów elektroniki.
7) Szkolenie z automatyzacji pobierania danych z internetu [sponsorowane] https://www.scrapowanie.pl/ INFO: Poznaj sposoby na efektywne scrapowanie danych z sieci, najczęstsze problemy występujące podczas parsowania plików oraz metody wykrywania wąskich gardeł spowalniających przetwarzanie danych. W skład szkolenia wchodzi opis użycia kilkudziesięciu przydatnych narzędzi oraz zapis rozmowy z prawnikiem o legalności scrapowania. Szkolenie jest dla Ciebie, jeśli jesteś programistą odpowiedzialnym za automatyzację procesu przetwarzania danych, analitykiem znużonym regularnym pobieraniem i ręczną obróbką plików albo ekonomistą agregującym raporty z różnych źródeł.
8) Skąd biorą się nazwy grup APT? Przegląd systemów nazewnictwa https://blog.cyberalerts.io/coming-soon/ INFO: Czy grupy przestępcze, takie jak Lazarus, Fancy Bear czy APT42, zanim zaczną okradać ludzi online, organizują spotkanie i debatują, jak się mają nazywać? Niekoniecznie ;) Za nazwy takich grup odpowiadają różne firmy zajmujące się analizą zagrożeń — każda z nich stosuje własne konwencje, przez co ta sama grupa może mieć nawet kilkanaście różnych pseudonimów. W artykule prześledzono przykłady nazw przypisanych słynnej grupie Lazarus oraz opisano systemy nazewnictwa stosowane m.in. przez CrowdStrike (zwierzęta), Mandiant (APT+numer, UNC) czy Microsoft (pogoda i kolor).
9) Content-visibility: auto – klucz do szybszego renderowania stron? https://cekrem.github.io/posts/content-visibility-auto-performance/ INFO: Wspomniana właściwość pozwala przeglądarce pomijać renderowanie elementów niewidocznych w widoku użytkownika, co znacząco poprawia szybkość działania i renderowania strony. Dzięki temu rozwiązaniu można łatwo optymalizować długie listy, tabele czy interfejsy o dużej liczbie elementów, minimalizując jednocześnie przesunięcia układu poprzez użycie właściwości contain-intrinsic-size. Funkcja ta jest bardzo dobrze wspierana w każdej nowoczesnej przeglądarce (pomińmy mały bug na Safari, bo ono zawsze jest dziwne), więc może warto jej się dokładniej przyjrzeć i zacząć z niej korzystać?
10) Jak działają benchmarki LLM i co naprawdę sprawdzają? (film, 18m) https://www.youtube.com/watch?v=nHlYp5llKFc INFO: Benchmarki AI stały się kluczowym narzędziem do oceny dużych modeli językowych. W tym filmie omówiono najważniejsze z nich: GLUE, SuperGLUE, MMLU, GPQA, TAU-Bench oraz SWE Bench Verified. Jakie zadania sprawdzają, na czym polegają różnice między nimi i dlaczego niektóre modele osiągają wysoki wynik tylko na papierze? Niektóre z testów są naprawdę ciekawe. Rzuć okiem.
11) AI jako członek zespołu? – eksperyment w Procter & Gamble https://www.oneusefulthing.org/p/the-cybernetic-teammate INFO: Czy sztuczna inteligencja może skutecznie zastąpić ludzkiego współpracownika w pracy zespołowej? Eksperyment przeprowadzony na 776 profesjonalistach we wspomnianej firmie pokazuje, że AI może nie tylko wyrównać poziom wyników między indywidualnymi pracownikami, ale także zmniejszyć granicę specjalizacji wiedzy. Co ciekawe, wyniki sugerują, że AI nie jest tylko narzędziem zwiększającym produktywność, ale może też pełnić funkcję wspierającego członka zespołu, wpływając przy tym na te bardziej miękkie aspekty współpracy w zespole.
12) GPT-4o zyskał nowy generator obrazów — jest zaskakująco dobry https://openai.com/index/introducing-4o-image-generation/ INFO: Do tej pory ChatGPT, chcąc wygenerować grafikę, posługiwał się modelem DALL-E, który (mówiąc bardzo delikatnie) mocno odbiegał od standardów rynkowych wśród generatorów grafiki. Obecnie model ma możliwość nie tylko tworzenia nowych grafik, ale także przerabiania tych już istniejących i, co ciekawe, robi to naprawdę dobrze. Nowe możliwości nie są jeszcze oficjalnie dostępne przez API, ale użytkownicy interfejsu webowego mogą już z tej funkcji korzystać.
13) GPSTracker - alternatywa open-source dla historii lokalizacji Google Maps https://blog.fabiomanganiello.com/article/gpstracker-a-self-hosted-alternative-to-google-maps-timeline INFO: Śledzenie lokalizacji w Google Maps to bardzo wygodna funkcja, jednak niekoniecznie wspiera ona Twoją prywatność. Twoja codzienna lokalizacja wysyłana jest na serwery zewnętrznej firmy, co może nie być Ci na rękę. Jak w takim razie korzystać z podobnej funkcjonalności, ale w wersji self-hosted? GPSTracker to narzędzie pozwalające na zapis i analizę historii lokalizacji na Twoim serwerze. W artykule znajdziesz pełen opis techniczny tego rozwiązania.
14) Jak w 1995 roku tworzono strony internetowe na GeoCities https://cybercultural.com/p/geocities-1995/ INFO: GeoCities, wcześniej znane jako Beverly Hills Internet, zrewolucjonizowało webdesign lat 90., ułatwiając zwykłym użytkownikom tworzenie własnych stron WWW. Dzięki podziałowi na tematyczne "cyber miasta" i prostemu generatorowi stron serwis umożliwiał masowe tworzenie treści w sieci, przyciągając tysiące użytkowników. Pomimo technicznych ograniczeń i dość szablonowego wyglądu, GeoCities zdobyło serca użytkowników i stało się nieodłącznym elementem historii internetu. Artykuł dla wielbicieli nostalgicznych technologii.
15) Jak Discord przyspieszył swoją aplikację mobilną na Androidzie https://discord.com/blog/supercharging-discord-mobile-our-journey-to-a-faster-app? INFO: Discord przeszedł na React Native dla wersji androidowej, co początkowo wiązało się z wyzwaniami wydajnościowymi, ale dzięki optymalizacjom udało się znacząco skrócić czas uruchamiania aplikacji i poprawić płynność działania interfejsu. Co konkretnie zmienili i z jakimi wyzwaniami wydajnościowymi spotkali się programiści, tego dowiesz się z artykułu. Użyteczne, jeśli tworzysz oprogramowanie na Androida.
16) Czym są błędy i tolerancja błędów w systemach rozproszonych? https://newsletter.scalablethread.com/p/understanding-faults-and-fault-tolerance INFO: Systemy rozproszone muszą radzić sobie z różnymi typami awarii, takimi jak błędy sprzętowe, sieciowe czy ludzkie. Aby zapewnić niezawodność, stosuje się techniki takie jak replikacja aktywna i pasywna, wykrywanie błędów poprzez heartbeaty czy strategie odzyskiwania, np. checkpointing i circuit breakers. Artykuł wyjaśnia, jak działają wspomniane mechanizmy i dlaczego są tak ważne dla zapewnienia ciągłości działania systemu.
17) Docker Hub wprowadza limity pulli – co to oznacza dla GitLab CI/CD? https://about.gitlab.com/blog/2025/03/24/prepare-now-docker-hub-rate-limits-will-impact-gitlab-ci-cd/ INFO: Docker Hub już 1 kwietnia zacznie egzekwować długo zapowiadane limity dla operacji PULL. Jeśli wykorzystujesz GitLaba do automatyzacji CI/CD, to istnieje ogromna szansa, że Twój pipeline przestanie działać. Z artykułu dowiesz się, co możesz zrobić, aby niskim (lub zerowym) kosztem sprawić, aby Twoje automatyzacje nadal działały tak jak dotychczas.
18) GPTBot skanuje internet? – jak OpenAI wpływa na przyszłość wyszukiwania https://dadalo.pl/tech/gptbot-skanuje-internet-zmiana-konsumpcji-tresci-przyszlosc-wyszukiwania/ INFO: OpenAI intensyfikuje indeksowanie sieci za pomocą swojego bota. Szykuje się jakaś większa zmiana? Analiza logów serwerowych pokazuje, że boty OpenAI koncentrują się na stronach WordPress i innych popularnych platformach, a ich celem może być implementacja bezpośredniego cytowania źródeł w odpowiedziach ChatGPT. W artykule znajdziesz między innymi porady dotyczące zarządzania dostępem do swojej strony oraz przewidywania dotyczące wpływu AI na przyszłość SEO.
19) Przydatne wzorce projektowe w PostgreSQL, które ułatwiają życie https://mccue.dev/pages/3-11-25-life-altering-postgresql-patterns?= INFO: Zbiór praktycznych wzorców i dobrych praktyk w PostgreSQL, które mogą znacząco poprawić jakość pracy z bazą danych. Autor omawia m.in. zastosowanie UUID jako kluczy głównych, wykorzystywanie pól timestamp do śledzenia zmian w rekordach, użycie przestrzeni nazw (schemas), a także wzorzec soft delete oraz przechowywanie statusów w formie logów. Każde z tych rozwiązań może z pozoru wydawać się drobne, ale ich zbiorcze zastosowanie w projekcie może dać zauważalne korzyści.
20) GPT-5 — co wiemy o nowym modelu OpenAI https://www.chatbase.co/blog/gpt-5 INFO: Nowy model ma przynieść znaczące ulepszenia w zakresie rozumowania, multimodalności (tekst, obraz, audio, wideo) oraz personalizacji, choć nie będzie to jeszcze poziom AGI. Według przewidywań jego premiera odbędzie się już w tym roku. Artykuł jest z lutego tego roku, więc niektóre z przewidywań (np. publikacja GPT-4.5) mamy już za sobą.
21) Nie używaj fałszywych pogrubień i kursywy w social mediach https://adrianroselli.com/2025/03/dont-use-fake-bold-or-italic-in-social-media.html INFO: Większość sieci społecznościowych nie posiada natywnego wsparcia dla formatowania tekstu, ale istnieją serwisy, które takie wsparcie mogą niejako dodać. Tak naprawdę zmieniają one klasyczne znaki na symbole Unicode, które te znaki przypominają. Problem w tym, że dla ludzkiego oka różnica jest niewielka (po prostu tekst jest grubszy lub pochylony), ale z punktu widzenia semantycznego to jest już zupełnie inny tekst. Utrudnia to wyszukiwanie informacji, zmniejsza zasięg wpisów w social mediach, ale dochodzi do tego jeszcze jeden aspekt, o którym nie myśli się za często. Mowa o dostępności takich wpisów dla osób z ograniczeniami wzroku, które przy codziennej pracy posługują się czytnikami ekranu. Zobacz (a właściwie to "posłuchaj"), jak tak sformatowane wpisy odczytywane są przez automaty.
22) Programowalny zasilacz na USB-C? - tak, to możliwe! (film, 12m) https://www.youtube.com/watch?v=kcmpGbR6xZc INFO: USB-C potrafi więcej, niż się wydaje. Standard PPS (Programmable Power Supply) pozwala na precyzyjne sterowanie napięciem i natężeniem prądu, zmieniając zwykłą ładowarkę USB-C w regulowane źródło zasilania. Film wyjaśnia, jak to działa, jakie układy scalone to umożliwiają oraz jak używać gotowych płytek do testowania tej technologii. Jest też ciekawy test wykorzystania PPS do ładowania akumulatora LiPo i porównanie z klasycznym zasilaniem USB-PD. Świetny materiał dla majsterkowiczów.
23) Unia Europejska zakazuje wybranych systemów sztucznej inteligencji https://homodigital.pl/zakazane-systemy-ai-sztucznej-inteligencji-ai-act/ INFO: AI Act klasyfikuje systemy sztucznej inteligencji według poziomu ryzyka i zakazuje tych, które potencjalnie mogą prowadzić do dyskryminacji, naruszeń prywatności lub manipulacji społeczeństwem. Co znajduje się na liście zakazanych przypadków użyć sztucznej inteligencji? Tego dowiesz się z artykułu.
24) Colormaxxing – jak uzyskać najintensywniejsze kolory w przeglądarce https://karuna.dev/colormaxxing/ INFO: Czy #ff0000 to naprawdę najintensywniejszy czerwony, jaki możesz zobaczyć na ekranie? Okazuje się, że nie – w przestrzeniach kolorów takich jak Display-P3 czy Rec. 2020 można uzyskać jeszcze bardziej nasycone barwy, których nie da się odwzorować w standardowym sRGB. Artykuł wyjaśnia, jak skorzystać z nowych przestrzeni kolorów w CSS oraz pokazuje różnice między klasycznymi a tymi "podkręconymi" kolorami.
25) Jak UE walczy z dezinformacją online? - FIMI i regulacje unijne (film, 30m) https://www.youtube.com/watch?v=juVnhEu3RbQ INFO: Unia Europejska stara się wypracować standardy walki z dezinformacją i manipulacją online. Czym jest FIMI (Foreign Information Manipulation and Interference) i jakie narzędzia mają pomóc w walce z propagandą? Temat jest ważny, ale także mocno kontrowersyjny. Jeśli jesteś skrajnym eurosceptykiem, warto omijać nagranie szerokim łukiem.
26) Fancy Components - kolekcja gotowych komponentów i mikrointerakcji dla Reacta https://www.fancycomponents.dev/ INFO: Biblioteka oferuje zestaw gotowych do użycia komponentów oraz mikrointerakcji, które mogą wzbogacić interfejs Twojej aplikacji. W dokumentacji znajdziesz przykłady tego, co możesz osiągnąć z tekstem, obrazami i innymi elementami. Całkiem interesująco wygląda np. silnik fizyczny (np. grawitacja), który możesz podpiąć do elementów na stronie.
27) Eksperymentowanie na stronie z document.designMode https://smashingmagazine.com/2025/03/previewing-content-changes-work-documentdesignmode/ INFO: Ta funkcja przeglądarki nie jest szczególnie popularna wśród programistów, jednak może ona w prosty sposób przyspieszyć wizualne eksperymenty na stronie. Chcesz np. wiedzieć, który tytuł będzie lepiej wyglądał, albo jak podzielić tekst artykułu, albo chcesz zrobić prostą makietę, która będzie symulować wypełnienie strony treścią. Wszystko to możesz osiągnąć bez modyfikacji kodu strony. Z artykułu dowiesz się, w jaki sposób możesz wykorzystać "design mode" w codziennej pracy. Być może jako programista nie skorzystasz z tego bardzo, ale możesz nauczyć swoich mniej technicznych współpracowników, jak to wykorzystać na swoją korzyść.
28) Optymalizacja aplikacji Next.js – praktyczny przewodnik https://medium.com/@ignatovich.dm/optimizing-next-js-applications-a-concise-guide-a8167dfc8271 INFO: Artykuł przedstawia zestaw sprawdzonych technik optymalizacji aplikacji Next.js, skupiając się na zmniejszeniu rozmiaru paczek, optymalizacji obrazów, usprawnieniu metod pobierania danych i zarządzania stanem. To praktyczny przewodnik dla każdego, kto chce przyspieszyć swoją aplikację i poprawić jej wyniki w Core Web Vitals. Same konkrety.
29) FBI ostrzega przed fałszywymi konwerterami plików – mogą infekować malware https://www.bleepingcomputer.com/news/security/fbi-warnings-are-true-fake-file-converters-do-push-malware/ INFO: Chcesz zamienić np. plik PDF na dokument Worda? No to masz problem, bo przypadkiem możesz natrafić na stronę, która zainfekuje Cię złośliwym oprogramowaniem. Oszuści tworzą strony imitujące legalne usługi do konwersji plików, ale zamiast przekonwertowanego dokumentu otrzymujesz z nich instalator malware.
30) osgint - narzędzie OSINT do wyszukiwania informacji o użytkownikach GitHuba https://github.com/hippiiee/osgint INFO: Prosta aplikacja do pobierania informacji o użytkownikach GitHuba na podstawie nazwy użytkownika lub adresu e-mail. Pozwala uzyskać dane takie jak ID konta, datę utworzenia, liczbę publicznych repozytoriów i gistów, a także ewentualne klucze GPG i SSH. Analizuje publiczne commit'y oraz dane z API GitHuba, aby maksymalnie zwiększyć skuteczność wyszukiwania.
31) Przydatne elementy HTML, które warto znać https://harrisonbroadbent.com/blog/cool-native-html-elements/ INFO: To kolejna porcja ciekawych, natywnych tagów z HTML, które pozwolą Ci uniknąć zbędnych zależności w JavaScript i CSS. Jak projektować okna modalne, akordeony, suwaki z podglądem wartości, paski postępu, itp. To wszystko można osiągnąć w czystym HTML-u.
== LINKI TYLKO DLA PATRONÓW ==
32) Jak hakować AWS - testy penetracyjne chmury dla pentesterów (film, 35m) https://uw7.org/un_b6b35a67ba79c INFO: Poziom złożoności usług na platformie AWS jest imponujący, co otwiera drzwi na nowe wektory ataków, które mogą wykorzystać agresorzy. Z tego krótkiego nagrania dowiesz się, na co warto zwrócić uwagę przy testowaniu zabezpieczeń swojego środowiska i jakich technik obecnie używają atakujący.
33) rozwiązanie pierwszych poziomów w Natas z OverTheWire https://uw7.org/un_064c583eaaee2 INFO: Opis przejścia przez pierwsze pięć poziomów w wyzwaniu Natas na platformie OverTheWire. Seria zadań dotyczących bezpieczeństwa po stronie serwera. Autor omawia wykorzystanie takich technik jak analiza źródła strony, manipulacja nagłówkami HTTP (m.in. Referer), przeszukiwanie struktur katalogów oraz plików konfiguracyjnych, a także użycie Burpa do przechwytywania zapytań. Dobre wprowadzenie do podstaw web security w praktyce, z cennymi wskazówkami nawet dla początkujących.
1 note
·
View note
Text
Besides paintings I'm working on 3D Engine for Raspberry Pi Pico 2.
Current functionalities:
1. It can render any model you want, but you have to implement function to create arrays with coords etc. I already have script to generate it out of obj file so I could add loading obj files. Right know I have cube and plane/square
2. Models has materials that can have some single color or texture.
3. Texture mapping
4. Flat shading (only single light source per model right now)
5. Light can have color and intensviity
6. Model can have defined list of transformations: translation, roatation and scaling.
7. Fixed point arithemtic instead of float based
1 note
·
View note
Text
Warum der Arduino trotz ESP32 & Co. nicht ausgedient hat

„Arduino? Das nutzt doch heute keiner mehr…“ Wer sich in den letzten Jahren mit Mikrocontrollern beschäftigt hat, stolpert überall über den ESP32. Dual-Core, WLAN, Bluetooth, 240 MHz, massig Speicher – und das alles für ein paar Euro. Kein Wunder also, dass der gute alte Arduino UNO im Schatten der neuen Mikrocontroller-Generation zu stehen scheint. Die Kommentare in Foren und Social Media klingen dann auch oft so: „Warum noch einen Arduino benutzen, wenn es doch den ESP32 gibt?“ Aber ist das wirklich so? Hat der Arduino tatsächlich ausgedient? Oder gibt es gute Gründe, auch heute noch auf den betagten Klassiker zu setzen? Und vor allem: Wenn ich gerade erst einsteige – sollte ich dann überhaupt noch mit einem Arduino anfangen, oder direkt auf einen ESP32 setzen? Genau um diese Fragen geht es in diesem Beitrag. Und so viel sei schon mal verraten: Leistung ist nicht immer alles.
ESP32 – das moderne Powerpaket (aber nicht für alles nötig)
Wenn man sich heute in der Maker-Szene oder auf YouTube umschaut, könnte man fast glauben, es gäbe nur noch den ESP32. Und das ist auch gar nicht so abwegig: Der ESP32 bringt schon ab Werk eine ganze Menge beeindruckender Features mit, die früher nur mit viel zusätzlicher Hardware möglich waren. 🔥 Ein kurzer Blick auf die Highlights: - Dual-Core mit bis zu 240 MHz - WLAN und Bluetooth direkt integriert - Bis zu 520 kB RAM und mehrere Megabyte Flash - Viele GPIOs, PWM, ADC, DAC, I2C, SPI, CAN, Touch-Sensoren, … - Bereits ab ca. 3 € (je nach Ausführung und Händler)
ESP32-S3-Matrix
ESP32-C3 mit LiPo Batterie
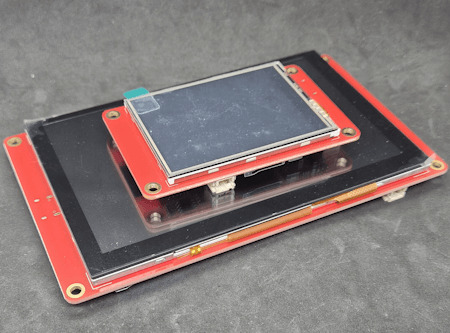
zwei Elecrow CrowPanels 2,4" & 5.0"
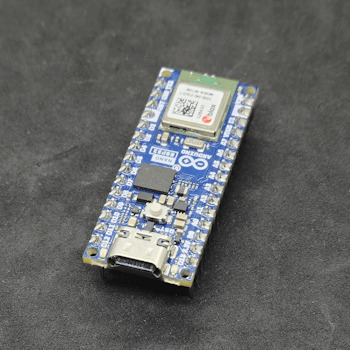
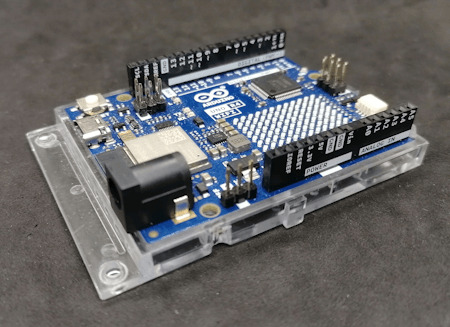
Arduino Nano ESP32
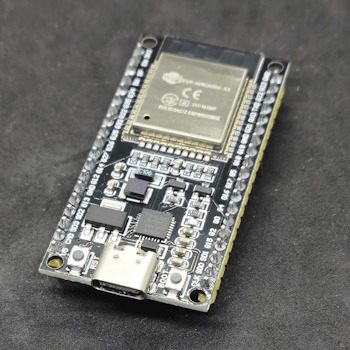
Generic-ESP32 Mikrocontroller

ESP32-C3 Super Mini

ESP32-S3-Zero Und dann wäre da noch ein echter Publikumsliebling: die ESP32-CAM.

Vergleich ESP32-CAM und ESP32-S3 CAM

ESP32-CAM mit externer Antenne und Board

ESP32-CAM

ESP32-CAM Modelle Für rund 5 € bekommt man hier nicht nur die Rechenpower des ESP32, sondern auch gleich eine kleine Kamera mit bis zu 5 Megapixeln dazu. Damit sind Projekte wie: - Überwachungskamera, - QR-Code-Scanner, - Fotos per E-Mail oder Telegram senden ganz einfach umsetzbar – ohne zusätzliche Hardware. Der Raspberry Pi Pico (RP2040) mischt kräftig mit – und bekommt Verstärkung Doch der ESP32 ist nicht allein auf dem Platz. Der Raspberry Pi Pico mit seinem RP2040 Dual-Core Cortex-M0+ Prozessor (133 MHz) hat sich schnell als leistungsfähige und günstige Alternative etabliert – und das in mehreren Varianten: BoardWLANBluetoothBesonderheitenRaspberry Pi Pico❌❌Basisversion, ohne FunkRaspberry Pi Pico W✅✅ (per Firmware)WLAN onboard, BT aktivierbarRP2350-Boards❌❌Mehr Power, keine Funkmodule (derzeit)


RP2040:bit
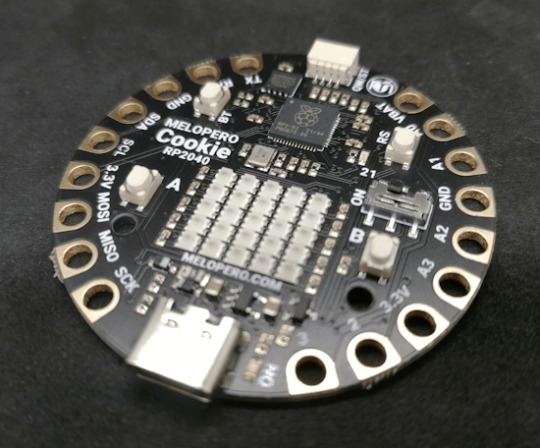
Melopero Cookie RP2040
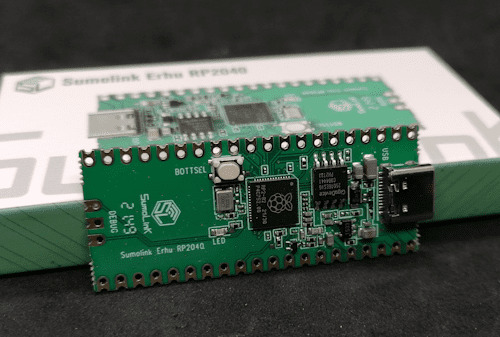
Sumolink Erhu RP240

Mikrocontroller - XIAO RP2040 & Raspberry PI Pico

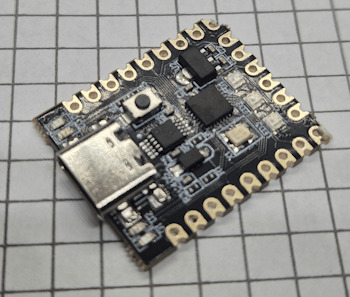
Raspberry Pi Pico 2 - RP2350A

XIAO RP2350 Mit dem neuen RP2350-Chip steht mittlerweile ein leistungsstärkerer Nachfolger in den Startlöchern. Er wird derzeit auf einigen neuen Boards verbaut (z. B. auf Prototypen oder Dev-Boards asiatischer Hersteller) und bringt: - Höhere Taktraten (bis 200 MHz möglich), - Verbesserte Peripherie, - Und bleibt trotzdem kompatibel zur RP2040-Familie. Was aktuell noch fehlt: WLAN und Bluetooth sind (noch) nicht integriert – was den Chip für reine IoT-Projekte (noch) weniger attraktiv macht, aber für USB-HID oder Highspeed-Sensoranwendungen interessant sein kann.
Arduino – Der Klassiker mit Kultstatus (und vielen Gesichtern)
Wenn man „Arduino“ sagt, denken viele sofort an das gute alte Original: Arduino UNO R3, Made in Italy, stabil, bewährt – aber auch nicht ganz billig. Und genau da beginnt der kleine Konflikt, den vermutlich viele kennen: ➡️ Das originale Board unterstützt die Plattform, die Entwicklung und das Open-Source-Projekt. ➡️ Aber: Der Preis liegt oft bei 20 € und mehr – während Clones für 2–3 € zu haben sind. Doch: Genau das ist eben auch der Spirit von Open Source. Die Arduino-Plattform wurde so entwickelt, dass jeder (mit Einhaltung gewisser Auflagen) eigene Boards bauen und verkaufen darf. Und das tun viele Hersteller – vor allem in Asien. Dabei gibt es längst nicht nur einfache UNO- oder Nano-Kopien. Die Vielfalt an Arduino-kompatiblen Boards ist inzwischen riesig: Board / CloneBesonderheitPreisbereichNano Clone (CH340G)Klassiker für einfache Projekte2–4 €Pro MiniOhne USB, super klein und sparsam2–4 €Nano mit integriertem OLEDAnzeige direkt am Mikrocontroller4–8 €Nano mit 2,4 GHz Funk (nRF24L01) oder 433 MHz ModulIdeal für Funkprojekte ohne WLAN5–10 €Nano mit ESP8266-Modul onboardWLAN-fähig, bleibt aber Arduino-kompatibel5–10 €Nano mit Bluetooth HC-05 oder HM-10Kabellose Kommunikation über BT Classic oder BLE5–10 €

Arduino Nano mit nRF24L01 Erweiterungsboard

Microcontroller BLE-Nano von Keywish

Arduino UNO R3
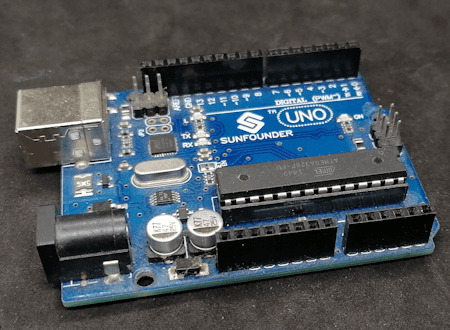
Arduino UNO R3 Clone von der Firma Sunfounder


Arduino Nano V3 , ATmega328P

Arduino Mega 2560 Pro mini

Arduino Nano V3
Seeeduino Nano Gerade diese Vielfalt an spezialisierten Clones und Abwandlungen ist ein echter Vorteil: Man wählt sich für sein Projekt genau die Features, die man braucht – und spart sich den Ballast von Funktionen, die gar nicht benötigt werden. ➡️ Keine WLAN-Probleme, wenn das Projekt gar kein WLAN braucht. ➡️ Keine Bluetooth-Komplexität, wenn ein simples Relais geschaltet werden soll. ➡️ Aber: Wenn ein Display gewünscht ist, einfach ein Clone mit integriertem OLED nehmen. Teures Original oder günstiger Clone? Das Original aus Italien unterstützt natürlich die Entwickler, die die Plattform erst möglich gemacht haben. Gerade wenn es um professionelle Projekte, Support oder Weiterentwicklung geht, ist das ein guter Grund, auch mal bewusst zum Original zu greifen. Wer dagegen einfach ein kleines Hobby-Projekt umsetzt oder ein günstiges Board für Lernzwecke sucht, wird vermutlich bei einem Clone aus Fernost landen – und das ist auch okay so. Beides hat seine Berechtigung. Im nächsten Abschnitt schauen wir uns an, warum diese Einfachheit und Flexibilität dem Arduino einen Platz auf dem Basteltisch gesichert haben – auch wenn ESP32, RP2040 & Co. daneben liegen. Clone statt Frust: Warum gerade Anfänger mit günstigen China-Boards besser fahren Seien wir ehrlich: Wer mit Mikrocontrollern anfängt, wird früher oder später mal einen Fehler machen. Ein Kabel verpolt, einen Pin aus Versehen kurzgeschlossen, eine Lötstelle zu heiß… ➡️ Passiert. Gehört zum Lernen einfach dazu. Wenn dann das teure Original-Board abraucht, ist der Frust groß – und das Projekt vielleicht erst mal gestorben. Anders sieht es aus, wenn das eingesetzte Board nur 2–3 € gekostet hat. Dann bestellt man sich einfach ein neues und weiter geht’s. Genau deshalb finde ich: ➡️ Gerade Anfänger sind mit einem günstigen Clone gut beraten. Das senkt die Hemmschwelle, etwas auszuprobieren, und macht es viel leichter, aus Fehlern zu lernen. Ob Arduino Nano Clone, Pro Mini oder einer der vielen China-Nachbauten mit Zusatzfeatures wie OLED oder Funk – hier kann man für kleines Geld experimentieren, lernen und Spaß haben. Und wenn das Projekt später stabil läuft und vielleicht sogar „ernsthaft“ eingesetzt werden soll, kann man immer noch überlegen, ob man auf ein höherwertiges Original umsteigt.
Wann ESP32, wann Arduino? – Entscheidungshilfe für Projekte
Natürlich ist es immer verlockend, einfach zum leistungsstärksten Mikrocontroller zu greifen. Aber genau das ist oft gar nicht nötig – und manchmal sogar umständlicher. Denn: Der beste Mikrocontroller ist der, der genau das kann, was dein Projekt braucht – nicht mehr und nicht weniger. Um dir die Wahl etwas leichter zu machen, hier eine kleine Entscheidungshilfe: ProjektideeEmpfehlungWarum?Blinkende LEDs, Relais steuern, Taster abfragenArduino UNO, Nano, Pro MiniEinfach, stabil, günstig, kein OverkillLCD/OLED-Anzeige mit Temperatur-/FeuchtesensorArduino oder PicoWLAN meist nicht nötig, einfache UmsetzungDaten per WLAN ins Netz (z. B. ThingSpeak, MQTT)ESP32, Pico WWLAN/BT bereits integriert, viele Beispiele vorhandenMobile Projekte mit Akku und langer LaufzeitPro Mini (mit LowPower-Mod) oder ESP32 mit Deep SleepStromsparend, je nach FunkbedarfKamera-Projekte (Foto/Video-Streaming)ESP32-CAMKamera onboard, einfache EinbindungUSB-Tastatur-Emulation, MacroPads, HID-GeräteArduino Leonardo / Micro oder Raspberry Pi Pico (RP2040)Beide unterstützen native USB-HIDFunkprojekte ohne WLAN (z. B. 433 MHz, nRF24L01)Arduino Nano Clone mit FunkmodulKein unnötiges WLAN, einfache FunkanbindungEchtzeitkritische Anwendungen mit viel GPIO und TimingRP2040 oder RP2350Schnelles Realtime-Processing dank PIO, viele GPIOs 💡 Zusatz-Tipp: Für USB-Tastatur-Emulation (z. B. MacroPads oder automatisierte Eingaben) ist der Arduino Leonardo eine super Wahl, weil er den ATmega32u4 verwendet, der USB nativ unterstützt. Alternativ funktioniert das auch mit dem Arduino Micro oder dem Raspberry Pi Pico (RP2040), dort oft über die TinyUSB-Bibliothek.

Keyestudio Leonardo

Arduino Leonardo Clone

Mini RP2040 Developmentboard
Fazit: Alt, aber alles andere als nutzlos!
Ja, der ESP32 ist ein echtes Powerpaket. Ja, der Raspberry Pi Pico (RP2040) mischt kräftig mit und hat auch seinen Platz auf dem Basteltisch. Und ja – es gibt mittlerweile zig Alternativen mit WLAN, Bluetooth, Kamera, HID und noch viel mehr. Aber: Gerade das macht den guten alten Arduino so sympathisch: Er will gar nicht alles können – sondern einfach das, was man für viele kleine bis mittlere Projekte wirklich braucht. Ein Relais schalten? Ein paar LEDs blinken lassen? Einen Sensor auslesen und auf dem Display anzeigen? ➡️ Warum dafür einen Dual-Core mit WLAN bemühen, wenn es ein Nano für 3 € auch tut? Und genau das ist der Punkt: 🔹 Der Arduino ist einfach. 🔹 Er ist stabil. 🔹 Er hat eine riesige Community und viele erprobte Bibliotheken. 🔹 Er eignet sich perfekt zum Lernen – und bleibt auch danach oft die pragmatische Wahl. Gerade Anfänger profitieren enorm davon, sich nicht direkt mit komplexen Themen wie WiFi-Stack, Sleep-Modes oder USB-Treiberherausforderungen herumschlagen zu müssen. Und: Auch fortgeschrittene Bastler greifen gerne zum „alten Bekannten“, wenn es mal schnell, unkompliziert und robust sein soll. Mein Fazit: Der Arduino hat seinen festen Platz – auch im Jahr 2025. Nicht überall, aber da, wo „Keep it simple“ gefragt ist, ist er oft genau die richtige Wahl. ➡️ ESP32, RP2040 & Co. sind keine Gegner – sie sind Mitspieler im Team der Mikrocontroller. Die Kunst ist es, je nach Projekt den passenden Baustein auszuwählen. Jetzt bist du dran! Arbeitest du noch mit dem Arduino? Oder hast du komplett auf ESP32, RP2040 & Co. umgestellt? Welche Projekte hast du schon umgesetzt – und welcher Mikrocontroller war dafür die beste Wahl? 👉 Schreib es mir gerne in die Kommentare – ich freue mich auf den Austausch! Read the full article
0 notes