#retropie raspberry pi
Explore tagged Tumblr posts
Visit Tumblr Blog
Explore Tumblr blogs with no restrictions, modern design and the best experience.
Last Seen Tumblr Blogs


Fun Fact
BuzzFeed published a report claiming that Tumblr was utilized as a distribution channel for Russian agents to influence American voting habits during the 2016 presidential election in Feb 2018.
Text

My old Radio Shack DVM displays "Shrt" for short circuit in continuity test mode. In this case I read it as 'Shit', because I somehow managed to fry this Raspberry Pi as I was trying to shoehorn it into one of those cheapo Walmart GoGamer handheld cases. I was 90% done but I think it must have gotten some wire trims on the bench stuck in it somewhere. Sloppy work on my part, my bad.
86 notes
·
View notes
Text
Going to kiss my Raspberry pi for spending more time installing more things onto it than actually playing games on it as an apology.
I love you, bbp, but I need to install Ship of Harkinian onto anything with a screen.
4 notes
·
View notes
Text
youtube
This is really impressive. Dude basically built an entire retro-style cable TV network into a raspberry pi. It handles everything: proper scheduling, channel guides, ad breaks, station IDs, the whole shebang.
Not only that, but he built it with such specificity that you can have not only seasonal programming (sports at certain times of years, or holiday movies), but even content-appropriate ads: beer commercials during football, or 1-900 numbers during late night programming. He also mentions setting up several cartoon channels that either switch to retro syndicated TV (Nick at Nite) or adult oriented cartoons (Adult Swim) after 6pm.
A RetroPi for emulators is interesting but I feel like if I ever get a Raspberry Pi, I'd want to do something like this with it. I'm just left wondering:
Are all channels simultaneously active all the time? I suppose if you're stringent about everything being a specific length (for scheduling) it wouldn't be that hard to just calculate how far past the hour you were and join a program already in progress, I'm mainly just worried about how often this thing is hitting the SD card and whether too many channels could overload the Pi.
I feel like adbreaks are going to be the biggest problem. Going by the video, it looks like ad breaks are evenly spaced out and probably completely automated. That's not always how TV was structured, and I worry it could splice in an ad break in the middle of dialog or an important scene. If it were me, I'd probably set a "we need a commercial break" flag and look for when a show goes quiet and fades to black for longer than, I dunno, half a second.
The github page implies that it does kind of pick shows at random. I'm sure if he built in specific times of day and seasonal content you could just build out detailed programming blocks (X-Files on Friday night at 8pm, every Friday) but I wonder how much randomness is built into this system. From a structure standpoint it feels like it would be easy to throw an entire series at this thing and have it build out specific time slots and rotate through programming, in order, automatically. Maybe it does, if he has a guide channel, since it would have to know what's coming up next. I just don't want things playing out of order.
It's stressed that this is still early yet, and not exactly user friendly to set up, but man. I am fascinated and want one really badly now.
#television#raspberry pi#tv#schedule#cable#cable tv#diy#python#I wanted to make something like this for internet radio once#Youtube
10 notes
·
View notes
Text

* Un RetroPie armado con una Raspberry Pi 3 con su case de Super Nintendo.
* Un Nintendo 64 modificado con mod HDMI, controles inalámbricos y un cartucho que es un lector SD para cargar juegos.
*Un GameCube con mod PicoBoot, que también corre sus juegos desde un disco SD.
Y sí... el N64 y el GameCube tienen carcasas fosforescentes ¡para que se note que están bien pimpeados! 😎💚💜
1 note
·
View note
Text
I spent over 100 hours over the course of 3 weeks building a RetroPie Emulator Box on a Raspberry Pi 3b+ as a Christmas gift for my brother in law. Either earlier today or yesterday it was basically perfect and just needed some polish, but I had to get too ambitious. I wanted to get it running Nintendo 64 and Sega CD games, so I needed a controller with more buttons, so I started messing with connecting an XBOX One and Switch Pro controller via Bluetooth and still never got N64 games emulating properly.
But SOMEWHERE along the way I FUCKED up the controller mapping for the 8bitdo Arcade stick with some (but not all!) of the Fighting arcade games running in mame2003-plus WHICH WAS THE WHOLE POINT NO ONE CARES ABOUT NINTENDO 64 WHEN THERE'S AN ARCADE EMULATOR!
Anyways it just became Christmas like the hour rolled over to midnight 00:00 Christmas Day and I'm going to attempt to rebuild 3 weeks worth of work in 8 hours with a fresh RetroPie image but I already have all the scraped video previews and gamelists backed up so... it should be doable. We shall see.
6 notes
·
View notes
Text
Raspberry Pi Board: Revolutionizing Computing and Education
The Raspberry Pi board is a series of small, affordable single-board computers developed by the Raspberry Pi Foundation, a UK-based charity focused on promoting computer science education and digital literacy. Since its launch in 2012, the Raspberry Pi has transformed from a niche educational tool into a versatile platform used in a wide range of applications, from DIY electronics projects to industrial automation.
A Brief History
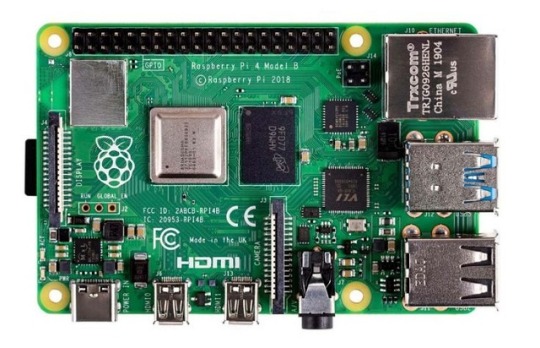
The first Raspberry Pi, the Model B, was released in February 2012. Designed to promote basic computer science in schools and developing countries, it featured a 700 MHz ARM11 processor, 256 MB of RAM, and basic connectivity options. The success of the Model B led to a rapid expansion of the Raspberry Pi lineup, with various models offering improved performance, more memory, and enhanced connectivity.
Key Features and Models
Raspberry Pi 1 Model B (2012):
Processor: 700 MHz ARM11
Memory: 256 MB RAM
Ports: 2 USB 2.0 ports, HDMI, Composite video, 3.5mm audio jack, Ethernet
Storage: SD card slot
Raspberry Pi 2 Model B (2015):
Processor: 900 MHz quad-core ARM Cortex-A7
Memory: 1 GB RAM
Ports: 4 USB 2.0 ports, HDMI, Composite video, 3.5mm audio jack, Ethernet
Storage: MicroSD card slot
Raspberry Pi 3 Model B (2016):
Processor: 1.2 GHz quad-core ARM Cortex-A53
Memory: 1 GB RAM
Ports: 4 USB 2.0 ports, HDMI, Composite video, 3.5mm audio jack, Ethernet
Wireless: Wi-Fi and Bluetooth
Raspberry Pi 4 Model B (2019):
Processor: 1.5 GHz quad-core ARM Cortex-A72
Memory: Options of 2 GB, 4 GB, and 8 GB RAM
Ports: 2 USB 3.0 ports, 2 USB 2.0 ports, 2 Micro HDMI ports, Ethernet, USB-C for power
Wireless: Wi-Fi and Bluetooth
Raspberry Pi Zero (2015) and Zero W (2017):
Processor: 1 GHz single-core ARM11
Memory: 512 MB RAM
Ports: Mini HDMI, Micro USB OTG, Micro USB for power, GPIO pins
Wireless (Zero W): Wi-Fi and Bluetooth
Applications and Uses
The versatility of the Raspberry Pi has led to its adoption in numerous fields:
Education:
Coding and Programming: Used in schools and educational programs to teach students programming languages such as Python, Scratch, and Java.
Computer Science Concepts: Introduces concepts like hardware, software, and networking.
DIY Projects and Maker Community:
Home Automation: Controls smart home devices, including lights, thermostats, and security systems.
Media Centers: Powers home media centers using software like Kodi.
Retro Gaming: Emulates classic gaming consoles using software like RetroPie.
Industrial and Commercial Applications:
IoT Devices: Serves as a hub for Internet of Things (IoT) devices, enabling data collection and remote control.
Automation and Control Systems: Used in factories and labs for monitoring and controlling equipment.
Research and Development:
Prototyping: Facilitates rapid prototyping of electronic devices and systems.
Data Collection: Gathers data from various sensors in environmental and scientific research.
Community and Ecosystem
The Raspberry Pi has cultivated a vibrant global community of developers, hobbyists, educators, and students. Online forums, tutorials, and community projects provide extensive support and resources for users at all skill levels. The Raspberry Pi Foundation also offers official accessories, including cases, cameras, and expansion boards, further enhancing the functionality of the Raspberry Pi.
Conclusion
The Raspberry Pi board has revolutionized the way people learn about and interact with technology. Its affordability, versatility, and extensive support network have made it an indispensable tool in education, DIY projects, and professional applications. As technology continues to evolve, the Raspberry Pi Foundation remains committed to expanding the capabilities and accessibility of this remarkable platform, ensuring that computing remains within reach for everyone.
3 notes
·
View notes
Video
youtube
Construye tu Máquina Arcade DIY con RASPBERRY PI y RETROPIE
0 notes
Text
Upgrades, upgrades, upgrades
It has been quite a while since the last update, but yes, PiCade still lives, or should I say lives again? It moved to another town, got our toddler's curiosity and with that at some point buttons stopped working as she found she could flip the power switch on, off, on, off, on, off, etc... so to revive, first step was to install a second main power switch override on top:

After this, I opened up Picade to see what was up. One of the wires actually came loose, so probably unrelated to our little girl's fun time with the pretty switch ;) But now that I opened up PiCade, why not upgrade? I had a Raspberry Pi 4 with RetroPie installed that I used at my then girlfriend's place (now the mother of our daughter and my wife) and found this nice USB pcb board/interface (Dragonrise USB zero delay for those interested) that allows easy connection of buttons and joystick to a Pie. So ordered the USB interface and installed the new Pie:


Retropie is a breeze to install and actually can scrape box art and descriptions of each rom from the web. So shortly after installation PiCade was back and up and running again.

I did need an extra 'hotkey' to be able to exit games in Retropie, so ordered it, installed it at the front of the cabinet and replaced the stickers while I was at it.
After playing around with the new setup, I also realised having the ability to connect USB sticks and/or keyboard for maintenance/adding more roms on the front of the cabinet would be useful, so I also installed a socket at the botttom of the controls part:

This also allows second controllers to be added for multiplayer play. I now have a USB NES, SNES and Megadrive controller to this purpose.
Playing around more, I noticed that in the current setup playing SNES and Megadrive games would only be possible if I added 'shoulder' buttons, so another upgrade was ordered and, due to the simple USB interface, easily installed as well:

Now for the final upgrade, I was browsing around on some arcade-shops and saw buttons that were lit... literally. I remembered that the USB interface also had three 5v connections options, so on my birthday wish list were LED buttons and a daisy chain cable to connect it all. My wish got granted recently and after an evening of tedious fiddling (and rewiring everything again after realising red in this case was NOT the positive lead), this was the wirey mess on the inside:

But look at this final glorious upgrade from the outside:

So, yes PiCade is still alive and better than ever.
1 note
·
View note
Text
Which Old Gaming OS Should You Use?
summary RetroPie, Batocera, and Lakka all run on a simplified Linux operating system and focus on retro games, which increases the hardware resources of the emulators. RetroPie works best on Raspberry Pi but is limited, Batocera is easy to use and works on different devices, while Lakka offers the most customization for power users. Both Batocera and Lakka can be run in direct USB mode, allowing…
0 notes
Text
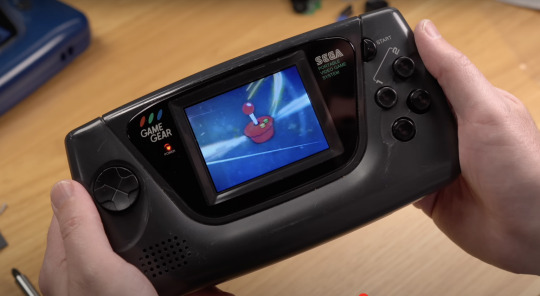
Our Compute Module 4 isn’t just for industrial applications. Turns out it can also resurrect childhood memories. Jeff Geerling blended sentimentality and innovation by sneaking one inside an old SEGA Game Gear to bring it, and his memories of Christmases past, back to life.
youtube
I do so like Jeff’s build video for the extra effort he put into finding the *exact* TV commercials that made us absolutely resolute that we must get a Game Gear for Christmas
Though the Game Gear was often seen as the poor cousin of the Game Boy, it still offered approximately 390 games. Not enough to satiate some modern gamers’ desires, however, so Jeff found a thoroughly 21st-century workaround.
RetroPie to the rescue
Compute Module 4 is running RetroPie inside a salvaged Game Gear handset, giving the user access to as many classic games as the innards of their machine will allow. Jeff explains in his build video that he could have used a Raspberry Pi Zero 2 W or a 3A+, which would draw less power but wouldn’t be quite as fast.
Custom modding kit
Jeff found a used, broken Game Gear handset online, and turned to John Maddison’s Zega Mame Boy, a Game Gear modding kit designed for use with Raspberry Pi, to help with the transformation. A smaller, more powerful audio board stepped in to improve the Game Gear’s sound. He also got a new screen and some fresh buttons from Hand Held Legend to disguise the battle scars from hours and hours of use in the handset’s previous life. I know from personal experience that your screen will get scratched if you throw your Game Boy at the wall every time you fail to complete the Bowser’s Castle level in Super Mario Bros.
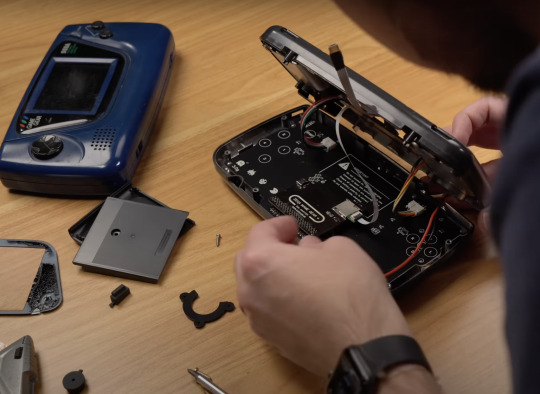
The Zega Mame Boy PCB slips straight into the Game Gear’s shell
With more time, Jeff would have addressed the battery life issue and swapped out the device’s original battery for something a bit punchier.

JEFF YOUR FINGERS
Anyone got a time machine?
Using Raspberry Pi to bridge the gap between past and present is one of our favourite things. If 2003-me had known that 2024-me could use my hot pink Game Boy Mini to play any retro game I wanted, I would’ve kept hold of it. Alas, off to eBay I go to source another one.
#youtube#sega#game gear#sega game gear#compute module 4#jeff geerling#game news#handheld#console#sega console
0 notes
Text
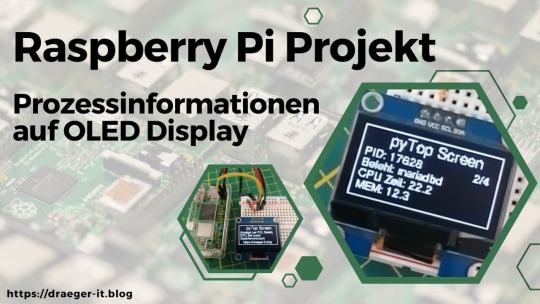
Raspberry Pi Projekt: Prozessinformationen auf OLED Display anzeigen
Wie du am Raspberry Pi ein OLED Display anschließt und programmierst, habe ich dir bereits gezeigt. Im heutigen Beitrag soll es darum gehen wie du Prozessinformationen auf dem OLED Display visualisierst. Es ist hier empfehlenswert ein großes Display zu verwenden, da die Daten, welche angezeigt werden sollen, doch recht umfangreich sind (oder man muss Abstriche bei den Daten machen). https://youtu.be/nOQnx6_ekVE Für diesen Beitrag verwende ich den Raspberry Pi Zero 2 WH, da mein eigentlich für solche Beiträge verwendete Raspberry Pi 3b+ nun in ein RetroPi verwandelt wurde. Jedoch steht der kleine Pi Zero 2 dem großen in nichts nach und kann für solche Projekte ebenso verwendet werden und du kannst dieses auch auf dein Pi nachbauen.
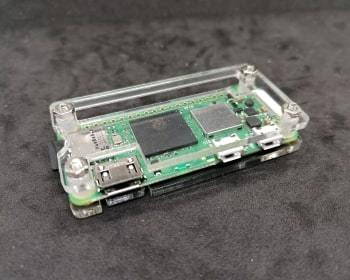
Acrylgehäuse für den Raspberry Pi Zero
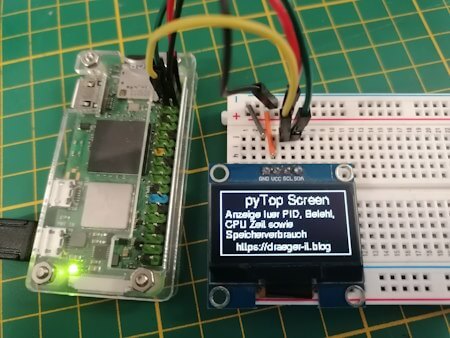
Splashscreen des Python Projektes - "pyTop Screen"
Daten aktuellen Prozessen auf dem OLED-Display Die Idee zu diesem Beitrag kommt aus einem Kommentar zu meinem YouTube-Video OLED Display am Raspberry Pi anschließen und per I2C steuern: So geht’s!. Ich bin immer froh, wenn solch Input aus meiner Community kommt und ich damit euch helfen kann und ich ebenso neuen Content generieren kann.
Benötigte Ressourcen für dieses Projekt
Wenn du dieses kleine Projekt nachbauen möchtest, dann benötigst du: - einen Raspberry Pi* inkl. Netzteil, SD-Karte etc., - ein OLED Display mit I2C Anschluss*, - ein paar Breadboardkabel*, - ein 400 Pin Breadboard* Hinweis von mir: Die mit einem Sternchen (*) markierten Links sind Affiliate-Links. Wenn du über diese Links einkaufst, erhalte ich eine kleine Provision, die dazu beiträgt, diesen Blog zu unterstützen. Der Preis für dich bleibt dabei unverändert. Vielen Dank für deine Unterstützung!
Was soll dargestellt werden?
Auf dem Display möchte ich die laufenden Prozesse darstellen, diese kann man sich recht einfach über den Befehl top anzeigen lassen. pi@raspberrypi:~ $ top top - 10:27:00 up 1:27, 1 user, load average: 0,07, 0,06, 0,09 Tasks: 194 total, 1 running, 193 sleeping, 0 stopped, 0 zombie %CPU(s): 0,5 us, 0,6 sy, 0,0 ni, 98,8 id, 0,1 wa, 0,0 hi, 0,0 si, 0,0 st MiB Spch: 426,7 total, 102,6 free, 132,7 used, 191,5 buff/cache MiB Swap: 100,0 total, 7,6 free, 92,4 used. 229,0 avail Spch PID USER PR NI VIRT RES SHR S %CPU %MEM ZEIT+ BEFEHL 17628 mysql 20 0 614080 67592 9212 S 1,3 15,5 3:49.26 mariadbd 22393 pi 20 0 11476 3204 2612 R 1,3 0,7 0:01.13 top 839 zabbix 20 0 128416 3552 2988 S 0,3 0,8 0:01.97 zabbix_server 857 zabbix 20 0 132984 2092 1808 S 0,3 0,5 0:00.36 zabbix_server 1 root 20 0 34948 5260 3568 S 0,0 1,2 0:28.14 systemd 2 root 20 0 0 0 0 S 0,0 0,0 0:00.03 kthreadd 3 root 0 -20 0 0 0 I 0,0 0,0 0:00.00 rcu_gp 4 root 0 -20 0 0 0 I 0,0 0,0 0:00.00 rcu_par_gp 5 root 0 -20 0 0 0 I 0,0 0,0 0:00.00 slub_flushwq 6 root 0 -20 0 0 0 I 0,0 0,0 0:00.00 netns 10 root 0 -20 0 0 0 I 0,0 0,0 0:00.00 mm_percpu_wq Jedoch interessieren mich hier nur die Werte, PID, %CPU, %MEM sowie der BEFEHL. Da wir diese Daten in Python weiterverarbeiten möchten, exportieren wir diese Daten mit einem Befehl in eine Semikolonseparierte CSV-Datei. (Das Komma wird in den Daten für die Gelitkommazahlen verwendet!) echo "PID;Befehl;CPU Zeit;Speicherverbrauch" > prozesse.csv && top -b -n 1 | awk 'NR > 7 { print $1 ";" $12 ";" $9 ";" $10 }' >> prozesse.csv Damit erhalten wir wie gewünscht lediglich die Daten für die Spalten PID, %CPU, %MEM, BEFEHL. PID;Befehl,CPU Zeit,Speicherverbrauch 22545;top;111;0,7 1;systemd;0,0;1,2 2;kthreadd;0,0;0,0 3;rcu_gp;0,0;0,0 4;rcu_par_gp;0,0;0,0;
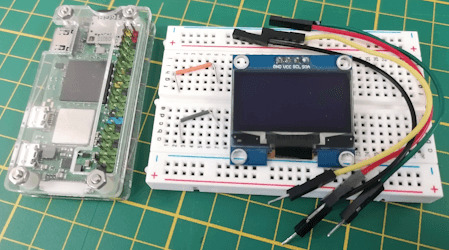
Aufbau der Schaltung - Raspberry Pi mit OLED Display
Wie bereits erwähnt baue ich die Schaltung am Raspberry Pi Zero 2 WH auf, du kannst diese aber ebenso am normalen Raspberry Pi nachbauen (solltest jedoch zusätzlich auf das ggf. geänderte Pinout achten).
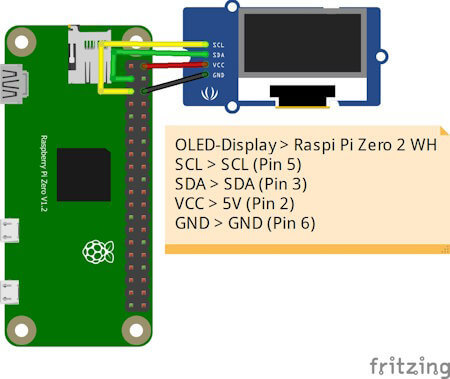
OLED-DisplayRaspberry Pi Zero 2 WHVCC5V (Pin 2)GNDGND (Pin 6)SDASDA (Pin 3)SCLSCL (Pin 5)
Python Skript im Hintergrund laufen lassen
Ich möchte das kleine Skript einmal starten und dann über die Tasten Funktionen ausführen können, während ich gleichzeitig weiterhin im geöffneten Terminalfenster arbeite. Deshalb soll das Skript im Hintergrund laufen. Es gibt hier mehrere Möglichkeiten, in diesem Beitrag möchte ich die einfachste nutzen und hänge lediglich ein & Zeichen an den Befehl und als Rückgabe erhalte ich eine PID. Mit dieser Prozess-ID kann ich dieses Skript auch jederzeit mit dem Befehl kill beenden. pi@raspberrypi:~/Python/DisplayTop $ python3 displayHello.py & 23467 pi@raspberrypi:~/Python/DisplayTop $ kill 23467 pi@raspberrypi:~/Python/DisplayTop $
Programmieren des Skriptes zum anzeigen der laufenden Prozesse
Starten wir nun und lassen die laufenden Prozesse auf dem OLED Display am Raspberry Pi anzeigen. Das Skript erstellen wir iterativ und nach jedem Schritt hast du quasi ein kleines lauffähiges Skript mit einer zusätzlichen Funktion. Schritt 1 - Willkommensnachricht anzeigen Im ersten Schritt lassen wir auf dem Display zunächst einen Text anzeigen, welcher kurz erläutert welche Daten angezeigt werden. import time from luma.core.interface.serial import i2c, spi, pcf8574 from luma.core.interface.parallel import bitbang_6800 from luma.core.render import canvas from luma.oled.device import sh1106 from PIL import ImageFont serial = i2c(port=1, address=0x3C) device = sh1106(serial) fontBig = ImageFont.truetype('FreeSans.ttf', 14) fontNormal = ImageFont.truetype('FreeSans.ttf', 10) while True: with canvas(device) as draw: draw.rectangle(device.bounding_box, outline="white", fill="black") draw.text((25, 3), "pyTop Screen", font=fontBig, fill="white") draw.text((5, 20), "Anzeige fuer PID, Befehl,", font=fontNormal, fill="white") draw.text((5, 30), "CPU Zeit sowie", font=fontNormal, fill="white") draw.text((5, 40), "Speicherverbrauch", font=fontNormal, fill="white") In meinem Fall nutze ich ein 1.3" OLED Display und musste die Schriftgröße auf 14 & 10 setzen. Hier gilt wie zuvor ein möglichst großes Display zu verwenden.
Splashscreen des Python Projektes - "pyTop Screen" Schritt 2 - exportieren der laufenden Prozesse als CSV Datei In einem Abschnitt zuvor habe ich dir gezeigt, wie der Befehl lautet, um die benötigten Daten der laufenden Prozesse in eine CSV Datei zu schreiben. Diesen wollen wir jetzt alle 2 Minuten ausführen. Damit wir eine Funktion im Hintergrund laufen lassen können, benötigen wir zusätzlich das Modul "schedule" dieses muss über den Befehl "python3 -m pip install schedule" installiert werden. pi@raspberrypi:~/Python/DisplayTop $ python3 -m pip install schedule Looking in indexes: https://pypi.org/simple, https://www.piwheels.org/simple Collecting schedule Downloading https://www.piwheels.org/simple/schedule/schedule-1.2.1-py3-none-any.whl (11 kB) Installing collected packages: schedule Successfully installed schedule-1.2.1 pi@raspberrypi:~/Python/DisplayTop $ import subprocess import schedule import time ... def loadProcessInformations(): command = 'echo "PID;Befehl;CPU Zeit;Speicherverbrauch" > prozesse.csv && top -b -n 1 | awk 'NR > 7 { print $1 ";" $12 ";" $9 ";" $10 }' >> prozesse.csv' subprocess.run(command, shell=True) loadProcessInformations() schedule.every(2).minutes.do(loadProcessInformations) ... while True: schedule.run_pending() Wenn wir das Skript ausgeführt wird, dann wird im aktuellen Verzeichnis die Datei "prozesse.csv" mit einem auszug der Daten von top angezeigt. pi@raspberrypi:~/Python/DisplayTop $ python3 pyTopScreen.py & 24037 pi@raspberrypi:~/Python/DisplayTop $ ls -ll insgesamt 12 -rw-r--r-- 1 pi pi 4987 21. Apr 11:43 prozesse.csv -rw-r--r-- 1 pi pi 1242 21. Apr 11:38 pyTopScreen.py pi@raspberrypi:~/Python/DisplayTop $ Schritt 3 - Parsen der CSV Datei in ein Dictionary Für einen einfachen Zugriff auf die exportierten Daten, parsen wir die CSV Datei in ein Dictionary. Es interessieren mich jedoch nur laufende Prozesse, diese haben eine CPU Zeit und einen Speicherverbrauch größer 0. import csv ... def loadProcessInformations(): command = 'echo "PID;Befehl;CPU Zeit;Speicherverbrauch" > prozesse.csv && top -b -n 1 | awk 'NR > 7 { print $1 ";" $12 ";" $9 ";" $10 }' >> prozesse.csv' subprocess.run(command, shell=True) prozesse_dict = {} with open('prozesse.csv', 'r') as file: csv_reader = csv.DictReader(file, delimiter=';') for row in csv_reader: pid = row cpu_zeit = float(row.replace(',', '.')) speicherverbrauch = float(row.replace(',', '.')) if cpu_zeit > 0 and speicherverbrauch > 0: befehl = row prozesse_dict = {'Befehl': befehl, 'CPU Zeit': cpu_zeit, 'Speicherverbrauch': speicherverbrauch} print(prozesse_dict) Immer wenn die neuen Daten geladen werden, werden diese zusätzlich im Terminalfenster ausgegeben. pi@raspberrypi:~/Python/DisplayTop $ python3 pyTopScreen.py { '24261': {'Befehl': 'python3', 'CPU Zeit': 100.0, 'Speicherverbrauch': 3.2}, '24530': {'Befehl': 'top', 'CPU Zeit': 5.9, 'Speicherverbrauch': 0.7} } Schritt 4 - Anzeigen der Prozessinformationen auf dem OLED Display am Raspberry Pi Kommen wir nun zum letzten Schritt und lassen die Prozessinformationen auf dem OLED Display anzeigen. Dazu müssen wir unseren bisherigen Code etwas anpassen, denn das Dictionary muss global abgelegt werden. prozesse_dict = {} def loadProcessInformations(): ... global prozesse_dict ... In der Endlosschleife in welchem der Code zum anzeigen der Daten wiederholt wird, legen wir dann eine For-Each-Schleife an welche über das Dictionary mit den Daten läuft. while True: schedule.run_pending() total = len(prozesse_dict) index = 1 for entry in prozesse_dict: showProcessEntry(entry, index, total) index += 1 time.sleep(2) Als Nächstes legen wir dann eine neue Funktion an welche einen Eintrag aus diesem Dictionary behandelt, bzw. wir übergeben lediglich die ID (die Prozess-ID / PID), zusätzlich wird noch die länge des Dictionarys sowie der aktuelle Index als Parameter übergeben (diese beiden Daten werden oben rechts im Display angezeigt). def showProcessEntry(entry, index, total): with canvas(device) as draw: draw.rectangle(device.bounding_box, outline="white", fill="black") draw.text((25, 3), "pyTop Screen", font=fontBig, fill="white") draw.text((105, 20), str(index) + "/"+ str(total), font=fontNormal, fill="white") draw.text((5, 20), "PID: "+ str(entry), font=fontNormal, fill="white") draw.text((5, 30), "Befehl: "+prozesse_dict, font=fontNormal, fill="white") draw.text((5, 40), "CPU Zeit: "+str(prozesse_dict), font=fontNormal, fill="white") draw.text((5, 50), "MEM: "+str(prozesse_dict), font=fontNormal, fill="white") Damit ist nun unser kleines Programm fertig und wir erhalten nun die Ausgabe der aktuellen Prozesse auf dem OLED-Display.
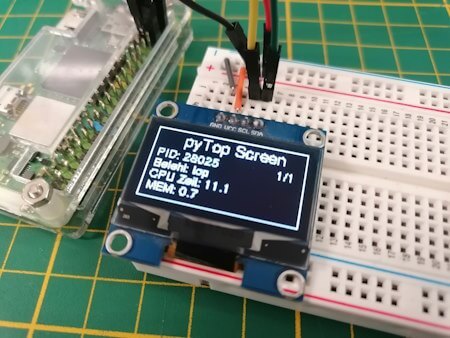
Daten aktuellen Prozessen auf dem OLED-Display Das fertige Python Skript zum anzeigen der Prozessinformationen auf einem OLED-Display Hier nun das fertige Python Skript als ZIP-Datei zum download. Programm - "pyTop-Screen" für das Anzeigen von Prozessinformationen auf einem OLED-DisplayHerunterladen import csv import subprocess import schedule import time from luma.core.interface.serial import i2c, spi, pcf8574 from luma.core.interface.parallel import bitbang_6800 from luma.core.render import canvas from luma.oled.device import sh1106 from PIL import ImageFont serial = i2c(port=1, address=0x3C) device = sh1106(serial) fontBig = ImageFont.truetype('FreeSans.ttf', 14) fontNormal = ImageFont.truetype('FreeSans.ttf', 10) fontSmall = ImageFont.truetype('FreeSans.ttf', 8) prozesse_dict = {} def loadProcessInformations(): command = 'echo "PID;Befehl;CPU Zeit;Speicherverbrauch" > prozesse.csv && top -b -n 1 | awk 'NR > 7 { print $1 ";" $12 ";" $9 ";" $10 }' >> prozesse.csv' subprocess.run(command, shell=True) global prozesse_dict prozesse_dict.clear() with open('prozesse.csv', 'r') as file: csv_reader = csv.DictReader(file, delimiter=';') for row in csv_reader: pid = row cpu_zeit = float(row.replace(',', '.')) speicherverbrauch = float(row.replace(',', '.')) if cpu_zeit > 0 and speicherverbrauch > 0: befehl = row prozesse_dict = {'Befehl': befehl, 'CPU Zeit': cpu_zeit, 'Speicherverbrauch': speicherverbrauch} print(prozesse_dict) def showProcessEntry(entry, index, total): with canvas(device) as draw: draw.rectangle(device.bounding_box, outline="white", fill="black") draw.text((25, 3), "pyTop Screen", font=fontBig, fill="white") draw.text((105, 20), str(index) + "/"+ str(total), font=fontNormal, fill="white") draw.text((5, 20), "PID: "+ str(entry), font=fontNormal, fill="white") draw.text((5, 30), "Befehl: "+prozesse_dict, font=fontNormal, fill="white") draw.text((5, 40), "CPU Zeit: "+str(prozesse_dict), font=fontNormal, fill="white") draw.text((5, 50), "MEM: "+str(prozesse_dict), font=fontNormal, fill="white") loadProcessInformations() schedule.every(15).seconds.do(loadProcessInformations) with canvas(device) as draw: draw.rectangle(device.bounding_box, outline="white", fill="black") draw.text((25, 3), "pyTop Screen", font=fontBig, fill="white") draw.text((5, 20), "Anzeige fuer PID, Befehl,", font=fontNormal, fill="white") draw.text((5, 30), "CPU Zeit sowie", font=fontNormal, fill="white") draw.text((5, 40), "Speicherverbrauch", font=fontNormal, fill="white") draw.text((15, 52), "https://draeger-it.blog", font=fontNormal, fill="white") time.sleep(3) while True: schedule.run_pending() total = len(prozesse_dict) index = 1 for entry in prozesse_dict: showProcessEntry(entry, index, total) index += 1 time.sleep(2)
Fazit & Ausblick zu Raspberry Pi Prozessinformationen am OLED Display anzeigen
Als Fazit ziehe ich ich jedoch das, dass kleine 1,3" OLED Display zu klein ist für die Informationen hier muss ich mal schauen ob es deutlich größere gibt um dieses kleine Projekt deutlich aufzuwerten. Die Nächste Ausbaustufe zu diesem Projekt könnte nun sein, drei Taster anzuschließen mit welchen man durch die aktiven Prozesse blättern kann. Zusätzlich mit einem roten Taster könnte man den Befehl kill auf einen Prozess anstoßen um den angezeigten Prozess hart zu beenden. Read the full article
0 notes
Note
like my unicodex idea it isnt a full on gigalink
youll need to have a raspberry pi and know what retropie is
thats basically all there is to it
i was planning to find a funny green theme and mess around with it but that is pretty much it
oooh ok ok i wanna see when its done
1 note
·
View note
Text
Raspberry Pi5にエミュレータ統合環境「Retropie」をインストールする!!
ラズベリーパイ5は昨年10月末に海外で発売され、日本国内での発売は技適が通るまで待っている状態でした。 そして2024年2月13日、ついに日本国内での販売が開始されました! リンク:「Raspberry Pi®…

View On WordPress
0 notes
Text
Buy Pocket Size Smart Computer At Best Price
Say hello to the piPocket Dongle powered by Raspberry Pi CM4 – a game-changing device that plugs directly into the HDMI port of your TV or monitor, requiring only a USB-C power source. With this innovative dongle, you can unlock a world of possibilities, from turning your TV into a Smart TV with Kodi to playing retro games with RetroPie. No more hassles with HDMI cables or bulky setups – the piPocket Dongle is here to simplify your digital life.
Key Features:
Compact Powerhouse: The piPocket is a pocket-sized marvel, packing the formidable Raspberry Pi Compute Module 4 within its sleek and compact design. Experience the power of a full-fledged computer in the palm of your hand.
Remote Control: Navigate with ease using the built-in IR receiver.
Remote Control Navigate with ease using the built-in IR receiver.
Endless Possibilities: Whether you're looking to browse the web, stream content, or immerse yourself in the latest games, piPocket adapts to your needs. Its versatility makes it perfect for work, entertainment, and everything in between.
Raspberry Pi Compute Module 4: At the heart of piPocket lies the Raspberry Pi Compute Module 4, offering advanced processing capabilities and seamless performance. Benefit from the latest technology in a form factor that fits right into your lifestyle.
Easy Setup: No need for complicated installations or technical expertise. Simply plug piPocket into your TV or monitor using the HDMI port, power it up, and you're ready to explore a world of possibilities.
Wireless Connectivity: Stay connected effortlessly with built-in Wi-Fi and Bluetooth capabilities. Browse the internet, connect to peripherals, and stream content without the hassle of wires.
Expandable Storage: Customize your piPocket experience with expandable storage options. Whether you need extra space for apps, games, or media, piPocket adapts to your storage requirements.
Open-Source Platform: Built on the foundation of open-source technology, piPocket encourages exploration and customization. Tailor your Smart Computer experience to suit your unique preferences and needs.
Upgrade your entertainment and computing experience with piPocket – the pocket-sized powerhouse that transforms the way you interact with your TV or monitor. Embrace the future of smart computing today!
BUY NOW LINK : https://shop.sb-components.co.uk/collections/pre-order/products/pipocket-pocket-size-smart-computer
0 notes
Text
The Script & Style web development podcast and Wyn Weng Labs were founded by David Walsh, a Senior Software Engineer and Evangelist for Mozilla who also blogs at davidwalsh.com. You'll receive technical advice and information on industry developments for web developers. Learn the most important Git commands and utilities, see how to build a RetroPie on a Raspberry Pi, and take the steps to stop experiencing the well-known imposter syndrome that often affects web developers.

CSS Tricks: Despite its misleading name, this blog contains information on more than simply CSS. Learn vital details on a variety of web design and development topics, from the basics to more complex subjects. Learn tips for writing animation code more effectively, discover why some HTML components age out, and explore working with APIs and authentication. The CSS techniques blog is a wonderful place to start if you want to understand the fundamentals and how to become a better web developer.
This one is for the creative developer, according to Creative Bloq. Creative Bloq is for you if you need creative inspiration for your coding process or if you want to see how elements like grid systems and animations appear in real-world web design. Read articles about how to design successful CTAs on a website and how to select the finest JavaScript frameworks. With this blog, you'll get a combination of front-end and back-end engineering information.
Webdesigner Depot: Webdesigner Depot offers free software downloads and articles to aid in the building of your website. You can learn more about what goes into making websites, even if you're brand-new to the field. Learn how to utilize PHP, how to decide between Grid and Flexbox, and how to build a "click to tweet" button on your website with the help of tools and tutorials. Additionally, you can master slightly more complex coding concepts like how to use machine learning.
Web Design Ledger: Web Design Ledger offers special insights on how to make beautiful web products for web developers and web designers. Through Q&A conversations, readers may learn about the most recent technological advancements and witness viewpoints from industry leaders in web development. Discover the top development tools, the top cloud computing programming languages, and methods for streamlining JavaScript testing and deployments.
0 notes
Text
for the record it has worked in the meantime, I'm just finally making the frame properly.
I had an old raspberry pi laying around as well as a screen, so I got some joysticks and buttons (off ali express??) and have ran RetroPi on it
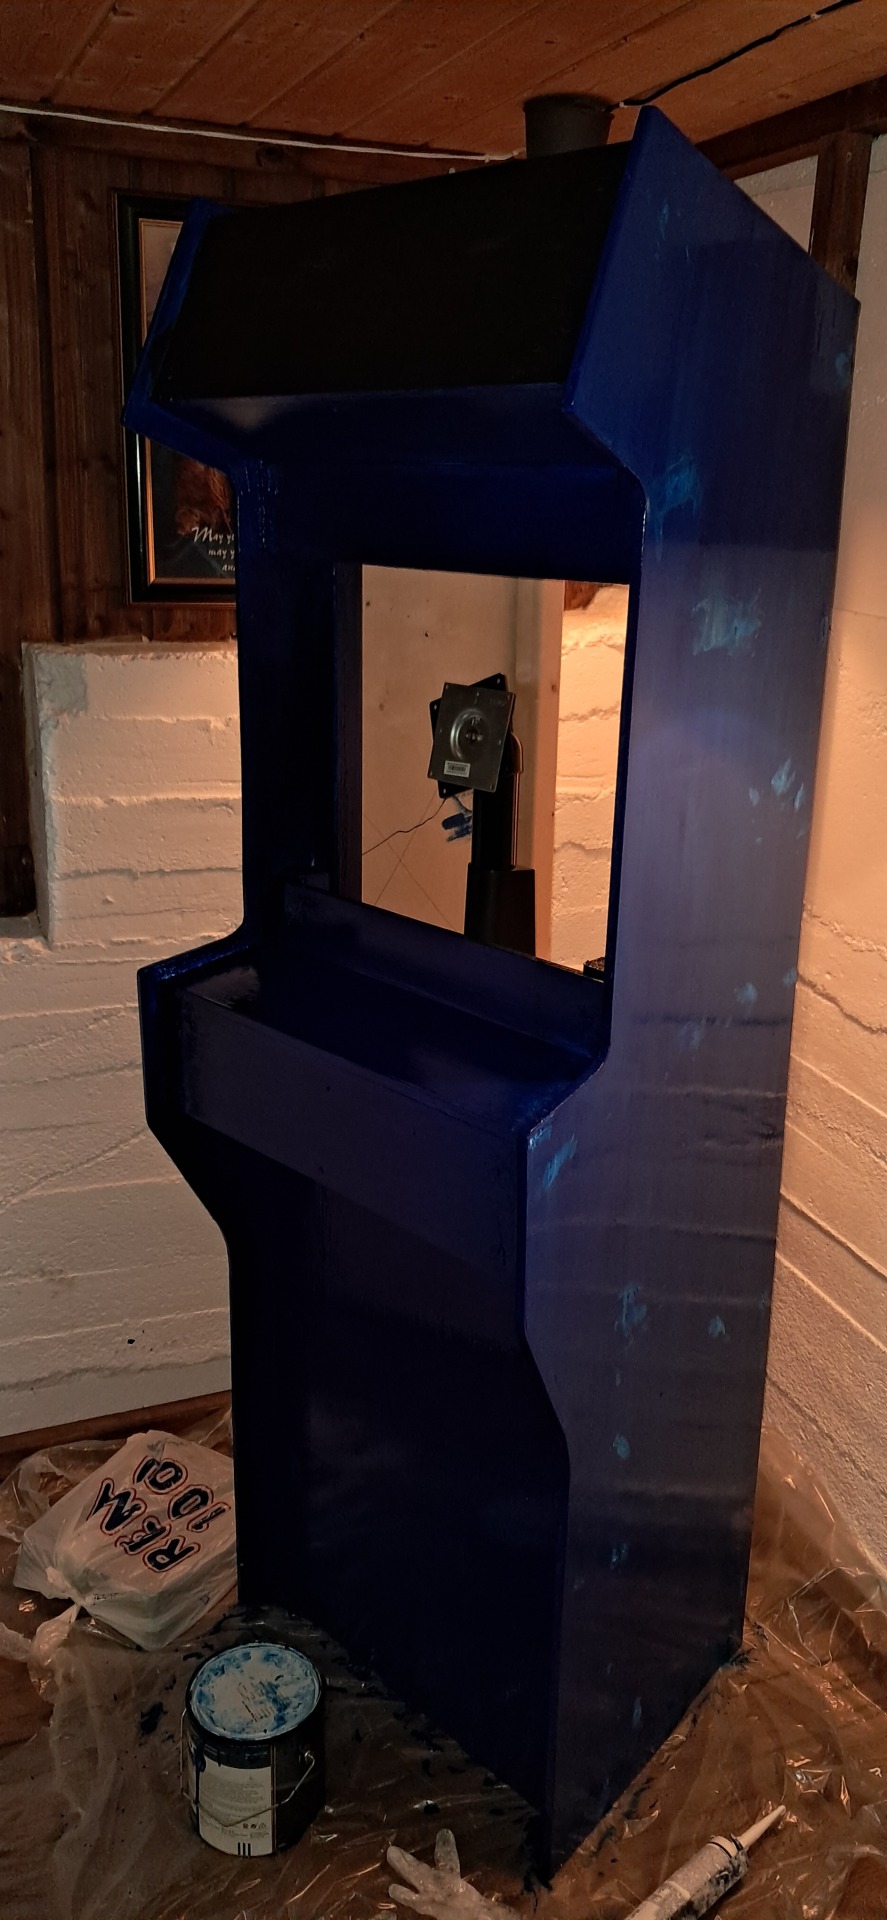
Arcade machine project still coming along
2 notes
·
View notes