#the lasso tool... isn't the best...
Explore tagged Tumblr posts
Visit Tumblr Blog
Explore Tumblr blogs with no restrictions, modern design and the best experience.
Last Seen Tumblr Blogs


Fun Fact
Tumblr has been banned in Indonesia for providing people with access to pornographic content.
Text
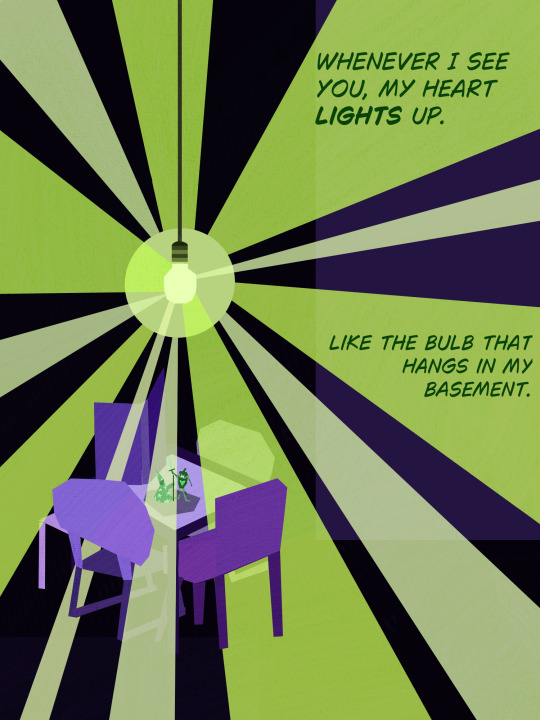
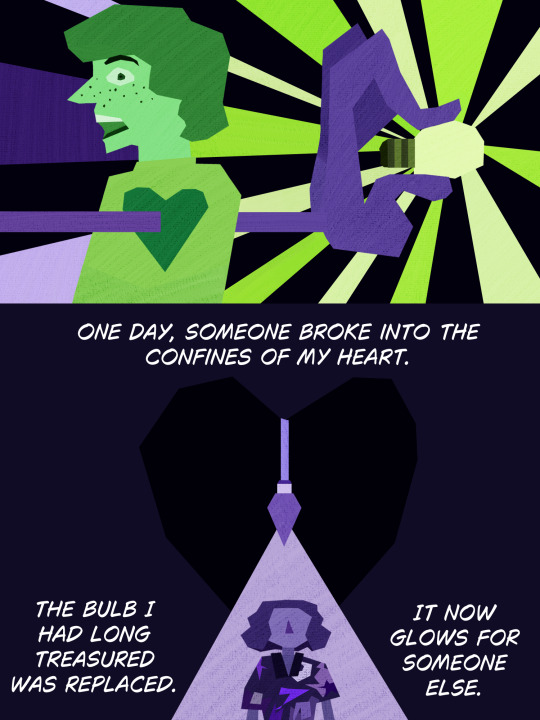
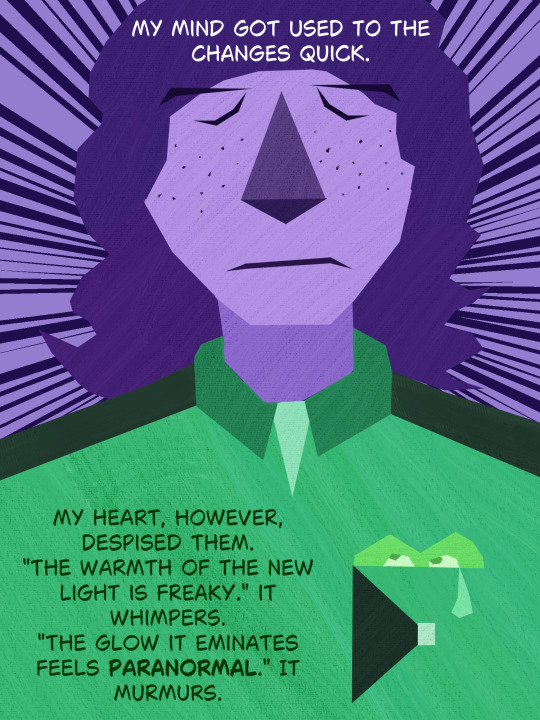
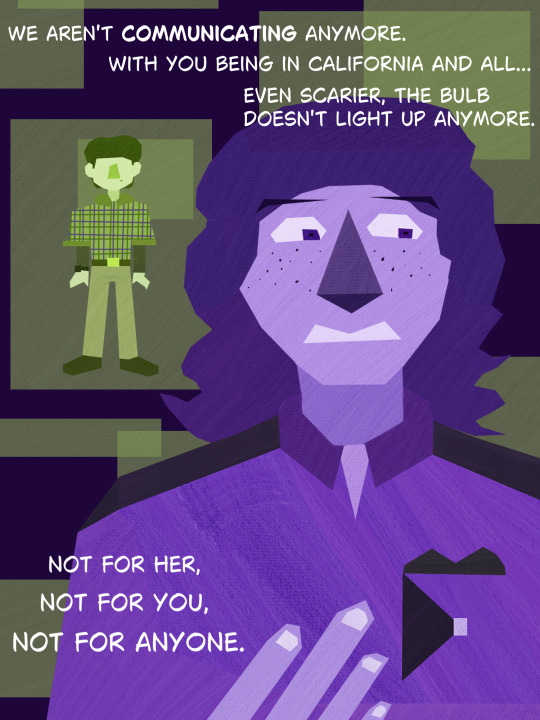
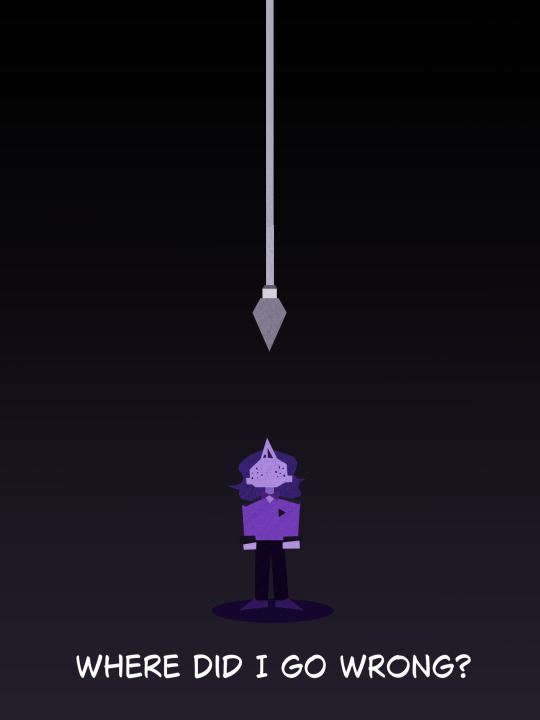
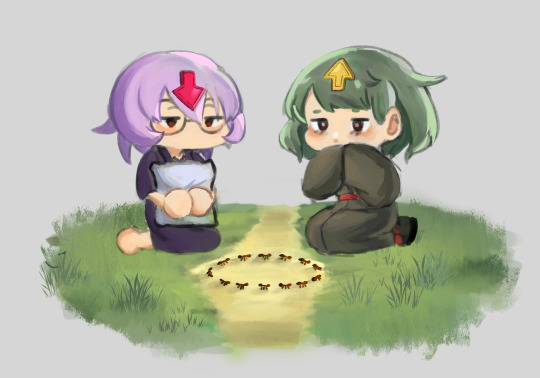
"It's dark and lonely. Where did I go wrong?" Day Two of @byler-week! Now it's Mike's turn for the standard, but not-so-standard (but just equally as devastating) angst. Will it get better tomorrow? Stay tuned to find out!
Today's Prompts were: Light, Paranormal, Communicating, Green/Purple Color Scheme
Part One
#cadetart#I really wanted to experiment with a style that A. suited Mike and B. experiment with the lasso tool on Clip Studio#and I am pleasantly surprised at how it turned out!#I used to use Procreate and I'm sorry Procreate users...#the lasso tool... isn't the best...#BUT IT STILL RULES THO LOL#also shirtgate reference in pages three and four??? more likely than you may think ;-)#don't wanna spoil ALL the symbolism...#but I love shirtgate so I had to shout it out in the tags :-)#byler#bylerweek#bylerweek2024#byler nation#byler fanart#stranger things#will byers#mike wheeler#shirtgate
194 notes
·
View notes
Text
Photoshop Tutorial #1 - Change Background & Add Reflections
Before & After


You will need
Photoshop
Internet Access
I was inspired to make this tutorial after facing a dilemma in my game. I wanted my sims to swim in Brindleton Bay, but, shock horror, the water there is not swimmable. Luckily, I know how to change the background of my screenshots to make it appear as though it is - and I'm going to bring you through the process of how!
Starting off, in game, I brought my sims to Tartosa and got my desired shot. Then, heading over to Brindleton Bay, I got some shots of the horizon that I wanted as a backdrop.
Here's a picture I took:

Okay! Let's open up Photoshop!
For reference, I have Photoshop 2024, but most if not all of the features I've used should be included in older versions too.

Here's our image! Now I'm selecting the Background layer in the layers panel and press CTRL J twice to create two duplicates.
I'll turn off the bottom two layers for now, (by clicking the eye button, for newbies) and go to the properties panel. this should be on the right hand side, above the layers panel, but if it isn't, simply go into window > properties to switch it on.
With the layer selected, I click remove background and voila! Photoshop has... er... done her best to remove the background (she sometimes gets it wrong, but at least it's a help)
You'll see that a layer mask has been created. (circled in image).

If you haven't used layer masks before, the only important thing to know is that black will erase and white will add.
So with my brush tool (shortcut B) selected and set to black, I can go around the image and erase all of the parts I don't want.
If you have a steady hand and a tablet/cintiq you can do the same job a little quicker with the lasso tool (shortcut L) by selecting any unwanted area and simply pressing delete
Once I've removed all that needs to be removed, I see that there's a little slice of her hair that needs to be added. I can change the brush colour to white and paint it in.
Done! Easy!

Okay, let's switch off this layer for now, and switch on the one beneath it.
This is the layer I want to make look like the Brindleton Bay sea. So I'll make sure to pull an image of the water up as reference for colour.
This time I'm going to create a layer mask using the polygonal lasso tool
It's easy.
Find the lasso tool in the tool panel on the left of screen (the third icon from the top - or by pressing L on your keyboard)
Left click & hold, and a menu will pop up. Select the polygonal lasso tool.
Click around the area you'd like to mask, in my case, the sea. Tip: if you hold down the shift key while clicking, you will be able to create perfectly straight lines.
Click on the layer mask button at the bottom of the layers panel (pictured)
Everything except the selected area should disappear!

A small thing here, but I don't want the reflection of the rock in the water in my picture. I'll select the layer (not mask), take the eyedropper tool (shortcut i) with the sample set to all layers, and use a soft brush (B) to paint it away.

Next I'm using adjustment layers to edit the colour of the water, to try and make the blue turquoise paradise look more like the horrible green bog water of the bay.
You'll find these next to the mask button in the layers panel.
For my picture, I'm using hue/saturation for the colour and levels for the light. you can fiddle around with any of the adjustment layers to find what works for you.
I've shown the adjustments I've made for my specific scene below, just for reference.
When I'm happy with the colours/lighting, I select all adjustment layers (shift + L click to select multiple), then right click and choose create clipping mask. This is to ensure that the adj layers don't affect any other parts of the image, just the area I want it to.
And there! My water is looking sludgy, just like I wanted.

Okay! I've decided that I'd like some texture in the water. It always annoys me that sims water looks so flat. So here's where Pinterest enters the story.
I like Pinterest because unlike Google, the majority of the images are not watermarked. You're also slightly less likely to find AI slop.
I wanted some water ripples, so I searched for something like Water Texture, found one I liked, and dragged and dropped it into my photoshop file.
From here, I transformed it (CTRL + T) by resizing & rotating the bounding box, then grabbing the corners while holding CTRL to create some kind of perspective that works for the image.
I didn't bother bringing it all the way to the horizon, because I intend to fade that out with a gradient anyway. I had to sacrifice the bottom of the image for the sake of correct perspective, but that's fine. I will crop that out later.
With the texture layer selected, set the blending mode to soft light. It blends nicely!

Now! Another layer mask! These are our friends
With the texture layer still selected, I create a layer mask.
This time, because I had nothing in the image selected first, the layer mask will appear white. That just means nothing has been masked yet.
With it selected, I find the gradient tool (shortcut G) if you press G and the paint bucket tool is activated, simply navigate to the tool panel on the left of the file, hold the paint bucket tool down and select gradient.
I'll change the colour to black, and make sure I have the foreground to transparent gradient selected.
Other settings are pictured.

I'll drag the gradient over the area I want to mask. In this case, the top of the water texture to make it appear as though it's fading away towards the horizon.
(Doubly make sure you've selected the mask, not the layer while performing this action.)
Looking good!
Time to drag the layer above your adjustment layers and create a clipping mask again.

Alright! Let's do the background.
I'll drag that image of Brindleton Bay that I took earlier into the file.
I want to place it below my sea layer, and above that original background layer (I am going to leave that untouched for insurance reasons)
Then, using the move tool (shortcut V) I'm simply going to move it to the correct place. Basically I just want the horizon lines to match up.
Tip: hold the shift key to drag an image in a straight line.
Enter to confirm.
You can see that the sky is now unfinished, but it's such an easy fix. I'll just select the sky colour with the eyedropper tool, then use the paint bucket tool & brush tool to fill in the sky.
Done!

Now - note that the sea doesn't quite blend in with the background. To fix this, I'm going to take my eyedropper tool (shortcut i) and select some of that dark green colour beneath the mountains.
I will create a layer (+ button on the base of the layer panel) and drag it above that sea texture layer I created earlier.
Then I'll create a layer mask to clip it to the sea.
I'm grabbing that gradient tool again (G) and creating a nice gradient on the horizon.
The horizon line is a little sharp, in my opinion, I want it more faded. So, using a soft brush (B) and that same green colour, I'm going to create a new layer & place it above that green gradient, this time I'm not clipping it.
Holding down the shift key, I'm going to draw a straight line right across the horizon. This helps to blend it all together a bit better.

Now! for Reflections!
Firstly, I'm going back to that sky layer with the Brindleton Bay mountains, and I'm going to duplicated by pressing CTRL + J
I'm dragging it above the sea layer, but below all of the other clipping masks. This will automatically create a clipping mask for the new layer.
Next, I'm going to edit > transform > flip vertical
With the move tool (V) I'm moving the image upwards so that the horizon lines meet and it looks like the lighthouse and mountains are reflecting in the sea.
Note: make sure auto select is off while using the move tool on a layer that lies beneath several others.

This leaves a little bit of a mess on the bottom on the canvas, which can be fixed by creating a layer mask & the gradient tool set to black, and dragging a gradient over the bottom of the image until it blends nicely into the sea.

With the mountains reflection done, I'm going to move onto the people.
I'll turn that top layer that I worked on earlier back on.
Then I'll duplicate it (CTRL + J)
Right click on the layer mask of the duplicate and select Apply Layer Mask from the dropdown. This simply bakes the layer mask into the image. Usually I try to edit non-destructively as much as possible, but in this case it's fine to destroy.
I'm going to rename this layer Reflection
With that new, reflection layer selected, I'll go to Edit > Transform > Flip Vertical, just like before.

I want to add a little water/shimmer effect to their faces, so I'm going to Filter > Distort > ZigZag
I'll just mess around with the settings here until I find something I like.
This is optional, obviously, I've done reflections in edits without doing any of this, but it just adds something a little extra to water scenes, I think.
Here's a time I didn't do that.

anyway, my sims are looking a bit crazy now, but it's fine, because I'm going to, you guessed it, add a layer mask and gradient.
But first, using the lasso tool (L) I'm going to draw around one of the characters and drag her into place. I can move the bounding box around a bit to make her shoulders meet in the right place.
Then I'll do the same for the other character.
Tip: Hold CTRL while moving, warping or resizing something for a smoother, more precise experience.

Now, I'm doing what I said I would, and I'm creating that layer mask. We know how to do it by now, right?
Make sure everything is deselected first by pressing CTRL + D
Create layer mask
Select Gradient (G) set to black
Drag gradient over bottom of reflection (If you ever need more precise gradients, you can select the round gradient at the top of the file. I needed it to blend the reflection on the right more, because the characters are not at an even height.)
In the Layer panel, change opacity to 20% (or whatever you like) and hit Enter to confirm

Using Crop (shortcut C) I'm going to crop my image, cut off that pesky strip at the bottom and just basically make the framing of the picture a little bit nicer.
And viola!

I could edit this image more, throw in bounced light, splashes etc etc but I'll leave it like this.
The only thing I will add in is a little lens flare to indicate sun, so again, I'm taking to Pinterest and searching for one that works.
Tip: make sure the background of a lens flare image is completely black. Otherwise it will be harder to use.
Below is the one I have chosen.
I'm simply changing the blending mode to screen, moving it and resizing it with the transform tool (T), and fiddling with the opacity until I'm happy.

That's it!
I made a video running through this whole process, with all of my shortcuts in the bottom right hand corner so that you can see exactly what is happening.
youtube
If there are other tutorials you'd like to see in future, please let me know!
And I'm more than happy to answer any questions!
Good luck <3
#sims 4 tutorial#editing tutorial#sims editing tutorial#sims 4 edit#photoshop editing#photoshop tutorial#sims 4 community#simblr#Youtube#sims 4 photoshop tutorial
193 notes
·
View notes
Text
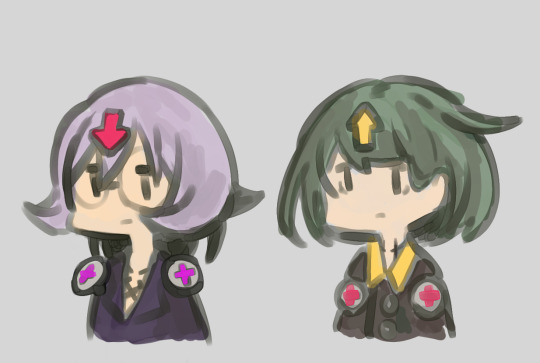
IT'S TIME TO ART DUMP
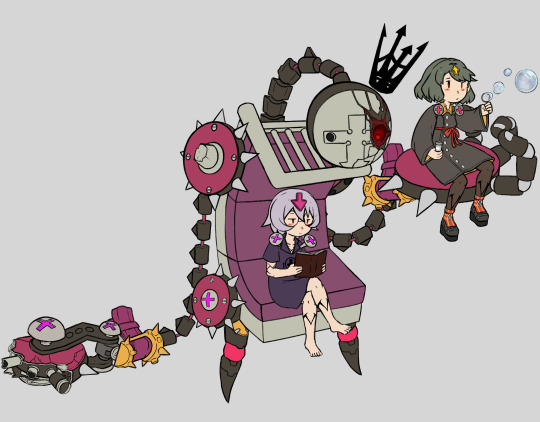
(Mostly some old gg art, mostly Bedsibs the usual)
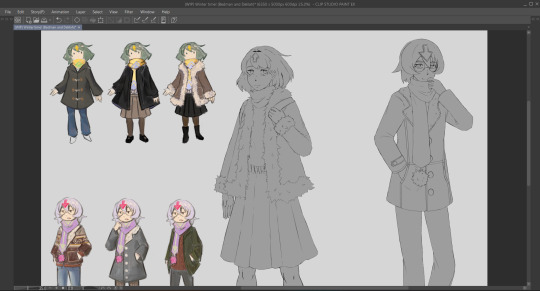
still working on this one, winter is coming! soo what's better than drawing your faves in some comfortable clothes.
also who knew watching wacky sh*t makes you draw good stuff? (jk)
ah yes my first time drawing the bedsibs, pretty fond of this one
I was kind of afraid to look back to this one because I drew like 4 months ago lol.
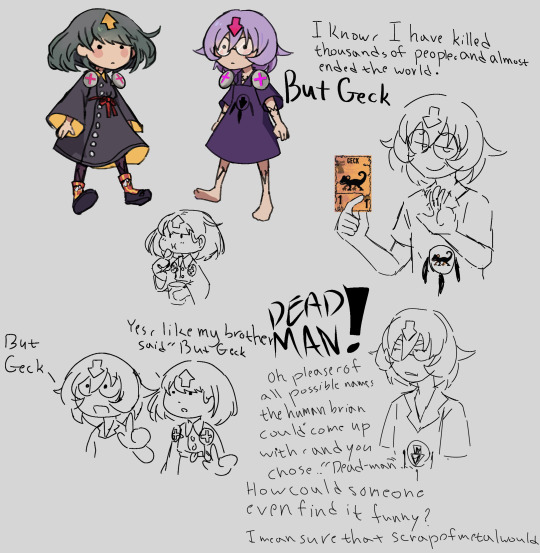
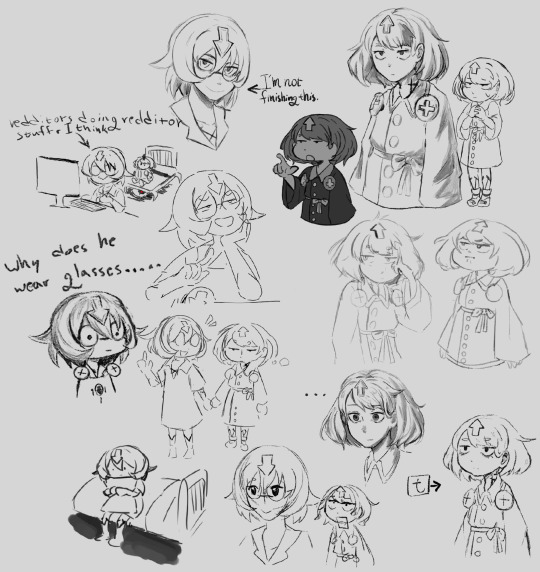
so I found out about Guilty gear the same time I was playing Inscryption (one of the best indie games I played seriously) and I.... had more fun than I should have with the Geck meme
( I couldn't just Not do it) frick these jokes I regret this...
Think this was my second time drawing the bedsibs
This is f*cking stupid moving on-
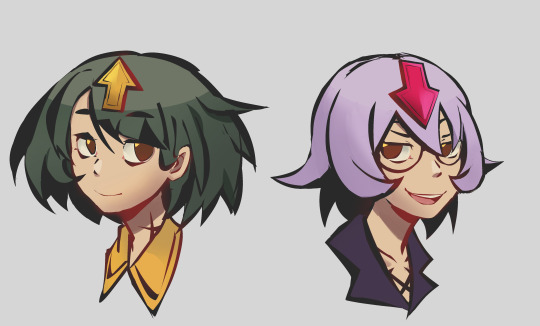
Drew this using the lasso tool (named this file delilasso and romeolasso for some reason) It looks really good!
dunno what to say about this one just some chibi art.
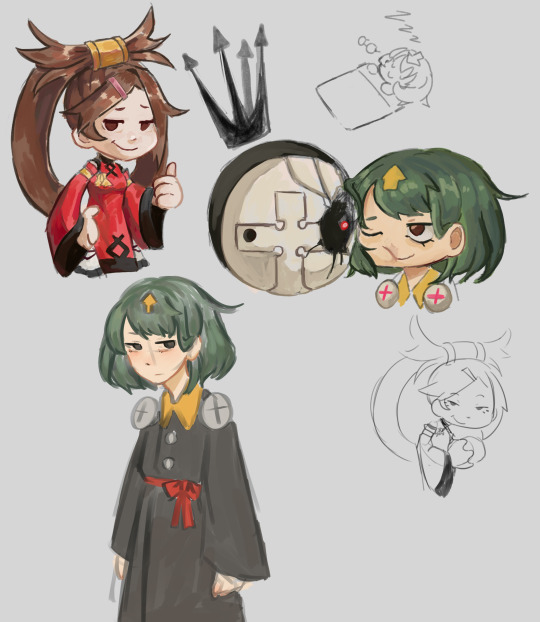
I literally don't know much about Jam, love her weird hair tho, Also circle (didn't know how to draw bed at that time, still don't)
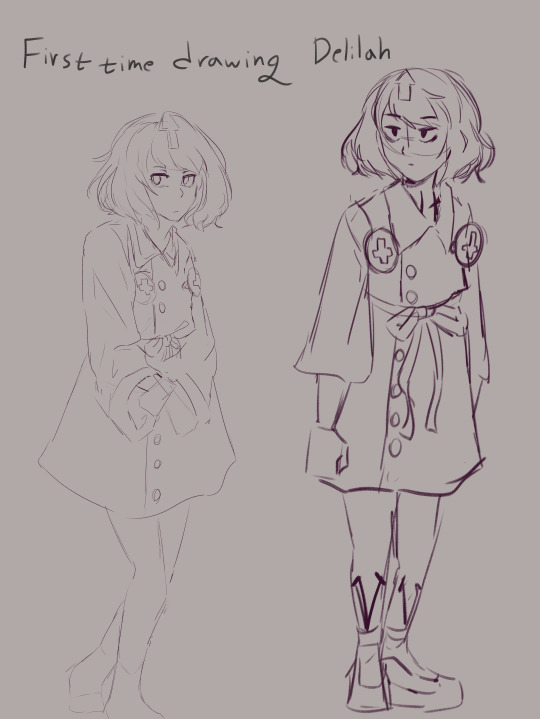
ohhh this is my first time drawing Delilah! she looks so weird, but I think it's a good first attempt. (don't mind my handwriting-wait why did I write it tho..eh whatever)
I can't say it's a good one, not bad either but does it matter? it's art dumping time ya know. I'll edit it some time. (they look weird, can't help but think it isn't that good)
I know I posted this last week, but I made a No Background version cuz that background that I drew was pretty basic ngl
yeah enough of bedsibs rn It's Millia time! (her design is so cool)
this is my first time drawing Millia! oh wait I didn't draw Millia a second time... yeah I gotta draw her some other time
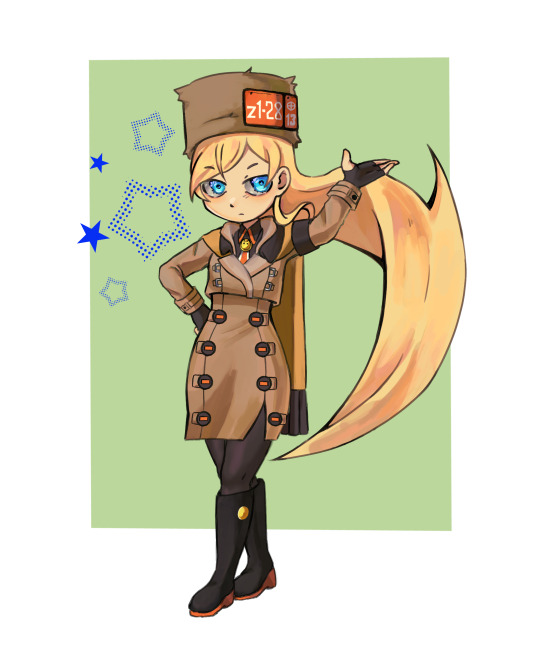
GUYS IT'S FANNY TIME WOOOOOO
After watching the:- "Talk to me about podcast" the Fanny episode
I just could not stop drawing Fanny everywhere mostly in my sketchbooks and School books, just any place that's drawable
thanks manzisme I now love Fanny.
oh I also just watched the daryl episode I now like him, I might draw him some other time (after I finish Xrd because ohh boi is it long and I also have strive...help)
Also everyone should draw Fanny at least one time, I need it
Well I sure do hope you enjoy my art and rambling and thanks!
#guilty gear strive#guilty gear#guilty gear fanart#ggst#guilty gear bedman#romeo f neumann#bedman?#guilty gear delilah#wait there's no tag for delilah's full name?#welp that's weird#millia rage#jam kuradoberi#wait should I tag inscryption#maybe not#guilty gear fanny#fanny best girl#tags are gonna be the cause of my death#we need fanny in strive#my art
90 notes
·
View notes
Note
is it okay to ask what kind of brushes do you use?
Yes of course! But the answer is not anything particularly interesting I fear haha
I answered an ask about this about a year ago with a few brushes but at this point my actual tools haven't changed but I've settled to a couple of staple ones: I use basically two brushes and one of them isn't even a brush.
The quick lasso fill tool is a life saver and I genuinely use it for probably 65% of all my rendering (especially in first few steps of me painting on top of a sketch)

And then the brush I use for literally everything else is this weird mangled version of Marc Brunet's lineart brush I've made that I use from sketching to lineart to colours and rendering. I use it for quite...literally everything.
And now after all these years I finally made a csp asset upload of it! (this is my first time uploading into the asset store, so I assume that if I fucked up somewhere it'll get taken down but let's hope for the best)

And as a final touch I use this rake brush for particles and other visual noise!

16 notes
·
View notes
Text
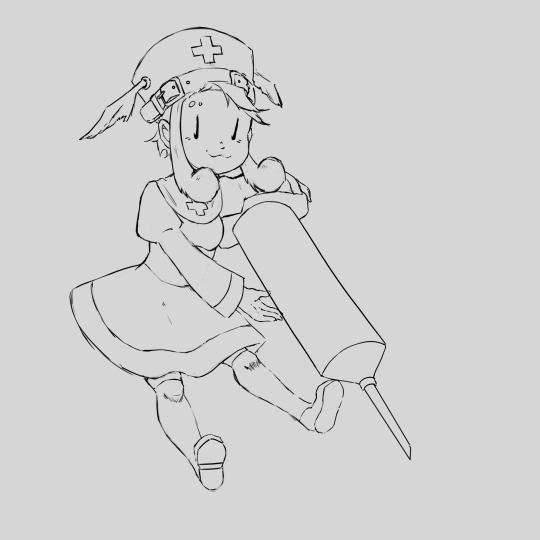
chonny jash mind heart and soul ocs

It isn't the best </3 I tried the lasso tool!! I love chonny jash covers so much bro what the sigma !
#Art#ibispaintx#drawing#chonny jash#the mind electric#the soul eclectic#Etc#lineless art#ocs#oc stuff#my ocs <3
18 notes
·
View notes
Note
Hi! I was just wondering if there’s any specific brushes you use? Sorry if you’ve already answered this, I’m pretty terrible at finding stuff 😭 Thank you!
Hi! UMMM unfortunately I'm one of those artists that uses "one brush for just about anything because i'm too lazy", but also "artist that changes brushes depending on the mood".
(Using CSP!) I assume you're referring to my most recent art, which is mostly just this modified Mili pen marker brush. You can duplicate and edit the settings similar to this:

I used this brush for the line art and shading on this post. Flats are done with a lasso-fill tool. The rough-edged-texture panels are the default Real G-Pen.
For no reason, I'll also sometimes just use the default G-pen at 80-90% opacity (like in this post); almost every drawing program should have a basic pen equivalent like this, so it really isn't anything fancy! Play around with the settings and find what works best for your hand :)
36 notes
·
View notes
Text
FIRST ROUND OF WITCHES DUELS - Battle 2: Edric Blight vs Willow Park
Disclaimer: This is not a popularity contest or which character do you prefer, in this tournament you decide who is stronger/better/smarter/etc. opponent.


Information for both opponents under the cut to those who don't know what they can do in their battle:
Edric Blight:
During this battle, Palismen are not allowed.
One of the tools Edric can use during his battles independently of whether or not his opponent also possesses any, is fireworks. That's right, Edric brings fireworks to the battlefield and can use them offensively. Due to how illegal and unstable they are and how Edric landed in the healing coven multiple times due to them, they're noted to be particularly destructive and unpredictable meaning any outcome can be achieved (either they hurt only Edric, they hurt his opponent or both or neither - the rule of random applies here so do whatever you want with it).

Edric has no real relationship with Willow so no personal feelings are involved. Edric also isn't really that much motivated to win the entire tournament but he is willing to show off.
Edric Blight is pretty chaotic and airheaded but can also be clever and sneaky. He can both focus on offense and deception. Granted at times he tends to not think things through and can make rash decisions that can and will blow up in his face. He specializes in Potions, Illusion, and Beast-Keeping magic, making him a pretty strong and skilled all-rounder even if he can be pretty impulsive.

Restraining Magic - Edric is capable of creating a lasso made out of light that can be used to restrain his enemies. We saw it when he tried this with Slitherbeast. However, Edric can also enhance any lasso or tie to specifically bind a particular target he has in mind as of Reaching Out, meaning it can be very difficult even for stronger opponents to break away from his bonds.

Explosive Potions - Edric is capable of brewing potions that explode upon shattering, thus can be used offensively, but also as a distraction and defense (the best defense is offense and the best offense is defense after all). Edric can throw multiple potions at once or in a row. He will usually have multiple at hand.

Transformation Potion - Edric improvised and created a potion that can alter the appearance of the drinker. Edric has the recipe and antidote (plenty of ice packs) at hand to either use this potion or on himself to transform into a stronger and "draconic" version of themselves (demonstrated on Warden Wrath though aside from his appearance and enhanced abilities, he didn't seem to display new ones). The potion allows the user to gain immense strength, sharp claws, spikes, and horns and is much bigger in size, however, it comes at the expense of rational thinking turning the user into a wild animal. So Edric either transforms and hopes and prays he can quiet down his instincts enough to apply ice packs on himself, or he uses it to confuse his enemies and hope they won't hurt him too much. After the potion's effects get canceled, the user of it gets nauseous and is incapable of further fighting. He will usually only have a few at hand though.

Truth Potion - Edric brewed those before battle with enough patience to not mess them up so he can use them safely. Their capacity on the battlefield usually extends to tricking the enemy into either drinking them or inhaling them and making them confess their weaknesses out loud. He will usually have a few at hand though.
Snow Magic - when training with Amity he did display he can use snow to his advantage, though he only used it to sink Amity into the ground, which would be only possible if the area's ground was always snow, but for that, I have a different spell in mind. Edric can create simple snow blasts with it or use it to immobilise his opponents by creating enough snow around them to burrow them in it.

Sinking Magic - Edric is capable of making the ground sink beneath the feet of his opponents if they're distracted enough. He demonstrated it when training with Amity and I'm making it a full-blown ability that can be hard to counter but not impossible if the opponent can dig through any surface. Be it snow or ground (though probably not metals considering how solid and refined they are).
Telekinesis - Edric displays an ability to move objects at ease. He can, in fact, lift his opponents and move them through great distances just fine, granted it works best on distracted opponents. He can also use this ability to throw projectiles of various sizes (though the biggest one probably won't be bigger than your average person who can be tall).

Illusion Casting - Edric is capable of casting any illusion of any object or even a living being. Said illusions can interact with the real world just fine (so he can for example create ammo as Amity threw at him "Hex me" papers he created himself and knocked him out with it). His illusions normally are fragile but with his beast magic, he can strengthen to make it harder to dispell them.

Trap Illusions - Edric can create illusions that can transform into barriers upon contact with them. This can restrain his opponents while still allowing Edric to be able to touch and affect them (like a Venetian mirror).

Camouflage - Now I'm not sure whether or not Edric can cast it on his own or if it requires a team effort, but in LR once Bump made a stand against the EC, all the other students would appear after the illusion of camouflage was dispelled, so I'll allow all illusion casters that were part of this to be capable to at least hide out of sight temporarily, so Edric now can use this ability to stay hidden for short time during the battle.

Bat Companion - now Edric may not possess a palisman, but he can use his pet bat during battles, sending him out of the attack to attack his opponents or distract them with it. To how much extent the bat will listen is however limited, though enough for the bat to not attack Edric.

Beast Luring - this was more or less proven in Reaching Ou how easier it was to lure out beasts Edric needed using his beast-keeping magic, so Edric could bring back any beast to the battlefield with his knowledge. However, said beasts will probably not listen to Edric at all.

Link to more of Edric's capabilities here
Willow Park:
Willow Park is a prodigy in plant magic. Only a few can match her talent and raw power when it comes to her command over plant life. She's also very knowledgeable when it comes to Botanics and is very promising when it comes to them (she knows how to tame various plants and what are they capable of). However, her capabilities only extend to plant magic and not other types of magic.
Willow Park is also very strong, athletic, and sporty. She's the Captain of Flyer Derby Emeral Entrails and managed to defeat the captain of Grudgby team Boscha while playing Grudgby for the first time. It is known that Willow works out and shows a lot of physical strength. The girl knows how to pack a punch.
During this battle Palismen are not allowed so Willow has no aid of Clover here.
Willow aims to win as she dreams to be strong and wise to protect her friends and this tournament is a chance to prove herself. No personal feelings for Edric here.
Willow's magic is enhanced by her emotional state. If she's confident in herself she's most in control, however, if she's bottling up her feelings or feeling insecure, her magic can turn against her. Her magic also gets stronger once she uses anger and determination to power it.
Water Magic - Willow showed in Something Ventured, Someone Framed that she's capable of summoning water, however, she only uses it to water her plants meaning that during her battle she could only use it to enhance her plants.
Healing Plants - as demonstrated in her debut, Willow can use her magic to directly heal plants. This could be quite useful in case her plants are damaged.
Bush disguise - Willow can briefly camouflage herself using bushes as demonstrated in Hooty's Moving Hassle. Willow during the battle would grow bushes all across the battlefield to hide in them to recover or do sneak attacks without leaving herself wide open.
Plant Pillow - Willow is capable of creating plants to break her fall, so in case she gets hit in midair, she can quickly recover and receive no fall damage whatsoever.

Plant Teleport - Willow can use her plants to transport herself across the battlefield. Can be quite effective for escaping.

Grass Trap - in the same vein of teleporting herself, Willow can also use her magic to transport others. During the combat she would utilise said abilities to make grass devour her opponents. Willow can choose whether or not she can spit out her opponents by either putting them in a different location or keeping them underground. However, the opponent can break away if they know how (using plant magic too as demonstrated by Hunter in HM when Belos also devoured him but he managed to escape).

Plant Tie - Willow can discreetly grow vines over her opponents' feet to keep them still or make them trip the moment they try to move as demonstrated with Boscha in WILW. She can also grow those even around herself if she loses composure.
Tree Block - Willow can create a singular tree to use to block attacks from her opponents. She demonstrated it in WILW against Boscha. Willow can use this ability to even block objects thrown with great force or fireballs.

Vine Whips - Willow is capable of creating two large and strong vine whips that could be used to catch or harm her opponents. Demonstrated this in LR and ASIAS, fusing both her physical strength with the strength of her plant magic. She can also create a singular one as well.

Vine Dome - Willow can grow a dome of vines to use as a shield from protection as demonstrated in ASIAS against Darius. The dome can still be cut with enough force.

Vine Grab - a stronger version of Plant Tie, in which Willow is capable of creating bigger and multiple vines to catch her opponents even from greater distances (like midair for example).

Plant Monster - Willow is capable of creating a Flower-like monster to use as a beast to fight for her. She demonstrated it on the First Day.

Vine Octopus - Willow is capable of surrounding herself with multiple crazy and moving vines that can grab her opponents, block attacks, or directly attack. She demonstrated it in her debut episode.

Giant Plant Monster - Willow is capable of creating a gigantic Plant-like monster to attack multiple opponents (but not only). It's a stronger version of Plant Monster. She demonstrated it in Hooty's Moving Hassle.

Vine block - utilising multiple vines at once, Willow can create a shield that can block her opponents as demonstrated in her debut.

Tree Arm - With the help of Green Thumb Gauntlet, Willow is capable of creating a giant tree arm that she can use to attack her opponents.

Tree Golem - With the help of Green Thumb Gauntlet, Willow is capable of creating a tree-like golem that can be used to aid Willow in her battles. The Golem has enough strength to break through barriers even created by Belos and the arms of the Golem can extend to very long distances while not losing any strength.
Vine Attack - Willow can grow multiple vines from the ground to use to attack her opponents. As of WaD, it's potent enough to grow an entire forest of such vines.

Plant Surf - As demonstrated in FTF, Willow can use her plant magic for transportation. She can also use it to create a bigger platform to stand for herself as seen when battling Kikimora.

Tree Movement - Willow is capable of moving the trees with her magic as demonstrated in FTF
Ultimate Vine Octopus - as demonstrated in COTH against Kikimora, Willow can create an even enhanced version of Vine Octopus in which she gains the high ground and uses even bigger and stronger vines to attack her opponents.

Multiple Vine Whips - Willow is capable of creating from her hands multiple little vine whips that can be used to hold down her enemies as demonstrated in KT against Belos.
Endless Vine Trap - Willow is capable of releasing a great amount of vines that can grow across large spaces as demonstrated in both her debut and FTF. The trap also has quite offensive capabilities

Link to more of Willow's capabilities here
Link to return to the Masterpost
#the owl house#battle witches#toh tournament#witches battles#witches duels#my polls#willow park#edric blight#toh edric#toh willow#first round of witches duels
32 notes
·
View notes
Note
So, what method do you use when drawing to keep going?
I personally always seem to struggle to finish an art piece and can never get myself to fully focus on learning the entirety of anatomy, etc.
I crave to finish an art piece again, I miss the feeling, but I haven't been able to do it in a long long while, I'm just hoping for a little advice, not sure who else to go to cause I don't have any friends but I look up to you a crazy amount so I figured I'd give this a shot, this isn't forced to answer by the way!
I don't want you to feel like you have to answer this.
If you do or you don't, you're still really cool, your art is awesome and inspiring and your aus are as well.
Heck, you're a pretty damn cool person too, art really does reflect artist sometimes huh?
Anyway, I'll get out of your hair, keep up the amazing work <3/p
When it comes to finishing an art piece that you know you want to finish but suddenly lose the motivation to
What I usually do (this might not work for everyone but it somewhat helps me so it helps you as well then that's awesome) is when I'm in the middle of drawing a piece and I suddenly lose interest or motivation, or something isn't going well which is making me lose patience. I just put the pencil down, and go do something else for a while until I get the urge to continue or try again. Example I go play video games for a while or maybe watch a movie or youtube for a bit, just giving yourself a small break from drawing until that motivation to draw comes back and then you go back to that piece and try again. And basically how ever often that happens (aka losing motivation, patience, etc), you just repeat the cycle until you're slowly getting closer and closer to finishing that piece (You can also doodle on the side as a refresher but I don't recommend starting a whole new piece when you want to finish your first one, usually for me I just end up forgetting the last drawing completely because I accidentally started a new project 😭 but that might be a me problem if it doesn't happen to you then it's a-okay) This is mostly what was helping me finish projects since I have a short attention span and often lose motivation and what not so I constantly do this FDSFDSDSF.
Now for anatomy, I'm not the best at anatomy myself but my first advice is don't immediately give up if your anatomy isn't perfect on the first try, it won't always look good on the first attempt which is why it's okay to go through a few trial and errors before you get it to a point you like it enough to continue. Also I'm not a professional and I suck at explaining things and honestly I know jackshit about anatomy I just wing it most of the time. But I can give you small tips that come in handy when drawing poses!!
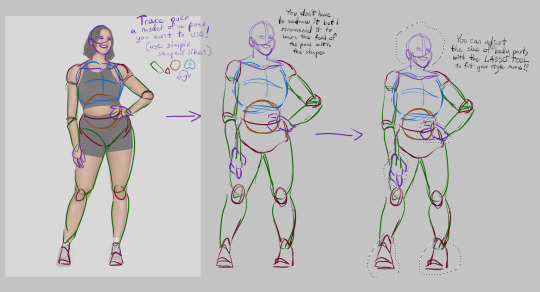
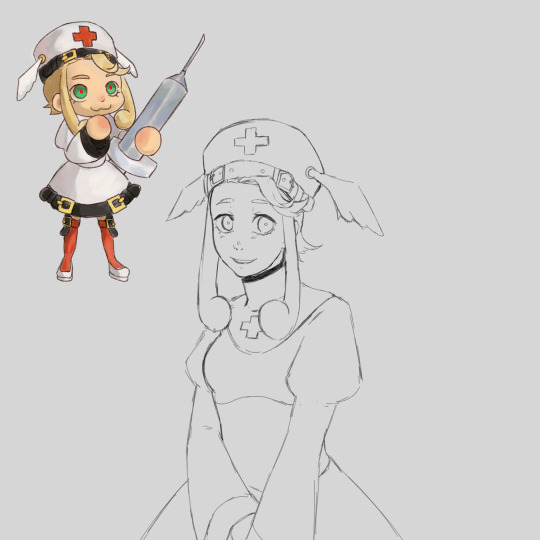
We're gonna use a reference for this, when you have a reference for a pose you want to use. A good way to get a hang of the pose is by tracing over it with simple shapes (such as cylinders, circles, triangles, etc) and then redrawing it with those same shapes to again get the hang of the pose, you don't have to really do it but it's a good practice so I recommend it. Then, after you have your pose, you can take the lasso tool (or selection tool) and then just resize body parts to your liking so they fit your style more!!! And ofc now you can draw over it and use it as a base for the character you want to use it for.
Now that's the first method, but I have a second one which is fun, I call it "frankesteining", which is where you grab 2 or more images and then take body parts and paste them onto the main reference picture you want to use.

Like here, you like the pose of the first reference, but wish both of the models arms were on the hips? Fear not! Just grab another image of a model who's arm IS on their hip
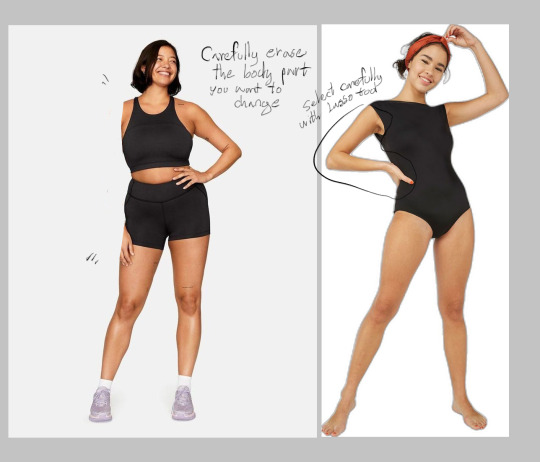
Then carefully erase the arm/body part on your main reference that you want to replace with another. Select the arm/body part of the second reference with lasso tool, and slowly trace over it so you can copy/cut it out and then paste it onto your main ref
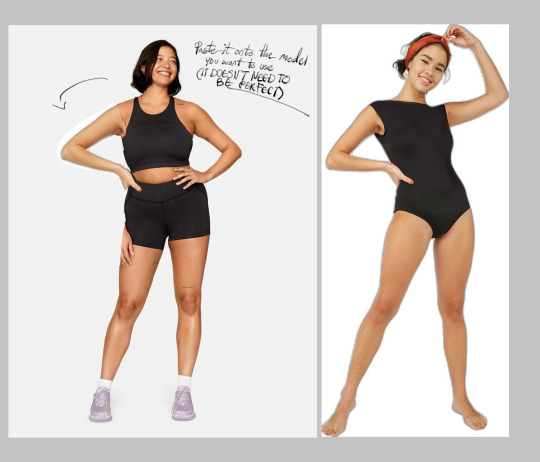
Like this! Now remember, the reference doesn't need to look aesthetically pleasing, after all you're just using it as a reference, so it's okay if it doesn't look perfect!! You can do this with many body parts as you want btw, just keep cutting and pasting until you get the pose you wanted!!

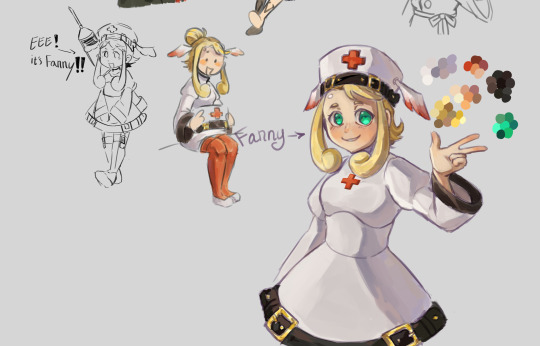
And finally just draw over it! Using the same methods as the first one, shapes, redraw and all! No one will ever know you were playing pretend dr frankenstein with the reference pictures before this!
Now these are the methods I use when posing characters, they might not always come out right the first time but if you keep trying you'll eventually get something you like a lil more than your last ones!! You can also just use a 3d model posing website/app and then screenshot the pose and redraw it from there. But this is if you're one of those people who for some reason just can't get the hang of those damn 3d model posers (aka me)
GUHH THIS POST IS SO LONG IM SORRY, I hope my rambles helped you out at least a lil bit and I hope you continue your journey in making art, believe in yourself and eventually everything will turn out alright in the end stay strong fellow artist 💜
#Also I'm sorry if there are misspells and such it's 2am#I'll edit the post later for misspells (I wont)#mono ask#Also if anyone else has any advice or tips as well please feel free to leave them in the replies tyvm
14 notes
·
View notes
Text

The best tool on magma is the lasso brush you will never prove me wrong Anyway, hii!!! more gert!!! This isn't the finished piece, it's not even the shading i want to use, I was just experimenting with light and stuff, and got this! So... here! *i force feed you a .jpeg file* >_<
#i hate fairyland#Gertrude Larry Wentsworth III#or just gert >_<#digital art#doodle#not finished#raaaaagh
13 notes
·
View notes
Text
Graphics tutorial requested by anonymous
All made with adobe photoshop 2023 (you can find free downloads of cracked versions on here occasionally, photopea.com is also good I've heard) I'm assuming basic knowledge of photoshop/similar editing platforms and their tools, but you can always message me or comment if you are confused about anything!
Also, I used keyboard shortcuts sometimes to change the size of a brush or toggle the brush options, I'm not going to annotate this because it's a lot but here is a resource for basic photoshop keyboard shortcuts
Firstly, the sizing of your edit matters! Max sizing for best quality on Tumblr is 1280 x 1920. If you want to put to put two images next to each other sizing should be 640 x 960.
Next, always try to find the highest quality picture of whatever you're using. Good resources include taylorpictures.net, 4k Taylor Swift, and if I can't find them here I do a google image search of my photo to see if any other websites have a bigger/hq file.
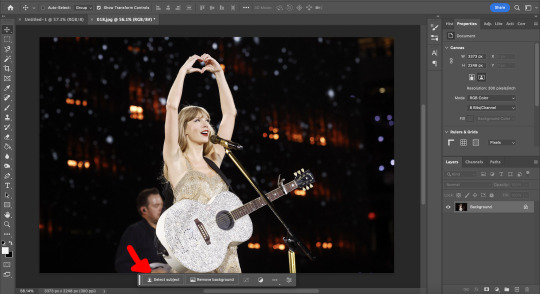
This video is a couple clips I screen recorded for you to see my process and demonstrate a few different tools I use regularly. I added timestamps for you to follow along as you read the rest of this.
Here's a photo of my workspace I am working with and what I will do first is cut out Taylor from this photo and move her to my correctly sized canvas. There are multiple ways to cut out an image in photoshop, the easiest I've found is the select subject function and using the quick selection tool (see toolbar beneath the photo). Other tools include the magic wand tool, lasso tool, and quick selection tool which I will show later.
Now you will see that my selection isn't perfect, so I will use the quick selection tool to fix a few areas that I'd like to manually select/correct. This isn't totally necessary at this stage as you can always perfect your cutout in the next few steps, but it does help save some time.
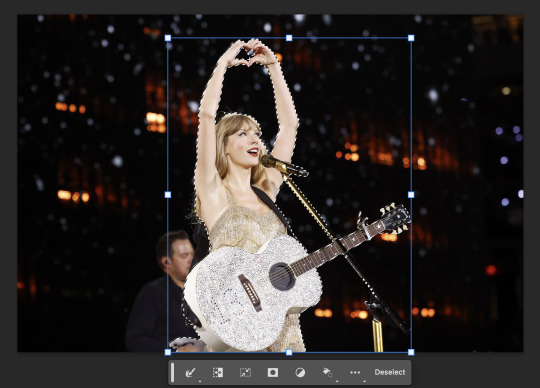
This is where I'll use the quick selection tool to either subtract or add to my selection. There are keyboard shortcuts to toggle between + and - to make this quicker.
See my screen recording of the process from 0:00-1:07
Now that we have our image selected and cut out, I copy and paste it to my canvas I want to work with (size 1280 x 1920) and this is what I've got:
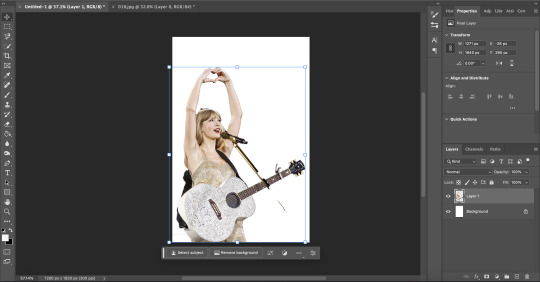
As you can see there's a few spots that need cleaning up in order to make our cutout perfect. You can do this with the eraser tool, magic wand, quick selection, or lasso tool.
See my screen recording of the process from: 1:08-3:50
Now that we're happy with our cutout, we can play around with it in any ways we want! Typically you're gonna do things like change the background color/texture, add elements with the square/circle tool to create what you're looking for, overlay elements and/or textures, and finally recolor it to your preferences.
This part is where you can try new techniques and play around to find what you like. I recorded some of my process of playing with different ideas and elements until I got to something I was happy with! The video explains the tools I was using as well
See my screen recording of the process from: 3:51 - the end
I hope this helps you with creating graphics in the future! The fun thing about photoshop is there are multiple ways to get what you want done. I showed you my way but there's plenty of other techniques and methods out there to try if you're unable to achieve what you want!
Best of luck and feel free to reach out to me if you are struggling/have questions! <3
#Tessa talks#requested#my tutorials#this took forever pls share!!!#photoshop tutorial#graphics tutorial#photoshop
46 notes
·
View notes
Text
Opinions on MagiReco outfits, Puella Historia edition
It's been a while since I last did this. Also renamed it because it sounds less harsh than 'judging'. Since Puella Historia is complete (at least it seems so for now), I felt like it'd be a good moment. I know I technically already looked at Tsuyu and Chizuru, but I'll include them just because this is supposed to be going over all of Puella Historia's new characters.
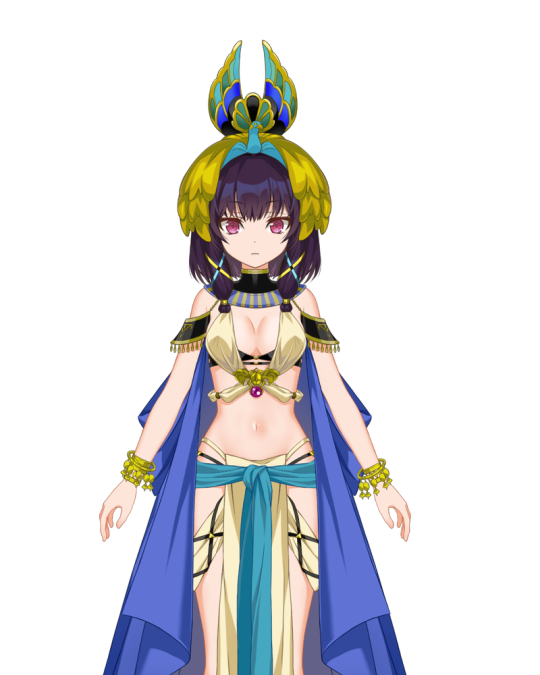
Tsuyu Mizuna

A simple and to the point outfit that does convey her aesthetic and gives me an idea of what kind of character she is personality-wise. The color palette fits nicely together and even the little bit of gold isn't out of place thanks to that. Previously I expressed wanting to see a back view to see how her hair is constructed as I was interested in that, the best I've got is a side view. It seems like what I assumed was a bun is more like a ponytail, huh.
Chizuru

Chizuru looks like she's mixing old with new. The vest over her arm feels a little peculiar to me, I'm not sure if it is just me but it reminds me of a winter jacket. The inner outfit itself gives me more summer-y vibes, though, leaving me a little bit confused. The headpiece brings me back to her actual era. Her exposed thighs feel a little bit like they just had to put gaps there though.
Kuro

Now, does Kuro belong to this arc or not? She was a non-alt character who had her playable debut during it, but even though she isn't technically from the Puella Historia, I'm including her anyway. She's also the second girl whose design is based on Iroha, which is very visible from the way her hood is colored and built up. I don't really have an opinion on this though, it's just...fine. For a background character, she's fine. Nothing too special or anything else that stands out though.
Ebony
Now I won't be kind, but if anyone expected me to, they don't know me. My biggest gripe with it is that it doesn't actually convey anything about her. It's all just...exposed (pale) skin for the sake of exotification. That's it. She's an assassin, and at least her weapon being a damn censer does its job of being unexpected. And while there were people who were less dark during that time, I heavily doubt they'd be this pale.
Olga

Olga takes mixing the old with the new to a different extent, and I'm not sure if it's working. What I do like is the cloak hanging from her belt but green makes for a very difficult kind of palette if it's the main color. Just like here, I chose to combine it with gold but the grey mesh is what throws me off, sorta. As well as the exposed midriff with the downwards cut in the mesh.
Gunhild

This reminds me of like. The thing where designers seemingly use the lasso tool and then they color in along to where the lasso tool made gaps. That's the vibe I get here. It's kind of an edgy mess of huge demon horns, Norse motifs and of course, showing skin for apparently no reason.
Also, two girls leading a war with one having blonde hair and being light-themed, the other having black hair and darkness-themed, in a Europe of the past, designed by Masugitsune. That's definitely original.
Heruka
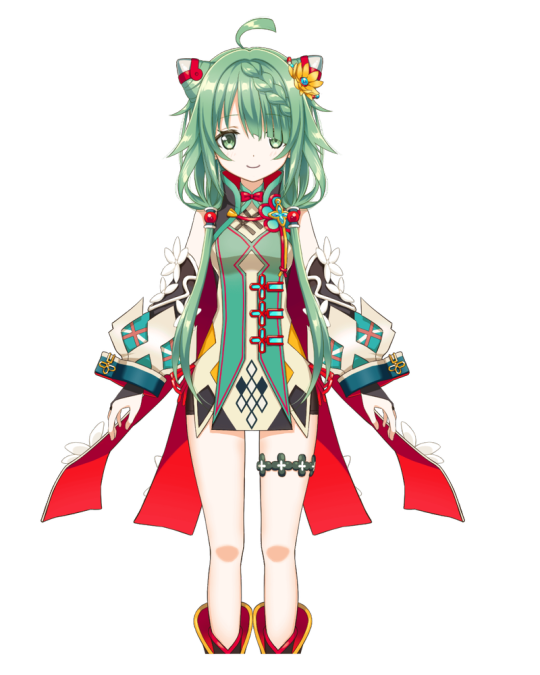
She's fine, if a little overdesigned (her artist likes to do that). The endless knot on her outfit is a nice touch (it's how I called her origin). If the garb it is on was a bit longer I would've probably liked it better, but I appreciate the artist combining green with red and avoiding that X-massy feeling you get with that combo. As a side note, having skin this pale is a beauty goal for many people who live in the area of Tibet I visited (Gansu), pretty much every person I've met has darker skin than you'd expect.
Toyo
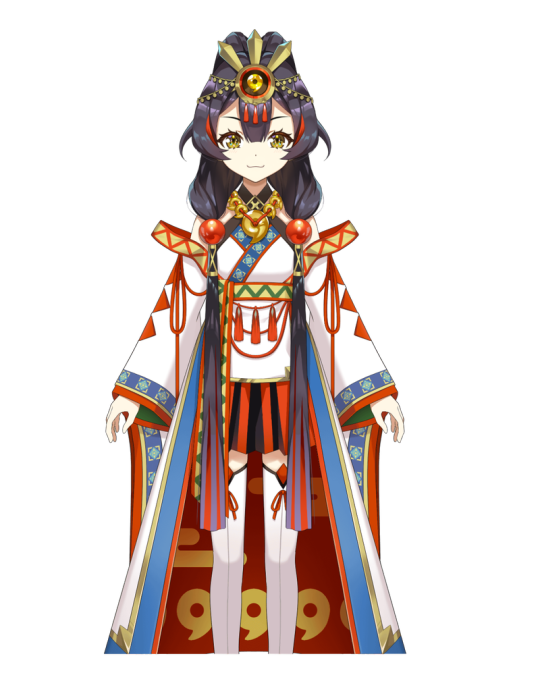
She's actually rather fine. I can tell where she's from and what kind of position she has in the scheme of things. The only slight difficulty I have is with seeing her hair at first glance, i.e where it droops down along the outfit. It does nicely break up the white of the sleeves with the white of the main outfit, but also obscures where the cloak that goes down from her waist comes from. Overall, I like the use of the magatama (it's one of the three regalia of Japan and no, you can't see the real stuff) in the outfit and it's actually kinda funny how GAN was asked to backpedal before he made this.
Amaryllis

In a vacuum, I really like this. I love the classic combination of purple and black, because they just go so well together. The veil and the way her dress poofs up gives me that 'mystic' kind of vibe, and the white is there to aid the gold that is in there with the purple. However, I would have never guessed that she's from ancient Italy. The only thing that does clue me in about that are the shape of her shoes. She's really pretty, she just doesn't clue me in about her era at all.
7 notes
·
View notes
Text
Small tip for ibis x beginners who want to try drawing detail-less backgrounds that at least look like they had some effort put in:
Select the things in the foreground using magic wand or lasso, click invert selection, and then draw on the background using any watercolor brush!
the background won't show up on the foreground, and it will look cool!
the images shown show this off, with the first one having a regular background using the bucket tool, and the second using watercolor brushes


i get that this isn't a very good example, so how about a drawing that actually shows this off better:
Take this piece I drew for a drawing challenge recently, showing off Azure, one of my pkmn irl oc's, spraying a can of raid (next to the original picture, which the drawing was based off)


I get that my drawing skills aren't the best, but as you can see, that background would still look better than a solid color background.
Of course, I recommend only doing this if you want your art to have depth (or something like that, idk I haven't actually taken art class yet)
Thanks for taking the time to read this! I normally don't do posts like this, since this is an rp blog, so this is very different from what I usually post
0 notes
Text
Thanks so much I am so glad!
I wish I could take credit for all of it but I recall someone else's meta highlighting the similarities between the Bee & ladybug tools and Kwami, IE both toys for lasso's and insects, ETC. Along with noting how the two were shown navigating the rooftops with equal ease, creating the sense of being counterparts.
When it comes to Zoe, I can't offer much as I did not watch past S3. I think that planned or not, what matters is execution. Which again I won't comment, on but yeah that's my lukewarm Zoe take XD Though, I do think that given how often Chloe is apparently still turning up in Miraculous Merch or was for a while afterwards certainly conveys where everyone thought the show was heading. But marketers & writers don't always talk ><
Indeed, back to Tiger!Chloe, I am again so glad you feel it works, determining alt Miraculous can be super tricky, & more than Pollen is high praise! I agree, Chloe is herself very aggressive and has a lot of fury; battles could be a great way to release it & Roaar, depending on writing could easily serve as a guide for Chloe in regards to using her anger and destructive power for good. The same way Plagg encourages Adrien to be independent or Tikki builds Marinette's confidence.
Not to say I don't think Pollen couldn't have been a good Kwami partner to Chloe, as it is, my stance is Pollen, Roaar & Sass are the best fits, with Plagg & Tikki coming in close next.
Pollen's problem is not living with Chloe & thus, not developing a strong enough bond before things got complicated. Had Chloe been living with source of unconditional love, I think she'd have grown very protective over Pollen, as she already seemed deeply invested despite only a few hours. Which would give Chloe pause and reason to listen.
Sass meanwhile embodies second chances which fits Chloe getting to be a hero and re-make first impressions & to try again and again until she gets it right to a T. What's more, Sass is cool, calm, collected & held in high regard by their peers, all the things Chloe wishes she was but isn't. So I could see Sass being very helpful & more than capable of working through her moods.
& as we discussed, Roaar embodies havoc, destruction, rage and other usually negatively associated traits. This could easily go either way for Chloe which would fit well with a Yin Yang kind of theme. With Chloe needing to find her own inner balance to best wield the powers and be a hero or risk being consumed by her own fury, or that of others, rendered but a tool in their arsenal.
Plus I think all 3 have the right personalities to keep up with her. Pollen seems game for most anything, not even blinking when summoned into a crowd. Sass is as said, always keeping a level head & wouldn't get swept up in a mood. & Roaar would have moods just as intense and powerful, two unstoppable forces meeting.
Tiger!Chloe (Thematic & Visual Language)
I finally figured out why I like Chloe with the Tiger Miraculous so much as a concept, beyond the rule of cool angle.
See, there were some design elements in making Chloe Queen Bee that mattered in serving to set her up as a distaff counterpart to Marinette. One who could be her rival, her ally, her opposite and equal.
The main one being that she shared a tool type with Ladybug. Both had a toy that could be used as a whip, bind and means of travel. The Tigers Bola has the same visual benefit, while adding a sub textual layer that Chloe is more offence oriented.
The other is more blunt but still very present, namely there's the classic stripes contrasting spots angle, which also came with the Bee & is present with the tiger.
But, there's an added boon to the tiger too!
Namely, it gives Chloe similar coding to Adrien! After all, Tiger & Cat are both felines, both their powers are primarily released via hand strikes. Both are violent and destructive powers. It shows how the both in many ways come from a similar place, are made of similar stuff but are at the same time, very different.
Basically, it doubles the visual themes and story telling one can do.
I dunno, I just think that its neat.
46 notes
·
View notes
Text
Episode 230 Director's Notes
Wanted to share these ones since I really enjoyed reading Joseph's thoughts.
Ok, so this was a mean little trick.
Quite some time ago, we came up with the idea of Dr. Lubelle explaining away Night Vale. First, we had poor Sarah Sultan, under the title "Sarah Sultan, Explained". Then I knew I wanted to go after someone really big. An iconic character. Thus "The Glow Cloud, Explained." And we always knew there would be one last episode with this title format, and it would, based on the previous pattern, establish an existential threat against our sweet Carlos.
But at no point did we consider actually explaining him away. Because, as Carlos points out in this episode:
a) explanations are not inherently threatening. It is how they are wielded, and who wields them, that can do damage
and
b) a lot of Dr. Lubelle's explanations didn't really hold water anyway.
I knew for this confrontation to work, we would need to hear from both Carlos and Dr. Lubelle themselves. It is always a joy and a privilege when Dylan takes the time from his busy schedule of, most recently, writing on Ted Lasso and creating a new podcast about Jar Jar Binks for TED, to record for us.
And what can be said about Janet Varney that isn't just a lot of incoherent gushing? She is an expert at voice performance. For her final section, I let her know it was her character's big villain monologue before she gets squashed by a cow and to really go for it. I'm actually writing these notes before I get to hear what she did, but I have complete confidence that she will swing for the fences in the best way possible.
In this era of science-denial, it can be tricky to try to tell a nuanced story about science. One that acknowledges the very real harms caused by western capitalism through the tool of science, while also keeping in mind that much of what makes our lives wonderful was also discovered through the same tool. Science has no morality. Morality is simply not what science is set up to do. So the ideas of right and wrong, harmful and helpful, those must come from the human being doing the science.
America has become obsessed with STEM, but when we only teach STEM to the exclusion of the humanties, we get Silicon Valley. A heartless place where very smart people use their knowledge of computers to, generally, make our lives much, much worse, often without knowing they are doing that, because at no point have they been trained to think about the importance of considering the bigger picture and the moral implications of what they are doing.
Anyway, it's a hard topic to write about, and I can't say we 100% pulled it off. But hey, I hope we at least enjoyed the bad guy getting a dead cow dropped on them.
We'll be taking July off as always, so see you in August with whatever is going to happen next year in Night Vale (genuinely we haven't talked about it yet so I don't know).
-Joseph Fink
305 notes
·
View notes
Note
Building off your argument that Ted isn't going to go back to Kansas, he was constantly correcting his mother this episode with regards to British terms. Where before he was the outsider who didn't understand Britishisms, now he is the native who uses the terms instinctively to the point where he gets annoyed when they're used wrong. Sounds like he's acclimatized to England.
Yes!!! I was thinking that a couple weeks back too when Ted first uses "football" instinctively and then comments on how natural it's become. He's reached a point where he's both using that terminology as a matter of course ("Some of us have a football team to coach!") as well as teaching others (here's how the dials on the oven work). (Sidenote: I'm not sure what to do with Dottie's tea comment yet. Not even sure atm whether I read it as sincere or sarcastic, but regardless, I think it's a potentially useful detail next to Ted willingly drinking tea in "Sunflowers." That was another version of acclimation on his part.) Now, combine this verbal/dietary acclimation with our opening where every previously negative interaction Ted had with the community has been flipped to show that they now adore him -- seen most strikingly through the "wanker" guy and, throughout this season, the pub trio supporting him at training -- and if they do send Ted back to Kansas it's really going to read as that Mary Poppins situation of, "He arrives to brighten everyone else's lives and then leaves. Why do you care what he needs? He's just a narrative tool."
To further add to this I can't help but think about the long-term structure of Ted's life now that we know Beard's backstory. We're told that, like his time here in Richmond, Ted helped Beard, forgave him, gave him another chance, and ultimately gave him a life. If we look at Beard's situation as a microcosm of the whole show, it seems significant that Ted does not leave Beard behind. That was not a situation -- a situation we're worried about getting now -- where Ted played the part of emotional coach and then sent Beard on his way, far from him as he's no longer needed. Instead, we get the opposite. Beard becomes his best friend, a staple of his life, and continues to help Ted in turn. By waiting until the penultimate episode to reveal the roots of Beard's loyalty, the show has ensured that the focus is on their equal standing and how Beard has likewise benefited Ted over the years: helping him see that wanting to win isn't a bad thing, trying to provide support through his anxiety, recognizing Ted's tells and informing their new community of what to look for (Nate, during the divorce arc: "Is he okay?" Beard: "No!") Beard could have been a minor, flatter character who popped out of the woodwork just to say, "Ted Lasso changed my life for the better, extraordinarily so, and he is The Best Man anyone could ever meet" (which, frankly, would have made Ted a flatter character too) and then gone on his way, having succeeded in the narrative function of reminding the viewer that this is Ted's sole role in the story: coaching others to be their best selves while pushing his own needs aside.
Instead, Beard becomes the cornerstone of Ted's support system. Ted doesn't leave him behind, he permanently integrates him into his life.
What's a microcosm of this microcosm? Ted Lasso does the same thing with Trent. Does he go off into the writing world once Ted helps him realize what he truly wants in life, his story concluded, never to be seen again? To quote Beard, "No!" Trent comes back and, significantly, Ted doesn't pull any metaphorical Mary Poppins arguments along the lines of, "I'm done all I can for you. It's time for you to move on." He eagerly invites Trent into their Richmond circle when no one else will (I'm currently working on a meta of Trent's first scene of Season 3 because OH BOY IS THERE A LOT) and Trent stays, not simply writing his book but becoming a member of the family. Surely there's a pattern here: The people Ted helps don't leave him, but rather become core additions to his life that enrich his own outlook and understanding of himself.
I'm not saying I'm going to toss Ted Lasso in the bin if we get the Kansas ending, but I AM saying you all will have to suffer through a dissertation length meta on my blog about why that was a bad choice lol
193 notes
·
View notes
Note
Hi, I'm a fan of your blended gifs they always look so good. I'm trying to learn how to do it and was wondering whether you have a tutorial for a beginner, I'm having difficulty blending the images cohesively :(
Any helps appreciated
Oh thank you! I'm really bad at tutorials (you can find decent blending tutorials here and here) but I can give some tips and tricks! My main process is similar I just use frames instead of timeline because that's how I learned photoshop.
Basic tips:
I find it easier to color, sharpen, all that good stuff before I start blending. This makes it easier to have a complete idea of what you want it to look like and what the base black you are working with is.
With that, coloring: Levels for deep blacks. Selective color is your best friend for fixing skin tone issues. Vibrancy for a good finishing touch.
Having the gifs be the same size to start with isn't 100% necessary but I find it makes them easier to work with so I do that pre blend as well.

For the above:
Making the top gif opaque while choosing where you want the blend to occur will help. No need to make it harder on yourself and you can set the top gif back to 100% opacity again when you are done.
Instead of erasure like many people use I like the lasso select tools
Once you've selected the part of the upper layer gif you want gone use Select > Modify > Feather and you get a nice mid blend in the middle. The two gifs will feed into each other creating a very nice visual effect.

For the above:
Make sure one gif has a deep black so that the upper layer will show more effectively, as you'll see it shows better on the black.
When you do a heavy color like this it helps for the second gif to be either 1) black & white or 2) a complementary color.
This particular example the top layered gif is set at opacity 45%. I have done any erasing on the top gif at all you'll see it just naturally disappears into the other lower layered gif as it gets lighter on the left side.
Its important to find a way that works for you and fits your work style and the visual style you want. Experiment with stuff and save a lot, no harm no foul. Just have fun and keep practicing and you'll get it.
#anonymous#i'm bad at tutorials because i need to do things my way#and my way is bad and messy#now why the hell did y'all put a community label on this
5 notes
·
View notes