#tutorial reblogs
Explore tagged Tumblr posts
Visit Tumblr Blog
Explore Tumblr blogs with no restrictions, modern design and the best experience.
Last Seen Tumblr Blogs


Fun Fact
Post activity is at the highest at 4:00 pm EDT; notes peak at 10:00 pm EDT.
Text

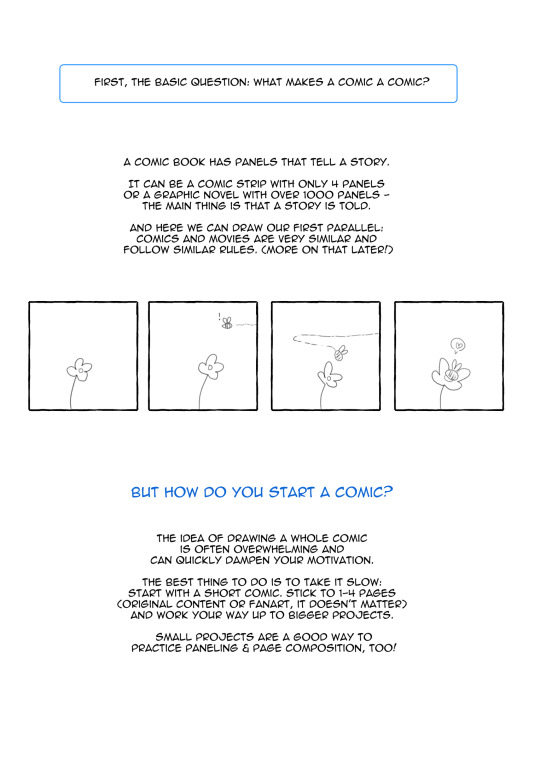
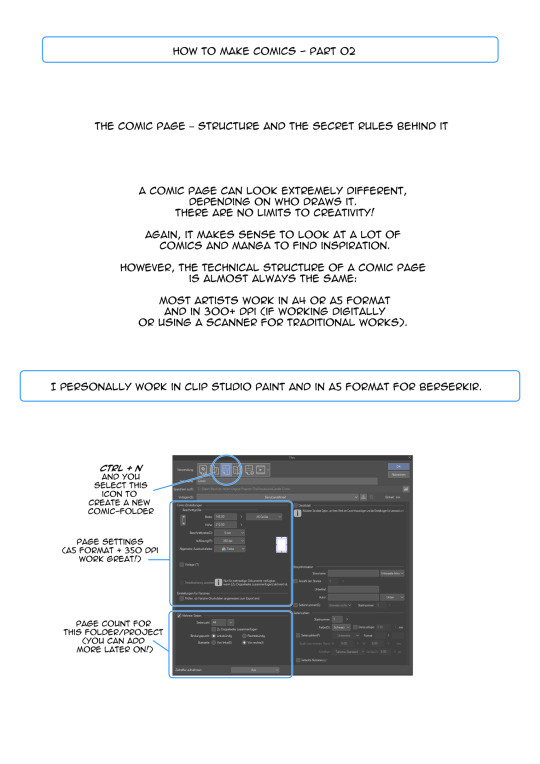
⭐ How to Draw Comics - a helpful guide for beginners by spicymotte is a 20-page booklet on how to make comics, even if you have never touched this subject before! My guide for comic newbies is now available on itch.io!
586 notes
·
View notes
Text

#I CRACKED THE CODE#JESUS CHRIST#DRAW THE GUAR#the elder scrolls#the trash talks#trash art tutorial#please reblog with your results. Please
230 notes
·
View notes
Text
MY GO-TO'S FOR EDITING.
I’ve decided to put together a masterlist of the resources I use, since I get asked about them pretty often. If you're somebody who can’t commission resource makers or you’re just wanting to get into editing or creating commissions yourself, I hope this helps.
pinterest. IMPORTANT NOTICE IF YOU UTILIZE THIS: avoid usings people's art; if you can get permission from an artist to use a piece, that's another discussion. Be warned there may also be ai mixed in, which I've personally got a good eye for spotting; i prefer to go by images i've seen long before the ai craze, since i've been on there for a while. your best bet is looking through miscellenous character boards. From there, you can choose images to blend or even make pngs out of, to give unique flare to your edits.
remove.bg + photokit. if you're looking to save time or don't have a way to cutout images manually ( i sometimes like to use my art tablet if I want to be really precise ), these are good ways to make pngs out of images you find, as opposed to png sites. i prefer this because ive caught adware on png sites before, plus there's also a lot of ai on those as well.
for screencaps, i use google images or youtube, since the quality is higher than anything on pinterest...though, psds are what normally cover up quality issues, from what i've learned. then again, it might depend on the psd. IMPORTANT NOTE IF YOU UTILIZE THIS: If you’re using google Images, searching for actual screencaps might lead you to blogs or websites dedicated to capping—many of which ask for credit if you use their content. Also, avoid reposting people's edits or gifs, since those will inevitably show up when searching faceclaim names and similar tags. on the off chance you find free-to-use faceclaim content, be sure to credit if/when asked !
photopea. it's a great alternative for those of us who can't be assed to learn adope, nor can afford it .
I know it doesn't look like much, but this is genuinely my go-to formula. I don't think there's any need for anything over the top. That said, if you guys have better alternatives or anything to add, feel free—this is just based on my own experience.
ADDITIONAL EDITING TIPS: If you find yourself stumped creatively or unsure how to approach using these, I’d recommend breaking down the character or setting you’re working with in terms of aesthetic. What are some keywords or imagery you associate with that muse ? Take a character like h/arry p/otter, for example—focus on individual visuals, important symbols, and signature colors. For him, I’d think of round glasses, lightning bolts, owls, candles, spell books, brooms, etc. Then, take each of those elements and explore them individually. I’d maybe start by looking up “owls” on Pinterest; from there, I might find images that can be turned into pngs. Repeat that process with every vibe or detail that comes to mind. You don’t have to limit yourself to making pngs either—feel free to experiment by blending different images together and building a look from there.
ADDITIONAL UPDATES/RECOMMENDATIONS:
Screencapped ( * will need an account )
VLC Media Player ( * good for screencaps / things you've downloaded from youtube )
#re: editing resources#free to reblog!#for the other anon i got#roleplay help#roleplay resources#roleplay community#rp graphics#rp resources#editing resources#editing tutorial#ish
84 notes
·
View notes
Text
Quixis!Midas eye study >:3

#got bored then got the art worms to draw eyes#and now we're here#sqcu#sqcu midas#quixis#sherbverse#sherbertquake56#latte has been sat in the coffee machine for a bit too long#also sh ignore the fact i forgor the quixis gem i just cba asked drawing and shading a crystal/gem#idk where the pin went but i saw tutorial on pinterest for these types of eyes and i went midas time#if i find it ill reblog with it :]
69 notes
·
View notes
Text
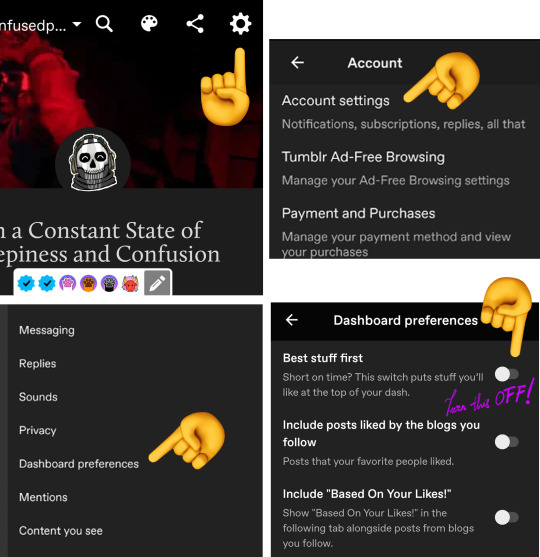
👾 How to Turn Off Algorithm on Your Dashboard 👾
So this post is for the people who've been using Tumblr, following people/blogs you like, hoping that every time they post you can see the stuffs they post/reblog! But there seems to be one problem... every time they post, their posts just doesn't show up on the top of your dashboard! You only saw them only hours or days later or you don't see them all, missing your mutual's post! 🫨
Is there an algorithm on Tumblr? Yes. But you can turn it OFF. Unlike Instagram which doesn't allow us to turn off its algorithm and only sees posts with high engagements, Tumblr has the option to turn OFF its algorithm - and ultimately makes your dashboard chronological/timeline-based ☝️🤓
---
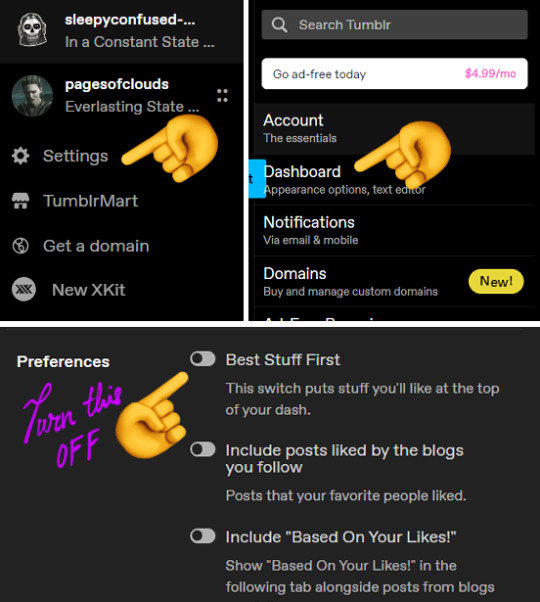
🔮 Turning OFF 'Best Stuff First' 🔮
So, to do this, go to your settings, and go to 'Dashboard Preferences', and TURN OFF the 'Best Stuff First'.
'Best Stuff First' is the algorithm in Tumblr where it'll present you with the stuffs they'd think you'd like based on your likes and reblogs. This is usually turned on automatically by the site itself for new-comers/users to give the new users some time as we look for blogs we like and follow.
Usually after you follow lots of blogs, you'd like to see your mutual's latest posts. So here is how you turn the algorithm off!
(For Mobile)
(For Website)
Et voila! Just like that, your dashboard is now timeline-based and chronological. No more seeing posts from days, weeks, or months ago.
(I myself like to see what's new from my mutuals. But if you have your own preference to see the most popular stuff on the top of your dashboard, feel free to turn the algorithm on.)
---
⌚ Turning on Time Stamps ⌚
To make it more clear, let's turn on the time stamps. Yes, you can know when a post is posted on Tumblr.
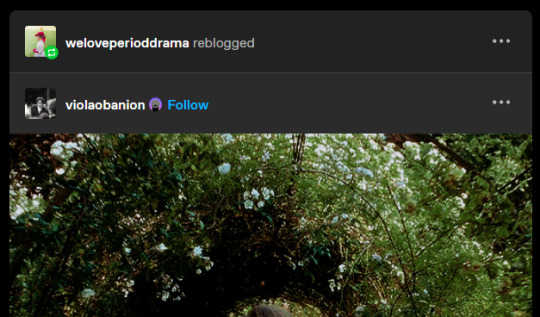
So you'd usually see posts on your dashboard like this image below. As you can see, there are only the usernames, but no time indicator.
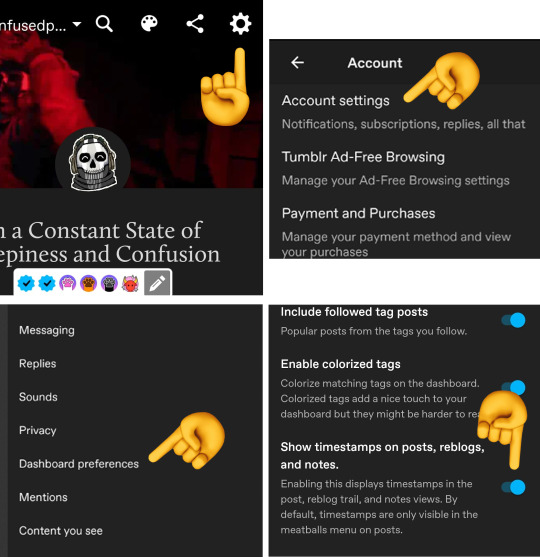
To see when this post was posted, you can go to the dashboard settings and turn ON the 'Show timestamps on posts, reblogs, and notes'
(For Mobile)
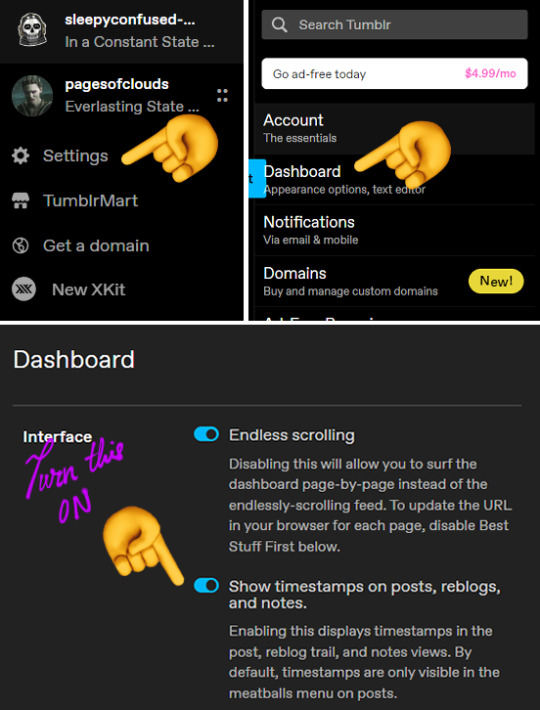
(For Website)
After turning this on, you can see that underneath the usernames, there's a timestamp! Now you know when the posts shown on your dashboard was posted!
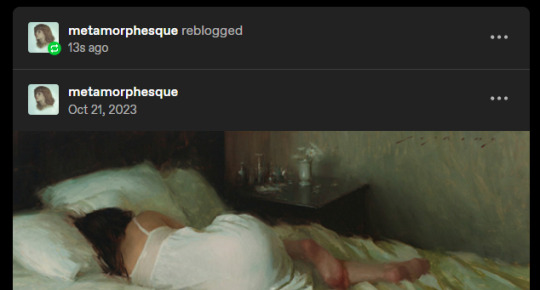
There's even posts from seconds ago! Pretty neat and convenient isn't it ( •̀ .̫ •́ )✧ OR again, if you don't like to see the times, feel free to turn it off too!
---
Anyway, have a good chronological/algorithm-free Tumblr experience!
Reblog is appreciated since a few of my friends have a hard time to see their mutuals' posts and unfortunately missed them. Don't forget you can also turn on notifications for when your beloved mutuals post! (๑•̀ㅂ•́)و✧
367 notes
·
View notes
Text


Funny that this is only the second tutorial I’ve ever uploaded on Instagram
This is more for Procreate specifically, but (sans the water brush) it pretty much applies to any program that has layer functions!
Want more tutorials in the future? Comment on what you’d like help on!
58 notes
·
View notes
Note
Here's a tutorial for changing tag colors: https://archiveofourown.org/works/53119543

THANK YOU!
Here is a clickable link for anyone who needs that - https://archiveofourown.org/works/53119543
and I shall tag @sorbusaucuparia to close the loop!
#mod remi#ao3 skins#ao3#archive of our own#y'all are amazing did you see how quickly that went#if there are more tutorials feel free to put them in the notes/reblogs!
184 notes
·
View notes
Text
PHOTOPEA TUTORIAL / PHOTO FILTER FOR SKIN TONES:
a tutorial on HOW TO BRING OUT SKIN TONES if an image is 'too gray' (faded) or has too much of one (likely over saturated) color! this technique can easily be applied to icons that already have a border ! just put your focus on the base image / icon ! this works on relatively anything, including poc and non-poc. WHAT YOU WILL NEED: photopea...and your desired your base image(for example, i'll be showcasing inconsistent or otherwise dark/faded scene lighting, like twilight and saw). DISCLAIMER: not all lighting/images are the same, nor are psd colorings. while some colorings may be designed to bring out reds/yellows(which is the filters we'll be using in this specific example), others may mute them and you may have to improvise with whatever color the psd you're using is designed to focus on. this is just a general idea, you will have to explore as you see fit. it's all going to depend on your personal taste !
by the end of this, you should be able to manage results like this !

cool, huh?....anyway, on with the mechanics !
EXAMPLES:

[ BEFORE PSD ] [ SYNOPSIS ]
#01 / LEFT IMAGE ABOVE: too much green, becomes muted with psd and doesn't show variety. #02 / RIGHT IMAGE ABOVE: the colors are very faded in this scene, and the pink focused psd in question made the image seem gray. we will start with EXAMPLE #01. i will be using the same PSD on both, a custom psd i made and focuses on reds/pinks.

as you'll see above the PSD has now been applied...but now it's kinda boring :// (there's nothing wrong if you don't mind how it is above, everyone's got their aesthetic choice—HOWEVER, we're aiming to add skin tone...)
once you have your image open, you'll want to go to image>adjustments>photo filter; i went ahead highlighted it in yellow for easy finding !

since this psd DOESN'T mute reds/yellows, (and those are usually the base of most/general skin tone combinations) i applied both a yellow and red filter. now, these colors i'll be using in this example, because they're in my default colors on the photo filter option—you can totally choose lighter or darker variants of these colors, or like i said, a different color altogether based on how the PSD you're using works. the toggle setting doesn't have to be exact to this example either—this is just what worked best on this image combined with the chosen PSD ! // RIGHT IMAGE IS THE FINAL RESULT AFTER APPLYING THE RED FILTER AFTER THE YELLOW.


repetition on a different example . . .


this scene in particular is very faded, and the red feels a little blotchy/over saturated here...so i'll show you an EXTRA STEP you can use ! in saying this, you don't have to do exactly this; you can even choose to go ahead with selective color to fix your image, without doing the filters, if you find that suitable. but i'll be showing you the magic of selective color to balance out the red toned overlay.

same concept as before, just a different selection: image>adjustments>selective color. think of selective colors as "balancing" the colors. it does have a toggle selection for each color, which is super helpful, including diminishing or adding white highlights. given the PSD colors, naturally, i'll be focusing on yellow and red.


it's now got a general skin tone and red is not as blotchy !
[ FINAL RESULTS / CONSISTENCY WITH PSD APPLIED ]

this is a great hack i use quite a bit, it's great for maintaining consistency in your icons when the lighting is working against you...hope this was comprehensible and helpful, happy editing !
#* RE - RELEASE#* MY TUTORIALS.#sorry i didnt realize i forgot to reupload this one!#long post /#FREE TO REBLOG !#rp community#icon tutorial#rp icon tutorial#psd tutorial#roleplay coloring#roleplay help#roleplay resources#roleplay community#roleplay graphics#coloring psd#psds#icon psd#psd#roleplay psd#rp graphics#rp psd#rp resources#tutorial#editing tutorial#rpc tutorial#editing resources#psd coloring
254 notes
·
View notes
Text
how two draw

#tell me if you see what I see#because I see what I see#and i see it#anyways#i drew a how to draw a penguin thing with no hidden thing in it at all nope no not at all nada#i hope you will teach this to your friends by reblogging it#hahskeleton#my art#how to draw#art tutorials#drawing tutorial#art tutorial#how to draw thing#reblog please#meme art#funny memes#funny#haha#humor#meme
67 notes
·
View notes
Text

KNiFELACE ──── a(n edit) resource blog run by @chocospresso .

𓊆 my neospring . if you wish for me to delete a post / reblog , let me know .

#𓊆 ✑ 𓊇 posts.#𓊆 ✑ 𓊇 asks.#𓊆 ✑ 𓊇 reblogs.#𓊆 ✑ 𓊇 not resources.#𓊆 ✑ 𓊇 transparents.#𓊆 ✑ 𓊇 masks.#𓊆 ✑ 𓊇 pfp masks.#𓊆 ✑ 𓊇 banner masks.#𓊆 ✑ 𓊇 dividers.#𓊆 ✑ 𓊇 lace.#𓊆 ✑ 𓊇 frames.#𓊆 ✑ 𓊇 backgrounds.#𓊆 ✑ 𓊇 psds.#𓊆 ✑ 𓊇 gradient maps.#𓊆 ✑ 𓊇 overlays.#𓊆 ✑ 𓊇 fonts.#𓊆 ✑ 𓊇 tutorials.#𓊆 ✑ 𓊇 websites.#𓊆 ✑ 𓊇 graphics.
66 notes
·
View notes
Text
Useful F2U Programs (and 1 F2U Website) For Writers
Can't afford Microsoft Office?? No problem, just download LibreOffice or OpenOffice, both in which are not-for-profit + open source, and you're good to go.
Need a dictionary to use when you're offline and have no internet or just need to know what something means + synonyms/antonyms?? No problem, just download WordWeb and you're good to go.
Need to create some fictitious deities for your fictitious race?? No problem, just go to Chaotic Shiny Productions, press CTRL + F, and type in Pantheon Generator Portable. Once downloaded, you're good to go.
Need to know how many words you need to write a day to reach your monthly goal of _____ number of words?? No problem, just go to Chaotic Shiny Productions, press CTRL + F, and type in NaNoWriMo Calendar. Once downloaded, you're good to go.
Want something that's better than Notepad because it auto-backups every-so-often and has a countdown word counter?? No problem, just download yEdit2 and you're good to go.
Need a program that allows you to do a scene-by-scene play for your works?? No problem, just download yWriter7 and you're good to go.
Want to be able to use ProWritingAid Pro without needing to purchase it?? No problem, just head to The ProWritingAid Team Trial Signup, get a Temporary Email (almost any of them will suffice), and create a new account every seven (7) days which will lead to an infinite number of #7DayTrails. You'll also need to download ProWritingAid and you're good to go.
Want to create your own Wikipedia?? No problem, just download this Wikipedia HTML-CSS-JS Template from HTML5 Templates, create an account on Neocities, and download Brackets to edit said Wikipedia Template. Once finished, you're good to go.
#pvposeur's tutorials#pvposeur's tutorial#pvposeur's how to#pvposeur's how tos#pvposeur's psa#pvposeur's public service announcements#pvposeur's public service announcement#writing tutorial#writing tutorials#free to use#f2u#writers on tumblr#writer on tumblr#authors on tumblr#author on tumblr#writeblr#authorblr#microsoft word#microsoft office#libreoffice#openoffice#yedit2#ywriter7#wordweb#nanowrimo#prowritingaid#brackets#wikipedia#neocities#free to reblog
27 notes
·
View notes
Text
how to edit in capcut in case anyone doesn’t know how after the ban!!<3
#capcut#capcut ban#tiktok banned#tiktok refugee#goodbye tiktok#tiktok ban#capcut edit#capcut tutorial#important#please reblog#please share#silly posting:33#uzi posts:3#:333
34 notes
·
View notes
Text


Biblical and Liminal
#angels#liminal spaces#yes this was inspired by that text post i reblogged#i never draw backgrounds n wanted to give it a shot#yes they arent perfect#i might watch some tutorials on background colorin n stuff#ref pics included#eyes#these perspectives be all wrong baby boi#its 2am
120 notes
·
View notes
Text
bae's channel.

oioi! tudo bem com vcs, meus amores? vim aqui para apresentar meu canal no youtube!
lá eu trago diversas coisinhas, incluindo tutoriais (alguns relacionados aos meus blogs) então, caso tenha algo que vcs queiram aprender, basta dar uma passadinha lá no meu post da comunidade e fazer seu pedido <3

enfim, um pequeno post mostrando outras sociais onde também ou ativa! espero muito que gostem 🫶🏻
bae on youtube
#͏ ͏ ͏ ͏ ͏ ͏ ͏ ͏ ͏ ͏ ͏ ͏ ͏ ͏ ͏ ͏ ͏ ͏ ͏ ͏ ͏ ͏ ͏ ͏ ͏ ͏ ͏ ͏ ͏ ͏ ͏ ͏ ͏ ͏ ͏ ͏ ͏ ͏ ͏ ͏ ͏ ͏ ͏ ͏ ͏ ͏ ͏ ͏ ͏ ͏ ͏ ͏ ͏ ͏ ͏ ͏ ͏ ͏ ͏ ͏ ͏ ͏ ͏ ͏ ͏ ͏ ͏#baenuit#like or reblog#aesthetic#messy bios#bios#nicknames#soft#kpop bios#messy icons#kpop nicks#youtube#kpop#gg#youtube channel#youtela#symbols#coquette#moodboard#lockscreens#event#veurence#minimalism#tutorial#long locs#short bios#random bios#textual locs#layouts#headers
66 notes
·
View notes
Text
How to filter out tags on tumblr?
I think people are once again forgetting how to blacklist tags they do not wish to see. The best way to avoid triggering and/or unfavourable content is to curate your own online space, which means putting in the work yourself instead of complaining in a post or sending hate to others in their asks or dms!
So here is a guide on how to blacklist tags on tumblr mobile! (please feel free to add to this post with other alternatives for pc and other filtering methods like add ons)
1. Go to your blog and find the gear icon

2. Find your accound settings

3. Find 'Content you see'

4. Tap 'New' and type in the offending tag you don't wish to see anymore

Congratulations! You have successfully filtered out the tag and now you never have to see that content again (as long as posts are all apropriately tagged)!!!
#pls reblog and spread this to everyone#ppl are forgetting how to do this!#tumblr#tags#filter#filtering tags#tutorial#tumblr tutorial#silmarillion#marvel#mcu#star wars#star trek#tolkien#game of thrones#fandom#i cant be bothered to tag more fandoms hopefully this willreach the ppl who need it
19 notes
·
View notes
Text
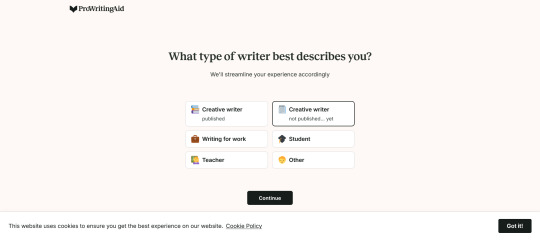
How to Use ProWritingAid Teams Free Indefinitely
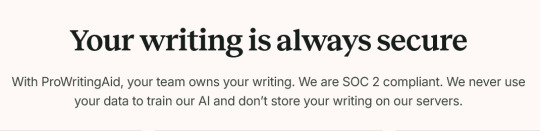
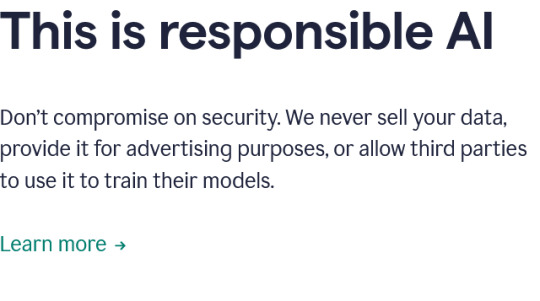
For anyone wondering, ProWritingAid is a lot like Grammarly. And, like Grammarly, ProWritingAid does not use your data to train AI programs shit and do not store your writing on their servers. Here are screencaps for proof with ProWritingAid and Grammarly.
So with all of that being said and done, I will get right down to the nitty gritty and explain how to use this for free 5ever. It is gonna be under a Read More to make it easier on everyone's dashboard.
001. Open this link here (https://prowritingaid.typeform.com/to/M8XJM6Kt?typeform-source=prowritingaid.com) in a new tab.
002. Get your hands on a 10 Minute Mail of your choice (pretty much any of them will do AFAIK).
003. Go back to the tab with The ProWritingAid Team Trial Signup and start filling everything out with the 10 Minute Mail info you have. Down below are some screencaps of how it ought to look.


004. Click Return to ProWritingAid and then proceed to the 10 Minute Mail tab. You will get an email from ProWritingAid looking something like this.

005. Click Confirm email. It will open in a new tab and you'll type in your password of choice. Click Save Account Details when finished. It will redirect you to a different page and you start filling some more stuff out. It will look something like this.
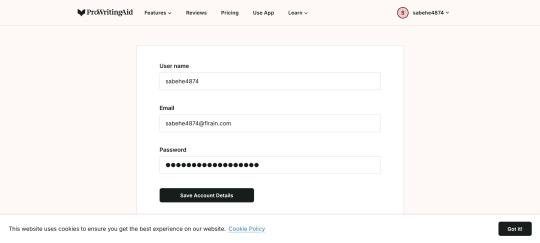
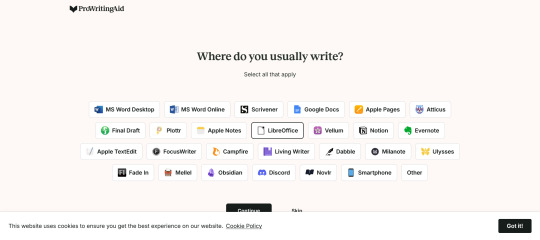

006. Once finished, click Download for OS and proceed to install it. After finished and is opened, a screen should pop up and look something like this.

007. Proceed to Log in and you are 100% good to go because it will redirect you to the account you, quite literally, just made.
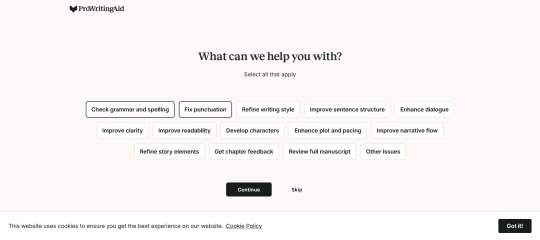
008. Once the 7-Day Trial is done, you will open the settings up for the app and click Sign Out. After that, you will do Steps 1 thru 5 and Steps 7 and 8.
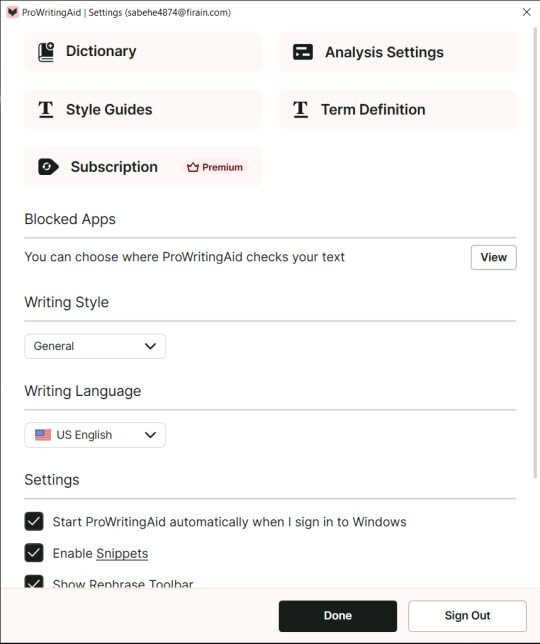
And there you have it! This is how you get your hands on a lifetime's worth of ProWritingAid Team for free.
#pvposeur's tutorial#pvposeur's tutorials#pvposeur's psa#pvposeur's public service announcement#pvposeur's public service announcements#pvposeur's guide#pvposeur's guides#tutorials#tutorial#psa#public service announcements#public service announcement#guides#guide#writeblr#writers on tumblr#writer on tumblr#writers#writer#authorblr#authors on tumblr#author on tumblr#authors#author#writing community#creative writing#fanfiction#free to reblog
20 notes
·
View notes