#using cardstock and acetate
Explore tagged Tumblr posts
Visit Tumblr Blog
Explore Tumblr blogs with no restrictions, modern design and the best experience.
Last Seen Tumblr Blogs


Fun Fact
Tumblr has a 66 index score for customer satisfaction in the US.
Text

Made Godzilla cake topper for wife’s birthday…
#rea’s text posts#there’s a lot I’d change#but other than getting the Godzilla svg from somewhere and using Cricut design images for everything else#I put it all together#using cardstock and acetate#(definitely gonna go with duralar next time)
10 notes
·
View notes
Text
Creating Custom Stencils from Images: A Step-by-Step Guide
Creating custom stencils from image is an excellent way to personalize art projects, enhance home décor, or develop unique designs for professional use. Stencils can bring precision and replicability to art, enabling designs to be consistently transferred across various surfaces like walls, fabric, glass, or wood. With just a few steps, you can transform your favorite image into a reusable stencil.
What You’ll Need
Image Editing Software (such as Photoshop, GIMP, or free online tools)
Printer and Paper (preferably cardstock for durability)
Cutting Tools (a craft knife or precision cutter)
Stencil Material (mylar, acetate, or heavy paper)
Stencil Adhesive (optional, but useful for positioning)
Choosing the Right Image
Choose an image with strong, clear outlines and contrast. Simple images with minimal details are ideal for creating stencils, especially if you’re a beginner. High-contrast photos work well, such as black-and-white images, silhouettes, or bold shapes. If you’re looking to create intricate designs, make sure you have the tools to cut out the finer details.
Convert the Image to a Stencil Design
To make a stencil-ready image, you’ll need to remove any unnecessary details and convert the picture to a solid black-and-white format.
Open the Image in Editing Software: Load your chosen image in software like Photoshop or GIMP.
Convert to Grayscale: If the image is in color, convert it to grayscale. This helps focus on the contrast between light and dark areas.
Adjust Contrast and Threshold: Increase the contrast or apply a threshold adjustment to make all lines and shapes either black or white. The goal is to create a design where all the areas you want to cut out are clearly defined.
Smooth and Simplify Lines: If needed, use smoothing tools to clean up the edges and remove any tiny, unwanted details that may be hard to cut out.
Print the Stencil Design
Once your image is stencil-ready, print it on paper or directly onto the material you’ll be using for the stencil. For a more durable stencil, print it on cardstock or other sturdy materials. If you’re using transparent materials, tape your printout underneath the stencil material so you can trace the design.
Cut Out the Stencil
Carefully cut along the black sections of your printed design using a craft knife or precision cutter. It’s best to work slowly and methodically to avoid mistakes. A cutting mat underneath will help protect your workspace.
Test and Refine Your Stencil
Once you’ve cut out your stencil, it’s a good idea to test it on a scrap piece of paper or fabric. Place the stencil down, secure it with stencil adhesive or painter’s tape, and apply paint or ink to test the design. If any areas are unclear or require additional smoothing, you can trim them as needed.
Applying and Reusing Your Stencil
Now your stencil is ready to use! Custom Stencils for Clothing are versatile and can be used repeatedly, depending on the material and how they’re handled. Clean them gently with a damp cloth after each use to preserve their longevity.
Tips for Creating Custom Stencils
Choose High-Quality Images to get clear, crisp lines in your design.
Use a Durable Material like mylar or acetate if you plan to use the stencil multiple times.
Layer Multiple Stencils if you want to add complexity, such as shading or color layers.
Work in a Well-Lit Area to see intricate cuts clearly.
0 notes
Text
Choosing the Right Sketch Pen: Factors to Consider

Sketch pens are versatile tools used by artists, designers, hobbyists, and professionals alike for various creative purposes. Whether you're sketching, illustrating, coloring, or lettering, selecting the right sketch pen can significantly impact your artwork. This article explores the key factors to consider when choosing sketch pens, helping you make informed decisions based on your artistic needs and preferences.
Understanding Sketch Pens
Sketch pens, also known as markers or felt-tip pens, are available in a wide range of types, colors, and tip sizes. They are characterized by their ink delivery system, which can be based on water-based or alcohol-based ink. Each type of sketch pen offers unique characteristics that influence its performance and suitability for different artistic applications.
Types of Sketch Pens
1. Water-Based Sketch Pens:
- Characteristics: Water-based ink is suitable for paper and porous surfaces. It typically produces vibrant colors and can be blended with water for watercolor-like effects.
- Applications: Ideal for illustrations, journaling, coloring books, and artworks that require layering and blending.
2. Alcohol-Based Sketch Pens:
- Characteristics: Alcohol-based ink dries quickly, is permanent, and produces vivid, saturated colors. It is suitable for non-porous surfaces like glass, plastic, and acetate.
- Applications: Preferred for professional illustrations, architectural drawings, fashion design, and artwork requiring precise lines and rich colors.
3. Brush Tip Sketch Pens:
- Characteristics: Feature a flexible brush tip that mimics the strokes of a paintbrush. Offers variable line widths depending on pressure.
- Applications: Excellent for calligraphy, lettering, expressive sketches, and artwork that requires varying line thicknesses.
4. Fine Tip and Bullet Tip Sketch Pens:
- Characteristics: Have firm, precise tips suitable for detailed work, outlining, and coloring small areas.
- Applications: Useful for technical drawings, fine details in illustrations, and outlining in coloring books.
Factors to Consider When Choosing Sketch Pens
Choosing the right sketch pen involves considering several factors that affect its usability, performance, and compatibility with your artistic style. Here are key considerations:
1. Ink Type
- Water-Based vs. Alcohol-Based: Determine whether you need water-soluble colors for blending and layering (water-based) or permanent, quick-drying colors (alcohol-based) that work on various surfaces.
2. Color Range
- Available Colors: Consider the range of colors available in the pen set. Larger color ranges offer more flexibility in creating vibrant artworks and intricate details.
3. Tip Size and Type
- Tip Size: Choose the appropriate tip size (fine, medium, brush) based on the scale of your artwork and the level of detail you wish to achieve.
- Tip Type: Decide on the tip type (brush, fine, bullet) that best suits your preferred drawing style and techniques.
4. Performance on Different Surfaces
-Surface Compatibility: Determine whether the sketch pen is suitable for the types of surfaces you commonly work on (paper, cardstock, plastic, etc.).
5. Blending and Layering Capability
- Blendability: Assess how well the ink blends (if applicable) and whether it meets your needs for creating smooth transitions and gradients.
6. Drying Time and Smudge Resistance
- Drying Time: Consider the drying time of the ink, especially for alcohol-based pens, to avoid smudging during layering or blending.
- Smudge Resistance: Ensure the ink is smudge-resistant once dried, particularly important for artworks that require handling or framing.
7. Archival Quality and Longevity
- Archival Quality: Check if the ink is archival quality, meaning it is lightfast and resistant to fading over time, ensuring the longevity of your artwork.
8. Ergonomics and Comfort
- Grip and Design: Evaluate the ergonomic design of the pen, including grip comfort and pen weight, especially if you plan to use them for extended periods.
9. Cost and Value
- Cost Consideration: Balance the quality and features of the sketch pen set with your budgetary constraints, considering the value they offer in terms of performance and longevity.
Making the Decision
When choosing sketch pens, it's essential to prioritize factors that align with your artistic goals and preferences. Experimenting with different brands and types can help you discover which sketch pens best suit your style and techniques. Here’s a summarized checklist to guide your decision:
- Research and Compare: Read reviews, compare brands, and consider recommendations from artists with similar artistic styles.
- Test Before Purchase: Whenever possible, test sketch pens to assess their performance on different surfaces and their compatibility with your techniques.
- Consider Long-Term Use: Invest in quality sketch pens that meet your current needs and have the durability to withstand frequent use over time.
Choosing the right sketch pen involves thoughtful consideration of factors such as ink type, tip size, color range, performance on different surfaces, and ergonomics. By understanding these factors and evaluating how they align with your artistic preferences and requirements, you can make informed decisions that enhance your creative process and elevate the quality of your artwork. Whether you're a beginner exploring different mediums or a seasoned artist looking to refine your tools, selecting the optimal sketch pens can empower you to express your creativity with confidence and precision.
0 notes
Text
Holding it Together: Exploring Adhesives for Paper Crafts and Everyday Needs
Paper, a versatile and ubiquitous material, forms the foundation of countless projects, from everyday tasks to artistic endeavors. But what keeps those paper creations together? The answer lies in the world of adhesives – specialized solutions designed to bond paper securely and effectively. This article dives into the different types of paper adhesives, their characteristics, and applications, and helps you choose the right adhesive for your next project.
The Adhesive Arsenal: A Look at Common Paper Adhesives
The vast array of paper adhesives caters to various needs and project types. Here's a breakdown of some commonly used options:
Glue Sticks: A familiar choice for many, glue sticks offer a convenient and mess-free solution for basic paper adhesion. They are typically activated by heat from friction and work best for lightweight paper and temporary bonding.
Liquid White Glue (Polyvinyl Acetate - PVA): Also known as school glue, white glue is a water-based adhesive that dries clear. It provides a strong bond for a variety of paper types, making it suitable for everyday use, crafting projects, and adhering heavier paper items like cardstock.
Rubber Cement: A solvent-based adhesive, rubber cement offers a temporary but strong bond. It allows for repositioning before drying and is ideal for scrapbooking, photo mounting, and adhering delicate paper materials. However, due to its solvent content, ensure proper ventilation when using it.
Spray Adhesives: These offer a quick and even application for large paper surfaces. They are ideal for mounting photos, posters, or laminating documents. Remember, proper ventilation is crucial when using spray adhesives due to the presence of volatile organic compounds (VOCs).
Double-Sided Tape: This versatile option offers a clean and convenient solution for temporary or permanent bonding. It comes in various widths and strengths, making it suitable for attaching photos, lightweight objects to paper, or creating interactive elements in scrapbooks.
Specialty Adhesives for Specific Tasks:
Beyond these common choices, specialty paper adhesives cater to specific needs:
Archival Adhesives: These acid-free adhesives are formulated to prevent paper degradation over time. They are crucial for scrapbooking, photo mounting, and preserving valuable documents.
Decoupage Glue: Specially formulated for decoupage, this adhesive allows for adhering paper to various surfaces like wood, fabric, or canvas. It often dries with a glossy finish, adding a decorative touch to projects.
Hot Glue: While not strictly an adhesive for paper alone, hot glue can be used for adhering paper to different materials like wood, plastic, or foam. It offers a strong, fast-setting bond but requires a hot glue gun for application.
Choosing the Right Adhesive for Your Project:
Selecting the most suitable adhesive for your paper project depends on several factors:
Materials to be Bonded: Consider the type of paper you're using (lightweight, cardstock, etc.) and if you need to adhere it to other materials.
Bond Strength Requirement: Do you need a temporary or permanent bond? Stronger adhesives might be necessary for heavier paper or functional projects.
Drying Time: Quick-drying adhesives are ideal for some projects, while others might require a slower drying time for repositioning.
Application Method: Consider your comfort level and project scale. Glue sticks and double-sided tape offer mess-free application, while spray adhesives are quicker for large surfaces.
Acidity: For archival projects or preserving valuable papers, choose acid-free adhesives to prevent paper degradation over time.
Additional Tips for Working with Paper Adhesives:
Surface Preparation: Ensure the paper surfaces to be bonded are clean, dry, and free of dust or grease for optimal adhesion.
Read the Label: Always familiarize yourself with the instructions and safety precautions provided on the adhesive label.
Test on Scraps: Before applying adhesive to your final project, test it on a scrap piece of paper to ensure compatibility and desired bond strength.
Storage: Store leftover adhesive in a cool, dry place following the manufacturer's recommendations.
Conclusion:
Adhesives play a vital role in bringing paper projects to life. Understanding the different types of paper adhesives, their applications, and choosing the right one for your needs empowers you to create strong, lasting paper creations, whether it's a simple school project, a beautiful scrapbook layout, or a stunning piece of paper art. So, unleash your creativity, explore the world of paper adhesives, and start crafting!adhesive for paper
1 note
·
View note
Text
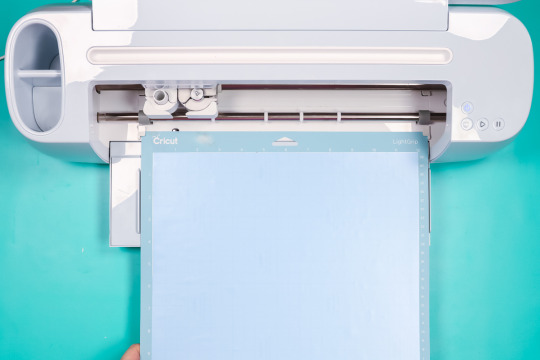
Cricut Maker 3 Set Up - The Ultimate Craft Cutting Machine

Today’s latest and must-have DIY gadget is Cricut Maker 3. It is always in the top list of the crafter’s wish lists. Also, crafters and DIYers praise this latest Cricut machine thanks to how easy it is to use and get more out of it. In addition to this, you do not require much prior experience or technical knowledge to use the machine.
However, Social media is full of videos where influencers share the endless tasks you can do with this incredible machine. Therefore, we decided to look at how the Maker 3 machine works and what it can do.
What is Cricut Maker 3?
This Maker 3 is a digital crafting machine that uses a design app (Design Space) and a variety of tools that allows you to do a fantastic craft project. This cutting machine is so smart that many things wouldn’t possibly be done with scissors alone.
Its upgraded cutting speed enables you to cut over 300 materials. Therefore, it is called the Rolls-Royce of cutting machines.
What Can a Cricut Maker Do?
The Cricut Maker 3 is the newest cutting machine model released in June 2021, which is a super choice for delivering performance at commercial grade level. Like the original Maker model, it can cut more than 300 different types of materials, including paper, wood, leather, fabric, and others. It is also compatible with the 13 tools for scoring foiling, writing, cutting, engraving, etc.
In contrast, the compatibility of Cricut Maker 3 with Smart Materials allows you to cut a long project up to the length of 12 feet without the need for a mat. Its strong motor can provide 2x fast cutting with 10x cutting force as the original Cricut Maker.
How Does the Cricut Maker 3 Work?
The Design Space app is required to control the Maker 3 machine. You can use the app on a computer or mobile device. Also, you can connect your Cricut Maker 3 machine via wireless Bluetooth technology or using a USB cable.
On Design Space, you can create your numerous designs from an image file format, such as PNG, JPG, and SVG. In addition to that, it also provides its own library of text fonts, pictures, and SVG files as part of the Cricut Access plan. What is the SVG file? The SVG stands for Scalable Vector Graphic, and this image uses code instead of pixels to form an image.
You also might have noticed the reduced quality of small images while resizing them to make them larger. This happens due to the pixels getting stretched and distorted. Whereas, when you try to resize the SVG file (image) then, you don’t see any distortion in your image. Additionally, you can break the graphic down into several layers that are quite easy to edit.
What Makes a Cricut Maker 3 Unique?
Cricut machines are famous for their top-notch cutting and drawing features, and they can easily cut vinyl, cardstock, balsa wood, fabric, leather, and paper. Here are the features of Cricut Maker 3 that makes it unique:
Adaptive Tool System
The feature of this versatile Cricut Maker 3 machine is so powerful, and it is the only machine that comes with this adaptive tool feature.
This adaptive system feature can equip different tools and blades to provide all types of cuts so that you can personalize your Cricut projects in a different manner.
Escalated Cutting Pressure
The Adaptive system means that the Maker 3 machines include a 10x cut force, meaning the applied pressure and their movement can provide precise cuts on your projects. Furthermore, it can cut over 300 materials, which include plastic, fabric, wood, leather, vinyl, and felt.
What Materials Can You Cut With Cricut Maker 3?
As mentioned earlier, Maker 3 can cut more than 300 materials, like Cardstock, Vinyl, and Paper. However, the more specialized material here includes:
Washi Sheet
Suede
Vellum
Poster
Magnetic Sheets
Glitter Duct Tape
Felt
Faux Leather
Craft Foam
Chipboard
Chalkboard Vinyl
Burlap
Balsa Wood
Aluminum Sheet
Acetate
Besides, the smart materials released by Cricut are now capable of working with the Cricut Maker 3 without using a mat, which is a game changer for DIYers and Crafters who have a larger task to do.
Earlier, it was only possible to cut the designs of the standard mat size 30.5 cm x 30.5 cm (12″ x 12″) or the long mat 30.5cm x 61cm (12″ x 24″). But now Smart Materials will enable you to cut designs that are 30.5 cm wide and up to 3.6 meters (12 feet) long.
Conclusion
In conclusion, the Cricut Maker 3 machine comes with the latest and unique features, such as an Adaptive tool system. It allows it to be equipped with a range of tools to provide all types of desired cuts on your Cricut projects. In addition, the Smart Materials for Cricut Maker 3 make it unique and don’t require any cutting mats. With this ultimate cutting machine, thrive in your crafting journey!
FAQs
Question 1: What blade comes with Cricut Maker 3?
Answer: When you buy a Maker 3, you get the Premium Fine-Point Blade aligned with housing, which can cut your most popular materials, including vinyl, iron-on (HTV), and paper. However, this Fine-Point Blade comes with Explore 3 and Maker 3, so you don’t need to purchase the housing separately. You just need a few replacement blades to have extra on hand. With jaw-dropping speed, expedite and boost your production with this smart gadget!
Question 2: What can you do with a Cricut Maker 3?
Answer: With this smart Maker 3 machine, you can perform various tasks, such as cutting hundreds of materials in less time with precision and also scoring foiling, writing, cutting, engraving, and more. In addition, the smart tool system allows you to switch out 13 different tools to perform actions on desirable materials.
Question 3: Do I need to connect to the internet to use Cricut Maker 3?
Answer: No, it’s not necessary to always connect to the internet. Cricut Design Space Software installed on your devices, such as a computer or iOS mobile device, can work without the internet. But to access some features, for example, uploading any content and syncing it to the cloud, may require you to use the internet.
0 notes
Text
2023.7.23
The first step is still to start with the oral transmission, I am going to use a white cardstock as a base for the "imagination" on two acetate transparencies.
On the base paper I still used the collage technique as the subject matter of the poster, I made a collage design of the mouth, the brain, and added some sound visualisations on the background.

For the second and third layers, I used ChatGPT to generate a couple of images of unicorns (because it's imagination, and maybe ChatGPT-generated images are also a representation of a computer's imagination)


I used these pink and black unicorn images as the imaginative base of the design, stretching and altering the overlays, collaging them together to form the second and third imaginative layers of the construction respectively, and adding the theme text of the whole poster——oral transmission, to the third layer. in the second layer, I added some text to describe the unicorns, which better explains the reason for the imagery.


Final outcomes:


After completing a series of designs I sent them off to Print-it at ECA to be printed and hopefully all will go well!
0 notes
Text
How to Make Stencils with Cricut? [A Comprehensive Guide]
Cricut machines are ideal for making stencils because the machine can take all the work by cutting the material and ensuring you have a perfect, professional stencil. In this tutorial blog, we will walk you through all the steps needed to make stencils with Cricut. Also, learn how to make a basic stencil. It might seem a bit complicated initially, but it can be really simple once you start making stencils. Through this, you can decorate anything you want like, for example, pillows, wall decors, and custom t-shirts.

What is a Stencil?
Before beginning with the steps to make stencils with Cricut machine, we first need to understand what stencil means. It is a thin sheet of material cut out of a design, usually plastic, Vinyl, or paper. They are versatile and can range from simple to complex, depending on your design.
Further, you can make stencils on different materials with a Cricut machine. You can make Reusable stencils using acetate, plastic, or laminating sheets. And for One-Time stencils, you can use vinyl sheets, contact paper, and Cricut stencil material.
What are the Materials and Tools to Make Stencils?
Before starting to make stencils with Cricut, there are a few important materials you will need. Let us take a look at the tools and materials that you need for making stencils.
You need to get a project upon which your stencil will go. The project surface can be blank, wooden tray, t-shirt, or plain wall.
Next, you need material to cut your stencil, such as Vinyl, paper, cardstock, etc.
Further, you need Transfer Tape, especially working with Vinyl, for safe transferring of the design.
You also need a stencil brush or a simple sponge brush.
Most importantly, you must have Weeding, Scraper, and Brayer tools.
How to Cut Stencil Vinyl with Cricut?
Now, we will look at how to design on Design Space and cut the stencil on the material.
The first step in any Cricut project is to make your stencil on Design Space or select the design from the Cricut Access Library.
Otherwise, you can even upload a stencil SVG file.

If you want to design your stencil image, you make a stencil with a monogram, some text, a short quote, an illustration, or any combination of these elements.
Remember that all the design elements must be touching, specifically to cut the stencil vinyl as one solid piece.
After finalizing the stencil design, you can prepare the Vinyl for cutting.
For that, the first step is to place the stencil vinyl on the surface of a Light Grip or Standard Grip cutting mat.
You can also use the Brayer tool to roll the stencil vinyl and ensure it is flat, smooth, and well-adhered to the mat.

Later, you need to press the load button into the machine by pressing the arrow buttons.
Further, open the Design Space with your design on it, and from there, send the file to your Cricut machine. For that, select the Make It option present in the top-right corner.

Cross-check if your design looks correct in the Prepare screen, then select Continue.
Afterward, you will see a Make Screen window; you must select your material from the list.

Now, your machine will cut the design on the mat.
How to Apply the Stencil on the Project Surface?
The final stage is applying the stencil vinyl onto the project surface and painting it. Let us see how to do it.
Next, apply the stencil on the project surface so it is dry and clean.
Later, you need to place the cut vinyl onto the surface carefully.
If you are using the Transfer Tape, weed out all the excess materials first. And then, place the tape on the Vinyl and burnish the stencil on it.

Now, you can place the design onto the surface. You can burn the stencil vinyl onto your project area using your Scraper tool.

After applying the stencil, it is time to paint the design.
For painting the stencil, you can use a stencil brush or a sponge brush, which helps dab a light coat of paint over the stencil vinyl.

Once the paint is dry, gently remove the stencil vinyl.
Finally, your stencil is ready.

Conclusion
To summarize, a stencil is a thin sheet of material, usually of plastic, Vinyl, or paper, cut with a design from a Cricut machine. They are versatile and very attractive to look at. So, in this blog, we learned how to make stencils with Cricut, the materials you can use. Also, the steps involved in making a stencil.
FAQs
Do I need to weed a stencil vinyl?
No, you don’t have to weed out the stencil always. The weeding of a stencil usually depends on the level of intricacy of your design. Sometimes, if the stencil Vinyl is thick and strong compared to the normal Vinyl, you can remove it from its backing without disturbing the design. So, if the design is simple, you can remove the stencil design easily.
Can I use stencil vinyl for glass etching?
Yes, you can use the stencil vinyl to etch the glass surface. But, as the Cricut stencil vinyl is thicker when compared to regular Vinyl, it can be a bit challenging to apply to curved surfaces. Remember that etching can be done only on tempered glass or colored glass. Also, it can be done on Pyrex and glazed ceramics. It is important to choose a smooth, glossy finish.
Can I reuse the Cricut stencil vinyl?
Yes, you can reuse the Cricut stencil vinyl. To reuse it, you just need to reposition the Cricut stencil vinyl on the different areas. Later, you need to let the previous paint dry. After the paint is dried, you can carefully peel off the Vinyl. Now, the adhesive will be sticky enough that the stencil will attach to the new area and use it again.
#cricut crafts#cricut home decor#cricut.com/create#cricut#cricut.com setup download#cricut.com/setup#cricut.com design space#cricut.com sign in
0 notes
Text
Award Folders
https://www.diplomacoversource.com/products/award-folders.html
Features
Red award certificate folders with high quality textured leatherette exterior
One white silk moiré panel on top, one white cardstock on the bottom side
Folded size is 7.5" x9.5" fits one 7" x9" diploma
Blank front cover for your school name and logo
One acetate protector overlay on your diploma
Tent style with hinge on long side
4 white satin ribbon corners
Standard 4mm foam padding
Custom colors and sizes are available
The unique texture exterior material of our award certificate binder has an elegant specialty leather finish that is perfect for display. Safeguard your teenager's middle school diploma and certificates in our award folders will stand out in this bright and beautiful way. This hot red color will make an excellent match for your certificate award. Except for red color, there are also 9 regular colors, including black, white, navy blue, royal blue, forest green, purple, burgundy, brown and grey for your choices. If you have any special requirement beyond above colors and sizes, you can choose to custom-made. You can get a favorable price with a 100pcs minimum order, the red 7" x9" diploma cover's production can be finished in 2-3 weeks, but we also provide rush order service to guarantee your delivery time. We recognize the vital importance for clients to get their award folders on time; we welcome customers to visit our factory to experience our production procedure and repaid delivery service.
Shipping Method: You can choose sea shipping, air shipping or express to deliver your cargo based on your specific need date.
Shipping Time: Express shipping is the fastest way to ship, but it is costly. If there is no tight schedule for the graduation ceremony, sea shipping would be the best choice to save cost.
Trade Terms: FOB, CIF.
Payment Terms: We can accept down payment via bank transfer, the balance can be paid after we send the copy of bill f lading. Some customers like to use PayPal to get payment done that is also fine.

1 note
·
View note
Text
☆ Final prototype design and poster
• After many feedback sessions, I adjusted the packaging to suit my target audience best with visual appeal whilst also fitting the right portion size for a child, and using 200gsm (cardstock) to be able to bear the weight of bon bon's. The next stage is to print them and build them using acetate for the window as it can be recycled unlike normal plastic and there is only a small amount to cover the 'mouth hole' so the cost will be less.
• As for the final poster design, it is clearly eye catching whilst also being comedic, bubbly and expressive which was the overall aim.

0 notes
Text
Custom Stencil Making: A Creative Guide to Personalizing Your Projects
Unlocking the Art of Stencils for DIY and Artistic Expression
Stencils are a fantastic way to add precision and detail to any project, from home decor and fashion to signage and artwork. While pre-made stencils are widely available, creating custom stencils allows for greater creativity, uniqueness, and personalization. This guide will walk you through the basics of custom stencil making, the tools you’ll need, and the step-by-step process for creating stencils that will elevate your artistic endeavors.
What is a Stencil?
A stencil is a template used to replicate patterns or designs onto a surface. The design is cut out of a sturdy material, leaving negative spaces through which paint or other materials can be applied. Stencils are incredibly versatile and can be used on walls, furniture, clothing, and more.
Why Make Custom Stencils?
Custom stencils offer complete creative freedom. Whether you're looking to add a personal touch to a DIY project, create unique designs for products, or simply explore new artistic techniques, Custom Stencils Made provide a tool that is both versatile and reusable. The ability to create stencils tailored to your specific needs—whether it’s a logo, pattern, or intricate design—opens up a world of possibilities.
Tools and Materials for Custom Stencil Making
To get started with making your own stencils, you'll need the following materials:
Stencil material: You can use materials such as Mylar sheets, acetate, vinyl, or even sturdy cardstock. Mylar is a popular choice because it’s durable, flexible, and easy to cut.
Cutting tools: A precision craft knife or an X-Acto knife works well for detailed cutting. You can also use a stencil cutter or laser cutter if you need to create highly intricate designs.
Stencil design: You can either draw your design by hand or use software like Adobe Illustrator or Inkscape to create digital designs.
Cutting mat: A self-healing cutting mat will protect your surfaces and make cutting easier.
Adhesive (optional): Stencil adhesive spray or painter’s tape helps hold your stencil in place on the surface while you apply paint.
Steps to Create a Custom Stencil
1. Design Your Stencil
Start by choosing a design. If you’re new to stencil making, it’s helpful to begin with simple shapes and gradually work your way to more intricate patterns. If you’re designing digitally, remember that all the areas you plan to cut away will be where your paint or medium will come through. Be sure to incorporate bridges, small uncut sections, in your design to connect the open spaces, which will help keep your stencil structurally intact.
2. Prepare Your Stencil Material
Once your design is ready, transfer it onto your stencil material. If you’re working digitally, print your design and tape it over your chosen material, or if using a laser cutter, input your design directly into the cutting machine.
3. Cut Your Stencil
Using your craft knife or stencil cutter, carefully cut along the design lines. Make sure you take your time, especially with small or delicate parts of the design, as it can be easy to accidentally cut into areas that should remain intact. For more detailed or complex stencils, you may want to use a magnifying glass or bright light to help ensure accuracy.
4. Test Your Stencil
Before applying your stencil to your final project, test it on a piece of scrap material. This will allow you to check for any areas that need adjustment and give you a chance to see how well your design translates to the final surface.
5. Apply Your Stencil
Once you're satisfied with your stencil, use it on your chosen surface. Whether you’re using spray paint, acrylic, or fabric paint, apply the medium carefully to avoid paint bleeding under the stencil. Use painter’s tape or adhesive spray to secure your stencil, and work in light, even coats for the best result.
Tips for Successful Stencil Making
Choose the right material: Mylar is durable and reusable, while cardstock is more suited for one-time use. Consider the complexity and the number of uses when selecting your material.
Keep designs simple at first: If you’re a beginner, start with simple shapes and letters before progressing to more detailed designs.
Use a sharp blade: Dull blades can cause jagged edges and uneven cuts, so make sure your cutting tools are sharp.
Clean your stencils: After using your stencil, clean it promptly to prevent paint buildup, which can affect future uses.
Creative Applications for Custom Stencils
Home decor: Use custom stencils to create unique wall art, furniture accents, or even stenciled tiles for an easy DIY renovation.
Fashion: Customize clothing, bags, and accessories by stenciling logos, patterns, or original artwork.
Signage: Create professional-looking signs for events, businesses, or personal use.
Crafts: From scrapbooking to card making, custom stencils add a personal touch to your crafts and hobbies.
0 notes
Text
The greeting card shop discount code

#The greeting card shop discount code how to
Save 10% off your purchase with the code “CELEBRATE5”.The next stop on the hop is the blog of Angelica Conrad.(Wow! She has a great blog!) You can also start at the beginning of the hop at the Pretty Pink Posh Blog.Īs part of the celebration, Pretty Pink Posh has two great offers: You can find it HERE at Pretty Pink Posh or HERE at Simon Says Stamp. Pretty Pink Posh also has a great new release. This post is part of their 3-day hop (today is the first day) filled with inspiration. Pretty Pink Posh is celebrating their 5th birthday! It has been such fun watching them grow. … and added a Pretty Pink Posh Floral Hearts Stamp Set ( SSS | PPP) greeting underneath. My last card uses the Pretty Pink Posh Hugs Die ( SSS | PPP) to create a circle flap…įor the background, I used the Carta Bella Perfect Stripe Embossing Folder… I also used the new Pretty Pink Posh Pinata Party Stamp Set ( SSS | PPP) on the background. I used it to create a shaker window with lots of Pretty Pink Posh Jewels ( SSS | PPP) inside. My second card features the new Pretty Pink Posh Celebrate Shaker Die ( SSS | PPP). (Be sure to watch it!) The “hugs and kisses” is from the Pretty Pink Posh Floral Hearts Stamp Set ( SSS | PPP).
#The greeting card shop discount code how to
In the video, I show how to use acetate to create little hinges to allow the heart die cut to open up to reveal a message. On the Simon Says Stamp Fog Cardstock background, I stamped Pretty Pink Posh Bold Blooms ( SSS | PPP) flowers with Simon Says Stamp Fog Ink and Hero Arts Unicorn White Ink. I colored a white die cut with Copic Markers and added silver shine with a Molotow Liquid Chrome Pen. My first example features the new Pretty Pink Posh With Love Shaker Die ( SSS | PPP). You can do this technique with most any die cut shape. For today’s cards, I created large elements that lift open to reveal a message. I enjoy making cards that open a bit differently than a traditional card.
1 note
·
View note
Text
Can I Use A Cricut Mat With My Silhouette Cameo?
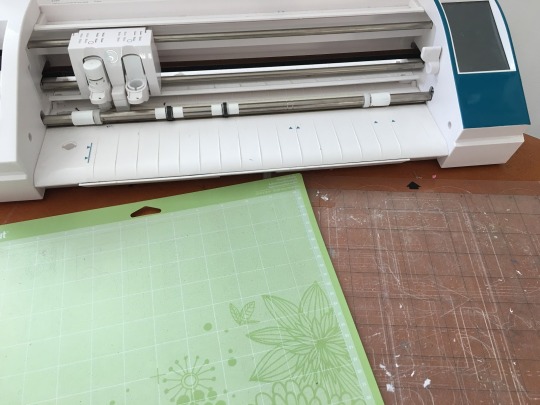
We are well aware these days that crafting supplies are not as cheap as they were earlier. In fact, the ones that are repetitively used by us get a bit torn with the passage of time. One such important yet very useful crafting supply is a cutting mat. I am sure you are here because you already have a Cricut cutting mat and want to know about the multiple ways you can put it to use.
We all know that both Cricut and Silhouette Cameo companies are primarily in the business of manufacturing cutting machines. And often times they require certain additional accessories. Since both the cutting machines are basically solving the same purpose, so are their additional accessories. In case you have been wondering - can I use a Cricut mat with my Silhouette Cameo - then the straightforward answer is yes, you can. So, wait no more and keep reading to find out everything I did to use a Cricut mat with my Silhouette Cameo. This insightful blog will actually be a perfect guide for when you start putting your Cricut mat to use with your Silhouette Cameo cutting machine.
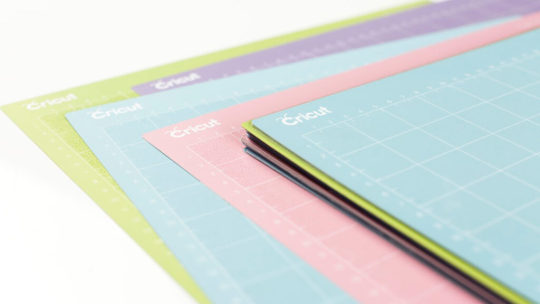
How Many Types Of Cricut Mats Are There?
A Cricut machine mat holds material firmly in its place as the cutting machine cuts, writes, or embellishes on it. These mats are primarily compatible with Cricut Explore and Cricut Maker series cutting machines. But they work perfectly well with cutting machines from other brands as well. There are four varieties of Cricut cutting mats available in the market, and each has a different color, namely, Blue, Green, Purple, and Pink. The blue one is also known as the light grip mat, which is used for lightweight materials like printer paper, pearl paper, Vellum, wrapping paper, etc.
The green-colored Cricut mat is known as the Standard Grip mat, which is used for medium-weight materials like Iron-on, Vinyl, Acetate, Matboard, Truebrush paper, glitter cardstock, embossed cardstock, etc. The purple-colored cutting mat is called the Strong Grip mat that is used for Heavyweight materials that include Wood veneer, Basswood, Felt, Aluminum sheets, Chipboard, Corrugated paper, and Leather. And lastly, the pink-colored Cricut cutting mat is known as the FabricGrip cutting mat, which is used for all kinds of fabrics and crepe paper.
Can I Use A Cricut Mat With My Silhouette Cameo?
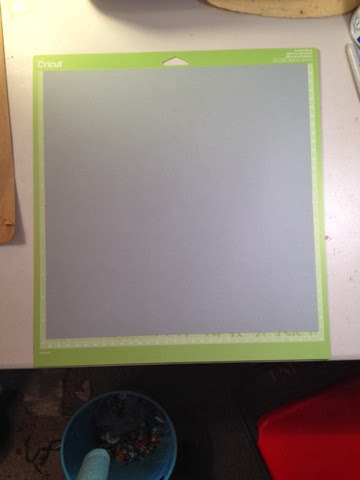
Yes, you can use a Cricut mat with your Silhouette Cameo cutting machine. See either one you have at present; both are interchangeable. But without a doubt, the mats are slightly different. This difference can be a bit tricky while performing precision cuts like cutting vinyl scraps. It can be hard to print and cut those materials where the Silhouette Cameo needs to read the registration marks. When I purchased the Cricut mat and compared it with my Silhouette mat, that was torn. I found out that the Cricut mat is slightly smaller than my old and worn-out Silhouette mat. The only reason why I had to buy a Cricut mat even though I had a Silhouette Cameo cutting machine was that first thing; I wanted to rule out all the possibilities. And secondly, I did not have enough time to wait for the shipping and delivery, which was quite a long process.
The black line where the top of the paper that we use for our creative endeavors would usually go on the Silhouette mat a little higher than on the Cricut cutting mat. The white-lined grids on the Cricut mats are surrounded by a small shaded border. So, like I did, you can also line up the paper along the top of the shading, leaving the shading on the side exposed. Then, I loaded the Cricut mat along with the paper material into the Silhouette Cameo. By doing so, the edge of the Cricut mat lined up with the edge of the roller in my Cameo machine. The best part was that I thought that I might need to adjust the blade settings since the Cricut mats are usually a little thicker, but luckily, I didn’t have to.
How To Use A Cricut Mat With My Silhouette Cameo?
We can use the Cricut mat with a Silhouette Cameo using the template method. You will need certain crafting supplies before we get started:
Cricut cutting mat
Masking Tape
Razor Knife
Straight Edge Metal Ruler
Marker
A clear sheet (same size as that of your Cricut mat)
Silhouette Cameo Cutting Machine
First, lay your Cricut cutting mat on a cutting-safe work surface. Then place the clear sheet on your Cricut mat and cover it completely by lining up all the corners.
Next, tape the clear sheet as well as the Cricut cutting mat on your work surface.
Mark the corners using the marker after you secured them well.
This is a basic template you can use to cut using a Cricut mat, and that is pretty much it.
Source:-Silhouette Cameo 4 Pro , Silhouette Cameo 4 Pro
1 note
·
View note
Text
Add Bright Colors to a Layout with Ink Pads – Scrap Booking
Add Bright Colors to a Layout with Ink Pads – Scrap Booking
Cathie has several different fun techniques using ink pads to add bold, bright colors to a layout. For the background she used ink and water on acetate for an ink smooshing technique, she colored stamped flowers with ink pads and also ink blended on cardstock and stamped more flowers over top to create a border. She’s sharing step by step photos for these techniques over on the Creative…

View On WordPress
0 notes
Text
Witchy DIY- paint chip runes
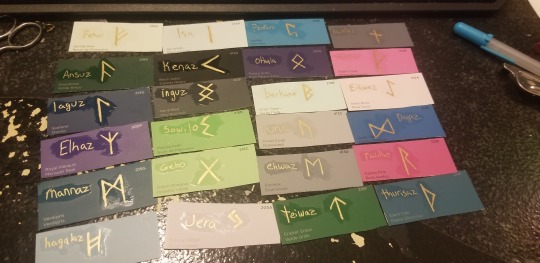
So I'm on a pretty tight budget right now, but I still wanted a set of elder futhark runes for divination.
Then I went to the hardware store on an errand and had a thought when I saw the paint chips. Unlike a lot of my thoughts, this one wasn't half bad. Hopefully it'll help my fellow broke witches out.
🍒What you need🍒
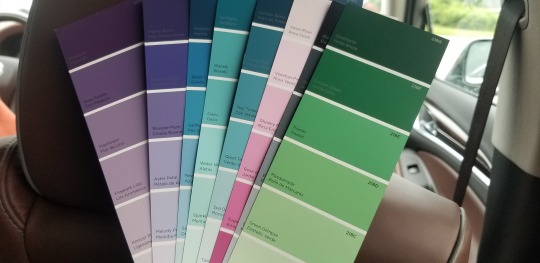
💜paint chips - you'll need 23 for elder futhark, 16 for younger futhark, and you'll probably want a few spares just in case.
💜scissors - optional if you're using stand alone squares, required if you're using strips.
💜a pen or permanent marker - I spent years without realizing this, but paint chips are actual paint samples. You don't want to use anything that you have to put a ton of pressure on or it'll rip the paint off. (... unless that's what you're going for.) I used a gold Gelly Roll metallic pen, personally.
💜clear nail polish - to seal them. The runes could rub off otherwise. If you don't have any it's sub five bucks for a bottle. I've used it to seal devotional stuff, seal charms on my nails before applying color polish over them, and to put tiny and almost invisible runes on my walls that are tied to my wards. (If you're still not sold on it or it would be considered too weird for you to have it clear contact paper is like six bucks a roll, and clear acetate mailing labels are six bucks for 480.)
🍒What to do🍒
Go to your nearest paint or hardware store for paint chips. (If that's not possible, coloring squares of cardstock would also work.)
You can try to color coordinate with the runes or you can be like me and grab what you like. This is what I ended up with:
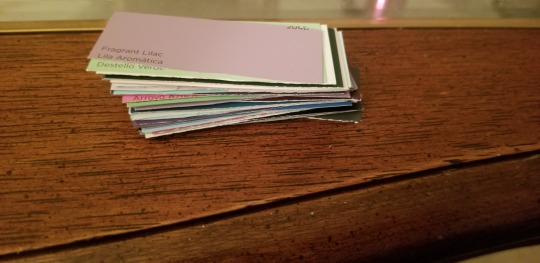
So if you go the strips route like I did, grab your scissors and cut 'em apart. Make sure they're a similar size, though it doesn't have to be exact. You'll end up with something like this:
So now, pull up a reference if you need one and draw your runes of choice, one a strip. Let them dry for twelve to 24 hours and don't move them before then, or they'll smear and just won't look as nice.
After you've exercised patience, it's time to apply the nail polish. Try to apply a thick coat so you don't have to brush it around- even after letting it sit for 12 hours it'll still rub off if you work it too much.
Put it aside to dry for another few hours (just to be safe) and now you've got your own runeset for under five dollars!
27 notes
·
View notes
Photo

Here‘s another #card I #handmade this week! 😋 Well, I know it’s not #harvest and maybe a lot of us are happy that spring is finally coming in northern hemisphere, but I couldn’t resist making a #fall inspired #shakercard with all the other #slimline #cuttingdies ❤️ 🎨 Materials and Methods (includes non-paid advertisements) Please check out my previous post for how I created the card base/ basic element shapes. I only changed my #dies from @aveccreative and my #color palette of #inkpads from @decotime , cardstock and aquamarkers for details. I used a yellow cardstock in slimline size and inkblended it to the top orange and reddish, added a #fox out of orange cardstock as well as clouds and hills. I taped these elements down as described in my other post but trimmed before about 0,5cm on each side left and right. Now I added a frame of foam tape, filled it with #glitter and a stuck acetate on top. As a frame I used another colored diecut. #️⃣ #art #caft #craftart #cardart #crafts #crafting #diy #slimelinecard #3dcard #landscape #landscapes #scene #scenery #scenecard #cards #make #creative https://www.instagram.com/p/CctKDfCLV7f/?igshid=NGJjMDIxMWI=
#card#handmade#harvest#fall#shakercard#slimline#cuttingdies#dies#color#inkpads#fox#glitter#art#caft#craftart#cardart#crafts#crafting#diy#slimelinecard#3dcard#landscape#landscapes#scene#scenery#scenecard#cards#make#creative
0 notes
Text
A Beginners Guide To Card Making Terms

Acetate - Acetate is a plastic film that has many applications. You can stamp onto it using rubber stamps, use it for making shaker cards, and use it to make an image or embellishment appear to hang independently. You can also paint Acetate with glass paints and glitter glues.
Acid Free - Anything that is acid free is perfect for card making and scrap booking as it will not deteriorate or discolour. Acid free is simply a product that is manufactured free of acid.
Adhesive - Adhesive is something that is used to stick one material to another. Common craft adhesives include glue dots, glue sticks, double sided tape and photo stickers.
Bone Folder - A bone folder is used for scoring and folding paper and card. It is a flat piece of plastic or bone which is pointed at one end and round at the other.
Brads - Brads are available in a wide range of designs, shapes and colours. Brads have two prongs at the back which are pushed through the paper or card and then flattened to hold in place in much the same way as a split pin..
Brayer - A brayer is usually used to create backgrounds or to roll over two pieces of paper to help glue them together. A brayer is a roller that is soft and made of rubber.
Cardstock - Cardstock is a sturdy thick scrapbook paper which is available in many different thicknesses, weights and colors.
Cello Bags - Cello Bags are used to protect your cards and often used when making cards to sell. They are made from thin plastic which is transparent.
Clear Rubber Stamps - Clear rubber stamps are usually used with an acrylic block, clear stamps can be positioned how you like, and can be mixed and matched with other stamps that you add to the acrylic block. Know more here PAPER EMBOSSING ROLLER
Corner Punch - A corner punch is used for cutting corner shapes, usually to round off the corners of cards.
Craft Knife - A craft knife is an essential item for card making and scrapbooking. It is a very sharp pointed knife that has replaceable blades.
Cutting Mat - A cutting mat is used with the craft knife. It is a mat that protects the surface you are working on.
Decoupage - Decoupage is a technique used to decorate cards. It is a technique where you build up a 3D picture using several pictures as layers.
Die Cut - Is a term that means 'cut out shape'. The shape is usually cut from a metal template called a 'die'.
Distressing - Distressing is a method used to give your project an old and worn look.. This can be achieved in many ways including, stamping, crumpling, inking and tearing.
Double Sided Tape - Double sided tape is sticky on both sides and can either be flat or 3D.
Embellishment - An embellishment is used to decorate a handmade card or scrapbook page layout.
Embossing - A technique used when stamping to create a raised image.
Embossing Powder - Embossing Powder is a fine powder that is available in a variety of colors. Embossing powder is sprinkled over a stamped image and heated to create a raised impression.
Eyelets - Eyelets are metal fasteners with holes in the middle. They are attached to cards and scrapbook pages. Once attached ribbon and fibres can be passed through the holes.
Gel Pens - Gel pens come in many different colors and can be used to colour small areas in a precise color.
Glitter Glue - Glitter glue is glue that is pre mixed with very fine glitter. Glitter glue is usually white and dries clear.
Glue Dots - Glue dots are used to attach embellishments such as buttons or other heavy materials. They are extremely sticky and should not be removed once applied.
Heat Gun - A heat gun is used to heat embossing powder
Iris Folding - A technique where strips of paper are folded and overlapped to create a background in an aperture card.
Light box - A back lit box used with an embossing stencil. The light in the box transmits through the image so that it can be seen through card and paper.
Matting - Matting is also known as mat and layering. It is a technique where a layer of paper is built up to produce a frame around an image or embellishment.
Pigment ink - pigment ink is normally used for embossing because it is like a water based ink that dries slowly enabling the embossing powders to stick to it.
Rub Ons - Rub ons are transfers that are applied by rubbing with a lolly stick. Once applied they are permanent. They are commonly used on scrapbook page layouts and for card making ideas.
Scoring - A way of creating a line that can be used to fold a card.
0 notes