#wildcard ssl multiple server
Explore tagged Tumblr posts
Visit Tumblr Blog
Explore Tumblr blogs with no restrictions, modern design and the best experience.
Last Seen Tumblr Blogs


Fun Fact
Celebrities use Tumblr as well.
Text
Prevent Subdomain Takeover in Laravel: Risks & Fixes
Introduction
Subdomain takeover is a serious security vulnerability that occurs when an attacker gains control of an unused or misconfigured subdomain. If your Laravel application has improperly removed subdomains or relies on third-party services like GitHub Pages or AWS, it may be at risk. In this blog, we will explore the causes, risks, and how to prevent subdomain takeover in Laravel with practical coding examples.

A compromised subdomain can lead to phishing attacks, malware distribution, and reputational damage. Let’s dive deep into how Laravel developers can safeguard their applications against this threat.
🔍 Related: Check out more cybersecurity insights on our Pentest Testing Corp blog.
What is Subdomain Takeover?
A subdomain takeover happens when a subdomain points to an external service that has been deleted or is no longer in use. Attackers exploit this misconfiguration by registering the service and gaining control over the subdomain.
Common Causes of Subdomain Takeover:
Dangling DNS Records: A CNAME record still points to an external service that is no longer active.
Unused Subdomains: Old test or staging subdomains that are no longer monitored.
Third-Party Services: If a subdomain was linked to GitHub Pages, AWS, or Heroku and the service was removed without updating the DNS settings.
How to Detect a Subdomain Takeover Vulnerability
Before diving into the fixes, let’s first identify if your Laravel application is vulnerable.
Manual Detection Steps:
Check for dangling subdomains: Run the following command in a terminal: nslookup subdomain.example.com If the response shows an unresolved host but still points to an external service, the subdomain may be vulnerable.
Verify the HTTP response: If visiting the subdomain returns a "404 Not Found" or an error stating that the service is unclaimed, it is at risk.
Automated Detection Using Our Free Tool
We recommend scanning your website using our free Website Security Scanner to detect subdomain takeover risks and other security vulnerabilities.
📷 Image 1: Screenshot of our free tool’s webpage:

Screenshot of the free tools webpage where you can access security assessment tools.
How to Prevent Subdomain Takeover in Laravel
Now, let’s secure your Laravel application from subdomain takeover threats.
1. Remove Unused DNS Records
If a subdomain is no longer in use, remove its DNS record from your domain provider.
For example, in Cloudflare DNS, go to: Dashboard → DNS → Remove the unwanted CNAME or A record
2. Claim Third-Party Services Before Deleting
If a subdomain points to GitHub Pages, AWS S3, or Heroku, ensure you delete the service before removing it from your DNS.
Example: If your subdomain points to a GitHub Page, make sure to claim it back before deleting it.
3. Implement a Subdomain Ownership Validation
Modify Laravel’s routes/web.php to prevent unauthorized access:
Route::get('/verify-subdomain', function () { $host = request()->getHost(); $allowedSubdomains = ['app.example.com', 'secure.example.com']; if (!in_array($host, $allowedSubdomains)) { abort(403, 'Unauthorized Subdomain Access'); } return 'Valid Subdomain'; });
This ensures that only predefined subdomains are accessible in your Laravel app.
4. Use Wildcard TLS Certificates
If you manage multiple subdomains, use wildcard SSL certificates to secure them.
Example nginx.conf setup for Laravel apps:
server { listen 443 ssl; server_name *.example.com; ssl_certificate /etc/ssl/certs/example.com.crt; ssl_certificate_key /etc/ssl/private/example.com.key; }
5. Automate Monitoring for Subdomain Takeovers
Set up a cron job to check for unresolved CNAME records:
#!/bin/bash host subdomain.example.com | grep "not found" if [ $? -eq 0 ]; then echo "Potential Subdomain Takeover Risk Detected!" | mail - s "Alert" [email protected] fi
This script will notify administrators if a subdomain becomes vulnerable.
Test Your Subdomain Security
To ensure your Laravel application is secure, use our free Website Security Checker to scan for vulnerabilities.
📷 Image 2: Screenshot of a website vulnerability assessment report generated using our free tool to check website vulnerability:

An Example of a vulnerability assessment report generated with our free tool, providing insights into possible vulnerabilities.
Conclusion
Subdomain takeover is a critical vulnerability that can be easily overlooked. Laravel developers should regularly audit their DNS settings, remove unused subdomains, and enforce proper subdomain validation techniques.
By following the prevention techniques discussed in this blog, you can significantly reduce the risk of subdomain takeover. Stay ahead of attackers by using automated security scans like our Website Security Checker to protect your web assets.
For more security tips and in-depth guides, check out our Pentest Testing Corp blog.
🚀 Stay secure, stay ahead!
1 note
·
View note
Text
Why I Don't Recommend the Paid Version of WP Encryption

Having a SSL certificate is a requirement on your website, and if you have a WordPress website, there are a few different plugins that I've used to generate SSL certificates. WP Encryption is one, and I've used it on several sites because the paid version allows me to generate a wildcard SSL (one that will secure multiple sites) much cheaper than if I purchased this type of security certificate through my host. I know this sounds very technical, but bear with me.
Free and Paid
WP Encryption, like many Wordpress plugins offers a free and a paid version. The free version allows you to secure one domain with or without the www (www.yourauthorwebsite.com or yourauthorwebsite.com). For most people that's sufficient. Once every 90 days you need to add some verification and regenerate the certificate, and this is a service I offer for FREE for my website hosting customers. Therefore, you never have to worry about your security certificate expiring and your website (along with its data) stays secure. If you have a web store on your site, then it is vital you always have a valid SSL certificate. The paid version will install the certificate for you, though depending on your host you may still need to go in and complete verification every 90 days. Additionally, it allows you to generate a wildcard SSL which secures multiple subdomains. (For example this website and the subdomains of this website.) And let's be honest, for a $49 lifetime fee, that WP Encryption paid program is one heck of a deal.
Why I no longer recommend upgrading
I have four paid upgrades for various websites with WP Encryption. Of those four upgrades, only ONE works correctly each and every time, out of the box. Considering that the back end of those websites is the same hardware/server configuration, and the websites are more or less the same (theme, WordPress, plugins, general configuration, etc.), that's a pretty high failure rate. I'm a technical person. I know how to put in support tickets and provide appropriate server information. I'm even extra nice to the help desk people I interact with because I know how awful some customers can be. And yet, the "support" I've received has been some of the worst, and that's saying something. And one issue (with my license key reading free, rather than paid, when I have and have provided receipts), they refuse to fix. I've taken steps to ensure I no longer have to deal with them on the websites that weren't working, and while I am willing to use the free version of their plugin and continue to do so, I cannot in good conscience recommend anyone upgrade this plugin.
The Bottom Line
First, the other plugin I've used to generate SSL certificates is SSL Zen, and this is the plugin that I'm using and suggesting on all new sites moving forward. Secondly, if you're hosted with me, I'll handle this for you, so you don't have to worry about it! It's included in the price of web hosting. And finally, if you do need a wildcard SSL, I am happy to recommend hosts which include the SSL in the cost of hosting for free or discussing different options. But I do not recommend paying for or upgrading to WP Encryption, because the truth is, it may or may not work, and the support will fail you and your site. Read the full article
0 notes
Text
How to Fix Your SSL: Ensuring a Secure and Trustworthy Website
In today’s digital landscape, website security is paramount. An essential component of this security is the SSL (Secure Sockets Layer) certificate, which encrypts data transmitted between your website and its visitors. An SSL certificate not only protects sensitive information but also boosts your site’s credibility and search engine ranking. If your SSL certificate is not working correctly, it can result in security warnings, loss of visitor trust, and a potential drop in traffic. Here’s a comprehensive guide on how to fix your SSL issues and ensure your website remains secure and trustworthy.
Understanding SSL Certificates
Before diving into the troubleshooting process, it’s important to understand what an SSL certificate does. SSL certificates create an encrypted connection between a web server and a browser, ensuring that any data transferred remains private and secure. This encryption is crucial for protecting sensitive information such as login credentials, personal details, and payment information.
Common SSL Issues and How to Fix Them
Expired SSL Certificate
Symptom: Visitors receive a warning that your certificate has expired.
Solution: Renew your SSL certificate through your certificate authority (CA). Most CAs send reminders before the certificate expires, so be sure to renew it promptly.
Mismatched Domain Name
Symptom: Visitors see a warning about a domain name mismatch.
Solution: Ensure that the SSL certificate matches the domain name exactly. For instance, if your certificate is for “www.example.com,” accessing “example.com” may trigger a warning. Consider getting a wildcard certificate if you have multiple subdomains.
Incomplete Certificate Chain
Symptom: Browsers display a warning about an incomplete certificate chain.
Solution: Install the intermediate certificates provided by your CA. These intermediate certificates link your SSL certificate to a trusted root certificate. Check your CA’s documentation for installation instructions.
Mixed Content Warnings
Symptom: The website displays mixed content warnings, indicating that some resources are not loaded securely.
Solution: Ensure that all elements on your site (images, scripts, stylesheets) are loaded over HTTPS. Update your website’s code to replace “http://” URLs with “https://”.
Incorrect Certificate Installation
Symptom: The SSL certificate does not work after installation.
Solution: Double-check the installation process. Ensure that the certificate is installed on the correct server and that the private key matches the certificate. Consult your web host’s support or your CA for detailed instructions.
Outdated Browser or Server Configuration
Symptom: Certain users or browsers cannot establish a secure connection.
Solution: Ensure that your server supports the latest SSL/TLS protocols and ciphers. Update your server software and configurations to support modern security standards. Encourage users to update their browsers.
Step-by-Step Guide to Fix SSL Issues
Verify Your SSL Certificate
Use online tools like SSL Labs’ SSL Test to check the status and configuration of your SSL certificate. This can help identify common issues such as expiration, mismatched domains, and incomplete certificate chains.
Renew and Replace Your Certificate
If your certificate is expired or nearing expiration, contact your CA to renew it. Follow the renewal process and install the new certificate on your server.
Update Domain Name Configurations
Ensure that your SSL certificate covers all necessary domain names and subdomains. Consider purchasing a wildcard certificate if you manage multiple subdomains.
Install Intermediate Certificates
Check your CA’s documentation for intermediate certificates. Install these on your server to complete the certificate chain.
Correct Mixed Content Issues
Review your website’s source code for any “http://” URLs. Update these to “https://” to ensure all resources are loaded securely.
Check Server and Browser Compatibility
Update your server configurations to support the latest SSL/TLS protocols and strong ciphers. Ensure your server software is up-to-date and encourage users to use modern browsers.
Preventive Measures for Future SSL Issues
Set Up Automatic Renewal
Many CAs and hosting providers offer automatic renewal options for SSL certificates. Enable this feature to avoid future expiration issues.
Regularly Monitor Your SSL Status
Use monitoring tools to regularly check the status of your SSL certificate. Set up alerts for potential issues like expiration or configuration problems.
Keep Your Server Updated
Regularly update your server software and configurations to comply with the latest security standards and protocols.
Educate Your Team
Ensure that your development and IT teams are aware of SSL best practices and stay updated on the latest security trends.
Conclusion
Fixing SSL issues is crucial for maintaining a secure and trustworthy website. By understanding common SSL problems and following the steps to resolve them, you can ensure your site remains protected and continues to inspire confidence in your visitors. Regular monitoring and proactive measures will help prevent future SSL issues, allowing you to focus on growing your online presence with peace of mind.
🌐 #WebsiteSecurity 🌐 #SSLFix 🌐 #SecureYourSite 🌐 #TrustworthyWeb 🌐 #OnlineSafety 🌐
If your website, ______ is not loading despite having SSL enabled, here are some steps to troubleshoot and resolve the issue:
Check SSL Certificate Validity:
Verify that your SSL certificate is still valid and has not expired. You can use online tools like SSL Checker to check the status.
Clear Browser Cache:
Sometimes, cached data can cause loading issues. Clear your browser cache or try accessing the site in an incognito window or a different browser.
DNS Issues:
Ensure your DNS settings are correctly configured. Use tools like DNS Checker to see if your domain is resolving correctly.
Hosting Issues:
Check with your hosting provider to see if there are any server issues or maintenance activities affecting your website.
SSL Configuration:
Ensure your server is properly configured to handle SSL. Check your server settings or contact your hosting provider for assistance.
Firewall/ Security Settings:
Verify that your firewall or security settings are not blocking access to your site.
Content Management System (CMS) Issues:
If you are using a CMS like WordPress, check for any updates or issues with plugins or themes that might be affecting the site.
Website Uptime Monitoring:
Use a service like UptimeRobot to monitor your website’s uptime and get alerts if it goes down.
If you still can’t resolve the issue, you might need to contact your hosting provider’s support team for further assistance. They can provide more detailed insights and help you troubleshoot specific server-related problems.
How to Change Your CNAME and A Record: A Comprehensive Guide
Managing your domain’s DNS settings can seem daunting, but it’s essential for directing your domain traffic to the right servers. Whether you need to set up a new website, verify domain ownership, or configure email services, knowing how to change your CNAME and A records is crucial. Here’s a step-by-step guide to help you through the process.
Understanding CNAME and A Records
CNAME Record: A Canonical Name (CNAME) record maps an alias name to a true or canonical domain name. This is often used to point subdomains to the domain hosting the content.
A Record: An Address (A) record maps a domain name to its corresponding IPv4 address. This is the primary method to link a domain to its web server.
Steps to Change Your CNAME Record
Access Your DNS Management Tool 🛠️
Log in to your domain registrar’s website (e.g., GoDaddy, Namecheap, Bluehost).
Navigate to the DNS management or DNS settings section.
Find the CNAME Record Section 🔍
Look for the section where you can add or edit DNS records.
It might be labeled as “Manage DNS” or “DNS Zone File.”
Add or Edit a CNAME Record ✏️
Adding a New CNAME Record:
Click on “Add Record” or similar.
Select CNAME from the record type dropdown.
Enter the subdomain you want to point (e.g., www).
Enter the canonical domain you want it to point to (e.g., example.com).
Editing an Existing CNAME Record:
Locate the existing CNAME record.
Click on edit or the pencil icon.
Update the canonical domain to the new target.
Save Changes 💾
Ensure all the details are correct.
Save or update the DNS record.
Propagation Time ⏳
Remember that DNS changes can take up to 48 hours to propagate globally, though they often update much faster.
Steps to Change Your A Record
Access Your DNS Management Tool 🛠️
Log in to your domain registrar’s website.
Navigate to the DNS management or DNS settings section.
Find the A Record Section 🔍
Look for the section where you can add or edit DNS records.
It might be labeled as “Manage DNS” or “DNS Zone File.”
Add or Edit an A Record ✏️
Adding a New A Record:
Click on “Add Record” or similar.
Select A from the record type dropdown.
Enter the domain or subdomain you want to point (e.g., @ for the root domain or www).
Enter the IPv4 address you want it to point to (e.g., 192.0.2.1).
Editing an Existing A Record:
Locate the existing A record.
Click on edit or the pencil icon.
Update the IP address to the new target.
Save Changes 💾
Ensure all the details are correct.
Save or update the DNS record.
Propagation Time ⏳
Just like with CNAME changes, A record changes can take up to 48 hours to propagate globally.
Useful Resources and Websites
GoDaddy: Manage DNS Records
Detailed guide on managing DNS records using GoDaddy’s interface.
Namecheap: How to Modify DNS Records
Instructions for editing DNS records with Namecheap.
Bluehost: How to Update DNS Records
Step-by-step guide for updating DNS records on Bluehost.
Google Domains: Configure Resource Records
Guide for configuring resource records in Google Domains.
YouTube Advice
How to Change DNS Records (CNAME, A, MX, etc.) by WPBeginner 🎥
A video tutorial on how to change various DNS records, including CNAME and A records.
Understanding DNS | A Records, CNAME Records, MX Records, TTL & More by Eli the Computer Guy 🎥
An in-depth explanation of DNS records and their functions.
Conclusion
Changing your CNAME and A records is a fundamental skill for managing your domain and ensuring proper web traffic routing. By following the steps outlined above and utilizing the provided resources, you can confidently update your DNS settings. Remember, patience is key as DNS changes propagate across the internet. Happy DNS managing!
0 notes
Text
Why Do I Need An SSL Certificate?

If you run a website, you've likely heard of SSL certificates. In fact, they've become as ubiquitous in the online world as social media is in real life. But what is an SSL certificate? How do they work? And why do I need one? Let's get the word out about SSL certificates and why they're important!
What can an SSL certificate do?
The most important thing to realize about SSL certificates is that they are a defense against cyber attacks.
You may have heard the term “hacker” and thought it was someone who was trying to steal your password. While that might be true sometimes, there are other ways in which hackers can use technology to cause damage or compromise your data and company. An SSL certificate will protect you from these kinds of attacks by:
Protecting sensitive data like credit card information and social security numbers.
Protecting against phishing and man-in-the-middle attacks (fraudulent websites).
Protecting against keyloggers or any other software used specifically for stealing information from users (like emails).
Keep hackers away from your website so they can't try their luck at stealing anything else.
Create a site-wide encryption standard.
An SSL certificate is a substantial way to protect your data. It's like the lock on your front door, securing your online home from would-be intruders. With an SSL certificate in place, no one can get into that data—not even hackers!
The bad news is that many people don't know how to use these locks effectively—and they often mistakenly believe that all SSL certificates are created equal. In reality, there are two main types of SSL certificates: domain and wildcard certificates. Each type has its own strengths and weaknesses (as well as price points).
Create a sense of trust among users.
SSL certificates help establish a sense of trust among users. The more confident a user feels, the more likely they will be to complete an online transaction or purchase. In order to increase the likelihood that a user will feel safe, secure, and confident in their online transactions, you should use an SSL certificate on your website.
Types of SSL certificates
SSL certificates are available in multiple types. The type of certificate you choose depends on the level of security and encryption you need, as well as the duration for which you want to secure your site. Here's a breakdown of what each type offers:
Domain validation certificates are the least expensive option and provide basic protection for your website. They're also the fastest to set up and can be issued within minutes once approved. However, they lack strong encryption measures so they're not recommended for e-commerce sites or sites that handle sensitive data like medical records or financial information.
Organization validation certificates are more secure than domain validation because they require proof of ownership from an authorized representative within your company or organization (such as an executive). They are also more expensive than most other options.
Extended validation SSLs offer the highest level of assurance and require more time to process than other forms because they require additional checks before being issued.
There are many reasons why an SSL certificate is essential.
It protects your website against phishing scams and data breaches.
It secures the server that you are using to host your website and all of its files.
The SSL certificate creates a public key, which is used to encrypt and decrypt data sent over the internet between two computers or devices (like a browser). This process uses TLS (Transport Layer Security) technology, which sends information through encrypted channels so that if someone intercepts it, they cannot read it without knowing what the key is. Because of this encryption method, an SSL certificate makes sure that any person browsing on their device with an unsecured connection will not be able to see any sensitive information about you or your business—including credit card numbers, usernames/passwords for social media accounts, etc.—that passes through their computer's connection with your site's servers when they click on links shared from within its content.
Conclusion
The bottom line is that an SSL certificate is a powerful tool for creating trust among your users and establishing a sense of professionalism. You can use SSL certificates to redirect traffic from HTTP to HTTPS, track visitor statistics, or even use them as security keys to encrypt data between your web server and client computers. As you can see, there are many benefits associated with having an SSL certificate installed on your website, so don't wait any longer!
To learn more about how Reversed Out can help secure your WordPress site so that people cannot access personal information stored there without permission (and make sure no hackers get in), contact us!
Contact Us
At Reversed Out Creative, we understand the challenges and opportunities presented by AI disruption. Our team of experts specializes in web design, SEO, graphic design, and digital marketing services. Reach out to us through our contact form to learn more about navigating the evolving job market and embracing the potential of AI. Together, let's shape a future that combines human ingenuity with the power of AI.
Original content source: https://reversedout.com/why-do-i-need-an-ssl-certificate/
#SSL certificate#Secure Sockets Layer#Website security#SSL encryption#HTTPS#SSL benefits#Secure browsing
0 notes
Text
The Right SSL Certificate For WordPress Websites
In the ever-evolving landscape of online security, having a secure and trustworthy website is paramount. One of the fundamental elements of securing your WordPress website is implementing the right SSL (Secure Socket Layer) certificate. In this guide, we will delve into the intricacies of SSL certificates and provide you with a comprehensive roadmap on how to choose the perfect SSL certificate for your WordPress website.
Understanding SSL Certificates
SSL certificates play a pivotal role in securing the communication between your website and its visitors. They ensure that the data transmitted between the user's browser and your server is encrypted and remains confidential. This is particularly crucial for websites that handle sensitive information, such as login credentials, personal details, or financial transactions.
SSL certificates also contribute to your website's search engine optimization (SEO) efforts. Search engines, like Google, prioritize secure websites in their rankings, making SSL a key factor in improving your site's visibility.

Types of SSL Certificates
Before diving into the selection process, it's essential to understand the different types of SSL certificates available:
Domain Validated (DV) Certificates:
Ideal for personal websites or blogs.
Quick issuance as it only requires domain ownership verification.
Offers basic encryption.
Organization Validated (OV) Certificates:
Suitable for business websites.
Involves a more thorough verification process, including organization details.
Provides a higher level of trust.
Extended Validation (EV) Certificates:
Recommended for e-commerce and financial websites.
Undergoes a rigorous validation process, including legal entity verification.
Displays a green address bar, signifying the highest level of trust.
Wildcard Certificates:
Secures a main domain and all its subdomains.
Cost-effective for websites with multiple subdomains.
Multi-Domain (SAN) Certificates:
Allows securing multiple domains with a single certificate.
Flexible for businesses managing multiple websites.
Factors to Consider
Choosing the right SSL certificate for your WordPress website involves considering various factors:
Security Requirements:
Assess the nature of your website and the sensitivity of the data it handles.
E-commerce sites may require the enhanced security provided by EV certificates.
Validation Level:
Determine the level of validation needed based on the trust level you want to establish with your audience.
Number of Domains:
If your website includes subdomains, a wildcard or multi-domain certificate may be more suitable.
Compatibility:
Ensure compatibility with different browsers and devices to provide a seamless user experience.
Certificate Authority
Choose a reputable CA for your SSL certificate to instill confidence in your visitors.
Renewal Process
Consider the ease of renewal and the validity period of the certificate.
Installation and Compatibility
After choosing the right SSL certificate, the next crucial step is proper installation and ensuring compatibility with your WordPress website. Many hosting providers offer a seamless integration process, but it's essential to follow best practices for a smooth transition.
WordPress itself recommends using the Really Simple SSL plugin for a hassle-free SSL setup. Additionally, ensure that your theme and plugins are compatible with SSL to prevent any issues.
Checking SSL Certificate Status
Regularly monitoring your SSL certificate's status is crucial for maintaining a secure website. You can use online tools to check the validity and expiration date of your certificate. Timely renewal is vital to prevent any disruptions in your website's security.
Conclusion
In conclusion, choosing the right SSL certificate for your WordPress website is a critical step in ensuring the security and trustworthiness of your online presence. By considering factors such as validation level, security requirements, and the type of certificate, you can make an informed decision that aligns with your website's needs.
Remember that SSL certificates not only protect your users' data but also contribute to your site's SEO ranking. As online security continues to be a priority, investing time and resources in selecting the right SSL certificate will undoubtedly benefit your WordPress website in the long run. Stay secure, build trust, and enhance your online presence with the perfect SSL certificate for your WordPress site.
Different Types Of Web Hosting Services Explained
1 note
·
View note
Text
"7 Best WordPress SSL Plugins to Secure Your Website"

As the Internet becomes more integral to daily life, online security becomes more important. WordPress is a popular content management system that helps businesses create and manage their websites. Luckily, there are many WordPress SSL plugins available to help secure WordPress websites.
Some of the best WordPress SSL plugins are SSL Insecure Content Fixer, Really Simple SSL, WP Force SSL, CloudFlare Flexible SSL, and WordPress HTTPS (SSL). SSL Insecure Content Fixer helps to fix mixed content warnings by automatically converting HTTP content to HTTPS. Really Simple SSL automatically detects your settings and configures your website to run over HTTPS. WP Force SSL helps to force SSL on specific pages or the entire site. CloudFlare Flexible SSL encrypts traffic between CloudFlare and the WordPress site visitor’s browser, but not between CloudFlare and the WordPress server. WordPress HTTPS (SSL) allows you to secure specific areas of your WordPress site.
These are just a few of the many WordPress SSL plugins available. By installing one of these plugins, you can help to ensure that your WordPress website is secure.
1. Keep your WordPress site secure with an SSL certificate
2. What is an SSL certificate and why do you need one?
3. The 7 best WordPress SSL plugins to secure your site
4. How to install an SSL certificate on your WordPress site
5. Why you should never buy an SSL certificate from your web hosting provider
6. How to set up Cloudflare SSL for your WordPress site
7. Final thoughts on securing your WordPress site with an SSL certificate
1. Keep your WordPress site secure with an SSL certificate
SSL, or Secure Sockets Layer, is a protocol that provides a secure connection between a web server and a web browser. This connection is established using an SSL certificate, which is a digital certificate that uses cryptographic methods to ensure that data is safe from eavesdropping and tampering.
WordPress is a content management system (CMS) that powers millions of websites around the world. A WordPress site can be secured with an SSL certificate in order to protect sensitive data, such as customer information and credit card numbers.
There are many WordPress SSL plugins available that can help you add an SSL certificate to your WordPress site. In this article, we will showcase the 7 best WordPress SSL plugins to help you keep your website secure.
1. Really Simple SSL
Really Simple SSL is a WordPress SSL plugin that enables SSL on your WordPress site with just a few clicks. It automatically detects your WordPress settings and configures your website to run over HTTPS.
2. WordPress HTTPS (SSL)
WordPress HTTPS (SSL) is a WordPress SSL plugin that allows you to configure your WordPress site to run over HTTPS. It supports both shared SSL certificates and private SSL certificates.
3. CloudFlare
CloudFlare is a WordPress SSL plugin that provides a free shared SSL certificate and helps to speed up your website. It also offers security features, such as a web application firewall (WAF), to protect your website from attacks.
4. SSL Insecure Content Fixer
SSL Insecure Content Fixer is a WordPress SSL plugin that helps you to fix mixed content errors on your WordPress site. It also allows you to configure your site to redirect all HTTP traffic to HTTPS.
5. WPForce SSL
WPForce SSL is a WordPress SSL plugin that redirects all HTTP traffic to HTTPS. It also ensures that all resources on your WordPress site are loaded over SSL.
6. Easy HTTPS Redirection
Easy HTTPS Redirection is a WordPress SSL plugin that allows you to easily redirect all HTTP traffic to HTTPS. It also provides a wildcard SSL certificate that can be used on multiple subdomains.
7. Flexible SSL
Flexible SSL is a WordPress SSL plugin that allows you to configure your site to run over HTTPS. It also provides a flexible SSL certificate that can be used on multiple subdomains.
2. What is an SSL certificate and why do you need one?
An SSL certificate is a digital certificate that is used to encrypt information on a website. This helps to protect the information from being intercepted by third parties. SSL certificates are also used to verify the identity of a website.
When a website is SSL encrypted, the information that is sent between the site and the visitor's browser is encrypted. This makes it much more difficult for third parties to intercept and read the information.
SSL certificates are also used to verify the identity of a website. This is important because it helps to ensure that visitors are not being taken to a fake site. Fake sites are often used to stealing people's personal information, such as credit card numbers and passwords.
It is important to note that not all websites need an SSL certificate. If a website does not deal with sensitive information, such as credit card numbers or passwords, then an SSL certificate is not really necessary. However, if a website does deal with sensitive information, then an SSL certificate is a must.
There are many different SSL certificates available, and it is important to choose the right one for your website. The type of SSL certificate you need will depend on the type of website you have and the level of security you need.
If you are not sure which SSL certificate is right for your website, there are many companies that offer SSL certificates. These companies will be able to advise you on the best SSL certificate for your website.
3. The 7 best WordPress SSL plugins to secure your site
When it comes to website security, one of the most important factors is having an SSL certificate. Not only does this ensure that your site is safe from hackers, but it also helps to build trust with your visitors.
There are a number of WordPress SSL plugins available, and it can be tricky to know which one to choose. To help you make the best decision for your website, we’ve compiled a list of the 7 best WordPress SSL plugins.
1. WP Engine SSL
If you’re looking for a comprehensive security solution, WP Engine SSL is a great option. This plugin offers a number of features, including a firewall, intrusion detection, and malware scanning.
2. Bulletproof Security
Bulletproof Security is a popular WordPress security plugin that offers a number of features, including an SSL certificate. This plugin is easy to use and offers a great level of protection for your website.
3. iThemes Security
iThemes Security is a WordPress security plugin that offers a number of features, including an SSL certificate. This plugin is easy to use and offers a great level of protection for your website.
4. Sucuri Security
Sucuri Security is a WordPress security plugin that offers a number of features, including an SSL certificate. This plugin is easy to use and offers a great level of protection for your website.
5. Wordfence Security
Wordfence Security is a WordPress security plugin that offers a number of features, including an SSL certificate. This plugin is easy to use and offers a great level of protection for your website.
6. Jetpack
Jetpack is a popular WordPress plugin that offers a number of features, including an SSL certificate. This plugin is easy to use and offers a great level of protection for your website.
7. Yoast SEO
Yoast SEO is a popular WordPress plugin that offers a number of features, including an SSL certificate. This plugin is easy to use and offers a great level of protection for your website.
4. How to install an SSL certificate on your WordPress site
An SSL certificate is a must for any site that wants to be taken seriously. It's a simple way to add security and can be easily installed on your WordPress site with one of the following plugins.
1. WordPress HTTPS (SSL)
This plugin is great for those who are not comfortable editing code. WordPress HTTPS will add an SSL certificate to your site and configure it for you.
2. Really Simple SSL
Like the name says, this plugin is really simple to use. Install it and activate it and your site will be SSL secured.
3. CloudFlare SSL
CloudFlare is a great way to add security to your site. This plugin will add an SSL certificate from CloudFlare and configure it for you.
4. WP Encrypt
WP Encrypt is a great plugin for those who want to add security to their WordPress site. It will add an SSL certificate and configure it for you.
5. Jetpack SSL
Jetpack is a great plugin for those who want to add security to their WordPress site. It will add an SSL certificate and configure it for you.
6. AutoSSL
AutoSSL is a great plugin for those who want to add security to their WordPress site. It will add an SSL certificate and configure it for you.
7. SSL Insecure Content Fixer
This plugin is great for those who want to add security to their WordPress site. It will fix insecure content on your site and make it SSL compliant.
5. Why you should never buy an SSL certificate from your web hosting provider
If you're running a website, it's important to make sure that it's secure. One way to do this is to install an SSL certificate. You might be tempted to buy an SSL certificate from your web hosting provider, but there are a few reasons why you shouldn't do this.
First of all, web hosting providers typically charge a lot more for SSL certificates than you would pay if you bought one from a dedicated SSL provider. This is because web hosting providers are middlemen who mark up the price of the certificate.
Additionally, web hosting providers often include "installation fees" and other hidden costs in their SSL certificate pricing. Dedicated SSL providers, on the other hand, typically have much more transparent pricing.
Another reason to avoid buying an SSL certificate from your web hosting provider is that they will likely put it on a shared IP address. This means that if another website on the same IP address gets hacked, your website could be vulnerable as well. If you have a dedicated IP address for your website, this is not an issue.
Finally, some web hosting providers will give you a free SSL certificate when you sign up for their service. However, these certificates are usually of low quality and may not provide the level of security that you need. It's always better to pay for a high-quality SSL certificate from a dedicated provider.
In conclusion, there are a few reasons why you shouldn't buy an SSL certificate from your web hosting provider. First of all, they charge more than dedicated SSL providers. Additionally, web hosting providers often have hidden costs, and their SSL certificates may be of low quality. Finally, your website could be put at risk if it shares an IP address with other websites.
6. How to set up Cloudflare SSL for your WordPress site
WordPress is a content management system (CMS) that allows users to create a website or blog from scratch, or to improve an existing website. WordPress is one of the most popular CMSs in use today, powering millions of websites and blogs.
One of the most important aspects of security for a WordPress site is SSL. SSL, or Secure Sockets Layer, is a protocol that encrypts communication between a website and a web browser. This encryption is important for protecting sensitive information, such as credit card numbers and passwords.
There are a number of ways to add SSL to a WordPress site. One popular option is to use a plugin. There are many WordPress SSL plugins available, and each has its own advantages and disadvantages.
Cloudflare is a security company that offers a number of security products, including an SSL certificate. Cloudflare SSL is a free SSL certificate that can be used to encrypt communication between a WordPress site and a web browser.
To set up Cloudflare SSL for your WordPress site, you will first need to sign up for a Cloudflare account. Once you have created an account, you will need to add your WordPress site to Cloudflare. After your site has been added, you will need to select the SSL certificate that you want to use. Cloudflare offers a number of different SSL certificates, including a free SSL certificate.
Once you have selected an SSL certificate, you will need to install the Cloudflare plugin on your WordPress site. After the plugin has been installed, you will need to activate the Cloudflare SSL certificate.
After the Cloudflare SSL certificate has been activated, your WordPress site will be secure and encrypted. Any sensitive information that is transmitted between your WordPress site and a web browser will be protected.
7. Final thoughts on securing your WordPress site with an SSL certificate
As we've seen, there are a number of ways to add an SSL certificate to your WordPress site. And while there's no one-size-fits-all solution, each of the plugins we've looked at has its own advantages and disadvantages.
Ultimately, the best WordPress SSL plugin for you will depend on your specific needs and the features you're looking for. However, all of the plugins we've discussed offer a great way to add an extra layer of security to your WordPress site.
If you're running an eCommerce site, then you'll definitely want to consider adding an SSL certificate. Not only will it help to keep your customers' information safe, but it can also boost your search engine ranking. And if you're accepting payments on your site, then an SSL certificate is absolutely essential.
For most other sites, an SSL certificate is not absolutely necessary. However, it is always a good idea to add one if you can. Even if you're not handling sensitive information on your site, it's still a good idea to make sure that your visitors know that their information is safe.
If you're not sure which WordPress SSL plugin is right for you, then take some time to experiment with each of them. Try out different features and see which ones you like best. And don't forget to ask your fellow WordPress users for their recommendations.If you're looking for the best WordPress SSL plugins to secure your website, look no further. Here are the 7 best plugins to keep your site safe and secure.
#free SSL plugins#WordPressSecurity#wordpress website#WordPress website security#Ssl zen download#ssl plugins
0 notes
Text
Which SSL is Best For Ecommerce Website?
INTRODUCTION
Securing your ecommerce website is very important to build trust with your visitors and protecting their sensitive information which has been taken during online transactions.SSL encrypts the data transferred between a user’s browser and your server. It also ensures that the personal and financial information remains confidential. Well I know that within this much SSL Certificate in this world it would be difficult for you to choose the best SSL certificate for your Ecommerce Website. But Don't Hesitate further in this blog we will help you to explore different SSL certificate types and also helps you to know what type of SSL certificate is needed for ecommerce website of yours..
Best SSL Certificate for Ecommerce
1. Organisation Validation SSL certificate :
It provides a higher level of validation as compared to the DV certificate. The CA verifies both domain ownership and also checks its organisation details, such as its legal existence. This additional information gives more confidence to customers as they will be able to easily mark the organisation name in the certificate details.
Best use Case : For small ecommerce websites or blogs that needs basic encryption without extensive identity validation
2. Extended validation SSL certificate :
This SSL certificate offers the highest level of validation and are ideal for ecommerce sites aiming to maximise trust and security. In this the CA conducts the verifications like organisation identity, including legal status, Physical location address, also operational existence. EV SSL mostly triggers the green address bar by which more users get confidential.
Best Use Case : Large Ecommerce websites, especially those dealing with sensitive customer data and high value transactions.
3. WildCard SSL Certificate :
Its Secures the main domain and all its domains with a single certificate. For example a wild card domain for yourdomain.com will also secure blog.domain.com which means blog pages and all other subdomains of your website. This SSL will be cost effective if you have multiple subdomain for your website.
Best use Case : Ecommerce website with several subdomains such as customers portals or language specific websites.
4. Multiple Domain SSL certificate :
If your Ecommerce business operates multiple domains and wants to secure all the domains using one SSL certificate, this is an excellent choice. Multiple domain SSL certificate is also known as subject alternatives name is one of an excellent choice. This certificate allows your to secure different domain names, Subdomains and even IP addresses with a single certificate.
Best Use Case : Ecommerce business with multiple websites or domains that wanted to streamline their certificate management.
5. EV multiple Domain SSL certificate :
For businesses with multiple domains that require the highest level of validation, EV multiple domain SSL certificates combine the benefits of extended validation with the flexibility of securing multiple domains.
Best Use Case : Large Ecommerce enterprise with a diverse online presence and a strong focus on customer trust.
Conclusion
Choosing the right SSL certificate is crucial for the security and success of an ecommerce website. Access you specific needs, the size of your business, the level of trust you want to establish with your customers choose according to it.
Source
#which ssl certificate is best for ecommerce website#what type of ssl certificate do i need for ecommerce#best ssl certificate for ecommerce site
0 notes
Text
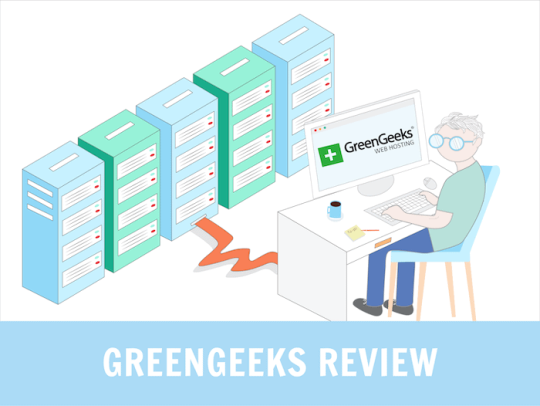
GreenGeeks Best WebHosting Service
Fun fact: do you know why Facebook moved its massive data center to Northern Sweden?
That’s because servers run hot, and cooling them down is expensive. Might as well keep them in a cold part of the world.
But more to the point in this GreenGeeks review: maintaining servers uses a ton of energy.
In fact, the Internet is one of the largest polluters in the world. Data centers account for 2% of the world’s CO2 emissions, about the same as the airline industry.
Well, if that’s a concern for you, I’ve got good news because the ‘green’ in GreenGeeks refers to their commitment to providing eco-friendly web hosting.
This is how it works, according to their website:
The platform is designed with a maximum use, no waste mindset.
For every amperage the company pulls from the grid, it matches it x3 in the form of renewable energy via the Bonneville Environmental Foundation
So they claim your website could be operating on a 300% green hosting platform!
While a growing number of hosting providers take the problem of energy seriously, (here’s an example from DreamHost), GreenGeeks really puts their ethos front and forward.
But what about other pros and cons, features and alternatives? Let’s put GreenGeeks through the wringer to see how it fares.
Table of Contents
GreenGeeks Prices
GreenGeeks Pros & Cons
What is GreenGeeks used for?
When not to use GreenGeeks hosting?
GreenGeeks Backups
GreenGeeks and WordPress
Final GreenGeeks Review Comments
Frequently Asked Quesitons
GreenGeeks Prices
Let’s first look at how much it costs per month to host your website on GreenGeeks. The first option is for shared hosting (the one most website owners need). You’ll also find that they offer WordPress web hosting. As far as I could tell, there is absolutely no difference between the WordPress and the shared hosting option.
As always, we’ll only be mentioning the regular price, which is what you pay after a first year at a discounted price. The first 12 months can be 50 – 70% cheaper.
Ecosite LiteEcosite ProEcosite Premium
Price (after renewal)$10.95 / month$15.95 / month$25.95 / month
You can purchase the plans for 12, 24 or 36 months. There is a significant discount for the longer terms, as you can see below:
GreenGeeks also offers VPS hosting, which comes with better performance, but a lot of limits depending on the plan you choose.
Price$39.95 / month$59.95 / month$109.95 / month
Finally, I should also mention that GreenGeeks has a few add-ons you can purchase to expand your hosting capabilities. These include:
Dedicated IP address: $48 per year
Premium AlphaSSL Wildcard: to secure SSL on multiple subdomains all at once.
WHMCS license: useful for resellers who want to bill hosting to their clients (note that GreenGeeks does offer a reselling option).
Last but not least, you’ll have to pay $25 for every backup restore, if you do it more than once per month (the first one is free).
What can you expect from each GreenGeeks plan?
As you can see in the above table, there’s a lot of unlimited stuff with their shared hosting and WordPress plans. That includes:
Unlimited bandwidth (or data transfer, which means the same thing)
Unlimited disk storage
Unlimited databases
Unlimited email accounts
Free SSL
The key limits to keep an eye on are maybe the number of ionodes, which is another way of saying the number of files on your site. It’s a very large number, mostly there to ensure you don’t abuse GreenGeeks’ generosity by hosting a file sharing website.
GreenGeeks Pros & Cons
Pros:
Green-minded: GreenGeeks is attempting to offset their server’s electricity consumption by using as much renewable energy as possible.
Unlimited data bandwidth: you can host one or multiple sites with complete peace of mind when it comes to visitor numbers and bandwidth.
Unlimited data storage: your site can be as large as you like, so good for video, high-res photos and ecommerce with loads of products. Just keep an eye on the number of files. Hosting more than 150,000 could void your plan’s contract.
Server locations: three continents to choose from, the US, Canada and Europe.
Heavily reduced long term plans: it’s not unusual to pay less for 24 or 36 month plans, but GreenGeeks is slashing their monthly prices by up to 70% for long term users.
Cons:
Missing advanced features: serious website owners and developers will need to look elsewhere for staging or premium DNSs.
No team management: it’s not possible to add multiple account users and to give permissions.
Lack of free backups: you get one automatic backup every 24 hours. One free restore per month, but the rest are paid. Not good enough.
Outdated design: Not a deal-breaker, but the whole system could do with a new coat of paint, which could also help with the user experience.
What is GreenGeeks used for?
I’d say GreenGeeks is best for website owners with green goals in mind. You can even show one of their green badges, to highlight on your site.
The generous bandwidth and storage is advantageous for those who own multiple sites. As far as the performance to price ratio goes, it’s good, and becomes more acceptable when you buy a long term contract of 24 or 36 months.
When not to use GreenGeeks hosting?
Anyone managing a team should consider that inviting others to join the account isn’t possible, and the lack of developer-friendly features could be a big no-no for certain businesses.
Developers with complicated workflows that need staging areas probably won’t be big fans of GreenGeeks’s platform either.
GreenGeeks Backups
Backups and restore are one of the areas I start considering a lot more these days when it comes to choosing a web host. A Sod’s law states: if something wrong can happen, it probably will, and at the worst possible times. This happened to us, and please learn from our mistakes when I say you should backup as often as possible.
GreenGeeks cPanel Backup Feature
Anyways, this is how it works with GreenGeeks. Option 1 is to use the cPanel backup tool. I’s a bit clunky and manual but by no means too difficult to do:
Login and click on the appropriate site’s cPanel button
Click Backup in the Files section
Click Home Directory under Download a Home Director
You can also download a database instead, or a full Zipped account backup, which is what you’ll need to keep on your local drives.
A couple of important things to note:
If your account is larger than 10GB in size, the whole cPanel backup option will be disabled. You’ll have to pay $5 per backup.
cPanel backups saved to your home directory will be deleted automatically after 48 hours, so it’s better to download the ZIP file locally.
The first monthly restore is free. After that, each restore costs $25. Note that it’s not unusual to restore at least a couple of times if there’s an issue (e.g. you chose the wrong backup to restore).
Option number two is to download files manually using an FTP program. If you use a CMS like WordPress or Drupal that also means you’ll need to backup databases. I always find that a big pain to do, and also slow. Which is why a better backup tool would have been useful.
GreenGeeks and WordPress
Although GreenGeeks has a special section on their website for WordPress hosting, I couldn’t find a difference between these plans and the share hosting ones.
In any case, here’s what you get for both if you want to install the world’s most popular CMS.
Easy installation: it’s not 1-click, but they use an install app called Softaculous, which simplifies the process for you. Maybe 4 or 5 steps, which you can read about here.
LiteSpeed Cache plugin: it’s a caching plugin that will make WordPress run faster on your site when properly configured. Be aware this is not GreenGeek’s own solution, but just a generic plugin they recommend.
LiteSpeed Cache Settings
To be honest, I feel like all the WordPress-optimized stuff is mostly there for marketing purposes. If you are really serious about WordPress experts (and you have the budget for it), I’d consider other options like Kinsta or WP Engine. SiteGround is also a great option if you need something a bit more affordable.
Final GreenGeeks Review Comments
GreenGeeks is certainly the provider we’ve tested that’s the most committed to protecting the environment. It’s an admirable choice, and businesses with a green goal will certainly be pleased to hear that they can host a website with a reliable performance, price, and low carbon footprint.
But there are nevertheless a few downsides to consider. The lack of advanced options like staging and team management features can be a dealbreaker for professional business owners. The limited backup features may be not enough for most.
And if you need a top-performing host, other (and more expensive) solutions like SiteGround, Kinsta or WP Engine could be considered.
It’s also not the cheapest provider out there. For example, at renewal DreamHost is more affordable and offers similar performance levels.
> Try GreenGeeks risk-free for 30 days
Frequently Asked Quesitons
How Do I Pay for GreenGeeks?
You can pay via all major credit cards and PayPal. No checks, money orders, wire transfers or Western Union payments.
Is Everything Really Unlimited?
Yes. Just keep in mind that there is a limit on the amount of files you can keep on your sites, though. It’s a really high number, so mostly a precaution against file-sharing websites.
Can I Get My Money Back?
There is an unconditional 30-day money back guarantee offer.
Is There an Uptime Service Guarantee?
Yes, if your website hosting drops below a 99.9% rate, GreenGeeks will refund some of your hosting fees.
Is GreenGeeks Really Environmentally-Friendly?
They’re certainly advertising as such. In practice this is how it works: GreenGeeks tells the Bonneville Environmental Foundation (BEF) how much electricity they use. The foundation calculates how much green energy they’ll need to use to make up for it. GreenGeeks purchases that amount in renewable energy.
So it’s not like their servers use less energy than standard hosting. However, they are certainly committed to making up for what they consume, and using as much green energy as possible.
Get GreenGeeks Now
#Best Web Hosting Services#Best Web Hosting Providers#best web hosts#web hosting#web host#web hosting provider#web hosting services#wordpress hosting#hosting
1 note
·
View note
Text
Web Application Penetration Testing Checklist
Web-application penetration testing, or web pen testing, is a way for a business to test its own software by mimicking cyber attacks, find and fix vulnerabilities before the software is made public. As such, it involves more than simply shaking the doors and rattling the digital windows of your company's online applications. It uses a methodological approach employing known, commonly used threat attacks and tools to test web apps for potential vulnerabilities. In the process, it can also uncover programming mistakes and faults, assess the overall vulnerability of the application, which include buffer overflow, input validation, code Execution, Bypass Authentication, SQL-Injection, CSRF, XSS etc.
Penetration Types and Testing Stages
Penetration testing can be performed at various points during application development and by various parties including developers, hosts and clients. There are two essential types of web pen testing:
l Internal: Tests are done on the enterprise's network while the app is still relatively secure and can reveal LAN vulnerabilities and susceptibility to an attack by an employee.
l External: Testing is done outside via the Internet, more closely approximating how customers — and hackers — would encounter the app once it is live.
The earlier in the software development stage that web pen testing begins, the more efficient and cost effective it will be. Fixing problems as an application is being built, rather than after it's completed and online, will save time, money and potential damage to a company's reputation.
The web pen testing process typically includes five stages:

1. Information Gathering and Planning: This comprises forming goals for testing, such as what systems will be under scrutiny, and gathering further information on the systems that will be hosting the web app.
2. Research and Scanning: Before mimicking an actual attack, a lot can be learned by scanning the application's static code. This can reveal many vulnerabilities. In addition to that, a dynamic scan of the application in actual use online will reveal additional weaknesses, if it has any.
3. Access and Exploitation: Using a standard array of hacking attacks ranging from SQL injection to password cracking, this part of the test will try to exploit any vulnerabilities and use them to determine if information can be stolen from or unauthorized access can be gained to other systems.
4. Reporting and Recommendations: At this stage a thorough analysis is done to reveal the type and severity of the vulnerabilities, the kind of data that might have been exposed and whether there is a compromise in authentication and authorization.
5. Remediation and Further Testing: Before the application is launched, patches and fixes will need to be made to eliminate the detected vulnerabilities. And additional pen tests should be performed to confirm that all loopholes are closed.
Information Gathering

1. Retrieve and Analyze the robot.txt files by using a tool called GNU Wget.
2. Examine the version of the software. DB Details, the error technical component, bugs by the error codes by requesting invalid pages.
3. Implement techniques such as DNS inverse queries, DNS zone Transfers, web-based DNS Searches.
4. Perform Directory style Searching and vulnerability scanning, Probe for URLs, using tools such as NMAP and Nessus.
5. Identify the Entry point of the application using Burp Proxy, OWSAP ZAP, TemperIE, WebscarabTemper Data.
6. By using traditional Fingerprint Tool such as Nmap, Amap, perform TCP/ICMP and service Fingerprinting.
7.By Requesting Common File Extension such as.ASP,EXE, .HTML, .PHP ,Test for recognized file types/Extensions/Directories.
8. Examine the Sources code From the Accessing Pages of the Application front end.
9. Many times social media platform also helps in gathering information. Github links, DomainName search can also give more information on the target. OSINT tool is such a tool which provides lot of information on target.
Authentication Testing

1. Check if it is possible to “reuse” the session after Logout. Verify if the user session idle time.
2. Verify if any sensitive information Remain Stored in browser cache/storage.
3. Check and try to Reset the password, by social engineering crack secretive questions and guessing.
4.Verify if the “Remember my password” Mechanism is implemented by checking the HTML code of the log-in page.
5. Check if the hardware devices directly communicate and independently with authentication infrastructure using an additional communication channel.
6. Test CAPTCHA for authentication vulnerabilities.
7. Verify if any weak security questions/Answer are presented.
8. A successful SQL injection could lead to the loss of customer trust and attackers can steal PID such as phone numbers, addresses, and credit card details. Placing a web application firewall can filter out the malicious SQL queries in the traffic.
Authorization Testing

1. Test the Role and Privilege Manipulation to Access the Resources.
2.Test For Path Traversal by Performing input Vector Enumeration and analyze the input validation functions presented in the web application.
3.Test for cookie and parameter Tempering using web spider tools.
4. Test for HTTP Request Tempering and check whether to gain illegal access to reserved resources.
Configuration Management Testing

1. Check file directory , File Enumeration review server and application Documentation. check the application admin interfaces.
2. Analyze the Web server banner and Performing network scanning.
3. Verify the presence of old Documentation and Backup and referenced files such as source codes, passwords, installation paths.
4.Verify the ports associated with the SSL/TLS services using NMAP and NESSUS.
5.Review OPTIONS HTTP method using Netcat and Telnet.
6. Test for HTTP methods and XST for credentials of legitimate users.
7. Perform application configuration management test to review the information of the source code, log files and default Error Codes.
Session Management Testing
1. Check the URL’s in the Restricted area to Test for CSRF (Cross Site Request Forgery).
2.Test for Exposed Session variables by inspecting Encryption and reuse of session token, Proxies and caching.
3. Collect a sufficient number of cookie samples and analyze the cookie sample algorithm and forge a valid Cookie in order to perform an Attack.
4. Test the cookie attribute using intercept proxies such as Burp Proxy, OWASP ZAP, or traffic intercept proxies such as Temper Data.
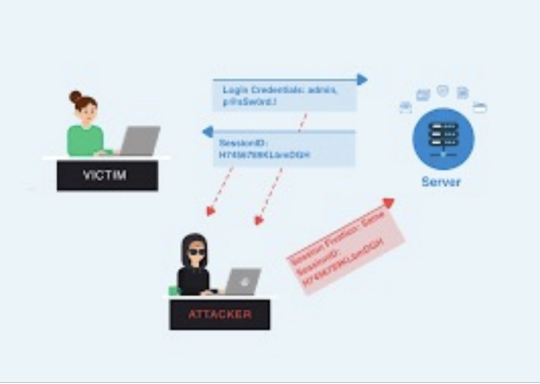
5. Test the session Fixation, to avoid seal user session.(session Hijacking )
Data Validation Testing
1. Performing Sources code Analyze for javascript Coding Errors.
2. Perform Union Query SQL injection testing, standard SQL injection Testing, blind SQL query Testing, using tools such as sqlninja, sqldumper, sql power injector .etc.
3. Analyze the HTML Code, Test for stored XSS, leverage stored XSS, using tools such as XSS proxy, Backframe, Burp Proxy, OWASP, ZAP, XSS Assistant.
4. Perform LDAP injection testing for sensitive information about users and hosts.
5. Perform IMAP/SMTP injection Testing for Access the Backend Mail server.
6.Perform XPATH Injection Testing for Accessing the confidential information
7. Perform XML injection testing to know information about XML Structure.
8. Perform Code injection testing to identify input validation Error.
9. Perform Buffer Overflow testing for Stack and heap memory information and application control flow.
10. Test for HTTP Splitting and smuggling for cookies and HTTP redirect information.
Denial of Service Testing

1. Send Large number of Requests that perform database operations and observe any Slowdown and Error Messages. A continuous ping command also will serve the purpose. A script to open browsers in loop for indefinite no will also help in mimicking DDOS attack scenario.
2.Perform manual source code analysis and submit a range of input varying lengths to the applications
3.Test for SQL wildcard attacks for application information testing. Enterprise Networks should choose the best DDoS Attack prevention services to ensure the DDoS attack protection and prevent their network
4. Test for User specifies object allocation whether a maximum number of object that application can handle.
5. Enter Extreme Large number of the input field used by the application as a Loop counter. Protect website from future attacks Also Check your Companies DDOS Attack Downtime Cost.
6. Use a script to automatically submit an extremely long value for the server can be logged the request.
Conclusion:
Web applications present a unique and potentially vulnerable target for cyber criminals. The goal of most web apps is to make services, products accessible for customers and employees. But it's definitely critical that web applications must not make it easier for criminals to break into systems. So, making proper plan on information gathered, execute it on multiple iterations will reduce the vulnerabilities and risk to a greater extent.
1 note
·
View note
Text
Comparing Standard SSL and Wildcard SSL Certificates: A Detailed Guide

As more and more businesses move online, ensuring the security of customer data and sensitive information has become a top priority.
One way to do this is by using SSL (Secure Sockets Layer) certificates to encrypt communication between web servers and browsers.
SSL certificates come in different types, and two of the most common are standard SSL and wildcard SSL certificates. In this article, we’ll explore the differences between these two types of SSL certificates and help you decide which one is right for your website.
What is an SSL Certificate?
An SSL certificate is a digital certificate that authenticates the identity of a website and encrypts data sent between the website and its visitors. When a website uses SSL, a padlock icon appears in the address bar of the browser, indicating that the website is secure. SSL certificates are issued by Certificate Authorities (CAs) such as DigiCert, GlobalSign, and Comodo.
SSL certificates use two keys, a public key and a private key. The public key is used to encrypt data, and the private key is used to decrypt it. When a browser connects to a website that has an SSL certificate, the browser verifies the identity of the website and establishes a secure connection using the public key.
Once the connection is established, data sent between the browser and the website is encrypted and can only be decrypted using the private key.
What is a Standard SSL Certificate?
A standard SSL certificate is issued to a single domain name, such as example.com. When a website uses a standard SSL certificate, all communication between the website and its visitors is encrypted and secure.
Standard SSL certificates are suitable for small and medium-sized businesses that have a single domain name and don’t need to secure subdomains.
What is a Wildcard SSL Certificate?
A wildcard SSL certificate is issued to a domain name and all its subdomains, such as *.example.com. When a website uses a wildcard SSL certificate, all communication between the website and its visitors, including subdomains, is encrypted and secure.
Wildcard SSL certificates are suitable for large businesses that have multiple subdomains and need to secure them all.
Find out: Free Web Hosting with SSL, PHP, MySQL, free Website Builder, cPanel, and no ads. Almost unlimited free website hosting. Host your first website with us
Differences Between Standard SSL and Wildcard SSL Certificates
The main difference between standard SSL and wildcard SSL certificates is the number of domains and subdomains they can secure.
Standard SSL certificates can only secure a single domain name, while wildcard SSL certificates can secure a domain name and all its subdomains.
Cost
One of the biggest differences between standard SSL and wildcard SSL certificates is the cost. Standard SSL certificates are generally less expensive than wildcard SSL certificates.
This is because standard SSL certificates only secure a single domain name, while wildcard SSL certificates can secure a domain name and all its subdomains.
Ease of Management
Managing SSL certificates can be a challenge, especially for businesses that have multiple subdomains. With a standard SSL certificate, each subdomain requires its own certificate.
This can be time-consuming and costly to manage. With a wildcard SSL certificate, a single certificate can secure a domain name and all its subdomains, making it easier to manage.
Security
Both standard SSL and wildcard SSL certificates provide the same level of encryption and security. However, wildcard SSL certificates are considered to be slightly less secure than standard SSL certificates.
This is because wildcard SSL certificates use the same private key for all subdomains. If the private key is compromised, all subdomains are at risk.
Compatibility
Most modern web browsers and operating systems support both standard SSL and wildcard SSL certificates. However, some older web browsers and operating systems may not support wildcard SSL certificates.
Which SSL Certificate Should You Choose?
Choosing the right SSL certificate for your website depends on your specific needs. If you have a single domain name and don’t need to secure subdomains, a standard SSL certificate is a good choice. Standard SSL certificates are less expensive and easier to manage.
On the other hand, if you have multiple subdomains that need to be secured, a wildcard SSL certificate may be the better option. It can be more expensive upfront, but it can also be more cost-effective and easier to manage in the long run.
It’s also worth considering the level of security you require. While both standard SSL and wildcard SSL certificates provide the same level of encryption and security, wildcard SSL certificates are considered to be slightly less secure than standard SSL certificates. If you need the highest level of security possible, a standard SSL certificate may be the better choice.
In addition, compatibility is also a factor to consider. While most modern web browsers and operating systems support both standard SSL and wildcard SSL certificates, some older web browsers and operating systems may not support wildcard SSL certificates.
It’s important to check the compatibility requirements of your website and its visitors before making a decision.
Ultimately, the choice between a standard SSL certificate and a wildcard SSL certificate depends on your specific needs and requirements. Consider the cost, ease of management, security, and compatibility factors before making a decision.
#ssl hashtag#wildcardssl hashtag#security hashtag#cybersecurity hashtag#dataprotection hashtag#cybersafety hashtag#encryption hashtag#HTTPS hashtag#onlinesecurity hashtag#websitesecurity hashtag#hostingseekers hashtag#wsdhs#domain#webhostingservices
0 notes
Text

SSL
HOW TO FIX YOUR SSL: ENSURING A SECURE AND TRUSTWORTHY WEBSITE
In today’s digital landscape, website security is paramount. An essential component of this security is the SSL (Secure Sockets Layer) certificate, which encrypts data transmitted between your website and its visitors. An SSL certificate not only protects sensitive information but also boosts your site’s credibility and search engine ranking. If your SSL certificate is not working correctly, it can result in security warnings, loss of visitor trust, and a potential drop in traffic. Here’s a comprehensive guide on how to fix your SSL issues and ensure your website remains secure and trustworthy.
UNDERSTANDING SSL CERTIFICATES
Before diving into the troubleshooting process, it’s important to understand what an SSL certificate does. SSL certificates create an encrypted connection between a web server and a browser, ensuring that any data transferred remains private and secure. This encryption is crucial for protecting sensitive information such as login credentials, personal details, and payment information.
COMMON SSL ISSUES AND HOW TO FIX THEM
Expired SSL Certificate
Symptom: Visitors receive a warning that your certificate has expired.
Solution: Renew your SSL certificate through your certificate authority (CA). Most CAs send reminders before the certificate expires, so be sure to renew it promptly.
Mismatched Domain Name
Symptom: Visitors see a warning about a domain name mismatch.
Solution: Ensure that the SSL certificate matches the domain name exactly. For instance, if your certificate is for “www.example.com,” accessing “example.com” may trigger a warning. Consider getting a wildcard certificate if you have multiple subdomains.
Incomplete Certificate Chain
Symptom: Browsers display a warning about an incomplete certificate chain.
Solution: Install the intermediate certificates provided by your CA. These intermediate certificates link your SSL certificate to a trusted root certificate. Check your CA’s documentation for installation instructions.
Mixed Content Warnings
Symptom: The website displays mixed content warnings, indicating that some resources are not loaded securely.
Solution: Ensure that all elements on your site (images, scripts, stylesheets) are loaded over HTTPS. Update your website’s code to replace “http://” URLs with “https://”.
Incorrect Certificate Installation
Symptom: The SSL certificate does not work after installation.
Solution: Double-check the installation process. Ensure that the certificate is installed on the correct server and that the private key matches the certificate. Consult your web host’s support or your CA for detailed instructions.
Outdated Browser or Server Configuration
Symptom: Certain users or browsers cannot establish a secure connection.
Solution: Ensure that your server supports the latest SSL/TLS protocols and ciphers. Update your server software and configurations to support modern security standards. Encourage users to update their browsers.
STEP-BY-STEP GUIDE TO FIX SSL ISSUES
Verify Your SSL Certificate
Use online tools like SSL Labs’ SSL Test to check the status and configuration of your SSL certificate. This can help identify common issues such as expiration, mismatched domains, and incomplete certificate chains.
Renew and Replace Your Certificate
If your certificate is expired or nearing expiration, contact your CA to renew it. Follow the renewal process and install the new certificate on your server.
Update Domain Name Configurations
Ensure that your SSL certificate covers all necessary domain names and subdomains. Consider purchasing a wildcard certificate if you manage multiple subdomains.
Install Intermediate Certificates
Check your CA’s documentation for intermediate certificates. Install these on your server to complete the certificate chain.
Correct Mixed Content Issues
Review your website’s source code for any “http://” URLs. Update these to “https://” to ensure all resources are loaded securely.
Check Server and Browser Compatibility
Update your server configurations to support the latest SSL/TLS protocols and strong ciphers. Ensure your server software is up-to-date and encourage users to use modern browsers.
PREVENTIVE MEASURES FOR FUTURE SSL ISSUES
Set Up Automatic Renewal
Many CAs and hosting providers offer automatic renewal options for SSL certificates. Enable this feature to avoid future expiration issues.
Regularly Monitor Your SSL Status
Use monitoring tools to regularly check the status of your SSL certificate. Set up alerts for potential issues like expiration or configuration problems.
Keep Your Server Updated
Regularly update your server software and configurations to comply with the latest security standards and protocols.
Educate Your Team
Ensure that your development and IT teams are aware of SSL best practices and stay updated on the latest security trends.
CONCLUSION
Fixing SSL issues is crucial for maintaining a secure and trustworthy website. By understanding common SSL problems and following the steps to resolve them, you can ensure your site remains protected and continues to inspire confidence in your visitors. Regular monitoring and proactive measures will help prevent future SSL issues, allowing you to focus on growing your online presence with peace of mind.
🌐 #WebsiteSecurity 🌐 #SSLFix 🌐 #SecureYourSite 🌐 #TrustworthyWeb 🌐 #OnlineSafety 🌐
If your website, ______ is not loading despite having SSL enabled, here are some steps to troubleshoot and resolve the issue:
Check SSL Certificate Validity:
Verify that your SSL certificate is still valid and has not expired. You can use online tools like SSL Checker to check the status.
Clear Browser Cache:
Sometimes, cached data can cause loading issues. Clear your browser cache or try accessing the site in an incognito window or a different browser.
DNS Issues:
Ensure your DNS settings are correctly configured. Use tools like DNS Checker to see if your domain is resolving correctly.
Hosting Issues:
Check with your hosting provider to see if there are any server issues or maintenance activities affecting your website.
SSL Configuration:
Ensure your server is properly configured to handle SSL. Check your server settings or contact your hosting provider for assistance.
Firewall/ Security Settings:
Verify that your firewall or security settings are not blocking access to your site.
Content Management System (CMS) Issues:
If you are using a CMS like WordPress, check for any updates or issues with plugins or themes that might be affecting the site.
Website Uptime Monitoring:
Use a service like UptimeRobot to monitor your website’s uptime and get alerts if it goes down.
If you still can’t resolve the issue, you might need to contact your hosting provider’s support team for further assistance. They can provide more detailed insights and help you troubleshoot specific server-related problems.
HOW TO CHANGE YOUR CNAME AND A RECORD: A COMPREHENSIVE GUIDE
Managing your domain’s DNS settings can seem daunting, but it’s essential for directing your domain traffic to the right servers. Whether you need to set up a new website, verify domain ownership, or configure email services, knowing how to change your CNAME and A records is crucial. Here’s a step-by-step guide to help you through the process.
UNDERSTANDING CNAME AND A RECORDS
CNAME Record: A Canonical Name (CNAME) record maps an alias name to a true or canonical domain name. This is often used to point subdomains to the domain hosting the content.
A Record: An Address (A) record maps a domain name to its corresponding IPv4 address. This is the primary method to link a domain to its web server.
STEPS TO CHANGE YOUR CNAME RECORD
Access Your DNS Management Tool 🛠️
Log in to your domain registrar’s website (e.g., GoDaddy, Namecheap, Bluehost).
Navigate to the DNS management or DNS settings section.
Find the CNAME Record Section 🔍
Look for the section where you can add or edit DNS records.
It might be labeled as “Manage DNS” or “DNS Zone File.”
Add or Edit a CNAME Record ✏️
Adding a New CNAME Record:
Click on “Add Record” or similar.
Select CNAME from the record type dropdown.
Enter the subdomain you want to point (e.g., www).
Enter the canonical domain you want it to point to (e.g., example.com).
Editing an Existing CNAME Record:
Locate the existing CNAME record.
Click on edit or the pencil icon.
Update the canonical domain to the new target.
Save Changes 💾
Ensure all the details are correct.
Save or update the DNS record.
Propagation Time ⏳
Remember that DNS changes can take up to 48 hours to propagate globally, though they often update much faster.
STEPS TO CHANGE YOUR A RECORD
Access Your DNS Management Tool 🛠️
Log in to your domain registrar’s website.
Navigate to the DNS management or DNS settings section.
Find the A Record Section 🔍
Look for the section where you can add or edit DNS records.
It might be labeled as “Manage DNS” or “DNS Zone File.”
Add or Edit an A Record ✏️
Adding a New A Record:
Click on “Add Record” or similar.
Select A from the record type dropdown.
Enter the domain or subdomain you want to point (e.g., @ for the root domain or www).
Enter the IPv4 address you want it to point to (e.g., 192.0.2.1).
Editing an Existing A Record:
Locate the existing A record.
Click on edit or the pencil icon.
Update the IP address to the new target.
Save Changes 💾
Ensure all the details are correct.
Save or update the DNS record.
Propagation Time ⏳
Just like with CNAME changes, A record changes can take up to 48 hours to propagate globally.
USEFUL RESOURCES AND WEBSITES
GoDaddy: Manage DNS Records
Detailed guide on managing DNS records using GoDaddy’s interface.
Namecheap: How to Modify DNS Records
Instructions for editing DNS records with Namecheap.
Bluehost: How to Update DNS Records
Step-by-step guide for updating DNS records on Bluehost.
Google Domains: Configure Resource Records
Guide for configuring resource records in Google Domains.
YOUTUBE ADVICE
How to Change DNS Records (CNAME, A, MX, etc.) by WPBeginner 🎥
A video tutorial on how to change various DNS records, including CNAME and A records.
Understanding DNS | A Records, CNAME Records, MX Records, TTL & More by Eli the Computer Guy 🎥
An in-depth explanation of DNS records and their functions.
CONCLUSION
Changing your CNAME and A records is a fundamental skill for managing your domain and ensuring proper web traffic routing. By following the steps outlined above and utilizing the provided resources, you can confidently update your DNS settings. Remember, patience is key as DNS changes propagate across the internet. Happy DNS managing!
0 notes
Text
Leading 10 Best Domain Registrars 2018
Top 10 Best Domain Name Registrars of 2019 {Must Check #4}
The availability of numerous domain registrars makes it quite challenging to come up the best domain registrar that offers reasonable pricing, renewal, and other essential features to manage your website name with ease. Nowadays, almost all hosting companies also provide other services like WordPress hosting, cloud hosting, web designing, email storage, and security tools such as SSL certificates, etc. With that said, you can avail each and everything from your domain name provider to run a smooth website.
But the question is how one can find the legitimate, well-reputed, and trusted domain registrars?
The key features are customer support, reliability, user-friendliness, sustainability, credibility, security, reasonable pricing as well as renewal rates. For more insights, I have compiled a list of important features that you should look for before choosing any registrar. Keep in mind, these are must-have features and the fact is top domain registrars employs all of them. It also helps companies to entice or attract more customers as well.
Before going ahead to our list of best domain registrars of 2019, I would like to share some information about domain names.
Websites or blogs are a great way to create an online community. To access any website, we need a complete address of that site, which is also known as an URL, domain name or website address. For example, if you want to open “Facebook” then you need the exact URL of Facebook, which is www.facebook.com or facebook.com or fb.com. This unique address is known as “Domain Name” and it represents an IP address (Internet Protocol) to locate site content.
Remembering IP addresses of different websites is a tough job, so that is why Domain Name System (DNS) was introduced. The world first domain name was registered on 15 March 1985 with the name of Symbolics.com [Symbolics Inc. by a computer firm].
What is a Domain Registrar?
Well, according to Wikipedia a domain name registrar is an organization or commercial entity that manages the reservation of Internet domain names. A domain name registrar must be accredited by a generic top-level domain (gTLD) registry and/or a country code top-level domain (ccTLD) registry. The management is done in accordance with the guidelines of the designated domain name registries.
If you search the query “domain registrar” you’ll see a list of hundreds of companies. Some are very expensive and the others are quite cheap (lowest and affordable in price). You can save some bucks by choosing the best place to buy domain names. If you’re new to the whole thing, then here is a step-by-step guide for you.
The following domain registrars can help you save some money if you choose to register your new domain. They have good reputations, users satisfaction, technical support, and also up-voted by real users.
Top 10 Best Domain Registrars 2019 (In-depth Reviews)
Here are detailed domain name registrars reviews to pick the best one for registering your new site name.
1. iPage
When we talk about cheap domain registrars and most affordable web hosting providers to create your website within the lowest budget, iPage got the first place in this list. Apart from cheap domain registration, iPage offers many services including free SiteLock, toll-free number, site analytics, YP(Yellow pages) listening, daily spam scanning, network monitoring, and up to $200 free marketing credits to drive instant traffic toward your newly created sites.
You can easily buy your desired if available website address through iPage at the reasonable price just like hosting plans. All of their shared hosting plans are also cheap and affordable. The best thing is you get a FREE domain on the purchase of one year web hosting subscription which only costs $24/year. But you’ve to choose a three-year subscription for maximum saving.
iPage claims to deliver an incredible 99% server uptime guarantee for all shared hosting users which is quite promising in this pricing. So, to testify whether they really deliver the claimed uptime, I purchased an annual plan and monitored server uptime with UptimeRobot for more than ten months. The results were impressive and they do provide 99.8% uptime. There was rare downtime but what you can expect from such a cheaper service.
On top of that, iPage allow you to host unlimited domain names on the single account. Though you may face rare issues regarding performance and accessibility. The 24/7 live customer support is always available to help you via multiple ways. In a nutshell, you must give it a TRY and in case of un-satisfaction, request for the refund within 30 days. Overall, still a good option for small to medium size projects.
P.S: I insist you must read my detailed iPage review here.
2. NameCheap
Namecheap was founded in 2000 by Richard Kirkendall. It is one of the top registrars to purchase the name of your next project at reasonable prices. I highly recommend NameCheap one of the best places to buy domains. HostReview selected them for “Reader’s Choice Award 2013”. Moreover, In the past, Namecheap was selected as the best domain registrar by Lifehacker public poll.
NameCheap also featured on many reviews sites due to outstanding services, user-friendly support, and suitable prices. You can avail almost any type of TLD extension along with one-year free WhoIS protection. It helps to hide your personal information from spammers and public access. WhoIS guard is available for all new customers at no extra costs.
Their old domain management system was ugly and difficult to understand, but the latest design is exceptionally user-friendly, flawless, and easy to understand. You can change Name Server records, Edit DNS, or add new records within a few click. Their control panel is clutter free and divided into sub-sections which ultimately maximize usability.
Besides, they also offer shared, reseller, VPS, dedicated servers and email hosting at comparatively lower prices than other companies. You might be surprised to know that the “Basic” package of NameCheap costs a few bucks for the whole year. By Using “MyTipsHub” coupon code, you can even get an exclusive 20% discount on hosting subscription.
Plus, you can buy SSL certificates such as Positive SSL, EV SSL, and Wildcard SSL to protect your website. They offer an outstanding 24/7 live chat support for instant help. Overall, it would be a great choice if you only want to buy domain names as their renewals are pretty good.
3. GoDaddy
GoDaddy is another domain registrar which also provide web hosting services. Established in 1997 as a Jomax Technologies, which later became Godaddy. It is the world’s largest leading domain registrar company with ICANN-accreditation and also sells e-business related software and tools.
They are managing more than 73 million domain names and 17 million customers under their platform. They offer dozens of extensions (100+) to choose from to help you pick the right one for your business. Godaddy offers most competitive prices which is the core reason that helped them build a huge customer base. Their prices are very attractive, you can get a .com domain for the first year just at $0.99.
Along with cheap domain registration, Godaddy provides web hosting, WordPress hosting, VPS, Dedicated, Cloud servers as well as managed WP hosting solutions. Web hosting plans start at $4.99/month which is same as Bluehost and Hostgator. Godaddy is the best place to buy domain names, according to my personal research their hosting is not that good. If you’re looking for some quality hosts, I would like to refer this article.
Each web hosting package comes with a bunch of great features such as more than 100 one-click installer scripts, DDoS attack protection, easy registration, 1-click upgrades, and flexible control panel to handle hosting account. With scripts installers, you can easily install WordPress, Joomla, Drupal, etc. within 1 minute. So, no technical knowledge required to start your first blog.
The company also has award-winning sales support for 24/7. You can contact the expert support team via phone for instant help. However, live chat also available to get in touch but it’s not accessible 24 hours, it means there are fixed working hours. The phone call and live chat are the most convenient ways to reach technical support within minutes.
4. BlueHost (Recommended)
BlueHost has gained massive notoriety due to reliable WordPress hosting services and official recommendation by WordPress developers. They also managed to get listed here as the best domain registrar because of reasonable prices. If you are planning to start a site on WordPress platform, then choose this provider without any doubt. You’ll get a free domain name on the purchase of annual hosting account.
No need of web hosting but only a domain name? You can get one at industry standard prices as well as renewals just like their hosting plans. The management panel is user friendly where everything can be changed related domains easily like DNS records, domain lock, managing sub-domains, and enable/disable WhoIS guard. All of these things can be done with few mouse clicks through the simplistic dashboard.
Besides registration, BlueHost offer’s the following services; free domain name with hosting purchase, Cloud Hosting, Shared and Dedicated hosting, VPS hosting, Site security and more. The custom designed hosting control panel comes with a bunch of features such as one-click WordPress install, easy Cloudflare integration, creating branded emails accounts, and FTP accounts.
24/7 customer support is available for the whole year to fix your issues instantly and thus earns it the top spot on this list. I am an old and experienced BlueHost user, their hosting services are quite solid, but occasionally you may need to contact them regarding downtime or performance issues. If you are looking for an affordable host that can deliver satisfied performance along with a dozen of features, then BlueHost is just perfect for you.
5. 1and1 Internet
The 1and1 Internet is another well know top registrar who provides cheap domain registrations at the insanely lower prices. The thing that makes it the best is they offer first year fee for TLD’s around $1~$2 with exclusive discounts on web hosting plans. Surprisingly, the users can buy a .com or .org extension just at $0.99/first year and then standard renewal. That’s why I can’t resist myself to include them as the best cheapest domain registrar.
It was founded in 1988 by Ralph Dommermuth, and United Internet is the owner of this great registrar and one of the biggest web hosting companies in Europe and Lenexa. The main headquarters located in Montabaur, Germany. They are handling more than 19 million registered domains for private and business customers globally till to date and growing.
You get a friendly Name Server management panel with advanced UI, sub-domains, SSL certificate, WhoIS guard, 24/7 support, and 2 GB storage for emails as freebies. So 1and1 enable you to create branded email account without paying any extra charges using which the users can communicate with their clients. They are generous enough to allow email forwarding at ZERO fees for all users to receive email at other address.
The 1and1 Internet offers Linux and Windows hosting, virtual servers, dedicated servers, managed cloud hosting, cloud apps, email and E-commerce solutions. They are also one of the cheap cloud providers that support a broad range of operating systems. Integrated 1-click installers included even in cheap shared hosting to help you install popular CMS such as WordPress, Joomla, Drupal, etc. with one click.
If you want to get a free domain name, just choose their basic hosting plan. You get one year domain registration on the purchase of any hosting package (shared). I’ve used 1and1 for one year and monitored their servers uptime via Uptime Robot, and the results were unbelievable. The average uptime was 99.9%. Don’t you think it’s fantastic for the money you pay? ????
6. InMotion Hosting
InMotionHosting is a top-rated CNET-certified hosting for last 14 years because of outstanding service, secure web transactions, and best business practices. They have A+ Better Business Bureau (BBB) rating and serving customer for many years. They are one of the hosts who provide SSD powered web storage for all plans even for shared hosting at cheap rates.
InMotion offers web hosting, domain names, site building tools, website design services and many useful tools. You get traditional cPanel to manage your domains, sub-domains, email and FTP account, as well as hosting account. There are also dozens of other features added to the cPanel such as server statistics, bandwidth monitoring, 400+ 1-click applications, phpMyAdmin, MySQL, easy DNS editor, and much more. The exclusive perks are customer server caching/firewall, free SSL, DDoS protection, Max Speed zone, and SSD drives.
If you’re looking for an affordable but fast web hosting with a free domain, backups, and unlimited storage then give them a TRY. I am sure you won’t find them unsatisfied. Their servers are blazingly fast as they use solid state drives and “Max Speed Zone” for fast data rendering.
You can approach the proactive support 24/7 via live chat, Skype, phone, email, and ticket system. Isn’t it good to have multiple ways to get in touch with customer support to ask for help? IMH is one of few hosts that also support Skype. Moreover, their pro-active live chat is very quick to respond and user-friendly. Along with all perks and features, here is another one and it’s their extended refund policy of 90-days money back guarantee. If you feel unsatisfied with them, just request to get your money back.
I managed to get an exclusive 47% off discount for MyTipsHub visitors which is included in the link here – no coupon code required. You just have to click on the link and choose “Business hosting” for bigger saving with a free domain name.
7. HostGator
Brent Oxley started HostGator in 23 October 2002. It is a Houston-based hosting company that offers shared, VPS, reseller, and dedicated hosting as well as domain name provider. HostGator is an excellent domain registrar and inexpensive WordPress host. HostGator growing very swiftly and has a giant base of 8,000,000+ websites under their platform.
Getting a domain name via HG is very easy, and the process is pretty straightforward. You can buy using PayPal and credits cards. Their domain prices are a little bit higher than a pure domain seller but keep in mind that web hosts usually charge more money than a pure domain name provider. Another considerable point here is, if you compare the domains price of HG with other hosting companies like BlueHost, you’ll find that it’s pretty fair.
The control panel is designed by keeping in mind beginners to deliver the maximum ease of use, and same goes with web hosting panel. It comes with an advanced and easy DNS editor to help you modify Name Server records and other settings such as lock/unlock, domain transfer, etc. So, you can point your website name to different hosting server or in simple words, DNS pointing.
It is one of the most popular hosting services among WordPress users and a great domain registrar. Many experts recommend this one for creating websites on WordPress platform. Their plans are very affordable and come with dozens of features to run small to big sites flawlessly. The shared packages start as low as $4 ~ $6 per month including a free domain on annual plans.
I have been using HostGator services for a couple of years, their hosting is remarkable, fast and secure (own experience). Give them a try; you’ll never regret your decision. Get your money back in case of unsatisfiable scenario within 45 days.
8. Name.com
Name.com is a well known ICANN accredited company with a ood online reputation among domain name providers. It was founded in 2003 by Bill Mushkin and handling more than 1.9 million domains under their umbrella. They offer different services such as SSL certificate, web hosting, website products, and email tools, etc. The buying and checkout process is very simple. All you have to do is enter the site address you want to purchase, create a new account with Name(dot)com, and make the payment. That’s it.
They offer a .com extension at $12.99/year, .org at $10.99, and .net at $12.99 which are quite reasonable rates. You can purchase any provided product like hosting, domains, or SSL using Credit Cards and PayPal. Unlike some hosts, they allow easy URL and domain forwarding feature at zero fees. Name.com provide a sophisticated and easy to follow control panel to help the users change/update settings such as DNS records, transfer, email forwarding, etc.
You can avail other services and tools including SEO tutor, website builder, one-click WordPress installer, security certificates, Google Apps for work, business email services, and much more. Right now, the company sells SSL certificates by RapidSSL, Symantec, and GeoTrust at the best rates. If you’re a blogger or eCommerce business owner then must buy and implement security certificate to protect your visitors’ information. Moreover, it’s also a ranking factor in Google search engine.
Their web hosting plan starts at $4.99/month (Startup) allowing a single site and $12.99/month for unlimited websites with one free domain name. The “Startup” includes 10GB storage, 100GB bandwidth, 100 email accounts, and 10 MySQL databases. Each plan holds over 50 auto installer scripts, 99.9% server uptime, subdomains, 100+ email accounts, free cPanel, developers tools, and free encryption. They also take daily backups, spam protection, phpMyAdmin, autoresponder, and much more. All of these features come with a 30 days money back guarantee.
9. Register
Three brothers Dan Levine, Richard, and Peter founded this company in 1994 as an Internet service provider. With over 15 years of experience, they successfully build a solid base of customers who are using it for decades to manage domain names and web products. Currently, handling millions of websites and blogs on their platform. Millions of people across the globe trust and use Register(dot)com. And that’s is why I listed them as the best domain registrar for 2019 in this list.
It is an all-in-one place to get your domain name and all web services which are required to run a blog or business website. You can opt-in DIY website builder or get custom designs to create any type of online entity. They also have web hosting services along with a dedicated technical support team via phone call. You can register your web name easily at the lowest prices for the first year.
Besides domain name provider, they offer the following facilities including shared hosting, dedicated hosting, email tools, online marketing, SEO, PPC, eCommerce solutions, and SSL certificates to protect privacy. Their hosting plans are quite affordable as the “Essential plan” enables you to store 300 GB data, 25 FTP accounts, 10 email addresses, 20 GB email storage, and unlimited monthly bandwidth. You also get a free domain with this package as a bonus which is another advantage to choose Register.com.
MyTipsHub visitors can avail a tremendous discount offer using which they can grab a .com, .net, .org, .biz, and .info, TLD extensions just at $5. All you have to do is create a new account to take benefits from this special deal and buy your new web address at an insanely lower price. Here keep in mind, you must check their renewal rates before buying because Register.com charges more money than any other domain registrar.
10. DreamHost
DreamHost is an ICANN accredited best domain registrar for buying domains and offer 350+ TLD extensions to choose from. You can buy your brand name as low as $11.95/year with convenient and easy to use control panel which allows domain locking/unlocking, URL forwarding, creating sub-domains and DNS management. Just like above company, they also have decades of business experience and managing a staggering number of 1.5 million domains and websites right now.
With each registration, you’ll get a free privacy protection to secure your personal information from public access like your name, email address, and phone number. Yes, that is a great benefit and many domain registrars charge for this. Another great thing is if you choose DreamHost to buy website name, they give you “Remixer site builder” at no extra cost. It is a drag-and-drop based tool which helps you design stunning business pages and posts without learning coding skills – good for newbies and non-techs.
The company voted by WordPress.org as one of the best WordPress hosting services to make a WordPress CMS powered site as well. They provide generous hosting packages packed with unlimited storage which makes it an excellent host to get started. DreamHost only offers one plan for shared hosting that costs just $8.95/month and allows unlimited websites and bandwidth. It looks a little bit costly, but all of their servers built with SSD drives to ensure fast speed and don’t forget you are allowed to host as many domains as you can.
Furthermore, following products are covered under their platform; shared and dedicated hosting, cloud servers, VPS servers, and live support. If you can afford some extra bucks, then this one would be an exceptional choice. Still, confused? Don’t worry DreamHost offers the longest money back guarantee of 97 days. So, your investment is secure for more than three months which is beyond the standard period and longer than any company in the world. Only a reputed and quality provider can offer such an extended refund duration.
Bonus: More Best Domain Registrar(s)
Still interested to know further providers? Here are some more registrars who are also known as the best;
Features to Look for Before Choosing a Domain Registrar
Registrar Online Reputation
As there are many registrars available to choose from but the important thing is, are they reputed, well-known, and thumbed up by real users? There are domain name providers that only focus on profit-making without delivering value to customers. Some even demand additional charges for services like technical support, domain transfer, etc.
In the worst scenario, you may end up losing your domain with them, so stay away from such domain registrars. Before selecting any provider, check their credibility, business practices, real user ratings, and ICANN accreditation, etc.
Prices and Renewals
Luckily, some domain name registrar out there, offer huge introductory rates to new clients which help them save money. Few of them even cost only $0.01 or $1 for the first year and then standard renewal rates which are usually higher than the first payment.
Mostly this promotional tactic can be seen on GoDaddy which also insanely cheap domain registration for first-time buyers. Oppositely, few charges more fees than standard rates for buying as well as renewals. So, compare your favorite registrars’ prices before making a decision to get convenient and quality service.
Secondly, you might fall in love with a company due to cheaper registrations and think it’s the best place to buy domain a name but what about renewal prices?
Normally, in web hosting and domain industry, it’s a marketing strategy to gain more customer by giving huge discounts and overcharge at the time of renewal. So, you must double check this fact before making a purchase.
Customer Support
Another most important thing when working online is “Customer Support”. Domain providers that realize its importance do offer 24/7 customer support through various channels? It is highly recommended if they have live chat and call for assistance.
The support quality can be determined by trying one of their supporting channels. If they respond under five minutes via live chat or phone, then it’s acceptable and a green signal to choose that domain host. You can also ask other questions to know their friendliness or behavior.
User Interface
An easy to navigate control panel not only help saving time but also good for setting up things such as domain/email forwarding, creating email addresses, modifying DNS configuration, etc. So below listed best domain registrar do offer simple yet powerful management panel. For example; NameCheap recently renovates its control panel entirely and now they have one of the easiest to use control center for both web hosting and domain names.
Refund Policy
All the reputed domain name providers always take care of their clients by giving a money back guarantee. It is also a good sign to identify if a domain name registrar is a legit business and can be trusted. Usually, you get a 3~7 day refund time on domain buying and 30 days or more on web hosting purchase – it varies.
We all love free stuff? You can avail freebies by picking the right place to buy domain names. There are few providers listed below that offer free WHOIS Guard which help you hide personal information such as your name, phone number, and email address from public access or at least from spammers to avoid junk emails. You might be surprised to know that WHOIS privacy usually costs around $4~$10 per year but one can avail free by making the right decision.
Auto Payment Support
It is optional and not essential if you regularly monitor your domain’s expiry date. But it could be a lifesaver for busy users. When enabled, automatic renewal feature will extend the life of your domain without your attention.
All you have to do is add at least one payment method with sufficient funds from which auto-renewal system will deduct the fees.
How to Pick the Perfect Domain Name?
I am pretty sure you acknowledged what are the best domain name registrars and now the question is how to come up the great domain name? Well, just like I mentioned some tips to find the good registrar there are also few things that should keep in mind to capture a great name. I recommended read all these points carefully because not only this time but in the future it’ll help you to choose the perfect web address.
Do not just buy a domain that you think looks attractive and cool, always do your best to discover a brandable name. Avoid common terms, numbers, hyphens, etc. because you cannot make them brandable. Let me ask one thing, how many times you see numbers or hyphens in a company domain? Probably never or rarely.
Before starting out, keep in mind few domain variations according to your niche to make the process easy and research thoroughly to hunt a brandable name. Don’t just stop with one name, repeat again and again. Sometimes we just register a domain and then realize that it doesn’t fit our current business model. Ultimately, it costs money and time.
Be Creative and Perceptual
Your domain name should be intuitive enough to help first-time listeners understand what it’s all about. In simple words, it should be self-described, when someone hears or read it, he/she can guess the topics/products behind. For example; HostingAdvice.com, one can easily understand that they cover web hosting stuff.
Another example is SearchEngineJournal where most of the information is related to SEO and search engines. So, while choosing your brand name thing twice because it’s not something that is easy to change later.
Make it Short and Memorable
Lengthy name not only difficult to remember but also frustrating to type. So, if possible always make it short and memorable to help the users remember it for next time visits. If you have a too long domain name, it might be stressful for mobile users to type the whole URL due to small screen dimensions. Short names are simple to refer, can comfortably fit on visiting cards, and looks striking in off media marketing campaigns too.
Make it Easy to Type
You might say if it’s short and easy to remember then what is the meaning of easy to type? Well, you’re quite right but what about this domain “simpleessy.com”? Looks short but not easy to type as the users can find two “ee” frustrating. Hope you get the point.
Use Target Keyword
Using target keywords also help the audience to know the main niche of your brand. There are some controversies that keywords in your site name or exact match domain plays a vital role to get high ranking in search engines but who knows. Personally, I think having target keywords is a unique move because it gives you two advantages.
Prefer .com TLD
When we talk about websites, the very first thing comes in general peoples mind is “.com” and the other reason is it’s the older extension on the internet. Mostly, web owners prefer to have .com tld and you should too. And the 3rd reason in my perspective is as mobile usage increased tremendously over the last few years, you may know that many modern smartphone keyboards come with “.com” button which makes it easy to complete the URL address by pressing that button.
If your desired business name is not available in dot-com extension, then you can also check for .net, .org, and .biz, etc. or find an alternative one as you’re on the starting phase. On the other hand, the existing business owners can contact the current domain owner to buy it, but it surely cost more money than buying a new one.
Easily Pronounceable
Before purchasing your brand name figure out if you or others can pronounce it easily. It should be easy to speak instead of telling every spelling to your clients/customers. Take a look at PCMag, TechRadar, LifeHacker, AuthorityHacker, Microsoft, etc. these domains are just formidable, branded, and much easier to pronounce too.
Avoid Numbers and Hyphens
Avoid using numbers and hyphens to make your domain name looks professional, brandable, and concise. Web addresses having hyphens or numbers in most of the cases feel awkward, generic, and weird so bypass them. Instead of carrying these words you can alternate the name or use some prefix.
My-Tips-Hub.com or MyTipsHub1.com both feels ugly and inconvenient, isn’t it?
Research Thoroughly (to Avoid Trademark Infringement)
Copyright infringement is something that can ruin your well-established business soon or later if you don’t care. Losing a brand name due to trademark infringement impacts badly on any company and sustaining after that is quite impossible as many firms got abandoned in the past due to copyright claims.
You must double check and amply investigate online before going with any web name. Long story short, do not get caught in the legal lawsuit to protect your hard earned reputation and customer base. It takes years of work for brand awareness and building loyal customer base and this mistake could cost you thousands of dollars.
Choose a Suitable TLD
Just like all other tips this one also important, selecting TLD according to your business module is crucial. If you’re an organization then pick .org, for commercial purpose .com would be perfect, and so on. Want to focus local audience? Then choose the appropriate ccTLD like for the United Kingdom .uk and the USA .us, etc.
Availability of Social Network
In the past, I purchased few expired/dropped domain names and when came across to social media profiles it were already taken by someone probably the previous owner. It frequently happens when you buy old names. If you’re planning to run a long term blog or online business then must take into account social media presence. Your social profiles and pages should match the website name as it’s more legitimate and trustworthy.
So double check social media name availability before making the purchase otherwise you’ll have to include some prefix or alternative words in social media usernames which is undoubtedly not a good thing – at least for me.
So, these are some well known top domain registrars where you can easily buy your website name. If you’re looking for a great web hosting company with a FREE domain, then pick BlueHost. They are fantastic, recommended by professionals, and robust platform to make your blog within budget. You also get free SSL certificate and backup services along with instant customer support through multiple channels.
On the other hand, NameCheap is the best place to buy domain names at affordable prices and ICANN accredited domain name registrar. You get one year WHOIS protection at no additional fees. Plus, they have a user-friendly control panel to perform all necessary settings like DNS editing, etc.
If you know any excellent domain name registrar that should be here in this list, feel free to suggest in the comments section below.
Is there any worst registrar added in this list? It will a pleasure to know which is your best domain registrar for buying domains?
Source
https://www.mytipshub.com/top-ten-best-domain-registrar/
2 notes
·
View notes
Text
Install mysql on mac brew

#Install mysql on mac brew install
#Install mysql on mac brew code
#Install mysql on mac brew password
#Install mysql on mac brew free
#Install mysql on mac brew install
To install specific versions of Xdebug we need to switch to the PHP version we want to install it on, then run these commands: For PHP 7.0 sphp 7.0 There are some compatibility issues we need to take into account, as certain versions of PHP can only run certain versions of Xdebug: PHP Version Full documentation on Xdebug contains extensive information about all the functionality available.
#Install mysql on mac brew code
This means you can set breakpoints, and step through your PHP code inspecting as you go. One of the best features however, is the ability to remote debug your code. It also provides other useful dumping methods as well as displaying stack traces. Xdebug provides is a debugging and profiling extension for PHP that provides an HTML-friendly output for the var_dump() method that improves the readability of the default version. PHP comes with limited support to dump variables or log to a file, but for more complex situations you need something more powerful. One of the most important aspects of any kind of development is the ability to debug and fix your code. Voila! we have successfully setup wildcard forwarding of all *.test DNS names to localhost. Now you can test it out by pinging some bogus. Sudo bash -c 'echo "nameserver 127.0.0.1" > /etc/resolver/test' Start it and ensure it auto-starts on reboot in the future: sudo brew services start dnsmasqĪnd lastly, add it to the resolvers: sudo mkdir -v /etc/resolver Then we setup *.test hosts: echo 'address=/.test/127.0.0.1' > /opt/homebrew/etc/nf You can do this by manually adding entries to /etc/hosts ever time, or you can install and configure Dnsmasq to automatically handle wildcard *.test names and forward all of them to localhost ( 127.0.0.1).įirst we install it with brew: brew install dnsmasq This by default will not resolve to your local machine, but it's often very useful to be able to setup various virtual hosts for development purposes. In the example virtualhost we setup above, we defined a ServerName of grav-admin.test. dev domains to use SSL, this guide has been updated to use. dev domain name, but since Chrome 63 forces all. ĭocumentRoot "/Users/your_user/Sites/grav-admin" When you set up virtual hosts, you will lose your older document root, so you will need to add back support for that first as a virtual host. This file has some instructions already but the important thing to remember is that these rules are matched in order. Then you can edit this referenced file and configure it to your needs: code /opt/homebrew/etc/httpd/extra/nf First you will need to uncomment the following lines in your /opt/homebrew/etc/httpd/nf file: LoadModule vhost_alias_module lib/httpd/modules/mod_vhost_alias.so Detailed information can be found on the site.Īpache already comes preconfigured to support this behavior but it is not enabled. This means that you can set up names such as which point to your Grav setup, or for a project-specific URL.Īpache generally performs name-based matching, so you don't need to configure multiple IP addresses. If you need to stop the server, you can use the simple command: brew services stop mariadb Apache Virtual HostsĪ very handy development option is to have multiple virtual hosts set up for you various projects. You should be create a new MySQL connection, give it a Name, a color, and check Use socket option after you enter a User of root and your newly created password.
#Install mysql on mac brew free
(it's awesome and there's a free version!). You can just press return when prompted for the current root password.ĭownload TablePlus and install it. Just answer the questions and fill them in as is appropriate for your environment. The simplest way to do this is to use the provided script: sudo /opt/homebrew/bin/mysql_secure_installation
#Install mysql on mac brew password
You must change MySQL server password and secure your installation. You should get some positive feedback on that action: => Successfully started `mariadb` (label: ) Detailed information on the HomeBrew installation process can be found on the site but the essentials are as follows:Īfter a successful installation, you can start the server ane ensure it autostarts in the future with: brew services start mariadb However, we now have switched to MariaDB which is a drop-in replacement for MySQL and is easily installed and updated with Brew. In the original guide, we used the Oracle MySQL installation package. MySQLĪlthough not required for development of Grav, there are times you definitely need an installation of MySQL. If you are a beginner developer, you will be better served using MAMP or MAMP Pro. This guide is intended for experienced web developers.
0 notes
Text
Welcome to this guide on how to install and Manage WordPress Website on Linux using WordOps. WordPress is a free and open-source PHP-based Content Management System developed by Matt Mullenweg and Mike Little in 2003. This simple and extensive CMS is used to create powerful and appealing websites with no programming knowledge required. There are several methods to install WordPress as illustrated in the guides below: Setup WordPress Website on Arch Linux / Manjaro Install WordPress with Nginx on Ubuntu / Debian How To Setup WordPress Multisite on Ubuntu WordOps is a tool that eases the WordPress installation and site administration with the following features: Easy to install: One step automated installer with migration from EasyEngine v3 support Powerful: Optimized Nginx configurations with multiple cache backends support Up-to-date: PHP 7.2, 7.3, 7.4, 8.0 & 8.1 – MariaDB 10.5 & Redis 6.0 SSL support: Domain, Subdomain & Wildcard Let’s Encrypt SSL certificates with DNS API support Custom Nginx build: Nginx 1.18.0 – TLS v1.3 Cloudflare HTTP/2 HPACK & Brotli support Fast deployment: Fast and automated WordPress, Nginx, PHP, MySQL & Redis installation User Friendly: WordOps dashboard with server status/monitoring and tools demo Offers Monitoring: Live Nginx virtual host traffic with ngx_vts_module and server monitoring with Netdata System Requirements WordOps can be installed on the following systems: Ubuntu 20.04 LTS (Focal) Ubuntu 18.04 LTS (Bionic) It is also compatible with the following systems. Debian 9 (Stretch) & Debian 10 (Buster) Raspbian 9 (Stretch) & Raspbian 10 (Buster) 1. Install WordOps on Linux WordOps can be installed using the command: wget -qO wo wops.cc && sudo bash wo Sample Output: Welcome to WordOps install/update script v3.14.1 Installing wo dependencies [OK] Installing WordOps [OK] Running post-install steps [OK] WordOps (wo) require an username & and an email address to configure Git (used to save server configurations) Your informations will ONLY be stored locally Enter your name: admin Enter your email: [email protected] Synchronizing wo database, please wait... WordOps (wo) installed successfully To enable bash-completion, just use the command: bash -l To install WordOps recommended stacks, you can use the command: wo stack install To create a first WordPress site, you can use the command: wo site create site.tld --wp WordOps Documentation : https://docs.wordops.net WordOps Community Forum : https://community.wordops.net WordOps Community Chat : https://chat.wordops.net Give WordOps a GitHub star : https://github.com/WordOps/WordOps/ 2. Install WordPress using WordOps. Creating a WordPress site using WordOps is so easy. The below command can be used to create a WordPress site on your domain name. sudo wo site create domain_name --wp When creating a site, you can specify the PHP version, Redis cache, cache enabler e.t.c using the below flags. # install wordpress with latest PHP 8.0 without any page caching sudo wo site create example.com --wp #install wordpress with PHP 8.1 without any page caching sudo wo site create example.com --wp --php81 # install wordpress + nginx fastcgi_cache sudo wo site create example.com --wpfc # install wordpress + nginx redis_cache sudo wo site create example.com --wpredis # install wordpress with WP-Rocket plugin sudo wo site create example.com --wprocket # install wordpress with Cache-enabler plugin sudo wo site create example.com --wpce # install wordpress with wp-super-cache plugin sudo wo site create example.com --wpsc To create a WordPress site with multisite with subdirectory, add the --wpsubdirflag to the above commands. For example, to install wpmu-subdirectory with the wp-super-cache plugin, the command will be: wo site create example.com --wpsubdir --wpsc
Also, you can create a WordPress multisite with a subdomain using the --wpsubdomain flag for example: wo site create example.com --wpsubdomain In this guide, I will demonstrate how to create a WordPress site on wordpress.example.com with PHP8.0. The command will be; sudo wo site create wordpress.example.com --wp Sample command execution output: This command installs and configures Nginx, MySQL database, PHP, and WordPress. Once complete, view the info about your site: sudo wo site info wordpress.example.com Sample Output: 3. Access the WordPress Site Access the WordPress site using the URL http://domain_name Visit the WordPress admin console with the URL http://domain_name/wp-admin On this page, log in using the created credentials provided during the installation. On successful authentication, you should see the WordPress admin dashboard as below. Once here, change the default password for the admin user, to create one of your own. Navigate to the users tab and click edit for the admin user. Set the preferred password and save the changes. That is it! You have successfully set up the WordPress Website on Linux using WordOps. 4. Manage WordPress Website on Linux using WordOps There are other configurations/management options you can easily make to your WordPress site with WordOps. The configuration you can make are; Switch between PHP versions With WordOps, you can easily switch between PHP versions on your created WordPress site. The possible commands are: # Switch to PHP 7.2 sudo wo site update example.com --php72 # switch to PHP 7.3 sudo wo site update example.com --php73 # switch to PHP 7.4 sudo wo site update example.com --php74 # switch to PHP 8.0 sudo wo site update example.com --php80 # switch to PHP 8.1 sudo wo site update example.com --php81 For example, switching our created site to PHP 8.1, we will use the command: sudo wo site update wordpress.example.com --php81 Sample Output: If you get an error “Oops Something went wrong!!“, view the logs using the command: $ tail /var/log/wo/wordops.log E: Could not get lock /var/lib/dpkg/lock-frontend. It is held by process 32655 (unattended-upgr) E: Unable to acquire the dpkg frontend lock (/var/lib/dpkg/lock-frontend), is another process using it? 2022-04-23 11:33:23,782 (INFO) wo : Oops Something went wrong!! Kill the process, then proceed and update the PHP version sudo kill -9 32655 sudo wo site update wordpress.example.com --php81 Once the upgrade is successful, verify the new PHP version using the command: sudo wo site info wordpress.example.com Sample Output: Secure WordPress with Let’s Encrypt You can use WordOps to secure the created site with Let’s Encrypt SSL certificates. Normally, the -le flag is used to issue Let’s Encrypt SSL certificates for your domain name. The possible commands here are: # Install wordpress & letsencrypt wo site create example.com --wp -le # Install wordpress & letsencrypt subdomain wo site create sub.example.com --wp -le # Install wordpress & letsencrypt with HSTS wo site create example.com --wp --letsencrypt --hsts # Install wordpress & wildcard SSL certificate with Cloudflare DNS API wo site create example.com --wp -le=wildcard --dns=dns_cf You can also issue Let’s Encrypt certificates manually by installing the required packages and proceeding as below: sudo apt install certbot python3-certbot-nginx sudo certbot --nginx Sample Output: Saving debug log to /var/log/letsencrypt/letsencrypt.log Plugins selected: Authenticator nginx, Installer nginx Enter email address (used for urgent renewal and security notices) (Enter 'c' to cancel): [email protected] - - - - - - - - - - - - - - - - - - - - - - - - - - - - - - - - - - - - - - - - Please read the Terms of Service at https://letsencrypt.org/documents/LE-SA-v1.2-November-15-2017.pdf. You must agree in order to register with the ACME server at https://acme-v02.api.letsencrypt.org/directory
- - - - - - - - - - - - - - - - - - - - - - - - - - - - - - - - - - - - - - - - (A)gree/(C)ancel: a - - - - - - - - - - - - - - - - - - - - - - - - - - - - - - - - - - - - - - - - Would you be willing to share your email address with the Electronic Frontier Foundation, a founding partner of the Let's Encrypt project and the non-profit organization that develops Certbot? We'd like to send you email about our work encrypting the web, EFF news, campaigns, and ways to support digital freedom. - - - - - - - - - - - - - - - - - - - - - - - - - - - - - - - - - - - - - - - - (Y)es/(N)o: y Which names would you like to activate HTTPS for? - - - - - - - - - - - - - - - - - - - - - - - - - - - - - - - - - - - - - - - - 1: wordpress.example.com 2: www.wordpress.example.com - - - - - - - - - - - - - - - - - - - - - - - - - - - - - - - - - - - - - - - - Select the appropriate numbers separated by commas and/or spaces, or leave input blank to select all options shown (Enter 'c' to cancel): 1 Requesting a certificate for wordpress.example.com Performing the following challenges: http-01 challenge for wordpress.example.com Waiting for verification... Cleaning up challenges ... Please choose whether or not to redirect HTTP traffic to HTTPS, removing HTTP access. - - - - - - - - - - - - - - - - - - - - - - - - - - - - - - - - - - - - - - - - 1: No redirect - Make no further changes to the webserver configuration. 2: Redirect - Make all requests redirect to secure HTTPS access. Choose this for new sites, or if you're confident your site works on HTTPS. You can undo this change by editing your web server's configuration. - - - - - - - - - - - - - - - - - - - - - - - - - - - - - - - - - - - - - - - - Select the appropriate number [1-2] then [enter] (press 'c' to cancel): 2 .... Successfully received certificate. Certificate is saved at: a2enmod ssl /etc/letsencrypt/live/wordpress.example.com/fullchain.pem Key is saved at: /etc/letsencrypt/live/wordpress.example.com/privkey.pem This certificate expires on 2022-07-18. These files will be updated when the certificate renews. Certbot has set up a scheduled task to automatically renew this certificate in the background. - - - - - - - - - - - - - - - - - - - - - - - - - - - - - - - - - - - - - - - - If you like Certbot, please consider supporting our work by: * Donating to ISRG / Let's Encrypt: https://letsencrypt.org/donate * Donating to EFF: https://eff.org/donate-le - - - - - - - - - - - - - - - - - - - - - - - - - - - - - - - Once SSL certificates are generated, proceed and access the site via HTTPS Update WordOps to the latest version using the command: wo update Conclusion We have successfully gone through how to install and Manage WordPress Websites on Linux using WordOps. We can all agree that WordOps makes it easy to install and manage WordPress sites. I hope this was significant.
0 notes
Text
interactsh Interactsh is an open-source tool for detecting out-of-band interactions. It is...
interactsh Interactsh is an open-source tool for detecting out-of-band interactions. It is a tool designed to detect vulnerabilities that cause external interactions. Features: ▫️ DNS/HTTP(S)/SMTP(S)/LDAP Interaction ▫️ CLI / Web / Burp / ZAP / Docker client ▫️ AES encryption with zero logging ▫️ Automatic ACME based Wildcard TLS w/ Auto Renewal ▫️ DNS Entries for Cloud Metadata service ▫️ Self-Hosted Interactsh Server ▫️ Multiple domain support (self-hosted) ▫️ NTLM/SMB/FTP/RESPONDER Listener (self-hosted) ▫️ Wildcard / Protected Interactions (self-hosted) ▫️ Customizable Payload Length (self-hosted) ▫️ Custom SSL Certificate (self-hosted) https://github.com/projectdiscovery/interactsh @HackGit

-
0 notes
Text
How to Create a Professional Website that Converts
To create a website that converts, one needs to have a definitive goal as to what they want to do.
Instead of choosing an attractive and costly website theme, it is better first to assess the reason behind your website’s existence.
Once you know what you want to achieve, you can choose your theme, design, colors, and content accordingly.
Estimates show that a user only takes 0.05 seconds to judge your website.
So, if you are looking to make a first impression through graphics and colors well, you won’t get much time to impress.
Then, how should you impress and convert them into your customers?
Well, here are seven tips to help you convert them:
7 tips for creating a professional website that converts
1. Have a solid base
A solid foundation is critical for the success of any website.
You don’t want your customer to bounce back after witnessing your website crash. Not only will it bring your search rankings down but, the witness won’t ever come to your website again.
Thus, it is best to invest in a trusted hosting service provider.
But it would be best if you chose them after viewing their reviews and ratings by their previous customers.
2. Get your web design done right.
Source – https://ift.tt/3xEPiCL
Just because you have got only 0.05 seconds to make a first impression does not mean that your design holds any less importance.
It is still critical for visitors who will scroll through your website to know more about you.
However, it would be best if you did not make it fancy and complicated. The simpler the web design is, the better impression it makes on the visitors.
Ensure that the color combinations in your web design resonate with your brand. In other words, your web design should complement your brand.
3. Secure your website with an SSL certificate
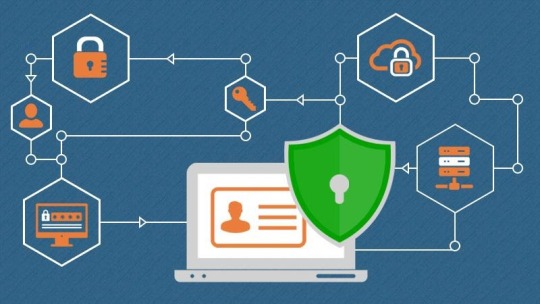
Source – https://ift.tt/3s9PxEM
A Secure Socket Layer or an SSL certificate is a security technology used to encrypt the information transfer between a client and a web server.
SSL uses Public Key Infrastructure that passes the data through a secure network keeping hackers at bay.
You can buy SSL certificate in two forms: a regular single-domain certificate and a wildcard certificate.
· Regular Certificate- A regular SSL certificate is generally used by sole proprietors with a static website that does not need to change. These certificates can only protect a single domain or subdomain.
· Wildcard Certificate – A wildcard SSL certificate is generally used by large brands who wish to secure their primary domain and multiple first-level subdomains. The best part about wildcard certificates is protecting multiple subdomains and the primary domain to level 1 by using a single SSL certificate. However, wildcard certificates only come with DV (Domain Validation and OV (Organization validation). EV is absent in wildcard certificates.
So, choose the SSL certificate that suits the requirements of your business.
4. Keep your website running 24×7
Like you cannot shut down your store in the middle of the day. Similarly, you cannot afford your website to shut down.
The key factors that lead to a website crash are software updates, malfunctioning plugins, poor hosting service, and a cyberattack.
It would be best if you prepared for all these factors beforehand. Keep your CMS software updated at all times and remove unwanted plugins from your website.
Moreover, get a web application firewall and an SSL certificate to keep your security tight and impenetrable.
By keeping track of all these factors, you can keep your website up and running at all times.
5. Arrange essential information appropriately.
You don’t want to keep your customers in a baffled state even for a second, which is why you have to place the important stuff in the right places strategically.
Generally, Footers and Sidebars are the areas on display. You must fill them with essential data such as contact us, product and service information, etc.
Most customers don’t want to search for these tabs and expect you to attach them to your menu bar.
So, analyze the strategic importance of every tab and place them accordingly.
6. Keep your main goal in the back of your head.
Sure, you want to offer the best experience to your visitors by simple design, secure communication, and arranged information but, your main goal is not confined to that.
You may want your visitors to sign up for your newsletter or purchase your product. Whatever it is, you must know the purpose of your efforts.
To comply with your goal, you can include relevant call to action buttons in strategic places so that you can drive conversions.
A call to action can be a “Buy Now” or a “Click to know more” button, which assists the user in taking further steps.
7. Have an email list in place
Emails are by far one of the most effective marketing channels. Through emails, you can contact a customer personally and let them know about your services and products.
The best part about email marketing is that it comes across as a genuine way to reach your customers.
Unlike ads which can sometimes be spammy, emails come across as a professional way to communicate with customers.
So, if you have an email list in place, you can market yourself in numerous ways. From how-to guides to free video courses, emails can help you drive conversions.
To Conclude
To drive conversions to a site, one needs to build it well. It should guarantee a safe visit to customers, away from cybercriminals.
Search engines like Google also rank those sites that can guarantee safety to their users, which is why having an SSL certificate, firewall, and updated CMS software is necessary.
But that is not all. Apart from thinking for customers and search engines, one needs to think about themselves as well.
The purpose of your website must be clear in your head, and you must market yourself to the public accordingly.
Call to action and allocation of the critical information to the sidebar and footer is equally essential.
So, consider these seven steps given above to help your site convert leads into customers.
The post How to Create a Professional Website that Converts appeared first on Scoop.it Blog.
How to Create a Professional Website that Converts published first on https://wabusinessapi.tumblr.com/
0 notes