
Don't wanna be here? Send us removal request.
Statistics
We looked inside some of the posts by apsetupus and here's what we found interesting.
Average Info
Notes Per Post
0
Likes Per Post
0
Reblog Per Post
0
Reply Per Post
0
Time Between Posts
6 days
Number of Posts By Type
Text
15
Link
2
Last Seen Tumblr Blogs


Fun Fact
The “We are the 99%” Tumblr blog became the slogan for the Occupy Wall Street movement.
Text
Wavlink WING 12M Extender Setup
You may connect the extender to your wireless router or modem by following the Wavlink AC1200 WING 12M setup guide. By using a WIFI setup you can improve the signal of your existing wireless network and guarantee continuous access to far-reaching devices.
Installation of the Wavlink WING 12M extender
Instruction manual for The Wing AC1200 12m Range Extender:
Connect the wireless devices to the Wing Extender.
To launch the browser, type ap.setup or the IP address 192.168.10.1.
To access the setup page, log in using the default username and password.
The repeater looks around for indications.
Click it to select the WiFi network at your residence.
After entering the WiFi setup, click Next.
Before linking the amp to your home network, wait 30 seconds.
Now that installation of the Wing 12m Extender units is complete.
To improve connectivity, put the extender near the area without internet.
Manual setup for the Wavlink WING 12M Extender
how to get to the manual setup page for the Wing 12m wifi extender:
The Wing 12m extender must be inserted into the outlet after the package has been opened.
Press the power button as soon as the power LED light goes green.
Now connect your WiFi device to the Ap extender configuration _Ext network.
In any active online browser, type Ap.setup.
You are presently on the setup page for the Wavlink Wing 12m Ac1200.
After creating your account, follow the AP Login procedures.
Note: If you need any assistance regarding your Wing 12m wifi extender so contact our technician or visit the official website that is ap setup login.
Wavlink Wing 12m Extender WPS Setup
One of the most common methods to connect the extender to an existing wifi network during installation is by pressing the wireless protected setup (W.P.S) button.
To install the extender, set up your Wing ac1200 according to by the following instructions:
Place the extension near to the main wifi modem or router as a first move.
The Wavlink wifi extender is working right now.
then watch for an important green power edge to appear.
To switch on the extension's power light, press the W.P.S button.
Click the W.P.S icon on the modem or network now.
Your extender and router's green light is blinking.
Allow 1-2 minutes for the extender and home wifi to join.
meets the specifications of IEEE 802 11a, b, g, and n.
The Dual-Band RJ45 Connection with setup Integrated Passive Power Over Ethernet (PoE), Up to 2.4GHz 300Mbps and 5GHz 867Mbps Speeds, and is intended for flexible placement based on its antenna offers excellent long-distance performance.
can generate 1000mW of energy and has a superior receiver design.
A sturdy, waterproof receptacle can withstand severe weather.
WPA and WPA2 3 LED Lightning Adapter with Built-in Bluetooth Signal Power and Maximum Security (15kV ESD)
Wavlink WING 12M access mode setup
You can begin the installation process once the real connection and wavlink ac1200 login steps are complete. Follow these simple guidelines:
The Wavlink AC1200's display will show the settings signs.
By using the drop-down options, you can select your time zone and country/region.
To access your web interface page, log in using the updated information.
After selecting the "Access Point" operating mode, adhere to the directions shown on the screen.
Choose the wifi network that is linked to the primary device and to which you want to add a second connection.
You should use the same wifi password for your external extender as you did for your home network.
Give the change a chance to take effect. There could be some labour necessary.
0 notes
Text
Re.Brostrend Extender Setup
The Brostrend Extender is a dual-band signal booster and network extender. Up to 20 devices may be connected, and the Wi-Fi network range is completely increased. By using a signal booster, you can easily increase the Wi-Fi range and expand the network coverage. The Wi-Fi range of this extender device covers the whole inside of your home. Additionally, the Brostrend AC1200 range extender supports both 2.4 GHz and 5 GHz networks. The extender has a speed of 300 mbps on the 2.4 GHz network and 867 Mbps on the 5 GHz network. The Wi-Fi network coverage is significantly enhanced by this network device. You need to set up the network in order to maintain & improve it. You may set up an extender quickly & easily at re.brostrend extender setup.
How do I set up the Re.brostrend WiFi extender?
Before the procedure restarts, the power LED will momentarily flash. Kindly wait.
Use your wi-fi device to connect to your extender after that. Standard Setup Network name for the Re.brostrend Extender. Before connecting to the extender, there was no need for a wifi password; now, you must now use either the 192.168.10.1 or AP.setup address.
For your initial login, you can select an administrator and a password.
When your existing router is closed, choose your WiFi network names and set the SSID and password.
By observing the colour of the extension's signal LED, you may determine how your extender and the present router are linked.
Note:- If you need any help regarding your wifi extender so contact our technician or visit the official website that is ap.setup.
Brostrend wifi extender setup via WPS button
You may also set up the range extender using the WPS button if it is not already set up with the default web address. Here are some instructions for setting up a Brostrend WPS-enabled wifi extender.
You must plug the Brostrend extender device into the wall power source in order to set it up with the WPS button.
As with a conventional router, you must first hit the WPS button on the device whose network you wish to extend in order to set up the extender using the WPS button.
Hold the WPS button for two to three seconds on the Brostrend extender.
The extender's status indicator light must now be checked; if it is red, the normal router must be kept away from this gadget.
You are attempting to position the normal router, an existing appliance, around the extender.
The connection is strong, the signal's LED light is solid blue, and it is ready for usage.
Dual-Band Wi-Fi Range Extender Setup
The fastest and most practical method to increase your Wi-Fi coverage is with the Bros Trend Dual-Band Wi-Fi Range Extender.
Please adhere to following instructions to set up the Wi-Fi Range Extender Bros Trend Wall Plug Band.
Connect it to the electric band via the extender.
For a faultless installation, we advise finishing the fundamental setup in the same room as your current router.
When the LED power switches from white to solid blue, please wait.
Bros Trend Extender may be configured in two different ways: by pressing the WPS button or by utilising the online user interface at re.brostrend.com.
Note: If your existing router does not support WPS Setup, make sure it has a WPS button before continuing.
#Re.Brostrend Extender Setup#Re.Brostrend wifi Extender Setup#Re.Brostrend Setup#ap.setup#ap setup#ap extender setup#ap wifi range extender setup
0 notes
Text
Wavlink AV500 Powerline Setup
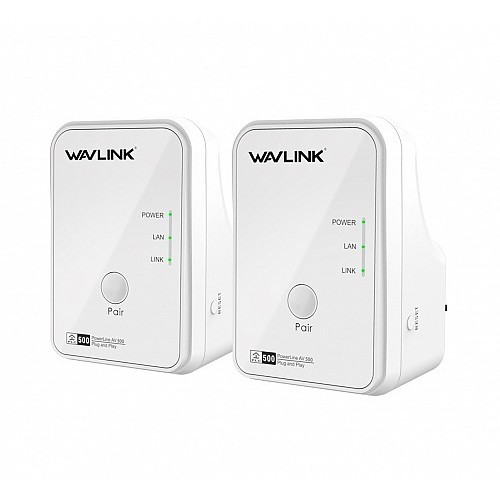
A strong internet connection is offered by the Wavlink AV500 Powerline setup of the wireless range extender, which may be extended using your Wi-Fi router/AP setup. It's ideal for frequent internet usage, including surfing, online gaming, video chats, buffer-free 4K HD video streaming, and more. It enables you to provide your mobile, computer, laptop, and other devices access to a high-quality wireless network. Starting with the Wavlink AV500 Powerline setup
Installation of Wavlink AV500 Powerline
This page contains instructions for setting up a Wavlink AV500 extender as an access point. One by one, the process is explained, and you won't need any further information.
Connect your AV500 repeater's power source to the wall outlet.
Switch on the access point and attach the Ethernet wire from the router to the LAN port of the extender.
Now that the Wi-Fi list is open on your computer, connect the Extender to the default Wi-Fi network.
Open any tab on the connected computer, type "http://wifi.wavlink.com or ap.setup" in the address box, then press Enter.
Request the login and password to open the web tab. Type "admin" as the choice in both locations, then click "Login."
To access the subsequent Wavlink Extender setup menu, select Wizard -> Select Access Point.
Create a new SSID, password, and protection from.
Once the progress meter is filled, wait an additional 60 seconds before requesting more.
After configuration changes and a reboot, the Wavlink AV500 repeater may now work as an access point.
Wavlink AV500 Powerline wps setup
Setting up a Wavlink AV500 extender using WPS:
You must carry out these actions one at a time if your Wavlink setup employs WPS.
Hold your Wavlink AV500 extender close to your router when it is connected to the power source to avoid disruptions.
An LED indication begins flashing after roughly 45 seconds of startup time.
When the router's light blinks to indicate it's ready to attach, press the WPS button to unlock it.
Before a flickering light indicating that it is connected to the router appears, press the WPS button.
Until the blinking light stops, you won't know the Wavlink AV500 extender setup is connected to the router.
Web browser setup for Wavlink Extender
The Wavlink AV500 powerline Extender may be configured via a web browser. You may finish the setup procedure using these steps.
Make sure your Wavlink extender and router are close to the power source when you plug them in.
After connecting the device to the socket, wait around 45 seconds for the LED light to begin blinking.
Go to the default network for Wavlink, Wavlink 2.4 GHz, in your mobile device's or computer's Wi-Fi list, and connect to it.
On the same computer or mobile device that you are connected to, launch the new web browser.
The Wavlink extender setup interface will launch. Please use the default username and password of "admin."
Select a language. Login Press.
On the following tab, you will be prompted to select your nation, time zone, and new password. The most recent password will be used when you log in again.
Open the Wavlink Web UI, choose the Wizard option, then choose Repeater mode. Next, find and choose your Wi-Fi host network.
Wait around 40 to 60 seconds until the progress metre is full before trying again.
When the flashing LED light returns to solid, the setup is sound.
0 notes
Text
#victony ac1200 extender setup#victony extender setup#victony wifi extender setup#ap wifi range extender setup#ap extender setup#ap.setup
0 notes
Text
#victony ac1200 extender setup#victony wifi extender setup#victony ac1200 wifi extender setup#ap wifi range extender setup#ap extender setup
0 notes
Text
Victony WA305 WiFi extender setup
The web has emerged as one of people's primary needs in today's world for carrying out the majority of their daily tasks. However, the main challenge for consumers is finding WiFi signals all throughout their location. It is now easy to do with the Victony WA305 WiFi extension.It is a fantastic dual-band wireless extender that is renowned for providing stronger signal. It aids in enhancing WiFi signals so that customers may continuously enjoy web series, movies, and gaming without experiencing erratic internet connections. By extending the WiFi signals to the device's dead zones, the two included antennas enhance its performance. Let's look at the Victony WA305 WiFi extender Setup.
Victony Wa305 web browser setup
When use Windows, remove any ethernet cables that are attached to the computer before connecting it to the network of the extender.
To join the wireless network of the extender, open the taskbar and choose the wifi icon.
Victony Extender 2.4GHz or Victony Extender 5GHz will be the name of the extender's wifi network, respectively.
In the case of Macintosh computers, unplug any Ethernet cables that are attached to the Mac OS machine.
Click the wifi icon in the upper-right corner of the screen to sign up for the extender's wifi network.
Victony Extender 2.4GHz or Victony Extender 5GHz will be the name of the extender's wifi network.
Note:- If you need any help regarding your victony wifi extender so contact our technician or visit the official website that is ap setup.
How do I install my Victony WA305 WIFI extender?
Connect your Victony WA305 wifi range extender to an electrical outlet before configuring it.
Wait until the LED light turns solid at this point.
Next, activate your WA305 wireless repeater's WPS button.
Push the same button on your primary modem or router next.
Right now, both devices' lights will be blinking, but they will cease within 15 to 20 seconds.
All of the solid LED lights on your Victony will be lighted up if your booster has connected successfully to your current wifi network.
Your new extender is now unplugged, and you may plug it in anywhere you want to use it.
Firmware update victony WA305 wifi extender
By following the simple instructions below, you may upgrade the Victony WA305 extender firmware:
the most recent firmware file from the business's website.
Enter the extender login and password on the ap.setup webpage.
Launch and choose "System Tools"
the Upgrade Firmware button
Click on upgrade, then go through the firmware file you downloaded.
Restart the extender after the upgrade. Okay, your extension's firmware has successfully been updated.
#Victony WA305 WiFi extender setup#Victony WA305 extender setup#Victony WA305 WiFi setup#ap.setup#ap setup#ap wifi range extender setup
0 notes
Text
#comfast wifi range extender setup#comfast extender setup#ap.setup#ap wifi range extender setup#ap setup
0 notes
Link
#Wavlink AC1200 WiFi extender setup#Wavlink AC1200 extender setup#wavlink wifi extender setup#ap.setup#ap setup
0 notes
Text
#Re.Brostrend wifi extender setup#Re.Brostrend extender setup#Re.Brostrend setup#Brostrend extender setup#ap wifi range extender setup#ap.setup#ap extender setup
0 notes
Text
MSRM US300 Extender Setup
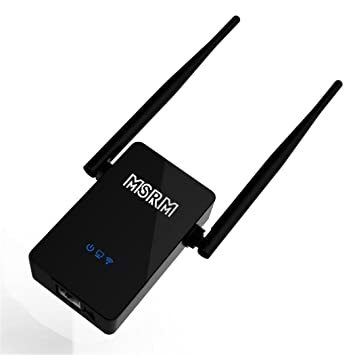
Do you want your home's WiFi dead zone to be fully eliminated? If so, don't waste your time. To eliminate WiFi dead zones, the MSRM US300 WiFi Range Extender is an important element. It provides your entire house with the fastest WiFi. Additionally, this extender enhances the WiFi signals from your existing network to a larger range, beyond the range of your router. Additionally, the installation of a msrm wifi extender is necessary to strengthen or increase the WiFi connection of your current device.
Do you want to know about the MSRM US300 Extender setup using several methods? Never worries; this blog will provide you detailed setup instructions using several different approaches.You will be capable of quickly and easily set up a WiFi Extender using this blog in a few minutes. Let's move on to the extender setup procedures.
How can I connect my MSRM US300 extender using wps?
Follow the step-by-step instructions below to set up an MSRM US300 WiFi extender using the WPS button.
You must firstly place the MSRM US300 extender in the same place where your current router is located.
The range extender must then be connected to the surge injector or wall outlet.
The extender's power button must then be turned to the on position, and you must wait until the PWR LED light goes solid.
Find the Wi-Fi Protected Configuration(WPS) button on your MSRM extender to complete the WPS button setup.
Next, briefly turn the WPS button on the extender.
Additionally, press the WPS button on your current WiFi router.
After that, you must wait until the extender's flash WPS stops.
The WPS LED light will become solid green following a successful WPS setup, and the network name will appear in the list.
Note:- If you need any help regarding your MSRM wifi extender so contact our technician or visit the official website that is MSRM US302 Setup.
How do I login MSRM US300 wifi range extender?
You must first connect your computer or mobile operating system to the MSRM extender's network. This extender's network name is MSRM EXT.
Launch the gateway of your choice after that, and put 192.168.10.1 into the address field.
As soon as you press the enter key, the login screen will appear.
To finish the login, the login interface will request the login information.
Simply provide the default MSRM wifi extender username and password in the corresponding columns.
This extender's default information is admin. Fill in both fields with the admin.
Finally, click the login tab.
MSRM US300 wifi extender firmware update
Start checking and upgrading the most recent firmware on your MSRM extender to receive the new features and expand the network.
Basically, you need to go to your MSRM US300 extender's official website, search for, and download the most recent firmware file if it is available.
The login interface must then be obtained, followed by successful login.
Then, on the home setup interface, click the System icon.
After that, click the System Tools tab to find the Firmware Upgrade icon.
Click the browser icon to download the latest firmware for the MSRM wifi extender.
Once you've selected the Browser icon, you must locate and submit the most recent downloaded file.
Press the Upgrade icon when the file has been fully uploaded to the relevant area.
#MSRM US300 Extender Setup#MSRM US300 wifi Extender Setup#MSRM US300 wifi range Extender Setup#MSRM US300 Setup#ap.setup#ap setup#ap extender setup
0 notes
Text
#MSRM US300 wifi extender setup#MSRM US300 extender setup#MSRM US300 setup#ap.setup#ap setup#ap extender setup#ap wifi range extender setup
0 notes
Text
#wavlink ac1200 wifi extender setup#wavlink wifi extender setup#wavlink extender setup#ap wifi range extender setup#ap setup
0 notes
Text
#wavlink ac1200 wifi extender setup#wavlink ac1200 extender setup#wavlink extender setup#ap.setup#ap setup#ap extender setup
0 notes
Text
#Wavlink AC600 Setup#wavlink ac600 extender setup#ap wifi range extender setup#ap.setup#ap extender setup#ap setup
0 notes
Link
#Wavlink AC1200 wifi extender setup#Wavlink AC1200 extender setup#Wavlink wifi extender setup#Wavlink extender setup#ap.setup#ap setup#ap extender setup
0 notes
Text
#victony ac1200 extender setup#victony wifi extender setup#victony ac1200 wifi extender setup#ap wifi range extender setup#ap.setup#ap extender setup
0 notes
Text
0 notes