adventures of a kink & costume leatherworker. Website - Facebook - dA - Instagram
Don't wanna be here? Send us removal request.
Statistics
We looked inside some of the posts by armory-rasa and here's what we found interesting.
Average Info
Notes Per Post
100K
Likes Per Post
55K
Reblog Per Post
45K
Reply Per Post
85
Time Between Posts
29 days
Number of Posts By Type
Text
16
Note
1
Last Seen Tumblr Blogs


Fun Fact
Mobile US users spent an average of 115.8 minutes on Tumblr app monthly.
Text
New workshop space! 🎉

So much natural light! 🤩
(lol and the worst view in the house, currently staring straight at the back of that decrepit fence, but I plan to cover it in ivy and jasmine. 👌👌)
Monster is "helping"! 😺

POV: she wants your chair.

Dappled afternoon sunlight filtering through the redwoods. 💚
Armory Rasa is back in business, baybee. 😎
32 notes
·
View notes
Text

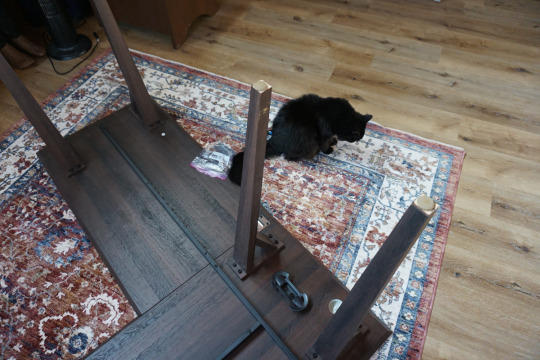
So Armory Rasa recently moved again (my second move in less than a year >_<), but this should be the last one for a long time, and as of today the workshop is up and running again!
My new space is GORGEOUS 🤩 and there will be more pictures incoming soon, but for now, enjoy Miss Monster on the new rug. 🥰
22 notes
·
View notes
Text

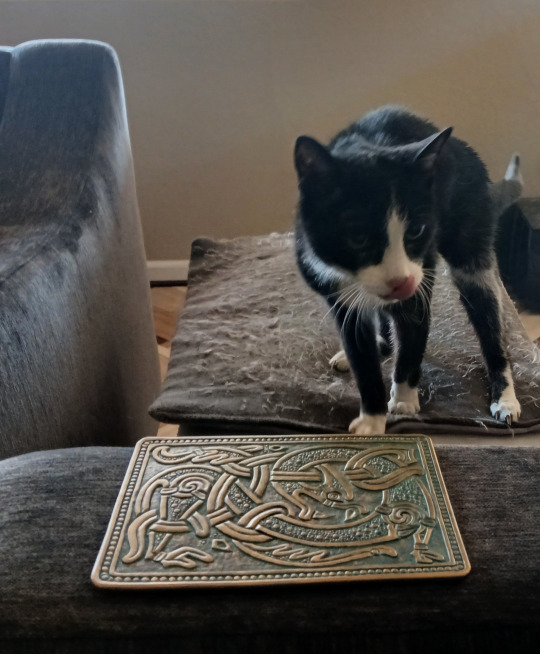
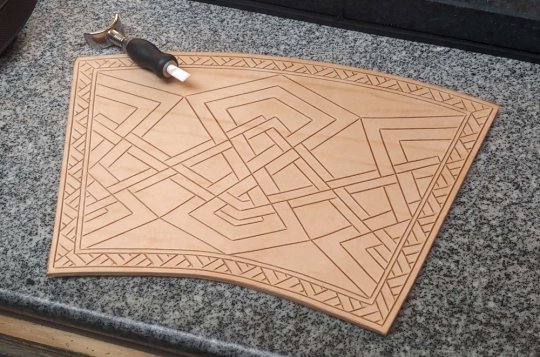
Needed a new coaster, wanted to practice doing a verdigris effect. Image from Jonas Lau Markussen's A Compendium of Viking Art. 10 oz veg-tan leather.
With 6 lb cat for scale:

38 notes
·
View notes
Text

This is badass: Medieval Nubian Fashion Brought to Life. Click through to the link because there’s more replica clothing and it is all stunning!
#these are so cool#I love seeing lavish historical costumes that aren't European#give me moaaaaar :D
73K notes
·
View notes
Text
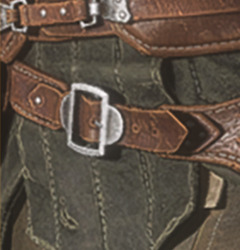
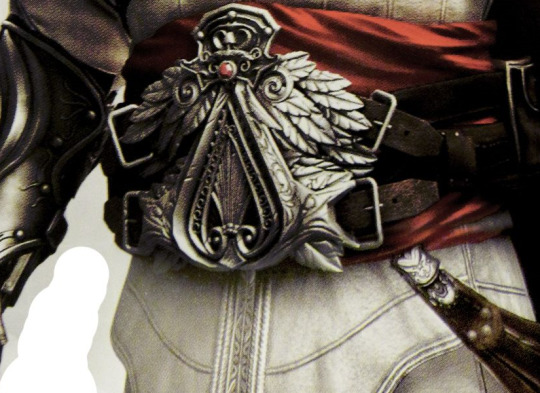
Four Dragon Age games, and Bioware still doesn't know which direction buckles are supposed to point. 🤦♂️
Though I suppose they're in good company, Ubisoft doesn't know either:
52 notes
·
View notes
Text

24 notes
·
View notes
Text


Embroidered tunic I made for my lawyer.
290 notes
·
View notes
Text


WIP pic of my current project -- the walls at our new (much larger) place are extremely bare, so I took one of my favorite pieces by Vitor Gonzales and adapted it for carving in leather. 18" diameter, out of 10-oz veg-tan. The tooling took about nine hours all told; haven't decided yet how I'm going to dye it to best bring out the design.
Not for sale -- this was done entirely for my own enjoyment, though I may find some royalty-free designs to make similar pieces available in my shop.
132 notes
·
View notes
Text
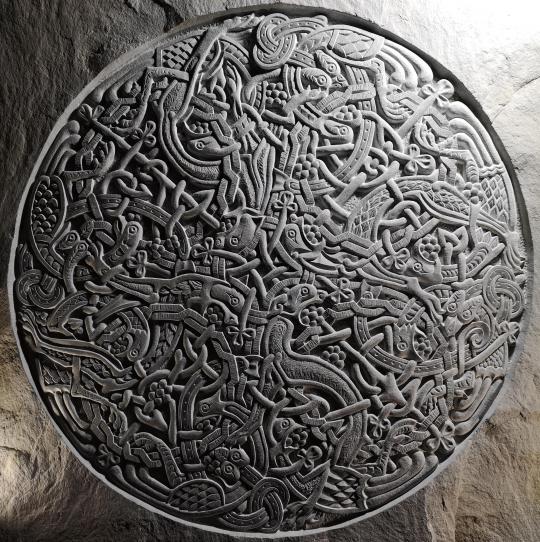
New to Tumblr, going to start dumping some of the stone carving that I've done here.
This big slate carving is based on a design from the Book of Kells, all hand carved with hammer and chisels.
#oh my god that's stunning#beautiful work OP#makes me want to do it in leather#lol and also makes me want to try stonecarving
24K notes
·
View notes
Note
I can't speak on textiles broadly, but I know you can over-dye the wool from black sheep with blue dye (which, from woad, was a super common dye stuff in Europe all the way back to the Neolithic period) to get a richer black fabric. In viking-era Scandinavia this color was called "blar" -- a term that has caused academic fistfights among subsequent historians over whether it means blue or black -- and while it seems to have been a striking color for clothing (based on saga evidence), it doesn't seem to have been all that rare.
Leather is even easier to dye black (despite the common misconception that black leather in a historical/fantasy setting would be impossible, or impossibly expensive). All you have to do is soak iron shavings in vinegar to get vinegaroon, which is not quite as intense as modern black dyes, but will look black once it's been waxed/oiled.
In any case, there certainly are processes that can achieve a true black in leather and textiles even using pre-modern materials and technology, but whether people would have had local access to those materials (like the black merino sheep), or know how to do those processes (some of which are quite involved and counter-intuitive), is going to vary a lot by time/place.
So I've seen conflicting stories about the colour black in history.
Some say it's very expensive and hard to maintain, so that's why rich merchants wore black. Evidence in portraits.
Some say that for dyes it's on the cheaper side actually.
Some say the expensive black doesn't come from dye but rather the colour of the animal, so black fabric comes from black fibre which comes from black sheep. How exactly would black sheep be more expensive than regular white sheep?
Which one is right? I know this is probably influenced by which century it's set in, like maybe some eras have an easier time getting black dye
I found a well-sourced blog post about this, luckily, because I'm a 19th-century focused researcher and I've heard conflicting things about black in earlier periods. It seems to be that high-quality black-dyed fabric was difficult to obtain in the west from the Middle Ages potentially through the 18th century because it required massive amounts of dye to get the color very deep ("true black"). Lesser black shades were quite common, though, so black, period, doesn't seem to be more expensive than any other color. Possibly the intensively dyed, deep blacks might have been? But not black in general.
source
Rich merchants did wear black- but so did other people. They just usually didn't have portraits.
The black sheep thing I've never heard before. And anyway, that could only apply to wool- not cotton, linen, silk, leather, etc.
2K notes
·
View notes
Text
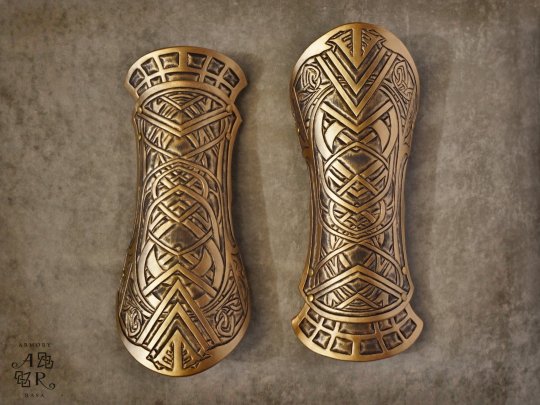
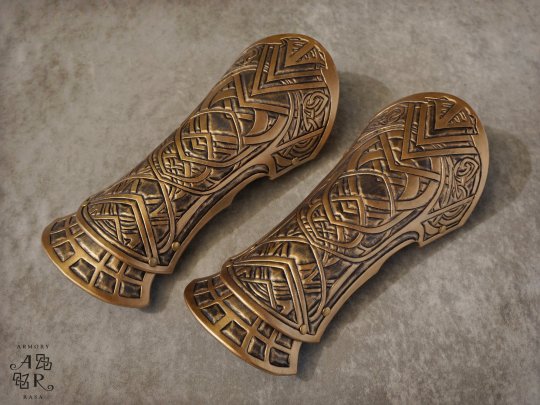


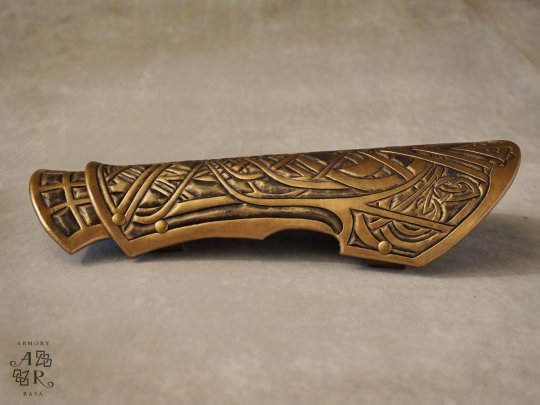
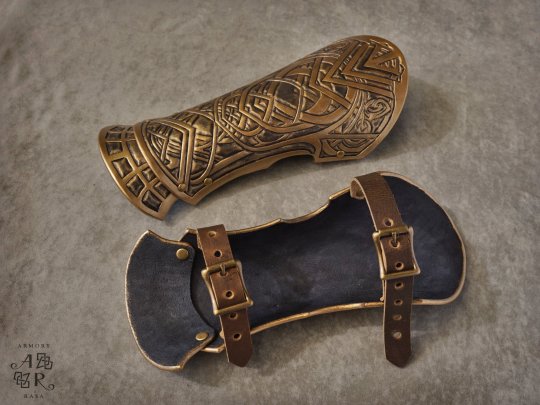
Raven bracers, Assassin's Creed: Valhalla, hand-tooled in 10 oz veg-tan leather.
(Available from Armory Rasa)
#assassin's creed valhalla#assassin's creed#bracers#cosplay#leatherworking#Eivor#looks more art nouveau than vikings to me#but I love them anyway
117 notes
·
View notes
Text
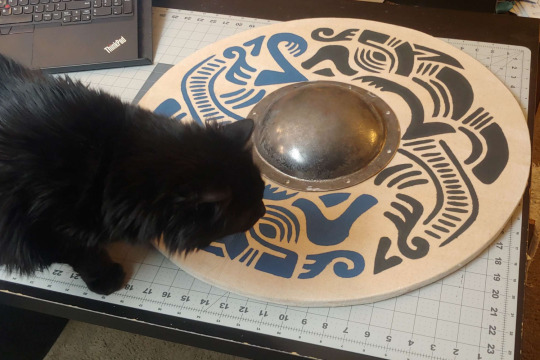
Progress is happening, on a functional round shield. :)
(1/2" plywood board, linen facing attached with wood glue, and a 14 gauge shield boss I hammered out myself. Design taken from a brooch found at Sutton Hoo.)
33 notes
·
View notes
Text
One (1) internet point to whoever can guess what I'm working on now! :D
26 notes
·
View notes
Text

I've had like four different people inquire about it over the years, and each time it fell through, but at long last I HAVE BEEN COMMISSIONED TO MAKE ALTAIR'S BRACER.
There are many like it, but this one is mine. 😁
Bracer details were taken from the 1:6 scale figure and HOLY SMOKES, I don't know how they got it that fine -- I'm making it real-person sized, and some of the detail is still nearly too small to render in leather. It must be microscopic on the figurine:

72 notes
·
View notes
Text
Anyway, I'm going to be vending at the first annual Lincoln Forest Faire, in Ruidoso NM, this upcoming May, which is why I'm stocking up on small bags. And knives, because these adorable little puukko knives were back in stock, so I bought like fifteen of them:
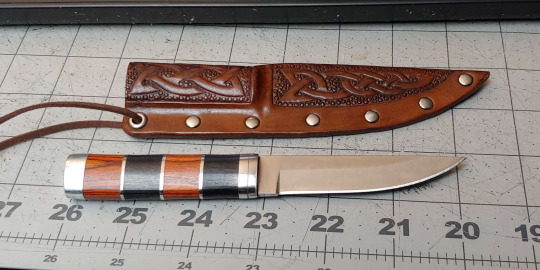
I'll be making a variety of sheaths for them (which I've talked about before), and selling them at the faire.
Neither the knives nor the couch pouches are likely to get listed in my shop (there's just... too much small variation to keep listings up-to-date) but if you are interested in either, absolutely hit me up, we can figure something out.
18 notes
·
View notes
Text
COUCH POUCH!! Free Pattern & Tutorial
...called thus because they use upholstery-weight leather for the bag body, that in my case was in fact skinned off a couch. 🤣 Turns out they are relatively quick and easy to make, so I tidied up the pattern for printing and took pictures to document the process when I made another five of them.

First off, print your pattern, 100% scale:
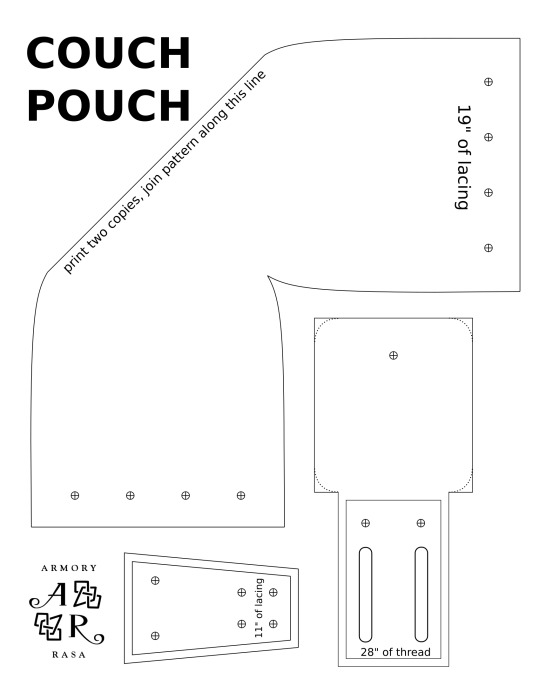
The bag shape was a modified version of the pattern I used for the Morpheus sandbag, but sized to fit in the roughly 11" squares that my couch skin came in. It makes a bag that sits very well on a tabletop, thanks to the flat base.
Though it turned out to not be the most efficient use of material, because that plus-shaped pattern tessellates well, if you're cutting them out of a full hide, but makes a lot of waste when you're cutting them out of squares of material. A more efficient design would have a half-rounded front and back, and a gusset between them, like so:
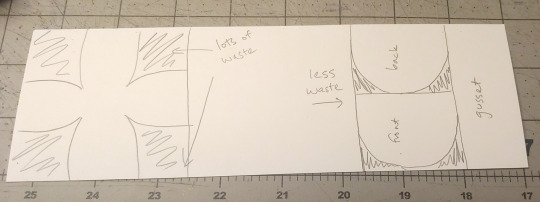
Ah well. It's not like I have any shortage of couch skin, though for the next round I'm going to experiment with a more efficient pattern.
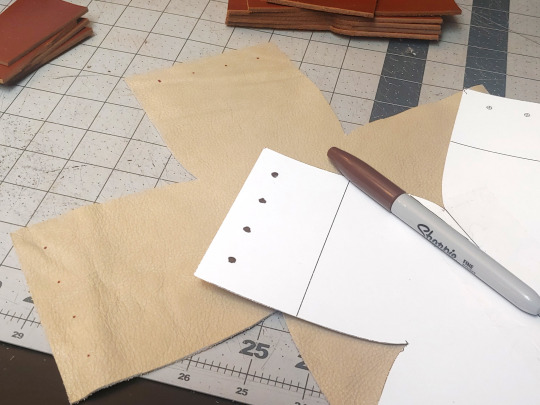
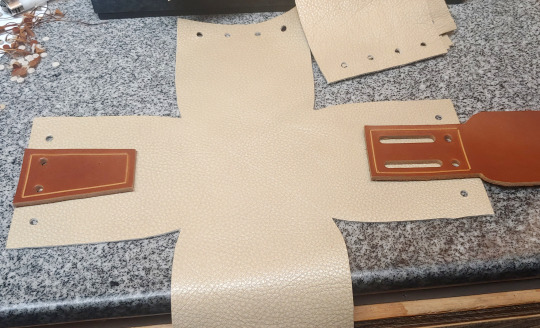
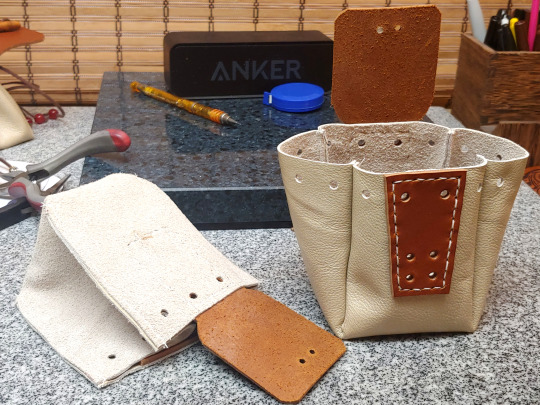
First step, trace and cut out the bag body from your chrome-tan leather:
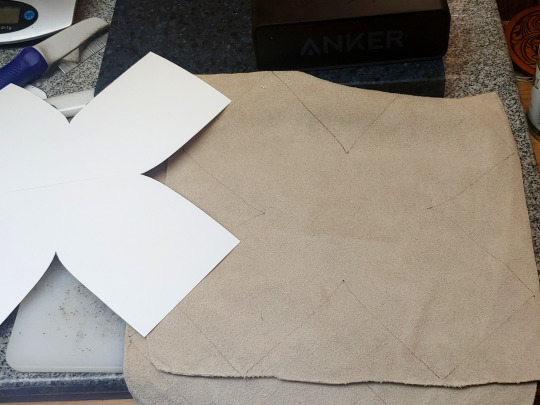
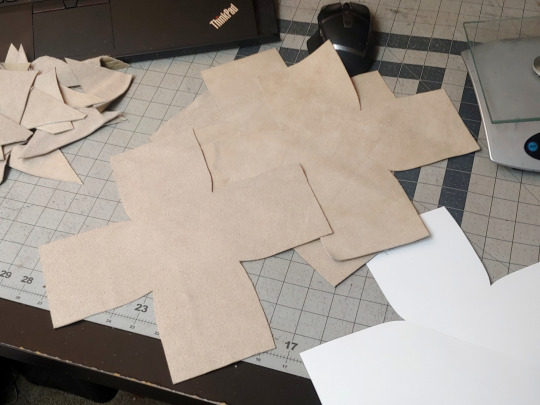
Like I said, this was upholstery leather, but anything that's flexible and ~1.5 mm thick will do.
The flap and front need to be a stiffer leather though -- I used 7 oz latigo, but veg-tan would work equally well. (And then you could ✨tool it!✨)
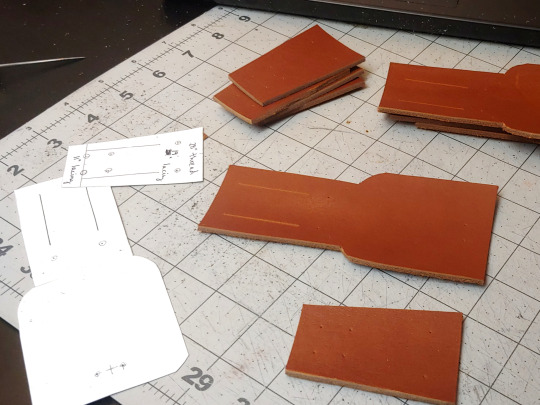
Cut them out, and then use the pattern to mark where your holes are going to be. Mark the holes on your bag body too:
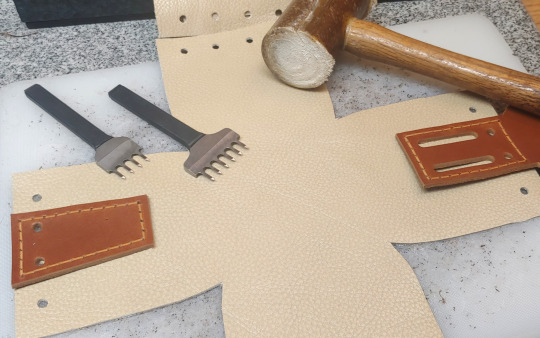
The latigo pieces get hand-stitched to the bag body, so I used a stitching groover to carve out little channels for the thread -- it's not strictly necessary, but it makes your stitches lay a lot more neatly:
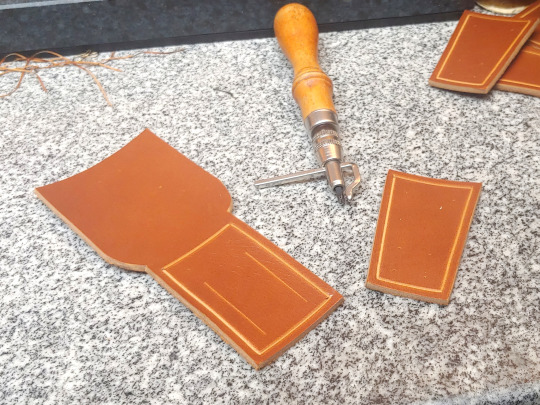
Punch the holes shown below:
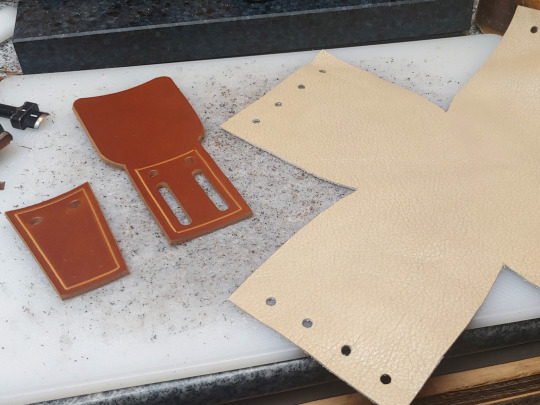
I used a ~5 mm hole punch for those, and a 1.5" slot punch for the belt loops. Some of the holes on the front piece you're not punching yet, because they need to go through both layers.
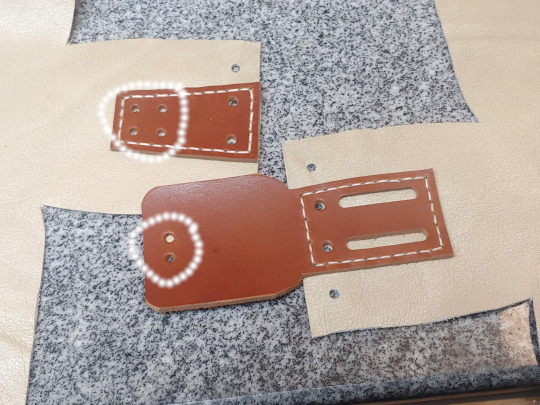
I put a dab of contact cement on the pieces (circled in white) to help hold them in place when I go to punch the stitching holes:
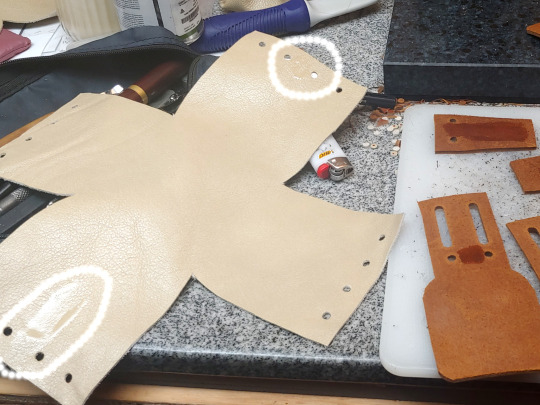
(Make sure you're not putting glue between the belt loops)
Wait fifteen minutes for the contact cement to dry until tacky, and then line up the holes and the edges and press the pieces together:
Punch stitching holes:
Saddle-stitch both pieces in place (takes 28" of thread per):
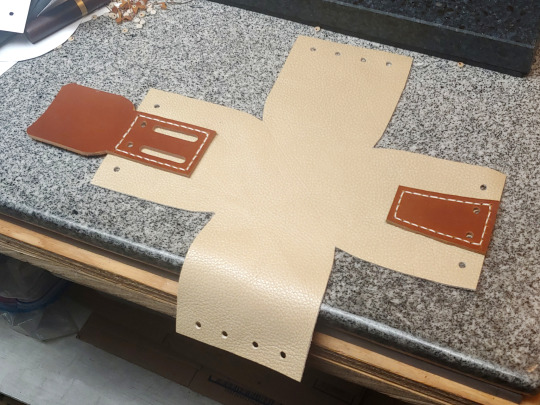
Now you can punch these holes:
(I used a slightly smaller hole punch than for the others, but it doesn't really matter.)
Now press the right sides of the leather together and sew up the seams from the inside:
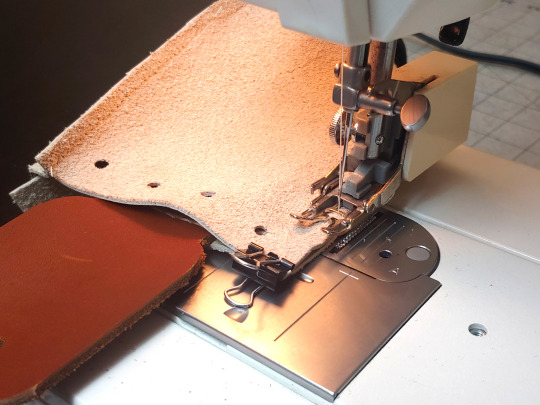
A regular sewing machine should be able to handle this, though you will need thicker thread, a heavy-duty leather-sewing needle, and a walking foot attachment. (If you don't have a walking foot attachment, it is SO WORTH getting one, even if you don't expect to sew much leather. Seriously, I use it for everything -- once you go walking foot, you don't go back. 💀) Because you can't pin leather without leaving permanent holes in it, tiny binder clips can be helpful for keeping your material lined up.
What they look like when you're finished sewing:
Cut 19" of lacing for the drawstring, and 11" of lacing for the toggle:
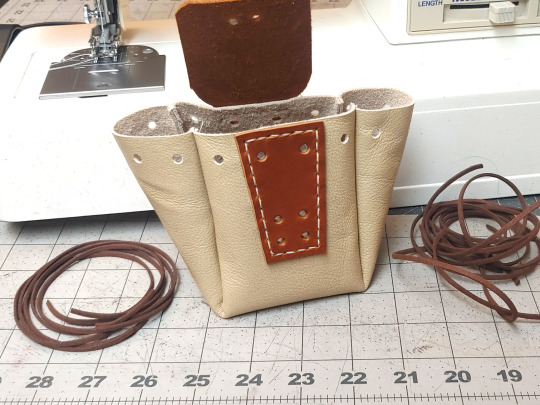
I use the 1/8" EcoSoft lace from Tandy, I think it's stronger than real leather would be at that thickness. The only important factor here is that you need something with a bit of texture and friction -- a silk cord isn't going to stay closed, it's going to slip open.
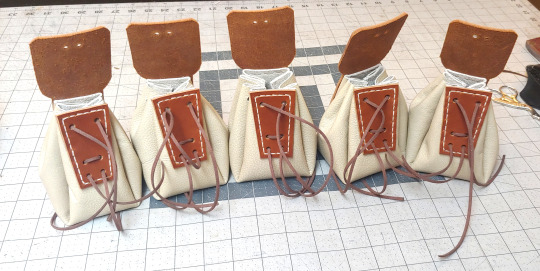
MANY BAGS.
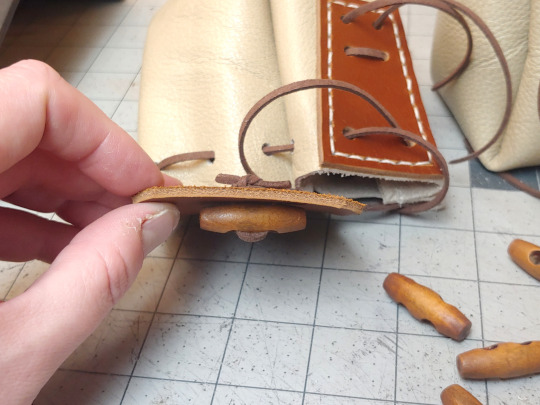
For these I used a wooden toggle -- cut another 8" of lacing, looped it through the toggle twice, and then made a tight square knot on the back:
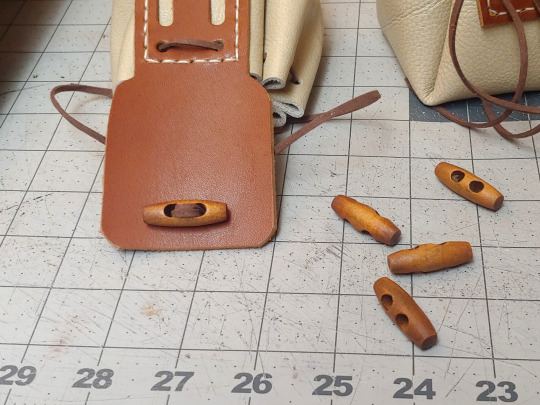
But another option is putting a concho or a large button on the flap. The bag I copied this design from, in fact, uses a concho toggle:

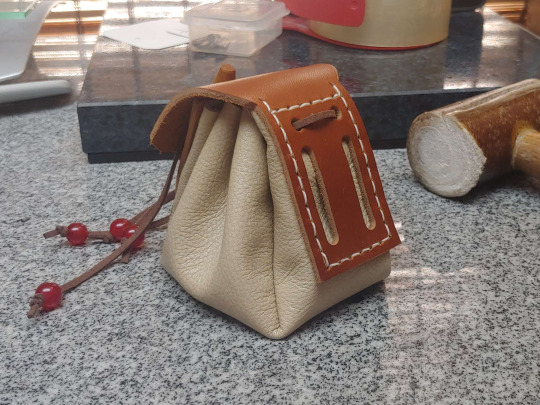
Thread some beads on the laces to keep the ends from getting lost, and you are DONE! 😁
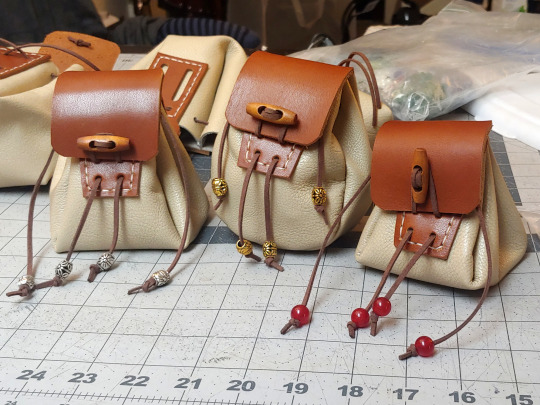
Happy Bagging!
715 notes
·
View notes
Text


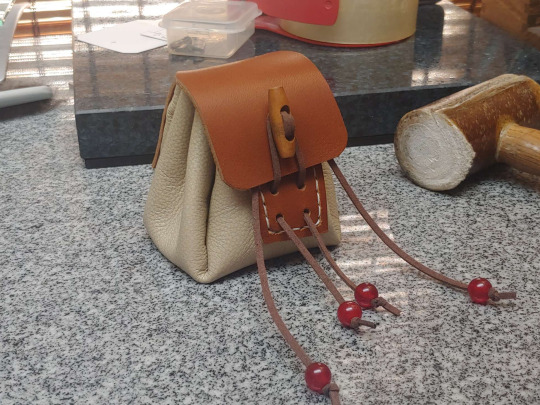
First attempt at redesigning the round pouch from the Breath of the Wild set -- it needs to be a little bigger, but I'm pleased with how tidy it came out, especially since I almost never work with soft leather.
Part of my motivation for redesigning it to use soft leather was because I currently have tons of the stuff, from skinning my lawyer's parents' old couches before they got carted off to the dump. 🤣
41 notes
·
View notes