
Yo, I'm Ash! I'm a super anime and tokusatsu fan and I love to sew! :D (idk, just a placeholder until I can write something better... >__>) EDIT: As of April 2024, I still haven't come up with anything better :P
Last active 4 hours ago
Don't wanna be here? Send us removal request.
Statistics
We looked inside some of the posts by ash-the-ketchup and here's what we found interesting.
Average Info
Notes Per Post
29K
Likes Per Post
18K
Reblog Per Post
10K
Reply Per Post
38
Time Between Posts
5 months
Number of Posts By Type
Photo
13
Text
4
Last Seen Tumblr Blogs


Fun Fact
Tumblr has a low social media market share in South America.
Photo

Official art by imozuka (Satoshi Ishino, No. 6 animation director), edited.
#The Venn diagram of No.6 fans and Kamen Rider fans has only two people in the center portion#me and the animation director of the No.6 anime apparently XD#no.6#nezushi#official art#satoshi ishino#imozuka#kamen rider
350 notes
·
View notes
Text
Houseki no Kuni/Land of the Lustrous Wig Tutorial: How to Create a Beautiful Gem-like Finish!
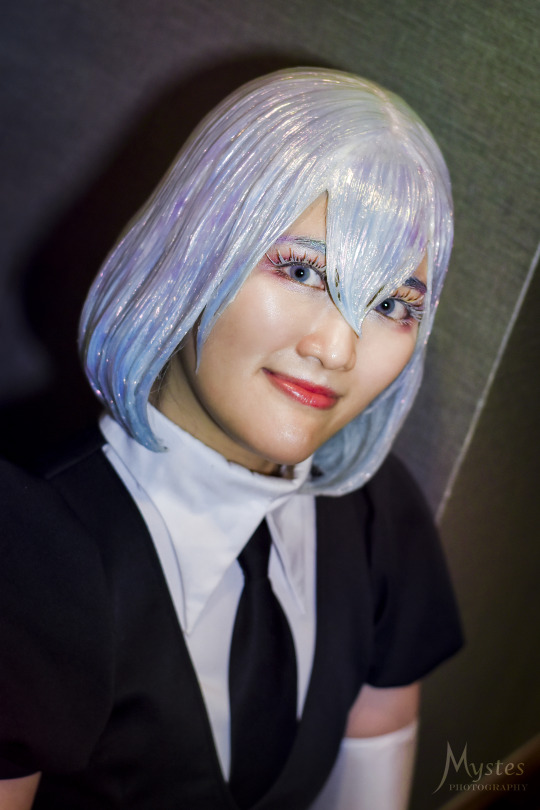

(Left photo taken by @/mystes_photo on Instagram)

When I first saw the characters in Houseki no Kuni, I knew right away that I wanted to cosplay Diamond, but to be honest, I did not like any of the commonly used methods to achieve the iridescent effect at the time (cellophane can easily be damaged, glitter doesn’t have the finish I want, resin is difficult to work with, etc.), so I did some research on ways to achieve a more convincing finish.
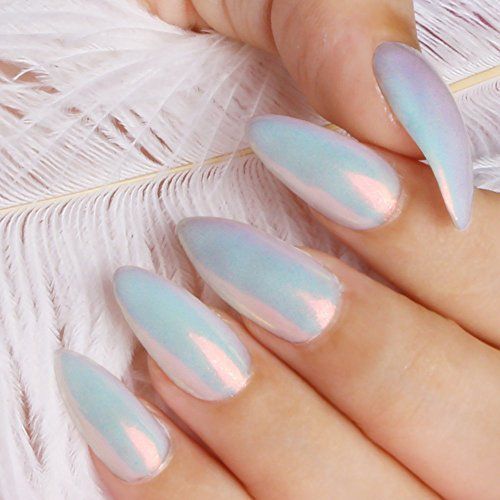
My main inspiration came from nail artists achieving a smooth iridescent finish similar to what I wanted for my wig (Fun fact, I became a SimplyNailogical fan during this whole process XD). Once I discovered that iridescent nail powder was the key material I needed, from there, I did some trial and error experiments to figure out the best method to apply it onto a wig and came up with this method!
This is not a styling tutorial on how to create a Diamond wig specifically, but rather how to create the unique gem-like finish on any wig! This tutorial can apply to any Houseki no Kuni/Land of the Lustrous character you’d like! :D
(Disclaimer, this method and the Diamond wig pictured above were created in 2021, but the wig featured in this tutorial was styled in 2024)
Skill level: Intermediate
Prerequisite: At least basic wig styling skills, dependent on character
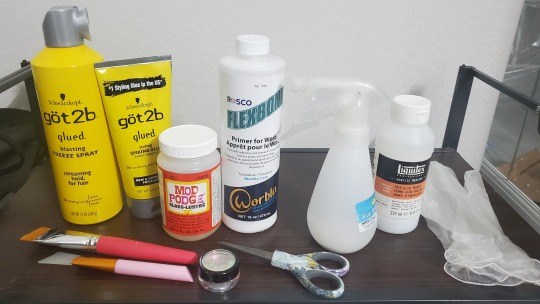
Materials needed:

Wig (style varies based on character, but I recommend using a thick base wig if you can! )
Wig head that’s close to the size of your head to ensure that style conforms properly to your head size
Wig stand
Got2b spray and glue
Flexbond primer (amount needed varies, but for reference, I was able to cover my Diamond wig with about ¾ of a 16 oz bottle)
Mod Podge Gloss waterbase sealer (optional if Flexbond is tacky enough on its own)
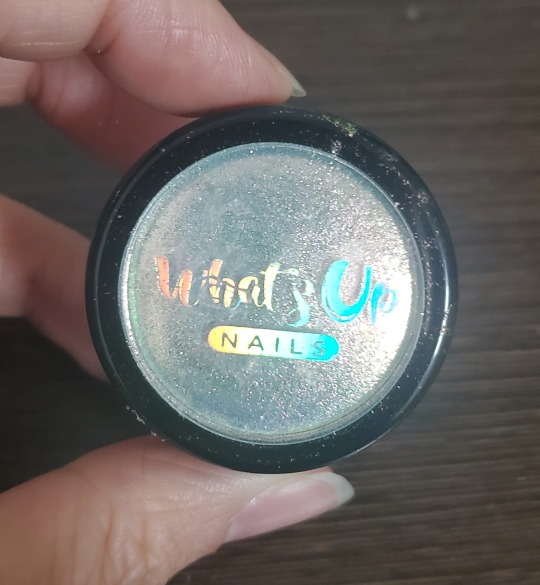
Iridescent/holographic nail powder (any can work depending on the finish you want, but I used the Aurora pigment powder from the brand What’s Up Nails. One little 1 gram jar was enough to cover two Diamond wigs with quite a bit left over, a little goes a long way!)
Clear gloss varnish
Spray bottle
Wide decoupage brush and/or any wide paintbrush
Silicone face mask brush (optional, but I find it great for smoothing out thick coats of Flexbond)
Mini scissors to trim stray hairs and/or excess Flexbond
Latex or vinyl gloves to rub on nail powder
Safety requirements:

Wear gloves to protect your hands. The nail powder is safe to touch barehanded, but the rubbing needed to buff the powder onto the wig may cause skin irritation or chafing if done excessively.
The nail powder is very fine, so I suggest wearing a face mask to avoid breathing it in/blowing it away. There are no toxic fumes or substances used in this tutorial, so a basic face mask should suffice.
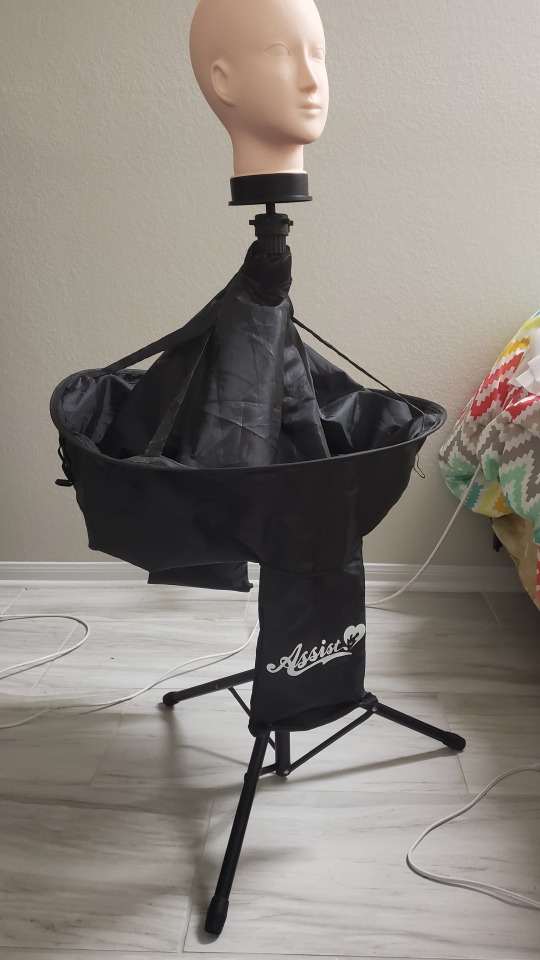
Keep the floor covered to protect the Flexbond from getting on it and causing a slipping hazard (also great for easy cleanup!) I initially laid out a bunch of old Amazon bags around the wig stand, but I recently picked up a handy device from Assist Wigs in Japan that was originally designed to catch cut wig hair, but it does a pretty good job catching dripping glue and loose nail powder as well!
Step 1:


Style your wig as you would a normal wig. This is highly dependent on the character you choose, but from experience, I have two tips I would highly recommend:
Make your wig about 10-20% fuller than you want the final wig to be. Like how actual hair flattens when it’s wet, depending on how the wig is styled, the same thing may happen once the Flexbond is added.
Try to keep at least the outer layer of hair on your wig as smooth and free of tangles as possible. When you coat the wig with Flexbond, any knots or irregularities in the wig will be emphasized. To avoid this, thoroughly comb through your wig to get rid of tangles and straighten any kinks or irregularities. Teasing your wig can leave the outside looking messy, so try to stick to the crimping method to add volume to wigs if needed, or at least limit teasing to areas that will be hidden with smoother hair later on.
youtube
I was quite fortunate that there’s an official 3D model video with the perfect references for Diamond’s hair that I was able to use as reference for my wig!
Step 2:
If you haven't already, protect the floor underneath your wig with any sort of protective covering to catch the Flexbond that will drip down from your wig.
Step 3:
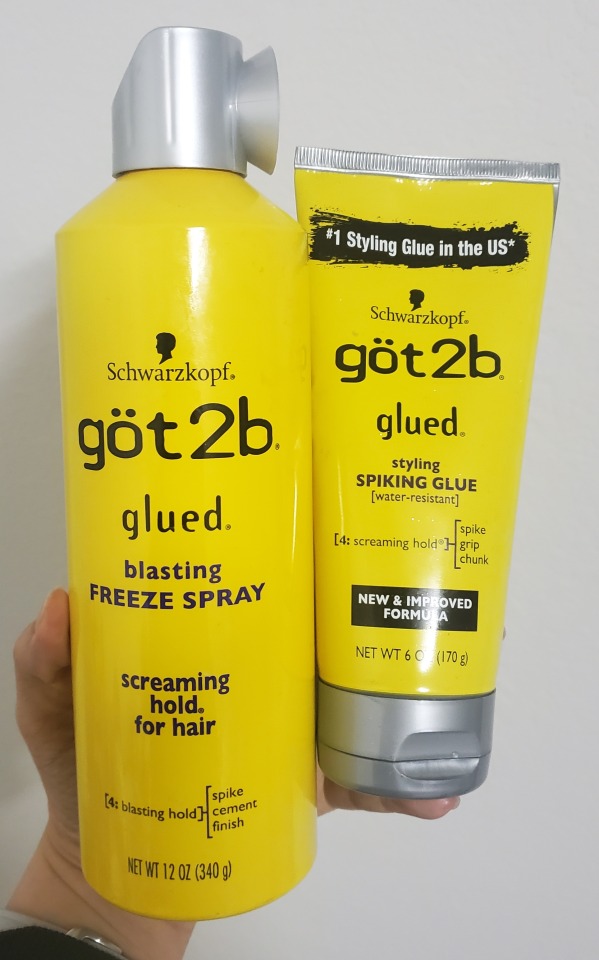
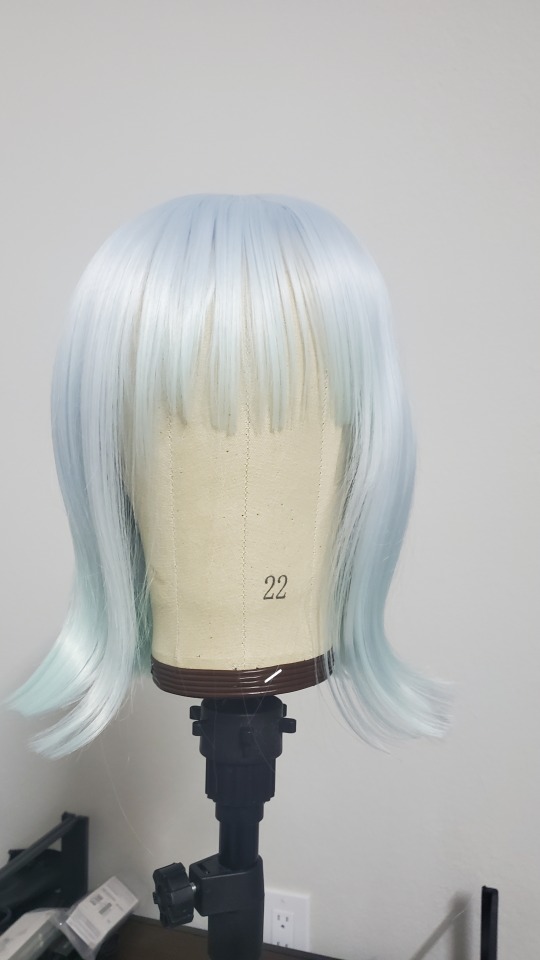
Use Got2B spray and spiking glue to hold the style in place to prepare for the next steps. Apply enough to make the wig relatively stiff, but avoid getting the hair saturated up to the point where the hair looks wet and stringy.
You'll know your wig is ready for Flexbond when your wig is quite stiff on the outside, as shown in the video above.
Step 4:

Take your Flexbond and dilute it with water to make a thin sprayable glue. I recommend about a 1 to 3 ratio of Flexbond to water to create a solution that is thin enough to easily spray yet still strong enough to be an effective glue. I would say the viscosity is similar to milk.
Step 5:
Apply the diluted Flexbond to the wig in a fine mist. If you see any significantly large droplets, use your fingers to carefully smooth them out. Do your best not to press down too hard or oversaturate the wig, as the goal is to create a hard outer shell on your wig rather than to saturate the entire wig in glue.
Repeat Step 5 a few times until your wig feels solid up to the point where the wig hair stays in place even when shaken around (or even turned upside down!) This step is very important because this creates the solid foundation for your wig that will support all the thick Flexbond layers you will be applying later.
Step 6:
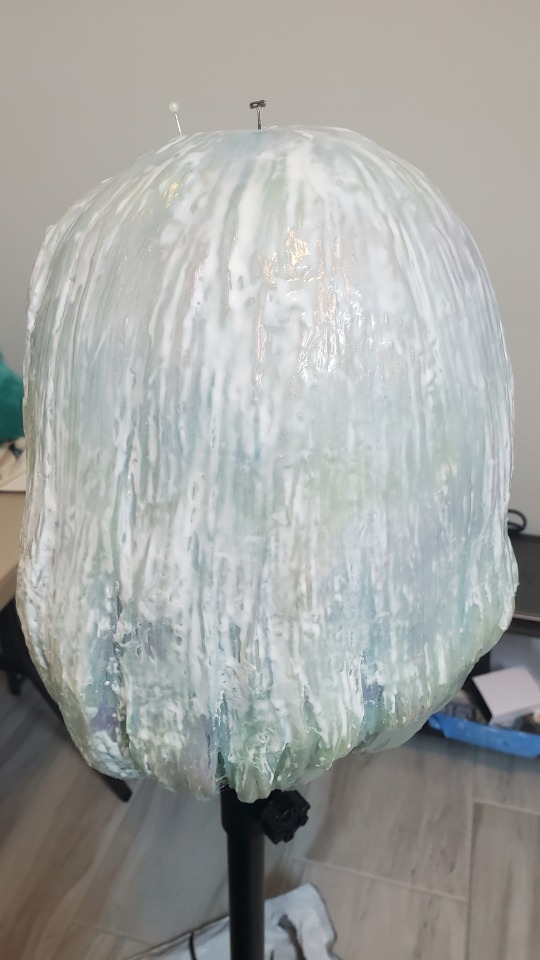
Once your wig is solid, coat the outer surface of the wig (you can cover all visible hair if desired, but I like having the hair inside soft against my skin) with a generous coat of Flexbond. You want this first coat to be thick enough to completely cover the outside of the wig’s surface, but not so much that the Flexbond is dripping.
However, if noticeable drips do occur, you can smooth them out with your brush while they’re still wet or trimmed off with scissors if already dried.
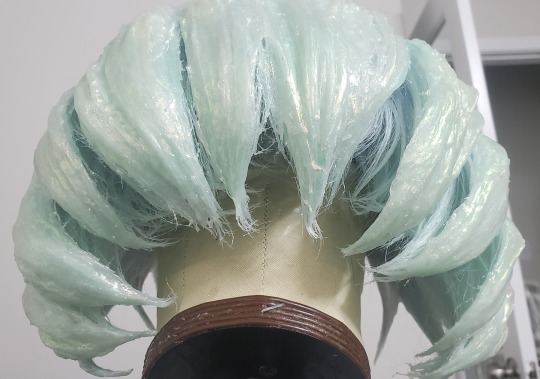
Repeat Step 6 for about 2-3 layers or until your wig has a smooth, almost glossy looking appearance, as pictured below.
Below are a few helpful tips to help you with this step!

Remember how if you did Step 5 correctly, you should be able to turn the wig upside down? You can use this to your advantage to help you coat the bottom half of the wig! Just be sure that the top half is completely dry before you place it on a surface. I would also alternate between coating the top half and the bottom half to keep the coats even.
2. You can use the Flexbond to gradually fill gaps between the fibers for a smoother appearance. Also, the more layers, the less emphasized the hair strands will be on the final product.
Step 7:

If you have stray hairs or glue strands that you find distracting, you can trim them off using a sharp pair of scissors. In the example above, you can see how I trimmed the frayed-looking ends of the hair to create nice clean points
Make sure to do this step prior to applying any nail powder to avoid wasting powder that be covering an area that will be cut off.
Step 8 (Possible extra step):
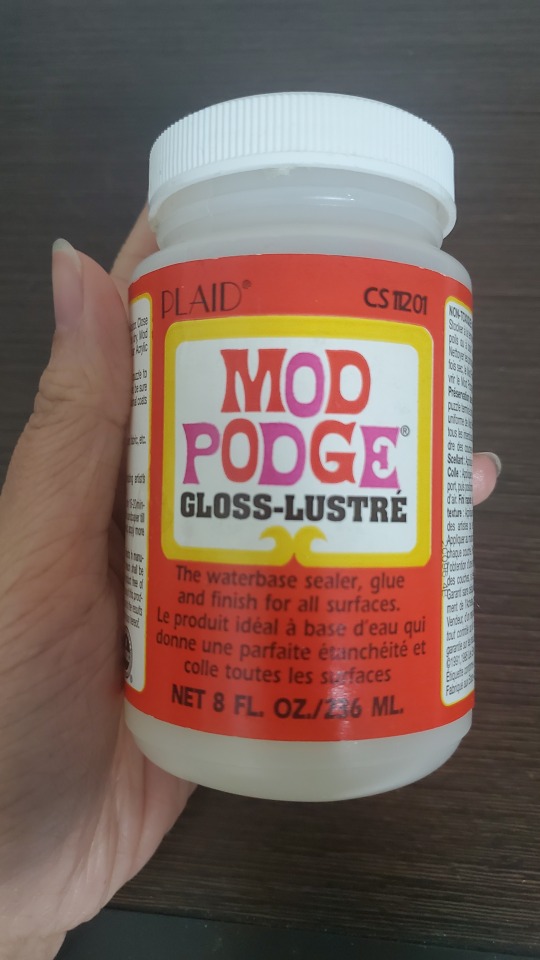
The first time I made my Diamond wig, I was able to rub the nail powder directly onto the Flexbond, which was just tacky enough for the powder to adhere itself to the wig. However, this time around, the Flexbond was not tacky enough and the powder would not adhere properly. I am unsure why this occurred, whether it was the weather/humidity (I created the first wig around Summer 2021 vs. this wig in late winter/early spring 2024) or Rosco tweaking the Flexbond formula sometime in the past few years. Thankfully, I was able to remedy this issue by applying a thin coat of Mod Podge Gloss, which I found stayed temporarily tacky for about 20 minutes after drying.
If you also encounter the same issue, apply a layer of Mod Podge Gloss over your wig. Check it frequently to able to apply the powder as soon as possible once it is dry before the Mod Podge loses its tackiness. Don't be too impatient though, as the Mod Podge will smear if you try to apply the powder before it is dried.
(I’m not sure if using only Mod Podge to create this outer shell would work as opposed to using the Flexbond due to its lower viscosity and lack of flexibility in thicker coats, but I do think it’d be an interesting experiment to try! If it’s successful, it’d be a much more accessible and budget-friendly option!)
*If the Flexbond you applied is tacky enough to apply powder onto directly, you can skip this step and jump ahead to Step 9.
Step 9:
Once your wig is dry, put on your gloves and dip your finger into the nail powder to coat it with a thin layer of powder. Take this powder and buff it onto the surface of your wig, similar to how you would buff nail powder onto your nails. Buff thoroughly until the surface is smooth and looks reflective. It should look almost like metallic/iridescent paint was applied rather than a powdery glitter. Continue this process on the entire wig.
Step 10
If you feel like you need more coverage with the nail powder after applying the first layer, coat the wig with another coat of Flexbond/Mod Podge (depending on what you use to adhere the nail powder), let it dry, then apply another layer of nail powder. You can repeat this process until you satisfied with the coverage. Depending on the powder used, I find that at least 3-4 coats are needed to obtain full coverage and a smooth finish!
Step 11:
Once you are satisfied with the finish, coat the wig in one last layer of Flexbond to protect the finish and add a bit of depth to the glassy finish as opposed to varnish alone.
Step 12:
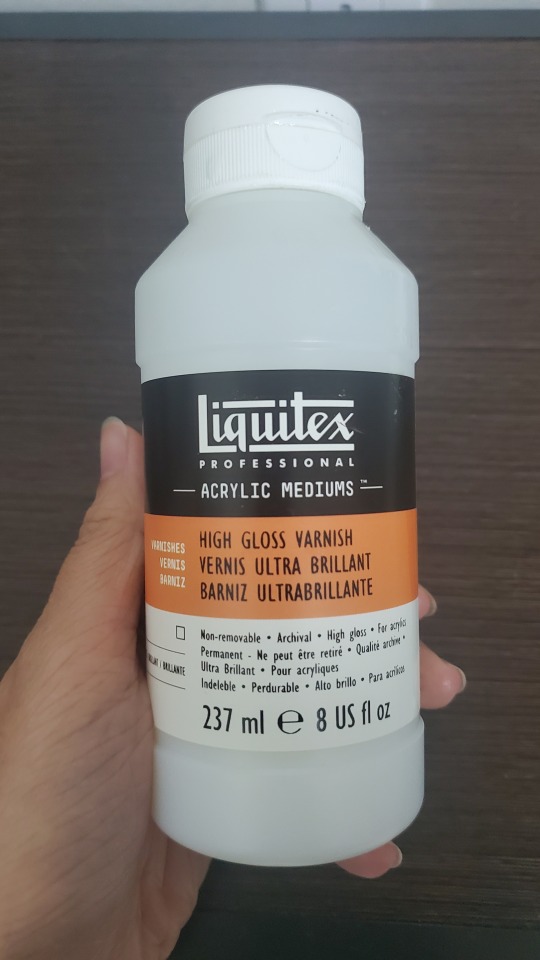
Add a final coat of gloss varnish to give your wig a beautiful glassy finish! You may notice the Flexbond turning white again underneath the varnish. Do not panic, Flexbond is known to do that when it gets wet! Once everything is dry again, it will return to being clear. :)
You Did it!
Now you have your finished Houseki no Kuni wig with a lovely iridescent finish that is not only beautiful, but also indestructible (seriously, I’ve thrown this thing at a wall and it stayed in perfect condition XD) and super easy to put on (very flexible and goes on like Lego hair XD)!
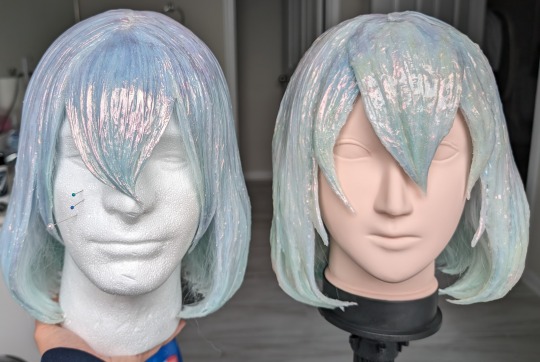


For my second Diamond wig, I wanted to be experimental and try remaking the wig with a shape more accurate to the show (less visible hair strands and more like solid shapes) and adding subtle stripes of color underneath the Flexbond. I will be honest, I actually ended up liking the first one a tad more ^^; It’s okay though, I still learned a lot, and I feel the mistakes I went through the second time around really helped me perfect the technique for this tutorial :)
Another key thing that I messed up on for the second wig is that due to lack of time, I was unable to apply as many layers of the nail powder as I would've liked. As mentioned in Step 10 above, adding at least 3-4 coats will result in a smooth lovely iridescent finish, as seen here on my first Diamond wig!
As mentioned before, this tutorial can apply to any Houseki no Kuni character! Here’s a little work-in-progress of my Phos wig! :) I actually used body glitter by Nyx Cosmetics instead of nail powder because it gave a similar smooth finish to the nail powder and gave the wig more of a blue-green-gold shift rather than a full iridescent rainbow spectrum.
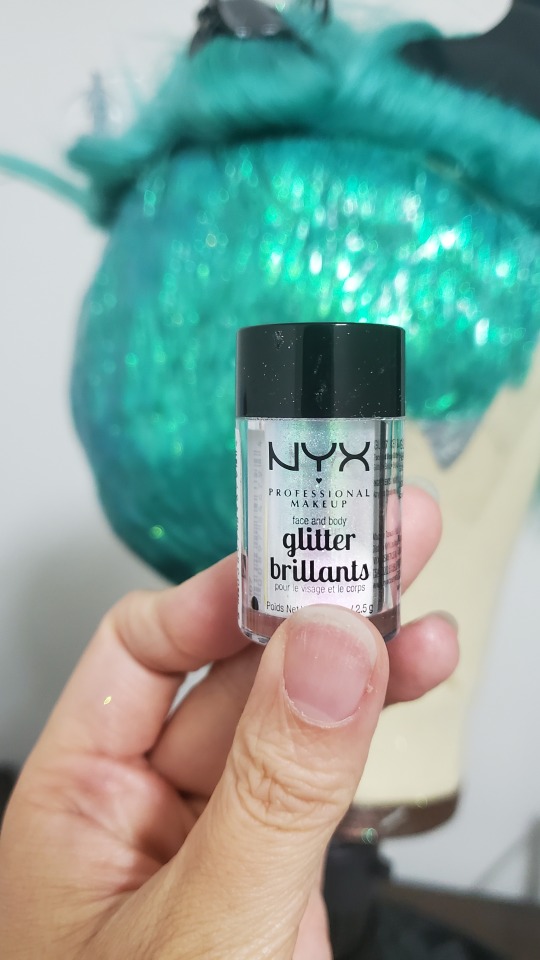
Bonus tip: for characters who have multiple distinct layers/sections in their hair, like Phos in this example (undercut and top half), I suggest applying the Flexbond and nail powder in sections as opposed to all at once.
Final words
Thank you so much for taking a look at my tutorial! I can’t wait to see all the lovely wigs that can be made using it~ ^_^
I'm not very active on Tumblr these days, so if you have any questions or need any clarifications for this tutorial, feel free to reach out to me on my Instagram account @/ashtheketchup!
(This tutorial is my entry for @/cosplaytutorialchallenge on IG's Online Cosplay Tutorial Challenge 2024)
31 notes
·
View notes
Text
And here I thought the suits were just super nice looking, but they actually have a lot of thought put into the symbolism! Thank you for this~
Analyzing the clothing designs of the Tokyo Revengers exhibition
Hello hello, as part of the promotion for the exhibition of Tokyo revengers in Osaka, Wakui released an HD wallpaper every remaining day of the exhibition. This allowed me to see details in the clothing of the characters that I hadn’t previously been able to see (they show a mythological animal and some other decoration), and those details have a lot to do with their personalities and the role in the story that these characters have. So, I invite you to read my obsessive analysis.
I will be using Hanakotoba (Japanese flower language) and some Japanese legends and myths.
It’s kinda obvious that there might be some manga spoilers under the cut:

Keep reading
632 notes
·
View notes
Photo

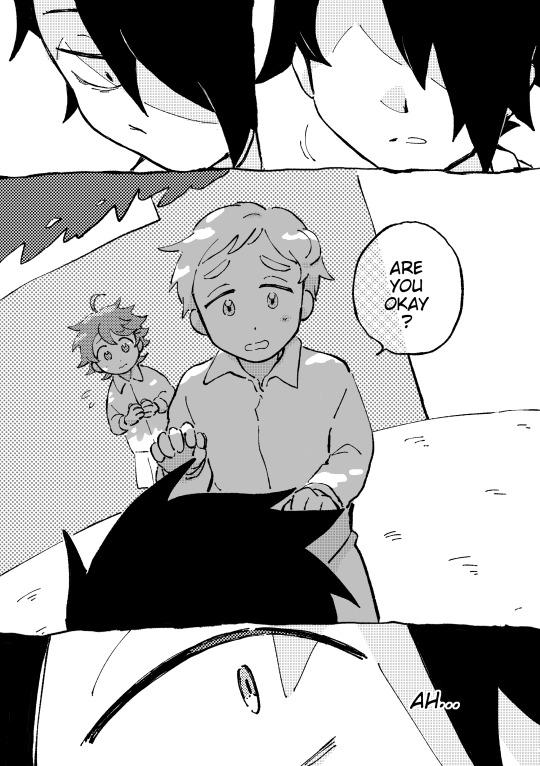

recently finished a promised neverland comic I had been working on since s1! major spoiling warning tho but you can read the full thing HERE
2K notes
·
View notes
Text
Things about Hatsuharu that took me way too long to realize, ordered from least to most egregious:
1. Haru and an upcoming character’s goth aesthetics are inspired by Japanese Buddhism, in which Gozu and Mezu (Ox-head and Horse-face) are guardians of the underworld.
2. Haru’s bisexuality is another way the duality of Haru’s character expresses itself, which of course was inspired by a cow’s black and white fur.
3. Haru’s whole introduction was a play on the legend of the Rat riding on the Ox’s back to the zodiac banquet. When Haru volunteers to take Yuki home after his asthma attack, he’s demonstrating that his relationship with Yuki is different now by symbolically creating a new story that invalidates the old.
1K notes
·
View notes
Photo
I HAVE A MIGHTY NEED


Movic is currently taking preorders for the Tiger & Bunny - The Rising plushie key chain set, which is being sold for 3,800 yen and will be released on 2nd August 2019. The preorder period ends on the 15th May on the Movic website.
Aitaikuji is also currently taking preorders over on their website for those outside Japan: https://aitaikuji.com/tiger-bunny-the-rising-movie-movic-plush-set
183 notes
·
View notes
Photo


When the same artist draw 2 of the same seiyuu characters together. NO.6 (Sion and Nezumi) and SnK (Eren and Reiner)
artist: toi8
#can't believe toi8 legit edited this pic#it's perfect#kaji yuki#hosoya yoshimasa#no. 6#shingeki no kyojin#toi8#yuki kaji#yoshimasa hosoya
13 notes
·
View notes

Photo

Sky High is a hero I trust with my life (his dog’s name is John)
886 notes
·
View notes
Photo
I’m so honored, thank you so much! ;///; <3

Kiss contest & zine giveaway results!
The winner of our grand prize drawing for the last remaining copy of the No. 6 Zine is…
@hi-im-secretly-satan ! Congratulations!
We chose this winner randomly, using an online random number generator.
The person who was the judge’s choice, who for their creative interpretation of the contest’s theme won a set of all four buttons designed by the No. 6 Zine artists, is…
@ash-the-ketchup ! We love your adorable plushies, which have so much care and detail put into them. Your entry incorporates cosplay, photography, and crafting all in one, which is very impressive and original. Congratulations!
Ash and Ace, please DM us your addresses asap so we can send you your prizes.
Lastly, the committee would like to give an honourable mention to the other participants whose works we considered for the judge’s choice, @hi-im-secretly-satan and @secretagentfan. Your fics were both very well written, explored the theme in multiple ways at once, and stirred many emotions in the judges’ hearts.
To everyone else: thank you so much for participating. We adored going over each and every entry, and we’re always humbled by your creativity, enthusiasm, and devotion to No. 6. To everyone who has been following the contest, we urge you to check out the works by all 13 people who participated, which we have reblogged to the RC blog already - each and every one of them is a fantastic example of this fandom’s creativity and enthusiasm.
#I appreciate the compliments about my entry as well#they make me so happy~ >///<#no. 6#rczinegiveaway
25 notes
·
View notes
Photo

It’s been a while since I’ve posted anything on here, hasn’t it? ^^;
This is my entry for @restructuralcommittee‘s Valentine’s Day contest/No. 6 zine giveaway! Given how little time I had to finish the plushies (due to real life taking priority), I’m actually pretty happy how they came out! ^_^
For the type of kiss, hmmm... I guess “indirect kiss”, maybe?
128 notes
·
View notes

Photo

Commission of Shion and Nezumi for @glorifiedscapegoat !! Thank you so much for commissioning! ^^
993 notes
·
View notes
Photo


leo19th [pixiv]
12K notes
·
View notes
Photo

Hey guys, so a lot of people always ask me what workouts I recommend for certain muscle groups and tbh I am kinda tired of linking people to my faq so I went ahead and made this chart! These are workouts that I do and are integrated into my programming :) If I made a mistake or if any of y’all want a clarification go ahead and send me an ask! and if you find this useful feel free to check out my: ko-fi
3K notes
·
View notes
Photo


[ Relateable ]
More crossover as coping mechanism. Behold team cross-dress & team “somebody shot me near the last episodes”
2K notes
·
View notes
Photo

482 notes
·
View notes