chatterbox3000
CHATTERBOX3000
hiya my name's juli and this is my oc blog
all my ocs are giant nerds and i like to talk about them so check out the tags list to see specific worlds or characters
1654 posts
Don't wanna be here? Send us removal request.
Last Seen Blogs

hoshi21love
Hoshi

nem0neen
🥚neen (message me somewhere else i dont check)

brothertedd
#brothertedd

jualtanahdiblitar
Jual Tanah di Blitar

lgbz75
Untitled
Text
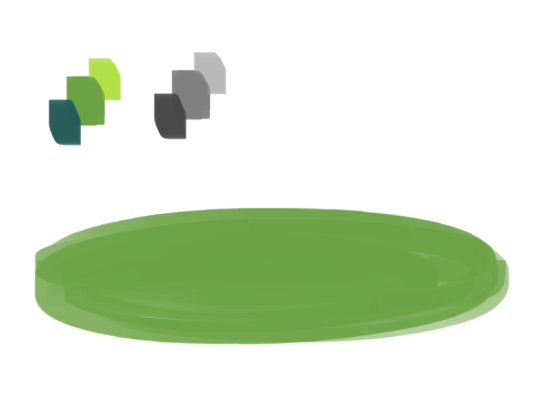
a quick grass tutorial
I’ve never really wrote a tutorial before so apologies if this is bad
1. okay first thing I do is pick three colors, a mid, dark, and light. I like to check the colors in greyscale to make sure there’s enough contrast between each one.
I then plop down a blob of whatever my middle tone color is.
2. next, I take my dark color and just sort of randomly place it around. I try to make sure there’s a good amount of both the mid and dark tones spread throughout. I personally like to keep it kinda messy. I also have pen pressure on for both brush size and opacity, so I can have some blending action going on.
3. for the next step I do the exact same thing as before, except with the light color.
4. aight this is where we start adding details. see how you just have a bunch of colors and edges where two colors meet? use the eyedropper and go to an area where two colors meet, eyedrop a color, and then use that color to draw in your grass blades. I do this at every point where colors meet. should note I personally like to use a square brush, but you can really just use anything.
5. you can technically stop at the last step if you’re going for a more simple look, but to add more details I go to the “empty” areas of solid color and just draw in random strokes using a color nearby. it’s just a way to fill up the empty space.

6. basically more of the same idea of eyedropping and drawing. for more variety so things look interesting, I like to add random plant shapes.

7. and so the grass doesn’t look too plain, I add random dots of color and pretend it’s flowers and stuff.
and there you have it, this is how I approach drawing grass.
120K notes
·
View notes
Note
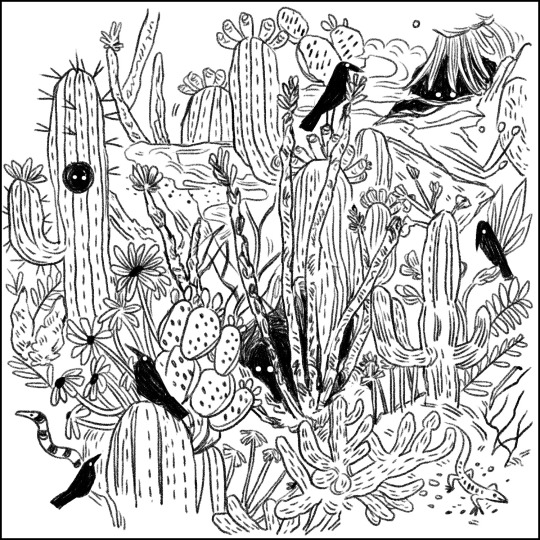
Hoi!! I saw a little bit of the process on your Instagram, but could you explain how you go about making a pattern? I absolutely love how that neato cactus/desert one you did turned out!
Alrighty!
So to make a repeating pattern:
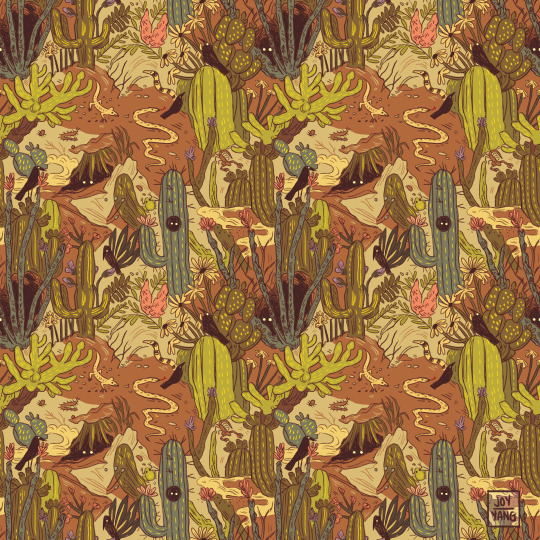
1. Open a canvas and draw in the center WITHOUT touching any of the edges.
2. [Below: Light cyan lines] Divide your canvas into four equal parts.
Make four guides framing the canvas, and two across the middle.
For the ones in the middle, View > New Guide > Horizontal or Vertical for needed orientation > type in 50% to get the exact middle of your canvas. These are photoshop shortcuts, may be different on your programs.
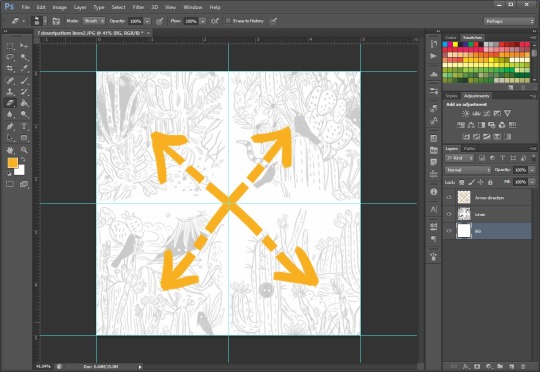
3. [Above: Yellow arrows] Make sureyou have ‘Snap’ checked under View > Snap, then select each quarter of your piece > layer via cut > move diagonally to the other side.
After you’re done moving things diagonally, you can either turn off Snap so your doodling won’t stick to the center lines, or toggle the guide visibility off (Ctrl+;). Merge the layers back together.
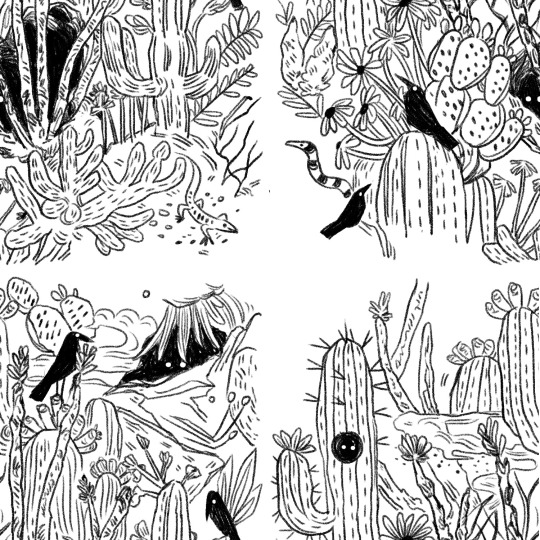
4. Draw in the middle without touching the borders, color the entire thing if you plan on doing that.
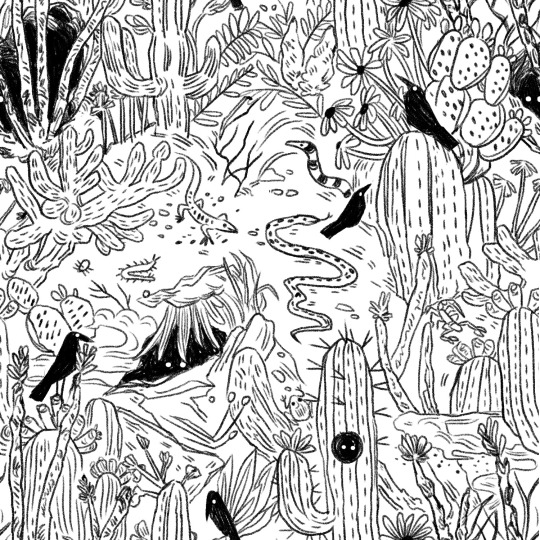
5. Setting your image as a pattern After your image is done, merge all layers into one > select the entire canvas (Ctrl+A) > Edit > Define Pattern
Open a new canvas bigger than the one you made the pattern on, and paint bucket it in! (Instead of the Foreground button at the top when paint bucket is active, select Pattern then your pattern)
If you aren’t using a program that lets you define patterns, merge everything into one layer and duplicate & tile them manually.

Cheers!
17K notes
·
View notes
Photo
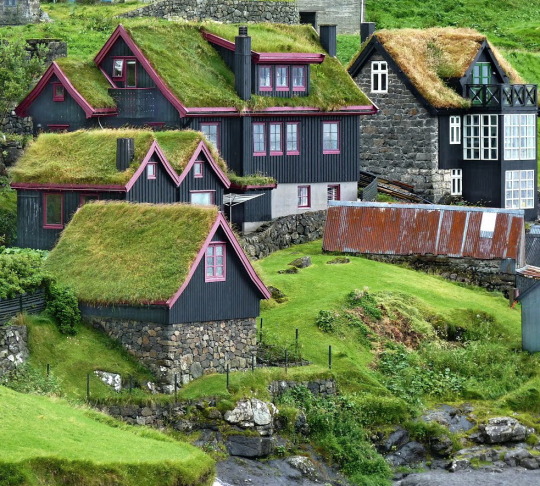
The remote village of Stykkið on the west coast of Faroe Islands (by patano).
50K notes
·
View notes
Text
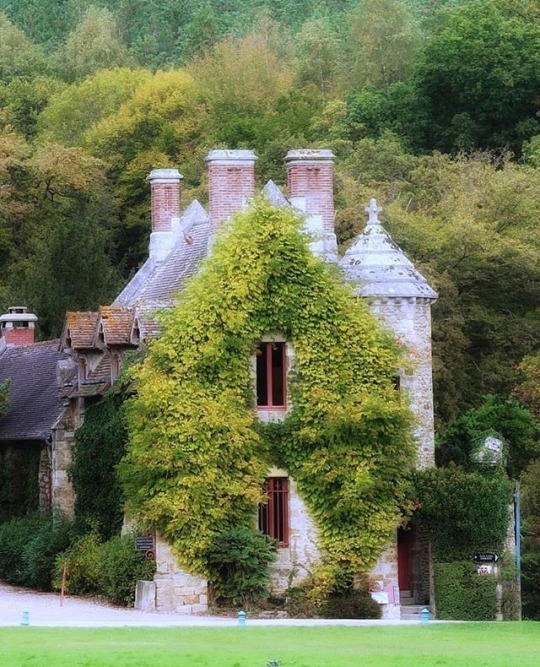
Cernay-la-ville
https://www.instagram.com/p/Bp7EaPoHRqJ/?utm_source=ig_share_sheet&igshid=1i516gbwj1hdy
43 notes
·
View notes
Note
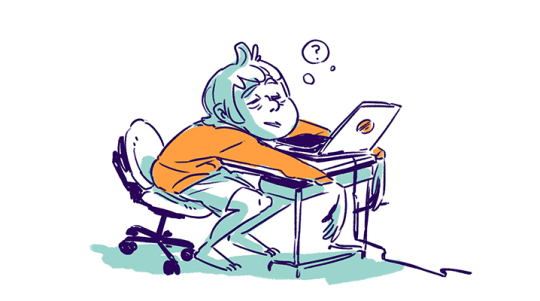
It's no problem, you deserve all the praise with your hard work! Do you actually have any advice to share on beginner animators like myself? And which programmes to use to make animating easier?
Hiya! Sorry to take so long to reply! I’ve been under a huuuuge workload the past months, and I when I finally got more time for myself I was just too tired to do anything else than simply rest. But here it is! I listed couple things I could think about how to think when you animate. Of course this is only my personal list, so I understand if someone disagrees.
It goes a bit in-and-out the range of actually animating things - but I feel like there cannot be one without the other, so here we go!
Hopefully this will be helpful!
1) Animating is SLOW
The biggest advice I can give is that animation is not easy. It’s hard. It’s tedious. It’ll always take like double the time you think it will. And that’s not on a scale of hours, but days and weeks. You think your scene will take 3 days to rough out? It’ll probably take 6. You think you can clean it up in 1 week? Book in 2,5. Just get some coffee and continue. It’ll be there. Eventually.
2) Take breaks
After a while you’ll become blind to the animation you’re making, so remember to take breaks. Take 30 min break, and when you get back to your animation and play it through you can usually spot a thing or two you just couldn’t see before. It’s also good for your body - I have to admit I tend to sit at my desk way too long hours, but I’m trying to get better.
3) Work out
I feel like I say this every time, but be considerate of your body. I’ve seen so many people having problems with their wrists and elbows, and the best thing to prevent those is to exercise. It also clears your head and ALMOST prevents you from getting sleepy while animating.
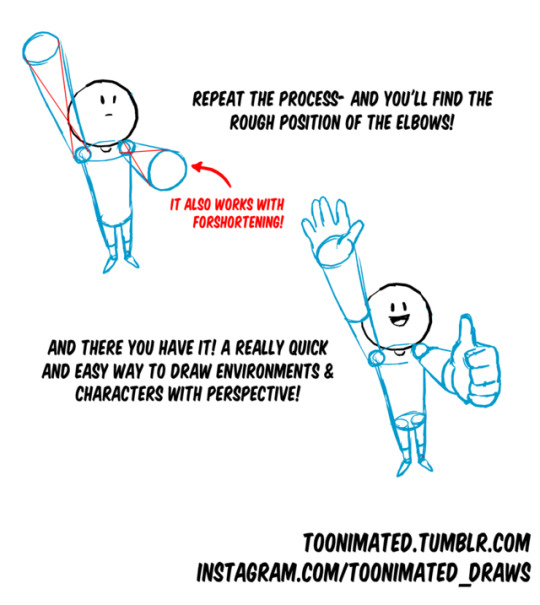
4) Start loose
I tend to start with really loose thumbnails in order to get the movement I want. Sketch those thumbnails in so loose that only you can tell what’s happening. You want to feel the movement, making the character pretty comes later. If I start with the construction, I realize half way that the character moves more like a machine than a living thing. Of course this is different for everyone. Some people can be like super humans and draw the final line in one try - I’m not one of them.
5) Kill your babies
Don’t be scared to ditch something that doesn’t work. Of course you want to keep the perfect looking key that you used so much time to finish, but if the movement doesn’t flow, it’s fine to get rid of it. You can use it as a base for your new better drawing
6) Toon Boom vs. TVPaint
These are the two programs I’ve used for 2D animation (+ Photoshop, but that was a bad idea). I actually started with Toon Boom and learned about TVPaint only later. I really like both of the programs, but they have some significant differences.
Toon Boom
Toon Boom is really advanced, bit confusing, originally vector-based 2D animation program. It’s really good, but learning to use it is bit of a work. I started with Toon Boom, and I’ve done most of my personal animations with it. My favorite part of the program is the vector line. You can tweak the line, resize, recolor, do almost anything you want even after you’ve finished your animation. Of course sketching with vector doesn’t feel as good as sketching in Photoshop, but nowadays the newest Toon Boom has been really improving with the feeling of the drawn line and they have even introduced bitmap based layers.
TVPaint
TVPaint is bitmap based program and much easier to learn than Toon Boom. It’s basically Photoshop with proper timeline and light table. The bad thing about it is that if you want to change something after drawing the frame, you better draw the whole frame again. It does feel much more natural to rough out the animation than Toon Boom though. Also the timeline and light table are better than the ones in Toon Boom. If you want to just find an animation program to start with, I guess TVPaint is a better choice. I did start with Toon Boom though, so can’t say learning it would be impossible. It just needs slightly more work.
4K notes
·
View notes
Note
how do you get your lines to look like that. ... .... so good ,, ur legit one of my fav tumblr artists
Thank you, I really love to ink :’3
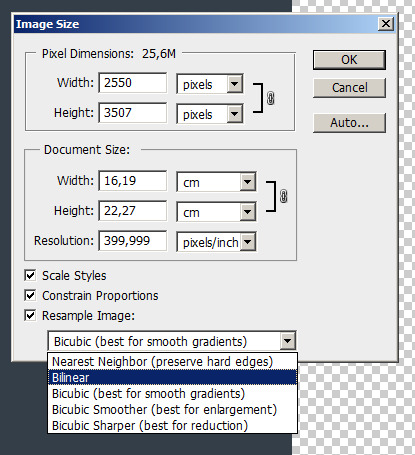
Aside from a couple years of practice, there are two important PS brush tricks I learned to make the lines extra sharp (which i value above all else cause I like them CRISPY).
First, I add a texture to my inking brush and put it on “color burn”. That will increase brush sharpness without changing its actual shape

Second thing, when I export the image, I always use the “bilinear” option. That’ll prevent photoshop from adding any softening gradation around the lines.
86 notes
·
View notes
Video
vimeo
Photoshop Splatter Brushes Mini Leaks Sampler Set from Nicolai on Vimeo.
7 of the 100 Photoshop splatter brushes from the InkyLeaks set are now available in the MiniLeaks sampler set. In this video you can see what just these seven brushes alone can do, imagine the mess you will create with all 100 brushes!
6 notes
·
View notes
Photo

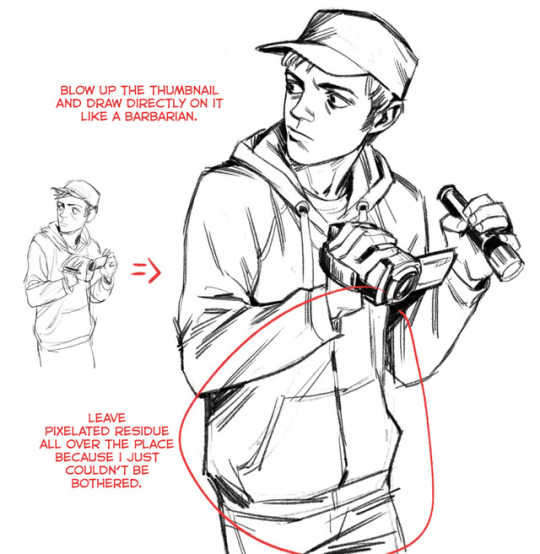
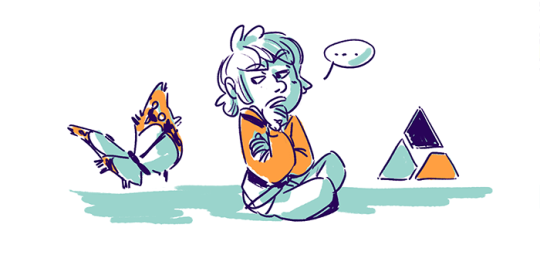
So here we go, a post about my drawing process, hope you can get something out of it.
I start from searching a composition/character pose by making a bunch of tiny thumbnails (pic.1). They don’t take much time and keep me from useless over-detailing.
When I found something I’m satisfied with I upscale the thumbnail to desired size. Now to get from here to lineart I can take one of three routs:
Pic.2. Proper. I don’t take it often enough.
Pic.3. I’m an expert, hold my beer.
Pic.4. Savage. Works for little drawings/doodles.
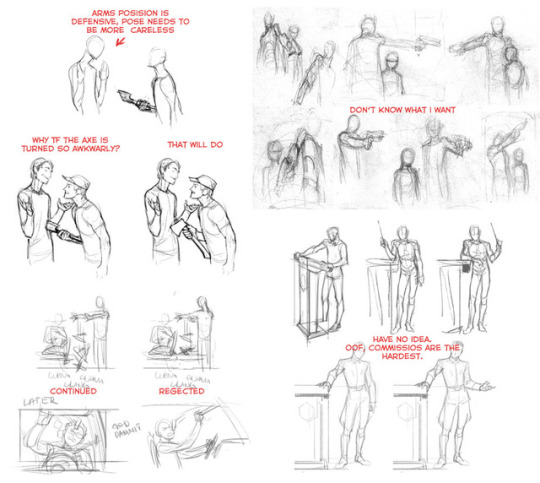
Generally, my sketches are varied from bunch of vague lines to roughly constructed objects and more or less anatomically correct “mannequins”(if it’s for a bigger picture), and stuff like clothes I often leave to figure out later in the lineart. I tried to do very elaborate sketches in the past but they would get cluttered and brought more confusion than actual help. Also inking would turn into a burden, because when every little detail has already been laid out, going over everything again felt like I was doing the same thing twice. After all, an undersketch just needs to provide some guidance so a better picture could be built on top of it, it doesn’t matter if it’s clean or looks “good”.
And you know that popular problem of hating your lineart because you think that a sketch looked much better? If your sketches never look nice in the first place then that problem is solved, ha! Okay, that may be an ill advice.
For inking part I can’t say anything substantial, I’m afraid. A demonstration of how it goes down is all I can offer, so check two videos at the end of this post.
Now, onto coloring. Going to take advantage of the moment and promote this efficient way of filling in a lineart. I keep seeing people filling in with a brush, and it hurts my non-existent soul when someone desperately tries to not go over the outer edges of the inks; oh honey, what are you doing, grab a magic wand and save yourself some time and effort.
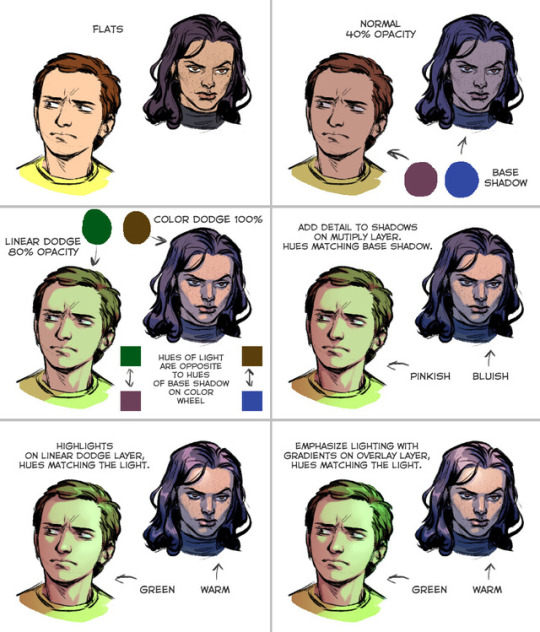
I often keep coloring simple (either giving picture an overall tint of one color, using related colors, or two complimentary colors), because I have hard time managing lots of different colors at once. But I also don’t forget that rule of making hue of shadows opposite to hue of light. On pic.5 there are some old tests of using opposite hues for light and shadow, tad bit extreme but descriptive examples of my approach to shading.
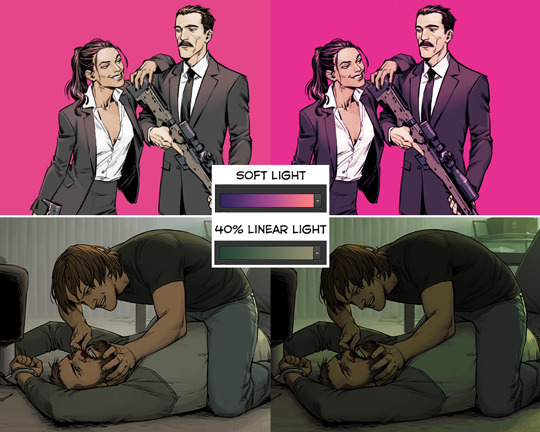
After all of that I might through some correction layers on top of the picture. My favorite crutch is gradient map, it can add an atmosphere to dull coloring, gather a picture full of colors that don’t go together very well, or simply liven up a grayscale drawing.
I rely heavily on different layer modes and correction layers. When everything is separated like that it’s very easy to change color and lighting. There are people who seem to know exactly what result they want to achieve, so they just paint directly on flats, goddamn wizards. I’m never sure of what I’m doing so I stick to my convoluted layer juggling.
And to wrap it up here are time-lapse videos of two recent drawings.
youtube
youtube
1K notes
·
View notes

Photo
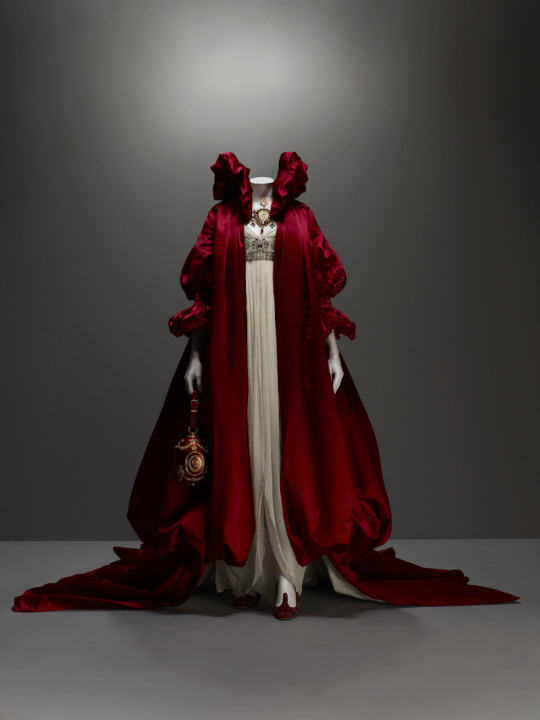
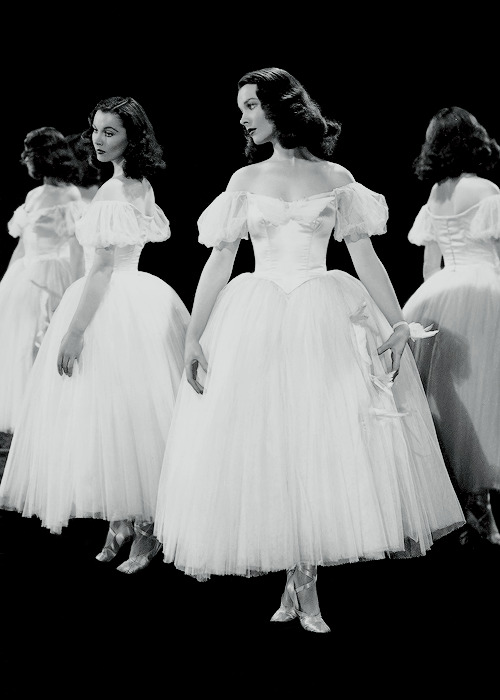
Alexander McQueen. “I want people to be afraid of the women I dress.”
31K notes
·
View notes
Photo


COFFEE QUEST CONTINUES!
Join our coffee adventure!- Or at least check out more Art Goodies here:
[Check out Toonimated’s Coffee Quest] <Take a look!
144K notes
·
View notes
Photo
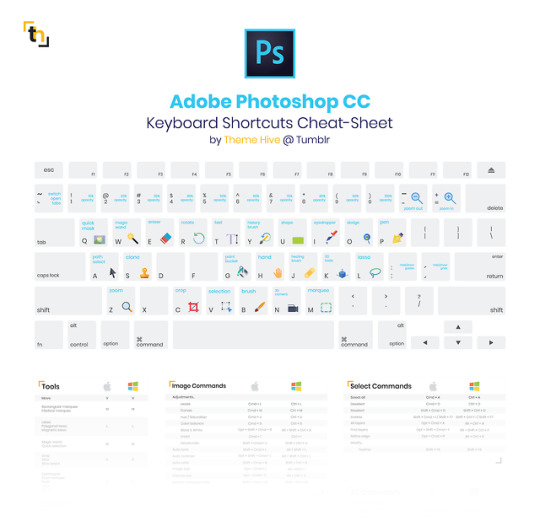
Photoshop CC Keyboard Shortcuts by Theme Hive - more goodies here
Revamp of my compilation of Photoshop CC keyboard shortcuts for Mac and Windows machines.
The list includes:
Keyboard w/ shortcuts
General tools
Image cmds
Layer cmds
View cmds
Select cmds
3D cmds
Filter cmds
This list uses the US International keyboard layout, which means that some shortcuts may be different if you’re using another layout, though the vast majority of them will be the same.
download: PDF (approx. 625KB)
2K notes
·
View notes
Photo
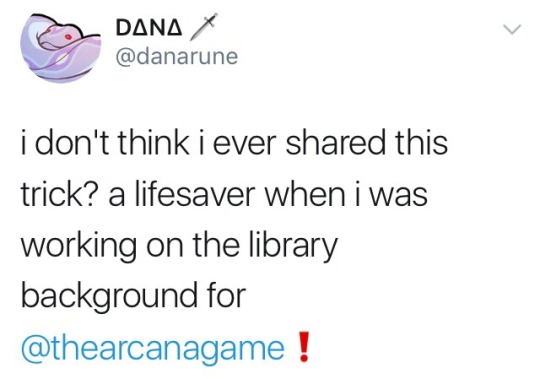
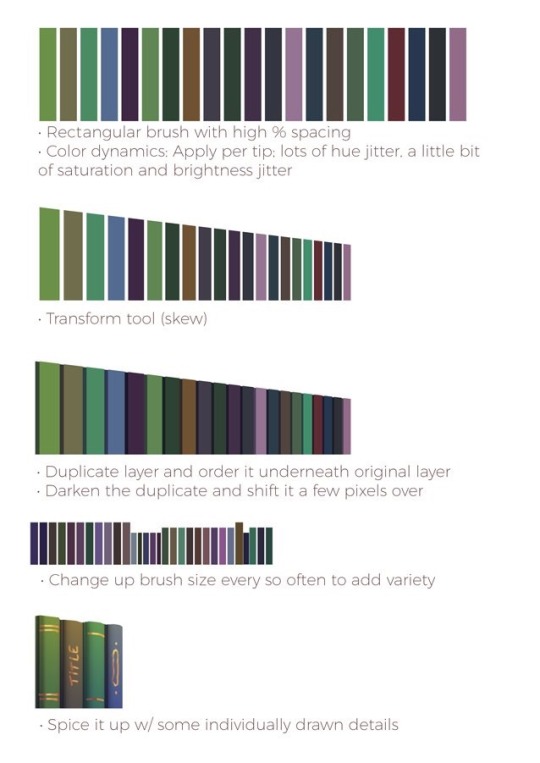
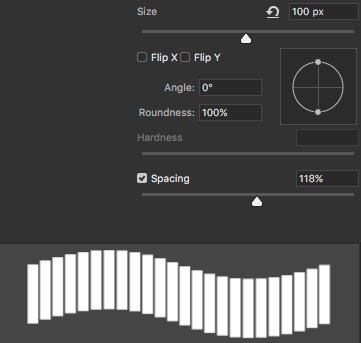
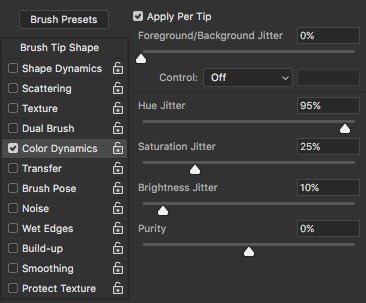

Library books art hack by @danarune on Twitter
132K notes
·
View notes
Photo
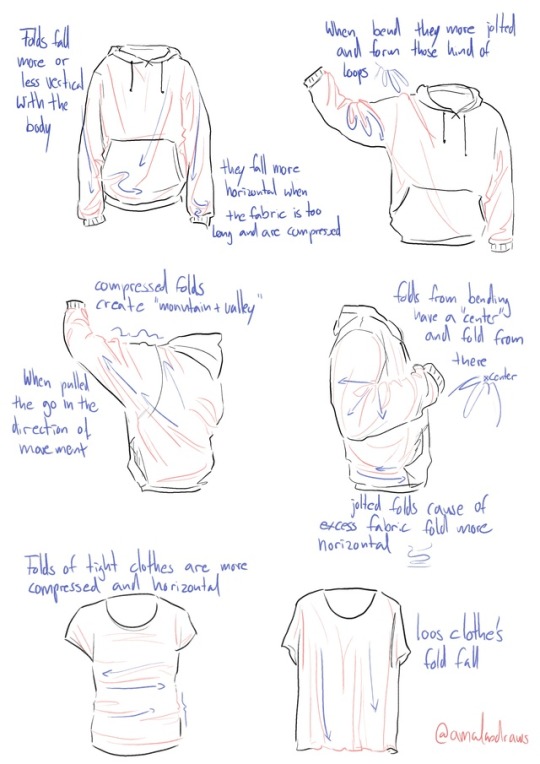
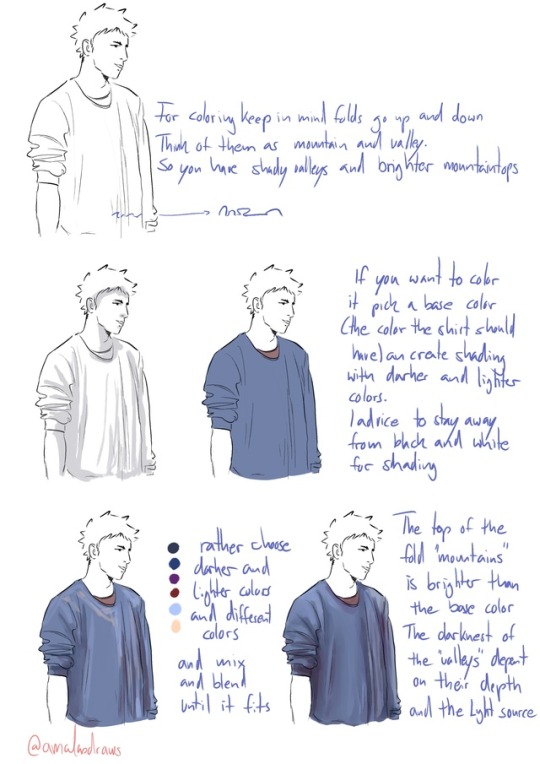
THANK YOU! ANON!
I stopped the coloring of the shirt here cause I guess you get the basic idea. If you wanna see more of the coloring and the brush I use you can look HERE!
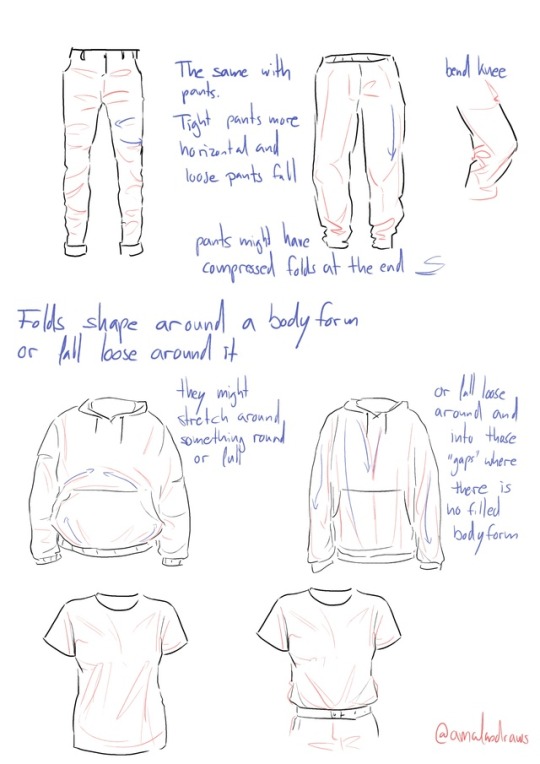
Also you can see how not just folds but shading can define a form HERE!
I hope this helps! I’m so bad with words and explaining things (/)//(/)
40K notes
·
View notes