
Click4support customer reviews & technical support blog provide online solution for technical problems related to Desktop, PC, Laptop and Mobile. Follow our blogs and get latest online solution for your technical query.
Don't wanna be here? Send us removal request.
Statistics
We looked inside some of the posts by click4support-blog and here's what we found interesting.
Average Info
Notes Per Post
4
Likes Per Post
4
Reblog Per Post
0
Reply Per Post
0
Time Between Posts
6 days
Number of Posts By Type
Text
17
Last Seen Tumblr Blogs


Fun Fact
In February 2021, Tumblr had 518.6 million blog accounts.
Text
How to Enable Emoji Keyboard on iPhone, iPad, iPod or Android
Emoji’s are the ideograms or smileys that are used in Japanese electronic messages and webpages. An Emoji originally developed in Japan, but some character sets have been incorporated into Unicode, which allow them to be used anywhere as well.

As a result, Emoji have become increasingly popular among the smartphone users. In this article, we will learn how to enable Emoji on Android, iPad, iPhone, and iPod.
How to enable the Emoji Keyboard on Android?
An Emoji keyboard is available in Android but it’s somewhat hidden. It allows you to express yourself using various symbols and it’s easy to enable and use.
Step 1: At first, go to your Android smartphone or tablet setting menu and tap language & input, under Personal.
Step 2: Now find the iWnn IME input and make sure it’s enabled.
Step 3: Now the thing to be notice is, whenever you’re using the normal Android keyboard and you want to use an icon, long press the space bar. Then tap Emoji Input method.
Step 4: You‘ll see a keyboard filled with a ton of fun emoticons like Android robot faces. Have Fun while using it.
How to enable the Emoji keyboard iPhone, iPad, iPod?
Do you want to send those little smiley face symbols to your friends messages or emails? Here you can modify your iPad keyboard to accomplish that. All you have to do is make sure you are using the latest iOS.
Step 1: At first, go to Settings->General->Keyboard
Step 2: Then, tap Keyboard.
Step 3: Tap Add New Keyboard
Step 4: Now you will be seeing a list, Tap on Emoji.
Step 5: Now, open any app that uses a keyboard. You will be presented with a reminder and a new icon will be next to the spacebar that look like a globe.
Step 6: Now tap on the globe and you will be presented with all kinds of symbols and choices. Tap on the various icons at the bottom to choose a set and scroll through the set from right to left to see how many pages of icons you have.
Step 7: Al last tap an icon and tap the globe symbol to get back to the regular keyboard.
After following this article, you will be able to enable Emoji in iPhone and Android. If you have any other issues feel free to contact our online Operating System expert.

#How to enable emoji on android#How to use emoji on iphone#Enabling emoji on iphone#emoji for android
0 notes
Text
How to Free Up Mac Disk Space?
Apple Mac computer come with small flash storage drives. Mostly we have seen people using 128GB or 256 GB Flash drive and this is often filled up with music, movies, and apps. It’s a good practice to keep at least 30 GB of storage space free on our hard drive. But if you fail to maintain the free space, your Mac OS X may start to slow down, and it will also struggle while downloading large files.

Before buying any external hard drive follow the tips in this article, it’s a better way to free up Mac disk space:
1.Secure Empty trash: Empty you’re Trash; it often takes up a couple of GBs, Right click the Trash icon in the dock and select Empty Trash. But that’s not all that you have to do. Mac doesn’t have only one trash. Apps like iPhone/Photos, iMovie, and Mail each have their own personal trash cans. So go to each App, find the trash option and empty it.
2.Delete Unnecessary Language Files: Most of us use Macs with English as the default language. Yet there are more than a hundred languages on your hard drive. Deleting all unnecessary languages will recover 3.5 GB Space.
3.Delete old iTunes Backups: iTunes manages a lot of files. If you regularly back up through iTunes on your Mac, then you have multiple iOS device backups that are wasting your Mac space.
4.Remove Large File: By deleting the large files that are not in use, can also increase space in your Mac. A good place to start is Movies folder, your documents folder. Once you’ve removed the large files, be sure to empty the trash again.
5.Delete Large App: Apps normally takes a lot of space in iTunes, so it’s often a good idea to delete them if you do not need them. Open the application folder and change to List view. After that click on sort by Size to view the apps that are taking up the most space. If you don’t use these apps often then drag them to the trash.
All above tips will help you to free up your Mac Disk space. If still you are spacing problem in freeing you Mac Disk Space or for any other issues call our Operating System expert.

0 notes
Text
How to Access WhatsApp on PC?
WhatsApp is a million dollar Android app which is basically a cross-platform mobile-based messenger. With this messenger, you can chat and share images, videos etc with your family and friends. For using WhatsApp, all you need is a smartphone and an internet connection.

Unfortunately, there was no desktop version for WhatsApp but nowadays WhatsApp is available for PC. Yes, you heard it correct. There are few ways to install WhatsApp on PC and can be used it to its full extent.
So, here is how to access WhatsApp on your desktop:
How to install WhatsApp on PC:
Step 1: Download free Windows Application BlueStack.
Step 2: Once the download is finished, double-click on downloaded file; click continue and click install.
Step 3: Now Download WhatsApp APK File.
Step 4: After finishing the download process double-click on downloaded WhatsApp APK file.
Step 5: Now, WhatsApp will install in your PC.
Step 6: Now open Bluestacks by clicking its icon on your desktop.
Step 7: Now in Bluestacks-> click on My Apps
Step 8: Now you will notice WhatsApp-> click on it.
Step 9: Accept its term and condition.
Step 10: Type your mobile number with country code in the field provided.
Step 11: Now WhatsApp will try to verify your mobile number, but it will show fail message.
Step 12: Now click on call me> you’ll receive an automatic/computerized call with a confirmation number, write down that number.
Step 13: At last, type the received number in verification field and you’re done with it.
By following these steps you will surely able to download and install WhatsApp in computer But, still if you find it difficult call our Windows support expert.

2 notes
·
View notes
Text
5G Wireless Technology - the Future of Next Generation Mobile Network
As we know that mobile networks generally have a very short lifespan of 10 years and are recognized by their generation. Now a day’s our current mobile network is based on 4G technology but it’s also true that the major portion of the world still only getting 3G networks.
So are you thinking that 4g is the next generation in mobile network? If so, then there is great news for you.

The 5G wireless internet is the 5th generation mobile network that’s coming on the way for the internet lover’s with its excellent browsing speed.
In this article, we will discuss what is 5G? And why it’s being so important for us?
What is 5G wireless technology?
5G is the fifth generation of mobile telecoms technology. It’s the successor of the 4G network that is taking place nowadays. But still these networks are not present yet. According to the news report, The London capital’s mayor Boris Johnson said London will be ready to host the fifth generation technology by 2020.
How fast is 5G?
According to the experts, 5G technology promises mobile data speed that will provide the fastest home broadband network with speeds of up to 100 gigabits per second. It’s also being assumed that 5G will be as much as 1000 times faster than the 4G networks that will enable you to download a film to your iPhone in few minutes.
The future of next generation mobile networks:
The future of mobile technology is based on these three different views on which the 5G will improve its performance:
1. Super fast mobile network: This network will be consisting of lots of small cells that will be closely distributed in the 5G wireless network with contiguous coverage.
2. Super efficient mobile network: 5G will have a super-efficient mobile network that will give a much better performance for lower cost. It will also focus on lower latency, better quality and reliability of the mobile connection.
3. The Convergence of fiber and wireless network: This view will enable the 5G wireless internet that will include short wireless links at the end of the optical fiber cable with a very high-frequency speed up to 10 Gbps.
With the combination of all three different views, the 5G wireless technology will for sure bring much higher speed than ever before.
Are you excited for the future mobile wireless technology? Do write us. Even If you had any queries related to mobile network or internet connection problem feel free to contact our Internet support expert.

1 note
·
View note
Text
Why Internet Explorer is running slow?
Now a day’s, Internet Explorer is used less because of the many flaws and issues in it. Although Internet Explorer 7 was a surprise to the users as compared to its past, but still it is a “headache” to many users and forcing them to choose any other web browsers instead.
In this article, we will discuss some flaws which makes internet explorer slow.

Excessive Usage of Add-ons
The Internet explorer is widely used web browser and includes the various helper objects, toolbars and add-ons. To stop those unwanted add-ons follow these steps:
1.In Internet explorer menu, select Tools and then Internet Options.
2.Now, select the Programs tab, then the Manage add-ons.
3.If you want to choose the add-on that you want to disable then choose the add-ons and click disable.
4.Then, click OK to exist and restart Internet Explorer.
Usage of the Internet Explorer History Folder
In Internet Explorer the history folder stores all the previously visited websites. This records turn into the large data and occupy the memory space. Delete this unnecessary record can significantly improve the overall speed.
To delete the history:
1.In Internet Explorer menu, select Tools and then Internet Options.
2.For Internet Explorer 7, select Settings under Browsing History.
3.Then, change the Days to keep in History value to 0.
4.Click Ok to exit.
Or
1.For Internet Explorer 6, change the value of Days to keep Pages in History to 0.
2.Then click ok to exit and restart
Configured Internet Explorer Start & Search Pages
Spywares and adwares often changes start and search pages automatically. They are also responsible to redirect you to the site or pages where you never want to go. To fix this issue follow these steps:
1.At first do not directly open Internet Explorer. Instead, with all programs closed, right click on the Internet Explorer icon.
Note : Internet Explorer icon should not be a shortcut
2.Then, click properties.
3.When you see the Properties window pop up, click on the Program tab and opt to Reset Web Settings.
4.Click Apply and Ok to exit.
If your start page is still affected, then you must try for the third party spyware removing software, also if you find the problem unsolvable call our Internet Explorer Browser support team.

1 note
·
View note
Text
How to Add Logo Watermark on Videos in VLC Media Player
For adding a logo or watermark on playing videos in VLC Media Player, you can use the effects and filters that are available in VLC media. You can customize the position of the logo, set the transparency of the watermark. All these customization is possible through overlay video effect which allows you to load a .jpg or .png picture or logo.
Here are some easy steps that are necessary to add logo / watermarks on videos in VLC Media Player:
Step1: In the Main menu bar, click on Tools-> Effects and Filters. (Ctrl + E)

Step 2: Now, Click on the tab “Video Effects” and then go to the tap “Overlay”.

Step 3: Check the “Add Logo” Checkbox.
Step 4: Then click the three dots besides the logo textbox. Now, browse and open the overlay image.
Step 6: You can use the “Top” and “Left” option to specify the position of the image.
Step 5: For the logo transparency, drag the “Transparency” bar from full towards none to increase transparency.

To add a text overlay:
Step 1: Now, in overlay video effects check the box “Add text”.
Step 2: Now, input the text in the available field.
Step 3: In the position dropdown, choose a position like “Left”, “Right”, ”Top-Left”, and “bottom-left” etc.

In this article, you came to know how to add watermark on video. If you have any other issues, regarding VLC Media Player that seems unable to solve, call our Multimedia Support Team.

0 notes
Text
How to Use Electronics at Bedtime Without Affecting your Health?
Do you often check your phone at night? Is it a common habit to check your instant messenger on your smartphone every night before sleeping? Are you in the habit of reading the e-book before sleep?
According to Scientists, a Research on urban residents has come up with the conclusion that electronics, especially the one used at late night have bad effect on health. As per the Harvard Medical School, it can result in Rapid Eye Movement. If you want to safe your health against disorder and want to peacefully sleep, then it’s important to understand the negative effects of smartphones on health and to use these electronics in proper manner.
Here are some tips to use electronics at bedtime without affecting your health:
Practice daily Meditation: Meditation has great benefits. It not only cleans you spiritually but also helps you relax physically and mentally. There is no specific time for these sessions; you could mediate anytime and at any place. All you need to learn is to relax and keep stress away.

Wear amber-lensed goggles: Amber-lensed goggles limit the blue-light exposure to your eyes and help you relax, especially when you are preparing to sleep. Melatonin shades are very popular and effective; they are affordable. So try to switch on your laptop or mobile device, only after you have put on these goggles.

Install blue-blockers Programs: Blue-blocker computer programs are mainly for the readers who simply can’t put away their electronic readers and smart device. These programs make the color of the computer’s display adapt to the time of day and night. They are simple to install and use and are compatible with Mac machines, PCs, iPhones and several Android-based devices as well.

Limit your electronics time at night: It’s always a best practice to limit your electronics time at night. Sleeping should not be your regular activity; it should be something that can actually relax your body and mind and easily prepare you to handle stress the next day.

Electronic devices and sleep cannot go together but with proper understanding and usage you can stay away from the harmful effect of the electronic devices. These tips will surely help you to stay connected with your electronic device without affecting your health. Do not miss to share these tips with others, if you have any other tips feel free to share with us.

#Electronic effect sleep#Negative effects of smartphones on health#Harmful effect of the electronic devices
0 notes
Text
Tips to Troubleshoot Bluetooth Connectivity Problem of Windows 8.1 OS
If you have recently upgraded you Windows 8 PC with Windows 8.1 OS, then there may be a chance to encounter with Bluetooth connectivity problem. In such situation users cannot establish active Bluetooth connection with their already paired devices. ‘Connection Failed Message’ or ‘Cannot find the Device Message’ are the common messages that appear then.
This article will help to troubleshoot the connectivity problem of Bluetooth devices with your latest Windows 8.1.
If the paired Bluetooth device is not showing in the PC or tablet then this error occurs due to connection error of Bluetooth keyboard, mouse or headphones. In this situation an error message will flash on the computer screen, verifying the status of the Bluetooth devices by using Device Manager Application.
If this feature is ‘Disabled’, make it ‘Enable’ for further steps:-
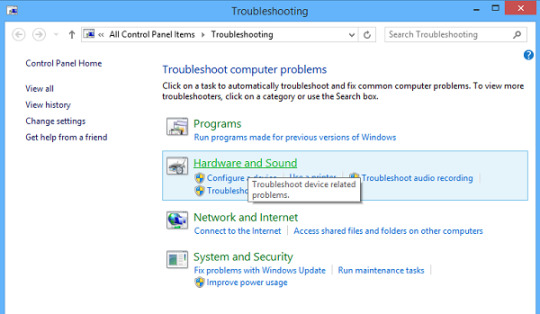
1.Run the hardware and troubleshoot the device: - The built-in hardware troubleshooter of the PC can scan the connection problem such as whether hardware is properly installed or not and new devices are properly configured or not. For this-
Press the ‘Windows+W’ key >> in the Search Box ‘Type Troubleshooter’ >> Hit ‘Enter’>>Click on ‘Hardware and Sound’>> Now click ‘Run the Hardware and device troubleshooter’.
2. To check whether the related services have been started and are running smoothly in your system or not-
Press Windows key + R>> type Services.msc. On command prompt>>Right click on Bluetooth Support Service >> Restart your System.

Now Right click on Bluetooth Support Service >> select Properties >> now to ensure startup type select ‘Automatic’.

3. Verify whether the settings of Bluetooth speaker are enabled or not, if not then make them enable by using following steps:-
Press Win+X key >> select Control Panel>>select Devices and Printers. In Devices and Printers find the Bluetooth speaker device and right click on that device>> Click on Properties>> switch to Services tab.
From this list select ‘Hands free Telephony Gateway’, ‘Audio Sink’ and ‘Remote Control’ >>click on Apply.

4.To update Bluetooth device driver use the Device Manager. Press Win+R>> Type ‘devmgmt.msc’ on the command prompt to open the Device Manager>> Expand Bluetooth option

Now Click on Properties>> click on Driver tab>>Click Update Drivers button

Now click on OK tab to complete the process.
These tips may help you to troubleshoot Bluetooth connectivity problems. The Bluetooth service of any PC requires association and discovery of remote Bluetooth devices and by stopping or disabling this service mistakenly may cause the connection problem of installed Bluetooth devices. Therefore, it is necessary that all properties of Bluetooth services and its related devices should be enabled. After troubleshoot the connection problem of your system you can easily share files and folders with Windows 8.1 OS.
If performing these step on your own seem to be too much or for some reason they are not doing the trick, calling PC / laptop optimization experts to do that for you is the only thing that remains.

#Troubleshoot Bluetooth Connectivity Problem#Bluetooth Connectivity Problem of Windows 8.1 OS#Bluetooth connectivity problem
0 notes
Text
How to Use Free Dropbox on Windows Phone?
Dropbox is a popular free cloud storage service that allows us to store, access and share files. Anything that is added to Dropbox automatically shows up on all your computer, phones and Dropbox website. This means we can access our stuff from anywhere and anytime.
This article will show you what you can do with the Dropbox app on Windows Phone.
How to download and install Dropbox?
To get Dropbox app on your Windows Phone, open Store and search for “dropbox”.

The Dropbox official app will open first when you type its name, select Install and download on your Windows Phone.

Once the Installation is done, the Dropbox app will be listed in your Windows Phone Appscreen.

How to connect and browse Dropbox account?
When Dropbox open for the first time, it gives a short welcoming presentation. After that, create a new Dropbox account.

Now, wait for the app to connect to your Dropbox account. Once it is connected, you can see all the files stored on your Dropbox account.
The Dropbox app is divided into three main sections: Files, photos, and favorites. To open any section, tab their icons in top menu bar.
Files: Files has a default view of the Dropbox app that allows you to see every file and folder shared with you by someone else.

Photos: The photos screen section display all the images stored on your Dropbox account from different folder.

And the final section, Favorites, display all your favorite files of any kind; that you selected as favorite files.

How to upload picture to Dropbox?
To upload pictures from Windows Phone to your Dropbox account, all you need to do is switch to the Files screen and browse to the folder to upload picture. Then, tap upload button.

Now the Choose picture screen opens, from where you can select the picture to upload. Once you tab a picture from smartphone, its upload process begins.

Hope you have got the way to use Dropbox in your Windows phone. What do you think about the Dropbox app? Feel free to write us also if you have any problem contact our Email support team

#dropbox on windows phone#download and install dropbox#upload picture to dropbox#connect and browse dropbox
0 notes
Text
How to hide drive partition in Windows?
Protecting data from unauthorized access has always been a matter of importance. Before encryption came in light, hiding data was the way to secure it. Hiding doesn’t mean to delete the data; it simply means to prevent that partition from displaying to the unwanted users. Though this is not a foolproof way to protect data, this can be done on certain scenarios like when you are lending your laptop to someone or you want to quickly hide some information’s etc. Here in this an article we are going to discuss two different ways to hide drive partitions in Windows. Hide Drive Partitions Using Command Prompt
Hiding a drive partition with command prompt is quiet simple, you just need to follow few steps. 1. First of all press Win + R and type “cmd” then press enter. When command prompt opens, type “diskpart” and press enter.

2. This will open Diskpart console. Now enter “list volume” to list all the drives.

3. Now you can see all the volumes, select the one here that you want to hide and don’t forget to replace “#number” with your actual drive number. For example, if you want to partition D drive the number will be 3.

4. After selecting the drive it is required to remove the drive letter in order to hide the targeted drive. Here also don’t forget to replace “driveLetter” with the actual drive letter. The drive letter here will be D.

5. When the above command is executed the drive will be hidden and is no longer visible.

Hiding Partition from Disk Management
1. First of all open Disk Management and access the Disk Management section. Here you can see the list of all partitions that are present in your system.

2. Right click on the targeted partition that needs to be hidden and select “Change Drive Letter Paths”.

3. Now in the Change Drive Letter Paths” window select “Remove” button.

4. Here you will asked to confirm the removal. Click on yes.Now the partition is hidden and will not be visible until it is unhidded.
if still you are facing problem, contact our Operating System Support Team.

0 notes
Text
Best 4 Ways to Extend Your Laptop’s Life
User often replaces their Laptop prematurely, just because it has become unresponsive or suffered some damage. Laptops are just portable computer that bring along some risk such as- of getting dropped, spilled on, hardware damage and so on. Usually lifespan of a laptop is short but you will love to hear that there are many ways to increase that.
1. Handle laptop with care: Laptops are breakable device. Although the damage cause due to regular use of the device but there are some ways to minimize the risk by handling laptop with care. Therefore, always hold laptop by its base and not by its LCD screen; keep liquids away from the laptop. Shutdown your laptop when not required.

2. Clean laptop hardware regularly: To have a long life for your laptop, try to keep it clean regularly. As laptop fan can accumulate dust it can make the device weaker. Regularly cleaning your laptop not only keeps the device dust-free, but also prevents it from overheating and increase it lifespan.

3. Update software and Operating system regularly: If laptop is working slowly, don’t try to change it with new. The problem could be the bad maintenance and poor operating system. Therefore, to increase its performance and life span, user must always keep the operating system upgraded with latest version and install it with updated software.

4. Upgrade laptop hardware: If you have less space in your device and are facing performance issues then, you should consider installing larger hard drive, increase its RAM or Solid state drive. This will help you to increase your performance issues and laptop long run.

Just follow these simple ways and you will be able to make your laptop run better and last longer. If you have any other suggestions, feel free to write us or for further queries call diagnosis and repair team

#Extend lifespan of laptop#upgrade laptop hardware update laptop operating system#Increase laptop lifespan
0 notes
Text
How to use VLC media player for screen recording and screen capturing?
As we all know VLC is one of the most popular media player used by numerous users. But not all of us are aware that VLC can do much more than just playing audio and video of different formats. VLC can also be used as online video downloading software, audio editor or auto shut down of the system once the track is finished. One more such feature is that you can use VLC as screen capture or screen recording software in order to save all your screen activities in a video format. Here are the steps to do this.
Steps to use VLC media player as screen recording software
• STEP 1: First of all download VLC media player and install it on your system.
• STEP 2: Open VLC menu, click on Media and then select Open Capture Device.
• STEP 3: A convert dialog box will appear, click on the Capture Device tab and desktop. Now set the frame rate also.
• STEP 4: Next click on the Arrow icon and select Convert.
• STEP 5: Now select a video and audio output format from the drop down menu.
• STEP 6: Click on settings and choose Video Codec tab, set the bit rate value as 2000 kbps. Now save the settings.
• STEP 7: In the convert dialog box, click on the Browse button and type a name for the output file, now save it.
• STEP 8: At last click on Start to record the desktop video.
Though VLC record screen is quiet an interesting feature in VLC but there are some limitations too that must never be ignored.
Limitations to be always kept in mind
1. There is no option to use your voice in the screencast. To do so you will have to record the voice separately and stream it with the desktop recording. Clicking on recording now will save the audio along with the screencast.
2. You will have to record your entire desktop. There is no option to record a part of it.
By learning the above steps, you would have understood that VLC screen recording is not that tough, but if you face any kind of problem, feel free to contact our Multimedia support team.

0 notes
Text
How to troubleshoot wireless router internet connection problem?
“Internet is so slow.” “Streaming video from phone to HDTV is impossible.” “Tablet won’t connect to router”. These are some of the common problems user face with their home networks and wireless connections. Although Setting up a home router seems to be easy, but to keep it running is much more complicated.
Here are some common wireless internet connection problems and their troubleshooting tricks that you can try before you call technical support expert.
1. Router won’t connect to the Internet:
Solution:
1. Unplug the network cables, coaxial cable, DSL or FiOS and power from the broadband modem. Leave everything unplugged and disconnected for at least 30 seconds.
2. Reconnect the coaxial cable, DSL, or FiOS connection to the broadband modem.
3. Now, wait until the WAN/internet light is on.
4. Then, attach all cables to the router and power the router on.
5. Make sure the internet connection activity light in on.
2. Router setup software won’t detect the router:
Solution:
1. Connect an Ethernet cable from computer to one of the LAN port of the router.
2. Now, go into networks settings.
3. In Windows 7 and 8 go to Control Panel->Network and Internet->Network and Sharing Center->Change Adapter Settings.
4. Then, right click Local Area Connection and select properties. Double click Internet Protocol Version 4 (TCP/IP v4).
5. In TCP/IP v4 window that opens, click the radio button and select “Use the following IP address”.
Note: If the default IP of the router is “192.168.1.1” then you should type in “192.168.1.2”. This prevents IP address conflict with the router while placing them on the same network.
3. Wireless network name / SSID Disappeared
Solution:
1.Try to connect the computer to the router even if it’s not broadcasting. For Windows, go into Control Panel->Network and Internet->Network and Sharing->Manage Wireless Networks.
2. If your wireless network is listed, right click on its icon and click properties. Check the option “Connect even if the network not broadcasting its name(SSID)”
Or
If your wireless network is not listed, click “Add” then select “Manually connects to a wireless network” and insert your wireless information in.
4. Signal drop while shifting to different place
Solution:
1. Physical interference is main cause of wireless signal to drop. Firstly check if all your devices and computer do not detect signal at the same location or in all location. If it’s all, chances are the problem lies with the router.
2. If so, consider an external antenna for the router.
3. Check for router-firmware updates and wireless extender.
4. If one specific machine is dropping the signal, update the firmware for that machine’s wireless client adapter or upgrade to a new adapter.
Analyzing these problems can help you solve some of the issues. But, there are many such issues that cannot be solved at your end. If you are facing problem, keep calling your Internet Service provider and if they are unable to solve the problem call or contact our Network troubleshooting team.
0 notes
Text
How to Recover Your Wi-Fi Password if Forgotten?
Routers protect their web interfaces with the help of username and passwords and these can be changed if required or to protect router’s settings.
If however, you have forgotten your Wi-Fi password or you have acquired a router and don’t know its password then the question arises how to find WiFi password? Don’t worry there are ways to recover Wi-Fi password but the ways are different in different operating systems.
In Windows:
There are many apps in the market that claims to reset your Wi-Fi password but you don’t need them on Windows PCs. You can recover your WiFi password on Windows by following the below steps but remember these steps works only when the security setting is set to personal.
1. First of all go to start->control panel->network and sharing centre. 2. Then click on the change adapter settings. 3. Right click the wifi network and then on status. 4. Then come to the wireless properties. 5. Click security tab. 6. Now you can see the name of the wifi network that you are using and the invisible password. 7. Click show characters and the password will become visible.
In MAC:
In MAC you can discover your password through the keychain Access app.
1. Firstly go to Applications Utilities. 2. Open the Keychain Access app and system keychain. 3. Search the wifi network that you are using by typing its name in the search box. 4. Now double click on the name of the network. 5. Check the password option. 6. Enter the user account password if asked and then you will get the Wi- Fi password.
On the router’s configuration webpage:
If you can somehow connect your system to the internet, then you can try this:
1. Open up your browser. 2. Enter the IP address of your router in the search box. 3. Look for the router’s default IP address in the documentation. Here you can get the default username and password. 4. Use this username and password to open router’s configuration webpage. 5. Now look here for wireless settings option. 6. Now see the wireless encryption settings, you will get the password.
Following the above steps you can reset your Wi-Fi password and can use it as before. But Still if you are unable to resolve the problem. You can take advice from our online Network support team.
#how to find wifi password#recover wifi password#recover wifi password for windows#recover wifi password for mac
0 notes
Text
Improve PC Performance by Disabling Windows 7 System Services
Many services run continuously in the background and perform certain task on their own in Windows 7. By disabling these unnecessary services, your PC can optimize windows 7 for better performance. In this post, we’d describe the process of disabling Windows Services.
How to disable services in windows 7?
Before starting and stopping any services, it’s important to know its features so that, it doesn’t interrupt any Windows features or background task. But, if you know the nature of services, feel free to disable it for better performance. Here are the tips to disable services in Windows 7:
Step1: To start or stop services or to, choose its Startup type: open the Services dialog box by searching for “Services” in the Start Menu search field.

Step2: The list of local services will appear. Now, double-click the required services to open the properties dialog box.

Step3: If you don’t want the services to automatically run and consume system resources, then change the startup type to Manual and click ok.

Step4: Now you can easily Start, Stop, Resume, Pause and Restart the services at any time.

Save-To-Disable System Services: The list below shows multiple services which are safe to disable. But before disabling any services, remember to read the service description carefully. If you have any doubt about the effect of disabling any services, it’s better to keep it unchanged. 1. Adaptive Brightness 2. Windows Time 3. Secondary logon 4. Offline Files 5. Portable Device Enumerator Service 6. Bluetooth Support Service 7. BitLocker Drive Encryption Service 8. Encrypting File System 9. Computer Browser 10. Certificate Propagation 11. Microsoft iSCSI Initiator Service 12. Netlogon 13. Parental Controls (in Windows 7) / Family Safety (in Windows 8) 14. Remote Desktop Configuration 15. Remote Desktop Services 16. Remote Desktop Services UserMode Port Redirector 17. Smart Card 18. Smart Card Removal Policy 19. Windows Connect Now 20. Windows Firewall 21. Windows Error Reporting Service 22. Remote Registry 23. Windows Defender
Note: Do not disable too many services at once; before disabling services take time to understand their functionality. Avoid disabling those services which are dependent on other services. If your system performance doesn’t improve, feel free to write us or call our technical support team.
#Windows 7 system services#Disable Windows services#improve pc performance#improve computer performance#disable system services
0 notes
Text
How to Enable and Disable Cookies in Browser?

What are cookies on computers?
Cookies are small encrypted text files that web server pass to your web browser when you visit the internet sites. The browser stores each cookie in a small file called cookie.txt. These files typically hold the information about your visits to the different web page. They are mainly used by the web developers to help users navigate their websites efficiently and perform certain functions.
What's in a Cookie?
When you access certain website, a small file with letter and number is downloaded on the computer, which allows a website to recognize you when you return to a site. Cookie files are automatically lodged into the cookie file that contains:
· The server name from where cookie was sent.
· The lifetime of the cookie
· A randomly generated unique number
The web server that sent this cookie uses this unique number to indentify you whenever you return to a site or browser from different page.
Why is Cookies Used?
Cookies are a convenient way to carry information from one session to another on a website or between sessions on related sites. Cookies are also used to distinguish you from other user to provide better functionality and services.
How long does Cookies exist?
By default the Cookie is destroyed when the current browser window is closed, but it can be preserved for an arbitrary length of time. The time of expiry can be set even when cookie is created.
How Secure are Cookies?
Cookies are plain text format, not viruses. They cannot be executed. They even cannot make their replicate file or spread to other network to execute.
Check your web browser setting to make sure you allow third party cookies. For enabling cookies, please select your current web browser:
· Mozilla Firefox
· Internet Explorer
· Google Chrome
· Opera Mini
If you are enable to allow or disallow cookies in your web browser or having any other issues on browser, feel free to contact our browser support team.
#enable cookies#enable cookies in different browser#what are cookies#enable or disable cookies#cookies in computer
0 notes
Text
OpenSSL Heartbleed Bug: What it is?
Heartbleed bug is a fault in Open SSL, the open source encryptionstandard that is used by a large number of sites on the web to transmit data safely and securely. It actually provides you a secure line when you are sending emails or messages.

It is important to know that Heartbleed is not a virus but a mistake in Open SSL. This mistake makes it possible for the hackers to extract data from the large database, which include username, passwords, and other confidential information.
How does Heartbleed bug work?
OpenSSL Heartbleed vulnerability lets a hacker access up to 64 kilobytes of server memory and carries out the attack again and again to gather lots of information. This means the hacker will not just know the username and password but also the cookie data that is used by the web servers and browsers to identify a person and allow log in.
If the attack is being done repeatedly then the site’s private SSL key could also be at risk which means that the hacker may use that key to create a fake website and steal different kind of information that includes credit card details, bank details, and other private messages.
Conditions when Heartbleed can’t infect you.
Although OpenSSL is the most used one but there are other SSL options too. Also some web sites use an older uninfluenced version of the OpenSSL. All these web sites are not affected by the Heartbleed or you may say
You are not vulnerable to Heartbleed if you are:
· Not using Open SSL
· Using OpenSSL without the Heartbeat function enabled
· Using OpenSSL 1.0.0 or some other older version
How to do a Heartbleed bug check?
If you are using OpenSSL and you want to know whether you are infected with the Heartbleed bug you may use the Trend Micro test Tool to check the bug. You may also run a full vulnerability scan of Trend Micro Deep security web apps on your web applications to check for the Heartbleed bug.
0 notes