#How to clear disk space on mac
Explore tagged Tumblr posts
Visit Tumblr Blog
Explore Tumblr blogs with no restrictions, modern design and the best experience.
Last Seen Tumblr Blogs


Fun Fact
In 2020, 44% of users from Denmark used Tumblr daily.
Text
I have done battle with my hard drive.


After two years, I've finally hunted down and destroyed the phantom file that's been haunting my computer.
Some backstory: I run Windows, mostly because I don't like the Mac UX, and when I set up this laptop in high school I didn't know enough about Linux to actually get that set up.
However, Windows is generally unsuited to science, especially in a field where everything gets built for Unix. As such, I've been using the Windows Subsystem for Linux (WSL) for all of my work.
Windows doesn't purely allocate hard drive space to WSL. Instead, it uses an adaptive system, where the wsl extension serves as a virtual disk that can take more memory when it needs it. If I had known how this worked two years ago, I wouldn't have been scraping by on 15 gigs for years.
Because the wsl virtual disk doesn't yield that disk space back if you clear out files in wsl. So, when as a sophomore in college doing your first real research, you accidentally tell a simulation to log its status every second of simulated time instead of every day, the 80-gig log file it produces demands a bunch of space from wsl, which expands its extension on the disk, and stays there even after you delete the file.
It's taken me several tries of digging through filesystems to actually turn out that space, but at last I've reclaimed my storage space.
#i really should switch to linux proper at some point#but who knows when I'll actually do that#windows subsystem for linux
3 notes
·
View notes
Text
Simon The Sorcerer Origins Release News and Updates

Simon The Sorcerer Origins the long-awaited prequel to the cult classic point and click adventure game is due to release on Linux, Steam Deck, Mac, and Windows PC. Thanks to the creative talents of developer Smallthing Studios. Working to find its way onto Steam.
Get your penguin-powered rigs warmed up, adventurers—because the Simon The Sorcerer Origins release is almost here, and it’s shaping up to be the magical comeback we never dared hope for.
A Spell Cast Three Decades Ago…
Remember firing up the original Simon the Sorcerer back in the ’90s, pointing, clicking, and cackling at every snarky one-liner? ININ Games and the wizards at Smallthing Studios are yanking us straight back into that realm, only this time we’re digging into Simon’s very beginnings. Mark October 28, 2025 on your calendar (and set that remind-me cron job, you know the drill): that’s when the prequel lands worldwide on Linux �� yes, Steam Deck too — in line with the Simon The Sorcerer Origins release.
Limited Edition Extras (Pony DLC Included!)
Collectors, start stretching those wallet muscles. A Limited Special Edition—packed with the tongue in cheek “Pony” DLC—is already up for pre-order at ININGAMES.COM. There’s only so many boxes to go around, so if you want that shiny physical goodness next to your boxed copy of Quake and your plush Tux, hop on it fast. Excitement is building around the release of Simon The Sorcerer Origins.
Voices You Grew Up With
Nothing short of sorcery: the original English and German voice actors are back. Chris Barrie reprises sarcastic Simon—yep, the same vocal chords that filled our CRT speakers in 1993. German fans get Erik Borner returning to drop wizardly zingers in their own tongue. Hearing them banter again feels like a time-travel potion with a powerful nostalgia kick, much like the release of Simon The Sorcerer Origins is meant to do.
A Soundtrack to Quest By
Composer Mason Fischer is scoring the adventure with new tunes that swing from whimsical lute plucks to goose-bump-raising crescendos. And if that wasn’t enough to melt your floppies, music legend Rick Astley pops in for a secret cameo. (We see you humming “Never Gonna Give You Up.” Don’t fight it.) Point and click adventure fans are eagerly awaiting the music featured in the Simon The Sorcerer Origins release.
The Sorcerer Origins - Release Announcement
youtube
Why the Simon The Sorcerer Origins release Matters
Helmut Schmitz, Head of ININ Games, didn’t hold back: “The Simon The Sorcerer series shaped the entire adventure genre. We’re honored.” Meanwhile, Smallthing Studios founder Massy Calamai practically burst into pixels: “Over thirty years later, the curtain is opening again!” Translation? The devs know exactly how much this franchise means to us, and they’re treating it with the reverence of a sacred save-file, with the upcoming debut.
Hand-Drawn Magic Meets Modern Convenience
Expect hand-drawn environments that ooze ’90s charm, plus classic puzzle design—no spoon-fed quest markers here, comrades! But don’t worry: modern shortcuts (think flexible save slots and slick UI scaling) keep it Steam Deck friendly for couch quests and Linux desktop play alike. All this comes together with the much-anticipated release of Simon The Sorcerer Origins.
Sarcasm, Wizards, and Community
From the very first insult you sling at a bumbling ogre, you’ll realize Simon’s trademark sarcasm is alive and well. Add in clever brain-twisters, emotional story beats, and a few fourth-wall smashes, and you’ve got a recipe for the kind of late-night Discord chatter we live for. The community is abuzz with anticipation for the release of Simon The Sorcerer Origins.
Simon The Sorcerer Origins release date
So grab your favorite distro, clear some disk space, and get those point and click fingers limbered up for adventure. The official date for game launch is on October 28, 2025. It's also more than a nostalgic nod—it’s a full-blown love letter to everything that made ’90s adventure gaming magic. Coming to Linux, Steam Deck, Mac, and Windows PC. So be sure to Wishlist it on Steam.
#simon the sorcerer origins#point and click adventure#linux#gaming news#smallthing studios#ubuntu#steam deck#mac#windows#pc#Youtube
0 notes
Text
Optimize Your Mac: Fix Common Issues
Introduction to Mac Performance Challenges
Every Mac user eventually faces performance hiccups that can disrupt their workflow. Two common issues that arise are running out of storage space and browser crashes. These problems can slow down your system, cause frustration, and hinder productivity. Fortunately, with the right approach, you can resolve these challenges and keep your Mac running smoothly. This article explores practical solutions for addressing storage shortages and browser errors, ensuring your device performs at its best. By following these steps, you can reclaim space, stabilize your browsing experience, and maintain a seamless user experience.
Addressing Storage Shortages
One of the most frequent notifications Mac users encounter is a warning about limited disk space. How to Fix Your Startup Disk Is Almost Full on Mac is a critical skill to master. When your startup disk is nearly full, your system struggles to function efficiently, leading to sluggish performance and potential crashes. To resolve this, start by assessing what’s consuming your storage. Navigate to the Apple menu, select "About This Mac," and click on the "Storage" tab. This provides a breakdown of your disk usage, highlighting areas like documents, apps, and system data.
Begin by deleting unnecessary files. Check your Downloads folder for old installers, PDFs, or media files you no longer need. Empty the Trash afterward to free up space permanently. Next, consider offloading large files to an external drive or cloud storage. Photos, videos, and backups often take up significant space, and relocating them can make a big difference. For a deeper clean, use the built-in storage management tool to identify and remove redundant system files, such as old caches or logs. Regularly clearing these files prevents your disk from filling up again.
Another effective strategy is to uninstall unused applications. Some apps, especially those with large data files, can occupy gigabytes of space. Go to the Applications folder, drag unneeded apps to the Trash, and empty it. If you’re unsure about an app’s dependencies, use a third-party uninstaller to ensure no residual files remain. By consistently managing your storage, you can prevent the startup disk from reaching capacity and maintain optimal performance.
Stabilizing Your Browser Experience
Browser issues can be equally disruptive, particularly when you rely on the web for work or leisure. How to Fix Safari Web Content Quit Unexpectedly on Mac is a common concern for users facing frequent crashes. This error occurs when the browser’s web content process fails, often due to corrupted data, conflicting extensions, or insufficient system resources. Resolving this issue requires a systematic approach to identify and eliminate the root cause.
Start by clearing your browser’s cache and cookies. These files accumulate over time and can cause instability. Open your browser, go to the History menu, and select "Clear History." Choose to clear all data, including cookies and cache, to reset the browser’s temporary files. This simple step often resolves crashes caused by corrupted data. Next, disable or remove unnecessary extensions. Extensions enhance functionality but can conflict with web pages or consume excessive resources. Access the Extensions menu in your browser’s preferences and turn off or delete any you don’t actively use.
If crashes persist, check for software updates. An outdated browser or operating system may struggle with modern web content. Go to the App Store or System Preferences to ensure both are up to date. Updates often include bug fixes that address stability issues. Additionally, consider resetting your browser to its default settings. This removes custom configurations that might be causing conflicts. Be aware that resetting erases saved passwords and preferences, so back up any critical data beforehand.
Preventing Future Issues
To avoid recurring storage and browser problems, adopt proactive habits. Regularly monitor your disk space using the storage management tool and delete unnecessary files monthly. Schedule backups to an external drive or cloud service to keep your startup disk lean. For browser stability, limit the number of open tabs and clear cache periodically. Avoid installing unverified extensions, as they can introduce vulnerabilities or performance issues.
Advanced Optimization Techniques
For users comfortable with advanced tools, consider using disk utility software to analyze and repair file system errors. These programs offer detailed insights into storage usage and can identify redundant data that manual methods might overlook. Similarly, monitoring system performance can help identify resource-heavy processes that impact browser stability. Activity monitoring tools built into macOS can identify processes consuming excessive memory or CPU, allowing you to terminate them and prevent crashes.
0 notes
Text
Why Won’t Cricut Design Space Open on My Computer: Fixed

Are you wondering why won’t Cricut Design Space open on my computer? Are you encountering issues when opening Cricut Design Space? Don’t worry, you are not alone. Many users face this issue when they try to open Cricut Design Space. Several reasons can cause this problem, including third-party software interference, incorrect network settings, and corrupt files.
In this guide, you will get the answer to your question – why won’t Cricut Design Space open on my computer? We are sure you will be able to open Cricut Design Space on your computer after reading this guide. So, without wasting your valuable time, let’s delve into it.
Why won’t Cricut Design Space open?
How to Fix Cricut Design Space Won’t Open Issue
In order to fix Cricut Design Space won’t open issue, follow the steps given below:
Step 1: Confirm Your Computer Meets the Minimum System Requirements
Your Windows or Mac computer should meet the minimum system requirements for using Cricut Design Space. If it doesn’t, it could be the reason why won’t Cricut Design Space open on your computer. Upgrade your device to meet those requirements.
Below are the minimum system requirements for using Cricut Design Space:
For Windows
Operating System: Windows 10 or later*
CPU: Intel™ Dual-Core or equivalent AMD® processor
RAM: 4GB
Disk Space: Minimum 2 GB of free disk space
Connection: An available USB port or Bluetooth connection
Display: Minimum 1024px x 768px screen resolution
Internet connection: Minimum 2-3 Mbps Download and 1-2 Mbps Upload
For Mac
Operating System: macOS 12 or later*
CPU: 1.83 GHz
RAM: 4GB
Disk Space: Minimum 2 GB of free disk space
Connection: An available USB port or Bluetooth connection
Display: Minimum 1024px x 768px screen resolution
Internet connection: Minimum 2-3 Mbps Download and 1-2 Mbps Upload
Step 2: Restart Your Device
A simple restart can fix lots of problems. When you restart your device, it clears out temporary files and frees up memory. In order to restart your device, follow the steps given below:
For Windows
To restart your Windows device, follow these steps:
Firstly, click the Start button.
Then, select the Power icon.
Choose Restart.
For Mac
To restart your Mac, follow the steps below:
Click the Apple menu in the top-left corner of the screen.
Then, choose Restart.
Step 3: Force Reload Cricut Design Space
You can also fix Cricut Design Space won’t open issue by forcing a reload. Sometimes, slow speed can cause the Cricut Design Space won’t open issue. A force reload can solve the problem.
In order to force reload Cricut Design Space, follow the steps given below:
Open the Cricut Design Space app.
Then, find the system menu in the top left corner.
After that, select the View option.
Lastly, select Force Reload from the dropdown menu.
If your Cricut Design Space still won’t open on your computer, move to the next step.
Step 4: Uninstall and Reinstall Cricut Design Space
Whether the Cricut Design Space is out of date or has had an issue, you can fix these most common errors by simply uninstalling and reinstalling it. Here are the steps on how to uninstall and reinstall Cricut Design Space.
How to Uninstall Cricut Design Space?
If you want to uninstall Cricut Design Space from your computer, follow the steps below:
For Windows
Firstly, make sure that Design Space is closed. If it is not closed, the application will not be uninstalled properly.
Select the Start icon and search for Programs.
Then, choose the option Add or remove programs. This will open the Apps & features window.
Type Cricut in the search field and choose Cricut Design Space from the list.
After that, select the Uninstall button.
A pop-up will show up on the screen asking, “Are you sure you want to uninstall Cricut Design Space?”. Select OK to uninstall Cricut Design Space.
The system will finish the uninstallation process. If prompted, restart your computer.
For Mac
Open the Finder and select Applications.
Then, drag the Cricut Design Space from the Applications to the Trash.
After that, right-click on the trash and select Empty Trash. You can also open the trash, click on the gear icon, and then select the Empty Trash option.
Next, click Empty Trash to confirm that you want to permanently delete the trash items.
Finally, the system will finish the uninstallation. If prompted, restart your Mac.
How to Reinstall Cricut Design Space?
Here are step-by-step instructions on how to reinstall Cricut Design Space.
For Windows
Go to the official Cricut Design Space website: Cricut.com/setup.
After that, type your machine model in the search field and select your device.
Select the checkbox confirming you agree to Cricut Terms of Use and Privacy Policy. Then, click on the Download button.
Once the downloading is complete, double-click the file in your browser or Downloads folder.
If a window opens asking if you trust the application, confirm that you trust the app.
Now, an installation progress window will appear.
Next, sign in with your Cricut ID and password.
Finally, you have successfully reinstalled Cricut Design Space on your computer.
For Mac
Visit the Cricut Design Space website: cricut.com/setup.
Then, enter your Cricut machine model in the search field and select your device.
Next, check the box to agree to Cricut Terms of Use and Privacy Policy. Then, click the Download button.
Select a location to save the file (By default, it will show the downloads folder). Click Save to start the download.
Now, the file download will start.
When the download is finished, go to the downloads folder. Then, double-click on the downloaded file.
A new window will appear. Drag the Cricut icon into the Applications folder icon to start the installation process. After this, Cricut Design Space for Desktop will be automatically added to your Applications folder.
Then, double-click on Cricut Design Space in your Applications folder in order to launch Design Space for Desktop.
A window will appear asking if you want to open the application downloaded from the internet. Click the Open button to continue.
Lastly, sign in with your Cricut ID and password. With this, you have successfully reinstalled Cricut Design Space on your Mac.
Conclusion
If you are wondering why won’t Cricut Design Space open on my computer. Don’t worry; you are not the only person facing this issue. Many Cricut Design Space users encounter this issue at some point. The Cricut Design Space won’t open issue can be caused by several reasons. The good thing is you can fix it easily in a few minutes.
By following the above-mentioned steps, you will be able to fix Cricut Design Space won’t open issue quickly. Make sure your Windows computer or Mac meet the minimum system requirements, restart your device, and force reload Cricut Design Space. If the issue is still there, try uninstalling and reinstalling Cricut Design Space.
Thank you for reading this post. We hope you find this guide helpful in understanding why won’t Cricut Design Space open on your computer and how to fix Cricut Design Space won’t open issue. Please stay connected with us for more tips and guides to make the most of your Cricut.
Source: why won’t Cricut Design Space open
#why won’t Cricut Design Space open#cricut design space won't open#cricut design space download#cricut design space app#cricut design space software#Cricut Setup
0 notes
Text
How to install Office 365 from portal.office.com on Mac?
Microsoft Office 365 is an essential suite of productivity applications that includes Word, Excel, PowerPoint, Outlook, and more. If you own a Mac and need to install Office 365, the process is straightforward and can be completed via the official Microsoft portal: portal.office.com. This guide will walk you through the steps required to install Office 365 on your Mac efficiently.
System Requirements for Office 365 on Mac
Before installing Office 365, ensure that your Mac meets the minimum system requirements:
Operating System: macOS Monterey (12), macOS Big Sur (11), macOS Catalina (10.15), or later.
Processor: Intel or Apple Silicon (M1/M2) with Rosetta 2.
RAM: At least 4GB.
Storage: Minimum of 10GB of free disk space.
Internet Connection: Required for downloading and activating Office 365.
You can check your macOS version by clicking Apple Menu > About This Mac.
Step-by-Step Guide to Installing Office 365 on Mac
Step 1: Sign in to Your Microsoft Account
Open your preferred web browser (Safari, Chrome, or Firefox).
Navigate to portal office com.
Enter your Microsoft account credentials (email and password) associated with your Office 365 subscription.
If prompted, complete the multi-factor authentication (MFA) process.
Note: If you do not have an active Office 365 subscription, you must purchase one before proceeding. You can subscribe through Microsoft 365 plans.
Step 2: Download the Office 365 Installer for Mac
Once signed in, you will be redirected to the Office 365 homepage.
Click on the Install Office button in the top-right corner.
Choose Office 365 apps to begin downloading the installer.
The download will start automatically, saving a .pkg file in your Mac's "Downloads" folder.
Tip: If the download does not start, refresh the page or try using a different browser.
Step 3: Install Office 365 on Mac
Open Finder and navigate to the Downloads folder.
Double-click the Microsoft_Office_Installer.pkg file.
The Microsoft Office installer will launch. Click Continue.
Read and accept the license agreement, then click Continue.
Select the Install Location (default location is recommended).
Click Install and enter your Mac’s administrator password if prompted.
Wait for the installation to complete.
Click Close once the installation is finished.
Tip: If you encounter a security warning, go to System Preferences > Security & Privacy and allow the installation under the "General" tab.
Step 4: Activate Office 365 on Mac
Open any Office application (e.g., Word, Excel, or PowerPoint).
A welcome screen will appear; click Sign In.
Enter the Microsoft account credentials used to purchase the subscription.
Follow the on-screen instructions to complete activation.
Once activated, click Start Using Office.
Note: If you see an error stating that your subscription cannot be verified, ensure you are connected to the internet and try signing in again.
Troubleshooting Common Installation Issues
1. Office 365 Installation is Stuck or Not Starting
Restart your Mac and try installing again.
Ensure that your internet connection is stable.
Clear your browser cache and try downloading the installer again.
2. macOS Blocks the Installation
Go to System Preferences > Security & Privacy > General.
Click Allow next to "Microsoft Corporation."
Restart the installation process.
3. Unable to Sign in to Activate Office 365
Double-check your Microsoft credentials.
Try signing in through a different browser.
Ensure that your Office 365 subscription is active.
Updating Office 365 on Mac
To keep Office 365 updated with the latest features and security patches:
Open any Office application (e.g., Word or Excel).
Click on Help in the menu bar.
Select Check for Updates.
Follow the on-screen prompts to install available updates.
Uninstalling Office 365 from Mac
If you need to remove Office 365 from your Mac, follow these steps:
Open Finder > Applications.
Locate Microsoft Office apps (Word, Excel, PowerPoint, Outlook, etc.).
Drag each app to the Trash.
Open Finder > Go > Go to Folder.
Type ~/Library and delete the following folders:
Containers/com.microsoft.*
Group Containers/UBF8T346G9.Office
Empty the Trash and restart your Mac.
Final Thoughts
Installing Office 365 on a Mac is a simple and quick process when done through portal.office.com. By following this guide, you can successfully download, install, and activate Microsoft Office 365 on your Mac.
If you encounter any issues, Microsoft's support team is available to help resolve installation or activation problems.
Now that you have Office 365 installed, you can enjoy seamless productivity and collaboration with its suite of powerful applications!
0 notes
Text
How to Boost Your Laptop's Performance: Tips and Tricks for Speeding up Your Device
Over time, laptops—whether they’re used for work, study, or entertainment—can become sluggish. Slow boot times, laggy applications, and overall performance dips can be frustrating, especially when you rely on your device for daily tasks. Fortunately, there are several strategies you can use to speed up your laptop without having to invest in costly upgrades. In this guide, we'll cover practical tips and tricks to boost your laptop's performance and get it running like new again.
1. Close Unnecessary Background Applications
One of the most common reasons your laptop feels slow is that too many applications are running in the background. Even if you're only using a few programs, others might be silently consuming system resources like CPU, memory (RAM), and storage.
How to fix it:
Check Task Manager (Windows): Press Ctrl + Shift + Esc to open Task Manager. Under the "Processes" tab, look for apps that are using a lot of resources and close them.
Check Activity Monitor (Mac): Go to "Applications > Utilities > Activity Monitor." You can sort by CPU usage, memory, and disk to see which programs are taking up the most resources.
Disable Startup Programs: Some apps automatically start when your laptop boots, which can slow down startup times. Disable unnecessary startup programs via Task Manager (Windows) or System Preferences > Users & Groups > Login Items (Mac).
2. Free Up Hard Drive Space
As your laptop fills up with files, apps, and updates, it can lead to slower performance. Operating systems need free space to work efficiently, especially when using virtual memory or paging files.
How to fix it:
Clear Temporary Files:
On Windows: Use the built-in Disk Cleanup tool. Type "Disk Cleanup" in the search bar, select the drive you want to clean, and click "OK."
On Mac: You can manually clean up caches or use a third-party app like CleanMyMac to clear system junk.
Uninstall Unused Programs: Check your installed applications and remove programs you no longer use. On Windows, go to "Control Panel > Programs > Uninstall a program," and on Mac, drag unused apps to the Trash.
Move Files to the Cloud: Store large files such as photos, videos, and documents on cloud services like Google Drive or iCloud to free up local storage.
3. Upgrade to an SSD
If your laptop is still using an old Hard Disk Drive (HDD), upgrading to a Solid-State Drive (SSD) is one of the best ways to see a dramatic improvement in speed. SSDs offer much faster read and write speeds compared to traditional HDDs, which means faster boot times, quicker file transfers, and improved overall performance.
How to upgrade:
Check your laptop’s compatibility: Some laptops have an easily accessible storage compartment for upgrades. Others may require more complex disassembly.
Consider cloning your current system: If you're switching to an SSD, use software like Macrium Reflect (for Windows) or Carbon Copy Cloner (for Mac) to clone your current operating system to the new SSD.
4. Add More RAM
RAM (Random Access Memory) plays a crucial role in multitasking and handling resource-intensive applications. If your laptop has 4GB or less, upgrading to 8GB or 16GB can provide a noticeable performance boost, especially when using memory-heavy programs like web browsers, video editors, or virtual machines.
How to upgrade:
Check your laptop's RAM capacity: Visit your laptop's manufacturer website or consult the manual to see how much RAM it supports.
Install additional RAM: If your laptop has a removable panel, you can purchase and install additional RAM sticks yourself. If not, you may need to take it to a professional technician.
5. Keep Your Operating System Updated
Operating system updates often include important performance improvements, bug fixes, and security patches. Running an outdated version of Windows or macOS can cause compatibility issues and performance slowdowns.
How to update:
On Windows: Go to Settings > Update & Security > Windows Update and click on "Check for updates."
On Mac: Open the App Store and check under the "Updates" tab.
6. Disable Visual Effects
While visual effects like animations and transparency look nice, they consume valuable system resources. Disabling these effects can help speed up your laptop, especially if you're working on a machine with limited resources.
How to disable:
On Windows: Type "Performance" in the search bar, then select "Adjust the appearance and performance of Windows." Under the "Visual Effects" tab, choose "Adjust for best performance."
On Mac: Go to System Preferences > Accessibility, and under "Display," check the box that says "Reduce motion" and "Reduce transparency."
7. Run a Full Virus Scan
Malware or unwanted software can significantly slow down your laptop’s performance. Viruses, adware, and other types of malware can use up resources and create unnecessary processes.
How to fix it:
Use antivirus software: If you don't already have antivirus software installed, it's crucial to do so. Programs like Windows Defender (Windows), Avast, or Bitdefender are great free or paid options.
Perform a full system scan: Run a comprehensive scan to ensure that your system is free of malware or potentially unwanted programs (PUPs).
8. Clean Your Laptop Physically
Over time, dust and debris can accumulate inside your laptop, especially around vents and fans. This can lead to overheating, which in turn causes the laptop to throttle performance.
How to clean it:
Turn off and unplug your laptop: Before you start, make sure the device is powered off.
Use compressed air: Gently blow compressed air into the vents to clear out dust and debris.
Clean the keyboard and screen: Use a microfiber cloth and a gentle cleaner for the screen and keyboard.
9. Reinstall the Operating System
If all else fails, performing a fresh installation of your operating system can give your laptop a significant speed boost. This process eliminates unnecessary files, software, and settings that may have accumulated over time.
How to reinstall:
Windows: Go to Settings > Update & Security > Recovery and select "Get started" under "Reset this PC."
Mac: Restart your Mac and hold down Command + R to enter macOS Recovery mode. From there, you can reinstall macOS.
10. Use Lighter Software Alternatives
If your laptop is struggling with resource-heavy software, consider switching to lighter alternatives. For example, instead of using Photoshop, you could try GIMP or Paint.NET for basic image editing. For web browsing, Opera or Brave are lighter alternatives to Chrome.
Conclusion
Improving your laptop's performance doesn’t always require expensive upgrades. By implementing these tips, you can speed up your laptop and extend its lifespan. Whether you choose to upgrade your hardware, optimize your software, or clean out unnecessary files, there are plenty of ways to give your device a performance boost. Regular maintenance and good habits, like keeping your system updated and freeing up storage, can help keep your laptop running smoothly for years to come.
Remember, if your laptop is still underperforming after trying these tips, it may be time to consult a professional technician for further diagnostics. Authorized Toshiba Service Centre in Nagpur provides professional services, maintenance, and warranty services for laptops, desktops, and other electronic products, ensuring genuine parts and expert support.
0 notes
Text
How to Boost Your Laptop's Performance: Tips and Tricks for Speeding up Your Device
Over time, laptops—whether they’re used for work, study, or entertainment—can become sluggish. Slow boot times, laggy applications, and overall performance dips can be frustrating, especially when you rely on your device for daily tasks. Fortunately, there are several strategies you can use to speed up your laptop without having to invest in costly upgrades. In this guide, we'll cover practical tips and tricks to boost your laptop's performance and get it running like new again.
1. Close Unnecessary Background Applications
One of the most common reasons your laptop feels slow is that too many applications are running in the background. Even if you're only using a few programs, others might be silently consuming system resources like CPU, memory (RAM), and storage.
How to fix it:
Check Task Manager (Windows): Press Ctrl + Shift + Esc to open Task Manager. Under the "Processes" tab, look for apps that are using a lot of resources and close them.
Check Activity Monitor (Mac): Go to "Applications > Utilities > Activity Monitor." You can sort by CPU usage, memory, and disk to see which programs are taking up the most resources.
Disable Startup Programs: Some apps automatically start when your laptop boots, which can slow down startup times. Disable unnecessary startup programs via Task Manager (Windows) or System Preferences > Users & Groups > Login Items (Mac).
2. Free Up Hard Drive Space
As your laptop fills up with files, apps, and updates, it can lead to slower performance. Operating systems need free space to work efficiently, especially when using virtual memory or paging files.
How to fix it:
Clear Temporary Files:
On Windows: Use the built-in Disk Cleanup tool. Type "Disk Cleanup" in the search bar, select the drive you want to clean, and click "OK."
On Mac: You can manually clean up caches or use a third-party app like CleanMyMac to clear system junk.
Uninstall Unused Programs: Check your installed applications and remove programs you no longer use. On Windows, go to "Control Panel > Programs > Uninstall a program," and on Mac, drag unused apps to the Trash.
Move Files to the Cloud: Store large files such as photos, videos, and documents on cloud services like Google Drive or iCloud to free up local storage.
3. Upgrade to an SSD
If your laptop is still using an old Hard Disk Drive (HDD), upgrading to a Solid-State Drive (SSD) is one of the best ways to see a dramatic improvement in speed. SSDs offer much faster read and write speeds compared to traditional HDDs, which means faster boot times, quicker file transfers, and improved overall performance.
How to upgrade:
Check your laptop’s compatibility: Some laptops have an easily accessible storage compartment for upgrades. Others may require more complex disassembly.
Consider cloning your current system: If you're switching to an SSD, use software like Macrium Reflect (for Windows) or Carbon Copy Cloner (for Mac) to clone your current operating system to the new SSD.
4. Add More RAM
RAM (Random Access Memory) plays a crucial role in multitasking and handling resource-intensive applications. If your laptop has 4GB or less, upgrading to 8GB or 16GB can provide a noticeable performance boost, especially when using memory-heavy programs like web browsers, video editors, or virtual machines.
How to upgrade:
Check your laptop's RAM capacity: Visit your laptop's manufacturer website or consult the manual to see how much RAM it supports.
Install additional RAM: If your laptop has a removable panel, you can purchase and install additional RAM sticks yourself. If not, you may need to take it to a professional technician.
5. Keep Your Operating System Updated
Operating system updates often include important performance improvements, bug fixes, and security patches. Running an outdated version of Windows or macOS can cause compatibility issues and performance slowdowns.
How to update:
On Windows: Go to Settings > Update & Security > Windows Update and click on "Check for updates."
On Mac: Open the App Store and check under the "Updates" tab.
6. Disable Visual Effects
While visual effects like animations and transparency look nice, they consume valuable system resources. Disabling these effects can help speed up your laptop, especially if you're working on a machine with limited resources.
How to disable:
On Windows: Type "Performance" in the search bar, then select "Adjust the appearance and performance of Windows." Under the "Visual Effects" tab, choose "Adjust for best performance."
On Mac: Go to System Preferences > Accessibility, and under "Display," check the box that says "Reduce motion" and "Reduce transparency."
7. Run a Full Virus Scan
Malware or unwanted software can significantly slow down your laptop’s performance. Viruses, adware, and other types of malware can use up resources and create unnecessary processes.
How to fix it:
Use antivirus software: If you don't already have antivirus software installed, it's crucial to do so. Programs like Windows Defender (Windows), Avast, or Bitdefender are great free or paid options.
Perform a full system scan: Run a comprehensive scan to ensure that your system is free of malware or potentially unwanted programs (PUPs).
8. Clean Your Laptop Physically
Over time, dust and debris can accumulate inside your laptop, especially around vents and fans. This can lead to overheating, which in turn causes the laptop to throttle performance.
How to clean it:
Turn off and unplug your laptop: Before you start, make sure the device is powered off.
Use compressed air: Gently blow compressed air into the vents to clear out dust and debris.
Clean the keyboard and screen: Use a microfiber cloth and a gentle cleaner for the screen and keyboard.
9. Reinstall the Operating System
If all else fails, performing a fresh installation of your operating system can give your laptop a significant speed boost. This process eliminates unnecessary files, software, and settings that may have accumulated over time.
How to reinstall:
Windows: Go to Settings > Update & Security > Recovery and select "Get started" under "Reset this PC."
Mac: Restart your Mac and hold down Command + R to enter macOS Recovery mode. From there, you can reinstall macOS.
10. Use Lighter Software Alternatives
If your laptop is struggling with resource-heavy software, consider switching to lighter alternatives. For example, instead of using Photoshop, you could try GIMP or Paint.NET for basic image editing. For web browsing, Opera or Brave are lighter alternatives to Chrome.
Conclusion
Improving your laptop's performance doesn’t always require expensive upgrades. By implementing these tips, you can speed up your laptop and extend its lifespan. Whether you choose to upgrade your hardware, optimize your software, or clean out unnecessary files, there are plenty of ways to give your device a performance boost. Regular maintenance and good habits, like keeping your system updated and freeing up storage, can help keep your laptop running smoothly for years to come.
Remember, if your laptop is still underperforming after trying these tips, it may be time to consult a professional technician for further diagnostics. A Lenovo Laptop Service Centre in Nagpur provides professional services, maintenance, and warranty services for laptops, desktops, and other electronic products, ensuring genuine parts and expert support.
0 notes
Text
Sell MacBook Pro for the Best Price: A Comprehensive Guide

Selling your MacBook Pro can be an excellent way to make some extra cash, especially if you’re planning to upgrade to a newer model or simply decluttering your living space. However, getting the best price for your device requires careful preparation and an understanding of the market. Here’s a step-by-step guide to ensure you maximize your profits when selling your MacBook Pro.
1. Evaluate Your MacBook Pro’s Condition
The first step in selling your MacBook Pro is to thoroughly assess its condition. Buyers are typically looking for devices that are in good working order, both physically and functionally. Here’s what to look for:
Physical Appearance: Examine the exterior for scratches, dents, or any visible damage. Devices that look well-maintained will attract higher offers. Make sure to clean your MacBook Pro to improve its appearance before taking photos.
Functionality: Test all functions, including the keyboard, trackpad, ports, and speakers. Ensure that everything is operational, as any malfunction can reduce your selling price. Take note of any issues that you should disclose to potential buyers.
Battery Health: The battery's condition can significantly affect resale value. Use the "About This Mac" feature to check the battery cycle count. A lower cycle count indicates a healthier battery, making your MacBook more appealing to buyers.
2. Back Up Your Data
Before you sell your MacBook Pro, back up all your important data. Use Time Machine to back up your files to an external hard drive or cloud storage. This will protect your data and ensure you can transfer your settings and files to a new device when you’re ready to upgrade.
3. Perform a Factory Reset
To protect your privacy, performing a factory reset on your MacBook Pro is essential. This process removes all your personal data and restores the device to its original settings. Here’s how to do it:
Sign out of iCloud and other Apple services.
Restart your MacBook while holding down Command + R to enter Recovery Mode.
Open Disk Utility, erase your startup disk, and reinstall macOS.
This will ensure that the new owner receives a clean, fresh installation of macOS.
4. Research Current Market Prices
Understanding how much your MacBook Pro is worth is crucial for setting a competitive price. Check online marketplaces like eBay, Craigslist, and Swappa to see what similar models are selling for. Here are some key factors that influence pricing:
Model Year: Newer models typically command higher resale prices.
Specifications: Higher RAM and storage configurations can increase the value of your device.
Condition: Be honest about the condition, as it significantly affects the price. Listing comparable devices can give you a better idea of how to price yours.
5. Choose the Best Selling Platform
The platform you choose to sell your MacBook Pro can impact your final selling price. Here are some popular options:
Online Marketplaces (eBay, Craigslist): These platforms give you direct access to buyers and allow you to set your price. However, selling on these platforms may involve negotiations and the risk of scams.
Trade-In Programs (Apple, Best Buy): These services are convenient, but they often offer lower payouts compared to selling directly to consumers. They also may only provide store credit instead of cash.
Buyback Services (SellMac): SellMac is an excellent option for those looking for a hassle-free selling experience. They provide instant offers based on the condition of your device and free shipping, ensuring you get a fair price without the effort of negotiating.
6. Create an Attractive Listing
If you choose to sell on an online marketplace, an attractive listing is key to attracting potential buyers. Here are some tips:
High-Quality Photos: Take clear, well-lit photos of your MacBook Pro from various angles. Highlight any unique features and include images of any accessories included in the sale.
Detailed Description: Provide a comprehensive description that includes the model, year, specifications, and condition. Be transparent about any defects to build trust with potential buyers.
7. Secure Payment and Shipping Arrangements
Once you’ve found a buyer, arrange for payment and shipping. If you’re selling locally, meet in a safe public place. For online sales, use secure payment methods like PayPal or Venmo to protect yourself from scams.
If you use a buyback service like SellMac, they’ll provide a prepaid shipping label, making the process straightforward. Just pack your MacBook securely and send it off.
8. Enjoy Your Earnings!
Once the sale is complete, you can enjoy the financial benefits of selling your MacBook Pro. Whether you decide to reinvest in a new device or save for future expenses, selling your MacBook can be a rewarding experience.
Conclusion
Sell MacBook Pro for the best price doesn’t have to be overwhelming. By assessing its condition, backing up your data, researching market prices, and selecting the right platform, you can maximize your return. Services like SellMac simplify the process with instant offers and free shipping, ensuring a hassle-free experience. Follow these steps, and you’ll be well on your way to a successful sale!
0 notes
Text
Mac email backup is very easy now
It has been a topic of discussion for long on how to mac email backup with an easy to use procedure.

Often it has been seen that Mac users complain about incomplete procedure on mac email backup. The foundation of an appropriate data backup always lies on a well instructed procedure. Therefore, it is very important to use a right, more precisely a professional tool for data backup.
While you may come across endless names for data backup tool, we offer the best in class product Mail Backup X. A well-engineered email backup tool for archiving emails from apple mailbox.
Also, the below links on Mac Operating System and Apple mail will make you understand about the subject in detail.
MacOS and Apple mail gives an idea on selection of the right tool considering different aspects of the mail communication tool.
The best way to mac email backup with clear instructions
Downloadthe mac email backup softwareand install on your Macformac email backup. Please follow the link for installation instructions.
Once the installation is completed, launch the tool from the Applications/ Quick Launch Menu.
You can start the fully functional trial run for 15 days or activate it if you have already purchased a license version of the tool.
You may choose to setup a new backup profile from the dashboard by choosing option “setup a new backup” oryou may click my backup profiles on the left side bar in the dashboard and click “set up a new backup profile”.
The next screen shows options to setup back for a list of mail clients. Choose Apple Mail and proceed to next step.
Once you click and choose Apple Mail to setup a backup you are presented with folder structure from Apple Mail accounts. Please select or deselect the folders out of all the mail accounts configured in Apple Mail.
The next step shows Advanced options like setting
* frequency of Mail backup (select automatic as its recommended or you may choose Manual or recurring at particular intervals).
* secure your backup archive by encrypting the data. So, it can only be viewed on this computer.
* you May also activate the USB Auto Snapshot option by assigning a USB drive. So, whenever you connect the USB drive, it automatically makes a snapshot copy of your local mail backup to the USB Drive in the background automatically.
8. You can set the location of backup to local disk drive or Cloud service by authenticating and adding Cloud Space (at Present Google Drive, DropBox and Microsoft One Drive are supported). Click save.
9. Apple Mail Backup Profile is set up and now your emails should have started to back up as per the options and settings you selected during the previous steps.
Demo is the preliminary answer on how to mac email backup on mac
In order to understand the basics of mac email backup, we recommend you to use the demo version of the tool initially.
The demo tool has various advantages before you proceed with the licensed product.
It is completely free and guides in the most systematic way on how to mac email backup. For more information, do visit the official website for a detailed tool on the software www.mailbackupx.com/how-to-backup-apple-mac-mail-mails-on-mac/.
1 note
·
View note
Text
How to Reformat an External Hard Drive: A Step-by-Step Guide
Reformatting an external hard drive can be essential for various reasons, such as preparing it for a new operating system, clearing old data, or changing the file system. While the process might seem daunting, it's relatively straightforward once you understand the steps involved. In this guide, we'll walk you through reformatting your external hard drive on both Windows and Mac systems.
Important Note
Reformatting will erase all data on the drive. Ensure you back up any important files before proceeding.
Reformatting on Windows
Connect the External Hard Drive:
Plug your external hard drive into an available USB port on your computer.
Open Disk Management:
Press Win + X and select Disk Management from the menu.
Locate Your External Hard Drive:
In the Disk Management window, find your external hard drive in the list of connected drives. It should be labeled as Disk 1, Disk 2, etc., depending on the number of drives connected.
Backup Data:
If you haven't already, back up any important data from the external hard drive.
Right-Click the Drive:
Right-click on the partition or unallocated space of your external hard drive. Select Format from the context menu.
Choose File System:
In the Format dialog box, choose the desired file system (NTFS, exFAT, or FAT32).
NTFS: Best for Windows-only drives.
exFAT: Compatible with both Windows and macOS, ideal for larger files.
FAT32: Older file system, compatible with many devices but limited to 4GB file size.
Enter a Volume Label:
Give your drive a name in the Volume label field.
Perform a Quick Format:
Check the Perform a quick format option for a faster process. Uncheck it if you want a thorough format (this will take longer).
Click OK:
Confirm the action and click OK to start the formatting process. Once completed, your drive will be ready for use.
Reformatting on macOS
Connect the External Hard Drive:
Plug your external hard drive into an available USB port on your Mac.
Open Disk Utility:
Go to Applications > Utilities > Disk Utility.
Select Your External Hard Drive:
In the Disk Utility sidebar, select your external hard drive.
Backup Data:
Ensure you have backed up any important data from the external hard drive.
Click Erase:
Click the Erase button at the top of the Disk Utility window.
Choose Format and Name:
In the Erase dialog box, choose the desired format:
APFS: Best for macOS-only drives.
Mac OS Extended (Journaled): Compatible with older macOS versions.
exFAT: Compatible with both Windows and macOS, ideal for larger files.
MS-DOS (FAT): Compatible with many devices but limited to 4GB file size.
Enter a Name:
Give your drive a name in the Name field.
Erase:
Click Erase to begin the formatting process. This will erase all data on the drive and format it with the selected file system.
Complete:
Once the process is complete, click Done. Your drive is now reformatted and ready to use.
Conclusion
Reformatting an external hard drive is a useful skill that can help you manage your storage devices more effectively. Whether you’re switching file systems for compatibility, clearing old data, or preparing a drive for a new purpose, following these steps will ensure a smooth and successful reformatting process. Always remember to back up any important data before you begin, as reformatting will erase all existing files on the drive. With your freshly formatted drive, you’re ready to tackle your next project with confidence!
0 notes
Text
How to Clear Trash on Mac in 4 different Ways
Managing storage efficiently is essential for maintaining the performance and organization of your Mac. One of the simplest ways to free up space is by regularly emptying your Trash. The Trash can hold a significant amount of deleted files, and over time, this can accumulate and take up valuable disk space. Regularly clearing the Trash not only helps reclaim storage but also keeps your system running smoothly, preventing potential slowdowns caused by an overloaded hard drive. In this guide, we will explore four different methods to clear Trash on Mac, ensuring that you can choose the one that best fits your workflow and preferences.
Whether you prefer a straightforward approach using Finder, a quick solution with Terminal commands, a scheduled cleanup with Automator, or a secure deletion process, we've got you covered. Each method is outlined with step-by-step instructions to help you efficiently manage your Mac's storage. By the end of this guide, you'll be equipped with the knowledge to clear Trash on Mac and keep it clutter-free and operating at its best. Let's dive into these four techniques and discover how easy it is to clear Trash on Mac and keep your storage optimized.
What is Trash on Mac?
On a Mac, the "Trash" is a special folder where files and folders are temporarily stored after you delete them. It's similar to the Recycle Bin in Windows. When you move an item to the Trash, it's not immediately and permanently deleted from your storage drive; instead, it remains in the Trash folder, allowing you to recover it later if you change your mind. Here's an overview of its functions and why you need to empty it:
Functions of Trash
Temporary Storage: The Trash provides a holding area for deleted files and folders, giving you a safety net to recover items if you delete them accidentally.
Recovery Option: You can easily restore items from the Trash to their original location or any other location on your Mac.
Organization: The Trash helps in managing files by letting you group all deletions in one place before deciding to permanently remove them.
Why You Need to Empty Trash
Free Up Disk Space: Files in the Trash still occupy disk space. Emptying the Trash removes these files from your storage drive, freeing up space for other data and applications.
System Performance: Keeping the Trash empty can help maintain optimal system performance, especially if the Trash contains large files or a large number of files.
Privacy and Security: Permanently deleting files from the Trash ensures that sensitive or personal data cannot be easily recovered, protecting your privacy and security.
Housekeeping: Regularly emptying the Trash helps keep your system organized and prevents it from getting cluttered with unnecessary files.
How to Empty Trash on a Mac That Won’t Delete: 4 Ways
Way 1. Macube Cleaner
Macube Cleaner is a powerful and efficient utility designed to help Mac users effortlessly free up gigabytes of storage space. It provides a comprehensive solution to clear system junk, caches, logs, and, importantly, securely empty the Trash on Mac. With a user-friendly interface and advanced features, Macube ensures that your Mac remains in optimal condition, improving performance and reclaiming valuable disk space. The software offers a 7-day free trial with full functionality and is compatible with macOS 10.11 or later.
Key Features:
Clean System Junk:
Quickly clears system caches, user logs, and outdated system logs to free up space and enhance performance. By regularly removing these files, your Mac can run more smoothly and efficiently.
Smart Scan:
Utilizes an industry-leading algorithm for fast, powerful, and secure scanning. The Smart Scan feature locates junk files across the entire Mac, providing an efficient way to clean up and optimize your storage.
App Cache Removal:
Deletes unnecessary files generated by apps, freeing up additional storage space. This feature ensures that old and unused app data does not clog up your system.
Other Storage Cleanup:
Sorts out and cleans mysterious “Other Storage” files, including caches, archives, and system files, to reclaim more disk space. This helps demystify the "Other" category in your storage and keeps it under control.
Securely Empty Trash on Mac:
Ensures that deleted files are permanently removed from the Trash, freeing up space and preventing data recovery. This feature is essential for maintaining privacy and maximizing available storage on your Mac.
Large and Old Files Finder:
Identifies large and old files that take up significant space, helping users decide what to keep and what to remove. This helps you manage your storage more effectively and remove unnecessary files.
Application Uninstaller:
Completely removes apps and their associated files to ensure no residual data is left behind. This thorough uninstallation process helps keep your system clean and organized.
Duplicate Finder:
Detects and deletes duplicate files and images, saving space and organizing your storage. This feature is particularly useful for cleaning up redundant data and maintaining an orderly file system.
Privacy Protection:
Clears cookies and browsing histories to protect user privacy. This feature is crucial for maintaining security and preventing tracking by websites.
How to Use:
Step 1: Download and Open Macube Cleaner
Begin by downloading and opening Macube Cleaner, a specialized application for cleaning junk files on Mac. This software aids in pinpointing and eliminating redundant files from your system.
Step 2: Execute a Smart Scan
With Macube Cleaner active, select the "Smart Scan" option. This feature will thoroughly scan your Mac, identifying all unnecessary data such as cache and temporary files. The scan will highlight files that are safe to remove, helping to optimize your system's performance.
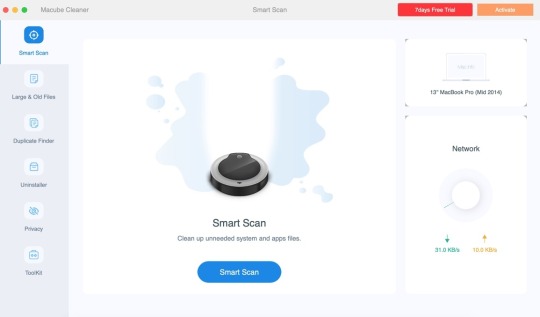
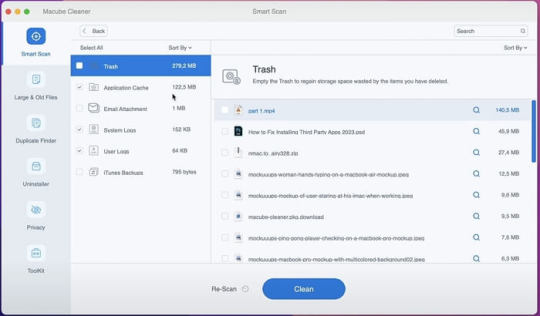
Step 3: Clear the Trash
Once the scan is finished, go to the Trash section in Macube Cleaner. Review the items listed and click "Clean" to completely empty the Trash. If you prefer to delete only certain files, select those specific items before proceeding with the cleaning.
Pros and Cons
Pros
Enhanced Security: Ensures deleted files are completely overwritten and unrecoverable.
User-Friendly Interface: Intuitive design makes it easy to navigate and use.
Comprehensive Toolset: Offers additional features for overall system optimization and maintenance.
Configurable Settings: Allows customization of shredding passes for varying levels of security.
Efficiency: Quickly and effectively removes files, improving system performance.
Cons
Cost: Macube Cleaner is a paid utility, which may be a consideration for some users.
Way 2. Using Terminal
Clearing the Trash on a Mac using Terminal is a quick and effective method to delete unwanted files that might not empty properly through the Finder. This approach is particularly useful for troubleshooting issues related to the Trash.
How to Use:
Step 1: Access Terminal
Start by opening the Terminal application. You can find it in the Utilities folder within Applications, or use Spotlight (Cmd + Space) to search for "Terminal".
Step 2: Execute Commands
Navigate to the Trash directory by typing cd ~/.Trash. To delete all items in the Trash, use rm -rf *. This command removes all files and folders within the Trash directory.
Step 3: Confirmation and Administrative Privileges
Ensure the process completes without errors. If issues arise, you can use sudo rm -rf ~/.Trash/* and enter your administrator password when prompted.
Pros and Cons
Pros:
Efficiency: Clears Trash instantly, bypassing graphical processes.
Effectiveness: Can delete stubborn files that Finder struggles to remove.
Cons:
Data Loss Risk: Files deleted via Terminal cannot be recovered from the Trash.
Caution Required: Misuse of commands can lead to unintentional deletion of important files.
Way 3. Using Finder Preferences:
Keeping your Mac tidy and optimizing disk space is crucial for smooth performance. One effective way to manage your Trash is through Finder Preferences, which offers an automated solution for emptying the Trash after 30 days. This ensures your Trash stays clear without needing manual intervention.
How to use
Step 1: Access Finder Preferences
Open Finder either from your Dock or by clicking on your desktop.
Navigate to the top menu bar, click on "Finder," and select "Preferences" from the dropdown.
Step 2: Activate Automatic Trash Removal
Within the Finder Preferences window, switch to the "Advanced" tab.
Check the box next to "Remove items from the Trash after 30 days."
Pros and Cons
Pros
Automated Maintenance: Keeps your Trash clear without manual effort.
Space Optimization: Efficiently manages disk space by regularly deleting old files.
Ease of Use: Simple setup with no ongoing maintenance required.
Cons
Delayed Deletion: Files stay in the Trash for 30 days before removal.
Limited Control: Less control over individual item deletion timing since it's automated.
Way 4. Safe Mode:
Clearing unwanted files from a Mac can sometimes prove challenging, especially when certain files refuse to be deleted. One effective method to tackle this issue is using Safe Mode, which temporarily disables certain software and processes that could hinder file deletion.
How to Use
Step 1: Restart in Safe Mode
Shut Down Your Mac: Click on the Apple menu and select "Shut Down".
Start in Safe Mode: Press the power button, then immediately hold down the Shift key until you see the login window with "Safe Boot" displayed in the top-right corner.
Step 2: Empty the Trash
Open the Trash: Click on the Trash icon located in the Dock.
Empty the Trash: Right-click on the Trash window and choose "Empty Trash". Confirm your action when prompted.
Step 3: Restart Normally
Restart Your Mac: Click on the Apple menu and select "Restart" to exit Safe Mode and return your Mac to its regular operation mode.
Pros and Cons
Pros:
Effective Deletion: Safe Mode can delete files that are otherwise stubborn due to active system processes or applications.
Enhanced Safety: By disabling unnecessary processes, Safe Mode reduces the chance of software conflicts during file deletion.
Cons:
Performance Impact: Safe Mode may run slower because it disables certain drivers and limits functionality temporarily.
Accessibility Issues: Some users might find the process of entering Safe Mode inconvenient, especially if it needs to be done frequently.
Conclusion:
In conclusion, effectively managing your Mac's storage by regularly clearing the Trash is crucial for maintaining optimal performance and organization. This guide has explored four distinct methods using Finder, Terminal commands, Automator, and Safe Mode—that cater to different user preferences and scenarios. Each method offers a straightforward approach to reclaiming disk space and ensuring that deleted files are either securely removed or managed automatically.
By incorporating these techniques into your routine, you can streamline maintenance tasks and keep your Mac running smoothly, free from the clutter that can impede performance. Whether you opt for the simplicity of Finder's preferences or the versatility of Terminal commands, taking proactive steps to clear Trash ensures your system remains efficient and responsive for your everyday tasks.
0 notes
Note
if u do go with anadius i totally recommend it cause its legit. i have the base game and a few packs that i got legally but all the others are bc of anadius. i remember the process of setting it up being a little tedious but maybe that was just me, the instructions are pretty clear on the download page lol. the only mildly annoying thing u gotta do is update the game config using the unlocker and then update ur packs using the updater program every time theres an update to the game. with how often EA breaks their own game with updates u might be having to do this fairly often but its a fast and easy process. if ur missing a lot of packs like i was then downloading them will take a while and also take up a lot of ur disk space, so watch out for that.
i hope the installation is smooth and it works out! 👍
goddd thank u sooo much this is super reassuring to hear!! i sent the link to my sister and told her id help with the installation if she needs but ya it seems to have preddy good instructions 👍👍 idk how shes gonna manage storage-wise bc she has a Mac laptop 💀 but I'll let her figure that out
#yall rly came in clutch on this one i felt so bad when i accidentally deleted all her dlc augh#hopefully this will make up for it ❤️❤️❤️ i appreciate it#03
1 note
·
View note
Text
Resolving Storage and Internet Issues
Computers are indispensable tools in our daily lives, but they can sometimes present frustrating challenges, such as running out of storage space or losing internet connectivity. These issues can disrupt productivity and cause significant inconvenience. This article explores practical solutions for two common problems: managing a nearly full startup disk on a Mac and addressing internet access issues on a Windows system. By following these steps, users can restore their devices to optimal performance and maintain seamless operation.
Addressing a Full Startup Disk on Mac
When a Mac displays a warning that the startup disk is nearly full, it signals that the primary drive, which houses the operating system and user files, is running out of space. This can lead to sluggish performance, application crashes, and an inability to save new files. How to Fix Your Startup Disk Is Almost Full on Mac begins with understanding the root cause and taking systematic steps to free up space.
The first step is to check how much storage is being used. Navigate to the system menu, select "About This Mac," and click on the storage tab to view a breakdown of space usage. This visual representation helps identify which file categories—such as applications, documents, or media—are consuming the most space. Once you have this overview, prioritize clearing out unnecessary files. Start by emptying the trash, as deleted files often linger there, taking up valuable space. Next, review the downloads folder, where temporary or forgotten files like installers or duplicates tend to accumulate. Deleting these can quickly reclaim space.
Another effective strategy is to manage large files, such as videos or archived projects, which often occupy significant portions of the disk. Use the built-in storage management tool to locate these files and consider moving them to an external drive or cloud storage. For users with extensive photo or video libraries, optimizing storage by enabling cloud-based syncing can offload files while keeping them accessible. Additionally, uninstall unused applications, as they not only consume disk space but may also run background processes that slow down the system.
Clearing system clutter is another critical step. Temporary files, caches, and logs can accumulate over time. Use trusted cleanup tools available in the Mac’s application store to safely remove these without affecting system stability. For advanced users, manually deleting cache files from the library folder can free up space, but caution is advised to avoid deleting essential system files. Regularly performing these maintenance tasks ensures the startup disk remains manageable, preventing future warnings.
Troubleshooting Internet Connectivity on Windows
Losing internet access on a Windows computer can be equally disruptive, whether it’s due to a misconfigured setting, hardware issue, or network problem. How to Fix No Internet Access in Windows involves a step-by-step approach to diagnose and resolve the issue, restoring connectivity efficiently.
Begin by verifying the physical connections. Ensure the Ethernet cable is securely plugged in or that the Wi-Fi adapter is enabled. Restarting the router and modem can resolve temporary glitches, as these devices sometimes encounter conflicts that disrupt connectivity. After rebooting, check the network status in the Windows taskbar. If the system indicates a connection but still shows no internet access, proceed to deeper troubleshooting.
Run the built-in network troubleshooter by accessing the network settings and selecting the option to diagnose problems. This tool automatically detects common issues, such as incorrect IP configurations or disabled services, and applies fixes where possible. If the troubleshooter doesn’t resolve the issue, manually reset the network settings. This can be done by navigating to the network and internet settings, selecting the reset option, and restarting the computer. Be aware that this resets all network adapters, requiring you to reconnect to Wi-Fi networks afterward.
Another potential cause of internet issues is outdated or corrupted network drivers. Visit the device manager, locate the network adapters, and check for any warning indicators. Updating drivers through the system or downloading the latest versions from the manufacturer’s website can resolve connectivity problems. If the issue persists, check for conflicts with security software. Firewalls or antivirus programs sometimes block connections inadvertently. Temporarily disabling these programs can help identify if they are the culprit, but ensure they are re-enabled after testing to maintain system security.
For persistent problems, consider external factors like network congestion or service provider outages. Contacting the internet service provider to confirm the status of the connection can clarify whether the issue is local or network-wide. Testing the connection on another device can also help determine if the problem is specific to the Windows system or a broader network issue.
Proactive Maintenance for Long-Term Performance
Preventing these issues from recurring requires proactive habits. For Mac users, regularly monitoring storage usage and setting up automatic cloud backups can prevent the startup disk from filling up. Scheduling monthly cleanups to remove redundant files and optimizing storage settings ensures the system runs smoothly. For Windows users, maintaining updated drivers and routinely checking network settings can prevent connectivity disruptions. Keeping security software updated and avoiding unnecessary applications also contributes to stable performance.
0 notes
Text
How Do I Connect Cricut to Computer: A Step-by-Step Guide
How do I connect Cricut to computer? This was a question I got on one of my blogs a week ago. Not only this, but I also received similar questions regarding connection from many readers. Since none of my posts has a complete guide to Cricut connection in one single guide, I tried to write this.
Without thinking twice, dive into this blog and explore the steps one by one. In this blog, I have answered how do I connect my Cricut to my computer via Bluetooth. Let’s start now!
What Do I Need to Connect My Cricut to a Computer?
In order to learn how do I connect Cricut to computer, you have to first understand what you need before connecting to your Cricut. As we know, the connection is a part of the Cricut setup, meaning we are actually setting up our machines. So, there are things that are required before setup. Let’s get a look into it:
Cricut machine
Power cable to connect your Cricut to a wall outlet
A flat surface like a table for keeping the machine on
A Windows/Mac computer with the following system requirements:
For Windows
Operating System – Windows 10 or later (64-bit)
RAM – Minimum 4GB
Disk – 2 GB free
CPU – Intel Dual Core or equivalent to AMD processor
Display – 1024px x 768px screen resolution
Connectivity – A USB port/Bluetooth connection
For Mac
Operating System – macOS 11 or later
CPU – 1.83 GHz
RAM – Minimum 4GB
Display – Minimum 1024px x 768px screen resolution
A USB port or Bluetooth is required
Disk – 2GB
How Do I Connect Cricut to Computer (Windows)?
You will need to set up your Cricut on a Windows PC, which requires a connection. Since the connection is part of the Cricut setup, you must use a compatible Windows PC, such as Windows 10 or a later version. I have explained the easy steps I followed to connect my Cricut to a Windows computer.
Here are the easy steps to connect your Cricut to a computer on a PC:
First, you need to look for a flat surface to place your Cricut.
Here, ensure the distance is no more than 15 feet from the PC.
Afterward, go to the Start menu and select a gear icon to open Settings.
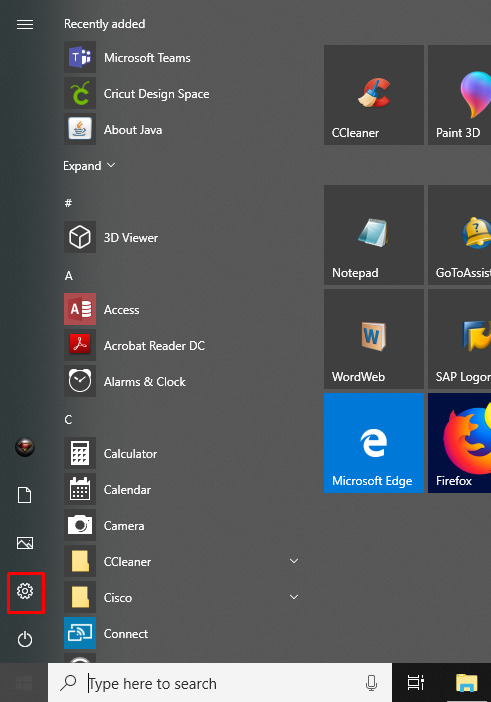
As you click on Settings, you will move to another screen, where you need to click on Devices.

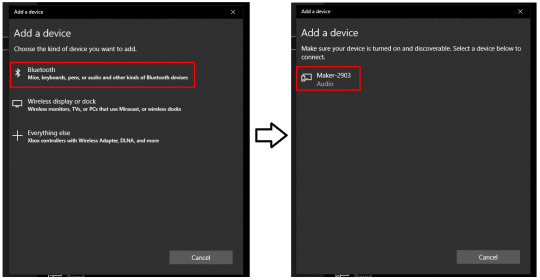
Verify if your Bluetooth is ON, then go to Add Bluetooth or other device.
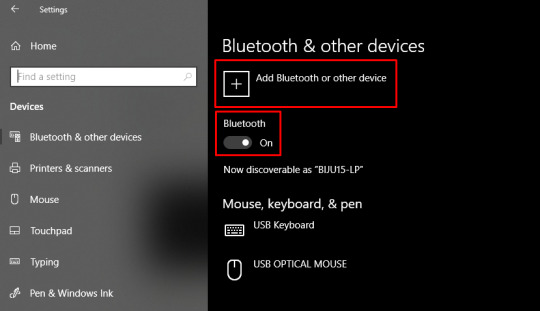
Next, select the Bluetooth option and wait for your PC to detect your Cricut machine.
Select it as it is visible in the open list, and your pairing will be done.
How Do I Connect Cricut to Computer (Mac)?
Mac users need to follow the following steps. However, the placements of Cricut and your computer are almost the same as for Windows. Here are the easy steps to connect your Cricut to a computer on a Mac:
Review if your computer is powered on or off.
After that, move to the Apple menu and choose the System Preferences option.
Now, go to the Bluetooth app on your Mac computer.
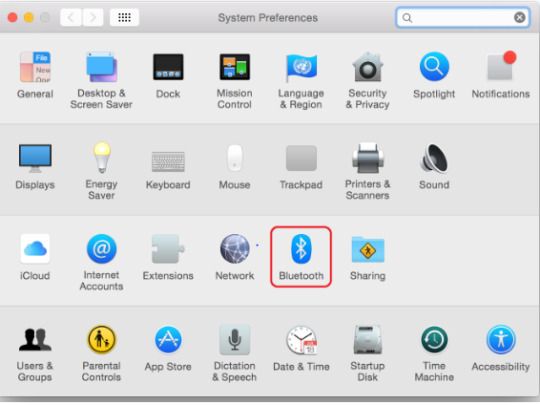
Afterward, turn on the Bluetooth.
Next, select the detected Cricut model from the available list.
Last but not least, you have connected your Mac computer to your Cricut.
FAQs
Question 1: What is the “Connect to Computer via Bluetooth” screen on Cricut?
Answer: The “Connect to Computer via Bluetooth” usually appears during the setup of Cricut Maker 3 or Cricut Explore 3. It happens because the Cricut Design Space app has detected an AMD Ryzen chip on your desktop. Actually, there is a problem with some Windows AMD Ryzen chips that may cause problems when you try to connect your Cricut via a USB cable. Therefore, Cricut recommends you use a Bluetooth connection for these computers.
Question 2: What should I do if my Cricut won’t connect?
Answer: If your Cricut is not connecting to your device, then you need to try the following useful tips:
You need to clear the cache and history of the web browser.
Run a scan on your computer for potential malware.
Defragment the hard disk.
Ensure your firewall or antivirus is blocking Cricut connections.
Question 3: Are all Bluetooth dongles compatible with Cricut machine?
Answer: According to Cricut’s official website, CSR (Cambridge Silicon Radio) Bluetooth dongles are incompatible with the Cricut machine. However, if you want to use a Bluetooth dongle, you need to use one that supports audio devices. Cricut doesn’t guarantee that all dongles will connect to your machine, but those that support audio devices are more likely to be able to connect.
Conclusion
To learn how do I connect Cricut to computer, I have explained all the steps carefully. Before that, I also mentioned things that were required before the Cricut setup. In it, I have especially discussed the system requirements. Make sure your Cricut meets the requirements so that you can do the setup in no time. To have an error-free, smooth connection with the Cricut software, go to this write-up and follow the steps mentioned above.
Read more: install cricut design space app
cricut.com/setup mac
Cricut Design Space
Cricut New Machine Setup
Source: How Do I Connect Cricut to Computer
#How Do I Connect Cricut to Computer#Cricut New Machine Setup#install cricut explore air 2#cricut design space#cricut explore 3#cricut.com/setup#design space signin#cricut.com/setup mac#cricut.com/setup windows
0 notes
Text
Cricut App for PC: Access the Innovative Crafting Software
Hello, my lovely DIYers, and welcome back to my other blog. Today, I will teach you how to get the Cricut app for PC. In the previous session, I discussed the Cricut app and its role in crafting projects. But if you are a newbie and completely clueless, don’t worry—I will help you with everything. I have been making customized crafts for more than four years and know which tools are important to create DIY projects.
Cricut Design Space is a crucial tool for all DIYers as it allows them to make several projects. The app also comes with a library that holds images, fonts, and ready-to-use projects. In addition, the Cricut software works with all Cricut cutting machines and can be downloaded on Windows and Mac computers. This guide will help you learn how to get the Cricut Design app on your separate computer.
Minimum System Requirements to Download Cricut App for PC
Before making the final call to get Design Space on your Windows or Mac operating system, ensure they fulfill the basic system requirements. Look at this part of the post below; you will have a clear idea of the essential system requirements your computer should have to support Cricut software.System RequirementsWindowsMacOperating SystemWindows 10 or a recent system. Intel Dual Core or similar processor. 4GB RAM with 2GB free disk space. Windows must have a USB port and an in-built Bluetooth technology. Screen resolution with 1024px x 768px.macOS 11 or the latest version. 1.83 GHz. RAM: 4GB 2 GB free disk space Must support wired and wireless connection. Screen resolution with 1024px x 768px.Internet ConnectionDownload: At least 2-3Mbps Upload: At least 1-2MbpsSame as the Windows operating system.Offline FeatureIt can be operated without internet connectivity.It can be operated without having an internet connection.
Equally important, it’s time for you to dig into the blog and acknowledge yourself by coming across the Design Space download & installation process.
Download and Install the Cricut App for PC
If you are keen to know which segment you can use to get the Cricut Design Space on your Windows & Mac computer, then this segment is best for you. It will teach you the entire process following which you can get this software on your respective PCs:
Windows
To download, launch, and install the Cricut Design app on your system, you are instructed to follow the steps given below:
Take the initiative by switching on your Windows computer and opening Google Chrome.
Now, navigate Cricut Design Space’s official portal and tick the Terms & Conditions checkbox.
After clicking the box, select the Download button, and the file will instantly begin to download to your system.

When the download is concluded, open the browser or Downloads folder on your device.
Now, double-click the .exe file, and a setup installation window will appear on your desktop screen.
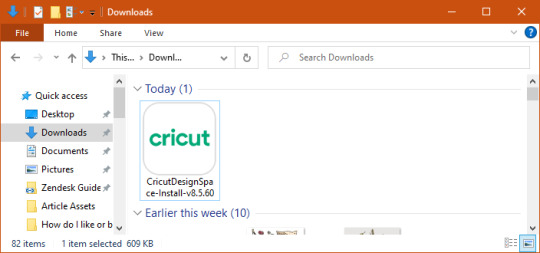
At this point, you need to hold on till the download process is currently active.
Following this, open the installed app, sign in, or create your account.
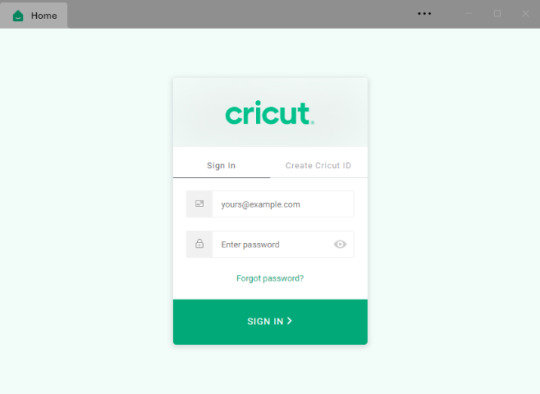
Conclude the download of the Cricut app for PC by starting to create new DIY designs on the canvas.
In addition to the blog, take a look at the section below to learn about installing the Cricut software on a Mac system.
Mac
Simultaneously, the below steps will guide you in successfully installing Design Space on your computer.
Start the Cricut installation process by opening the Safari search engine.
After it opens, you need to visit design.cricut.com and hit the Download button.

Now, you will get to see a small window in which you need to choose the folder where you want to save the Cricut Design Space file.
Also, choose the Downloads folder and then hit the Save button given inside the blue box.

At this point, minimize the search engine and open the Downloads folder.
Following this, double-click the .dmg file and move the Cricut Design app to the Applications folder.
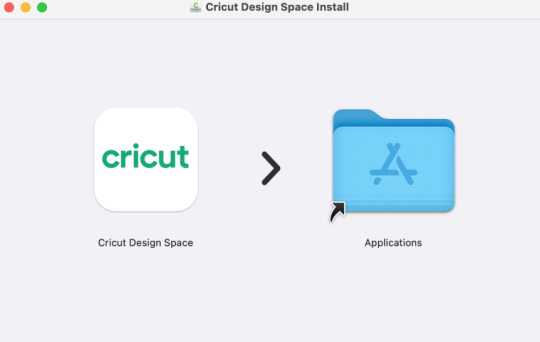
Now, launch Cricut Design Space by opening the Applications folder and double-clicking the Cricut app.
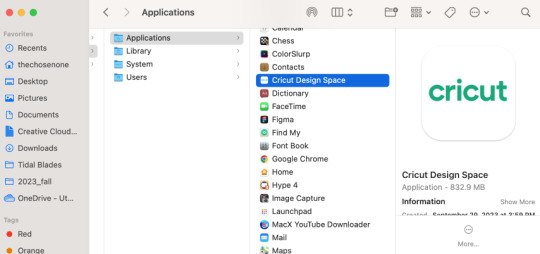
Next, a Mac window will open, confirming you to open the application.
Equally important, you are supposed to click the Open button and proceed towards the next step.
At this moment, you need to sign in to your Cricut account by using your username & password.
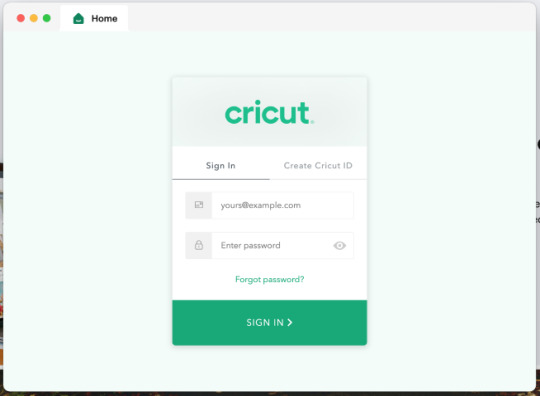
On the contrary, if you don’t have an official ID, create one by entering the required details on the page.
Final Words
As a result of the Cricut app for PC blog, you got introduced to the concepts of the Cricut Design Space software, system requirements, and how to get it on your Windows & Mac systems. No doubt, you need to pay special attention while performing the Cricut software download & installation process on your device.
Read more: install cricut design space app
cricut.com/setup
cricut.com/setup mac
Cricut New Machine Setup
Source: cricut app for pc
#cricut app for pc#Cricut New Machine Setup#install cricut explore air 2#cricut explore 3#cricut design space#cricut.com/setup
0 notes
Text
Shell
Manpage
Most of Unix systems are managed by using Shell. Just as you need to know a minimum number of words to have a discussion in a language, you need to know a minimum number of commands to be able to easily interact with a system. Unix systems all have, sometimes with slight differences, the same set of commands. While it is not too hard to remember commands, it might be hard to remember all of their options and how exactly to use them. The solution to this is the man command. Let’s go through a part of the ssh one, as there are few elements to know to be able to read a man page:
NAME ssh — OpenSSH SSH client (remote login program) SYNOPSIS ssh [-1246AaCfgKkMNnqsTtVvXxYy] [-b bind_address] [-c cipher_spec] [-D [bind_address:]port] [-E log_file] [-e escape_char] [-F configfile] [-I pkcs11] [-i identity_file] [-L [bind_address:]port:host:hostport] [-l login_name] [-m mac_spec] [-O ctl_cmd] [-o option] [-p port] [-Q cipher | cipher-auth | mac | kex | key] [-R [bind_address:]port:host:hostport] [-S ctl_path] [-W host:port] [-w local_tun[:remote_tun]] [user@]hostname [command] DESCRIPTION ssh (SSH client) is a program for logging into a remote machine and for executing commands on a remote machine. It is intended to replace rlogin and rsh, and provide secure encrypted communications between two untrusted hosts over an insecure network. X11 connections and arbitrary TCP ports can also be forwarded over the secure channel.
Some tips:
The NAME will summarize what the command is doing. As it is usually super short, you might want to look at DESCRIPTION (bellow) if ever it does not gives clear enough information
The SYNOPSIS will help you to understand the structure of the command:
A shell command usually have this format: command options parameters
Options inside [] are optional
The string without [] are mandatory
ssh [-1246AaCfgKkMNnqsTtVvXxYy] [-D [bind_address:]port]
ssh is mandatory
-1246AaCfgKkMNnqsTtVvXxYy is optional
-D [bind_address:]port is optional (with bind_address: being itself optional within -D [bind_address:]port
Commands
Here is the (non-exhaustive) list of commands & concepts you should master to be verbose with Unix systems:
awk # pattern scanning and processing language basename # strip directory and suffix from filenames bg # resumes suspended jobs without bringing them to the foreground cat # print files cd # change the shell working directory. chmod # change file mode chown # change file owner and group crontab # maintain crontab files curl # transfer a URL cut # remove sections from each line of files date # display or set date and time dig # DNS lookup utility df # report file system disk space usage diff # compare files line by line du # estimate file space usage echo # display a line of text find # search for files in a directory hierarchy fg # resumes suspended jobs and bring them to the foreground grep # print lines matching a pattern kill # send a signal to a process less # read file with pagination ln # create links ls # list directory contents lsb_release # print distribution-specific information lsof # list open files mkdir # create mv # move files nc # arbitrary TCP and UDP connections and listens netstat # print network connections, routing tables, interface statistics... nice # execute a utility with an altered scheduling priority nproc # print the number of processing units available passwd # change user password pgrep # look up processes based on name and other attributes pkill # send signal to processes based on name and other attributes printenv # print all or part of environment pwd # print name of current/working directory top # display Linux processes tr # translate or delete characters ps # report a snapshot of the current processes rm # remove files or directories rmdir # remove directories rsync # remote file copy scp # secure copy (remote file copy program) sed # stream editor for filtering and transforming text sleep # suspend execution for an interval of time sort # sort lines of text file ssh # OpenSSH SSH client (remote login program) ssh-keygen # SSH key generation, management and conversion su # substitute user identity sudo # execute a command as another user tail # output the last part of files tar # manipulate archives files tr # translate or delete characters uname # Print operating system name uniq # report or omit repeated lines uptime # show how long system has been running w # Show who is logged on and what they are doing whereis # locate the binary, source, and manual page files for a command which # locate a command wc # print newline, word, and byte counts for each file xargs # build and execute command lines from standard input | # redirect standard output to another command > # redirect standard output < # redirect standard input & # send process to background
Shortcuts
Some handy shortcuts:
CTRL+A # go to beginning of line CTRL+B # moves backward one character CTRL+C # stops the current command CTRL+D # deletes one character backward or logs out of current session CTRL+E # go to end of line CTRL+F # moves forward one character CTRL+G # aborts the current editing command and ring the terminal bell CTRL+K # deletes (kill) forward to end of line CTRL+L # clears screen and redisplay the line CTRL+N # next line in command history CTRL+R # searches in your command history CTRL+T # transposes two characters CTRL+U # kills backward to the beginning of line CTRL+W # kills the word behind the cursor CTRL+Y # retrieves last deleted string CTRL+Z # stops the current command, resume with fg in the foreground or bg in the background
0 notes