
Don't wanna be here? Send us removal request.
Statistics
We looked inside some of the posts by coffeelevel8-blog and here's what we found interesting.
Average Info
Notes Per Post
0
Likes Per Post
0
Reblog Per Post
0
Reply Per Post
0
Time Between Posts
3 days
Number of Posts By Type
Text
17
Last Seen Tumblr Blogs


Fun Fact
In February 2021, Tumblr had 518.6 million blog accounts.
Text
Get 20% Off the ThermoWorks Smoke BBQ Thermometer
[Photograph: Vicky Wasik]
We've been fans of the ThermoWorks Smoke BBQ Thermometer ever since it came on the market. It's one of our favorite leave-in probe thermometers because it's useful both indoors and out, and it comes complete with a wireless radio receiver that you can carry up to 300 feet away. It also has two probes, so it can easily track the temperature inside a roast and the temperature in your oven or smoker.
The importance of using a thermometer to check for doneness—and using it correctly—is a topic we've written about ad nauseam, because there really is no other way to know whether your meat is properly cooked. (The "poke test" isn't gonna do it, FYI.)
The ability to accurately monitor the temperature of what you're cooking can mean the difference between a steak that's nicely rosy inside and one that’s overcooked and gray in the middle. ThermoWorks' Smoke makes it easy to constantly monitor smoked and slow-roasted items, so you'll never have to worry about your expensive investment of meat (and time!) going to waste.
This thermometer usually sells for $99, but from today through June 12 at midnight Eastern time, you can get yourself a Smoke for only $79.20. Whether you're an avid griller, barbecue enthusiast, or are just looking for a great Father's Day gift, the Smoke will serve you well.
Get your Smoke today!
This post may contain links to Amazon or other partners; your purchases via these links can benefit Serious Eats. Read more about our affiliate linking policy.
Source: https://www.seriouseats.com/2019/06/get-20-percent-off-thermoworks-smoke.html

0 notes
Text
These Clever Tips Will Help You Drink More Water in 2019
While the jury remains out on just how much water we need each day (some experts stand by the old recommendation of eight, 8-ounce glass and others now say we need half of our weight in ounces, meaning a 130-pound woman would need 65 ounces), there’s one thing for certain: all of us should probably be drinking more of it. The good news is that it’s pretty easy to trick yourself into it! We’ve got 10 smart tips to help you—whether you’ve made it a new year’s resolution or you just want to get better at hydrating.
1. Drink a glass or two as soon as you wake up.
Before you have your morning coffee or tea, force yourself to drink a glass of water. And help yourself to a second one if you’re feeling extra motivated. Not only will this work to rehydrate you after a night of (hopefully restful) slumber, it will also help you start your day off on the right foot. If you start by drinking water, you’ll be more likely to keep it going throughout the day.
2. Get a pretty pitcher.
If you like your water nice and cold, then the first step to drinking more water is to always have some that’s nice and cold. Get a pretty pitcher, fill it up, and stash it in the fridge. Then, any time you pour from it, refill it before you put it back. This way, you’ll always be prepared.
3. Or a beverage dispenser.
Most beverage dispensers have a larger capacity than pitchers, which means there’s an even lower risk of running out of water. Get one that’ll fit in your fridge if you want cold water or just a pretty one that can sit out on your counter. Any time you go into your kitchen or look in your fridge, you’ll be reminded that it’s time for a sip or three.
4. Invest in a carbonator.
Despite lots of misconceptions, unflavored seltzer is just as hydrating as un-carbonated water. (The one thing to keep in mind is that all those bubbles can lead to burping and bloat.) So, if you prefer fizzy water over flat, go ahead! Get yourself a carbonator so that you can bubble up your water on your own, whenever you want it.
5. Find a water bottle you love.
Look around the conference room table the next time you’re in a meeting at work. You’ll probably notice that almost everyone there has brought their own water bottle. That’s because your coworkers know that the first step toward more drinking water is to, um, actually have water with them. If you get a water bottle that you actually like drinking from (one with a straw or an easy-to-open spout, for example), you’ll be more likely to bring it around with you and use it.
6. And keep it with you at all times.
Worried you’re going to forget that water bottle at work or in the car? Consider getting more than one and keeping them in your most visited places—like your purse, your desk, and your living room.
7. Set an alarm on your phone.
There are a few apps that you can download to track or monitor your water consumption, but you don’t even need to get that involved. Just set your phone’s timer to go off every hour or half-hour (or whatever works for you). When the timer goes off, it’s time to drink a glass.
8. Turn regular water into fancy, spa water.
We get it: Water can be boring. Luckily, it’s super easy to fun up. (And “spa water” just sounds so fancy, doesn’t it?) Slice some lemon wedges, cut some strawberries, or mash a handful of herbs and toss them into a pitcher. You can even spiralize a cucumber to create the prettiest spa water of all time.
9. Swap water for other liquids.
Instead of ordering that soda or iced tea, go for a water the next time you’re out to eat. You can even treat yourself to the sparkling option (see tip number 4) and, bonus, you’d still probably even up spending less money.
10. Make it habit.
Tie your water consumption to an activity. For example, force yourself to have a glass of water every time you get home or before each meal. Do this enough times and, eventually, it’ll become a habit and you’ll do it without even thinking about it.
Source: https://blog.williams-sonoma.com/10-brilliant-tips-to-help-you-drink-more-water-in-2019/
0 notes
Text
Pumpkin Cake (BEST EVER!)
The BEST ever moist and perfectly spiced pumpkin cake with a luscious cream cheese frosting and optionally garnished with candied pecans
Pumpkin cake has been on my list to perfect every Fall time, and after creating this pumpkin carrot cake, I thought my work was done. (Seriously that cake is unbelievable!) But as August started approaching this year I was dying to pull out the pumpkin and experiment so I set to making the best pumpkin (without carrot!) cake.
To have the perfect pumpkin cake it needs to be moist, sweet (without being cloying), perfectly spiced, AND have the perfect cream cheese frosting. I’m excited to tell you this cake ticks all the boxes (and then some) and it’s been a hit with everyone that’s tried it — especially my pumpkin obsessed boys!
How do you make a pumpkin cake?
This pumpkin cake is exceptionally easy to make! It’s as easy as mixing together the wet ingredients (pumpkin, eggs, oil, vanilla, brown sugar, & white sugar) in one bowl, mixing the dry ingredients (flour, baking soda, salt & lots of pumpkin-y spices) in a separate bowl, and combining the two! You don’t need a stand mixer to make this cake — hand mixers will work just fine! Once the mixture is combined you can pour it into a prepared pan (greased and floured) and bake it!
While the pumpkin cake is baking, you can whip up the frosting and frost the cake the minute it’s completely cooled!
Can you make this pumpkin cake with canned pumpkin? Can you make this pumpkin cake with fresh pumpkin?
This pumpkin cake recipe is made with a good solid-packed canned pumpkin. I highly recommend Libby’s canned pumpkin (not sponsored) as I’ve found it always has the best results as far as moisture content, color, and overall flavor. However, you can use fresh pumpkin at the same volume (1-3/4 cup fresh puree for 1-3/4 cup canned for this specific recipe) so long as you’ve drained excess moisture.
If you are using fresh pumpkin you’ll want to make sure you drain any excess moisture to avoid a pumpkin cake that is “too wet” and doesn’t cook properly. To drain fresh pumpkin: rest a fine mesh strainer over a large bowl. Line that mesh strainer with cheesecloth and then add the fresh pumpkin puree to the lined strainer. Let the pumpkin stand (at room temperature) and drain for 1-2 hours or until the pumpkin is thick and can hold its shape when pressed together in the cheesecloth. Once the pumpkin is to this consistency, you can use it in this recipe!
Tips for success on this easy pumpkin cake:
Don’t overmix the batter. Overmixing the batter activates the gluten in flour (great for breads and rolls, not so much for cakes and cupcakes!) which will result in a denser cake as opposed to a light and airy cake.
Correctly measure the flour: If you press a measuring cup into a bag of flour you will pack in way too much flour (which will result in a pumpkin cake with the wrong texture — way too dense!). To properly measure your flour, spoon the flour into the measuring cup until its overfilled. Then use the back of a butter knife to level the measuring cup at the top. You’ll have a perfect flour measurement now!
Use room temperature eggs: This ensures the eggs disperse more evenly into the batter giving these cookies a lighter texture (the eggs trap air). Soaking refrigerated eggs in a bowl of warm (not hot) water for about 10 minutes is a quick way to do this. Otherwise, pull the eggs out of the refrigerator about 30 minutes before use.
Is this a healthy pumpkin cake? How many calories are in one slice of this pumpkin cake?
I wouldn’t consider this a healthy cake, but using a vegetable like pumpkin in a cake is always going to make it a better option than say a chocolate or vanilla cake :). This cake has pumpkin, eggs, and so many different delicious spices (which are zero calories). For more details on calories you can see our nutrition facts below the recipe. 🙂
For healthier substitutions, you can use a white whole wheat flour in place of the white flour (1:1 substitution), reduce or omit the frosting, and can reduce the sugar by up to 1/2 cup. For the best results on a rich and delicious pumpkin cake, follow the ingredients listed 🙂
This pumpkin cake recipe has cream cheese frosting on it which is my all-time favorite! If you want to try a different frosting you could try:
You can cover this pumpkin cake in a glaze (which is especially pretty on a bundt cake). For this pumpkin cake I’d suggest using a glaze like this one.
If you like the combination of chocolate and pumpkin i’d recommend using this milk chocolate frosting. If you’re going the chocolate + pumpkin route, I’d also add 1 cup of miniature chocolate chips to the cake batter!
Finally, this pumpkin cake would also be really good with a brown butter frosting. I’d recommend this brown butter frosting.
Can I freeze pumpkin cake?
You CAN freeze this pumpkin cake. Pumpkin cake pre-baked will freeze well and retain its moisture and flavor for up to 2 months. (After 2 months you can expect the flavor to change a little and it may have more of a dry texture.)
If freezing this pumpkin cake, I would suggest freezing just the cake base and making the frosting fresh. (If you’re in a pinch, cream cheese frosting is one of the best frostings to freeze, but I tend to prefer that frosting made fresh.)
To freeze: make sure you cover the cake well before freezing! I like to wrap it in plastic wrap several times before freezing When you take it out of the freezer, expect it to take about 1-2 hours (at room temperature) to defrost. In that time you can whip up the frosting 🙂 Frost the pumpkin cake only when it is fully defrosted for best results.
How far in advance can you make this pumpkin cake?
Fresh pumpkin cake like this will last about 3-4 days at its peak. If you keep it refrigerated it should last about a week. If you frost this pumpkin cake with cream cheese frosting, you’ll want to refrigerate it (covered tightly) the first day you’ve made it.
I actually like this pumpkin cake best the SECOND DAY it’s made! The spice flavors and moistness have intensified and I think it’s the very best on the second day. Whenever I make this cake to share with others, I make it 1 day in advance 🙂
More Amazing Pumpkin Treats:
The BEST Pumpkin Cake
The BEST ever moist and perfectly spiced pumpkin cake with a luscious cream cheese frosting and optionally garnished with candied pecans. Feel free to make this cake the night before, we like it best on the second day!
Course: Dessert
Cuisine: American
Keyword: pumpkin cake
Servings: 10 -12 slices
Calories: 378 kcal
Author: Chelsea
Ingredients
1 can (15 ounces) or 1-3/4 cups solid-packed pumpkin (I highly recommend Libby's)
1 and 1/2 cups white granulated sugar
1/2 cup light brown sugar, packed
4 large eggs
1 cup vegetable oil
1 teaspoon vanilla extract
2 cups all purpose white flour
2 teaspoons baking soda
2 teaspoons ground cinnamon
3/4 teaspoon ground cloves
1/2 teaspoon salt
1/2 teaspoon ground ginger
1/4 teaspoon ground nutmeg
1 teaspoon pumpkin pie spice
Cream Cheese Frosting
1 package (8 ounces) full fat cream cheese, at room temperature
1/2 cup unsalted butter, at room temperature
3 cups powdered sugar
1/4 teaspoon pumpkin pie spice
1 teaspoon vanilla extract
1/8 teaspoon salt
Chopped (plain or candied) pecans, optional
Instructions
Preheat the oven to 350 degrees F. Generously grease and lightly flour a 10-inch bundt pan. Set aside.
In a large bowl, add the canned pumpkin (if you have wet/fresh pumpkin make sure to drain off excess liquid), white sugar, brown sugar, eggs, oil, and vanilla extract. Beat with hand mixers until combined and well blended.
In another bowl, combine the flour, baking soda, cinnamon, ground cloves, salt, ground ginger, ground nutmeg, and pumpkin pie spice. Whisk until combined. Add the dry ingredients into the wet and beat until just combined. Use a spatula to ensure all of the ingredients are fully incorporated.
Pour mixture into prepared bundt pan and bake for 50-65 minutes or until a toothpick when inserted into the center comes out clean or with moist cake crumbs. The cake should spring back when lightly touched. Remove from the oven and cool on a wire cooling rack for 10 minutes before inverting the cake onto the cooling rack to cool completely.
For the frosting: in a large bowl, beat ROOM TEMPERATURE cream cheese and butter until completely smooth. It's important the cream cheese and butter are at the same temperature so you don't get bumpy cream cheese! Add powdered sugar, pumpkin pie spice, vanilla and salt; beat until completely smooth. Pipe over the completely cooled cake. If desired, garnish with chopped candied or plain pecans. (See recipe notes for my candied pecan recipe).
Recipe Notes
To make candied pecans, click here.
Highly Adapted from Taste of Home
For more delicious recipes, follow along on Pinterest, Instagram, Facebook, and YouTube
Source: https://www.chelseasmessyapron.com/best-pumpkin-cake/
0 notes
Text
We tried the new Reese’s Peanut Butter Cups, and this is our honest review
Is the best part of a Reese’s the peanut butter or the chocolate? To settle the debate once and for all, the brand is launching two new variations on the classic cups — one with more peanut butter and the other with more chocolate.
The Best Chocolate Shop in Every State
Reese’s Lovers Cups will be available to the public in regular and king-size starting mid-April 2019, but thanks to our friends at the brand, our team was able to try them before their official release. We were really reluctant to taste them, though — because Reese’s are gorgeous just the way they are and if something’s not broken, don’t fix it.
But listen: The peanut butter version gave us life. It is a 10/10, beautiful, groundbreaking creation. It’s not unlike that sexy, silky, smooth peanut butter ball that some Midwesterners like to call a “buckeye.”
We don’t particularly like seeing change around these parts, but we need this to become a permanent addition to the Reese’s family. Just make sure to have a glass of milk at the ready, because it will make you thirsty, as peanut butter does. We are obsessed! We are in love! We want to marry this peanut butter cup!
The chocolate kind, on the other hand, was pretty anti-climactic. For some unexplained reason, Reese’s used “slightly darker milk chocolate” in this recipe instead of the regular milk chocolate longtime fans know and love. So that’s the downfall here. It’s a hard shell that kind of tastes like coconut. It isn’t bad, but we wanted to like it more. The rippled edge of a standard Reese’s is so satisfying, and if the brand had stuck to the classic milk chocolate code, we think this could’ve been a hit. Now we’re just confused and need closure.
So we definitely just settled this contest: Chocolate doesn’t hold a candle to peanut butter. But if you don’t believe us, find out for yourself. Fans can get an early taste of the limited-time-only sweets at the Reese’s Swap Shop at 321 Canal Street in New York City on March 26 from 12 to 6 p.m. and March 27 from 10 a.m. to 6 p.m. Visitors can bring in “anything they love, from an old toaster to their original roller skates, or even their last participation trophy,” and trade it for an exclusive first taste of Lovers Cups while supplies last. Reese’s, all we’re asking is that you keep the peanut butter cup on shelves forever and always. If not, we’ll be asking for its return just like these discontinued snack foods we wish they’d bring back.

Source: https://www.thedailymeal.com/eat/reeses-lovers-cups-review/032519
0 notes
Text
72 Hours in Seattle
Hi, it’s Abby. My mom asked me to write an introduction for this post about our last-minute trip to Seattle a few weeks ago. I was invited to play in a soccer tournament there and this one was different than most because there was only one game a day, which means there was plenty of down time to explore a city. (That is how I convinced my mom to go.) We flew out the morning after my last final and stayed with her college roommate, Jenn for three nights and three days. Mom already told you that the culinary highlight of our trip was eating a Dutch Baby with backyard raspberries in Jenn’s kitchen nook, but that doesn’t mean we didn’t pound some pavement in search of great food around town. Here, Mom and I take turns giving you a run-down of our packed 72 hours.
DAY 1: THURSDAY
1:00 [Jenny] I am forever in search of counter-service spots when I travel, especially for lunch, when you don’t want to spend an hour-plus lounging around while the sun shines on a brand new city that is calling for you. That’s why we dropped our bags at my friend Jenn’s house (in Ballard) at 12:45, then headed straight to The Fat Hen, a sweet, bright fast-casual spot that served avocado toasts, ricotta toasts, freshly squeezed juices, and good coffee. It killed us to forgo Frankie & Jo’s, the vegan ice cream shop sensation right across the street (they have multiple locations around the city) but we were saving room for dinner. FYI: Delancey — remember Delancey? — was right there, too. [Photo credit: Seattle Magazine]
2:30 [Abby] We walked from Fat Hen down 15th Street to Ballard Avenue, the main drag in Ballard, a neighborhood that reminded me of Brooklyn. There was a ton of stuff to do and a lot of fun shopping including a cool second-hand furniture store called Ballard Consignment, an aesthetically pleasing succulent store (I can’t remember the name, can someone help me?), and a trendy clothing place called Prism where my mom tried on a thousand dresses but ended up just buying my sister an iron-on patch for her jean jacket that said “Stay Wild Child.”
4:00 [Abby] We met up with my mom’s friend Jenn, who got out of work early for us, and headed to Golden Gardens Park for a walk. It was so beautiful! I got a virgin pina colada at Miri’s, a new cafe right on the beach. Also, even though everyone says Seattle weather is not so great, look at our sky! It was like that for most of the time we were there. (Here’s a tip to future travelers: Go there in late June, early July.)
5:30 [Jenny] I think the only reason why I agreed to take Abby to Seattle was so I could try to snag a table at The Walrus and the Carpenter, the original Renee Erickson French-style raw bar in Ballard that opened almost ten years ago and that I tried to get into during my last visit, only to be turned away by the long wait every time. This time I wasn’t messing around. At the very un-glamourous hour of 5:30, I dragged Abby, Jenn, and Jenn’s 15-year-old daughter Stella to dine on fried oysters and small plates in their bright happy space. FYI: Erickson has opened a bunch of other places in Capitol Hill, including a steakhouse Bateau, another oyster bar with the greatest electric mint color scheme (Bar Melusine), and stuffed doughnut mecca General Porpoise, which, for Abby, might’ve been more of a reason to go to Seattle than her soccer tournament. (More on that below.)
7:30 After dinner, we walked back up Ballard Avenue to get ice cream at Salt & Straw, the Portland-based makers who have won over legions of fans with their artisanal concoctions…think Fresh Sheep’s Cheese and Strawberries or Oregon Wasabi and Raspberry Sorbet. But the line was too long, and even though it was still early, we were on East Coast time, so we headed home to bed. (For those of you interested, here’s an interview with Salt & Straw founder Tyler Malek on the always awesome Bon Appetit’s Foodcast.)
DAY 2: FRIDAY
10:00 [Abby] I had a soccer game in Redmond (we won 4-0!) where the most exciting food moment of the morning was a pretzel that came with that fakey nacho cheese that is so delicious. We didn’t get to start exploring again until lunchtime and decided we wanted to spend the afternoon checking out Capitol Hill. First stop…
12:30…Rocket Taco for lunch, where we ate some of the best carnitas tacos I can remember.
1:45 It was Pride Month! We loved the rainbow crosswalks which made for especially good instagram posts. (That’s me with our friend Maylie. And this was at the intersection of East Pine and 10th Ave.)
2:30 [Abby] And of course, we had to hit Elliott Bay Books. My mom bought me a paperback copy of The Handmaid’s Tale — I’ve been watching the TV show and it’s very disturbing, but she said I’d like the book. (She wants me to tell you that for school I also had to read Hiroshima and Take the Cannoli)
3:01 [Abby] Then the funniest thing happened. I had been looking forward to going to the iconic General Porpoise Doughnuts from the moment we booked our flights — we practically planned our entire Capitol Hill outing around it — but when we got there at 3:01, we tried to open the door and it was locked. It closed at 3:00! For about ten seconds we were all super disappointed but then, out of nowhere, an employee walks outside and asked “Does anyone want a dozen free doughnuts?” I guess they like everything to be fresh, so at the end of the day, they give away what hasn’t sold instead of selling them the next day. That might’ve been the highlight of the trip. And those doughnuts were some of the best I’ve ever had– the vanilla stuffed ones especially!!
4:00 [Jenny] We hadn’t planned on it, but we decided to hit Pike Place Market (because: of course!) on our way home to Ballard from Capitol Hill. We bought fruit and a lovely flower arrangement for our lovely hosts, but for the most part we just walked up and down the long hallways and gaped at the offerings. Maybe the most amazing part was that I got a parking spot on Pike Place right in the middle of everything (across from the flagship Starbucks.) I kept looking at the spot and looking at the sign saying This is too good to be true (once a New Yorker always a New Yorker, I guess) but it was actually true. Over a month later, I’m still on a high from it.
6:30 [Jenny] I know this is hard to believe, but we still had more to eat. I’ve written about this before, but the way Abby and I go about planning where we want to eat in a new city is completely different. I go to tried-and-true sources like Bon Appetit City Guides or Eater’s Heat Maps. She goes right to instagram, searches by locations, then studies the grid until a particularly inspiring pastry or bowl of ramen shows up. That is how she landed on Fremont Bowl where we went with Jenn’s family. Abby’s review: “Crazy good Japanese bowls, with fish, chicken teriyaki, and so much more. I’m not really a tofu fan, but according to my mom she had the best tofu she’d ever had in her life at this place. Fremont’s a fun area to walk around, too.” She’s totally right, the fried house-made tofu that our friend Maylie ordered was off-the-hook delicious. I was psyched because right next door was Book Larder, a store that specializes in cookbooks and community culinary events, but sadly they were closed for a private event. I guess that’s as good an excuse as any to return to Seattle in the very near future.
DAY 3: SATURDAY 9:00 [Abby] Mom, Jenn, and Jenn’s husband, Ben went for an early run around Green Lake Park (about a 3-mile loop she says) then we all gorged on Jenn’s now legendary Dutch Babies and plotted the day. Ben pointed us in the direction of the giant Asian Market Uwajimaya which was awesome (Oh, before that, Mom stopped for another cup of coffee at Anchored Ship in Ballard) but we ended up eating around the corner at at Dough Zone due to some intense soup dumpling cravings, aka the best food in the world. It’s a good thing my next soccer game wasn’t until 4:00 that afternoon. We pretty much rolled out of there. Those dumplings were amazing.
6:00 [Abby] After my soccer game (lost 2-1) we drove to Mulkiteo and caught a ferry to Whidbey Island, about 25 miles north of Seattle across the Puget Sound, where Jenn and Ben have the sweetest cabin. The ferry was only about 25 minutes, but involved spectacular views of islands and huge mountains in the distance.
7:30 We only had about 12 hours to hang on Whidbey, but we got a good taste of it, snacking on their porch (above), chilling out by the campfire for an epic sunset; Ben grilled some local salmon and hot dogs for dinner. The house only had two bedrooms so my mom and I got to sleep in a tent listening to the crackling campfire.
. Side Note [Jenny] Those of you who follow me on instagram might remember this photo. Jenn and Ben were torturing themselves trying to decide what color to paint the cabin — they were going for a dark Scandinavian cottage look — so I conducted an insta poll asking which combo you all liked. Most of you were in favor of the navy/white palette, the third one down. Last week, she sent me this pic:
How beautiful is that?!?!?! They went with Sherwin Williams Inkwell for the house and Benjamin Moore Oxford White for the trim.
DAY 4 SUNDAY
8:30 [Abby] We had an early afternoon plane to catch, so didn’t have a ton of time to explore, but we did manage to squeeze in a walk on the beach and a quick trip to Langley, where we ate eggs and cinnamon rolls at Useless Bay Coffee, then took a walk to a dramatic sandbar called Seawall Park. The town was so charming! From there was a convenient shuttle from Whidbey to the Seattle Airport, and we were on our way home.
Boy you fed us well, Seattle. We miss you so much!
Related: 36 Hours in Austin; 36 Hours in Portland, Maine; 48 Hours in Montreal.
Source: http://www.dinneralovestory.com/72-hours-in-seattle/
0 notes
Text
Creamy vegan risotto with mushrooms & sausage
Want to impress your Valentine? Make this creamy vegan risotto with mushrooms and sausage.
Risotto isn’t difficult to make. But it does take a bit of babying. The effort is totally worth it – bite after luxurious bite.
Thank you to Herbivorous Butcher for sponsoring today’s post! The contents, photos, and opinions expressed are fully my own.
There’s a thick blanket of snow outside. And I am under a thick blanket of cotton inside…
This time of year, it’s hard to fight against the pull of cozy. A warm home, thick slippers, and a couple of purring cats are endlessly persuasive when the air is biting and gray.
So what’s a person to do on special occasions like Valentine’s Day? Bring the fun of going out to the comfort of your own kitchen!
Herbivorous Butcher: Valentine’s Day Dinner for Two
All year ’round, you can order from the Herbivorous Butcher on their website. They have a wide array of plant-based meats and cheeses (including the best vegan bacon out there!)
Their vegan meats and cheeses are also available in some stores, including grocery stores in Iowa City & Des Moines.
Plus, throughout the year they offer special packages online.
I was delighted when Herbivorous Butcher reached out about partnering for a few of their upcoming packages. I’m sharing what the packages include, as well as a recipe to go with each of them!
Today’s recipe is for creamy vegan risotto with mushrooms and sausage. You are going to love it! But more on that in a bit…
(Of course, even if you are unable to order the package or if you’ve missed the ordering deadlines, you can still make the recipes any time!)
Regular readers know that I’m a longtime fan of Herbivorous Butcher. No visit to the Twin Cities is complete without a stop at their brick and mortar location. Their plant-based meats & cheeses are artisanal quality.
So I’m beyond excited to share their Valentine’s Day Dinner for Two. It’s sure to make your loved one swoon! (And yes, everything in these pictures is 100% vegan!)
The Valentine’s Day pack includes:
Two Filet Mignons (7 ounces each)
Garlic Sausage (13 ounces)
Havarti Reserva (5 ounces)
Fondue Cheese (16 ounces)
Two 1-minute mug cakes from Coconut Whisk
The Valentine’s Day pack won’t start shipping until February, but I got an early peek at the goods. (Get all of the ordering details on the Herbivorous Butcher website or at the bottom of this post!)
Havarti Reserva
David and I celebrated Valentine’s Day early with a vegan cheeseboard – including Havarti Reserva and melty fondue cheese for dunking.
Can you believe the gorgeousness of that Havarti Reserva?
It’s made by reducing red wine, and then marbling it in the cheese sauce before it hardens. This buttery cheese has a mild flavor. And it spreads onto crackers like a dream.
Fondue
Before I went vegan, I loved having birthdays and anniversaries at a fondue restaurant in Los Angeles. I’d get all of my friends to come out. And we’d make a meal of little bites dunked in melty cheese.
So it really took me back to get the fondue pot going for this velvety cheese dip.
To take this fondue experience to the next level, add a wide array of dippers. This seriously could be a meal all on its own!
Dippers for vegan fondue:
Toasted bread chunks (I used garlic sourdough. Marbled rye would also be good!)
Soft pretzels
Herbivorous Butcher garlic sausage, browned in bite-sized pieces
Tiny roasted potatoes
Roasted Brussels sprouts
Roasted cauliflower
Cornichons
Olives
Cherry tomatoes
Regarding the soft pretzels, I recommend leaving them whole on the charcuterie board. Then you can just pull off a part before dunking. (Obviously read the ingredients first, but it’s usually not hard to find frozen soft pretzels that are vegan in the grocery store.)
For more ideas, just think of anything that would be improved with a ladling of salty, tangy cheese, and pop it onto the board.
Filet Mignon
Something I love about Herbivorous Butcher’s steaks & filets is that they can really take a good sear without drying out. In the summer, I cook them on the outdoor grill. In the winter, I take to the grill pan.
And my favorite part is getting a good, crusty exterior that you can crackle through. You don’t have to worry that it’s going to dry out the insides to get some color on the outside.
The filet is really thickly cut, which makes for an impressive looking entrée. You can serve it whole, or put it in slices on a plate.
I’m surprised again and again at the filling nature of their seitan. David and I usually split one filet between the two of us!
To finish off this romantic meal, I made creamy vegan risotto with mushrooms and the Herbivorous Butcher garlic sausage.
Risotto has “special occasion” written all over it, because it does take a little more attention than your standard weeknight rice dish. However, it’s not complicated to make. It just means that you have to focus on the one thing you’re doing.
For this risotto, I used Arborio rice. It is a plump grain that holds its shape, and has a starchiness that lends itself to risotto.
But this vegan risotto is not just creamy from the rice alone. I also finish it with cashew cream. It’s almost like vegan risotto meets mushroom alfredo.
It makes for a really indulgent, full-bodied dish that feels downright decadent.
How to make creamy vegan risotto
Start by browning bite-sized pieces of seitan sausage in a large skillet. Then move them to a plate for later.
Then sauté mushrooms in the skillet until they release their juices and brown. Push them to one side of the skillet, and add onions and garlic. Sauté until fragrant.
Add the Arborio rice, thyme, rosemary, and pepper. Get everything fully coated.
Then it’s time to start slowly adding in vegetable broth – one or two ladles at a time from a pot of warm vegetable broth on the stove.
With each ladling of broth, allow the rice to fully soak it up before adding another. Keep stirring. As it cooks, the risotto will start to thicken.
Keep adding ladle after ladle of broth until you run out. This will take about 25 minutes. By the time you finish, the rice should be al dente.
Add cashew cream to the pan (made with raw cashews and water). Also add the seitan sausage back into the pan. Combine everything and let it cook for about a minute more.
The risotto should be creamy and luxurious, but not overly wet.
Serve this creamy vegan risotto with seitan filet mignon, and a green vegetable like steamed broccoli or grilled asparagus.
How to place an order for the Valentine’s Day Dinner for Two
You can place an order for Herbivorous Butcher’s Valentine’s Day Dinner for Two on their website. They ship to all 50 states & Puerto Rico. They do not ship internationally.
Get the feast shipped to you for $90 (includes postage and handling). Or if you’re a Twin Cities local, you can pick it up in the store for $65.
If you place your order by January 27th, it will be shipped on February 4th.
If you place your order by February 3rd, it will be shipped on February 11th.
Cadry Nelson
About 3 1/2 cups of risotto
Creamy vegan risotto with mushrooms & sausage
This full-bodied risotto is extra creamy by way of cashew cream. It's a vegan main or side dish that really feels like an indulgence. It's loaded with mushrooms and seitan sausage. Worthy of a date night!
10 minPrep Time
38 minCook Time
48 minTotal Time

5 based on 2 review(s)
Ingredients
1/4 cup + 2 Tablespoons raw cashews*
1/2 cup water
3 1/2 cups vegetable broth**
2 teaspoons organic canola oil (or other neutral-flavored high heat oil), divided
1 cup (6 ounces) chopped seitan sausage (I used Herbivorous Butcher garlic sausage), small to medium bite-sized pieces
8 ounces cremini mushrooms, sliced
Pinch of salt
1/2 cup chopped yellow onions
2 cloves garlic, minced
1 cup Arborio rice
1/2 teaspoon dried thyme
1/2 teaspoon dried rosemary
Pepper, to taste
Instructions
Make the cashew cream. Put the raw cashews into a high speed blender with 1/2 cup of water. Blend until it is completely smooth, a thick cashew cream. Set aside.
Bring a small pot of vegetable broth to a low heat on the stove. You'll come back to it in a bit.
Bring a large non-stick skillet to a medium heat with one teaspoon of oil. Brown the seitan sausage pieces in the skillet to give them some color on both sides. This should just take a couple of minutes. Remove the sausage pieces from the skillet, and transfer them to a plate for later.
Add a half teaspoon of oil to the skillet, as well as the sliced mushrooms and a pinch of salt. Allow the mushrooms to release their liquid and brown in the skillet. Once the mushrooms are brown on one side, flip them. (Moving the mushrooms too often will slow their browning.)
Once the mushrooms have some nice color, push them to one side of the skillet. Add the remaining 1/2 teaspoon of oil to the empty side of the skillet, along with chopped onions & garlic. Saute the onions and garlic for a couple minutes, until fragrant. Then stir them together with the mushrooms.
Add Arborio rice, dried thyme, dried rosemary, and a grind of black pepper to the skillet. Use a spatula to fully incorporate all of the ingredients. Cook for a minute or so.
Now it's time to start incorporating the warm broth. Add one or two ladles of warm broth to the skillet. Stir the Arborio rice mixture almost constantly. The ingredients in the skillet should be at a low simmer. You don't want everything to boil off quickly, but you also don't want the heat so low that it takes forever to cook.
Once the rice has fully absorbed the first round of broth, add another ladleful and allow that to be absorbed, continuing to stir often. Keep going in this manner - ladle by ladle - until all of the broth is used. (Once the broth is gone out of the small pot, remember to turn off the heat.) As it cooks, the risotto will start to thicken. It should take about 25 minutes for all of the broth to be absorbed into the rice. Take a bite. The rice should be perfectly al dente. (It's unlikely, but if it still feels too hard, you can add a splash more of water to the rice until it reaches the right texture.)
Now it's time to add the cashew cream. Pour the cashew cream into the skillet, and fully combine. Allow the risotto to cook for a minute or so longer. It should be velvety and rich. Taste for salt & pepper, and add more if necessary. Serve right away.
Notes
*If you aren't using a high speed blender, you'll need to soak the raw cashews in additional water for several hours to soften and then drain before continuing with the recipe. Or grind the dry raw cashews in a clean coffee grinder until they are fine like a flour. Then add them to your standard blender with the water. If you're using a high speed blender, you can skip this step.
**If you'd prefer, instead of vegetable broth you can use 3 1/2 cups of water + 1 Tablespoon Better Than Bouillon in the no-chicken base. Just stir the Better Than Bouillon into the warm water until it dissolves.
7.8.1.2
272
https://cadryskitchen.com/2019/01/14/vegan-risotto/
Recipe video music: https://www.bensound.com/royalty-free-music
This is a sponsored post with a brand that I use in my own home. Posts like these help me keep fresh recipes coming your way!


Source: https://cadryskitchen.com/2019/01/14/vegan-risotto/
0 notes
Text
crispy spinach pizza
I went through a phase this summer where I couldn’t stop making crispy spinach pizza, but I had no plans to tell you about for a couple reasons, the first of which is it’s absolutely hideous. It looks like someone melted Oscar the Grouch onto a pizza dough and little I did improved this, not making it round, nor rectangular, in good light nor light so dim that maybe you wouldn’t notice it at all.
Crispy spinach pizza isn’t its official name (that’s, in fact, The Popeye) but in our household dish names are marketing devices and heaps of spinach are, understandably, a hard sell. It’s not much easier with adults. Yes, I know many of us enjoy green vegetables and volunteer to eat them on the regular, but even as one of those people, I felt nothing but panic and dread the first time I saw this unsettlingly large pile of charred-edge greens and no sign of cheese or any other anchors of joy coming across the room to me at the late Co., and knew I’d ordered all wrong.
Except it’s very, very good. Just about anyone who lived through the year 2010 knows what kale chips are, but did you know that other greens also get crispy when they hang out in the oven? If you’re questioning whether you *need* crispy greens in your life, consider how happy your feet will be when walking down a sidewalk through piles of fallen leaves a few weeks from now. That’s the effect of this pizza, except there’s also a small but mighty layer of cheese underneath, a complex salty, stretchy, funky three-fer of mozzarella, pecorino, and gruyere that anchors the spinach to the crust and together they hit the spot.
Previously
One year ago: Chocolate Tahini Challah Buns and Quick Pasta and Chickpeas Two years ago: Magic Apple Plum Cobbler and Garlic Wine and Butter Steamed Clams Three years ago: Oat and Wheat Sandwich Bread and The Perfect Manhattan Four years ago: Cucumber Lemonade and Sunken Apple and Honey Cake Five years ago: Fudgy Chocolate Sheet Cake and Frico Grilled Cheese Sandwiches Six years ago: Homemade Wheat Thins and Crackly Banana Bread Seven years ago: Apple and Honey Challah and Apple Pie Cookies Eight years ago: Monkey Cake and Beef Chili with Cheddar Sour Cream Biscuits Nine years ago: Lebanese-Style Stuffed Eggplant Ten years ago: The Baked Brownie, Spiced Up, Braised Romano Beans and Spinach Quiche Eleven years ago: Cream Cheese Noodle Kugel and Couscous and Feta-Stuffed Peppers [New!] Twelve years ago: Orange Chocolate Chunk Cake and Acorn Squash with Chile-Lime Vinaigrette
And for the other side of the world: Six Months Ago: Melting Potatoes and Asparagus and Egg Salad with Walnuts and Mint 1.5 Years Ago: Easiest French Fries and Peanut Butter-Swirled Brownies 2.5 Years Ago: Sesame Soba and Ribboned Omelet Salad and Eggs in Purgatory, Puttanesca-Style 3.5 Years Ago: Black Bottom Oatmeal Pie and Potatoes with Soft Eggs and Bacon Vinaigrette 4.5 Years Ago: Whole-Grain Cinnamon Swirl Bread and Three Bean Chili
Crispy Spinach Pizza
Servings: 4
Time: 20 minutes
Source: Jim Lahey's Popeye Pizza
Print
Have you heard me mention this 2012 book before? It’s a Top 10 for me, for sure. Even if you think you’re not a pizza person (gasp), I find his treatment of vegetables as toppings, such as this (and also his mushroom pizza, and also this astounding summer squash one) innovative and fantastic.
No matter how much spinach it looks like when you put it on, I promise, it’s not too much. We all know the jokes about spinach, right? You’ll be glad you heaped it all the way to the toppling over point.
This makes two 12-inch round or one 13×18 (half-sheet) thin-crusted pizza
Olive oil
Cornmeal, for dusting
1 fully risen pizza dough or about a 2/3 volume of my lazy fitted-to-your-schedule favorite or your favorite, whichever it may be
2 ounces (2/3 cup) grated gruyere or comte cheese
2 ounces pecorino cheese, chopped into mixed-sized rubble or 2/3 cup grated
4 ounces mozzarella, either torn into shreds, diced, or (as shown) in ciliegine
1 large garlic clove, thinly sliced or grated
Sea salt and freshly ground black pepper
8 to 9 ounces fresh spinach, larger stems removed
Heat your oven to 500°F (or as hot as it goes) with a rack in the center.
Coat either 1 13×18-inch rimmed half-sheet pan or 2 12-inch round pizza pans lightly with olive oil. Sprinkle lightly with cornmeal. Use your fingers to stretch dough to the edges of the pan(s). If it puts up a lot of resistance, let it rest for 5 to 10 minutes, and resume working the dough to the sides.
Top dough(s) with cheeses, a few grinds of black pepper, and garlic. Heap spinach all over; season with salt. Bake pizza until spinach is wilted and slightly browned, about 10 minutes. Remove pizza from oven and drizzle with olive oil. Cut and serve immediately.
Source: https://smittenkitchen.com/2018/10/crispy-spinach-pizza/
0 notes
Text
Paleo Lemon Blueberry Muffins
These Paleo Blueberry Muffins are bursting with lemon flavor and plump blueberries! They come together easily, are gluten-free, made with almond flour, and the perfect healthy muffin recipe for any brunch or as a snack!
Paleo Blueberry Muffins
These grain-free Paleo Lemon Blueberry Muffins are so simple, moist, and delicious. They are bursting with blueberries, with a fluffy texture and a bright lemon flavor. Nobody will know these muffins are gluten-free, grain-free, and paleo-friendly! They are so easy to make and can easily be made for a quick brunch or breakfast at home. Get the kids and they can help too!
Here’s what you need to make them:
Almond flour
Coconut flour
Baking Soda
Eggs
Honey
Vanilla extract
Unsweetened applesauce
Lemons
Fresh blueberries
Swapping with Frozen Blueberries
It’s so nice during blueberry season to include them fresh in this muffin, but in the dead of winter, frozen blueberries can work too! To avoid turning the muffin batter blue fold the blueberries in while they’re still frozen. They might need an extra minute or two to cook in the oven, but otherwise the recipe will work the same.
Is Almond Flour Healthy?
Almond flour is a delicious and nutrient dense alternative to any other flour. It is low in carbs and high in fat which makes it a great healthy flour that you can feel great about eating.
How to Measure Almond Flour
If you have an electronic kitchen scale at home, it’s best to use it here to measure almond flour. Almond flour can be tricky to measure as it can be easily compacted, even straight from the bag. The same goes for coconut flour too since it’s such an absorbent flour. Even a small measuring error with coconut flour can impact a recipe. So we’ve included the weight in grams here. Any electronic kitchen scale can switch between grams and ounces. Since grams are more precise we’re use that. If you don’t have a scale: whisk almond flour until it’s lightened up and lightly scoop the almond flour or coconut flour into the cup measurement and level it off.
If you like this muffin recipe, check out these others:
If you like this blueberry recipe, check out these others:
Paleo Lemon Blueberry Muffins
Ingredients
2 cups (192 grams) almond flour
1 tablespoon (7 grams) coconut flour
1/8 teaspoon salt
1/2 teaspoon baking soda
2 eggs
3 tablespoons honey
1 teaspoon organic vanilla
1/4 cup unsweetened applesauce
Zest of 1 lemon (about 2 teaspoons)
1 teaspoon lemon juice
1 cup blueberries, divided
Directions
Preheat oven to 350ºF and line muffin tin with parchment liners.
In a large bowl whisk together almond flour, coconut flour, salt and baking soda.
In a separate medium bowl, whisk to combine eggs, honey, vanilla, applesauce, lemon zest and juice.
Combine wet into dry and stir until fully incorporated. Gently fold in 1/2 blueberries.
Using a muffin scoop or spoon, fill liners with 1/4 cup batter. Place remaining blueberries into the top of batter.
Bake for 20 minutes or until a toothpick comes out clean.
Recipe Notes
Recipe originally published in 2014, recipe updated in 2018 and republished with new photos in July 2019.
Loading nutrition data...
There may be affiliate links in this post! By clicking on them, or purchasing recommended items I may receive a small compensation, at no cost to you! However, I only recommend products I absolutely love and use in my own home! Thank you for supporting Lexi's Clean Kitchen when you shop! See my privacy policy for more information about this, the information we save, and more!
Source: https://lexiscleankitchen.com/lemon-blueberry-muffins/
0 notes
Text
2017 – A Year in Review // Winter Pasta with Slow-Cooked Kale, Kabocha Squash, and Golden Raisins
Although I’m a bit later than usual this year, my annual year-end post is one of my favorite things to write each year. I love reading other people’s posts, too, even people I don’t know personally. I like reflecting on how much growth and change and activity a single year can hold. It gives me perspective. But, if you’re not a big fan of this sort of thing, or of lengthy personal blog posts, skip on down to the end. There’s a recipe for a kale, golden raisin, and kabocha squash pasta that’s been getting me through this cold snap. I’ve made it four or five times to get the balance just right, and now it’s become my go-to winter pasta.
For those of you sticking with me for the long haul, let’s talk about 2017. For me, 2017 was the year of the wedding, first and foremost. After that, there was travel – but less of it than 2016 and 2015 and more of it for fun than for work. It was a year of great and easy friendships, of growing beautiful flowers, of work weekends in Maine. It was a good year, perhaps not a great year, but a good one.
The big thing – our wedding
Of course, we knew before the year even started that 2017 would be the year of the wedding. It dominated the whole year. Our wedding day turned out more beautiful than we had imagined, but it was a huge amount of work to get there. We had our wedding at my parent’s house in Maine, and it was very much a from-scratch affair. We built the barn by hand (and by we I mean mostly my parents), which was an enormous undertaking. We had gorgeous hand-made farm tables milled from trees on the property. I did my own flowers, and grew half of them. (As an aside, 2017 was 100% a year of flowers for me. I fell in love with flower gardening and arranging and I can’t wait to get my seeds started in the spring.) Every aspect of the wedding was personal and lovely, but it was so much work. I’m really glad we got married and had our closest friends and family there by our sides, and I’m really glad we’re not doing it again.
Twenty-eight countries and counting
Trevor and I kicked off the year with five weeks in Portugal, an incredible escape from the cold and dark of January in Boston. Of course, I was working the whole time, but we still got to explore on weekends and immerse ourselves in the wonderful Portuguese culture. I leave a little part of my heart everywhere I travel, but I left a big piece in Portugal. I miss the food and the wine, the lonely sounds of fado in tiny clubs, the white light reflecting off the cobblestones. I miss the café culture and the gentle winter sunshine. I miss the people, my coworkers and friends, who opened their hearts to us so easily. I miss the language, which I still practice almost daily, in hopes that I’ll need it again. I’m glad that we’re staying put this winter, after relocating for January and February in the past two years, but it was a wonderful experience to live in Lisbon.
In July, I took a long-anticipated trip to Iceland with three of my best girlfriends. It was a short trip – just five days – but absolutely packed. Iceland was stunning and wild, exceeding my already high expectations. It was also wonderful (if very tiring) to travel with friends, something I hadn’t done before beyond short weekend trips in the states. I already can’t wait to return to Iceland and continue exploring. And in November, we made a Thanksgiving trip to Colorado and Utah to visit my extended family. The sun was life-giving, and we were outside hiking in the beautiful desert every day.
And then of course, there was our honeymoon. We were gone three full weeks, making our way up the Croatian coastline, driving through the Slovenian alps, then wrapping up with a city break in Prague. It was an epic trip. It was also so nice to just be with Trevor for three weeks and… hang out. Of course we were exploring and adventuring but we were also just being us, something I had missed in the chaos leading up to the wedding. I’ll write about our trip properly someday, but for now, I’ll just mention the highlights. There was a sunset bike ride through the sleepy hill-top olive groves in Korcula, followed by an unforgettable candlelit dinner under pomegranate trees. We spent an afternoon drinking champagne and watching the sun slowly sink over the Adriatic at a seaside bar where you could climb down into the ocean at any point. We hiked up through the emerald gorges in Slovenia, following a wooden sign with a piece of cheese on it, until we reached a beautiful alpine valley with two houses, one of which did, indeed, serve us some cheese. We designed our own brewery tour in Prague, sampling the best of the Czech Republic’s beer scene. We fit so much into three weeks – it will be a hard trip to top.
For other work travel, there was one follow-up trip to Portugal in April, for my birthday in fact. Never have I received so many hugs on a single day. A July trip to Hong Kong and Singapore registers as barely a blip on my mental calendar of the year, although it was my first time in Singapore. I’ll be back to both countries in a few weeks, and I’m excited to escape the cold (and for the food! Always the food). Then just a few weeks ago, a December trip to a small town in Northern Ireland followed by two days in Dublin. I love Ireland for so many reasons but this trip was a blur, especially getting home just three days before Christmas. Overall, work travel felt much more manageable this year – hopefully I can carry that through into 2018.
The best people
I’m not particularly quick to make new friends – I’ve always done better with a small group of people I’m really close to. But after 6 years living in Boston, I have such a solid crew, many of them high school friends who have moved back to the area. They are all good, smart people who are easy to be with, and some of my best memories of this year were with them. A lazy August Sunday spent tubing down the Saco river was a highlight, as was a weekend at a friend’s Maine island cottage, complete with hours of wine-laced Molkky, a candlelit lobster dinner, the poetry reading that his father mandates, beautiful sailing, and a late night bonfire dance party. And, I almost forgot, our 10 year Andover reunion. I imagine most people don’t look forward to their high school reunions as much as we do. It was a blissful weekend full of super impressive people, an all day kickball lawn party (complete with kegs), midnight dancing, and collapsing on the lawn in fits of giggles around 2am. Sunday we couldn’t move, because we’re old now, but it was worth it. Add to this the many other dinner parties, bar nights, one epic scavenger hunt birthday party and a casual NYE game night turned dance party to close out the year, and it sums up to a year of really good playtime with really good friends.
Working and blogging and growing
I feel a huge amount of relief going into 2018 with an understanding of what I want this blog to be. I spent the first half of 2017 listening to blogging podcasts ad nauseam, investing in a new design and a mailing list and SEO plugins. I thought a lot about my content and who I wanted it to reach, and I pored over my analytics to understand how I could grow. Basically, I hustled. It was stressful and frustrating and overwhelming. And then somewhere in the middle of all that hustle I realized that I don’t want to blog as a business-owner. That’s not why I started, and that’s not what brings me joy. I have a stable, compelling career that I love and it’s not blogging – so why should I turn blogging into work when it doesn’t need to be? I want to create beautiful content and delicious recipes and tell stories as long as it feels like a hobby and not a chore. Of course, it’s nice when a hobby has financial perks, but making business success the goal of blogging took all the fun out of it. Realizing this has been so helpful.
On the flip side of this blogging decisions lies my real work. Although I went through a similar questioning phase about what I wanted my next career move to be, I came out the other side with the realization that I really like my job. I’m going into 2018 in a new role, with a team and multiple projects to manage, and I’m excited. I have a lot to learn but I work in a team with the smartest, best people, which makes all the learning and growing easier.
Now for 2018
I’ve been reflecting this week about how open 2018 feels. It’s a wonderful feeling. Of course, we have things planned – weddings to attend and house projects and a few trips with friends already on our calendar. But largely, the year feels full of potential, untethered to major life milestones. I’m excited to see where it takes us, what new opportunities and adventures it will bring. My intentions for 2018 are to bring a sense of calm into every day, to spend as much time as I can outside in nature, to prioritize my health, and to learn and grow.
Winter Pasta
And if you made it through all of that… I’m impressed. I’m guessing even my mother will skim this one. So now, what most of you are here for, a recipe for a delicious winter pasta. A few year’s back I read a magazine article about how you should always be finishing your pasta in the pan with the sauce and a splash of the pasta cooking water, and it has totally changed the way I cook pasta. It’s such a simple trick and it makes a huge difference. Since reading that article, I’ve been experimenting with what I think of as “perfect seasonal pastas.” I test them over and over again until they are just right, foolproof, and full of seasonal ingredients. So far I have a summer pasta, with heirloom yellow tomatoes and sweet onions, a creamy mushroom spaghetti that is irresistible in the fall, and a spring carbonara with ramps and meyer lemon zest. Over the past 5 or 6 weeks I’ve been testing what I’ve come to think of as my winter pasta, and I’m ready to share it. This pasta has tuscan kale and shallots slow-cooked in white wine, plump golden raisins, a hint of chile, and sweet roasted kabocha squash. It is hearty and wintery without being overly heavy or creamy. It’s on weekly rotation in our house and I hope it will be in yours, too.
Happy 2018 to all of you!
Past New Years’ posts…
2016: Feta and Onion Phyllo Pie 2015: Brown-Butter Chestnut Waffles with Poached Pears and Mascarpone 2014: Rye Blini, Smoked Salmon Dip, Russian Beet Dip, Pretty in Pink Cocktail 2013: Raspberry Sherbet Champagne Floats 2012: Butter-Roasted Cinnamon Chicken with Almonds and Pomegranates
Like what you just read? Subscribe to Katie at the Kitchen Door in the box on the right, on Feedly or Bloglovin‘, or follow along on Facebook, Pinterest, or Instagram. Thanks for reading!
Print
<![CDATA[ .tasty-recipes-image float: right; .tasty-recipes-print-button background-color: #666677; display: inline-block; padding-left: 1em; padding-right: 1em; padding-top: 0.5em; padding-bottom: 0.5em; text-decoration: none; a.tasty-recipes-print-button color: #FFF; a.tasty-recipes-print-button:hover color: #FFF; .tasty-recipes-rating.tasty-recipes-clip-10 -webkit-clip-path: polygon(0 0, 10% 0%, 10% 100%, 0% 100%); clip-path: polygon(0 0, 10% 0%, 10% 100%, 0% 100%); .tasty-recipes-rating.tasty-recipes-clip-20 -webkit-clip-path: polygon(0 0, 20% 0%, 20% 100%, 0% 100%); clip-path: polygon(0 0, 20% 0%, 20% 100%, 0% 100%); .tasty-recipes-rating.tasty-recipes-clip-30 -webkit-clip-path: polygon(0 0, 30% 0%, 30% 100%, 0% 100%); clip-path: polygon(0 0, 30% 0%, 30% 100%, 0% 100%); .tasty-recipes-rating.tasty-recipes-clip-40 -webkit-clip-path: polygon(0 0, 40% 0%, 40% 100%, 0% 100%); clip-path: polygon(0 0, 40% 0%, 40% 100%, 0% 100%); .tasty-recipes-rating.tasty-recipes-clip-50 -webkit-clip-path: polygon(0 0, 50% 0%, 50% 100%, 0% 100%); clip-path: polygon(0 0, 50% 0%, 50% 100%, 0% 100%); .tasty-recipes-rating.tasty-recipes-clip-60 -webkit-clip-path: polygon(0 0, 60% 0%, 60% 100%, 0% 100%); clip-path: polygon(0 0, 60% 0%, 60% 100%, 0% 100%); .tasty-recipes-rating.tasty-recipes-clip-70 -webkit-clip-path: polygon(0 0, 70% 0%, 70% 100%, 0% 100%); clip-path: polygon(0 0, 70% 0%, 70% 100%, 0% 100%); .tasty-recipes-rating.tasty-recipes-clip-80 -webkit-clip-path: polygon(0 0, 80% 0%, 80% 100%, 0% 100%); clip-path: polygon(0 0, 80% 0%, 80% 100%, 0% 100%); .tasty-recipes-rating.tasty-recipes-clip-90 -webkit-clip-path: polygon(0 0, 90% 0%, 90% 100%, 0% 100%); clip-path: polygon(0 0, 90% 0%, 90% 100%, 0% 100%); .tasty-recipes-nutrition ul list-style-type: none; margin: 0; padding: 0; .tasty-recipes-nutrition ul:after display: block; content: ' '; clear: both; .tasty-recipes-nutrition li float: left; margin-right: 1em; @media print .tasty-recipes-no-print, .tasty-recipes-no-print * display: none !important; ]]>
A seasonal winter pasta with slow-cooked Tuscan kale, roasted kabocha squash and golden raisins. Satisfying and warming without being heavy.
Inspired by Sunday Suppers at Lucques.
Author: Katie at the Kitchen Door
Yield: 2-3
Ingredients
1/2 small kabocha squash, peeled, seeded, and cut into 1/2 inch cubes
5 TBS olive oil, divided
sea salt and black pepper to taste
4 shallots, peeled and thinly sliced
4 cloves garlic, peeled and thinly sliced
1 sprig fresh rosemary, needles finely chopped
1 chile de arbol, broken in half (or 1/4 tsp red pepper flakes)
1 bunch Tuscan kale, center ribs removed, torn into bite-sized pieces
1/2 cup white wine
1/4 cup golden raisins
1/2 lb. orechiette pasta (or other similar shape)
1/2 cup freshly grated parmesan cheese
Instructions
Preheat the oven to 400F. Toss the cubed squash with 2 TBS of olive oil and spread out on a rimmed baking sheet. Season with sea salt and black pepper. Roast in the preheated oven until tender, about 25-30 minutes. Flip the squash cubes over halfway through cooking.
Bring a large pot of salted water to boil.
Heat 1 of the remaining tablespoons of olive oil in a large saute pan over medium-low heat. Add the sliced shallots, sliced garlic, chopped rosemary, and the chile de arbol to the pan. Saute until the shallots are soft and golden brown, about 5 minutes. Add the kale along with the remaining 2 tablespoons of olive oil. Season with sea salt. Cook the kale in the olive oil for 3-4 minutes, stirring frequently, then add the wine and the raisins to the pan. As soon as you add the wine, stir to scrape any burnt bits off the bottom of the pan.
Cook the kale over low heat for about 10 minutes. After 10 minutes, add the pasta to the boiling water. Continue cooking the kale while the pasta cooks. When the pasta is just barely al dente, use a skimmer to add the pasta to the pan with the kale. Add a few splashes of the pasta cooking water to the pan as well, along with the grated parmesan cheese. Add the roasted squash to the pan. Cook everything together for 2-3 minutes, stirring to fully coat the pasta in the sauce and to evenly distribute the vegetables. Serve immediately.
6

Source: http://katieatthekitchendoor.com/2018/01/07/2017-year-review-winter-pasta-slow-cooked-kale-kabocha-squash-golden-raisins/
0 notes
Text
Banana Oatmeal Cookies
These whole grain banana oatmeal cookies are soft and chewy, sweetened only with bananas and honey and a few chocolate chips. This is one recipe you’re going to want to double!
Baking with bananas
If you don’t like the taste of bananas, then this recipe definitely isn’t for you! Don’t despair, though. This recipe for simple oatmeal breakfast cookies is a great option. So are these pumpkin oatmeal breakfast cookies.
If you’re like my family and you have a constant rotation of underripe and overripe bananas, both on your kitchen counter and in your freezer, pull up a seat.🛋 You’re in the right place.
Bananas add a natural sweetness to everything from banana bread (how about one with a cinnamon swirl?) to banana muffins and even banana oatmeal muffins. Once they’re almost uncomfortably ripe, you can either bake with them right away or peel, chop and freeze them in a single layer. Then, pile them into a ziptop bag and use them in almost any way you would use fresh bananas.
You can blend your frozen bananas into a smoothie, or thaw them out on the countertop or in the microwave. Then, mash those ripe bananas and bake with them as normal.
One of my favorite ways to bake with them is by pairing them with oats. The creaminess of bananas is a natural complement to the chewiness of oats.
Why these cookies are for breakfast, not dessert
If you’re looking for traditional gluten free oatmeal cookies to satisfy a hankering for everyone’s second favorite buttery dessert cookie, this is not that recipe! That oatmeal cookie recipe is made to be eaten at the end of the day, with a tall glass of milk.
This recipe is meant to be enjoyed with a hot cup of morning coffee—or on the run if that’s how your day is working out. It’s made without any all purpose flour of any kind (gluten free or not). The structure is created by oats in two forms (rolled oats and oat flour).
I would never call this recipe flourless, though, since I take that term very literally. If I’m calling a recipe flourless, that means that there’s nothing in the recipe that’s been ground into a flour. That means no oat flour, no almond flour, and no rice flour at all.
Since this recipe is made without any refined grains, and only honey and mashed bananas for sweetness, it’s much healthier than a traditional dessert cookie. It does have a few chocolate chips, but you can leave those out or replace them with chopped raw nuts if you’d prefer.
How to make this recipe in one bowl
Whenever possible, I write my recipes to be made in one single bowl. These banana oatmeal cookies aren’t very fussy at all and can tolerate a few substitutions quite easily. (See the “Ingredients and substitutions” section below for full substitution information.)
But as written the recipe will require a bowl to melt the butter, and one to beat the egg. Here’s how the recipe is written.
Combine the dry ingredients (oats, oat flour, baking soda and salt) in a large bowl and whisk them to combine. Then create a well in the center of the dry ingredients with a spoon.
Next, add the wet ingredients (melted butter, banana, egg, and honey) in the center. The well you’ve created in the dry ingredients allows the wet ingredients to be mixed into the dry in just a few strokes.
Since you’ll need melted butter and a beaten egg, if you’d rather make the recipe in precisely one single bowl, there’s another way. Flip the preparation of the wet ingredients with the preparation of the dry.
First, place the butter in a large bowl, and melt the butter in the microwave. Allow the melted butter to cool until it’s no longer hot to the touch. Mash the banana right into the melted butter, then add the egg and honey and beat with a fork to combine well.
Then, you can add the oats, oat flour, baking soda and salt to the wet ingredients and mix them into the soft cookie dough. Just be sure to mix it fully so the baking soda and salt aren’t concentrated in one single area of the mixture.
The cookies have so little fat in them that they won’t spread much at all during baking. So be sure to flatten the mounds of cookie dough with wet fingers before putting them in the oven.
Ingredients and substitutions
I’ve made these cookies dairy-free, but I haven’t made them without the egg or without oats. If you have additional dietary restrictions, here are my best-educated guesses about replacing some of the ingredients in this recipe.
Egg-Free: Since there’s only 1 egg in this recipe, try replacing it with one “chia egg” (mix 1 tablespoon ground chia flour with 1 tablespoon lukewarm water and allow it to sit until it gels).
Dairy-Free: The only dairy in this recipe is unsalted butter, and it can be replaced with virgin coconut oil, gram for gram. Just be sure you’re using dairy free chocolate chips.
My favorite brand of dairy-free chocolate chips is Enjoy Life brand, but Nestle also makes a variety of chocolate chips that are top 8 allergen-free called “Simply Delicious.” They’re made with only 3 ingredients, and they taste great.
Oats: In the U.S., there are certified gluten free oats that are grown on dedicated gluten-free fields and stored in dedicated silos. We use them all the time.
For oat flour, I simply grind them in a blender or food processor as finely as possible. If I’m using oats in a recipe, I want some chew from them, so I never worry about having a superfine oat flour.
If you can’t or would rather not have oats for any reason, though, they can be replaced in gluten free baking. The oat flour should be replaced with quinoa flakes and the old-fashioned oats with beaten rice, but click through the link in the previous sentence for a complete explanation.
Honey: If you can’t have honey or you’d like to make this recipe vegan by replacing the egg as directed above, you can try replacing the honey with agave syrup or Lyle’s golden syrup. You could also replace it with light corn syrup, but it must be a liquid sweetener, not a granulated one.
Source: https://glutenfreeonashoestring.com/banana-oatmeal-cookies/
0 notes
Text
How to Decorate a Store-Bought Cake with Candy
When it’s the middle of summer, we’ll do just about anything to avoid turning the oven on during a heat wave. If you’re in the same boat, this quick cake makeover is just what you need! A simply store-bought sheet cake gets a whole new look with this adorable village of colorful houses. Have you ever heard of Jellybean Row? The colorful row of houses is located in Newfoundland on the east coast of Canada and is a popular tourist attraction there. These gummy candy houses may not be made of jellybeans, but the colors are pretty close, don’t you think? Keep reading to see the quick and simple tutorial below.
Store-bought cake
Starburst Gummies (original and sour)
Extra frosting (optional)
Knife
Cutting board
Spatula
Step 1 Open up your bags of Starburst Gummies – we bought one bag of original and one bag of sour and that was more than enough to decorate a cake this size, with extras for taste-testing of course! Decided if you want to use all the colors, or if you want your little village to have a more specific color scheme. Lay the gummies out on a cutting board and carefully use a knife to cut some of the squares in half, from corner to corner. These triangular pieces will be the roofs for the houses.
Arrange the houses so that you know you have a roof for each house. We made eighteen houses for this cake.
Step 2 If your store-bought cake was already frosted with plain icing, you’re ready to decorate! However if, like ours, your cake has piped frosted details you want to remove, carefully use a spatula to scrape off and remove those. Depending on your cake, you might find that you’re able to use a spatula to smooth everything out nicely, but if not, just add a little bit of ready-made frosting on top to cover up any crumbs as needed.
Once your cake is ready, simply arrange the gummy houses on top and you’re ready to enjoy!

Source: https://www.handmadecharlotte.com/decorate-store-bought-cake-candy/
0 notes
Text
Big Batch Multi-Cooker Cinnamon and Oatmeal
Big Batch Multi-cooker Oatmeal is perfect for back to school or even when you need to serve up or prepare a large breakfast for a lot of people.
I often use the weekends to prepare food for the week. Yes, I have even made larger batches of oatmeal on the weekend to reheat during the week. I don’t like the packages of instant oatmeal, they have a lot of extra ingredients in them, and they also have a lot of sugar. So I like to purchase a better quality of oatmeal and prepare it in a large batch.
Large Batch Oatmeal
For this large batch oatmeal recipe, you could make it on your stove top, or you can make it in a multi cooker. I know not everyone has a full kitchen to prepare food in, and appliance like this could easily take care of a lot of your food preparation needs. For this recipe, I opted to make an apple and cinnamon flavored one. If you are looking for more types of oatmeal recipes, I recommend Oatrageous Oatmeals.
This week I have been testing out the Cosori Multi-Cooker. I was sent this appliance to review, all opinions are my own. If you are unfamiliar with Multi-Cookers, they have been around for a while. I don’t know about you, but I don’t have an infinite amount of space in my kitchen, so I have to really think through small kitchen appliances very well. I love appliances like multi cookers because they can do so many different things.
A multi cooker can
Steam
Slow Cook
Saute
Boil
Brown
Bake
I tested this multi cooker by making hard cooked eggs by steaming them, making macaroni and cheese, and large batch oatmeal. I have been very pleased with the variety of food preparation with this multi cooker.
More foods that would be ideal for a multi cooker
I could easily envision using a multi cooker for the holidays. With large gatherings it’s hard to figure out who is going to use the stove and in what order. With a cooker like this, you could easily make some mashed potatoes, other vegetables, and heat up soups, and cocoa. I have actually brought a device like this to a pot luck, and finished cooking my food while at my pot luck.
This blog post contains an affliate link.
Big Batch Cinnamon and Apples Oatmeal
Make a large batch of oatmeal, this is perfect for a large family, or for when you want to make it ahead of time.
Ingredients
6 cups water
2 cups whole milk do not use skim or 2% milk, it may curdle
4 cups old fashioned oats
1 teaspoon salt
3 teaspoons ground cinnamon
1/2 teaspoon nutmeg
1/2 cup brown sugar
1 1/2 cups chopped apple I prefer granny smith
1 teaspoon vanilla
Instructions
Multi Cooker Instructions
Place the multicooker on boil. Add water and milk, (use whole milk, lower fat milk may curdle). When the milk and water begina to simmer, add the oatmeal, salt, cinnamon, and nutmeg.
When the oatmeal begins to boil add the chopped apple. Cook on a full boil for 7 to 8 minutes. Stir frequently, the oatmeal will scorch if you do not stir.
Add apples and brown sugar, and cook for 3 to 4 minutes more. Turn off the heat.
Add the vanilla and stir in well.
Stovetop Instructions
In a large pot water and milk, (use whole milk, lower fat milk may curdle). Cook on high. When the milk and water begins to simmer, add the oatmeal, salt, cinnamon, and nutmeg.
When the oatmeal begins to boil add the chopped apple. Cook on a full boil for 7 to 8 minutes. Stir frequently, the oatmeal will scorch if you do not stir.
Add apples and brown sugar, and cook for 3 to 4 minutes more. Remove from heat.
Add the vanilla and stir in well.
Nutrition Facts
Big Batch Cinnamon and Apples Oatmeal
Amount Per Serving
Calories 172 Calories from Fat 27
% Daily Value*
Total Fat 3g 5%
Saturated Fat 1g 5%
Cholesterol 4mg 1%
Sodium 221mg 9%
Potassium 180mg 5%
Total Carbohydrates 31g 10%
Dietary Fiber 3g 12%
Sugars 12g
Protein 4g 8%
Vitamin A 1.5%
Vitamin C 0.9%
Calcium 7.7%
Iron 7.1%
* Percent Daily Values are based on a 2000 calorie diet.
Source: https://copykat.com/big-batch-multi-cooker-cinnamon-and-oatmeal/
0 notes
Text
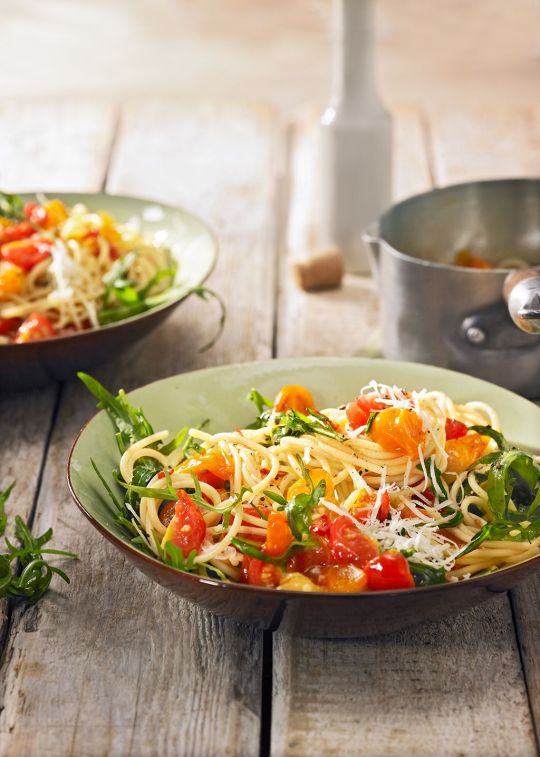
30 Minute Healthy Mains
These 30 minute healthy mains will stop you from even considering the drive thru.
We have all been there – running on empty, thinking that you would rather just pick something up than cook – but don’t do it. You will feel so much better if you make a quick meal that is fresh, tasty, and good for you.
Most likely, you will also save money. My favorite meals aren’t even built from a recipe. I will take the salmon from below (cooked from frozen) and toss it on top of a bed of fresh mixed greens with some fresh lemon juice squeezed on top. YUM!
I can’t be with you all – in the car on the way home from work – but I hope I can get in your head. You can do this!! You can make better food and better choices. Maybe not all of the time but most of the time.
Many of the recipes can be straight from your pantry. I keep food like frozen chicken breasts, frozen fish, canned beans, canned tuna, and all sorts of shelf stable food in my house so I can be ready for a busy night. Yes, that takes planning but it isn’t so bad once you get the hang of it.
Please share your favorite 30 minute healthy mains in the comment section. We can all use more ideas!
1. Easy Hot and Sour Soup
Get the recipe here: Easy Hot and Sour Soup Recipe
2. Baked Cod
Get the recipe here: Baked Cod Recipe
3. Tuna and Bean Salad
Get the recipe here: Tuna and Bean Salad Recipe
4. Twenty Minute Marinara Sauce
Get the recipe here: Homemade Marinara Sauce Recipe
5. Baked Salmon with Mustard
Get the recipe here: Baked Salmon with Mustard Recipe
6. Mexican Chicken Soup
Get the recipe here: Mexican Chicken Soup Recipe
7. One Pan Lemon Garlic Chicken and Asparagus Recipe
Get the recipe here: One Pan Lemon Garlic Chicken and Asparagus Recipe
8. Chili with Cocoa Powder Recipe
Get the recipe here: Chili with Cocoa Powder Recipe
9. Rosemary White Bean and Kale Quesadillas
Get the recipe here: Rosemary White Bean and Kale Quesadillas Recipe
10. Baked Salmon and Asparagus Recipe
Get the recipe here: Baked Salmon and Asparagus Recipe
11. How to Cook Salmon From Frozen
Get the recipe here: How to Cook Salmon from Frozen Recipe
12. Healthy Baked Chicken Breast (35 minutes)
Get the recipe here: Healthy Baked Chicken Breast Recipe
13. Best Vegetable Soup Recipe
Get the recipe here: Best Vegetable Soup Recipe
14. White Turkey Chili Recipe
Get the recipe here: White Turkey Chili Recipe

Source: https://snack-girl.com/snack/30-minute-healthy-mains/
0 notes
Text
Gluten Free Pumpkin Carrot Cupcakes
Ease into the baking season with gluten free pumpkin carrot cupcakes, packed with tons of shredded carrots, a cup of pumpkin puree, and plenty of warm spices.
When the mums are for sale at the grocery store, you know fall is actually around the corner. You certainly can’t go by the wax pumpkins at the hobby store or the Halloween candy for sale. Those can come in the middle of summer. But the mums are the real deal. 🌼
I’ve been seeing mums for weeks now, so I figure I have the green light to start pushing the pumpkin baking. Besides, soon enough you’ll start hearing that there’s a canned pumpkin shortage coming. Don’t they seem to say that nearly every single year?
These might be the moistest cupcakes I’ve ever made. There’s something about the combination of pumpkin puree, shredded carrots, and oil that just makes for a super tender and moist cake. It’s the sort of cake where the crumbs are so moist they’ll stick to the tines of a fork.
Are these pumpkin carrot cupcakes … healthy?
I first started making these cupcakes back in 2011. It’s so long ago that my children don’t even remember them.
My oldest asked if they were cupcakes or muffins, which really means she’s asking if she can have them for breakfast. They really are cupcakes, since the batter is relatively thick but the texture is so tender and cake-like.
I’m more likely to call something a muffin if it’s a bit drier and denser. A good muffin is never actually dry, but the crumb is typically a bit drier than a cupcake. A cupcake is, well, a mini cake.
These cupcakes are, in fact, made with 2 cups shredded carrots. Then again, our gluten free carrot cake has plenty of carrots, too, and no one would call that health food.
The batter also has half a can of pure pumpkin puree, which has a single ingredient: pumpkin. There is no denying that these cupcakes are filled with beta-carotene.
But their health benefits, if any, are purely accidental. They’re not a multivitamin, and you wouldn’t really serve them for breakfast (except for a very special occasion?).
The process
Like most of my cake recipes, these gluten free pumpkin carrot cupcakes are made in one bowl. One notable exception is the very best gluten free vanilla cake recipe, which calls for sifting the flour.
That vanilla cake is a true exception and demands that the butter is beaten with the sugar. The flour must be sifted into the wet ingredients. This cake can be made entirely in one bowl, easily.
All of the ingredients must at room temperature, as is the case for all baking other than pastry-making. If your eggs aren’t already at room temperature, just float them in a warm water bath for about 10 minutes.
Simply whisk together the dry ingredients (flour, baking soda, salt, spices, granulated sugar, brown sugar), and break up any lumps in the brown sugar. Most of the sugar in this recipe is brown sugar, and it does have a tendency to clump.
Be sure to break up all of those clumps or you’ll have pockets of undissolved sugar in your cupcakes. They’ll bake differently and won’t really become part of the cupcake.
Next, use a large spoon to create a deep well in the center of the dry ingredients. This will allow the wet ingredients to reach the bottom of the bowl of dry ingredients right away. It makes mixing the batter much easier.
Gluten free cupcakes might not have wheat gluten in them, but tender gluten free baked goods still shouldn’t be overmixed. That’s part of the reason to use melted butter and oil, which allows for faster mixing of the cupcake batter.
Be sure to fill each well of the muffin tin fully with batter. The size of the wells of any muffin tin varies, so if the wells of your muffin tin aren’t quite as large as mine, you’ll end up with some extra batter. Just use it to bake an extra cupcake or two in another pan.
I prefer to line my muffin tins with greaseproof liners (they don’t stick to the baked goods like typical grocery store liners tend to). I find that the batter rises straight up more evenly. But of course you can bake these cupcakes in a greased muffin tin.
Ingredients and substitutions
Recipe testing isn’t for the faint-of-heart (wasting ingredients is no joke!), and I hate to ask you to do any of it at all. But if I haven’t tried a recipe with certain substitutions, I’m afraid an educated guess is all I can offer. Here goes:
Dairy-free: These cupcakes are really just 1 tablespoon of butter away from being naturally dairy-free. The butter does give the cupcakes some richness, but it’s easily replaced by one extra tablespoon of neutral oil. Just be sure you use dairy-free chocolate chips, and you’re all set!
Egg-free: I’ve never tried these cupcakes with an egg substitute, but I’m tempted to recommend that you try making it with 1 “chia egg” (1 tablespoon ground white chia seeds + 1 tablespoon lukewarm water, mixed and allowed to gel) and replacing the second egg with another ounce of pumpkin puree.
I’m afraid I’m just shooting in the dark with that suggestion, though. If you do try it, I’d also try adding 1/4 teaspoon of baking powder to the dry ingredients.
Sugars: The brown sugar in this recipe really gives the cupcakes a richness and depth of flavor that you can’t get from just granulated sugar alone. You can’t replace a granulated sweetener with a liquid one like maple syrup or honey, but you should be able to replace both of the sugars with coconut palm sugar.
Palm sugar is a flavorful, rich unrefined sugar, and can be a great, somewhat healthier alternative to brown sugar. But it doesn’t dissolve quite as well in baking as refined sugars, so I recommend grinding it in a blender or food processor before adding it to the batter. That will help it dissolve.
If you’d like to try an alternative sweetener like monkfruit, I’d recommend trying Swerve brand brown sugar alternative or Lankato monkfruit. Both tend to be drying, though, so you might want to add a bit more pumpkin puree. I’m afraid you’ll have to experiment!
Chocolate chips: When I first started making this recipe years ago, I used to make it with equal amounts white chocolate chips and raisins. But I just love the combination of pumpkin and chocolate so much that I really prefer semi-sweet chocolate chips here now.
If you’d like to replace the chips, though, you can use any small mix-in that holds its shape and doesn’t add moisture. Small bits of dried fruit like raisins are always a solid choice. Chopped nuts would also work really well.
Source: https://glutenfreeonashoestring.com/pumpkin-carrot-cupcakes/
0 notes
Text
Oat Milk Collagen Hot Chocolate
Oat Milk Collagen Hot Chocolate
Drinks, Healthy, Quick and Easy, The Holidays, Winter
WHO AM I RIGHT NOW? This recipe title sounds so very…how do put this? Los Angeles. This recipe sounds very “LA.” But the truth is, I make iterations of this drink all the time and I love it.
I’m not sure if you’ve heard but oat milk is all the rage right now. And in my typical bratty behavior, I snubbed it for months. I honestly drink my coffee black anyway but a few weeks ago, after I drove across town for a meeting and needed an afternoon pick-me-up, I stopped in a cafe and ordered an oat milk cappuccino. IT WAS GOOD.

It tastes kinda like nothing. It’s a really good texture—not too heavy or thick, not too thin. It provides some nice foam and marries with the espresso so very well.
I figured it was time to put it to test in a more sweet capacity so enter: this hot chocolate. I added a scoop of collagen to the blender, along with some melted chocolate, oat milk and a teaspoon of maple syrup. Blended right up and it’s oh so good!
The collagen adds a super nice creamy texture to it and adds some nice protein. Of course it’s optional.
Don’t worry, if you want the real deal with luscious dairy-milk and good ol’ sugar, click here. And of course, that version has marshmallows
I’m still down with that version, too.

Oat Milk Collage Hot Chocolate
Rating: 51
Prep Time: 5 minutes
Cook Time: 5 minutes
Total Time: 10 minutes
Serving Size: 2
Ingredients
2 ounces chopped semi-sweet chocolate or dark chocolate
2 cups oat milk
1 teaspoon maple syrup
Pinch of salt
2 scoops of collagen (optional)
Directions
In a medium saucepan, pour in the chocolate, oat milk, maple syrup and pinch of salt. Turn the heat to medium-low and warm slowly, whisking steadily, until the chocolate has melted and has married with the oat milk.
Carefully transfer to the blender and pour in the scoops of collage, if using.
Place the lid on and allow some steam to escape (if you don’t, it can sometimes lead to a bit of an explosion) and pulse for about 30 seconds, until nice and frothy.
Divide amongst mugs and serve.
3.1
https://www.acozykitchen.com/oat-milk-collagen-hot-chocolate/
December 14, 2018 by Adrianna Adarme
Adrianna Adarme
A Cozy Kitchen is a blog written by Adrianna Adarme. Adrianna likes corgis, pancakes and cute things.
Previous Post
You Might Also Like
Espresso Chocolate Chip Cookies
September 11, 2017
Cornbread Ebelskivers
December 23, 2016
Pumpkin Raclette Stove-Top Mac and Cheese with Jalapeños
November 22, 2016

Hi! This is my lil’ corner on da internets called A Cozy Kitchen. I live in Los Angeles, California with my husband Joshua and my corgi Amelia.
Read More
Cozy Cooking Playlist!
Cookbook!

Stay Up To Date
SUBSCRIBE
Fall Foods!

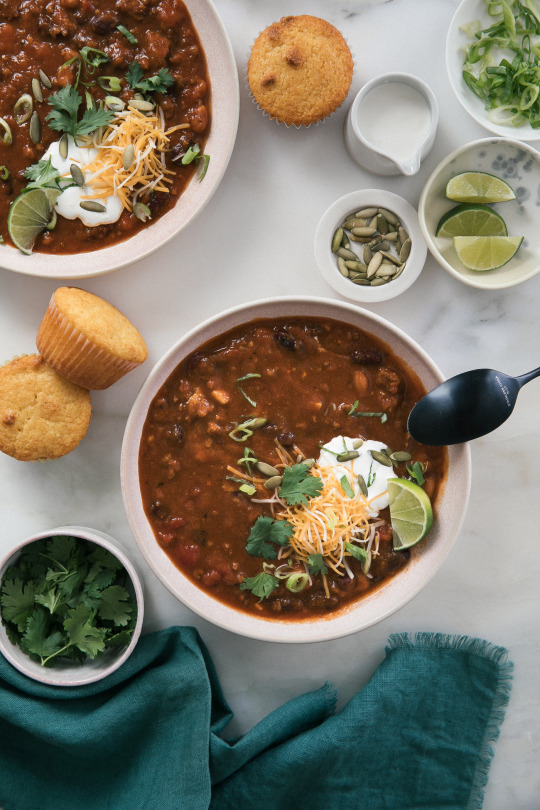

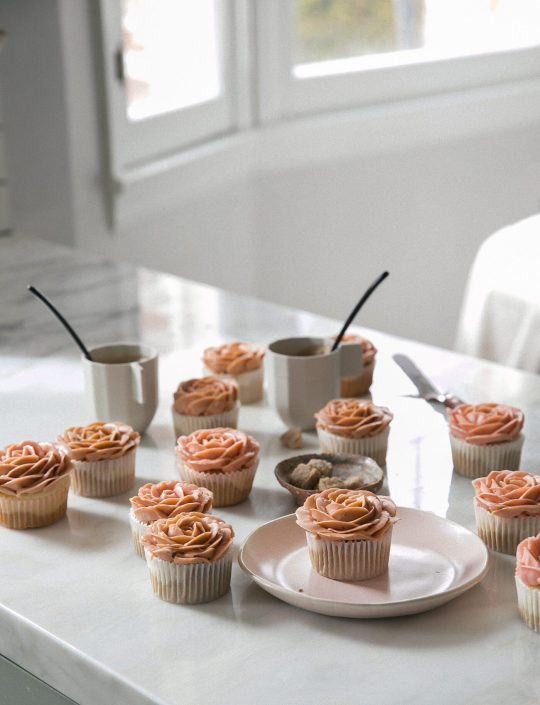
Fun Brand Partnerships


Source: https://www.acozykitchen.com/oat-milk-collagen-hot-chocolate/
0 notes
Text
Turtle Cookies
The chocolate chips, pecans, and caramel bits are a winning combination in these Turtle Cookies! Eat warm out of the oven with a big glass of cold milk!
What are Turtle Cookies?
Turtle Cookies are cookies made with all of the delicious flavors and textures in a turtle chocolate candy, namely chocolate, caramel, and pecans. Our Turtle Cookie Recipe features a traditional cookie dough
I knew I wanted to make Turtle Cookies the moment I discovered baking caramel bits. They make baking with caramel so much easier! I love baking and making caramel apples with classic caramel candies, but the unwrapping of every individual piece is so time consuming. It takes forever! Now I can have my cake and eat it too. Speaking of cake, now my head is just spinning with ideas for caramel bits in other recipes.
Recipe tips for Turtle Cookies
Just a few tips on this Turtle Cookies recipe, be sure to use semi-sweet or even dark chocolate chips. We tried milk chocolate chips and it made the cookies way too sweet. Also, feel free to substitute with chopped almonds if you are not a pecan fan, or leave them out altogether if you don’t like nuts. You are going to love the combination of the chocolate, caramel and pecans! They are definitely a step up from your typical chocolate chips.
If you aren’t a nut fan, another REALLY yummy substitute is swapping the pecans out for diced dried apple, which makes an awesome caramel apple cookie! Both kinds of cookie make for awesome after school snacks and fall get togethers! Football potlucks are approaching fast! This is definitely one to put on your radar or pin for later!
How to make Turtle Cookies
Turtle Cookies
Turtle Cookies combine all of the flavors and textures of a turtle candy into a scrumptious cookie. One bite and you'll be hooked!
Course: Dessert
Cuisine: American
Keyword: Turtle Cookies
Servings: 36 cookies
Ingredients (with Amazon Links)
Instructions
Pre-heat oven to 375 degrees.
In a medium size bowl, stir together flour with baking soda and salt, and set aside
In large mixing bowl, beat butter with sugar and brown sugar at medium speed until creamy and lightened in color.
Add eggs and vanilla, one at a time. Mix on low speed until incorporated.
Gradually blend dry mixture into creamed mixture.
Stir in nuts, chocolate chips, and caramel bits.
Drop by tablespoon onto ungreased cookie sheets.
Bake for 9 to 11 minutes or until lightly browned.
More Cookie Recipes
If you have a Cookie Monster in the family, or if you are a Cookie Monster yourself, here are some more incredible cookie recipes to indulge your cookie cravings:
Monster Cookies – The ultimate Cookie Monster cookie! They are loaded with chocolate chips, M&M’s, oatmeal, and peanut butter.
Peanut Butter and Jelly Cookies – A peanut butter cookie with a jelly filling. A great after-school-snack cookie.
Spiced Molasses Cookies – Molasses, cinnamon, ginger, and cloves give these traditional cookies so much flavor. They are soft and chewy and so good!
No Bake Cookies – Too hot to turn on the oven or short on time? No Bake Cookies are the answer! These chocolate cookies are melt-in-your-mouth delicious.
Homemade Oreo Cookies – An all time favorite in our family! Two soft, chewy, chocolate cookies sandwich a creamy cream cheese filling.
SaveSave
More from Favorite Family Recipes:


Source: https://www.favfamilyrecipes.com/turtle-cookies/
0 notes
Text
Chocolate Mint Bundt Cake
Every Christmas, I look for new ways to incorporate mint and chocolate together, as it’s a favorite combination of mine. This bundt cake is a great way to showcase both flavors, and it’s a bit easier to put together then a layer cake. The chocolate cake is moist, the mint-chocolate ganache rich and indulgent, and the crushed peppermint candies a sparkly touch.
For the cake
3 oz (85 g) bittersweet chocolate
1 cup boiling water
1/2 cup sour cream
1/2 cup whole milk
½ cup canola oil
4 large eggs, room temperature
2 tsp pure vanilla extract
2 cups (284 g) all purpose flour
2 cups (396 g) sugar
¾ cup (75 g) Dutch process cocoa powder
2 teaspoons baking soda
1 teaspoons baking powder
1 teaspoon salt
For the ganache
6 ounces (170g) bittersweet chocolate, chopped fine
3/4 cup heavy cream
1/2 teaspoon pure mint extract
10 peppermint candies, crushed
For the cake: Adjust an oven rack to the middle position. Preheat the oven to 350F. Butter and flour (or grease) a 10-inch Bundt pan.
Put the bittersweet chocolate in a small bowl. Pour the hot water over it and cover with a piece of plastic wrap. In a medium bowl or liquid measuring cup, whisk the sour cream, milk, canola oil, eggs, and vanilla.
In the bowl of a stand mixer fitted with a paddle, mix the flour, sugar, cocoa powder, baking soda, baking powder, and salt on low until combined. (If the cocoa powder is lumpy, you can sift it into the other ingredients.) With the mixer running on low, slowly add the sour cream mixture. Increase the speed to medium and beat until combined, 20-30 seconds.
Whisk the chocolate and hot water together until completely smooth. With the mixer running on low, slowly pour the mixture into the batter and mix until just combined. Using a spatula, give the batter a couple of turns to make sure it is fully mixed.
Pour the batter evenly into the prepared pan. Bake 35-55 minutes, until a wooden skewer or toothpick comes out with a little bit of crumb.
Transfer the cake to a wire rack and let cool for 30 minutes. Turn the cake out onto the rack, and let cool completely. Once cool, the cake can be topped with chocolate ganache and crushed peppermint candies.
For the ganache: Place the chocolate in a small bowl. Heat the heavy cream in a small saucepan until it is simmering and just about to boil. Pour the cream over the chocolate, cover the bowl with plastic wrap, and let sit for 5 minutes.
Remove the plastic wrap and whisk until completely smooth. Coat the cake with the ganache while the ganache is still warm, but the cake has cooled. Let the ganache set before slicing the cake.
Enjoy!
Source: https://www.handmadecharlotte.com/chocolate-mint-bundt-cake/
0 notes