
Don't wanna be here? Send us removal request.
Statistics
We looked inside some of the posts by dashlung62-blog and here's what we found interesting.
Average Info
Notes Per Post
0
Likes Per Post
0
Reblog Per Post
0
Reply Per Post
0
Time Between Posts
3 days
Number of Posts By Type
Text
17
Last Seen Tumblr Blogs


Fun Fact
The KCSC sent more than 20K requests to delete posts related to prostitution and porn to Tumblr from January to June 2017.
Text
Creamy Tomato Tortellini Soup
Creamy Tomato Tortellini Soup – we love this simple and delicious tortellini soup! A classic tomato soup turned up a notch by adding delicious cheese tortellini and served with crusty bread.
Tortellini Soup, A Family Favorite
Tomato soup has always been my favorite, you can’t go wrong with a classic. And now I have a new favorite tomato soup because this Creamy Tomato Tortellini Soup is SO good! We kicked the classic tomato soup up a notch by adding cheese tortellini! We love tortellini and the cheese tortellini goes perfectly with the creamy tomato soup! Our entire family loves this easy tortellini soup. It always makes a great lunch or dinner.
Creamy Tortellini Soup without the Cream
You will think this soup is loaded with heavy cream because it is so creamy and so good, but Greek yogurt is the secret ingredient to this creamy tortellini soup. The Greek yogurt makes the soup super creamy without adding all of the fat and calories!
Make sure your Greek yogurt is at room temperature before adding it to the soup so it will melt right in. If you don’t have Greek yogurt, you can use sour cream, but we love using Greek yogurt in this soup.
I like to add fresh basil and shredded Parmesan cheese to my bowl of warm tortellini soup! They are the perfect finishing touches to this easy soup!
Easy Tortellini Soup
This Creamy Tomato Tortellini Soup is super simple to make and a hit with our entire family. Serve crusty bread on the side because you can never have too many carbs! Or you can make a simple green salad to go with the tortellini soup. You can’t go wrong when this easy tortellini soup is on the menu. It is always a dinner hit! This soup is perfect for a chilly day, I always love cozying up to a bowl of this soup!
If you like this tortellini soup recipe, you might also like:
Creamy Tomato Tortellini Soup

Creamy tomato soup with cheese tortellini! You will think this soup is made with heavy cream, but the secret is Greek yogurt! We love this simple soup!
Yield: Serves 6-8
Prep Time: 5 minutes
Cook Time: 30 minutes
Total Time: 35 minutes
Ingredients:
1 tablespoon olive oil
1/2 cup chopped onion
3 cloves garlic, minced
2 bay leaves
Dash of crushed red pepper flakes
2 (28 oz) cans diced tomatoes
1 (32 oz) container vegetable broth
1/4 cup chopped fresh basil
Salt and freshly ground black pepper, to taste
1/2 cup plain Greek yogurt, at room temperature
2 (9 oz) packages fresh or frozen cheese tortellini
Grated Parmesan cheese and fresh basil, for garnish, optional
Directions:
In a large pot, heat the olive oil over medium heat. Add the onion and garlic and cook until tender, about 5 minutes. Stir in the bay leaves and crushed red pepper flakes.
Add the diced tomatoes and vegetable broth. Stir in fresh basil and season with salt and black pepper, to taste. Simmer on low for 15 minutes.
Remove the bay leaves from the pot. Use a hand immersion blender to blend the soup (or carefully transfer soup to a blender to blend and return to the pot). Stir in the Greek yogurt until well combined. Stir in the cheese tortellini and cook on medium-low until tortellini is cooked, about 7-8 minutes. Serve warm.
All images and text ©Two Peas & Their Pod.
Follow twopeasandpod on Instagram and show us what recipes you are making from our blog! Use the hashtag #twopeasandtheirpod! We want to see what you are making in your kitchen!
posted on September 1, 2018 by Two Peas

Source: https://www.twopeasandtheirpod.com/creamy-tomato-tortellini-soup/
0 notes
Text
Golden Winter Root Vegetable Soup (Paleo, Vegan)
Cold days call for a silky and golden hued winter soup filled with hearty root vegetables.
So here we are, in the thick of winter. With the holidays behind us and the promise of spring and summer still so far away, I ease into the New Year with both a bit of nostalgia as well as giddy anticipation for what awaits ahead. And as I get settled back into my old routines, after a month filled with excess and allowances, only soup will do.
Winter is of course prime soup season; soothing, warming and nutritious, it’s a natural this time of year. Not just any kind of soup though, the kind that’s filled with a medley of winter vegetables like carrots, parsnips, turnips, potatoes and fennel, and makes for a satisfying meal.
Come winter, root vegetables are a cook’s best friend. They’re easy to find, store practically forever and mix and mingle together with such ease. Now’s the time to dive into those often forgotten vegetables like parsnips and turnips, and this warming winter soup is one of the easiest way to do so.
Easy to make and even better the next day, it’s just the kind of thing to carry you through the winter months. The golden color comes from the carrots and a touch of turmeric. And even though there’s a hodgepodge of vegetables involved, they don’t compete with one another, instead, they all work together to create a delicately flavored soup with just a hint of sweetness and spice.
There’s no sautéing or sweating of vegetables and no stock of any kind involved, just a quick chop and simmer in a large pot of water until meltingly tender and fragrant. A quick spin in the blender until silky and smooth and dinner is served. If I have the time I also like to top mine with a few fried sage leaves, to complement the earthy roots and create an elegant finish but a dollop of yogurt (regular or dairy-free) or a sprinkling of pumpkin seeds would be nice as well.
Here’s to the New Year!
Sylvie Shirazi
20 minPrep Time
40 minCook Time
1 hrTotal Time
Ingredients
3 celery stalks, finely diced
1 medium parsnip, finely diced
3 carrots, finely diced
½ a large turnip, finely diced
½ a large potato or Japanese sweet potato, peeled and finely diced
½ a large or 1 small fennel bulb, finely chopped
1 large or 2 small shallots, finely chopped
3 garlic cloves, finely chopped
1 bay leaf
1-inch piece of fresh turmeric, peeled and grated on a microplane
1 teaspoon fine sea salt
¼ teaspoon freshly ground black pepper
1 Tablespoon/15ml extra-virgin olive oil (plus more for fried sage leaves)
4 cups/960ml filtered water
Small bunch of fresh sage leaves for frying (optional)
Instructions
Add all ingredients except for sage leaves to a large heavy bottomed soup or stock pot and cover with water. Bring to a boil; reduce heat to low, cover and simmer until vegetables are tender (about 40 minutes).
Remove bay leaf and purée soup in a high-speed blender, in batches if necessary.
Pour a thin layer of olive oil into a small skillet over medium-high heat. When oil begins to ripple lower heat and add sage leaves in a single layer. Fry for a few seconds (do not brown), then transfer leaves to a paper towel to drain. Sprinkle with salt to taste.
Serve soup topped with fried sage leaves.
7.8.1.2
346
https://gourmandeinthekitchen.com/golden-winter-root-vegetable-soup/
gourmandeinthekitchen.com

Source: https://gourmandeinthekitchen.com/golden-winter-root-vegetable-soup/
0 notes
Text
Blueberry Olive Oil Cake
I know it may sound a bit weird at first as we usually associate olive oil with savory foods, but trust me, this Blueberry Olive Oil Cake is no weirder than sea salt caramels. It’s also a lot easier to make than cakes using butter as it integrates more readily into the batter. The finished cake is marvelously crisp around the edges and ultra-moist and tender on the inside.
Why olive oil
Baking a cake is a delicate interplay of leavening, starch, sugar, and fat. The fat plays many important roles, and for a lighter cake that still has plenty of flavor, the golden-green oil pressed from olives makes for the perfect fat. Here’s just some of what it does for the cake:
Moisture – since fat does not evaporate in the oven, it gives a sense of moistness in the cake even after it’s been baked. Most cakes use some form of fat, such as butter, egg yolks, or plain vegetable oil for this reason. In this cake, the olive oil helps ensure the cake doesn’t get dry, even after it sits for a few days.
Texture – Fat is also important in giving cakes their delicate texture. When you add flour and water to a mixture and agitate it, you form an elastic network of gluten. This is what gives doughs their chewy texture. While chewiness is a desirable trait in bread and pasta, it’s not a great mouthfeel for cakes, which is where the fat comes in. Fat coats these proteins and impedes the formation of gluten, which is why you can mix this olive oil cake batter without having it turn out like a hockey puck.
Flavor – Butter is the usual goto when you want to add a rich, creamy flavor to your cake, but olive oil can also have a smooth buttery flavor, which makes it perfect for some cakes. Just be sure to use a mild fruity extra virgin olive oil that you enjoy the taste of. Bitter, astringent or spicy olive oils can make your cake taste unpleasant. I’m using one called Ardoino Fructus, which comes from the Imperia region of Italy.
Flavorings and Fruit
Because the olive oil contributes such a wonderful flavor to this cake, you don’t need to do too much in the flavor department. The oil I used has a mild fruity flavor that’s round and buttery with just a hint of citrus, which is why I decided to go with a bit of orange zest for the flavoring. Lemon zest, vanilla beans, and cinnamon would all be delightful additions to olive oil cake, and you can add them in with the eggs and sugar.
Texture of the cake
We already touched on the important role that olive oil plays for the texture of the inside of the cake, but what about the outside? I like to give undecorated cakes a nice crust on the outside, so you have something crispy to juxtapose the soft fluffy interior. To do this, I like to line the cake pan with some olive oil and sugar. The oil helps the sugar stick to the side of the pan, while the combination of the two not only prevent the cake from sticking to the pan, they create a sort of caramelized crust that gives your cake a wonderful texture around the edges.
For even more texture, I also sprinkled some very coarse sugar on the bottom of the cake tin. This sugar will not melt completely and gives the bottom of your cake a pleasant crunch as the sugar crystals burst in your mouth.
How to Mix Olive Oil Cake
There aren’t a whole lot of ingredients in this cake, but how you combine them will make a big difference in the texture of your finished cake. I borrowed a page from making a French genoise to make this.
First, the eggs and sugar are heated to about 100 degrees F. You don’t have to be exact on the temperature; it should be warm, but not hot. Then you whip the mixture into a dense marshmallowy foam that’s much more stable than a meringue made with egg whites. The key here is to whip the mix longer than you think it needs to be whipped: 5 minutes is a safe bet.
The foam retains its structure even after incorporating the olive oil and flour, which together with the baking powder gives you some great lift. The resulting batter is viscous enough to hold the blueberries aloft while giving you a beautiful dense crumb that reminds me of a great pound cake.
Once the batter is done, it’s just a matter of folding in the berries and popping the cake in the oven until it’s cooked through.
Variations of Olive Oil Cake
A blueberry patch near home kept my kitchen stocked with plump, juicy berries this summer, but this olive oil cake is delicious without any berries at all. You can also add other fruit such as chopped up apples, fresh cranberries, blackberries or bananas. Dried fruit such as raisins, currants or blueberries also work well, but I’d recommend rehydrating them in your favorite liquor first.
How to Make Blueberry Olive Oil Cake
If you enjoyed this video head over to YouTube to give it a like👍🏽 and Subscribe to our channel while you’re there!
Source: https://norecipes.com/blueberry-olive-oil-cake-recipe
0 notes
Text
Vegan BBQ Jackfruit, Kale & Black Bean Enchiladas
For all of my interest in new, plant-based products, I’m often a slow adopter. I’ve got so many standby staple foods that it can take me a while to welcome something new into the rotation, and jackfruit is a perfect example. It’s one of the most popular ingredients in plant-based cooking these days, and until this summer, I had never—never!—even tasted it.
Thankfully, I’ve welcomed jackfruit into my life in the last few months, thanks to the folks at The Jackfruit Company, and it hasn’t taken me long to see what people love about it. It’s got a dense, “meaty” texture that’s still tender enough to pull apart—no wonder it’s so often used in place of pulled pork—and it seems to absorb flavor and seasonings readily, which makes it super versatile for cooking.
For all of its popularity in the vegan community, jackfruit is a relatively new product to US consumers (I’d never even heard of it until quite a few years after I’d gone vegan). Part of its growing presence here is thanks to Annie Ryu, the founder of The Jackfruit Company, whose vision has been and continues to be making jackfruit available worldwide.
Annie is a former pre-med student, who traveled to India in 2011 to implement a maternal and child healthcare program she’d developed with her brother. She saw jackfruit at a local street vendor’s stall and was intrigued—like most Americans, she’d never seen or heard of it. She soon learned that jackfruit is nutritious and sustainable: it’s resistant to drought and doesn’t need replanting each year, which makes it a good investment for farmers in tropical climates.
Struck by her experience in India, Annie ultimately moved away from medicine and toward building the Jackfruit company, creating a working international supply chain to make jackfruit more available around the world. Today, The Jackfruit Company, which is based in Boulder, works with 1,000 farming families in India to make jackfruit more globally available and to see that less of the fruit goes to waste, while providing income for the farming families.
The company makes refrigerated seasoned jackfruit meal starters, frozen single serve entrees, and foodservice products, all of which are vegan, non-GMO, and gluten free. I’ve had a wonderful time getting to know them, piece by piece: I’m saving some of the frozen meals for the fall, when time to cook will be more precious than it is now. I’ve gotten to know the seasoned jackfruit well, and so far, my favorite flavors are Tex-Mex, Curry, and BBQ.
It’s the BBQ that’s on full display in today’s easy vegan jackfruit, kale, and black bean enchiladas. The idea here was to pair jackfruit with greens for color, texture, and nutrition, and then to throw in black beans for some extra plant protein. It’s worth saying that jackfruit is very micronutrient dense—rich in Vitamins A and C, as well as a number of B vitamins—and it’s high in fiber. But for a meat replacement, it’s not high protein, so I usually pair it with some sort of legume.
I’m super excited to continue getting to know this new-to-me ingredient in more dishes: I see tacos, stir fries, and stews in my near future. But for now, I’m happy to use the BBQ jackfruit in one of my all-time favorite comfort food dishes—one that I like to eat for breakfast, lunch, or dinner!
This one serves a crowd: it’s enough filling for 12-16 tortillas, depending on the brand and size you use. Because I’m eating leftovers on my own this week, I made 7 of the enchiladas and froze half for future comfort food suppers, which was a cool make-ahead strategy for when the DI starts.
Vegan BBQ Jackfruit, Kale & Black Bean Enchiladas
Print
Recipe type: main dish, breakfast
Cuisine: vegan, gluten free option, soy free, tree nut free
Author: Gena Hamshaw
Prep time: 15 mins
Cook time: 35 mins
Total time: 50 mins
Serves: 12-16 enchiladas
Ingredients
1 tablespoon olive oil
12 ounces washed and chopped curly kale
3 cloves thinly sliced garlic
2 tablespoons freshly squeezed lime juice
1 ½ cups cooked black beans (1 can, drained and rinsed)
20 ounces The Jackfruit Company BBQ jackfruit
Salt and freshly ground pepper to taste
12-16 corn or wheat tortillas of choice
1 15-ounce can green enchilada sauce (or a batch of the tomatillo sauce inthis recipe)
Chopped fresh cilantro, pickled jalapenos, and/or chopped avocado, for serving
Instructions
Preheat your oven to 350F and lightly spray a rectangular baking dish with oil.
Heat the oil over medium heat in a large, roomy skillet. Add the garlic slices and allow them to sizzle for about a minute; next, add the kale (you may need to do so in batches) and stir it as it wilts down. Continue cooking the kale until it’s tender, about 4-5 minutes.
Stir in the lime juice, black beans, and jackfruit. Mix and heat the ingredients through; taste and add salt and pepper as needed.
Pour ½ cup of the enchilada sauce in the bottom of the baking dish and spread it thinly and evenly. Fill each tortilla with about ⅓-1/2 cup jackfruit mixture. Wrap the tortillas up and place them, seam side down, in the baking dish. Pour the remaining sauce on top of the enchiladas. Bake for 35-40 minutes, or until the sauce has darkened on top and the edges are golden. Top the enchiladas as you like, and serve.
3.5.3251
This is one of my easiest and most low-key enchilada recipes to date, which works perfectly with my hands off summer of meal preparation. It’s also in keeping with the star ingredient: the nice thing about using the BBQ jackfruit is that it’s flavorful enough to resist the need for a lot of extra spices and seasonings. These are weeknight friendly enchiladas, or a great prep-ahead option for a group brunch.
No matter how many years I’ve been eating plant-based food, I continue to feel grateful and give thanks for new options—especially those that hail from different parts of the world, and which I might not encounter without some encouragement. I’m so glad to welcome jackfruit into my repertoire! If you’re curious to try some of The Jackfruit Company’s products for yourself, you can check out their website, where you’ll also find a coupon to receive a dollar off any one of their products! You can also find the BBQ jackfruit—and other flavors—at retailers across the country.
Happy Meatless Monday, friends. I’ll be back later this week with a super easy grain salad for back-to-school packed lunches and other quick fall meals. Till then, take care.
xo
This post is sponsored by The Jackfruit Company. All opinions are my own, and I love this unique and versatile product. Thanks for your support!
Source: https://www.thefullhelping.com/vegan-bbq-jackfruit-kale-black-bean-enchiladas/

0 notes
Text
Clean Eating Southwestern Quinoa Bowl Recipe
Cooked up on August 14, 2018
This clean eating southwestern quinoa bowl recipe is a deliciously simple, plant-based, complete protein meal!
Now that I’m plant-based, I’m constantly looking for ways to get complete proteins. While there is some evidence that this isn’t necessary, I do find that I feel better when I ensure getting complete proteins on a regular basis.
I’m in culinary school and we are learning about batch cooking as well as the convenience of meals in bowls. So I combined the two to get this dish.
Over the weekend, I made a huge pot of quinoa. I had some cooked black beans in the freezer that I thawed out, and the rest was pretty much all just veggies I chopped. It couldn’t have been simpler!!
IDEAS FOR BATCH COOKING:
If you think you might benefit from batch cooking, here are some of the staples I cook every weekend right now. They don’t require hours in the kitchen and they make for super quick and nutritious meals when I just don’t have time to cook (which is surprisingly often these days!)
Quinoa
Brown Rice
Farro
Barley
Black Beans
Chickpeas
Pinto Beans
I simply keep these in containers and make meals with them all week long. It’s a fantastic way to eat nutritiously as well a budget friendly.
WHAT NUTRITIONAL BENEFITS DOES THIS RECIPE GIVE YOU?
Red bell peppers – Tons of vitamin C and B6 as well as antioxidants.
Tomatoes – Lycopene (an antioxidant), vitamin C, potassium and vitamin K.
Black olives – Lots of healthy fats, vitamin E and flavonoids. They also seem to have anti-inflammatory benefits.
Black beans – Lots of fiber and potassium as well as vitamin B6.
Avocado – Lots of good-for-you, healthy fats as well as more potassium then bananas!
Quinoa – Lots of protein (all 9 amino acids!), fiber, iron and magnesium.
Lime – Tons of vitamin C and antioxidants.
Parsley – A vitamin rich diuretic containing vitamins A, B, C and K.
Cilantro – Vitamins A and K as well as potassium
YOU MIGHT ALSO ENJOY THESE CLEAN EATING RECIPES:

CLEAN EATING SOUTHWESTERN QUINOA BOWL RECIPE:
Clean Eating Southwestern Quinoa Bowl
A delicious, plant-based, complete protein meal that's quick and easy to put together.
Course: Grains, Main Course
Cuisine: SouthWestern
Yield: 2 servings
Calories: 379 kcal
Author: The Gracious Pantry
Ingredients
2 cups cooked quinoa
1/3 cup cooked black beans
1/3 cup chopped red bell peppers
1/3 cup chopped tomatoes
1/3 cup sliced black olives
1/2 cup chopped avocado
2 tbsp. chopped, fresh cilantro or parsley
1/2 medium lime (squeeze liberally over dish at serving)
1/4 cup your favorite clean salsa (optional, but delicious)
Instructions
Place the quinoa in a bowl and layer on all the other ingredients.
Stir to combine and enjoy.
Recipe Notes
Please note that the nutrition data below is a ballpark figure. Exact data is not possible.
Nutrition Facts
Clean Eating Southwestern Quinoa Bowl
Amount Per Serving (0.5 the recipe)
Calories 379 Calories from Fat 108
% Daily Value*
Total Fat 12g 18%
Saturated Fat 1g 5%
Sodium 660mg 28%
Potassium 899mg 26%
Total Carbohydrates 56g 19%
Dietary Fiber 12g 48%
Sugars 5g
Protein 13g 26%
Vitamin A 42.4%
Vitamin C 53.1%
Calcium 8.3%
Iron 25.3%
* Percent Daily Values are based on a 2000 calorie diet.

Source: https://www.thegraciouspantry.com/clean-eating-southwestern-quinoa-bowl-recipe/
0 notes
Text
Instant Pot HK Onion Chicken
Step by Step Cooking Guide
Jacky & I love to explore different cultures through taste because food means so much more than just filling our tummies with nutrients.
Food actually preserves memories & emotions, while it expresses creativity, identity, history, and culture. What’s amazing about food is its’ mystical power to transport you to other places or back to the past.
Cha Chaan Teng (Chinese: 港式茶餐廳), aka Hong Kong Style Cafes, bring us the comfort of home, the fond memories of childhood, and the taste of who we are.
We just love redeveloping classic Cha Chaan Teng favorites, like this HK Onion Chicken in Instant Pot. Sharing with you a taste of home! 🙂
Home: a place your feet may leave, but your heart will always be…
Have fun cooking & enjoy this Classic Instant Pot HK Onion Chicken!

our privacy policy here
Print Recipe
Instant Pot HK Onion Chicken
Make Classic Cha Chaan Teng Style Instant Pot HK Onion Chicken with a few simple ingredients! Tender, juicy chicken drizzled with delicious black pepper onion sauce. Comforting super quick and easy busy nights chicken and rice family meal.
Ingredients
4 (1.5lb, 680g) chicken thighs , bone-in, skin-on
1 (210g) medium onion , sliced
2 (8g) garlic cloves , chopped
1 cup (200g) frozen mixed vegetables
½ cup (125ml) unsalted chicken stock
1 tablespoon (14.5g) unsalted butter
1 tablespoon + 1 teaspoon (20ml) regular soy sauce
1 tablespoon (15g) tomato paste
1 teaspoon (5ml) Worcestershire sauce
1 teaspoon (5g) sugar
Salt + black pepper
Pot In Pot Rice:
1 cup (230g) Jasmine rice
1 cup (250ml) cold water
Thickener:
2.5 tablespoons (22.5g) cornstarch
3 tablespoons (45ml) cold water
Instructions
Brown Chicken Thighs or Chicken Breasts: Heat up Instant Pot using Sauté More function. Wait until it says HOT. Pat dry chicken with paper towel and season one side gently with salt + black pepper. Add in 1 tbsp (14g) unsalted butter, then quickly add in chicken to prevent the butter from burning. While one side is browning, season the other side with more salt + black pepper. Brown first side for 3.5 minutes, then the other side for 2 minutes. Set the chicken aside.
Saute Onion & Garlic: Add in sliced onion, then saute for 3 minutes. Add in chopped garlic, then saute for another 30 seconds.
Deglaze Instant Pot: Pour in ½ cup (125ml) unsalted chicken stock, then deglaze by scrubbing all the flavorful brown bits off the bottom of the pot with a wooden spoon. Give it a quick mix.
Pressure Cook HK Onion Chicken: Add 1 tbsp (15g) tomato paste, 1 tbsp + 1 tsp (20ml) regular soy sauce, 1 tsp (5g) sugar, and 1 tsp (5ml) Worcestershire sauce. Give it a quick mix. Add browned chicken back into the Onion Sauce.
If you want to cook rice at the same time - Use Pot-in-Pot Method: Place a trivet in Instant Pot, then layer a stainless steel bowl with 1 cup (230g) Jasmine rice + 1 cup (250ml) cold water.
Close lid, then Pressure Cook: -With Pot in Pot Rice: High Pressure for 5 minutes, then Natural Release 10 minutes -Without Pot in Pot Rice: High Pressure for 6 minutes, then Natural Release 10 minutes
Thicken Onion Sauce: Set aside the bowl of rice, trivet, and chicken. Bring the onion sauce mixture back to a boil using the "Saute" button. Add 1 cup (200g) frozen mixed vegetables in the onion sauce to heat them up. Mix 2.5 tbsp (22.5g) cornstarch with 3 tbsp (45ml) cold water in a small mixing bowl. Add the cornstarch mixture one third at a time to thicken the onion sauce until desired thickness. Taste and adjust seasoning with more salt (For Reference: we added 2 pinches of salt).
Serve: Add rice on serving plate, mixed vegetables on the side, then layer the chicken beside the rice, and drizzle some HK Onion Sauce on top of the chicken. Enjoy~
Get Free Tried & True Recipes Weekly
♥ Spread the Love by sharing your food photo with hashtag #AmyJacky on Facebook or Instagram, so we can see it and others can enjoy it too! Thank you 🙂
Nutrition Facts
Instant Pot HK Onion Chicken
Amount Per Serving
Calories 238 Calories from Fat 63
% Daily Value*
Total Fat 7g 11%
Saturated Fat 4g 20%
Cholesterol 17mg 6%
Sodium 718mg 30%
Potassium 417mg 12%
Total Carbohydrates 38g 13%
Dietary Fiber 5g 20%
Sugars 3g
Protein 6g 12%
Vitamin A 126.1%
Vitamin C 16.9%
Calcium 3%
Iron 10.2%
* Percent Daily Values are based on a 2000 calorie diet.
Step-by-Step Cooking Guide
Prepare Ingredients for Instant Pot HK Onion Chicken.
1
Brown Chicken Thighs or Chicken Breasts
Heat up Instant Pot using Sauté More function.
*Tip: For older version, press “Saute” button, then “Adjust” button. For newer version, press “Saute” button twice.
Wait until it says HOT (takes roughly 8 minutes). This prevents the chicken from sticking to the pot.
Pat dry chicken with paper towel and season one side gently with salt + black pepper.
Add in 1 tbsp (14g) unsalted butter, then quickly add in the chicken to prevent the butter from burning.
While one side is browning, season the other side with more salt + black pepper.
Brown first side for 3.5 minutes, then the other side for 2 minutes. Set the chicken aside.
2
Saute Onion & Garlic
Add in sliced onion, then saute for 3 minutes. Add in chopped garlic, then saute for another 30 seconds.
3
Deglaze Instant Pot
Pour in ½ cup (125ml) unsalted chicken stock, then deglaze by scrubbing all the flavorful brown bits off the bottom of the pot with a wooden spoon. Give it a quick mix.
4
Pressure Cook HK Onion Chicken
Add 1 tbsp (15g) tomato paste, 1 tbsp + 1 tsp (20ml) regular soy sauce, 1 tsp (5g) sugar, and 1 tsp (5ml) Worcestershire sauce. Give it a quick mix.
Add browned chicken back into the sauce mixture.
If you want to cook rice at the same time, use the Pot in Pot Method: Place a trivet in Instant Pot, then layer a stainless steel bowl with 1 cup (230g) Jasmine rice + 1 cup (250ml) cold water (as shown in below photo).
Close lid, then Pressure Cook:
With Pot in Pot Rice: High Pressure for 5 minutes, then Natural Release for 10 minutes
Without Pot in Pot Rice: High Pressure for 6 minutes, then Natural Release for 10 minutes
After 10 minutes, release remaining pressure by turning Venting Knob to Venting Position. Open the lid carefully.
5
Thicken Onion Sauce
Set aside the bowl of rice, trivet, then place the chicken thighs on a serving plate.
Bring the onion sauce mixture back to a boil using the “Saute” button.
Add 1 cup (200g) frozen mixed vegetables in the onion sauce to heat them up (or you can heat up the vegetables on the stovetop).
Mix 2.5 tbsp (22.5g) cornstarch with 3 tbsp (45ml) cold water in a small mixing bowl.
Add the cornstarch mixture one third at a time to thicken the onion sauce until desired thickness.
Taste and adjust seasoning with more salt (For Reference: we added 2 pinches of salt).
6
Serve Instant Pot HK Onion Chicken
Serve the HK Onion Chicken in “Cha Chaan Teng” aka Hong Kong Cafe Style: add rice on a plate, mixed vegetables on the side, and layer the chicken beside the rice, then drizzle some HK Onion Sauce on top of the chicken.
Enjoy your Delicious Instant Pot HK Onion Chicken!~ 🙂
Tools for Instant Pot HK Onion Chicken
Optional Pot-in-Pot Rice:

Source: https://www.pressurecookrecipes.com/instant-pot-hk-onion-chicken/
0 notes
Text
Introducing Tasty's New Talent Program
Tasty
Information storage and access
The storage of information, or access to information that is already stored, on your device such as advertising identifiers, device identifiers, cookies, and similar technologies.
Personalisation
The collection and processing of information about your use of this service to subsequently personalise advertising and/or content for you in other contexts, such as on other websites or apps, over time. Typically, the content of the site or app is used to make inferences about your interests, which inform future selection of advertising and/or content.
Ad selection, delivery, reporting
The collection of information, and combination with previously collected information, to select and deliver advertisements for you, and to measure the delivery and effectiveness of such advertisements. This includes using previously collected information about your interests to select ads, processing data about what advertisements were shown, how often they were shown, when and where they were shown, and whether you took any action related to the advertisement, including for example clicking an ad or making a purchase. This does not include personalisation, which is the collection and processing of information about your use of this service to subsequently personalise advertising and/or content for you in other contexts, such as websites or apps, over time.
Content selection, delivery, reporting
The collection of information, and combination with previously collected information, to select and deliver content for you, and to measure the delivery and effectiveness of such content. This includes using previously collected information about your interests to select content, processing data about what content was shown, how often or how long it was shown, when and where it was shown, and whether the you took any action related to the content, including for example clicking on content. This does not include personalisation, which is the collection and processing of information about your use of this service to subsequently personalise content and/or advertising for you in other contexts, such as websites or apps, over time.
Third-party vendors
Company
Lotame Solutions, Inc.
OpenX Software Ltd. and its affiliates
The Rubicon Project, Limited
Index Exchange, Inc.
comScore, Inc.
DoubleVerify Inc.
LiveRamp, Inc.
Taboola Europe Limited
Outbrain UK Ltd
Nielsen Marketing Cloud
Google (DFP / AdX)
Company
Lotame Solutions, Inc.
OpenX Software Ltd. and its affiliates
LiveRamp, Inc.
Outbrain UK Ltd
Nielsen Marketing Cloud
Google (DFP / AdX)
Company
Lotame Solutions, Inc.
OpenX Software Ltd. and its affiliates
LiveRamp, Inc.
Outbrain UK Ltd
Google (DFP / AdX)
Company
Lotame Solutions, Inc.
LiveRamp, Inc.
Google (DFP / AdX)
Company
Lotame Solutions, Inc.
RhythmOne, LLC
comScore, Inc.
DoubleVerify Inc.
LiveRamp, Inc.
Outbrain UK Ltd
Google (DFP / AdX)
< Back Source: https://tasty.co/article/tasty/tasty-chefs-and-creators

0 notes
Text
THOMAS FAMILY FRENCH FRIES + SECRET SAUCE
For my entire life my dad has been serving up plates of his glorious french fries. They’re perfect. Deep golden and crisp on the outside, fluffy and soft on the inside, with flecks of salt punctuating the fat. Whenever my mom needed a pick me up, I’d hear her softly call from her bed, “Brennie, can you make us some fries!” This request usually popped up late in the evening, when my mom and I would be snuggles in her bed watching the end of jeopardy. And somehow, like magic, Dad would emerge fifteen minutes later with a plate of hot, delicious fries. My mom would kiss him and make some joke about being the cutest short order cook, and then she’d swat my hand away from the plate because I was already picking through fries to find the “best ones.”
My brother, Henry, has taken up the french fry mantle and added his own twist – Henry’s special sauce. Together, they’re perfect. Enjoy!
INGREDIENTS:
[Note] Serves 5
1 gallon vegetable oil
5 russet potatoes
sea salt
DIRECTIONS:
Heat the oil in a deep heavy pot over medium heat until it reaches 330 F. Meanwhile, slice your russets into slices about a 1/4 inch thick, skin on.
When the oil is ready, add a third of the potato slices and stir once with some tongs, just to make sure they don’t clump together. Cook for about 10 to 15 minutes, until a deep golden brown. Cook the remaining fries in batches
Set aside in a tray lined with paper towels. Immediately sprinkle with sea salt and eat immediately with Henry’s Secret Sauce.
INGREDIENTS (HENRY’S SECRET SAUCE):
1/4 cup ketchup
2 tablespoons mayonnaise
1 tablespoon dijon mustard
1/4 teaspoon garlic powder
1 pinch of salt
DIRECTIONS:
Combine all of the ingredients and stir together.
Source: https://www.thekitchykitchen.com/?recipes=/thomas-family-french-fries-secret-sauce/
0 notes
Text
Chopped Thai Salad
Let’s take a quick poll – just leave your answer in the comments – do we want more healthy recipes on the blog this time of year?? I feel like fall recipes are so often really decadent which I am 1000% okay with, but also I love a good healthy fall meal too. Thoughts? Leave them below.
Today we’re for sure on the healthy train because I ate like a jerk over the weekend. SO many cookies, cocktails, burgers, steaks, fries… the works. And today I need a re-set. This Chopped Thai Salad is LOADED with everything you need to keep things light and bright. Tons of veggies and a really light vinaigrette that you’ll love. You could add some roasted salmon or chicken or steak if you want extra protein too. But brace yourselves, because you’ll want 4 servings of this it’s THAT good!! Have at it! xo

Ingredients
1/3 cup olive oil
4 cloves garlic, peeled
4 tablespoons low sodium soy sauce
2 tablespoons water
2 tablespoons rice wine vinegar
1 tablespoons honey
1 tablespoon chili garlic sauce
1 tablespoon sesame oil
1 tablespoon grated ginger
1 lime, zested and juice
8 ounces frozen shelled edamame
5-6 cups baby kale, shredded
3 large carrots, shredded
2 bell peppers (1 red, 1 yellow), thinly sliced
1 cup cilantro leaves
1 cup sliced green onions
3/4 cup cashews, roughly chopped
1 avocado, diced
1 mango, diced
Instructions
Whisk the dressing ingredients together in a small bowl and set aside.
Cook the edamame according to the package directions. Drain and allow it to cool. Meanwhile, combine the kale, carrots, peppers, cilantro leaves, and green onions.
Add the cooked edamame, cashews, avocado and mango to the bowl with all the ingredients. Add the dressing and toss to combine. Serve immediately.
https://whatsgabycooking.com/chopped-thai-salad/

Source: https://whatsgabycooking.com/chopped-thai-salad/
0 notes
Text
Slow Cooker Split Pea Soup
2 Freestyle Points 325 Calories
Making Split Pea Soup in the Slow Cooker is so easy and perfect for busy weeknight meals. It’s also freezer friendly, so you can make a batch and freeze the leftovers for another night.
Crockpot Split Pea Soup
I love using smoked ham hocks in pea soup, it gives the soup a wonderful smoky flavor, but if you don’t have ham hocks you can also use a leftover ham bone, ham steak or even smoked turkey leg instead. You can see my stove top Pea Soup Recipe, and I also have an Instant Pot Pea Soup version which is great if you want to speed this up!
When I make this on the stove, I use more liquid, which you can see if you compare recipes. Since you don’t have any evaporation when you use the slow cooker, I always cut the liquid back. This soup is super easy to make, the only prep is sautéing the onions and garlic, which you can do the night before if you want to turn this on in the morning and head out the door.
Slow Cooker Pea Soup Tips and Variations
If you can’t find smoked ham hocks, use a leftover ham bone or ham steak.
If you don’t eat pork, you can swap the ham for a smoked turkey leg.
To make this vegetarian, leave the ham out, swap the broth for vegetarian broth and add more salt.
To freeze pea soup, let the soup cool then transfer to freezer safe containers in portions and label the soup with the date and time. To reheat, thaw overnight in the refrigerator then reheat on the stove or microwave.
Slow Cooker Split Pea Soup with Ham Hock
Making Split Pea Soup in the Slow Cooker is so easy and perfect for busy weeknight meals. It’s also freezer friendly, so you can make a batch and freeze the leftovers for another night.
Ingredients:
16 oz bag of dried split peas
1 teaspoon olive oil
1 medium chopped onion
2 3 cloves of garlic, chopped
2 large carrots, chopped
1 smoked ham hock, about 11 ounces (assuming 4 ounces meat removing bone and skin)
6 cups chicken broth
black pepper, to taste
Directions:
Wash and drain the peas in a colander.
In a small skillet, saute onions and garlic in oil over medium heat until soft, about 3 minutes.
Transfer to the slow cooker and add peas, carrots, ham hock and chicken broth, cover and cook on LOW 10 hours, until the peas are tender.
Remove ham hock and season with black pepper.
Discard the skin of the ham hock and shred the pork off the bone, add back to the soup.
Nutrition Information
Yield: 6 servings, Serving Size: 1 1/3 cups
Amount Per Serving:
Freestyle Points: 2
Points +: 7
Calories: 325 calories
Total Fat: 2.5g
Saturated Fat: 2.5g
Cholesterol: 10mg
Sodium: 729.5mg
Carbohydrates: 54g
Fiber: 20g
Sugar: 9g
Protein: 24g
All images and text ©Gina Homolka for Skinnytaste
posted March 7, 2019 by Gina
Don’t Miss a Recipe!
Get new free recipes and exclusive content delivered right to your inbox:
Source: https://www.skinnytaste.com/slow-cooker-split-pea-soup/
0 notes
Text
3 Ways to Hide the Power of Bone Broth in Chocolate
This post is from contributing writer Leah Vachani, CNC, of Lunch with Leah.
Unless you have been hiding under a rock for the past few years, I’m sure you have heard the buzz about bone broth. Nutritionists, doctors, personal trainers, even estheticians are touting the magical benefits of bone broth to their clients, their friends, and anyone who they meet on the street. But why? What’s the deal?
First, let’s go back in time. Bone broth is a traditional food that has been consumed by humans since the beginning of recorded history. Basically, bone broth has been around since early humans discovered fire and invented a pot to boil water in. In the interest of using every last possible part of the animals they hunted, they began to boil down the bones. Hippocrates was known to prescribe bone broth to improve digestive health in his patients (1), and similar practices were being shared all over Asia and the Middle East.
Health Benefits of Bone Broth
So, it’s been around forever…it must be good for you then? Yes. Here are just some of the amazing benefits of bone broth:
Boosts the immune system (2)
Reduces joint pain (3)
Supports weight loss (3)
Aid in sleep (3)
Promotes healthy hair + skin (4)
Heals the gut (3)
Supports healthy digestion (5)
Fights inflammation which is the root cause of most disease (3)
Enhances brain function + mood (6)
Highly nutritious (3)
Plus, it’s super easy to make – Katie’s kids even help:
If you can’t view the video above, click Kids Cook Homemade Chicken Stock to Show How Easy it Is! to see it directly on YouTube.
Great! Now, how do I get it in my body (and my kids)?
The traditional way would be to make some soup with bone broth. However, I have 3 more suggestions and they all involve chocolate!
Health Benefits of Chocolate
When I see “health” and “chocolate” together I’m pretty much sold already, but if you need some validation, then here you go.
Dark chocolate (raw cacao) can be found to:
Can have positive effects on stress, improve your mood and memory (9)
Is high in polyphenols (protective antioxidants) (8)
Supports a healthy gut microbiome as a prebiotic (food for the good bacteria) (7)
Reduces inflammation (10)
Could improve brain function (11)
So yay! Let’s all eat chocolate for breakfast!
Hold up! Make sure you are using dark chocolate or raw cacao. Milk chocolate has a lot of sugar and very little actual cacao in it (which is the constituent with all the health benefits). So, make sure you are getting the good stuff.
What does it mean if I crave chocolate?
Unfortunately, the common saying surrounding chocolate cravings being due to a magnesium deficiency is still being debated. Although dark chocolate does contain some magnesium, there are other foods that contain higher amounts, like spinach. When was the last time you craved spinach?
Most likely if you are craving chocolate your body is needing an energy boost or mood boost. Just eat the (moderate portion of) dark chocolate and enjoy! Magnesium or not. You will still get some healthy bonuses. (To actually get enough magnesium, you could use this topical spray or take an Epsom salt bath.)
Now for the delicious ways to get the superpowers from bone broth and chocolate into your mouth…
3 Ways to Hide the Power of Bone Broth in Chocolate
I solemnly swear that these methods have all been tried and found to be delicious on all accounts by myself and my test group of two (ages 5 and 9). (But I would still love to hear your results in the comments below!)
Print
<![CDATA[.tasty-recipes-imagefloat:right.tasty-recipes-print-buttonbackground-color:#667;display:inline-block;padding-left:1em;padding-right:1em;padding-top:.5em;padding-bottom:.5em;text-decoration:nonea.tasty-recipes-print-buttoncolor:#fffa.tasty-recipes-print-button:hovercolor:#fff.tasty-recipes-rating.tasty-recipes-clip-10-webkit-clip-path:polygon(0 0,10% 0%,10% 100%,0% 100%);clip-path:polygon(0 0,10% 0%,10% 100%,0% 100%).tasty-recipes-rating.tasty-recipes-clip-20-webkit-clip-path:polygon(0 0,20% 0%,20% 100%,0% 100%);clip-path:polygon(0 0,20% 0%,20% 100%,0% 100%).tasty-recipes-rating.tasty-recipes-clip-30-webkit-clip-path:polygon(0 0,30% 0%,30% 100%,0% 100%);clip-path:polygon(0 0,30% 0%,30% 100%,0% 100%).tasty-recipes-rating.tasty-recipes-clip-40-webkit-clip-path:polygon(0 0,40% 0%,40% 100%,0% 100%);clip-path:polygon(0 0,40% 0%,40% 100%,0% 100%).tasty-recipes-rating.tasty-recipes-clip-50-webkit-clip-path:polygon(0 0,50% 0%,50% 100%,0% 100%);clip-path:polygon(0 0,50% 0%,50% 100%,0% 100%).tasty-recipes-rating.tasty-recipes-clip-60-webkit-clip-path:polygon(0 0,60% 0%,60% 100%,0% 100%);clip-path:polygon(0 0,60% 0%,60% 100%,0% 100%).tasty-recipes-rating.tasty-recipes-clip-70-webkit-clip-path:polygon(0 0,70% 0%,70% 100%,0% 100%);clip-path:polygon(0 0,70% 0%,70% 100%,0% 100%).tasty-recipes-rating.tasty-recipes-clip-80-webkit-clip-path:polygon(0 0,80% 0%,80% 100%,0% 100%);clip-path:polygon(0 0,80% 0%,80% 100%,0% 100%).tasty-recipes-rating.tasty-recipes-clip-90-webkit-clip-path:polygon(0 0,90% 0%,90% 100%,0% 100%);clip-path:polygon(0 0,90% 0%,90% 100%,0% 100%).tasty-recipes-nutrition ullist-style-type:none;margin:0;padding:0.tasty-recipes-nutrition ul:afterdisplay:block;content:' ';clear:both.tasty-recipes-nutrition lifloat:left;margin-right:1em.tasty-recipes-plugtext-align:center;margin-bottom:1em;display:-ms-flexbox;display:flex;-ms-flex-align:center;align-items:center;-ms-flex-pack:center;justify-content:center.tasty-recipes-plug atext-decoration:none;box-shadow:none.tasty-recipes-plug a imgwidth:150px;height:auto;margin:5px 0 0 8px;display:inline-block@media print.tasty-recipes-no-print,.tasty-recipes-no-print *display:none!important.tasty-recipesmargin-bottom:4em;max-width:700px;background-color:#f9f9f9.tasty-recipes.tasty-recipes-has-plugmargin-bottom:1em.tasty-recipes-plugmargin-bottom:4em.tasty-recipes-print-buttondisplay:none.tasty-recipes-image-shimheight:69.5px;clear:both.tasty-recipes-entry-headerbackground-color:#f9f9f9;padding-top:2em;padding-left:2em;padding-right:2em.tasty-recipes-entry-header.tasty-recipes-has-imagepadding-top:0.tasty-recipes-entry-header .tasty-recipes-imagefloat:none;margin-bottom:1em@media only screen and (min-width:730px).tasty-recipes-entry-header .tasty-recipes-imagefloat:left;margin-right:16px.tasty-recipes-entry-header .tasty-recipes-image imgfloat:none;height:150px;width:150px.tasty-recipes-entry-header .tasty-recipes-header-contentmin-height:215px.tasty-recipes-entry-header h2margin-bottom:0;margin-top:0;padding-top:0;padding-bottom:0;clear:none.tasty-recipes-entry-header hrborder:1px solid #eee;background-color:#eee;margin-bottom:0;margin-top:1em;margin-right:-2em;margin-left:-2em.tasty-recipes-entry-header .tasty-recipes-rating-outerwidth:100%.tasty-recipes-entry-header .tasty-recipes-rating-outer atext-decoration:none;border:none;display:inherit;box-shadow:none.tasty-recipes-entry-header .tasty-recipes-rating-outer a:hovertext-decoration:none.tasty-recipes-entry-header .tasty-recipes-rating-starsfont-size:18px.tasty-recipes-entry-header .tasty-recipes-rating-stars spanmargin-right:2px;margin-left:2px;color:#aaa.tasty-recipes-entry-header .tasty-recipes-rating-stars span:first-childmargin-left:0.tasty-recipes-entry-header .tasty-recipes-rating-labelcolor:#B7BBC6;font-size:.6875em;margin-top:1em;position:absolute.tasty-recipes-entry-header .tasty-recipes-rating-stars .post-ratingsfont-size:10px.tasty-recipes-entry-header .tasty-recipes-rating-stars .post-ratings .tasty-recipes-cf-ratings-labelmargin-top:0;line-height:1.tasty-recipes-entry-header .tasty-recipes-detailsmargin-top:1.5em;color:#606060.tasty-recipes-entry-header .tasty-recipes-details ullist-style-type:none;margin:0;padding-left:0.tasty-recipes-entry-header .tasty-recipes-details ul lidisplay:inline-block;margin-left:0;padding-left:0;margin-right:.5em;margin-bottom:0;font-size:1em;line-height:1.8em.tasty-recipes-entry-header .tasty-recipes-details .detail-iconheight:1em;margin-top:.4em.tasty-recipes-entry-header .tasty-recipes-details ul lifont-size:1em.tasty-recipes-entry-header .tasty-recipes-details .tasty-recipes-labelmargin-right:.125em.tasty-recipes-entry-header .tasty-recipes-details .detail-iconvertical-align:top;margin-right:.2em@media only screen and (min-width:730px).tasty-recipes-entry-header .tasty-recipes-detailspadding-left:166px.tasty-recipes-entry-contentpadding-top:.1em;background:#f9f9f9;color:#606060;clear:both.tasty-recipes-entry-header .tasty-recipes-buttonsmargin-top:1.25em;margin-bottom:1.25em;width:100%.tasty-recipes-entry-header .tasty-recipes-buttons:aftercontent:" ";display:block;clear:both.tasty-recipes-entry-header .tasty-recipes-button-wrapbox-sizing:border-box.tasty-recipes-entry-header .tasty-recipes-buttons atext-transform:uppercase;text-align:center;display:block;background-color:#f9f9f9;font-size:1em;line-height:1.375em;font-weight:700;padding-top:7px;padding-bottom:7px;margin-top:0;border:1px solid #aaa;;border-radius:0;text-decoration:none;color:#aaa.tasty-recipes-entry-header .tasty-recipes-buttons .button:hoverbackground-color:#f9f9f9;border:3px solid #aaa;color:#aaa;opacity:1.tasty-recipes-entry-content a imgbox-shadow:none;-webkit-box-shadow:none.tasty-recipes-entry-header .tasty-recipes-buttons a:hoverbackground-color:#979599;text-decoration:none.tasty-recipes-entry-header .tasty-recipes-buttons imgvertical-align:top.tasty-recipes-entry-header .tasty-recipes-buttons img.svg-print,.tasty-recipes-entry-header .tasty-recipes-buttons img.svg-pinterestheight:1.25em;margin-right:.375em;margin-bottom:0;background:none;display:inline-block;box-shadow:none@media only screen and (max-width:730px).tasty-recipes-entry-header .tasty-recipes-button-wrapwidth:100%.tasty-recipes-entry-header .tasty-recipes-button-wrap:nth-child(2)padding-top:1em@media only screen and (min-width:450px).tasty-recipes-entry-header .tasty-recipes-buttonswidth:100%;float:none.tasty-recipes-entry-header .tasty-recipes-button-wrap:first-childwidth:50%;padding-right:5px;float:left.tasty-recipes-entry-header .tasty-recipes-button-wrap:last-childwidth:50%;padding-left:5px;float:right;padding-top:0@media only screen and (min-width:730px).tasty-recipes-entry-header .tasty-recipes-buttonspadding-left:166px;box-sizing:border-box.tasty-recipes-header-contentposition:relative.tasty-recipes-header-content .tasty-recipes-rating-outerposition:absolute;top:155px;width:150px;text-align:center.tasty-recipes-header-content .tasty-recipes-rating-labeldisplay:block;position:static;margin-top:0.tasty-recipes-entry-content h3color:initial.tasty-recipes-entry-content h4font-size:1em;padding-top:0;margin-bottom:1.5em;margin-top:1.5em.tasty-recipes-entry-content hrbackground-color:#eee;border:1px solid #eee;margin-top:1em;margin-bottom:1em.tasty-recipes-entry-content .tasty-recipes-description,.tasty-recipes-entry-content .tasty-recipes-ingredients,.tasty-recipes-entry-content .tasty-recipes-instructions,.tasty-recipes-entry-content .tasty-recipes-keywordspadding-left:2em;padding-right:2em.tasty-recipes-entry-content .tasty-recipes-description pmargin-bottom:1em.tasty-recipes-entry-content .tasty-recipes-ingredients ul,.tasty-recipes-entry-content .tasty-recipes-instructions ullist-style-type:none;margin-left:0;margin-bottom:1.5em;padding:0.tasty-recipes-entry-content .tasty-recipes-ingredients ul li,.tasty-recipes-entry-content .tasty-recipes-instructions ul limargin-bottom:.625em;list-style-type:none;position:relative;margin-left:2.5em;line-height:1.46.tasty-recipes-entry-content .tasty-recipes-ingredients ul li:before,.tasty-recipes-entry-content .tasty-recipes-instructions ul li:beforebackground-color:#aaa;-webkit-border-radius:50%;-moz-border-radius:50%;border-radius:50%;height:.5em;width:.5em;display:block;content:" ";left:-1.25em;top:.375em;position:absolute.tasty-recipes-entry-content .tasty-recipes-ingredients ol,.tasty-recipes-entry-content .tasty-recipes-instructions olcounter-reset:li;margin-left:0;padding:0.tasty-recipes-entry-content .tasty-recipes-ingredients ol li,.tasty-recipes-entry-content .tasty-recipes-instructions ol lilist-style-type:none;position:relative;margin-bottom:1em;margin-left:2.5em;line-height:1.46.tasty-recipes-entry-content .tasty-recipes-ingredients ol li:before,.tasty-recipes-entry-content .tasty-recipes-instructions ol li:beforecontent:counter(li);counter-increment:li;position:absolute;background-color:#aaa;-webkit-border-radius:50%;-moz-border-radius:50%;border-radius:50%;height:1.45em;width:1.45em;color:#FFF;left:-1.25em;transform:translateX(-50%);line-height:1.5em;font-size:.6875em;text-align:center;top:.1875em@media only screen and (max-width:520px).tasty-recipes-entry-content .tasty-recipes-ingredients ol,.tasty-recipes-entry-content .tasty-recipes-instructions olmargin-left:0.tasty-recipes-entry-content .tasty-recipes-notes,.tasty-recipes-entry-content .tasty-recipes-nutritionpadding-bottom:1.25em;padding-left:2em;padding-right:2em.tasty-recipes-entry-content .tasty-recipes-notes olcounter-reset:li;margin-left:0;padding:0;margin-bottom:0.tasty-recipes-entry-content .tasty-recipes-notes ulmargin-left:0;padding:0;margin-bottom:0.tasty-recipes-entry-content .tasty-recipes-notes p,.tasty-recipes-entry-content .tasty-recipes-notes ul li,.tasty-recipes-entry-content .tasty-recipes-notes ol lipadding-left:1.5625em;padding-right:1.5625em;padding-top:1.25em;padding-bottom:1.25em;position:relative;margin-bottom:1.5em;list-style-type:none.tasty-recipes-entry-content .tasty-recipes-notes p,.tasty-recipes-entry-content .tasty-recipes-notes ul li,.tasty-recipes-entry-content .tasty-recipes-notes ol lipadding-left:2.5em;margin-left:0;margin-bottom:0.tasty-recipes-entry-content .tasty-recipes-notes p:before,.tasty-recipes-entry-content .tasty-recipes-notes ul li:beforecontent:"i";display:block;background-color:#aaa;-webkit-border-radius:50%;-moz-border-radius:50%;border-radius:50%;height:1.3em;width:1.3em;font-size:.75em;line-height:1.3em;text-align:center;color:#FFF;position:absolute;left:1.167em;top:2.1em.tasty-recipes-entry-content .tasty-recipes-notes ol li:beforecontent:counter(li);counter-increment:li;position:absolute;background-color:#aaa;-webkit-border-radius:50%;-moz-border-radius:50%;border-radius:50%;height:1.45em;width:1.45em;color:#FFF;left:2em;transform:translateX(-50%);line-height:1.5em;font-size:.6875em;text-align:center;top:2.3em.tasty-recipes-entry-content .tasty-recipes-notes p:last-childmargin-bottom:0.tasty-recipes-entry-content .tasty-recipes-keywordsmargin-top:1em;margin-bottom:1em;color:#aaa.tasty-recipes-entry-content .tasty-recipes-keywords pmargin-bottom:0;font-size:.7em.tasty-recipes-nutrifoxtext-align:center;margin:0.tasty-recipes-nutrifox iframewidth:100%;display:block;margin:0.tasty-recipes-entry-content .tasty-recipes-nutrition ul lifloat:none;line-height:2em;list-style-type:none;margin-left:0;padding-left:.833em.tasty-recipes-entry-footerbackground-color:#fff;padding-top:1.5625em;padding-bottom:1.25em;padding-left:2.5em;padding-right:2.5em;text-align:center.tasty-recipes-entry-footer .tasty-recipes-footer-contentdisplay:inline-block.tasty-recipes-entry-footer imgwidth:65px.tasty-recipes-entry-footer h3font-size:1.25em;line-height:2.25em;margin-top:.5em;margin-bottom:.125em;padding:0;line-height:1em.tasty-recipes-entry-footer pmargin-bottom:0;font-size:.75em.tasty-recipes-entry-footer p atext-decoration:underline;box-shadow:none;border-bottom:none.tasty-recipes-entry-footer:aftercontent:" ";display:block;clear:both@media only screen and (max-width:520px).tasty-recipes-entry-footer h3margin-top:.5em;margin-bottom:.5em.tasty-recipes-entry-footertext-align:center@media only screen and (min-width:520px).tasty-recipes-entry-footer imgfloat:left.tasty-recipes-entry-footer h3,.tasty-recipes-entry-footer pmargin-left:90px;clear:none;text-align:left.clearfix:afterclear:both;content:" ";display:table.tasty-recipes-print-viewfont-size:11px.tasty-recipes-print-view .tasty-recipes-print-buttondisplay:inline-block.tasty-recipes-printpadding:0.tasty-recipes-print-view .tasty-recipes,.tasty-recipes-print-view .tasty-recipes-entry-contentbackground:#fff.tasty-recipes-print-view .tasty-recipesmargin-top:1em.tasty-recipes-print .tasty-recipes-entry-headerbackground-color:inherit;color:inherit;padding-bottom:0;padding-left:1em;padding-right:1em.tasty-recipes-print .tasty-recipes-entry-header .tasty-recipes-imagetransform:none;float:left;margin-right:16px.tasty-recipes-print-view .tasty-recipes-entry-header .tasty-recipes-header-contentmin-height:150px.tasty-recipes-print.tasty-recipes-has-image .tasty-recipes-entry-header h2margin-top:0.tasty-recipes-print .tasty-recipes-entry-header h2color:inherit;margin-bottom:.5em.tasty-recipes-print .tasty-recipes-entry-header hrdisplay:none.tasty-recipes-print .tasty-recipes-header-content .tasty-recipes-rating-outerposition:initial;text-align:left;width:unset;top:unset.tasty-recipes-print .tasty-recipes-entry-header .tasty-recipes-rating-stars spancolor:#000.tasty-recipes-print .tasty-recipes-entry-header .tasty-recipes-details ulpadding:0;clear:none.tasty-recipes-print .tasty-recipes-entry-header .tasty-recipes-details ul liline-height:1.8em;margin-bottom:0.tasty-recipes-print .tasty-recipes-entry-header .tasty-recipes-details .detail-icondisplay:none.tasty-recipes-print-view .tasty-recipes-source-linktext-align:center.tasty-recipes-print-view .tasty-recipes-entry-content .tasty-recipes-ingredients ul li,.tasty-recipes-print-view .tasty-recipes-entry-content .tasty-recipes-instructions ul li,.tasty-recipes-print-view .tasty-recipes-entry-content .tasty-recipes-ingredients ol li,.tasty-recipes-print-view .tasty-recipes-entry-content .tasty-recipes-instructions ol limargin-bottom:0.tasty-recipes-print-view .tasty-recipes-entry-content .tasty-recipes-notes p,.tasty-recipes-print-view .tasty-recipes-entry-content .tasty-recipes-notes ul li,.tasty-recipes-print-view .tasty-recipes-entry-content .tasty-recipes-notes ol limargin-top:1rem;padding-top:0;padding-bottom:0.tasty-recipes-print-view .tasty-recipes-entry-content .tasty-recipes-notes p:before,.tasty-recipes-print-view .tasty-recipes-entry-content .tasty-recipes-notes ul li:beforetop:.1em]]>
Chocolate Smoothie w/Kale and Collagen
Description
This “No Fail Chocolate Kale Smoothie” is a staple in our home because according to my kids, “it’s delicious!” We drink it as a smoothie and we make it into popsicles in the summertime. (Simply pour the smoothie into popsicle molds and freeze).
To add the benefits of bone broth, use collagen (use the coupon KS10 for 10% off!) — but never gelatin as it will gum up your blender.
Ingredients
1 cup chocolate hazelnut milk (you can easily sub any type of milk here)
1 cup frozen blueberries
2-3 leaves kale
2 Tbsp raw cacao powder
½ banana (fresh or frozen)
1 Tbsp grass-fed collagen (use the coupon KS10 for 10% off!)
Instructions
Blend everything in a high powered blender (we use a Vitamix) for a couple of minutes and drink to your health!
Notes
Raw honey: 1 Tbsp can be added if you are weaning you (or your child’s) taste buds away from sugary, sweet foods towards less sweet tasting foods. Try to decrease the amount of honey as your taste buds adjust. (Don’t give honey to children under 1 year of age.)
You can sprinkle extra raw cacao powder or raw hemp seeds on top if you want some delicious decoration.
For the full recipe as well as how to make this smoothie into summertime popsicles, visit LunchwithLeah.com.
Trouble Getting Healthy Food on the Table Every Day?
Enter Real Plans
Real Plans is an online meal planning software & app that is probably smarter than I am.
It works with all food restrictions to help families find the perfect meal, generate a shopping list, scale it up if needed, and you’re totally in control. Use your own fav recipes, skip a suggestion and tell Real Plans all the foods you don’t like/can’t eat, and it will still do half the work of meal planning (or more) for you.
Real Plans takes the stress out of meal planning and puts the nourishing food BACK on your table. There’s a plan for every diet type, including GAPS, Paleo, AIP, Whole30, vegetarian and more!
FIND ONE THAT FITS YOUR FAMILY
Print
<![CDATA[.tasty-recipes-imagefloat:right.tasty-recipes-print-buttonbackground-color:#667;display:inline-block;padding-left:1em;padding-right:1em;padding-top:.5em;padding-bottom:.5em;text-decoration:nonea.tasty-recipes-print-buttoncolor:#fffa.tasty-recipes-print-button:hovercolor:#fff.tasty-recipes-rating.tasty-recipes-clip-10-webkit-clip-path:polygon(0 0,10% 0%,10% 100%,0% 100%);clip-path:polygon(0 0,10% 0%,10% 100%,0% 100%).tasty-recipes-rating.tasty-recipes-clip-20-webkit-clip-path:polygon(0 0,20% 0%,20% 100%,0% 100%);clip-path:polygon(0 0,20% 0%,20% 100%,0% 100%).tasty-recipes-rating.tasty-recipes-clip-30-webkit-clip-path:polygon(0 0,30% 0%,30% 100%,0% 100%);clip-path:polygon(0 0,30% 0%,30% 100%,0% 100%).tasty-recipes-rating.tasty-recipes-clip-40-webkit-clip-path:polygon(0 0,40% 0%,40% 100%,0% 100%);clip-path:polygon(0 0,40% 0%,40% 100%,0% 100%).tasty-recipes-rating.tasty-recipes-clip-50-webkit-clip-path:polygon(0 0,50% 0%,50% 100%,0% 100%);clip-path:polygon(0 0,50% 0%,50% 100%,0% 100%).tasty-recipes-rating.tasty-recipes-clip-60-webkit-clip-path:polygon(0 0,60% 0%,60% 100%,0% 100%);clip-path:polygon(0 0,60% 0%,60% 100%,0% 100%).tasty-recipes-rating.tasty-recipes-clip-70-webkit-clip-path:polygon(0 0,70% 0%,70% 100%,0% 100%);clip-path:polygon(0 0,70% 0%,70% 100%,0% 100%).tasty-recipes-rating.tasty-recipes-clip-80-webkit-clip-path:polygon(0 0,80% 0%,80% 100%,0% 100%);clip-path:polygon(0 0,80% 0%,80% 100%,0% 100%).tasty-recipes-rating.tasty-recipes-clip-90-webkit-clip-path:polygon(0 0,90% 0%,90% 100%,0% 100%);clip-path:polygon(0 0,90% 0%,90% 100%,0% 100%).tasty-recipes-nutrition ullist-style-type:none;margin:0;padding:0.tasty-recipes-nutrition ul:afterdisplay:block;content:' ';clear:both.tasty-recipes-nutrition lifloat:left;margin-right:1em.tasty-recipes-plugtext-align:center;margin-bottom:1em;display:-ms-flexbox;display:flex;-ms-flex-align:center;align-items:center;-ms-flex-pack:center;justify-content:center.tasty-recipes-plug atext-decoration:none;box-shadow:none.tasty-recipes-plug a imgwidth:150px;height:auto;margin:5px 0 0 8px;display:inline-block@media print.tasty-recipes-no-print,.tasty-recipes-no-print *display:none!important.tasty-recipesmargin-bottom:4em;max-width:700px;background-color:#f9f9f9.tasty-recipes.tasty-recipes-has-plugmargin-bottom:1em.tasty-recipes-plugmargin-bottom:4em.tasty-recipes-print-buttondisplay:none.tasty-recipes-image-shimheight:69.5px;clear:both.tasty-recipes-entry-headerbackground-color:#f9f9f9;padding-top:2em;padding-left:2em;padding-right:2em.tasty-recipes-entry-header.tasty-recipes-has-imagepadding-top:0.tasty-recipes-entry-header .tasty-recipes-imagefloat:none;margin-bottom:1em@media only screen and (min-width:730px).tasty-recipes-entry-header .tasty-recipes-imagefloat:left;margin-right:16px.tasty-recipes-entry-header .tasty-recipes-image imgfloat:none;height:150px;width:150px.tasty-recipes-entry-header .tasty-recipes-header-contentmin-height:215px.tasty-recipes-entry-header h2margin-bottom:0;margin-top:0;padding-top:0;padding-bottom:0;clear:none.tasty-recipes-entry-header hrborder:1px solid #eee;background-color:#eee;margin-bottom:0;margin-top:1em;margin-right:-2em;margin-left:-2em.tasty-recipes-entry-header .tasty-recipes-rating-outerwidth:100%.tasty-recipes-entry-header .tasty-recipes-rating-outer atext-decoration:none;border:none;display:inherit;box-shadow:none.tasty-recipes-entry-header .tasty-recipes-rating-outer a:hovertext-decoration:none.tasty-recipes-entry-header .tasty-recipes-rating-starsfont-size:18px.tasty-recipes-entry-header .tasty-recipes-rating-stars spanmargin-right:2px;margin-left:2px;color:#aaa.tasty-recipes-entry-header .tasty-recipes-rating-stars span:first-childmargin-left:0.tasty-recipes-entry-header .tasty-recipes-rating-labelcolor:#B7BBC6;font-size:.6875em;margin-top:1em;position:absolute.tasty-recipes-entry-header .tasty-recipes-rating-stars .post-ratingsfont-size:10px.tasty-recipes-entry-header .tasty-recipes-rating-stars .post-ratings .tasty-recipes-cf-ratings-labelmargin-top:0;line-height:1.tasty-recipes-entry-header .tasty-recipes-detailsmargin-top:1.5em;color:#606060.tasty-recipes-entry-header .tasty-recipes-details ullist-style-type:none;margin:0;padding-left:0.tasty-recipes-entry-header .tasty-recipes-details ul lidisplay:inline-block;margin-left:0;padding-left:0;margin-right:.5em;margin-bottom:0;font-size:1em;line-height:1.8em.tasty-recipes-entry-header .tasty-recipes-details .detail-iconheight:1em;margin-top:.4em.tasty-recipes-entry-header .tasty-recipes-details ul lifont-size:1em.tasty-recipes-entry-header .tasty-recipes-details .tasty-recipes-labelmargin-right:.125em.tasty-recipes-entry-header .tasty-recipes-details .detail-iconvertical-align:top;margin-right:.2em@media only screen and (min-width:730px).tasty-recipes-entry-header .tasty-recipes-detailspadding-left:166px.tasty-recipes-entry-contentpadding-top:.1em;background:#f9f9f9;color:#606060;clear:both.tasty-recipes-entry-header .tasty-recipes-buttonsmargin-top:1.25em;margin-bottom:1.25em;width:100%.tasty-recipes-entry-header .tasty-recipes-buttons:aftercontent:" ";display:block;clear:both.tasty-recipes-entry-header .tasty-recipes-button-wrapbox-sizing:border-box.tasty-recipes-entry-header .tasty-recipes-buttons atext-transform:uppercase;text-align:center;display:block;background-color:#f9f9f9;font-size:1em;line-height:1.375em;font-weight:700;padding-top:7px;padding-bottom:7px;margin-top:0;border:1px solid #aaa;;border-radius:0;text-decoration:none;color:#aaa.tasty-recipes-entry-header .tasty-recipes-buttons .button:hoverbackground-color:#f9f9f9;border:3px solid #aaa;color:#aaa;opacity:1.tasty-recipes-entry-content a imgbox-shadow:none;-webkit-box-shadow:none.tasty-recipes-entry-header .tasty-recipes-buttons a:hoverbackground-color:#979599;text-decoration:none.tasty-recipes-entry-header .tasty-recipes-buttons imgvertical-align:top.tasty-recipes-entry-header .tasty-recipes-buttons img.svg-print,.tasty-recipes-entry-header .tasty-recipes-buttons img.svg-pinterestheight:1.25em;margin-right:.375em;margin-bottom:0;background:none;display:inline-block;box-shadow:none@media only screen and (max-width:730px).tasty-recipes-entry-header .tasty-recipes-button-wrapwidth:100%.tasty-recipes-entry-header .tasty-recipes-button-wrap:nth-child(2)padding-top:1em@media only screen and (min-width:450px).tasty-recipes-entry-header .tasty-recipes-buttonswidth:100%;float:none.tasty-recipes-entry-header .tasty-recipes-button-wrap:first-childwidth:50%;padding-right:5px;float:left.tasty-recipes-entry-header .tasty-recipes-button-wrap:last-childwidth:50%;padding-left:5px;float:right;padding-top:0@media only screen and (min-width:730px).tasty-recipes-entry-header .tasty-recipes-buttonspadding-left:166px;box-sizing:border-box.tasty-recipes-header-contentposition:relative.tasty-recipes-header-content .tasty-recipes-rating-outerposition:absolute;top:155px;width:150px;text-align:center.tasty-recipes-header-content .tasty-recipes-rating-labeldisplay:block;position:static;margin-top:0.tasty-recipes-entry-content h3color:initial.tasty-recipes-entry-content h4font-size:1em;padding-top:0;margin-bottom:1.5em;margin-top:1.5em.tasty-recipes-entry-content hrbackground-color:#eee;border:1px solid #eee;margin-top:1em;margin-bottom:1em.tasty-recipes-entry-content .tasty-recipes-description,.tasty-recipes-entry-content .tasty-recipes-ingredients,.tasty-recipes-entry-content .tasty-recipes-instructions,.tasty-recipes-entry-content .tasty-recipes-keywordspadding-left:2em;padding-right:2em.tasty-recipes-entry-content .tasty-recipes-description pmargin-bottom:1em.tasty-recipes-entry-content .tasty-recipes-ingredients ul,.tasty-recipes-entry-content .tasty-recipes-instructions ullist-style-type:none;margin-left:0;margin-bottom:1.5em;padding:0.tasty-recipes-entry-content .tasty-recipes-ingredients ul li,.tasty-recipes-entry-content .tasty-recipes-instructions ul limargin-bottom:.625em;list-style-type:none;position:relative;margin-left:2.5em;line-height:1.46.tasty-recipes-entry-content .tasty-recipes-ingredients ul li:before,.tasty-recipes-entry-content .tasty-recipes-instructions ul li:beforebackground-color:#aaa;-webkit-border-radius:50%;-moz-border-radius:50%;border-radius:50%;height:.5em;width:.5em;display:block;content:" ";left:-1.25em;top:.375em;position:absolute.tasty-recipes-entry-content .tasty-recipes-ingredients ol,.tasty-recipes-entry-content .tasty-recipes-instructions olcounter-reset:li;margin-left:0;padding:0.tasty-recipes-entry-content .tasty-recipes-ingredients ol li,.tasty-recipes-entry-content .tasty-recipes-instructions ol lilist-style-type:none;position:relative;margin-bottom:1em;margin-left:2.5em;line-height:1.46.tasty-recipes-entry-content .tasty-recipes-ingredients ol li:before,.tasty-recipes-entry-content .tasty-recipes-instructions ol li:beforecontent:counter(li);counter-increment:li;position:absolute;background-color:#aaa;-webkit-border-radius:50%;-moz-border-radius:50%;border-radius:50%;height:1.45em;width:1.45em;color:#FFF;left:-1.25em;transform:translateX(-50%);line-height:1.5em;font-size:.6875em;text-align:center;top:.1875em@media only screen and (max-width:520px).tasty-recipes-entry-content .tasty-recipes-ingredients ol,.tasty-recipes-entry-content .tasty-recipes-instructions olmargin-left:0.tasty-recipes-entry-content .tasty-recipes-notes,.tasty-recipes-entry-content .tasty-recipes-nutritionpadding-bottom:1.25em;padding-left:2em;padding-right:2em.tasty-recipes-entry-content .tasty-recipes-notes olcounter-reset:li;margin-left:0;padding:0;margin-bottom:0.tasty-recipes-entry-content .tasty-recipes-notes ulmargin-left:0;padding:0;margin-bottom:0.tasty-recipes-entry-content .tasty-recipes-notes p,.tasty-recipes-entry-content .tasty-recipes-notes ul li,.tasty-recipes-entry-content .tasty-recipes-notes ol lipadding-left:1.5625em;padding-right:1.5625em;padding-top:1.25em;padding-bottom:1.25em;position:relative;margin-bottom:1.5em;list-style-type:none.tasty-recipes-entry-content .tasty-recipes-notes p,.tasty-recipes-entry-content .tasty-recipes-notes ul li,.tasty-recipes-entry-content .tasty-recipes-notes ol lipadding-left:2.5em;margin-left:0;margin-bottom:0.tasty-recipes-entry-content .tasty-recipes-notes p:before,.tasty-recipes-entry-content .tasty-recipes-notes ul li:beforecontent:"i";display:block;background-color:#aaa;-webkit-border-radius:50%;-moz-border-radius:50%;border-radius:50%;height:1.3em;width:1.3em;font-size:.75em;line-height:1.3em;text-align:center;color:#FFF;position:absolute;left:1.167em;top:2.1em.tasty-recipes-entry-content .tasty-recipes-notes ol li:beforecontent:counter(li);counter-increment:li;position:absolute;background-color:#aaa;-webkit-border-radius:50%;-moz-border-radius:50%;border-radius:50%;height:1.45em;width:1.45em;color:#FFF;left:2em;transform:translateX(-50%);line-height:1.5em;font-size:.6875em;text-align:center;top:2.3em.tasty-recipes-entry-content .tasty-recipes-notes p:last-childmargin-bottom:0.tasty-recipes-entry-content .tasty-recipes-keywordsmargin-top:1em;margin-bottom:1em;color:#aaa.tasty-recipes-entry-content .tasty-recipes-keywords pmargin-bottom:0;font-size:.7em.tasty-recipes-nutrifoxtext-align:center;margin:0.tasty-recipes-nutrifox iframewidth:100%;display:block;margin:0.tasty-recipes-entry-content .tasty-recipes-nutrition ul lifloat:none;line-height:2em;list-style-type:none;margin-left:0;padding-left:.833em.tasty-recipes-entry-footerbackground-color:#fff;padding-top:1.5625em;padding-bottom:1.25em;padding-left:2.5em;padding-right:2.5em;text-align:center.tasty-recipes-entry-footer .tasty-recipes-footer-contentdisplay:inline-block.tasty-recipes-entry-footer imgwidth:65px.tasty-recipes-entry-footer h3font-size:1.25em;line-height:2.25em;margin-top:.5em;margin-bottom:.125em;padding:0;line-height:1em.tasty-recipes-entry-footer pmargin-bottom:0;font-size:.75em.tasty-recipes-entry-footer p atext-decoration:underline;box-shadow:none;border-bottom:none.tasty-recipes-entry-footer:aftercontent:" ";display:block;clear:both@media only screen and (max-width:520px).tasty-recipes-entry-footer h3margin-top:.5em;margin-bottom:.5em.tasty-recipes-entry-footertext-align:center@media only screen and (min-width:520px).tasty-recipes-entry-footer imgfloat:left.tasty-recipes-entry-footer h3,.tasty-recipes-entry-footer pmargin-left:90px;clear:none;text-align:left.clearfix:afterclear:both;content:" ";display:table.tasty-recipes-print-viewfont-size:11px.tasty-recipes-print-view .tasty-recipes-print-buttondisplay:inline-block.tasty-recipes-printpadding:0.tasty-recipes-print-view .tasty-recipes,.tasty-recipes-print-view .tasty-recipes-entry-contentbackground:#fff.tasty-recipes-print-view .tasty-recipesmargin-top:1em.tasty-recipes-print .tasty-recipes-entry-headerbackground-color:inherit;color:inherit;padding-bottom:0;padding-left:1em;padding-right:1em.tasty-recipes-print .tasty-recipes-entry-header .tasty-recipes-imagetransform:none;float:left;margin-right:16px.tasty-recipes-print-view .tasty-recipes-entry-header .tasty-recipes-header-contentmin-height:150px.tasty-recipes-print.tasty-recipes-has-image .tasty-recipes-entry-header h2margin-top:0.tasty-recipes-print .tasty-recipes-entry-header h2color:inherit;margin-bottom:.5em.tasty-recipes-print .tasty-recipes-entry-header hrdisplay:none.tasty-recipes-print .tasty-recipes-header-content .tasty-recipes-rating-outerposition:initial;text-align:left;width:unset;top:unset.tasty-recipes-print .tasty-recipes-entry-header .tasty-recipes-rating-stars spancolor:#000.tasty-recipes-print .tasty-recipes-entry-header .tasty-recipes-details ulpadding:0;clear:none.tasty-recipes-print .tasty-recipes-entry-header .tasty-recipes-details ul liline-height:1.8em;margin-bottom:0.tasty-recipes-print .tasty-recipes-entry-header .tasty-recipes-details .detail-icondisplay:none.tasty-recipes-print-view .tasty-recipes-source-linktext-align:center.tasty-recipes-print-view .tasty-recipes-entry-content .tasty-recipes-ingredients ul li,.tasty-recipes-print-view .tasty-recipes-entry-content .tasty-recipes-instructions ul li,.tasty-recipes-print-view .tasty-recipes-entry-content .tasty-recipes-ingredients ol li,.tasty-recipes-print-view .tasty-recipes-entry-content .tasty-recipes-instructions ol limargin-bottom:0.tasty-recipes-print-view .tasty-recipes-entry-content .tasty-recipes-notes p,.tasty-recipes-print-view .tasty-recipes-entry-content .tasty-recipes-notes ul li,.tasty-recipes-print-view .tasty-recipes-entry-content .tasty-recipes-notes ol limargin-top:1rem;padding-top:0;padding-bottom:0.tasty-recipes-print-view .tasty-recipes-entry-content .tasty-recipes-notes p:before,.tasty-recipes-print-view .tasty-recipes-entry-content .tasty-recipes-notes ul li:beforetop:.1em]]>
Healthy Hot Chocolate with a Secret Ingredient!
Description
Enjoy the health benefits of grass-fed gelatin while getting one of your favorite treats…hot chocolate. Kid-approved, and healthy enough you are happy to serve it daily!
Instructions
Warm the milk either in the microwave or on the stovetop. You want it very warm but not boiling.
Add all the ingredients (except the topping) into a high powered blender and blend on high for about 1 minute. Pour into a mug, add the powdered topping (optional), serve and enjoy
Print
<![CDATA[.tasty-recipes-imagefloat:right.tasty-recipes-print-buttonbackground-color:#667;display:inline-block;padding-left:1em;padding-right:1em;padding-top:.5em;padding-bottom:.5em;text-decoration:nonea.tasty-recipes-print-buttoncolor:#fffa.tasty-recipes-print-button:hovercolor:#fff.tasty-recipes-rating.tasty-recipes-clip-10-webkit-clip-path:polygon(0 0,10% 0%,10% 100%,0% 100%);clip-path:polygon(0 0,10% 0%,10% 100%,0% 100%).tasty-recipes-rating.tasty-recipes-clip-20-webkit-clip-path:polygon(0 0,20% 0%,20% 100%,0% 100%);clip-path:polygon(0 0,20% 0%,20% 100%,0% 100%).tasty-recipes-rating.tasty-recipes-clip-30-webkit-clip-path:polygon(0 0,30% 0%,30% 100%,0% 100%);clip-path:polygon(0 0,30% 0%,30% 100%,0% 100%).tasty-recipes-rating.tasty-recipes-clip-40-webkit-clip-path:polygon(0 0,40% 0%,40% 100%,0% 100%);clip-path:polygon(0 0,40% 0%,40% 100%,0% 100%).tasty-recipes-rating.tasty-recipes-clip-50-webkit-clip-path:polygon(0 0,50% 0%,50% 100%,0% 100%);clip-path:polygon(0 0,50% 0%,50% 100%,0% 100%).tasty-recipes-rating.tasty-recipes-clip-60-webkit-clip-path:polygon(0 0,60% 0%,60% 100%,0% 100%);clip-path:polygon(0 0,60% 0%,60% 100%,0% 100%).tasty-recipes-rating.tasty-recipes-clip-70-webkit-clip-path:polygon(0 0,70% 0%,70% 100%,0% 100%);clip-path:polygon(0 0,70% 0%,70% 100%,0% 100%).tasty-recipes-rating.tasty-recipes-clip-80-webkit-clip-path:polygon(0 0,80% 0%,80% 100%,0% 100%);clip-path:polygon(0 0,80% 0%,80% 100%,0% 100%).tasty-recipes-rating.tasty-recipes-clip-90-webkit-clip-path:polygon(0 0,90% 0%,90% 100%,0% 100%);clip-path:polygon(0 0,90% 0%,90% 100%,0% 100%).tasty-recipes-nutrition ullist-style-type:none;margin:0;padding:0.tasty-recipes-nutrition ul:afterdisplay:block;content:' ';clear:both.tasty-recipes-nutrition lifloat:left;margin-right:1em.tasty-recipes-plugtext-align:center;margin-bottom:1em;display:-ms-flexbox;display:flex;-ms-flex-align:center;align-items:center;-ms-flex-pack:center;justify-content:center.tasty-recipes-plug atext-decoration:none;box-shadow:none.tasty-recipes-plug a imgwidth:150px;height:auto;margin:5px 0 0 8px;display:inline-block@media print.tasty-recipes-no-print,.tasty-recipes-no-print *display:none!important.tasty-recipesmargin-bottom:4em;max-width:700px;background-color:#f9f9f9.tasty-recipes.tasty-recipes-has-plugmargin-bottom:1em.tasty-recipes-plugmargin-bottom:4em.tasty-recipes-print-buttondisplay:none.tasty-recipes-image-shimheight:69.5px;clear:both.tasty-recipes-entry-headerbackground-color:#f9f9f9;padding-top:2em;padding-left:2em;padding-right:2em.tasty-recipes-entry-header.tasty-recipes-has-imagepadding-top:0.tasty-recipes-entry-header .tasty-recipes-imagefloat:none;margin-bottom:1em@media only screen and (min-width:730px).tasty-recipes-entry-header .tasty-recipes-imagefloat:left;margin-right:16px.tasty-recipes-entry-header .tasty-recipes-image imgfloat:none;height:150px;width:150px.tasty-recipes-entry-header .tasty-recipes-header-contentmin-height:215px.tasty-recipes-entry-header h2margin-bottom:0;margin-top:0;padding-top:0;padding-bottom:0;clear:none.tasty-recipes-entry-header hrborder:1px solid #eee;background-color:#eee;margin-bottom:0;margin-top:1em;margin-right:-2em;margin-left:-2em.tasty-recipes-entry-header .tasty-recipes-rating-outerwidth:100%.tasty-recipes-entry-header .tasty-recipes-rating-outer atext-decoration:none;border:none;display:inherit;box-shadow:none.tasty-recipes-entry-header .tasty-recipes-rating-outer a:hovertext-decoration:none.tasty-recipes-entry-header .tasty-recipes-rating-starsfont-size:18px.tasty-recipes-entry-header .tasty-recipes-rating-stars spanmargin-right:2px;margin-left:2px;color:#aaa.tasty-recipes-entry-header .tasty-recipes-rating-stars span:first-childmargin-left:0.tasty-recipes-entry-header .tasty-recipes-rating-labelcolor:#B7BBC6;font-size:.6875em;margin-top:1em;position:absolute.tasty-recipes-entry-header .tasty-recipes-rating-stars .post-ratingsfont-size:10px.tasty-recipes-entry-header .tasty-recipes-rating-stars .post-ratings .tasty-recipes-cf-ratings-labelmargin-top:0;line-height:1.tasty-recipes-entry-header .tasty-recipes-detailsmargin-top:1.5em;color:#606060.tasty-recipes-entry-header .tasty-recipes-details ullist-style-type:none;margin:0;padding-left:0.tasty-recipes-entry-header .tasty-recipes-details ul lidisplay:inline-block;margin-left:0;padding-left:0;margin-right:.5em;margin-bottom:0;font-size:1em;line-height:1.8em.tasty-recipes-entry-header .tasty-recipes-details .detail-iconheight:1em;margin-top:.4em.tasty-recipes-entry-header .tasty-recipes-details ul lifont-size:1em.tasty-recipes-entry-header .tasty-recipes-details .tasty-recipes-labelmargin-right:.125em.tasty-recipes-entry-header .tasty-recipes-details .detail-iconvertical-align:top;margin-right:.2em@media only screen and (min-width:730px).tasty-recipes-entry-header .tasty-recipes-detailspadding-left:166px.tasty-recipes-entry-contentpadding-top:.1em;background:#f9f9f9;color:#606060;clear:both.tasty-recipes-entry-header .tasty-recipes-buttonsmargin-top:1.25em;margin-bottom:1.25em;width:100%.tasty-recipes-entry-header .tasty-recipes-buttons:aftercontent:" ";display:block;clear:both.tasty-recipes-entry-header .tasty-recipes-button-wrapbox-sizing:border-box.tasty-recipes-entry-header .tasty-recipes-buttons atext-transform:uppercase;text-align:center;display:block;background-color:#f9f9f9;font-size:1em;line-height:1.375em;font-weight:700;padding-top:7px;padding-bottom:7px;margin-top:0;border:1px solid #aaa;;border-radius:0;text-decoration:none;color:#aaa.tasty-recipes-entry-header .tasty-recipes-buttons .button:hoverbackground-color:#f9f9f9;border:3px solid #aaa;color:#aaa;opacity:1.tasty-recipes-entry-content a imgbox-shadow:none;-webkit-box-shadow:none.tasty-recipes-entry-header .tasty-recipes-buttons a:hoverbackground-color:#979599;text-decoration:none.tasty-recipes-entry-header .tasty-recipes-buttons imgvertical-align:top.tasty-recipes-entry-header .tasty-recipes-buttons img.svg-print,.tasty-recipes-entry-header .tasty-recipes-buttons img.svg-pinterestheight:1.25em;margin-right:.375em;margin-bottom:0;background:none;display:inline-block;box-shadow:none@media only screen and (max-width:730px).tasty-recipes-entry-header .tasty-recipes-button-wrapwidth:100%.tasty-recipes-entry-header .tasty-recipes-button-wrap:nth-child(2)padding-top:1em@media only screen and (min-width:450px).tasty-recipes-entry-header .tasty-recipes-buttonswidth:100%;float:none.tasty-recipes-entry-header .tasty-recipes-button-wrap:first-childwidth:50%;padding-right:5px;float:left.tasty-recipes-entry-header .tasty-recipes-button-wrap:last-childwidth:50%;padding-left:5px;float:right;padding-top:0@media only screen and (min-width:730px).tasty-recipes-entry-header .tasty-recipes-buttonspadding-left:166px;box-sizing:border-box.tasty-recipes-header-contentposition:relative.tasty-recipes-header-content .tasty-recipes-rating-outerposition:absolute;top:155px;width:150px;text-align:center.tasty-recipes-header-content .tasty-recipes-rating-labeldisplay:block;position:static;margin-top:0.tasty-recipes-entry-content h3color:initial.tasty-recipes-entry-content h4font-size:1em;padding-top:0;margin-bottom:1.5em;margin-top:1.5em.tasty-recipes-entry-content hrbackground-color:#eee;border:1px solid #eee;margin-top:1em;margin-bottom:1em.tasty-recipes-entry-content .tasty-recipes-description,.tasty-recipes-entry-content .tasty-recipes-ingredients,.tasty-recipes-entry-content .tasty-recipes-instructions,.tasty-recipes-entry-content .tasty-recipes-keywordspadding-left:2em;padding-right:2em.tasty-recipes-entry-content .tasty-recipes-description pmargin-bottom:1em.tasty-recipes-entry-content .tasty-recipes-ingredients ul,.tasty-recipes-entry-content .tasty-recipes-instructions ullist-style-type:none;margin-left:0;margin-bottom:1.5em;padding:0.tasty-recipes-entry-content .tasty-recipes-ingredients ul li,.tasty-recipes-entry-content .tasty-recipes-instructions ul limargin-bottom:.625em;list-style-type:none;position:relative;margin-left:2.5em;line-height:1.46.tasty-recipes-entry-content .tasty-recipes-ingredients ul li:before,.tasty-recipes-entry-content .tasty-recipes-instructions ul li:beforebackground-color:#aaa;-webkit-border-radius:50%;-moz-border-radius:50%;border-radius:50%;height:.5em;width:.5em;display:block;content:" ";left:-1.25em;top:.375em;position:absolute.tasty-recipes-entry-content .tasty-recipes-ingredients ol,.tasty-recipes-entry-content .tasty-recipes-instructions olcounter-reset:li;margin-left:0;padding:0.tasty-recipes-entry-content .tasty-recipes-ingredients ol li,.tasty-recipes-entry-content .tasty-recipes-instructions ol lilist-style-type:none;position:relative;margin-bottom:1em;margin-left:2.5em;line-height:1.46.tasty-recipes-entry-content .tasty-recipes-ingredients ol li:before,.tasty-recipes-entry-content .tasty-recipes-instructions ol li:beforecontent:counter(li);counter-increment:li;position:absolute;background-color:#aaa;-webkit-border-radius:50%;-moz-border-radius:50%;border-radius:50%;height:1.45em;width:1.45em;color:#FFF;left:-1.25em;transform:translateX(-50%);line-height:1.5em;font-size:.6875em;text-align:center;top:.1875em@media only screen and (max-width:520px).tasty-recipes-entry-content .tasty-recipes-ingredients ol,.tasty-recipes-entry-content .tasty-recipes-instructions olmargin-left:0.tasty-recipes-entry-content .tasty-recipes-notes,.tasty-recipes-entry-content .tasty-recipes-nutritionpadding-bottom:1.25em;padding-left:2em;padding-right:2em.tasty-recipes-entry-content .tasty-recipes-notes olcounter-reset:li;margin-left:0;padding:0;margin-bottom:0.tasty-recipes-entry-content .tasty-recipes-notes ulmargin-left:0;padding:0;margin-bottom:0.tasty-recipes-entry-content .tasty-recipes-notes p,.tasty-recipes-entry-content .tasty-recipes-notes ul li,.tasty-recipes-entry-content .tasty-recipes-notes ol lipadding-left:1.5625em;padding-right:1.5625em;padding-top:1.25em;padding-bottom:1.25em;position:relative;margin-bottom:1.5em;list-style-type:none.tasty-recipes-entry-content .tasty-recipes-notes p,.tasty-recipes-entry-content .tasty-recipes-notes ul li,.tasty-recipes-entry-content .tasty-recipes-notes ol lipadding-left:2.5em;margin-left:0;margin-bottom:0.tasty-recipes-entry-content .tasty-recipes-notes p:before,.tasty-recipes-entry-content .tasty-recipes-notes ul li:beforecontent:"i";display:block;background-color:#aaa;-webkit-border-radius:50%;-moz-border-radius:50%;border-radius:50%;height:1.3em;width:1.3em;font-size:.75em;line-height:1.3em;text-align:center;color:#FFF;position:absolute;left:1.167em;top:2.1em.tasty-recipes-entry-content .tasty-recipes-notes ol li:beforecontent:counter(li);counter-increment:li;position:absolute;background-color:#aaa;-webkit-border-radius:50%;-moz-border-radius:50%;border-radius:50%;height:1.45em;width:1.45em;color:#FFF;left:2em;transform:translateX(-50%);line-height:1.5em;font-size:.6875em;text-align:center;top:2.3em.tasty-recipes-entry-content .tasty-recipes-notes p:last-childmargin-bottom:0.tasty-recipes-entry-content .tasty-recipes-keywordsmargin-top:1em;margin-bottom:1em;color:#aaa.tasty-recipes-entry-content .tasty-recipes-keywords pmargin-bottom:0;font-size:.7em.tasty-recipes-nutrifoxtext-align:center;margin:0.tasty-recipes-nutrifox iframewidth:100%;display:block;margin:0.tasty-recipes-entry-content .tasty-recipes-nutrition ul lifloat:none;line-height:2em;list-style-type:none;margin-left:0;padding-left:.833em.tasty-recipes-entry-footerbackground-color:#fff;padding-top:1.5625em;padding-bottom:1.25em;padding-left:2.5em;padding-right:2.5em;text-align:center.tasty-recipes-entry-footer .tasty-recipes-footer-contentdisplay:inline-block.tasty-recipes-entry-footer imgwidth:65px.tasty-recipes-entry-footer h3font-size:1.25em;line-height:2.25em;margin-top:.5em;margin-bottom:.125em;padding:0;line-height:1em.tasty-recipes-entry-footer pmargin-bottom:0;font-size:.75em.tasty-recipes-entry-footer p atext-decoration:underline;box-shadow:none;border-bottom:none.tasty-recipes-entry-footer:aftercontent:" ";display:block;clear:both@media only screen and (max-width:520px).tasty-recipes-entry-footer h3margin-top:.5em;margin-bottom:.5em.tasty-recipes-entry-footertext-align:center@media only screen and (min-width:520px).tasty-recipes-entry-footer imgfloat:left.tasty-recipes-entry-footer h3,.tasty-recipes-entry-footer pmargin-left:90px;clear:none;text-align:left.clearfix:afterclear:both;content:" ";display:table.tasty-recipes-print-viewfont-size:11px.tasty-recipes-print-view .tasty-recipes-print-buttondisplay:inline-block.tasty-recipes-printpadding:0.tasty-recipes-print-view .tasty-recipes,.tasty-recipes-print-view .tasty-recipes-entry-contentbackground:#fff.tasty-recipes-print-view .tasty-recipesmargin-top:1em.tasty-recipes-print .tasty-recipes-entry-headerbackground-color:inherit;color:inherit;padding-bottom:0;padding-left:1em;padding-right:1em.tasty-recipes-print .tasty-recipes-entry-header .tasty-recipes-imagetransform:none;float:left;margin-right:16px.tasty-recipes-print-view .tasty-recipes-entry-header .tasty-recipes-header-contentmin-height:150px.tasty-recipes-print.tasty-recipes-has-image .tasty-recipes-entry-header h2margin-top:0.tasty-recipes-print .tasty-recipes-entry-header h2color:inherit;margin-bottom:.5em.tasty-recipes-print .tasty-recipes-entry-header hrdisplay:none.tasty-recipes-print .tasty-recipes-header-content .tasty-recipes-rating-outerposition:initial;text-align:left;width:unset;top:unset.tasty-recipes-print .tasty-recipes-entry-header .tasty-recipes-rating-stars spancolor:#000.tasty-recipes-print .tasty-recipes-entry-header .tasty-recipes-details ulpadding:0;clear:none.tasty-recipes-print .tasty-recipes-entry-header .tasty-recipes-details ul liline-height:1.8em;margin-bottom:0.tasty-recipes-print .tasty-recipes-entry-header .tasty-recipes-details .detail-icondisplay:none.tasty-recipes-print-view .tasty-recipes-source-linktext-align:center.tasty-recipes-print-view .tasty-recipes-entry-content .tasty-recipes-ingredients ul li,.tasty-recipes-print-view .tasty-recipes-entry-content .tasty-recipes-instructions ul li,.tasty-recipes-print-view .tasty-recipes-entry-content .tasty-recipes-ingredients ol li,.tasty-recipes-print-view .tasty-recipes-entry-content .tasty-recipes-instructions ol limargin-bottom:0.tasty-recipes-print-view .tasty-recipes-entry-content .tasty-recipes-notes p,.tasty-recipes-print-view .tasty-recipes-entry-content .tasty-recipes-notes ul li,.tasty-recipes-print-view .tasty-recipes-entry-content .tasty-recipes-notes ol limargin-top:1rem;padding-top:0;padding-bottom:0.tasty-recipes-print-view .tasty-recipes-entry-content .tasty-recipes-notes p:before,.tasty-recipes-print-view .tasty-recipes-entry-content .tasty-recipes-notes ul li:beforetop:.1em]]>
Description
No processed sugar, artificial dyes or colors in this delicious gummy treat! These chocolate gummies are easy to make and full of nutrition.
Instructions
Warm the coconut milk and cacao over medium heat. Use a whisk to thoroughly stir in the cacao. You want the mixture to be hot but not boiling.
Add the honey and vanilla and stir well.
Add the gelatin 1 Tbsp at a time whisking continuously to avoid clumping.
Remove from heat. (Optional – add mixture to a Pyrex container with pouring spout for easier pouring.) Work quickly to pour mixture into a glass dish lined with parchment paper or into silicone candy or ice molds. (Don’t take too long doing this step or the mixture will harden.)
Chill in the fridge for at least one hour.
Remove from molds or if you used a glass baking dish, slice into 1-inch squares and remove with a spatula. Serve and enjoy.
Store in the fridge.
Are Collagen and Gelatin the Same as Bone Broth?
In a nutshell, yes. The health benefits touted from bone broth come mostly from a protein called collagen found in high amounts in the connective tissues, tendons, ligaments, and cartilage in animals. When we cook these animals parts down, in a bone broth, we get gelatin. If you further cook and process gelatin you can get hydrolyze collagen.
While they contain different chemical properties, collagen and gelatin and bone broth are all, in essence, the same amino acids and offer very similar health benefits. However, when using them in the kitchen, you want bone broth, gelatin, and collagen for different things! You can’t make gummy bears with collagen but they work perfectly with gelatin.
Enjoy 3 New Ways to Eat “Bone Broth” with Chocolate
I hope you enjoy the 3 recipes given here to enhance the delicious methods of enjoying bone broth. While a cup of soup made with bone broth can do wonders for the body, sometimes it’s nice to have an equally healthy alternative.
In my experience, most kids are way more excited about chocolate than soup. Heck, I could say the same about many adults too. Enjoy!
References
https://articles.mercola.com/sites/articles/archive/2014/11/23/nourishing-bone-broth.aspx
https://www.westonaprice.org/health-topics/food-features/broth-is-beautiful/
Johnson, J. (2018, December 6). “What are the benefits of bone broth?.” Medical News Today. Retrieved from https://www.medicalnewstoday.com/articles/323903.php.
https://blog.kettleandfire.com/bone-broth-beauty-benefits-2/
https://blog.kettleandfire.com/4-amazing-ways-collagen-bone-broth-heal-your-gut/
https://happymammoth.co/science-backed-bone-broth-benefits/
https://www.ncbi.nlm.nih.gov/pmc/articles/PMC3566565/
https://www.ncbi.nlm.nih.gov/pmc/articles/PMC5465250/
https://www.usatoday.com/story/news/nation-now/2018/04/26/dark-chocolate-good-mood-memory/553460002/
https://www.ncbi.nlm.nih.gov/pmc/articles/PMC3818345/
https://www.ncbi.nlm.nih.gov/pubmed/15549276
Source: https://www.kitchenstewardship.com/hide-bone-broth-in-chocolate/
0 notes
Text
Try this Sous-Vide Wild Boar Stew Because Fall is Coming
Photo: Claire Lower, Graphic: Angelica Alzona
My grandfather was an eater of many meats—even possum—but he did not care for the texture of wild boar. His recipe for wild boar stew was simple—cook the boar with various vegetables, then “throw the meat in the garbage and keep the broth.” It is worth noting that he was not exactly the cook of the family, but the fact remains that feral pig can be quite tough if not cooked with care.
This is part of Will It Sous Vide? the column where I usually make whatever you want me to with my immersion circulator.

Make Your Own 'Dirty Water Dogs' With a Sous-Vide Setup
Hot dogs are the ultimate easy crowd pleaser. They’re already cooked, so you don’t have to worry…
Read more Read
Luckily, an immersion circulator is the most careful cooking appliance around, and you can sous vide your way to a stew that contains both rich, hearty, tender meat and a flavorful, heart-warming broth. If it still seems a little warm out for stew, know that this meat, when shredded, also makes an excellent taco filling, and tacos know no season.
Similar to our sous-vide chili, this is an overnight project and—like most stews and sauces—this stuff gets better if you let it sit for a day after cooking is complete. That may seem like torture, but the flavor melding that happens in that bag is well worth the wait. To make it yourself, you will need:
2 pounds of wild boar stew meat, cut into cubes
2 tablespoons olive oil
2 small onions, cut into 1-inch pieces
2 sweet Italian peppers, diced
6 cloves of garlic, diced
2 tablespoons tomato paste
1/2 a cup of red wine
2 canned chiles in adobo sauce (By that I mean two of the chiles in the can, not two cans.)
1 tablespoon soy sauce
5 sprigs of fresh thyme
5 sprigs of fresh oregano
5 sprigs of fresh marjoram
1 big sprig of rosemary
1 sprig of tarragon
1 bay leaf
If your meat is frozen (mine was), let it thaw completely in the fridge. Season the vegetables with salt and pepper, and heat the olive oil in a large sauté pan. Cook the onions and peppers over medium-high heat until they are soft and well browned. The darker the vegetables, the more umami they will add to the dish, but be careful not to burn them. Add the garlic, and cook until it is fragrant and golden (about two minutes). Stir the tomato paste into the vegetables and cook for a couple more minutes, until the paste turns a dark brick red.
Transfer the vegetables to a gallon-sized freezer bag, and deglaze the pan with the wine, scraping all the lovely little browned bits left behind by the veggies. Let that reduce for a couple of minutes, then pour it in the bag as well. Season the meat with salt and pepper, and add it along with all remaining ingredients to the bag. You can tie the herbs into a little bouquet garni with some twine if you like, unless you enjoy fishing out individual twigs, which is what I ended up doing, because I forgot to tie up my herbs.
Get that bag into a 145-degree sous-vide water bath, using the displacement method to remove the air and help the contents stay submerged. (You can also use a vacuum bag if you want, but I didn’t find that to be necessary with this recipe, and vacuum bags are kind of expensive.)

Seal Food for Sous Vide Cooking or the Freezer with Just a Bowl of Water
Vacuum sealing is a great way to preserve your food and keep it from getting freezer burn. If you…
Read more Read
Let that crazy porcine hang out for at least eight hours or up to 12. I found the meat had just a touch more chew than I like at eight, but it was still much more tender than most other stewed meat I’ve eaten. Ten is pretty much perfect, but I slept through my alarm so didn’t take this batch out until the 12-hour mark. Luckily, that extra two hours did nothing to change the flavor or texture.
Now, you could eat this meat straight out of the bag, and it would be fine, but that’s all it would be. When I first tasted wild boar after removing it from its little hot tub, I was disappointed. It wasn’t bad, but it wasn’t as tender as I had thought it would be, and the flavor didn’t blow me away. Frankly, I wasn’t even sure it was good enough to tell you about. I chilled it in an ice bath and—somewhat morosely—put it in the fridge.
The next day, I tried it again and found (with great relief) that the period of chilly rest had greatly improved both the texture and flavor of the meat, and I happily ate it throughout the long weekend. Though it is filling, the herbs and peppers keep it from being too rich to enjoy during these not-quite-fall days, and the easily shredded meat doubles as a superb taco filling or rice bowl topper. Though I can’t say with 100% certainty my grandfather would have loved it, I’m pretty sure he would have. I know he would have at least enjoyed it more than possum, which only earned a “not too bad.”

Source: https://skillet.lifehacker.com/try-this-sous-vide-wild-boar-stew-because-fall-is-comin-1828805318
0 notes
Text
Fresh Apple Cake with Caramel Cream Cheese Frosting
This old-fashioned Fresh Apple Cake recipe is all the bits I cherish about fall—apple picking, chunky sweaters, cinnamon sticks, and crackly orange leaves—turned into a warm hug of a dessert and slathered with dreamy caramel cream cheese frosting.
When I think about the perfect fall day, I envision red leaves against icy blue skies, backyard football games, and piping hot mugs of cider.
I imagine pink cheeks, fuzzy slippers, and oversized, squashy armchairs.
Most importantly, my perfect fall day necessitates a big, warm slice of freshly baked apple something. Something frosted. Or glazed. Or ice creamed. Or frosted AND ice creamed.
Fresh Apple Cake with Caramel Cream Cheese Frosting, you are that apple something of my eye!
This fresh Apple Cake is a moist, rich spice cake studded with hunks of tart apple and bits of toasted walnuts. It is scented with cinnamon and nutmeg and allspice and is the kind of homey, comforting dessert I imagine myself loving as a kid and baking as a grandma and craving every autumn in between.
The apple cake recipe was a bit of a saga to get right, but it was worth every Granny Smith (and GASP honeycrisp!) in the bag.
If you follow me on Instagram, you may have witnessed the incident in which the beautiful apple bundt cake I stayed awake until midnight to bake emerged from its pan in 10 odd pieces.
As I learned the hard way, this apple cake is so supremely moist and apple packed, it’s better suited for a regular square baking dish than it is a bundt pan.
(Don’t worry though—I pieced that broken bundt back together, poured caramel glaze over the top, and served it at a dinner party. No leftovers!)
A few adjustments to the recipe later, and I have for you a perfect, more reliable Fresh Apple Cake, scratch-made and ready to be slathered in cream cheese frosting.
But not just any cream cheese frosting. CARAMEL cream cheese frosting. This Fresh Apple Cake is special, and it deserves a special topping to match.
The addition of the brown sugar makes the cream cheese frosting taste like caramel, no making of actual caramel required. Translation: it’s quicker and easier, which means you will be eating apple cake sooner than later. YES.
Add a shower of toasted walnuts and you have a creamy, crunchy sensation in every bite.
Another yummy twist for the next time you bake this cake, as I suspect there will be a next time: Fresh Apple Cake with coconut and pecans (swap pecans for the walnuts and add a sprinkle of both on top). New topping, same warm, happy fall feeling.
Every fall, I like to treat myself to at least one indulgent apple dessert. It’s my grown-up way of experiencing the same unabridged autumn bliss I did as a kid diving into a pile of leaves, with fewer bruises. I can attest to this because I tried jumping into what I thought was a large, cushy leaf pile recently. Let’s just say I don’t bounce back the way I once did.
While Vegan Apple Crisp, Hasselback Apples, and baked Apple Chips are a few of my go-to healthy apple treats, this Fresh Apple Cake is extra special. Don’t skip the cream cheese frosting, and be generous with the nuts. Your inner leaf-jumping kid (and outer apple-dessert-loving adult) will thank you!

Moist, rich old fashioned apple cake with caramel cream cheese frosting. Filled with fresh apples, walnuts, and cinnamon. Easy to make and a fall favorite!
Yield: 1 9x9-inch cake (Serves 12)
Prep Time: 30 minutes
Cook Time: 40 minutes
Total Time: 2 hours, 30 minutes
Ingredients:
For the Apple Cake:
3/4 cup walnut halves
1 2/3 cups white whole wheat flour
1/4 teaspoon baking soda
1/4 teaspoon baking powder
1/2 teaspoon kosher salt
1 teaspoon ground cinnamon
1/4 teaspoon ground nutmeg
1/4 teaspoon ground allspice
6 tablespoons unsalted butter, at room temperature
1/2 cup packed light or dark brown sugar
1/2 cup granulated sugar
2 large eggs, at room temperature
1/4 cup nonfat plain Greek yogurt, at room temperature
1 teaspoon pure vanilla extract
2 cups peeled and 1/4-inch-chopped apples (about 2 medium apples—choose a firm, flavorful variety such as Granny Smith, Fuji, McIntosh, or Cortland)
For the Brown Sugar Cream Cheese Frosting:
6 ounces reduced-fat cream cheese, at room temperature
2 tablespoons unsalted butter, at room temperature
1/2 cup brown sugar
1 teaspoon vanilla extract
1/4 teaspoon kosher salt
1/2 cup powdered sugar
Directions:
Place the rack in the center of your oven. Preheat the oven to 325 degrees F. Line a 9×9-inch or 8×8-inch square baking pan with parchment paper so that it overhangs two of the sides like handles. Lightly coat the parchment with nonstick spray. Set aside. Place the nuts in a single layer on an ungreased baking pan. Bake until toasted and fragrant, about 8 to 12 minutes. Do not walk away during the last few minutes (this is when nuts love to burn). Immediately transfer to a cutting board. Coarsely chop and set aside.
In a medium bowl, whisk together the white whole wheat flour, baking soda, baking powder, salt, cinnamon, nutmeg, and allspice.
In the bowl of a standing mixer fitted with the paddle attachment or a large mixing bowl, cream together the butter, brown sugar, and granulated sugar until light and fluffy, about 3 minutes. Beat in the eggs, one at a time, stopping in between each to scrape down the bowl. Beat in the Greek yogurt and vanilla extract. With the mixer on low, slowly add the dry ingredients, mixing just until evenly moistened. Fold in the apples and 1/2 cup of the toasted chopped walnuts. The batter will be very thick.
Scrape the batter into the prepared pan and with the back of a spatula, spread it evenly. Bake until a toothpick inserted into the center comes out clean and the edges are light golden brown, about 35 to 45 minutes. The baking time will vary depending upon the moisture content of your apples. The center of the cake will still feel soft but should spring back just a little when touched. Check at the 35-minute mark. If your cake isn’t done but the top is browning more quickly than you would like, loosely tent it with foil, then continue baking as directed. When it’s done, place the pan on a wire rack and let cool completely before frosting.
To make the frosting: In a mixing bowl or a stand mixer fitted with the paddle attachment, beat the cream cheese, butter, and brown sugar at medium speed until creamy, about 1 to 2 minutes. Add the vanilla and salt and beat until blended. Reduce the mixer speed to low. Gradually add the powdered sugar, beating just until combined. Increase the mixer speed to high. Beat 1 additional minute or until smooth. Spread the frosting generously onto the cooled cake. Sprinkle the remaining walnuts over the top. Slice generously and serve.
Store leftovers in an airtight container in the refrigerator for up to 5 days. (I find it tastes even better and more moist on day two! Let come close to room temperature prior to serving.)
Freeze (frosted or unfrosted) for up to 1 month. Let thaw overnight in the refrigerator.
All images and text ©Erin Clarke/Well Plated.
Nutrition Information
Serving Size: 1 slice (of 12)
Amount Per Serving:
Calories: 321 Calories
Total Fat: 17g
Saturated Fat: 8g
Cholesterol: 62mg
Carbohydrates: 37g
Fiber: 3g
Sugar: 25g
Protein: 6g

This post contains some affiliate links, which means that I make a small commission off items you purchase at no additional cost to you.
Source: https://www.wellplated.com/fresh-apple-cake/

0 notes
Text
Rye Bread
Rye bread made without yeast. A rye soda bread recipe that will make you fall in love with rye flour.
I have a quick love letter to write today, and I hope you’ll indulge me.
It’s part love letter, but really, I want to let you know which cookbooks I use in my kitchen several times a week. If you reach for a cookbook on a weeknight, or if you reach for a cookbook more than once a week, it’s a good sign.
I have a coffee nook in my kitchen, well, I’m a tea drinker, so I should call it a tea nook, but it was clearly designed as a coffee station. Anyway, since I have no need for a coffee maker, espresso machine, or any of those other coffee tools in my nook, I keep a small selection of cookbooks on the counter.
It’s well-thought-out; it’s the books I love the most and use the most. Not just beautiful books that inspire me, it’s incredible books that make me want to get in the kitchen and cook that very instant. Often, the pages have food splatters and can be a bit sticky, but that’s even better for me.
The cookbooks that I use the most are written by Heidi Swanson from 101cookbooks.com. I first discovered her when I moved to California, and upon first meeting, I believe I told her that she taught me everything I know about California cuisine.
Heidi taught me how to shop at and how to love farmer’s markets, and she taught me about Deborah Madison and all the other great chefs in California that are paving/had paved the way for eating REAL food. Because of Heidi, my top factor when choosing food is where was it produced and how was it produced.
I reach for her cookbooks after every farmer’s market haul. Her stuff is vegetarian, yes, but it’s the most flavorful, unique vegetarian food I’ve ever had that makes you never miss the meat, honest!
In full disclosure, my husband and I are part-time vegetarians. While most people do ‘meatless Monday’ and take one day off each week from meat, we actually only eat meat one day a week or so. It’s not uncommon for us to call instant pot mac and cheese with a salad a Monday night dinner, and enjoy a my orzo pasta salad with feta or my pesto tortellini salad later in the week. Our one meat day might include my honey garlic chicken thighs.
But did you notice a theme? My vegetarian meals rely heavily on pasta. Not Heidi’s.
Heidi’s recipes are inventive and far from your standard vegetarian recipes. I own all of her books, and I cook from them often.
Super Natural Every Day is the one I grab the most, though I am working my way through the very beautiful Near & Far.
Her dish called Otsu is something I make for company, especially company that has food allergies. Plus, it’s my belief that she invented baked oatmeal, and the world is a much better place for it.
More details about this rye bread made without yeast:
Today, I’m sharing with you her recipe for rye bread. It doesn’t have any yeast, and is technically a rye soda bread. It bakes up so crunchy, crusty, and beautiful that it took my breath away the first time I made it years ago.
As I baked this rye bread recipe for possibly the one-hundredth time to photograph this for you, it still took my breath away when it emerged from the oven.
I can’t help but run my finger over the indentations made with the knife before baking–that’s where the real CRUST emerges.
Soda bread made without deep slashes is now dead to me–this is the only way forward.
Honestly, I can’t believe I get to count Heidi as one of my friends. She inspires me so much. A woman who can make bread with just 4 ingredients that tastes this good is an angel.
I keep rye flour in my house now to make this rye bread whenever I have soup or stew on the stove. It comes together so quickly, and serving homemade bread with a meal makes me feel like I’ve got my life together.
For some strange reason, my daughter isn’t that into carbs, unless gnocchi is involved, and she frequently licks the butter off bread and leaves the bread.
However, she loves this rye bread. The dark color scared her at first, so I served it with the dill butter that Heidi recommends in the book, and it sold her. Most commonly, I serve it with salted European-style butter.
Is rye bread gluten free?
No, it’s not. I wanted to answer that question, because I know it will come up.
It’s important to me that Camille learns to love bread and carbs, because there are so many B vitamins in whole grains. I am so grateful this rye bread recipe helps me accomplish that goal.
Rye flour can be a tough sell when it comes to whole grains, but I’ve been working it into my pancakes for two recipe, and I’m considering adding some to my small batch crepes recipe, too.
Ok, onto the recipe now. I hope you love this homemade rye bread recipe made without yeast. It will quickly go into your Fall rotation for serving alongside soup, and I’m sure it will find its way out again for St Patrick’s Day since it’s technically soda bread.
Rye Bread
Christina Lane
Yields 1 small boule
Homemade rye bread made without yeast.
15 minPrep Time
50 minCook Time
1 hr, 5 Total Time
Ingredients
2 1/3 cups (9.75 ounces) rye flour
1 3/4 cups (8 ounces) all-purpose flour
1 3/4 teaspoons baking soda
1 1/4 teaspoons fine sea salt
2 cups (475 mL) buttermilk
Instructions
Preheat the oven to 400, and ensure a wire rack is in the middle position. Line a small baking sheet with parchment paper.
Sift the flours, baking soda and salt into a large bowl.
Make a well in the center of the flours and pour in all of the buttermilk at once. Stir just until a dough forms.
Scoop the dough out onto a lightly floured surface. Knead for about 30 seconds to bring it together.
Using your hands, press the dough into an even flat disk.
Sprinkle the top of the dough disk with about 2 tablespoons of all-purpose flour.
Next, make 4 deep slashes into the dough, about two-thirds of the way through. Be careful not to cut all the way through.
Bake for 30 minutes, and then move the dough to the top rack of the oven. Bake for another 20 minutes to crisp up the surface.
Let cool on a wire rack completely before serving with salted butter.
7.8.1.2
2024
https://www.dessertfortwo.com/rye-bread/
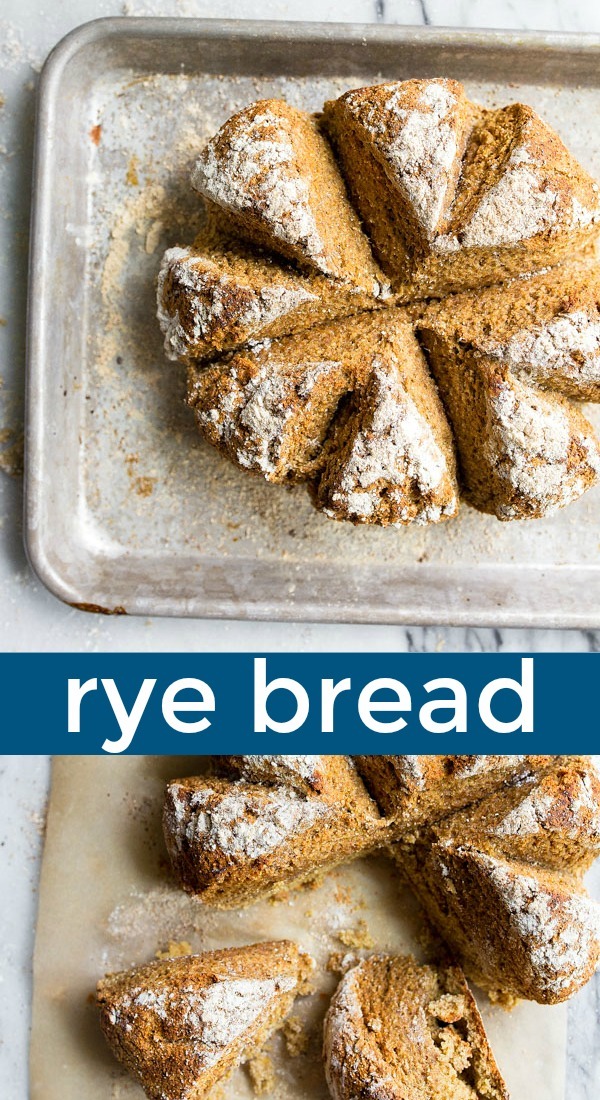
Source: https://www.dessertfortwo.com/rye-bread/

0 notes
Text
Chick-fil-A Adds New Menu and Catering Options
Chick-fil-A bolsters their regular menu and catering choices with five new options nationwide, including an "improved" Fruit Cup.
The new regular menu options include:
- Improved Fruit Cup - Now with fewer apples and more strawberries, blueberries, and mandarin oranges.
- Waffle Potato Chips - Taken from the catering menu, you can now order a bag of kettle-cooked waffle cut chips from the regular menu as well.
- 30-Count Nuggets - Instead of ordering multiple boxes 8- or 12-count boxes, you can now order a box of 30 at the counter, drive-thru, and with the Chick-fil-A mobile app.
On the catering side of things, they've introduced the following two options:
- Grilled Chicken Bundle - The bundle includes 10 grilled chicken breasts, multigrain buns, Honey Roasted BBQ Sauce, green leaf lettuce, tomatoes, Colby-Jack cheese and applewood-smoked bacon so that you can build your own grilled chicken sandwich (serves 10).
- Spicy Chilled Grilled Chicken Sub Sandwich - A boneless spicy chicken breast marinated with a special blend of seasonings, grilled, thinly sliced and served chilled on a multigrain baguette with pepper jack cheese, baby greens, and sliced tomato. It is served with Honey Roasted BBQ Sauce.
Photo via Chick-fil-A.
Sharing is Caring
Source: https://www.brandeating.com/2018/09/chick-fil-adds-new-menu-and-catering-options.html
0 notes
Text
Throwback Thursday: Chicken Under Pressure
Can’t talk now. Busy. Gotta run. Work, work, work.

We had a software upgrade over the long weekend, and I’ve been working 12 to 18 hour days ever since. What do I do when I work late and have to squeeze in dinner before another scheduled install at 8:30 PM?
I give in to the dark side…of the chicken. Instant Pot Chicken Legs, here we come.

Pressure Cooker Chicken Legs with Herb Rub
Recipe: Pressure Cooker Chicken Legs with Herb Rub
Recipe here: Pressure Cooker Chicken Legs with Herb Rub – [DadCooksDinner]
An update to the recipe: I use Penzeys Sunny Paris Seasoning instead of the Italian Seasoning. Any herb blend will work, but I’m in love with Sunny Paris. They hooked me with a free sample; I’ve gone through three more full-sized jars since then. Sunny Paris goes with chicken, pork, and vegetables – Especially vegetables. If there’s a Penzeys near you, try a jar. You won’t be disappointed.
What do you think?
Questions? Other ideas? Leave them in the comments section below.
Related Posts
My Pressure Cooker Recipes Index My Pressure Cooker Time Lapse Videos
Enjoyed this post? Want to help out DadCooksDinner? Subscribe to DadCooksDinner via email and share this post with your friends. Want to contribute directly? Donate to my Tip Jar, or buy something from Amazon.com through the links on this site. Thank you.

Source: https://www.dadcooksdinner.com/throwback-thursday-chicken-under-pressure/
0 notes
Text
Sprouted Wheat Sourdough Ciabatta
Ciabatta is one of my favorite breads, and now I’ve hit upon a great combination of flavor, texture and nutrition by using sprouted hard red wheat berries that I mill in my Mockmill. Sprouted wheat is slightly sweeter than regular grains, which is a great balance to the sourdough starter in the recipe, and sprouting a grain makes more of the nutrients available [paywall] for digestion (more studies of sprouted grain nutrition available here). It can also increase fermentation activity in dough and slow down staling (though this ciabatta gets eaten in a few days, so I haven’t been able to fully test that theory).
In the past, I developed a ciabatta recipe with all bread flour (good flavor, great structure) and with all whole grain spelt flour (great flavor, less pockety crumb). This recipe is the best of both and more, because of the sprouted aspect of the whole grain wheat.
Windowpane test after some additional hand mixing
With za’atar and olive oil, and with tomatoes
The techniques for developing the gluten, shaping the wet dough, and baking the ciabatta slippers are similar to my earlier ciabatta recipes: mixing by hand or a stand mixer, three rounds of stretching and folding, a preshape / shape by gently stretching the dough into a rectangle and then folding it over on itself, and finally baking on a preheated pizza stone, steel, or cookie sheet with a pan underneath for water at the start of the bake.
This video shows the hand mixing technique that can be done instead of, or in addition to, using a stand mixer.
Sprouted Wheat Sourdough Ciabatta

This ciabatta recipe uses home-milled sprouted red wheat to make it more nutritious and complex in flavor without compromising the wild open crumb that is characteristic of the style.
Ingredients
Baker's Percentages*
82% bread flour
18% homemilled sprouted hard red wheat berries
68% water
50% sourdough starter (100% hydration)
4.2% olive oil
2.4% salt
*Note that the large amount of starter relative to flour means that the dough will feel much wetter than 68% water. Similarly, the salt and oil percentages seem high, but the flour and water in the starter essentially dilutes them down to a lighter flavor.
Instructions
Combine all the ingredients in a stand mixer with dough hook attachment. Mix on low speed about a minute until combined and then scrape down the sides. Then mix on medium-low speed for about 5 minutes and then transfer the dough to a clean bowl. Alternately or additionally, mix in a bowl with a stiff spatula and then with the Rubaud Method for 2-10 minutes (the longer time is if you take breaks). After mixing, note the time and room temperature if you like to track fermentation this way.
Cover and let the dough rest for 30 minutes.
Do three gentle stretch and folds, spaced 25-45 minutes apart. Use damp fingertips or a dough scraper to pull the dough from the sides of the bowl and fold it over (four sides, twice around). Cover after each stretch and fold.
Let ferment until bubbly and roughly doubled. This was a little over 4 hours from mixing in summer house temps (75-78F).
Flour your countertop, then scrape the dough out of the bowl.
Flour your hands and gently slide your fingers under the dough from all sides to pull it outward into a square shape about 1/2 an inch thick. Do not flour the surface of the dough as this will be the interior of your slippers.
Using a bench scraper, fold the rectangle of dough in half on itself. Then cut the dough in pieces. I went with five small slippers, almost like large rolls. Of note I did not do a bench rest and reshape. It was about 10 minutes from bowl to couche.
Using a bench scraper and your free hand, transfer the slippers to the channels of a heavily floured couche or tea towel. The slippers will scrunch up a bit as you gather them, but you can adjust and stretch them out again as you lay them in the couche.
Loosely cover the slippers with the couche itself or with another tea towel.
Let the slippers proof for about 30 minutes at warm room temperatures, longer in cool temps.
If you have a baking stone or steel, put it in the oven. You can also cook the slippers on a metal cookie sheet. (Do not use a dark non-stick surface because of the high oven temperature.)
Prepare to create steam early in the baking process. You can put a cast iron pan on the shelf under the baking stone. Or you can create a drip system by putting an aluminum pan with a pinhole in the oven under the stone, and a metal cookie sheet on the base of the oven. When making the pinhole, test over your sink that water drips through it about 1-2 drops a second. My heating element is exposed on the bottom of my oven, so the aluminum pan drips onto the bottom of the oven rather than a cookie sheet, which works fine too. (See gallery for photo of setup.)
Preheat your oven and stone to 500 F for 30 minutes as the dough proofs. If you are baking on a cookie sheet, a 15 minute preheat should be enough.
When proofing is complete, flip the slippers onto pieces of parchment paper, and slide the slippers onto your preheated stone. You can use a pizza peel or a cold upside down cookie sheet to transfer the slippers.
Immediately pour a cup of water onto the aluminum tray or cast iron pan that is under your stone, and quickly close the oven door to trap the steam.
Bake at 500 F for 10 minutes. Then remove the parchment paper and rotate the slippers 180 degrees if your oven seems to brown unevenly.
Bake an additional 5-10 minutes at 450 F.
After baking, turn off the oven, crack open the door a couple of inches, and leave the slippers in the oven for another 5 minutes. This will make the crust crunchier.
Internal temperature should be about 205 F.
Let cool on a rack for about one hour before slicing.
4.26
https://breadtopia.com/sprouted-wheat-sourdough-ciabatta/
Transferred to a bowl after mixing in a stand mixer for a few minutes
Windowpane test after some additional hand mixing
Just before the second of three rounds of stretching and folding
At the end of the bulk fermentation
Shaped into small slippers
Just before covering to proof on a linen couche
Flipped onto pieces of parchment paper
Prepped and preheated oven
Baking on 500F preheated oven and stone
About the author
Melissa Johnson: Devoted bread baker, inspired by the science and art of sourdough.

Source: https://breadtopia.com/sprouted-wheat-sourdough-ciabatta/
0 notes