
I like to explore technology, information security, raspberry pi projects, and any other advanced information technology projects that seem interesting. I welcome you to join me in learning something new.
Don't wanna be here? Send us removal request.
Statistics
We looked inside some of the posts by davesinfo-techspot and here's what we found interesting.
Average Info
Notes Per Post
1
Likes Per Post
1
Reblog Per Post
0
Reply Per Post
0
Time Between Posts
1 month
Number of Posts By Type
Text
5
Last Seen Tumblr Blogs


Fun Fact
Tumblr Inc. is funded by 13 investors.
Text
Setting up SSH and Remote Desktop for Kali Linux on Raspberry Pi

First while logged into raspberry pi you will always, want to update using:
sudo apt-get update -y && sudo apt-get dist-upgrade -y && sudo apt-get autoremove -y
I also recommend using PuTTY to ssh into your Kali Linux. Its a great tool used by all the pros I know. You can download here:
https://www.chiark.greenend.org.uk/~sgtatham/putty/latest.html

Then once you are setup you will want to install ssh by running:
apt-get install ssh
then you will want to configure ssh to open using:
systemctl enable ssh
systemctl start ssh
Now that we have enabled ssh, we want to install a way for us to remote desktop into our Kali Linux from a windows machine. So we will install xrdp for kali linux. Start with the following command: Apt-get install xrdp
After xrdp is installed you can start the server with the following command:
Service xrdp start Service xrdp-sesman start
Finally if you want xrdp to automatically run after startup, run the following: update-rc.d xrdp enable
Now you should be able to run Remote Desktop on Windows machine and use the Kali linux IP address to Remote into it.
It will look like the following:

You will just login with your user account or root user.

and you’re in!

If you run into issues this page updates regularly:
https://msitpros.com/?p=3209
0 notes
Text
Setting up OpenVAS Greenbone in Kali Linux on a Raspberry Pi 4 (4GB RAM)

Today I was able to successfully setup OpenVAS Greenbone in Kali Linux on a Raspberry Pi 4 (4 GB RAM). I have read that many people had issues doing this but, I was able to get it working without getting the Raspberry Pi to overheat. I think the only way to do this is on the latest (as of 2019) Raspberry Pi 4 (4GB RAM).
If you don’t know what Greenbone is, you are missing out. Greenbone is a vulnerability management solution for enterprise IT which includes reporting and security change management. It is the equivalent of Nessus... except Greenbone is free!
Lets go ahead and get started. I had some issues installing this. There are very little screenshots but I will do my best to make the text as clear as possible. I started out by running the standard:
sudo apt-get update -y && sudo apt-get upgrade -y && sudo apt-get autoremove
Then went right into installing:
sudo apt-get install openvas
Once this completed I ran:
sudo openvas-setup
Once this completes, you will get issues. However these issues can be easy to solve. You can find the issues by typing:
openvas-check-setup
It will go in Steps and show you what they recommend to do to sold issues. An example:

You should see several step:

You will see the ERROR: Your OpenVAS-9 is not complete!
Once you see that scroll up and look at the ERROR: in the last steps. It will also show you a FIX: that you can run.
In my example I had to run gsad
then I ran the openvas-check-setup again to check for other errors. Then I would repeat the openvas-check-setup and run those fixes until it said “It seems like you OpenVAS-9 installation is OK.”
Once that is done you will need to make some adjustments to Greenbone.
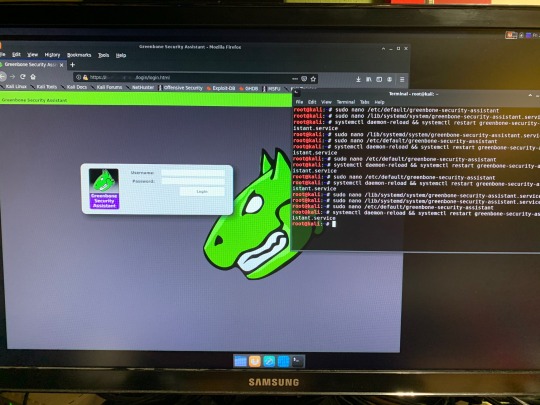
First it will always start out with 127.0.0.1 on Kali Linux. Not sure why, but the fix for that is to run the following and change IP addresses from 127.0.0.1:9001 to your device’s IP Address:Port Number. So first go to:
sudo nano /etc/default/greenbone-security-assistant
There you will press the down arrow untill you see the IP Address that needs to be changed. Then go to:
sudo nano /lib/systemd/system/greenbone-security-assistant.service
then change the IP Address and port number there too.
Finally you will need to restart the services for all the changes to go into effect. Type:
systemctl daemon-reload && systemctl restart greenbone-security-assistant.service
Once that goes into effect, you should be able to go to your local https://IPAddress:PortNumber
Remember it has to be https!
That is it for today. Hopefully you enjoy my Raspberry Pi hacks and tools setup.
Last note: when I tried to run a scan it took up all my bandwidth (which isn’t great to begin with) and my wife yelled at me that streaming services wasn’t working... oops. To be fair, I was also running an IP Scanner and NMAP. So... yeah. Not the best idea.
0 notes
Text
Installing Kali Linux on a Raspberry Pi

If you haven’t used, Kali Linux is an excellent tool for penetration testing. It’s widely used by Information Security experts and can help determine vulnerabilities in your environment. You do need to know how to use all the tools that come pre-installed in order for you to test the environment, but I will definitely post about some of these at another time. Today, I am just looking at installing Kali Linux Distro on a Raspberry Pi.
I know what some of you are thinking, why would you install this on a Raspberry Pi, why not install it on a desktop or laptop? I’m glad you asked. Having Kali Linux on a Raspberry Pi can make it ultra portable, a very lightweight operating system, a great tool in the bag of tricks, and very interchangeable. Having the Raspberry Pi is so convenient, you can take it to any location and plug in and start using. Because Kali Linux distro is smaller and doesn’t include all the bells and whistles that normal operating systems use, it runs incredibly well on a Raspberry Pi, and it’s very widely supported. It is also nice to have as an extra tool in the bag when testing environments. finally its interchangeable, as in you can switch the Micro SD card with some other install of Linux or a different OS (Raspbian or Ubuntu or even IoT Windows).
Before we begin, I want to recommend that you do not do this on a work network, as most organizations that have any type of information security network, will automatically become suspicious of you downloading Kali Linux. Remember, technically, this operating system is used for hacking, finding vulnerabilities, and exploiting weaknesses in an organizational environment. You will want to do this at home or in a allowed classroom setting (in other words: get permission if you are not sure). Disclaimer: I am not responsible for what anyone does with the information I am providing, nor do I take responsibility if your organization takes action upon you for using, installing, executing on your work, home or any other environment. Please use responsibly.
First, you want to start out you want to download the .img file from the kali linux arm image from https://www.offensive-security.com/kali-linux-arm-images/
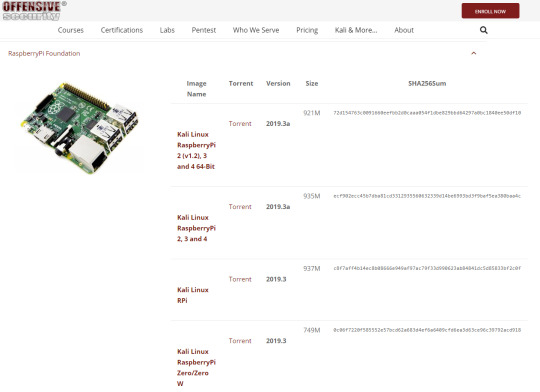
Depending on what version of raspberry pi you have, will dictate which Kali Linux distro to install. It will start out downloading .torrent file. This will take moments to download. While that is going I would recommend downloading bittorrent or some other torrent downloader to get the image file.
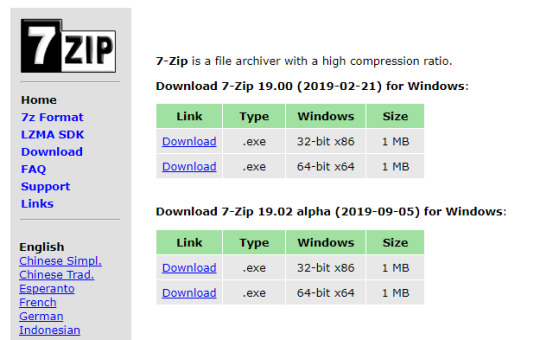
Once the download is finished it will still not be an image (.img) file just yet. It will be a .xyz file. You will want to download 7-zip (https://www.7-zip.org/) to convert the .xyz file to a .img file.
Once you convert this file, then you are ready to install on the Micro SD card. Make sure you have belenaEtcher (https://www.balena.io/etcher/) on your PC and plug in your Micro SD card. Verify that the correct image is selected and that the correct disk is selected.
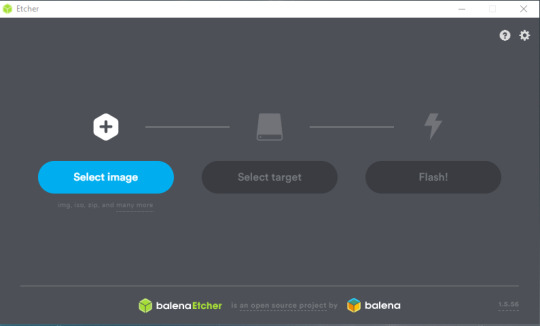
Then select Flash! It will immediately start reimaging the Micro SD card with Kali Linux. Once this is completed, you will remove the Micro SD card and plug it into your Raspberry Pi. You should see the following screen:
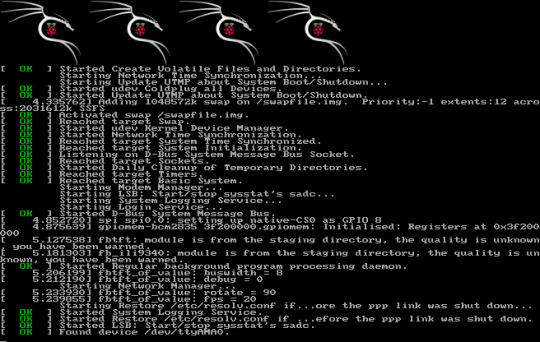
If you don’t see that, you may need to restart from the beginning, and re-try to install on the SD card.
Once inside Kali Linux it will look like this:

I hope you enjoy learning about Kali Linux as I have. It really can be a great tool for any Information Security Engineer looking to find vulnerabilities and learn about Digital Forensics.
Fixing Kali Linux Raspberry Pi clock issue:
Install ntpdate: sudo apt-get install ntpdate
know your local ntp server: ntpdate 0.north-america.pool.ntp.org
create a folder in root and call it scripts
type: cd scripts type: nano start.sh
add the following command: sudo ntpdate 0.north-america.pool.ntp.org
ctrl c to exit, select y for yes, and press enter to keep name as is.
type: cd ~
cd /etc/
nano crontab
on the last line type: @reboot /root/scripts/start.sh
(Whatever you do DON’T add a script for trying to automate apt-get updates/upgrades/autoremove. It will cause issues in Raspberry pi and will prevent you from logging in remotely or through ssh. If you try this you will have to log in manually and remove the script for this... you have been warned.)
ctrl c to exit, select y for yes, and press enter to keep name as is.
verify that it works by reboot now command.
Display Settings and Ethernet port issue:
When I installed on Raspberry Pi 4 I noticed there was an issue with my network Ethernet cable connection. It was receiving IPv6 but not IPv4. I checked the Ethernet Network and it showed device not managed. I ran the following:
sudo nano /etc/NetworkManager/NetworkManager.conf
and changed the False to true as shown below:

Note: Usually, you will want to run sudo service network-manager restart and reboot the Raspberry Pi but since we are configuring the display, we will wait until the end.
Lastly, to fix the screen, I had to go into the following:
sudo nano /boot/config.txt
Then removed the # from in front of the
disable_overscan=1;
While I did all that I ran:
sudo apt-get update
and
sudo apt-get upgrade
Waiting for updates... Taking sooo long on slow network...

Finally rebooting with:
sudo service network-manager restart
reboot
Testing now and, The screen and the Ethernet Port is working properly.
#Kali Linux#Raspberry Pi#Installation#Installation guide#Linux#information security#information technology#IT#cybersecurity#Cyber Security
0 notes
Text
Raspberry Pi Kiosk with Security and Backup

Needs on for the Computer and Raspberry Pi
-Belena Etcher - https://www.balena.io/etcher/
-Raspbian Buster Lite - https://downloads.raspberrypi.org/raspbian_lite_latest
-Micro SD Card reader/writer
-Wired keyboard
Installing OS on Micro SD card
After downloading Raspbian Lite and Belena Etcher on your Windows machine, Select the Raspbian Lite img file. If it is still in the original zip file, please make sure you unzip or extract all the files so that Etcher can access the image file.
Select the Micro SD card, and Flash the Micro SD card.
Once the flash is complete, then you will plug in the Micro SD card to the Raspberry Pi and let it boot. You should see the following screen.
You should see the default Raspberry Login:
Username: pi
Password: raspberry
Configuring the Raspberry Pi
Change the default username and password for the raspberry pi:
Type: Sudo raspi-config
Select option 2 and follow the instructions to change the password to something else for security.
Select the language/region option specifically for the keyboard. You will have to change to keyboard to be an English - US keyboard NOT English – GB (Great Britain) keyboard. If you do not set this up correctly, you will not be able to type commands properly.
We will also need updates
sudo apt-get update
sudo apt-get upgrade (This may take a while)
sudo apt-get install unattended-upgrade
Reboot the device by typing:
sudo reboot
Login to pi
Now we will plug our raspberry pi into the network and configure our localized options with:
sudo raspi-config
Go to the main screen and go to option 3 and select option 1 and select B2.
Now we will install the kiosk software:
sudo apt-get install –no-install-recommends xserver-xorg x11-xserver-utils xinit openbox
This will take 5 minutes. After it installs, then we will be using chromium browser in incognito mode to configure the webpage.

Set this for Kiosk mode:
Sudo apt-get install –no-install-recommends chromium-browser
Type y
This will take 10 minutes to install.
Now we will setup autostart.
sudo nano /etc/xdg/openbox/autostart
You will see the following:
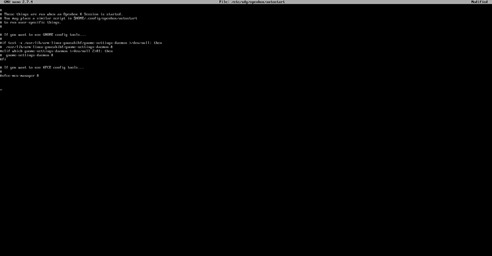
Note: If you do not see the screen above, you may have to troubleshoot. Troubleshooting steps: run the following:
sudo apt-get clean
sudo apt-get autoremove
sudo apt-get remove --auto-remove --purge 'libx11-.*'
sudo apt-get autoremove --purge
Now, go back and re-install the kiosk software and the chromium browser.
Once, get the screen above, leave everything as is. Move to the bottom of the screen where there is no text. Type:
xset s off
xset s noblank
xset –dpms
chromium-browser --disable-infobars --kiosk --incognito ‘http://www.DavidAlanGarza.com’
Once you have that set, type Cntl-X type y Click Enter
Now to disable the mouse cursor:
Type: startx -- -nocursor -incognito
This will display the webpage or should. If it did not, you will need to see what needs correcting on the code above.
Now we will go back into
Nano .bash_profile
Now type the following very very carefully:
[[ -z $DSIPLAY && $XDG_VTNR –eq 1 ]] && startx -- -nocursor
Type CNTL-X to save and type y

Improve Security:
We will deny sshd by typing
sudo nano /etc/ssh/sshd_config
allowUsers pi
Now we will install a firewall by typing the following:
sudo apt install ufw
sudo ufw enable
Now we will install an fail2ban which scans log files (e.g. /var/log/apache/error_log) and bans IPs that show the malicious signs -- too many password failures, seeking for exploits, etc. Generally Fail2Ban is then used to update firewall rules to reject the IP addresses for a specified amount of time, although any arbitrary other action (e.g. sending an email) could also be configured. Out of the box Fail2Ban comes with filters for various services (apache, courier, ssh, etc). Fail2Ban is able to reduce the rate of incorrect authentications attempts however it cannot eliminate the risk that weak authentication presents. Configure services to use only two factor or public/private authentication mechanisms if you really want to protect services.
Type: sudo apt install fail2ban
Installing Automatic Updates:
By default your Pi won’t be rebooted if required, so if you want it to (and want to set the time) you can do that like this:
First install Unattended-upgrade
sudo apt-get install unattended-upgrade
sudo sed -i 's/^\/\/Unattended-Upgrade::Automatic-Reboot "false";/Unattended-Upgrade::Automatic-Reboot "true";/g' /etc/apt/apt.conf.d/50unattended-upgrades
sudo sed -i 's/^\/\/Unattended-Upgrade::Automatic-Reboot-Time "02:00";/Unattended-Upgrade::Automatic-Reboot-Time "02:00";/g' /etc/apt/apt.conf.d/50unattended-upgrades
And if you want unused packages to be removed (like when you run apt-get autoremove):
sudo sed -i 's/^\/\/Unattended-Upgrade::Remove-Unused-Dependencies "false";/Unattended-Upgrade::Remove-Unused-Dependencies "true";/g' /etc/apt/apt.conf.d/50unattended-upgrades
Next we must create the /etc/apt/apt.conf.d/20auto-upgrades file to instruct the updater what to do:
sudo tee /etc/apt/apt.conf.d/20auto-upgrades > /dev/null <<EOF
APT::Periodic::Update-Package-Lists "1";
APT::Periodic::Unattended-Upgrade "1";
EOF
And that’s all there is to it! Every day your Pi will now check for updates
Cloning Micro SD
Download Win32 Disk Imager onto your computer. https://sourceforge.net/projects/win32diskimager/
If you have a micro sd card you want to image, plug it into the computer.
You will see the following window:
In the image file type in where you want to save an img file. You can create an empty text file and rename it to be a .img file and write over it if you want to create an image.
Select Write to write over the image file. Select Read to erase and image the Micro SD card with whatever is on the .img file.
Last Note:
If you are noticing that something is not working right while you are building this kiosk. You may want to completely restart from scratch and re-install the OS. On of the main things about this Raspbian and these Raspberry Pi’s is that if one thing gets slightly corrupt, then the whole system can be corrupted. So with this project, be patient, and take your time. The majority of the code is Case Sensitive. It can be tedious, but I know you can do it! I hope you have fun setting up the kiosk.
Hidden Wifi:
I found out these would not connect to the hidden Wireless. It would even attempt to access.
You must open text editor to:
sudo nano /etc/wpa_supplicant/wpa_supplicant.conf
and change the following:
ctrl_interface=DIR=/var/run/wpa_supplicant GROUP=netdev update_config=1 country=US
network={ ssid="Your Hidden SSID" scan_ssid=1 key_mgmt=WPA-PSK psk="Your SSID's Password"
}
0 notes
Text
Setting up Always On SQL Clustering Group, with Microsoft Server 2016 and VMWare

Setting up clusters in Windows Server 2016 has become so easy. However; When integrating it with other environments, like VMWare, and AO SQL Clustering. It can get quite Tricky. First we want to setup our environment in VSphere. Next we will setup Windows Server 2016 with Failover Clustering. Then we’ll make sure to make some adjustments to DNS. Finally, We will setup AlwaysOn SQL Clustering.

Please make sure you have .NET Framework 3.5.1 or greater on the servers. Then We will need to create 2 VMs with 3 drives each. Then we will need to make sure that the drives are online, and available from other locations. However one main aspect that I had overlooked was that the Virtual Disks have to be created Eager Zero Thick not Lazy Zero Thick. I made the heinous mistake of using Lazy Zero Thick, and then could not understand why I was having so many problems.
Note: When creating virtual disks with Eager Zero Thick, it does take longer than using the faster Lazy Zero Thick option. Eager Zero Thick Disks allocates the space for the virtual disk, then zeros it all out unlike the Lazy Zero Thick which only allocates the space.
You also generally wouldn’t use Eager Zero Thick except for Microsoft clustering and Oracle programs. Once the disks are created we are reading to install Windows Server 2016.

Install either Datacenter edition or Standard edition. For this example we’ll use the standard edition. Install all the Microsoft Windows feature updates and verify that you have already allocated all the resources needed. Check that the additional Virtual Disks are available, and make sure you install the Failover Cluster feature. You may want to reboot after the feature is installed, if you have not done so. Once you installed the feature go to the Failover Cluster Manager and prepare to create the cluster. If this is a two node cluster be sure to add a Witness Server or Desktop. Once this is created and validated, go to your computer manager and verify that the virtual disks are online and initialized. Next, you will want to configure the cluster quorum settings. I created a separate server for this quorum and configured a File share witness.
Now, make sure you can access these from another computer on the secured network. You will have to setup a Host A record round robin DNS situation, where you give a specified name the 2 failover cluster nodes IP adresses in the Host address. Example: if the nodes had up address of 192.168.1.43 and 192.168.1.44. Then the two Host records you would need to create are AOSqlServer -> 192.168.1.43 and AOSqlServer -> 192.169.1.44
Finally, We will enable AlwaysOn Availability Groups on SQL Server 2016.
After Installing SQL Server 2012 or 2014 Enterprise edition on all the replicas. Please install it on as a stand-alone instance, and then we will configure SQL Server. Once you expand SQL Server Network Configuration node, and click on Protocols for MSSQLServer, you will see the TCP/IP dialog box on the right panel. Right click on the TCP/IP entry and select Enable.
In SQL Server Configuration Manager, right click on SQL Server Services to open the Properties dialog box. Navigate to the AlwaysOn High Availability tab to select the “Enable AlwaysOn Availability Groups.

Now we must configure the login accounts and the replicas that will need read write privileges.
First verify that your SQL Service Account is there and is a domain account, not a local machine account. Now login through SQL Management Studio (SSMS). Add you SQL Service account to the Administrators group on each replica (via computer management). Then allow connect permissions to the SQL Service account through SSMS: Right click on the SQL Service login to open the Properties dialog box. On each replica navigate to the Securables page and make sure Connect SQL Grant box is checked and allow remote connections. You can do this by using SSMS in the instance properties or by using sp_configure.
EXEC sp_configure ‘remote access’, 1;
GO
RECONFIGURE;
GO
Now we will create the file share through the Server Manager that the SQL Service account, and the replicas can access. The File is for the initial backup/restore process that happens to the databases when you join the AlwaysOn group during setup.

Last thing is to install the AlwaysOn Availability group. Once you’s ensured that full backups have been created, and all databases are in Full recovery mode, you will have to remove these databases from the tlog backup maintenece during the installation of Always on (you can always add them back). It could cause errors with both tlogs backing up while AlwaysOn is being created.
On you primary, open SSMS and expand the AlwaysOn High Availablity folder. Right click on the Availability Groups and select New Availability Group Wizard.

Select only the databases you want to include in the AlwaysOn group.
Next to the databases you will see the status with a blue link. If you see "Meets Prerequisites” it will signify that these databases are included in your group. If it does not say "Meets Prerequisites”, then click on the link to see more details on what needs to be corrected.
Now, you will specify and Add the Replicas. You will need to specify if you want Automatic or Manual Failover, Synchronous or Asynchronous Data Replication, and the type of Connections you are allowing to the end users.
Be sure to view the troubleshooting page if you have any issues:
http://blogs.msdn.com/b/alwaysonpro/archive/2013/12/09/trouble-shoot-error.aspx
The backup preferences tab will assist in choosing the type of backup and to prioritize the replica backups.
In the Listener tab, you will create an availability group listener button, Enter the string DNS name, enter port 1433 and enter the IP address for your listener, which should be an unused IP address on the network.
Next, you will Select Initial Data Synchronization page, join the databases to the Always on group, then verify the Full option is selected for using File Shares. For large databases select Join or Skip to restore the databases to the secondary replica. We will use Full for now. Last thing to do here is remember the SQL Service accounts and set that all replicas have read/write permissions to the file Share or it will not work.
Run the Validation checks, and make sure it the results are successful.
That is it, once you get that done you should have High availability and AlwaysOn SQL Server. I hope you’ve enjoyed this instructional blog. Please come back and visit us to see other projects.
#Always On SQL Server#High Availability SQL#Failover Cluster#SQL Failover Cluster#VMWare Failover Cluster#VMWare with MS Failover Cluster#VMWare with MSFC#AlwaysOn SQL
1 note
·
View note