
Don't wanna be here? Send us removal request.
Statistics
We looked inside some of the posts by designcricut and here's what we found interesting.
Average Info
Notes Per Post
18
Likes Per Post
18
Reblog Per Post
0
Reply Per Post
0
Time Between Posts
28 days
Number of Posts By Type
Text
17
Last Seen Tumblr Blogs


Fun Fact
Tumblr has 16.74 million mobile monthly users in the US.
Text
How to Make Stickers With Cricut? (Complete Guide)
Cricut is a brand that offers versatile crafting machines, enabling professionals and hobbyists to create stunning DIY projects. Creating with Cricut has become a passionate pursuit for many. Therefore, beginners are also starting to craft their own projects using the Cricut machine. In this blog, we’ll guide you through the learning process of operating the crafting machine, starting with one of the most demanding requests for beginners: how to make stickers with Cricut. So, without further ado, let’s dive into this and start crafting!
Essential Tools and Materials for Making Cricut Stickers
Before you start making stickers with your machine, gather the following tools and accessories to ensure a smooth crafting process and get high-quality results.
Cricut Machine
Printer
Cutting Mat
Printable Sticker Paper
Printable Clear Sticker Paper
A4 Printable Vinyl Sheets
Cricut Design Space (Windows, Mac, Android, or iOS)
How to Make Stickers With Cricut? [6 Simple Steps]
Here are the basic steps for creating custom stickers with your crafting machine, which cover everything from setting up your design to printing, cutting, and peeling your stickers for use on different surfaces.
Step 1: Setup Your Design in Cricut Design Space
First, open the Cricut Design Space app on your device and create a new canvas. (Uploading a design can simplify the process for beginners.)
Second, create your sticker designs and flatten any multi-layered elements. This ensures your machine treats them as a single printable image. Then, you’re ready to print and cut.
Third, create a template and put a 6.75 x 9.25-inch square from the shapes library onto that template.
Once you arrange this much, remove the square from the canvas.
Next, select all the images on the sheet and group them. This step ensures their positions are locked, preparing them for printing and cutting.
Step 2: Prepare Your Design for Print Then Cut
Click on “Make It.” Your designs will appear inside a lined box, which acts as a guide for the Cricut’s cutting sensors. (Note: the sensors on your machine will print and read this black box, helping it know precisely where to make those important cuts.)
Next, select “usual” as your machine cutting type, then click “Print.”
On the next print screen, you’ll see the option to add or remove bleed. (Choosing this will create a margin around your sticker designs.)
Also, you can adjust the print settings for optimal quality by selecting the “Use System Dialogue” option.
Step 3: Print Your Sticker Sheet
Load your printer with the correct printable material, ensuring it is positioned face up or face down as per your printer’s specifications for optimal print quality and accurate design alignment.
Step 4: Place the Printed Sheet on Mat
After the sheet is printed, place it onto a LightGrip cutting mat, aligning it with the top-left corner.
Step 5: Cut Your Stickers With Cricut
Now, select the material you want to cut. In this step, you’ll set your machine to cut for a sticker, not always cutting all the way through.
Pro Tip: If the machine fails to detect the lines, try placing it in a darker area or shining a flashlight on the sensor lines while it reads them.
Once the machine successfully reads the sensor lines, it will automatically start cutting the stickers with precision, which ensures your designs are perfectly shaped and ready for use.
Step 6: Peel and Use Your Custom Stickers

Once the sticker is cut, the only thing left to do is carefully peel it off from the backing and stick it onto your desired surface, adding a personal touch to your projects or belongings.
Conclusion
The Cricut machine is a versatile device that enables you to create impressive crafts like stickers. This guide provided a step-by-step method on how to create stickers with Cricut. In the end, we hope you find this guide helpful and informative on how to make stickers with Cricut. However, if you encounter any trouble while creating a sticker, you are welcome to contact us for expert assistance with your issue.
Frequently Asked Questions (FAQs)
What Cricut Machines are Compatible with Create Sticker feature?
Making stickers is slightly more advanced than regular cutting because it uses the ‘Print Then Cut‘ feature. This means you’ll need a Cricut machine that supports print-then-cut, such as the Joy Xtra, Explore series, Maker series, and Venture. However, Cricut Joy is not compatible with sticker creation.
Is a Cricut Access plan necessary to use the Create Sticker feature?
You can preview the feature on Canvas and Mat Preview. However, a Cricut Access subscription is always required for cutting. If you lack Cricut Access, you can begin the free trial today and explore all the Cricut machine features.
Is Cricut Machine Good for making Stickers?
Yes, Cricut machines are great for creating custom stickers. They give precise cuts and handle different materials, including vinyl, printable paper, and sticker sheets. The Design Space app allows you to make designs and cut stickers accurately.
Source: How to Make Stickers With Cricut
#how to make stickers with Cricut#cricut design space app#cricut design space software#Cricut Setup#Cricut machine setup
0 notes
Text
How to Use Cricut Infusible Ink for Smooth & Vibrant Projects

Do you love crafting shirts and other fabric materials? Then, you can learn how to use Cricut infusible ink. Cricut has released a new material called infusible ink that bonds with fabric, unlike iron-on vinyl that sits on top.
Infusible ink is a transfer process where the colors from a transfer sheet are directly applied to the blank surface. Unlike heat-transfer vinyl, the ink does not sit on top of the surface. It is directly applied to and absorbed by the fibers. Read the blog to explore everything about infusible ink.
What Is Cricut Infusible Ink?
Infusible ink is a special kind of material that is super easy to use. However, the important thing you need to remember is the supplies needed to make these projects. You can make t-shirts and tote bags that are safe for machine washing, drying, ironing, and steaming. Wash them with mild detergent and cold water to preserve the design.
How to Use Cricut Infusible Ink: 5 Easy Steps
Here are the steps to begin your project. First, let’s list the materials you will need.
Step 1: Supplies and Tools Needed
Before you learn how to use Cricut infusible ink, you will need some art supplies and materials to start your project. Check the list of materials below and gather them.
You can choose a Cricut Maker, Explore Air 2, Explore 3, and Joy.
Cricut EasyPress 2
EasyPress mat
Infusible ink transfer
Lint roller
Butcher paper
Cardstock
SVG text
Design Space
After gathering all the materials, you need to start creating your project. Let’s get started with the step-by-step instructions:
Step 1: Create a Design for Your Project
First, open the Design Space and click on New Project. Once the file is open, upload the SVG text file, select all the letters, hit the Weld option, and weld them together. Then, size it and place it on the background design. Select both layers, slice them, and delete the unneeded pieces. Make sure to mirror your design. You are ready to send it to your machine for cutting.
Important Note: You need to mirror your design before you send it to the cutting machine.
Step 2: Load the Sheet on Mat
Place the infusible ink transfer sheet on the StandardGrip mat with the liner side down. Under the materials section, go to Browse All Materials and search for the infusible ink transfer sheet from the list of materials. To cut with the machine, you need to load the mat and blade into a machine and hit the Go button.
Step 3: Weed Out the Design
After cutting the design, flip the mat over and remove the extra part with the weeding tool. To separate the cutout design, roll it, use your fingers or tweezers to remove the negative pieces around it, and leave the design. Cut the clear liner so it does not extend beyond the edge of your heat press heat plate.
Step 4: Prep the Tote Bag
Once you place a blank on top of the EasyPress mat, position the sheet of cardstock inside the blank to protect your mat and project. Before applying your design to the tote bag, use a lint roller to remove lint and debris from the entire surface. Cover the blank with butcher paper, which must be larger than the heat plate. Preheat the tote bag to remove any moisture and wrinkles that cause unwanted effects.
Step 5: Apply the Infusible Ink
Place the cut design on the material and use the heat press to transfer it. Then, put the design on a tote bag and apply pressure with the machine to transfer it to the material. Finally, allow the tote bag to cool completely before removing the transfer paper.
Tips to Know Before Starting Your Project
Now, you know the process of using infusible ink, but there are some tips you should remember while working with infusible ink.
When you handle an infusible ink material, make sure that your hands are dry and free of oil; otherwise, it will stick to the sheet.
If you are preparing your base material for the design application, it is recommended that you set up your press machine with the right temperature and pressure.
Do not reuse butcher paper for multiple projects. This is because it protects your design from transferring to another blank material.
Summary
This blog covers everything you need to know about infusible ink and how to use Cricut infusible ink. This material allows you to easily create a permanent and seamless design that becomes part of the fabric, and you can craft many projects with it.
You can use ink on various materials, including apparel, bags, pillows, covers, hats, and ceramics. Follow the above guide, and you can simply start crafting with Infusible ink.
FAQs
Which Is Better Infusible Ink or Iron-on Vinyl?
Infusible ink is often preferred over iron-on vinyl for its seamless, permanent designs. It can create a more permanent and vibrant result, especially light-colored materials. Iron-on material is better suited for dark fabrics or when you need more texture and layers for different materials stacked on top of each other.
How Long Does Cricut Ink Sheet Last?
The infusible ink is supposed to last a lifetime. The heat press machine permanently transfers the ink to the blank material and does not flake, peel off, or wrinkle. However, the ink has a shelf life, so using it within the time limit is important. If you want it to last a lifetime, you can protect it from moisture by using the carrier sheet and washing the material with a mild detergent.
Can I Use Infusible Ink Sheets on Regular Paper?
No, you should not use Infusible Ink sheets on regular paper. If you want to use paper with Infusibe ink, you need to use laser copy paper, which is designed to withstand high heat and has a special coating to prevent it from transferring to another part of the project. The ink is designed in such a way that it can absorb the heat, and the design will get transferred to the material.
Visit: Cricut.com/setup Cricut setup www.cricut/setup
Source: how to use cricut infusible ink
#how to use cricut infusible ink#cricut design space download#cricut design space app#cricut design space software#Cricut setup
1 note
·
View note
Text
How to Use Cricut Mug Press: An Easy Tutorial for Beginners
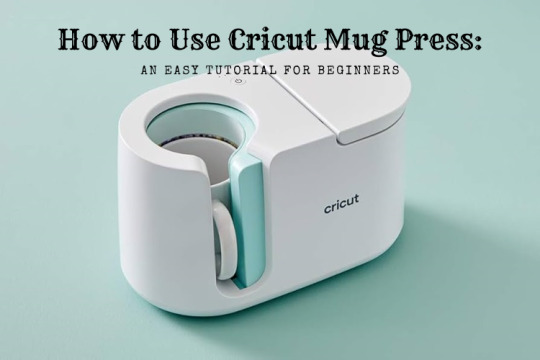
Read this blog to learn How to use Cricut Mug Press? The Cricut Mug Press is a tool that transfers heat with a no-fuss, easy-to-use machine for making mugs. It allows you to create high-quality, permanent mug designs using a sublimation process. Using Cricut’s Infusible Ink Transfer Sheets or the Infusible Ink Pen, you can create your design in Design Space, draw or cut it, and place and transfer your design on the mug. Mugs made with the Cricut Mug Press are microwave-safe and dishwasher-safe.
It is so easy and fun to make. Read this write-up to learn about the Cricut Mug Press, the materials required, and some easy steps to make our customized Mug.
Materials Requirement
Here are the things that you will need to make custom, vibrant mugs using the Cricut Mug Press:
Cricut Cutting Machine
Cricut Mug Press
Infusible Ink
Heat resistant tape
Cricut Mug Blank
Standard grip-cutting mat
Now that you know what supplies to make your mugs, proceed to the next step: learning how to activate the Mug Press. Afterward, follow the tutorial for easy instructions on how to use the Cricut Mug Press.
How to Activate the Cricut Mug Press
Before you start using the Cricut Mug Press, you must know how to activate it. Follow the below steps to learn:
First, open your Design Space app on a Windows or Mac. If you do not have Design Space installed, download it and double-click on the file in your downloaded folder to Open or Run it.
Now, Sign in with your Cricut ID and password. If you do not have a Cricut ID, then create one.
A page titled “Welcome to your Cricut Setup” will appear. Then, Select Heat Press and click on Cricut Mug Press.
Follow the on-screen prompts to connect your press, verify firmware, and complete activation.
Select Get Started to make your first mug when the activation is complete.
How to Use Cricut Mug Press: 4 Stepwise Tutorial
Now that you know what material to make your mugs using the Cricut Mug Press, follow the steps below to make one for yourself:
Step 1: Making Your Designs
First, open the Design Space app and select the machine from the drop-down menu. Next, you can look for pre-prepared projects or create your design using the fonts and images available in the app. When making a design for your mug, check the size of your design and mug to see if they are compatible. Then next, you can look for
Step 2: Cutting Your Designs
This process is very similar to any Cricut project. When you are done creating your design, do not forget to mirror it, especially if you choose a design with words or elements. Afterward, click “Make It” in the Design Space app when you can cut your design. Then, select Infusible Ink as your material and load your cutting mat into the cutting machine. When the machine is loaded, follow the prompt shown on the screen and click on the “Go” button once it flashes. When your machine is done cutting the design, remove the design from the mat and the extra part with the help of the weeding tool.
Step 3: Clean Your Mug
First and foremost, use a lint roller to remove dust from the mug. This step is important before applying the design to your blank Cricut Mag because you will only get an even and smooth transfer if there is fine dust on the mug. Once your mug is nice and clean, place your design where you would like it on the mug and firmly press it down to sit. Use the Cricut Scraper tool to avoid and press out any air bubbles.
Step 4: Transfer Your Design to the Mug Press
Turn on your Cricut Mug press so that it can start to heat up; the light will be red when it starts to heat up and green when it is ready.
When the press is heated, take your heat-resistant tape to secure the edges of your design. This step is necessary to ensure your design does not move around when we press it. Once done, simply slide your mug into the Cricut Mug Press by holding the handle. When it is ready, the lights will be full and beep. Then, remove your mug from the Mug Press with the help of the handle and put it into the mat to cool down. Wait 10-15 minutes to peel off the transfer sheet to reveal your design.
Summary
This guide teaches you how to use Cricut Mug Press. The Mug Press makes creating custom permanent dishwasher mugs at home easy. Whether you are a beginner or a Cricut newbie, following the simple instructions above will allow you to create the next level of professional mugs for yourself or your loved ones. So, start making your mug today.
FAQs
What should I do if the machine shuts off and the power button turns red?
If your Cricut Mug Press shuts off and the power button turns red, it could be due to a powerful related issue, or it could be due to an error. If the machine is on, check the temperature and allow it to adjust the room temperature.
Which mugs can be used with the Cricut Mug Press?
The Cricut Mug Press is designed for smooth, curved ceramic mugs, but it can also be used with non-Cricut mugs labeled sublimation-compatible. It is likely to work with infusible ink and Cricut Mug Press.
How does the Cricut Mug Press differ from other Mug Presses?
Cricut Mug Press is a press that passes heat and makes it easy to create custom, quality, and permanent mugs in minutes. It has sleek, safety-design features, one-touch settings with just the right temperature control, and an auto-off feature, distinguishing it from other mug presses. It has a user-friendly design and does not require manual adjustments.
Source: How to Use Cricut Mug Press
#how to use cricut mug press#cricut mug press#cricut design space#cricut explore air 2 setup#cricut machine setup#Cricut design space download#Cricut design space app
1 note
·
View note
Text
Halloween Cricut Ideas: 8 Spooky Projects for 2024

Halloween is around the corner, and if you want to create something different and unique, this blog will show you 8 Halloween Cricut ideas for 2024. Get creative and design for the season with Cricut. This is the ultimate crafting tool you will need to create your amazing and fun crafts. This festival is important and the perfect time to get crafty and creative with your Cricut machine setup and make something spooky and fun.
As time comes, you do not have much time to plan and think about creating. So, without further delay, let’s read this blog to discover amazing Halloween projects you can do with Cricut.
1. Flying Paper Bats
Flying paper bats can add the perfect eerie Halloween vibes to your home. Do not worry about cutting paper because, with Cricut, you can cut so much paper easily in a minute and make as many bats as you want. It's such a great way to decorate your wall or ceiling. Or you can tie it with a thread and hang it on the wall to create spooky vibes and scare your family and friends.
2. Candy Bag
For this Halloween, create these decal monster munchies candy bags for your kids, who are excited to get that proper Halloween look. What can be better Halloween Cricut ideas than this? Those days are gone when we use pillow cases as candy bags to store all our candy. Creating candy bags and expensive stuff with your Cricut machine is possible now. So, this year, do not waste your money and start making your craft with this machine.
3. Glowing Skull Pumpkin
Well, when it comes to Halloween, pumpkins are used. You can carve and make a skull design on your pumpkin with Vinyl's help, so do not worry—Cricut can do that. You must design the skull in the Cricut Design Space app and then cut the design using a Cricut machine. Clean your pumpkin with baby wipes or soap and water. This process is important as we must ensure the vinyl starts properly. Apply your vinyl with the help of transfer tape, and it is done.
4. Doormat
When someone comes into your house, they first notice your doormat, so isn’t it a great way to scare them? It is an advanced project, but decorating your doormats with ghosts, spiderwebs, etc., can change your home's vibe and turn it into a full spooky home. You can create a custom design and choose different fonts to add Halloween vibes and freak out your guests.
5. Candles
Halloween is incomplete without candles, isn’t it? Transform your ordinary candles into a Halloween decoration with just a little vinyl. You can create hundreds of scary designs in the Design Space app, cut them on HTV, and transfer them to your candles.
6. Spider Web Earrings
To create spider web earrings, use faux leather cut with a Cricut or another cutting machine. This is a super quick and unique project you can make and celebrate with style.
7. Customized Shirts
Cricut offers a wide variety of features for making custom shirts. You can choose some of the best spooky designs or create your own in the Design Space app. Then, you can cut the designs on vinyl and transfer them to the plain shirt with EasyPress. Use permanent vinyl if you want your design to be durable and long-lasting.
8. Wall Stickers
Turn your home into the spookiest place for Halloween with these removable wall decals. You can use vinyl to make different kinds of stickers and put them on the wall. Do not worry about the design. You can get it from the internet or apps like Pinterest, or you can create it in the Design Space app. Use removable vinyl to make these spooky stickers; otherwise, you can ruin your walls.
Conclusion
In this blog, you read about the Halloween Cricut ideas. Hopefully, it was helpful, and you can create some amazing projects with your Cricut machine. It is a great companion for people and DIY crafters; it gives you full freedom to design simple and complex designs. Make your designs and projects with the Cricut machine and gift them to your close and loved ones. You do not have to limit your creativity; celebrate this Halloween with a free spirit full of happiness.
For more information visit: cricut.com/setup cricut design space login cricut design space download
#halloween cricut ideas#cricut design space software#cricut design space login#cricut design space desktop#cricut design space app
1 note
·
View note
Text
iPhone 14 Pro vs iPhone 16 Pro: 5 Updates You Must Know!

The iPhone 16 Pro has been released, making it a good time for users to upgrade their iPhones. However, users are expecting a great deal to upgrade themselves to the latest model and say bye to the iPhone 14 Pro. Well, the addition of a new model doesn’t make any difference to the older models’ capabilities, but it drives users to try new, updated features. The same is true in the case of iPhone 16 Pro. This blog will reveal iPhone 14 pro vs iPhone 16 Pro.
Apple launched the iPhone 14 Pro in 2022, and since then, it has been the center of attention until the launch of its successor, the iPhone 15 Pro. And now, in 2024, the iPhone 16 Pro has beaten the older models. It’s understood that the newer model (iPhone 16 Pro) must have some big changes, but for whom it is worth it, and for whom not, let’s understand in this blog.
Comparison Between iPhone 14 Pro and iPhone 16 Pro
As Apple has launched its new model, iPhone 16 Pro, comparing it with other models is crucial. The arrival of a new phone model might bring an opportunity for users to upgrade their phones. I have tried breaking down each new update about the new model and its comparison with the iPhone 14 Pro.
Equipped With AI features and Apple Intelligence
The newly launched iPhone 16 Pro has built-in AI features that will improve the user experience and make it more intriguing. Rumors say that Apple will soon release its personalized artificial intelligence, Apple Intelligence.
Unfortunately, iPhone 14 Pro users won’t get this advantage, as it’s only exclusive to the latest release. Hence, whoever wants to stay updated with the latest AI features might be attracted to this fresh feature.
Thinner & Bigger Screen Than the iPhone 14 Pro
The new launch has a stretched display of 6.3 inches, whereas the iPhone 14 Pro has a 6.12-inch screen. It’s a notable change that attracts users. This small change could be a great deal for gaming enthusiasts who need a bigger display. Also, it’s a great enhancement for attending video call conferences and editing an important document.
Larger Battery With 3355 mAh
The new model, the iPhone 16 Pro, has a comparatively larger battery at 3355 mAh, compared to just 3200 mAh in the iPhone 14 Pro. Furthermore, the new model has a faster charging capacity than the previous models. It supports 40W charging, which isn’t possible with the 14 Pro. Thus, it can be the right time to upgrade.
Extraordinary Camera Quality With 48 MP
You know the new models are superior in many cases. The camera quality is the first to get everyone’s attention. The latest model beats the iPhone 14 Pro with a camera quality of 48 MP, which is way better than that. The enhancements can be seen in the optical zoom, which is 5 x in iPhone 16 Pro and 3 x in 14 Pro. Plus, the addition of a new capture button in the latest release enhances your capturing experience.
Differences in the Starting Prices
Well, it’s a topic of concern for many who are upgrading their phone. The pricing differs significantly. The new model costs only $999, which is only $800 for iPhone 14 Pro. However, with a bigger screen, 8GB RAM, and a good battery life
Reasons Why You Should Stick to Your iPhone 14 Pro
Besides the iPhone 16 Pro’s big list of features, you still can stick to your iPhone 14 Pro. This is because the newer updates are not necessarily beneficial for you. If your phone meets all your expectations and you’re comfortable with its feel and features, you can stick to your iPhone 14 Pro.
Moreover, if you’re financially strained, upgrading a phone might not be a good decision. And if you’ve recently finished paying for your 14 Pro, switching to an upgrade may leave you in regret.
If you look around, you’ll find many users who are content with their iPhone 14 Pro and have not switched to a new model yet. Besides everything, if you’re confident and require an immediate upgrade, the iPhone 16 Pro is an ideal option as of now.
FAQs
Is It Worth Switching to the iPhone 16 Pro?
Yes, absolutely. The new model is equipped with enhanced features that can upgrade your phone experience. With a thinner, slimmer look and a bigger display, it instantly catches everyone’s attention. If you’re expecting a good camera and better battery life, you’re good to go with an iPhone 16 Pro.
What’s the Major Difference Between iPhone 14 and 16 Pro?
There are significant differences between these two models. Starting from their screen and dimensions, the iPhone 16 Pro has the bigger ones. Moreover, the battery life, price difference, and AI integration are all the upgrades the newer model carries.
Is the iPhone 16 Pro Water-Resistant?
Yes, the latest iPhone 16 Pro is water-resistant, with an IP68 rating. It can withstand water up to 6 m for 30 minutes. The IP rating shows a device’s resistance to dust, water, and rain.
Source: iPhone 14 Pro vs iPhone 16 Pro
#iPhone 14 Pro vs iPhone 16 Pro#iPhone 14 Pro#iPhone 16 Pro#Cricut design space download#Cricut design space app#Cricut machine set up
1 note
·
View note
Text
How to Connect Cricut Bluetooth to Mac and Windows?

Have trouble connecting a crafting machine? Here, I answer how to connect Cricut Bluetooth on Mac and Windows computers. During my six-year crafting journey, I faced many challenges. Be it creating a project or setting up the machine, the journey was full of ups and downs.
Nothing can be worse for crafters than setting up this machine. It takes time, and many non-tech-savvy people do not like to do it—no worries; I know your pain😉! In addition, these years of experience have taught me a lot about this exceptional machine.
Hence, believe it or not, these overall steps can be fun. To learn more, delve into this tutorial and check out the blog. I will explain the system specs first, then show you how to connect Cricut to computer via Bluetooth.
System Specifications for Using Cricut Design Space
Alright, we are heading to learn how to connect Cricut Bluetooth. But before you connect, you need to check the system specs. As I said earlier, checking the system steps can prevent your PC from crashing and many other errors. Let’s take a look at a few important points provided below:
Mac
Supported Operating System: macOS 11 or later
RAM: 4 GB
CPU: 1.83 GHz
Display Resolution: 1024px x 768px
Internet: Minimum 2 – 3 Mbps Download & 1 – 2 Mbps Upload
Hard Disk Space: 2 GB required at least
Connection Type: Bluetooth wireless or wired USB
Offline Feature: Yes, it is available for Mac
Windows
Supported Operating System: Windows 10 or later
RAM: 4 GB
CPU: Intel Dual-Core or equivalent AMD processor
Display Resolution: 1024px x 768px
Internet: Minimum 2 – 3 Mbps Download & 1 – 2 Mbps Upload
Hard Disk Space: 2 GB required at least
Connection Type: Bluetooth wireless or wired USB
Offline Feature: Yes, it is available for Windows
How to Connect Cricut Bluetooth to Your Computer?
Here, I am going to connect your machine to Bluetooth devices such as Windows and Mac. By connecting this machine to your compatible device, you will be able to start your crafting journey in one go! Let’s delve into the steps given below:
Mac
Power on your machine and MacBook.
Cutting machine should be within 10-15 feet of your Mac.
After that, you will need to go to the Apple menu given in the upper left corner.
Next, choose System Preferences or System Settings.
Now, search for the Bluetooth option.
Turn on the Bluetooth.
Wait and see if your Mac detects your nearby machine.
When detected, select it and click on the Pair button.
Once done, return to your Design Space app and Cricut New Product Setup.
Then, your machine will show that your device is connected.
Windows
Turn on the PC and place it 10 to 15 feet away from the machine.
After that, press the Start button (Windows logo-like key) on the keyboard and select a gear icon, which is your Settings.
Once the Settings opens, you need to select the Devices option.
Now, you will need to find the Bluetooth option and check if it is on.
If your Bluetooth is off, turn it on.
Then, you have to add your machine by clicking on Add Bluetooth or other device.
On the next pop-up screen, you are required to select the Bluetooth option.
Also, your PC will start looking for the machine nearby.
Once it finds your machine model, click on it to pair.
Finally, you learned how to connect Cricut to computer. Afterward, you can open your Design Space and start setting up the machine. For setup, you will need to follow the on-screen prompts displayed on the Design Space app. Once done, you are all set to craft!
Final Words
So, yeah, that’s all in this blog tutorial. By now, you might have learned how to connect Cricut Bluetooth. Afterward, you are ready to proceed and complete the machine setup. To conclude, I explained the system specs so that you can understand your system’s compatibility before setting it up. After the system specs, I explained the steps for connecting the machine to the PC and Mac separately. Good luck with your crafting journey.
FAQs
How can I connect my Cricut to Bluetooth?
To create your machine to your Bluetooth device, check out the following points:
Go to your mobile device (Android or iOS).
Ensure Bluetooth is turned on.
Also, turn on the heat press.
Then, head to Google Play Store (on Android) or App Store (on iOS).
Search for the Cricut Heat app and download it.
Open the app and select the Cricut Setup button on the screen.
After that, your device will detect your nearby device.
Tap on the Connect button.
Finally, your heat press is paired now.
Which Cricut machine is Bluetooth enabled?
Several Cricut machines are Bluetooth enabled, such as the Maker, Maker 3, Explore Air 2, Explore 3, Joy, and Joy Xtra. These latest and smart cutting machines have built-in Bluetooth and are compatible with iOS, Android, Windows, and macOS. However, they can be connected via USB cable except for the Joy model.
How to install a Bluetooth adapter in Cricut?
In order to install a Bluetooth adapter in your Explore or Explore One machine, delve into the following quick steps:
Turn on the Explore machine.
Grab the Bluetooth adapter and remove its cap.
Insert the adapter into your Explore machine.
Ensure the text on the adapter is facing up
When you notice a blue light flashing, it means you have installed the adapter.
Source: How to Connect Cricut Bluetooth
#how to connect cricut bluetooth#how to connect cricut to computer#cricut design space download#cricut design space app#cricut design space software#cricut explore air 2 setup#Cricut setup on computer#how to setup cricut explore#cricut explore air 2 software#Cricut New Machine Setup#Cricut maker setup
1 note
·
View note
Text
Cricut Design Space: Ultimate Guide to Get Started

Are you looking for design software with many tools and a smooth-running interface? The internet is filled with inexpensive, multifaceted design software. Yet, only a few match crafters’ desires, like Cricut Design Space.
Without further ado, let’s explore the features and versatility of Cricut software, which has been used by known crafters and is still catching the eye of many. Also, learn how you can download the application on your Mac, Windows, iOS, and Android devices.
What Is Cricut Design Space?
Design Space is free software that offers different design elements and a range of tools. Users can access designs, projects, fonts, photos, and templates to create free-hand designs. They can also import their artwork or images into the app.
It is widely known among crafters due to its brilliant user interface, which allows users to express their creativity freely. Also, it works on Windows, iOS, Mac, and Android devices. The Cricut app provides a cloud-based storage account that can be synced to multiple accounts.
Why to Use Cricut Design Space?
The app has ample features for crafters and DIY enthusiasts. Also, even beginners find it easy to use and satisfying. Let’s read about the benefits first before proceeding to the installation process.
1. Customize Ready-to-Make Projects
Crafters find working on multiple projects as complicated and tedious. This is where Design Space software comes into play. It offers thousands of ready-to-make projects. Also, there are a variety of categories, such as clothing, accessories, iron-ons, home decor, etc. The app also delivers free pre-made projects, text fonts, and images. The user must select the “Free” option in the filter to view them.
2. Sharing and Privacy
Like other design software, it also has a sharing option. Users must go to the My Stuff section, which is available at the top left of the bar. After that, users can search for designs or projects and click the Share icon. Also, projects can be shared via private links. Users can also make their public art private. The app is made to protect the privacy of the user’s art and designs, whether uploaded photos or system fonts.
3. Easy-to-Use Interface
The Cricut Design Space features a smooth and effortless user interface. Users can easily navigate through various features, like adding new templates, text, shapes, etc., available at the left bar. Plus, it can be easily used by beginners.
4. Access to Exclusive Templates
In the Cricut app, users have access to various pre-formatted documents. These are time-saving and let you focus on positioning the design in the template. Plus, they help you visualize the final designs after they have been cut out. For clients’ projects, templates help clarify ideas.
5. Designing Accessible Both Online and Offline
The Cricut software works both online and offline. To use it offline, the first user needs to sign in to the app by connecting to an internet service. Once signed in, the user can work offline.
How to Download Cricut Design Space on Windows?
Downloading the Cricut Design app is unlike other apps; there are certain parameters to follow for a quick installation and launching. Below are the seven steps for a hassle-free process:
Step 1: First, open any internet browser and type in or go to design.cricut.com.
Step 2: Before downloading the app, you must read and agree to the terms of use and privacy policy. Then, click the Download button.
Step 3: When the downloading ends, open the file, which will be available in your browser’s download options. If not, you can also open the file through your Downloads folder.
Step 4: If a window asks you, “If you trust the application,” don’t panic. Also, select the option to trust the application.
Step 5: After that, a setup window will appear to display the installation progress.
Step 6: Now, you can sign in with your Cricut account and password after installation.
Step 7: Lastly, navigate through the outstanding features of the software to create marvelous pieces of art.
Conclusion
Cricut Design Space serves many purposes by forging visions and ideas into art. It is a cloud-based application that assists users in designing everywhere. Plus, it offers a series of features, such as attach, Bluetooth companion, contour, curve text, machine setup, etc. You can download the app on desktops and smartphones. The software works online and offline; meanwhile, you must follow the file-saving instructions.
FAQs
Does Cricut Design Space Only Work in Online Mode?
No, the Design Space app works both offline and online. In the case of offline, the device must be connected to an internet connection while saving your project. Apart from that, you must save the project in the cloud and on your computer. Therefore, always connect your device to the internet before saving it so that it appears on other devices.
How Can I Download Cricut Design Space for Mac?
It is as easy as pie. First, open your internet browser and type in cricut.com/setup. Then, agree to Cricut’s Terms of Use and Privacy Policy and click Download. After that, select a location to save the file and click Download. Now, open the Downloads folder and click the .dmg file. Next, drag the Cricut icon to the Applications folder icon to begin the installation. Also, double-click the app in your Applications folder. At last, a Mac window will appear, and click the Open option.
Does Cricut Design Space Have Same Features in Every Operating System?
Design Space’s features vary for Windows, Mac, iOS, and Android devices. For example, Android mobile users can’t use project sharing, and smart guides are unavailable for Windows and Mac users. iOS users can enjoy most features, but knife blade cutting, pattern fills, and templates are unavailable on this Design Space platform.
Source: Cricut Design Space
#Cricut design space#cricut design space desktop#cricut design space app#cricut design space software download#cricut software app#cricut software download
0 notes
Text
How to Clean a Cricut Mat: Tips and Tricks for Crafters

It is important for all Cricut users to know how to clean a Cricut mat. Anyone who has been using a Cricut machine for a while knows how crucial it is. If you are a beginner and do not know much about it, you don’t have to worry much! You can learn all about keeping your Cricut cutting mat clean by reading this blog, and you will be good at cleaning mats. All I would ask you is to read the blog till the end.
Cleaning the mats properly is necessary if you want them to last a long time. If you do not clean them regularly, you will have difficulty making clean and precise cuts. So, if you want a better Cricut experience, you must learn to clean mats, and you can do that by reading this post. So, let’s delve into it.
Why Do You Need to Clean a Cricut Mat?
When you use your Cricut machine, you cut materials on the mat. After you finish cutting, you will see lots of small cut pieces on the mat. If you do not remove these leftover materials and dirt from the mat, you will find it difficult to cut the materials.
Cleaning the mat is essential, and if you don’t clean it properly, you won’t get clean and sharp cutting. If you get the mat cleaned, then the material will not move during cutting, and you will not get feathered edges. The stickiness of the mat is very important, and dust and paper residues can reduce its stickiness. So, if you want to solve all these issues, you must clean your Cricut cutting mat regularly, and the mat will last longer. After cleaning mats, you will get very clean and precise cuts on them.
How to Clean a Cricut Mat: Top 3 Methods
You can use a few methods to clean a cutting mat. I have written them all down, and you can follow them.
Method 1: Scraper Tool
The first and easiest way to clean a mat is to use a scraper tool. All you have to do is take any tool with a sharp edge and then press it in one direction on the mat. You have to do the same thing in all directions. You will see that the dirt and all the residue are being removed. Just make sure that you are not pressing too hard and damaging the mat.
Method 2: Lint Roller
If you notice that the mat is still not completely cleaned, you can use a sticky lint roller. You will take the roller and slowly roll it across the mat. You will see that the sticky part of the roller picks up the dust and glitter, and the mat becomes clean.
Method 3: Baby Wipes
Finally, you can use a wet wiper to clean the remaining parts of the mat. You have to take it and press it in all directions, making sure that you are not using a wipe that may damage the mat’s stickiness.
How to Maintain a Cricut Mat After Cleaning?
Cleaning a Cricut mat is not enough; you should also know how to maintain it after cleaning it. That way, you will be able to use the mat for a longer period of time and will not need to replace it anytime soon.
For maintenance, the mat should be kept covered when not in use. It will increase the longevity of the mat, keep it sticky, and protect it from dust and small fibers.
Extra Tips and Tricks for Clean Cutting
If you want to cut well on your Cricut machine, you need to know how to clean a Cricut mat. But you also have to keep other things in mind. Here are a few things you should do to clean and precise the cutting.
Check Your Blade
Always make sure that your blade is free from fibers. You can remove them by removing the blade and installing it back when you are done. The fibers around your blade can damage it.
Use Different Areas of the Mat
Each time you use the mat to cut, you should use different areas of the mat. If you use the same area of the mat all the time, there is a higher chance of the mat getting damaged, and you may need to replace it sooner than you expect.
Apply the Correct Amount of Pressure
You must use the right amount of pressure when cutting on the Cricut machine. In order to cut a material, you will need to apply the minimum amount of pressure that is sufficient to make the cut. This way, the possibility of damaging the mat is minimized.
Conclusion
To summarize the blog, I would say that learning how to clean a Cricut mat is important for all Cricut users. If you are new to the world of Cricut and did not know its importance, now you do. With the help of this write-up, you can easily clean your mat and then take care of other things so that your Cricut machine cuts well. You can also maintain the mat after cleaning, and your mat will give you a great cutting experience for a long time.
FAQs
Why Is It Important to Clean a Cricut Cutting Mat?
Cleaning a mat is very important because you put different materials on it and then start cutting them. If the Cricut mat is not clean, you will not get clear and sharp cutting. Dust, glitters, fibers, and remnants can also damage the blade. To prevent all this, you should clean the mat properly.
How Long Can I Use a Cricut Mat?
How long you can use a mat will depend on how often you use it. Someone who uses Cricut mats every day will have to replace the mat more often than someone who uses them once or twice a week. Also, if you clean the mat properly every now and then, the mat will have a longer life. So, clean the mat after every 3-4 cuts, and the mats will last longer. A mat usually lasts around 50 cuts, and then you will have to change it.
How Can I Remove Residue From a Cricut Mat?
There are a few basic ways to clean a Cricut mat. The first way is to scrape off the dust. You have to take a scraper tool and remove the residue from the mat by pressing the tool in all directions. Another method is to use a sticky lint roller. When you roll it on the mat, the sticky part picks up the remnants. You can also wipe the mat with a soft, wet wipe.
For more information visit: cricut.com/setup app cricut software download cricut design space app
Source: How to Clean a Cricut Mat
#how to clean a cricut mat#cricut design space app#cricut design space#cricut design space login#cricut.com/setup#cricut software download#cricut explore air 2
0 notes
Text
7 Easy Beginner Cricut Projects to Get Started in 2024

Are you finding some ideas for easy beginner Cricut projects? If so, you are in the right place! In this blog, I am basically going to discuss the 7 free Cricut projects for beginners. If you are excited to explore, you must read this write-up once.
I came up with a few Cricut project ideas because of my sister. She insisted I use my Cricut machine setup to create wall decals to decorate her room. She was very excited about her new personal room decor, so all she wanted was a wall decal. During the making process, I recommended a simple design, as it suits most walls. Also, I didn’t want to work on any complex project😅, so I made one I mentioned in this blog.
In addition, I have also created some other projects like coasters, T-shirts and more. To explore, look into this post.
1. Wooden Coaster
Love personalized coasters for gifting someone? This could be a great idea if you want easy beginner Cricut projects. I tried this to show you all because it is very easy to create, and any novice in crafting can make this coaster without any hassle. All you need is wooden slices and some vinyl in your desired color. Just add the first letter of anyone’s name and choose some stylish font. Next, send the design to Cricut, and it will do its work!
2. Customized T-Shirt
When it comes to customized T-shirts, I am always ahead in making one. I have gifted many family members, including friends, a personalized shirt. So, you can also do the same. You must be prepared with some supplies you will need to create this shirt. The supplies include a blank shirt, an iron-on vinyl sheet, and a Cricut machine with accessories. After that, create the design you want to add to your shirt and let your Cricut handle the rest of the task!
3. Earrings
Would you believe me if I told you I made this earring using veneer wood? Yes, it’s true, and I cut these veneers using my Cricut machine. That’s what your Cricut can do😉! And you won’t even realize it—you will have something so beautiful. This wooden earring was a gift for my sister on her 22nd birthday. In order to make these easy beginner Cricut projects, you will need a piece of veneer wood with a recommended thickness and a Cricut cutting machine.
4. Mug
Is someone’s birthday approaching? If it’s a child’s birthday, you can try the design I have done in mine. It is easy to create on Cricut Design Space app. However, you can find numerous ready-made mug designs on the Cricut app for free; you can still create them as they require simple shapes and text. But when working on mugs, having a Cricut Mug Press is a must. Make sure you have one at least.
5. Keychain
I have many keychains, all personalized for every family member. There is a different keychain for a car’s key, a room’s key, and so on. And any of them belonging to a particular person has a first letter printed. Some of them are engraved keychains, which can be done on a Cricut machine. Yes, that is true—Cricut can engrave acrylic, wood, etc. What are you waiting for? Let’s get started with such easy beginner Cricut projects.
6. Wish Card
A wish card can be the best way to wish someone good wishes on their anniversary, birthday, and other special occasions. This project is so easy to create on your Cricut Joy without hassle. So, bring your Cricut Joy and start enthusiastically creating crafts. Use things like the Cricut card mat and its basic toolset to support your project’s crafting.
7. Wall Decals
Want to decorate your home? Here’s one of the best wall decals I made using my Cricut Maker 3 Setup. This one is my favorite. It doesn’t have many intricate designs, which makes it look complex, so I thought I’d try this simple design. The benefit of such a simple design is that you don’t waste hours creating these easy beginner Cricut projects.
FAQs
What are free Cricut projects for beginners?
For beginners, you will need something easy to create and less time-consuming for crafts. However, if you are looking for such projects which are also free, you should look into the following list:
Stickers
Coasters
Jewelry
Apparel
Wall decals
Mugs/tumblers
Canister/jar labels
Banners
Cards
Tea towel
What cardstock projects can I make with Cricut?
Using material like cardstock paper, you can easily create several projects. However, I have mentioned some of the easiest projects you can try making on your Cricut. Find the project list given below:
Gift card holder
Canvas wall art
Paper heart envelope
Heart box
Cake toppers
Paper star lanterns
Shadow boxes
Drawer dividers
Gold paper flower
Treat boxes
How to make paper flowers using Cricut?
Follow the steps below to make flowers using your Cricut:
You need to cut the flower template on Cricut
Then, cut the petals from cardstock by using a machine.
Now, overlap the slit at the bottom of each petal and glue.
After that, use clothespins or wonder clips while the glue sets.
Glue the first layer of petals to the flower base, starting with the largest bottom layer.
Next, continue gluing each layer of petals towards the center.
Finally, add the center of the flower and leaves if desired.
For more information visit: cricut.com/setup app cricut account login design.cricut/setup
Source: Easy Beginner Cricut Projects
#easy beginner Cricut projects#cricut design space download#cricut design space app#design.cricut.com#cricut software app#cricut machine setup#cricut account login#cricut joy extra#cricut maker setup
1 note
·
View note
Text
8 Unique Cricut Leather Projects for Making DIY Projects

Hey, avid crafters, are you looking for unique Cricut leather projects? If yes, you have come to the right place! In this blog, you will learn about the wonderful projects that I have made over the years using my Cricut machine and leather.
Leather can be a great material for making crafts. It also gives a classy look to anything that you create. Be it a passport holder or keychain, you have endless ideas on how to make your own stuff. The best part is that you can create all kinds of useful items, such as cord organizers, baby shoes, and earrings.
Whether it is a Cricut Maker Setup or an Explore machine, you have to explore different operations such as engraving, debossing, and much more than cutting. Let’s dive into it without further ado!
1. Passport Holder
Why buy any other passport holder when you can make your own passport holder using a Cricut machine? Such a cool leather idea that my sister recommended. Actually, she recently moved to London to pursue higher education. In order to give her something precious, I tried to make this passport holder especially for her. So, if you are looking for easy-to-make Cricut leather projects, here you go with a holder!
2. Baby Shoes
Wow, such adorable leather baby shoes!🥰 Babies stuff is really cute, no? Okay, so coming to the point, I created this for my newborn cousin’s daughter. I just wanted to give her something that is very cute. Also, it is made up of Cricut, so it can be used to show off at home to make a memory. If you want to make something for a newborn, Cricut has your back! 😁
3. Faux Leather Earrings
Looking for something gorgeous for gifting? I have made one of the faux leather Cricut projects that you can make easily in no time. This superb and intricately cut earring is made using a Cricut cutting machine. Yes, I never thought we could create beautiful jewelry using a robust Cricut machine. No doubt, Cricut is amazing as it allows us to explore ideas in Cricut leather projects that we have never thought of in our dreams.
4. Luggage Tag
Are you planning a summer or vocational trip with your friends? Then, you must be carrying some luggage, right? If so, you need to give it a tag. Create this personalized tag using leather and a Cricut machine, give it to all your friends, and add the same to your bag as well. And go on a journey where nobody stops you from being yourself!
5. No-Stitch Wallet
Need a wallet that, too, without any stitching on it? I know stitching is a big task when it comes to a wallet. But with Cricut, you really don’t need it. In order to create such an extraordinary wallet, you need a Cricut machine and some piece of leather. After that, you are ready to go! Just explore ideas like Cricut leather projects and bring your ideas to reality!
6. Cord Keepers
I can manage cords like USB cables and wired phones using this leather cord keeper. I made this out of frustration when I couldn’t deal with those clumsy cords. Hence, I made this keeper only on Cricut. It is not only easy to create but also keeps my things organized and easy to find. Thanks to Cricut for the amazing devices that they have built so far.
7. Key Fob
Want some little key chains? Here’s the key fob. See how beautiful they are. I love them because they are multiple colors with different patterns. Also, these Cricut leather projects can be used as gifts for your loved ones. Start creating with your full dedication and see the magic your Cricut delivers! So, add your love with Cricut and let your artistic skills spread their spirit everywhere.
8. Journal
Are you looking for Cricut leather projects or something for your journal? If yes, here you go with this enticing-looking journal cover that I created using my Cricut Maker 3 machine. As you can see above, I used a debossing effect on the front cover. Hence, for this particular project, you will need to rely on Cricut Maker or its latest version, Cricut Maker 3.
FAQs
Can I use Cricut on leather?
You can use your Cricut to cut and engrave your leather. The Cricut offers many models for many operations, such as the Cricut Maker, Explore, and Venture machines. To use the machine, you first need to take the desirable size of leather and then place it on the strong grip mat. So, if you want the best results, you can use Cricut genuine leather, a clean cutting mat, and a sharp blade.
Can I engrave leather?
Yes, absolutely; you can use your leather with specialized tools. Engraving is a way to customize leather by removing some leather through carving or etching. So, use the engraving tool and start carving on your leather.
Here are some steps you need to follow to engrave leather.
Choose a design
Use acetone
Attach the right accessory
Trace the design
What other Cricut projects can I create using leather?
There are multiple Cricut leather projects that you can try using your Cricut cutting machine. The projects are easy to cut and engrave. All you need is the right tool to cut and engrave the leather. Here are the list of DIY projects that you can make using leather:
Bows
Bookmarks
Coasters
Earrings
Bracelets
Keychains
Flowers
Phone cases
Wallets
For more information visit: www.cricut.com/setup login cricut.com/create Cricut Design Space Login Cricut design space download
Source: Cricut Leather Projects
#Cricut leather projects#faux leather Cricut projects#Cricut.com/setup#cricut design space download#cricut design space login#cricut design space app#www.cricut.com/setup login#cricut.com/create#cricut machine setup#cricut maker 3#cricut maker setup
1 note
·
View note
Text
How to Make a Puzzle on Cricut: A Step-by-Step Guide

My nephew Philip is about to celebrate his 2nd birthday, and as his godmother, I’m determined to make it an unforgettable one. As a craft teacher, I couldn’t resist the chance to surprise him with a unique gift. I decided to step into my art room and begin a puzzle-making adventure with my Cricut machine set up.
Of course, puzzles will not only test his mental skills but will also increase his IQ level. Before rolling over with how to make a puzzle on Cricut, I need to have all the crafting supplies. I am on a mission to teach you the right way to make a puzzle with Cricut.
If you are thinking that this project is very hard to create, then you are wrong. This guide will let you know the method through which you can make this craft with ease.
Step 1: Log in to Cricut App and Create a Design
Start the process by downloading Cricut Design Space on your device. If you don’t have an account, create one by providing the required details. After creating your account, open the app and tap the Uploads toolbox. Now, upload the file from the Downloads folder into the Cricut Design app. After that, select your image and hit the Insert Image button at the bottom right side of the page.
Also, change the size of your image and open the Uploads toolbox again. At this point of how to make a puzzle on Cricut process, choose the picture and click the Save as a Print Then Cut Image option.
Next, start changing the size of your picture to make it fit perfectly on the puzzle. To make a puzzle with Cricut, select both of the files and open the Align section. After it opens, select Center. Then, tick the Attach option present at the end of the Layers column.
At this stage of how to make a puzzle on Cricut, follow the steps and and take out the printout of your picture. Now, place the printout on the item you are going to use and then remove the sticker paper from it. Equally important, give a smooth press to ensure that it is placed properly without leaving any bubbles.
Step 2: Select Material & Load It to Your Cricut Machine
To make a custom puzzle out of a cutting machine, you should settle down the design on your Cricut mat. After doing that, open the Browse All Materials drop-box and search for Cereal Box. After finding it, please select it and then hit the Done button given inside the green box. Now, go ahead and change the pressure from Default to More and load the Deep-Point Blade into Clamp B.
Step 3: Put All the Puzzle Pieces Together
Also, the cutting machine will do the rest of the work by cutting the design into equal parts. Following this, put the mat upside down and gently remove the puzzle without any hurries. Now, take your Cricut weeding tool and separate the puzzle pieces one by one without causing any damage to the image.
After collecting all the pieces of the puzzle, shuffle them and make the design again. While joining back all the pieces, you will surely feel proud of how smoothly you completed the process by paying attention to every single detail during the process.
Didn’t you fall in love with how to make a puzzle on Cricut? If yes! Then, there is nothing better than looking at your kids playing with it with so much excitement. Besides, the puzzle can also become a great idea for giving as a present at a birthday party or a return gift to the guest.
FAQs
Can You Make a Custom Puzzle With Cricut Design Space?
You can make a custom puzzle using the Cricut Design Space app. After signing into the app, it will get much easier for you to create the design that you are going to use for your puzzle. Also, the Cricut Design app will give you access to the library and other tools while drawing your design.
Which Blade Should I Use to Cut the Cricut Cereal Box?
The Cricut blade that can help you in cutting the cereal box is the Knife blade. With its sharp edges and amazing flexibility, you will get smooth cuts that will give you equal pieces of the puzzle. Also, it can be installed easily on the Clamp, which means that it will save time during the crafting process.
Is It Possible to Make Money With Cricut Puzzles?
Yes, you can surely make a lot of money by making custom puzzles. You can either start your own business or make it part-time and create puzzles out of any material. But, you should be aware of how to work the craft plotter and choose the correct materials before starting the process.
For more information visit: Cricut.com/setup Cricut setup on computer Cricut account login
Source: How to Make a Puzzle on Cricut
#make a puzzle with cricut#how to make a puzzle on cricut#cricut design space download#cricut design space app#design.cricut.com#www.cricut.com/setup login#cricut software app#cricut machine setup#Cricut setup on computer
1 note
·
View note
Text
How to Connect Cricut via Bluetooth: Easy Setup Guide

Hello readers! Thanks for stopping by. Today, I have something very interesting for you all. As you’re all inspired by Cricut machines, what will be more meaningful than a brief note on its connection setup? With this blog, I will be sharing with you how to connect Cricut via Bluetooth. If you guys are looking for that, you will get it all here. Keep reading this blog to explore methods to connect your Cricut to a computer and phone via Bluetooth.
However, don’t forget to download and install the latest version of Cricut Design Space Software on your computer and mobile device. Only then will you be able to use your Cricut machine to make something. Now, let’s get started with my most awaited blog.
How to Connect Cricut via Bluetooth to Desktop?
Maximum users have a desktop to control their Cricut machines, so do I have. A desktop makes your work easier with a wider screen and fast speed. So, let’s go through the steps for connecting your Cricut via Bluetooth to a desktop.
Windows
From those maximum users who use desktops, the majority of users have a Windows PC for its utmost convenience. Let’s check out the steps to set up your Cricut.
Initially, make sure that your Cricut product is ON and within a range of 10-15 feet from your Windows PC.
Then, go to the Settings option from the Start menu and move to the Devices option.
After that, make sure that the Bluetooth option is ON.
In the following screen, press the Add Bluetooth or other device option.
Choose the Bluetooth option and let your PC recognize your Cricut machine.
Next, choose your machine from the list of devices.
Finally, your Cricut machine will pair with the Windows PC via Bluetooth.
That’s how to connect Cricut via Bluetooth to a Windows PC. Don’t have a Windows PC? Don’t worry; I will cover all devices here.
Mac
For the Mac users, here are the simplified steps for connecting their Cricut machine via Bluetooth to it. Look at the steps below to learn it.
In the beginning, make sure that your Cricut product is ON and at a distance of 10-15 feet from your Mac.
Then, head to the System Preferences from your Apple menu and check the Bluetooth option.
After that, make sure that the Bluetooth option is ON and choose your Cricut model from the given list of devices.
Now, your Cricut cutting machine is all set for the Bluetooth connection.
That’s it for connecting a Cricut via Bluetooth to a Mac device. You can now start using your Cricut after installing Cricut Design app on your device.
How to Connect Cricut via Bluetooth to Phone?
If you want to connect your Cricut via Bluetooth to a mobile device, it’s possible. Let’s check the steps here.
iOS
Use the following steps to connect your Cricut to iOS via Bluetooth. Then, you can use your Cricut the way you want.
First, make sure that your machine is utmost and at a distance of 10-15 feet from your mobile device.
Then, open the Bluetooth option under the Settings.
After that, make sure that the Bluetooth option is ON and choose your Cricut model from the available list of devices.
Now, your Cricut machine will pair with a Bluetooth connection.
Next, go to the Cricut Design Space and select the Cricut New Product setup.
That’s how to connect Cricut via Bluetooth to an iOS device to setup your machine. Now, It’s time to check the steps for an Android device.
Android
Android users should follow the steps below to connect their Cricut via Bluetooth. Let’s check the steps here.
In the first step, make sure that your Cricut is ON and within 10-15 feet away from your phone.
Then, open the Bluetooth option from the Settings option.
After that, make sure that the Bluetooth option is ON and choose your Cricut from the list.
Now, your devices are paired with each other.
At last, go back to the Cricut Design Space and click on the Cricut New Product Setup.
That’s it for connecting Cricut via Bluetooth to an Android device. Once you set up your devices, you’re ready to use your machine.
Conclusion
Finally you’ve learned how to connect Cricut via Bluetooth to different devices. It’s so simple that even beginners can perform it. Moreover, you need to understand that you must download Cricut Design Space to allow your device to connect with the Cricut machine. Only then, you’ll be able to use your machine for creating compelling projects. Once you connect your Cricut to a computer or mobile device, you’re good to go with all the crafting work.
FAQs
How to Connect a Cricut Machine to Laptop Wirelessly?
To connect a Cricut product to a laptop wirelessly, follow these steps:
To start, make sure that the Bluetooth is ON on your laptop and Cricut.
Now, tap on the Add Bluetooth or other device option.
Choose the Bluetooth option and allow your laptop to recognize your machine.
After that, pick your Cricut model from the list.
Finally, your machine is paired with a Bluetooth connection.
What to Do if My Cricut Is Not Connecting to Bluetooth?
If you see that your Cricut machine is unable to connect via Bluetooth, you must ensure that your machine is ON and within a distance of 10-15 feet from the computer. If not, you need to change their place to the required location. Moreover, if your Cricut machine doesn’t have a Bluetooth connection, you can buy a Bluetooth adapter.
How Do I Connect Cricut via Bluetooth to Windows 10?
To connect your Cricut machine to Windows 10, follow these steps:
To start, make sure that your Cricut is at least 10-15 feet away from your computer.
Open the Settings tab from the Menu and then launch the Devices option.
Thereafter, check if the Bluetooth option is ON.
Then, hit on the Add Bluetooth or other device option.
Tap the Bluetooth option to let your Windows 10 PC detect your machine, and pick your machine from the list.
Finally, your machine is paired with Bluetooth.
For more information visit: www.cricut.com/setup login design.cricut.com Cricut New Machine Setup
Source: How to Connect Cricut via Bluetooth
#how to connect cricut via bluetooth#cricut design space download#cricut design space app#cricut design space login#cricut machine setup#Cricut New Product setup#Cricut setup on computer
2 notes
·
View notes
Text
How to Setup Cricut Design Space on Computers and Mobiles?

Whether you want to know how to setup Cricut Design Space or Cricut machine, both are similar questions, so don’t get confused between them. Since the Cricut software plays a vital role in setting up Cricut, it is a must-have on your device. Anyway, my main purpose in writing this blog is to show you how to setup a Cricut machine on various devices, such as Mac, Windows, Android, or iOS.
If you are ready with your new Cricut product, let’s start delving into the world of Cricut. You will learn to setup Cricut in no time. Let’s get started!
How to Setup Cricut Design Space on a Computer?
As I have already cleared above, whether you are setting up the Cricut software or the Cricut machine is. Both are the same, as you need both of them to setup the machine. In it, you will learn how to setup a Cricut machine on Mac and Windows. The steps are the same for both computers. Without further delay, let’s get into the first step.
Step 1: Unbox the Cricut Machine
The Cricut setup is all about setting up a new machine. But you might have bought a new machine so you need to unbox it.
Once you unbox the machine, you have to take out all the accessories that come along with it. Inside this box, I got a Cricut Explore Air 2 with some other instructional manuals and accessories.
Step 2: Open Your Cricut Cutting Machine
After unboxing, you should place your Cricut machine on a flat surface, such as a table. Ensure the distance between your Cricut and computer is not more than 15 feet. Now, I will show you how to open the machine. To open your Cricut Explore Air 2, you just need to press the Open button on the left side of your machine. However, if you are using a Maker, then lift the top lid.
Remember, you don’t need to pull the door. You let it open slowly on its own. Once it is open, you have to move to the next steps.
Step 3: Turn On the Cricut Machine
Next, it’s time to power on the machine. Take the power cord that came with your machine and plug it into the power socket. And the other end goes into the machine. After that, you don’t need to turn it on. Wait for some time; we will switch it on a bit later.
Step 4: Download & Install the Cricut App
Here comes the exciting part: we are finally going to set it up. The setup starts after downloading and installing the software. To download the app, you should visit cricut.com/setup. After downloading, install the app and open it on your device.
Step 5: Log in to Your Cricut Account
Then, the app is opened on your desktop. You have to sign in using your Cricut ID and password. If you don’t have any, then create an account. Also, you need to proceed to the next step, where you will learn how to setup Cricut Design Space.
Step 6: Complete the Cricut Setup
You might have logged in to your Cricut account login by now. As soon as you are done with your account setup, the next screen will guide you through three prompts to setup your machine. These prompts are as follows:
a. Prepare Your Workspace
In it, you have to place your machine in an appropriate place. I have already covered this in the first step above.
b. Plug in and Power on Your Cricut Machine
We have already done this, too. To do this, just power on your machine by pressing the power button.
c. Connect via a USB Cable or Bluetooth
Now, you have to connect your Cricut machine via Bluetooth or a USB cable. Choose what suits you the best. Finally, after connecting it to the computer, you will be redirected to perform a test cut. Do it, and your Cricut setup will be done! 😍
How to Setup Cricut Design Space on Mobile Devices?
If you are an Android or iOS user, don’t worry. You can easily setup your Cricut using your smartphone, too. However, the first three steps that I have explained above are the same for mobile devices; once done, you can proceed with the steps below:
Connect your Cricut product using a wireless Bluetooth connection.
After pairing your device, go to the Play Store or App Store on your device.
And then search for the Cricut Design Space.
Hit the Install on an Android device and Get on an iOS device to download the app.
After installation of the software, create your Cricut ID or simply log in if you have an account.
Finally, you have learned how to setup Cricut Design Space on your mobile design.
FAQs
How do I install Cricut Design Space on my PC?
To install Cricut app, you will need to follow the steps below:
Open the internet browser on your computer and go to the design.cricut.com.
Now, you will need to download the Cricut Design Space app.
After that, select the Download button and move ahead to download.
Then, go to the file folder where you have downloaded your file.
To open the file, you have to double-click on it.
Lastly, follow the directions to install the app.
What can I do with my Cricut Design Space?
The Cricut Design app can help you set up your Cricut machine. This software connects your machine to your computer or mobile device. So, ensure you have used the right or compatible device with the Cricut software. Plus, you can use this app to make amazing designs, accessing thousands of free resources, including ready-made projects, images, and fonts.
Can I use my Cricut machine without the Cricut app?
No, you cannot use or run the Cricut machine without using the Cricut software. However, the software helps you connect the machine, create a design, and send it to the machine. Without this software, you can’t make a single cut on your material. Hence, the Cricut app is a must for using the Cricut machine.
Source: How to Setup Cricut Design Space
#setup cricut design space#How to Setup Cricut Design Space#cricut design space download#cricut design space login#cricut design space app#cricut design space software#cricut machine setup#cricut software app
1 note
·
View note
Text
Cricut Maker Setup: Get a Head Start on Your Crafting Journey

Cricut machine setup can be intimidating when you are a beginner. All Cricut machines are great, but here I am going to talk about the Cricut Maker setup for beginners on different devices. Since this machine is excellent in all aspects, users often consider it for their crafting needs. If you are setting up your Cricut machine for the first time, don’t worry; I will help you with this.
Before I get started, you should know that you need a stable internet connection, either a desktop, laptop, or mobile device, to establish a connection. Moreover, you must have the Design Space software installed. When you know everything to get started, let’s start with the blog.
Step 1: Unpacking the Cricut Machine Box
The first thing you should do is unbox your brand-new Cricut Maker machine and take out all the necessary items from it. Below are all the items you’ll get along with the Cricut Maker.
Brand new Cricut Maker
FabricGrip mat (12 x 12)
LightGrip mat (12 x 12)
Rotary blade
Fine point pen
Premium fine point blade and housing
USB cable
Welcome book
Power adapter
Cricut Access membership (free trial)
Sample material for the first project
Once you have checked everything in the machine’s box, you’re ready to do the Cricut Maker setup.
Step 2: Turn on Your Cricut Cutting Machine
When you are ready, follow all the instructions below.
First, connect your Cricut Maker to the power supply and switch it on.
Then, connect your Maker with the cable.
Now, visit cricut.com/setup and continue with the on-screen prompts that will guide you through the process.
After that, you can create a separate Cricut Design Space account.
Also, if you want, you can take a free trial of Cricut Access.
Once you turn on your machine, head to the next steps to perform the machine’s setup.
Step 3: Cricut Maker Setup on a Computer/Mobile
Here, in this section, you will learn to set up a Cricut Maker on a desktop like Windows or Mac. Look at the steps below.
For Desktop
In the first step, open a browser and then navigate to www.cricut.com/setup login.
Then, get the Cricut Design Space on your desktop using the on-screen prompts.
Now, continue with all the instructions to sign in to Cricut ID or Create a Cricut ID.
After that, choose your Cricut machine on the next screen.
Plug your Maker machine with the power supply and hit the power button to turn the machine on.
Next, connect the machine to a computer via a USB cord. Alternatively, you can pair it with Bluetooth.
You need to wait until your machine updates fully.
Now, you can try the Cricut Access free trial.
Lastly, continue with the on-screen prompts to prepare your first project.
Finally, you did the Cricut Maker setup on your computer. If you want, you can setup the machine on a mobile device.
For Smartphone
In the first step, head to the App Store/Play Store to install Design Space.
Then, launch your app and sign in to the Cricut ID.
If you’re a beginner, you can even create a whole new account as well.
After that, click on the Menu and choose the Machine Setup.
Now, you need to choose your Cricut Maker machine from the list.
Then, continue with the on-screen instructions.
Next, connect your machine to the power cord and turn it on.
Connect the machine to an iPhone or Android device using USB or a Bluetooth connection.
At last, your Design Space will prompt you to make a first cut.
That’s it for the Cricut Maker setup on a mobile device. Enjoy crafting with your machine. But wait, are you still confused about downloading the Design Space correctly?
How to Download Cricut Maker Setup Software?
As you all know Cricut Design Space is essential to setup a Cricut machine. So, how to download and install it correctly? If you don’t know, the below steps will help you to understand it better.
First of all, launch an internet browser and navigate to cricut.com/setup app.
Then, hit the Download button to get the software on your desktop.
The downloaded file will move to the Downloads folder.
Now, you need to move to that folder on your desktop.
After that, search for your file and double-click on it to open it.
Next, you will see an installation window.
Proceed with the on-screen prompts.
Open the file and sign in to your Cricut ID to use your account.
If you are a new user, you should create a new account.
Next, click on your Cricut Maker machine.
Lastly, you can take a free trial membership to Cricut Access to use the premium features.
Well, these steps are for the desktop. If you want to get this software on your mobile device, you can install the Cricut Design app and then connect it to your machine.
Conclusion
Finally, you understood everything about the Cricut Maker setup. The process is simple and straightforward. Also, you don’t have to be a tech savvy person to setup your latest Cricut Maker machine. All you have to do is to check a stable internet connection and the necessary items in the machine’s box while unboxing your machine. Hopefully you liked my instructional blog on the Cricut machine setup. And now you are all set to start your DIY projects. For premium features, take the Cricut Access membership.
For more information visit: cricut com setup download design.cricut.com for mac
Source: Cricut Maker Setup
#cricut maker setup#Cricut maker setup software#www.cricut.com/setup login#how to setup cricut maker#cricut machine setup#cricut design space download#cricut design space login#design.cricut.com for mac
2 notes
·
View notes
Text
How to Cut Wood With Cricut: A Complete Guide

You might have heard about cutting wood with a Cricut machine and making unique and beautiful DIY projects, but do you know how to do it? If not, it is the perfect time to learn how to cut wood with Cricut. In this guide, I will walk you through everything from the basics, opening up a world of crafting possibilities.
Over the past few months, I have dedicated myself to creating a woodworking project for my client, decorated with a personalized Home sign using iron-on finishing with the Cricut machine setup.
That’s why I’ll be with you today to walk you through cutting wood with Cricut and making an entire project, from selecting materials, loading the blade, creating a design, and more. Believe me, it is going to be fun and easy, so stay calm and follow this guide till the end.
Step 1: Supplies and Tools You Will Require
To learn how to cut wood with Cricut, you will need the following supplies and tools for the project.
Cricut machine (preferably Maker or Maker 3)
Cutting mat
Plain wood (Basswood sheet)
Cricut knife blade
Your device with Cricut Design Space installed
Iron-on vinyl
Cricut Heat Press
Brayer
Once you have gathered these supplies and tools, let’s continue with the instructions below to learn how to cut wood.
Step 2: Prepare Your Wood on the Cricut Mat
A common mistake for beginner crafters is not knowing how to prepare wood on the cutting mat.
Place your basswood on a Cricut mat and apply slight pressure from all sides.
Next, use the brayer to gently press down on the middle and corners to remove any bubbles.
After that, secure the wood sheet with painter’s tape along all four sides.
Step 3: Select the Design and Cut Settings
Once the mat is prepared, navigate to the Cricut app and access Design and Cut settings to learn how to cut wood with Cricut.
Begin by opening Cricut Design Space App and selecting New Project.
Next, click the Upload button and upload the SVG file to Canvas.
Then, drag the wood design onto the canvas and resize it as needed.
Once the design is finalized, click the Make It button.
On the next page, enable the Mirror Settings and click Continue.
After that, select Basswood from the All Browse Materials menu and click Continue.
Step 4: Load the Knife Blade and Cut Your Wood
Once you have done your project and selected the appropriate cut settings, I will guide you through loading the knife blade and cutting the wood.
Open the clamp of the Cricut machine and move the rollers to the sides.
Next, remove the fine-point blade and insert the knife blade housing.
Then, click the Load button, place the cutting mat, and press the blinking button to begin cutting.
During the cutting process, remove any wood debris if the machine pauses.
After cutting, click the Load button, remove the mat, and peel off the tape.
Finally, weed out the design and remove the wood piece.
Step 5: Start Cutting
So far, you’ve learned how to cut wood with Cricut. Now, let’s take it a step further and learn how to apply iron-on vinyl to the wood.
First, open the Cricut app and upload the free Sweet Home file onto the Canvas.
Resize the design to fit the wood and click on the Make It button.
Enable the Mirror option, select iron-on vinyl as the material, and then click Continue.
Load the iron-on vinyl onto the Cricut mat and cut out the design as instructed on the screen.
After cutting, remove the mat and weed out any negative portions from the iron-on vinyl.
Step 6: Apply Your Design to the Wood
Now, you’re all set to learn how to iron on wood with Cricut, so let’s dive in.
Start by painting your wood design and allowing it to dry completely.
Then, refer to the Cricut Heat Guide and preheat your Cricut Heat Press machine accordingly.
Next, position the iron-on vinyl design on the wood and apply heat and pressure using the Cricut Heat Press.
Once the plastic carrier sheet has cooled down, carefully remove it to reveal your finished project.
Final Words
Wood has been integral to human civilization throughout history, and even in today’s digital age, it remains widely used. Thanks to Cricut, cutting wood and crafting DIY projects has become much simpler. While it may be difficult for new crafters to navigate cutting wood with Cricut, I’ve provided a complete explanation of the process. Now, it’s time to practice and strive for perfection.
For more information visit: cricut.com/setup app cricut.com/create cricut maker setup
Source: How to Cut Wood With Cricut
#how to cut wood with Cricut Maker#how to cut wood with Cricut#cricut machine setup#cricut design space download#cricut design space app#cricut design space login#cricut maker setup#cricut maker 3 setup#cricut heat app
1 note
·
View note
Text
Top 3 Cricut Maker 3 Bundles: Unlock Your Crafting Skills Now!

If you are looking for Cricut Maker 3 bundles, you should definitely read this blog to understand what’s included in these bundles and whether it’s worth getting. Cricut bundles are a savior for crafters. With the right set of bundles, you can save money and time on your favorite projects.
For beginners, it can be a powerhouse that covers almost everything they need while working on their Cricut machines. Plus, Cricut never stops launching the latest bundles for all beginners as well as professional crafters.
While updating tools with the latest trends, Cricut is always working to ensure customer satisfaction. And why not? Cricut Maker 3 is a favorite machine, and many people are always looking for something new.
Cricut Maker 3 Bundles
The Cricut Maker 3 machine is one of the top Cricut machines with a big user base. Basically, there are three types of bundles in Maker 3. You can choose one that fits your regular needs.
1. Essentials Materials Bundle
This Maker 3 bundle includes a Basic and Essential tool set. You’ll get a weeder, scissors, a scraper, and a scoring stylus. Plus, you’ll get Smart vinyl and iron-on in different colors. So, along with all the essentials in the Maker 3 box, you’ll get the bundle items. See the list below.
2. Everything Materials Bundle + Subscription
This is one of the best Cricut Maker 3 bundles which is available along with a Cricut Access subscription plan for a month. So, if you get this Cricut bundle, you can use the subscription for free. Isn’t it a great deal? Are you ready to see what is included in this bundle? Here is the list.
As this machine allows you to use the smart Cricut materials, all the projects you’ll make will be fun. And you will not run out of materials. Let’s look at the last bundle.
3. Bundle for Card Making
If you are looking for a particular Cricut bundle for your cards, this bundle will be perfect for you. So, hang on and see what it gets you.
That’s all for the Cricut Maker 3 bundles. As Maker 3 is a versatile machine, its bundles are also loaded with the highest quality tools and smart materials.
Where to Get the Cricut Accessories Bundle?
Cricut bundles are available on the Cricut’s official website. You can navigate to design.cricut.com to see all the bundles out there to choose from. These bundles are available for every Cricut cutting machine, like Maker 3, Explore Air 2, Joy, etc. Moreover, these robust bundles include all the important Cricut accessories needed to create a project.
It includes almost everything, so there will be no shortage of materials while you are making something with it. You will get a 30-day free access for the Cricut Access subscription in the Everything bundle of a Cricut machine. So, isn’t it interesting to get a handful of things at once?
Are Cricut Bundles Worth It in 2024?
Obviously, yes. Getting bundles is not a waste at all. In fact, it is the most useful thing you can ever do in your crafting journey as a beginner or as a high-level crafter.
If you buy Cricut bundles along with the machine, you can save a hefty amount of money, which is way better than buying each product separately. And, you will also save a lot of time in deciding what you want and arranging it then.
Overall, buying bundles is completely worth it in 2024 and all the years ahead due to the immense benefits of buying so. Therefore, if you want to get more in less, don’t wait for too long to get a Cricut bundle for yourself.
Conclusion
Cricut Maker 3 bundles are great if you are looking for a full package of necessary Cricut Maker 3 accessories. If you often use your Cricut, you will need a bundle to save money and time. Plus, a bundle will also reduce your guesswork when deciding everything related to making a project. So, what are you waiting for? Grab a Cricut bundle soon and start your crafting journey with more excitement and enthusiasm.
For More Information Visit: cricut.com sign in cricut.com/create cricut new machine setup install cricut design space
Source: Cricut Maker 3 Bundles
#Cricut maker 3 bundles#cricut design space download#cricut design space login#design.cricut.com#cricut machine setup#Cricut maker setup#Cricut maker 3#install cricut design space app
2 notes
·
View notes
Text
How to Make Cricut Baby Shower Invitations: Full Guide

A few weeks ago, my sister gave me the news that I was going to be an aunt, and not only would I be the event manager, but I would also be the godmother. After hearing such good news, I am on cloud nine, and countless ideas are coming to my mind to host this event. However, I decided to invite guests by creating cute yet elegant Cricut baby shower invitations and adding a pinch of personal touch to them.
Beyond question, organizing such a grand party isn’t as easy as ABC since I will be in charge of the event. But many thanks to my husband and children for supporting me every step of the way. Apart from my family members, my Cricut machine will also help me in designing customized cards for guests.
Let’s start giving a perfect look to this unique custom-made craft without wasting even a moment.
Which Cricut Tools Should I Use for Creating a Custom Card?
After researching for hours, I finally decided to design the cards in the shape of baby onesies. Like other projects, I will need some tools to help me make the project in perfect condition. However, I must learn everything about them to finish them smoothly without technical issues. Below, you will get to know about all the craft plotter supplies that are involved in this crafting process:
Cricut cutting machine
Design Space account
Cricut cutting mat
Any inkjet printer
White & Pink printing paper
Cricut blade
Strong adhesive glue
How Can I Make Cricut Baby Shower Invitations?
I will observe this paragraph to make cute welcome cards with Cricut products at home. Moreover, I need to finish this do-it-yourself craft without skipping any step. Have a look at the details given in the below pointers:
Step 1: First, Make a Design on the Cricut App
Download the Cricut app on your devices in the opening stage of making this craft. After the successful installation, create your separate account by entering my email ID & password inside the blank. Next, press the New Project button, and your Design Space canvas will appear on your screen.
At this point of designing baby shower cards, click Upload and insert the onesies outlet from your system download or Cricut folder. Now, press the Complex button on the right side of your onesie outlet. Afterward, select the Save as a cut image, followed by the Save button.
Once the outlet gets shifted to the canvas, make it a little bigger and choose the Duplicate option on the screen’s right side. When the image gets duplicated, change its color by pressing the Materials color box. Now, tap the Text toolbar and enter the space with the text you want inside the outlet. Next, tick the Weld box and fill in the space between the words and the alphabet.
Following this, duplicate your onesie in white, change its color to Blue, and choose the Send to Back option. Afterward, place it at the back of the white onesie and increase its size compared to the white one. After doing that, select the other design and press the Attach button given at the bottom right hand of the canvas. Now, choose the white onesie design and tap the Attach option.

Step 2: After That, Print Your Onesie
To take out the printout of Cricut baby shower invitations:
Insert the pink and white color printing paper inside your printer.
Wait for a few minutes till your printer is printing on the loaded paper.
After getting the printout, remove the pages from the machine and prepare for the cutting process.

Step 3: Next, Cut Your Onesie Design
Further, including the process, unbox your craft plotter, open your Clamp, and insert the compatible blade inside it. Following this, unbox your Cricut cut mats with the brayer tool. Next, put the printouts one by one inside the cut-die machine. After your craft plotter cuts the printouts, unload them and place them at the side of your table.
Step 4: Lastly, Put the Finishing Touches
Remove the cutting mat from your craft plotter after finalizing the baby shower card-cutting process. Afterward, peel off the extra material from the mat and keep the onesie project on the other side of the table. Then, turn the white onesie upside down and apply glue to it.

Besides this fantastic DIY craft, you can do multiple projects with the cut-die machine and other supplies. Some custom-made projects include keychains, coasters, t-shirts, onesies, baby signs, etc.
Frequently Asked Questions
Question: Can I Make a Baby Shower Onesie Using the Cricut App?
Answer: You can easily make custom-made onesies out of the Cricut app. Cricut Design Space Software is a design that works with the cut-die machine during cutting. While making the design, create the design with various tools such as images, text, templates, and others. The app will also offer a Cricut Access plan by paying a certain amount.
Question: What Are Various Baby Shower Projects That Can Be Made Out of Cricut?
Answer: The different baby show projects that electronic cutting machines can make for baby shower events are as follows:
Banner
Boxes
Cake toppers
Photo Booth
Custom made t-shirts
Greetings card
Hats
Onesies
Question: How Do I Create Cricut Baby Shower Invitations?
Answer: Read the below pointers and learn about making Cricut baby shower cards:
Go to the Cricut Design Space application and sign in to your account.
Next, choose your template from the Upload gallery and insert text and color.
After that, take out the printout of the device and load the material on the machine.
Now, unload the mat from the cutting machine and remove the design from the Cricut cut mat.
Finally, you can make this do-it-yourself craft and give it as a gift at the party.
Source: How to Make Cricut Baby Shower Invitations
#cricut baby shower invitations#cricut design space download#cricut design space software#cricut design space login#cricut.com/setup login#cricut design space desktop#design.cricut/setup#cricut explore air 2 setup
2 notes
·
View notes