
designsmartcricut
David Adam
Hello, I'm David Adam, a Graphic Designer based in the vibrant city of New York. When I'm not creating eye-catching visuals, I'm diving into the world of DIY projects, crafting, and hands-on creativity. Web development is another passion, and I love designing user-friendly digital experiences. Join me on this creative journey, and let's explore the art of design and the magic of DIY together. Cricut Machine Setup
23 posts
Don't wanna be here? Send us removal request.
Last Seen Blogs

lonely-roadd
We're all gonna die

kerizaret
KeRiZaReT

123winv
123WIN 🎖️ LINK VÀO NHÀ CÁI 123WIN WIN【TẶNG 123K】

suvurilodar
Untitled

funfettimix
jubilation's free
Text
If you are into DIY crafting, you’re likely familiar with the challenge of cutting designs precisely. But now, the Cricut machine takes care of it all: cutting, writing, scoring, foiling, and engraving different materials with unparalleled accuracy. Just get familiar with its Cricut Design Space software by downloading and installing it from cricut.com/setup. Once done, you can explore its advanced features and functions to design, upload, create projects, and command the Cricut machine setup easily.
0 notes
Text
Cricut Setup: A Complete Guide for Easy Installation
A few days ago, I got a new Cricut machine. I have been using the older version, but I moved to the latest one because it has many incredible features. After a long time, I had to perform the Cricut setup. If you are a beginner and don’t know much about how to setup Cricut, you are in the right place!
I have noticed among novice crafters that they are afraid to set up their Cricut machines. I also felt the same way. Anyway, I have now come up with the best and easiest way to explain everything about setting up the Cricut machine. Let’s delve into the blog below, and let me guide you through setting up the machine in no time. I will explain for Windows computers only. Let’s get started!
Step 1: Unboxing Your Cricut Product

Beforethe Cricut setup, you need to unbox your machine. Inside the machine, you will get many items, including accessories. Have a look at the following list of items:
Cricut Machine
Welcome Book
Rotary Blade With Drive Housing
USB Cable
Power Adapter
Free Trial Membership to Cricut Access
Premium Fine-Point Blade With Housing
Fine Point Pen (Black)
Materials For A Practice Project
Warranty Document
Fabric Grip Machine Mat
Lightgrip Machine Mat
50 Free Ready-To-Make Projects, Including 25 Sewing Patterns

Step 2: Power on the Cricut Machine
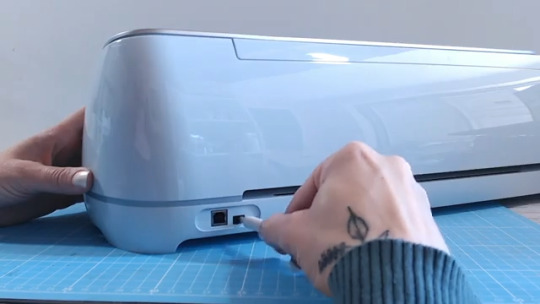
First, you need to plug the power cable into the Cricut machine. Then, plug the other end of the cord into the power wall outlet. Now, you have to pull the lid to open it gently. Afterward, remove all the foam pieces from the clamps. Next, hit the power button on the top of your machine. Once you have turned on the machine, proceed to the following step.
Step 3: Connect Cricut to a Computer via Bluetooth
Establishing a connection is a must for the Cricut setup. Let’s connect the Cricut product to the PC using Bluetooth. Although we can connect Cricut with a USB cable, I often prefer a wireless connection.
Head to the Windows icon on the taskbar.
Click on it and select a gear-like icon, i.e., your Settings > Devices.


Then, select Add Bluetooth or other device.
Next, click on the Bluetooth option and let your PC find your Cricut machine.

Once your Bluetooth detects the machine, click on the model name from the list.
Now, you have connected your Cricut to a Windows computer via Bluetooth.
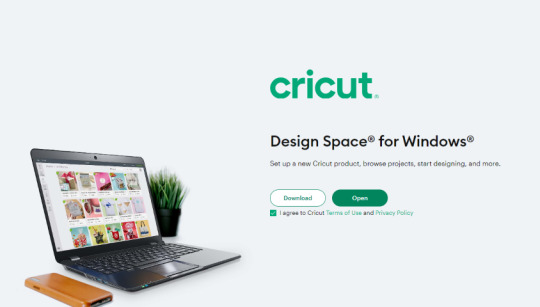
Step 4: Downloading the Cricut Software
Here are the steps to download the Cricut Design Space app, which is a must-have software for the Cricut setup:
Head to the browser search bar and type the URL design.cricut.com.
Next, tap on the Enter key on your keyboard.
Later, you will go to a page where you must select a checkbox.
Now, click on the Download tab to download & install the Cricut app.
Once the download has begun, follow the instructions on the display to install the application.
Once you have downloaded the app, you need to connect your Cricut to your Windows computer using Bluetooth.
Step 5: Creating a Cricut Account ID
Now, let’s create a Cricut account, which is essential for the Cricut setup. Below, I have explained everything stepwise to make you understand easily:
Visit design.cricut.com on your internet browser.
Then, click on the Get Started button on the screen.

Enter your details, including your name, last name, and email address. Also, select a country such as the United States, Canada, and the United Kingdom.
Here, you will need to read the Cricut terms of use and click on the checkbox to accept it.
If you want to receive Cricut tutorials, you will need to check the box that says Send me Cricut Tutorials, inspiration, and deals via email.
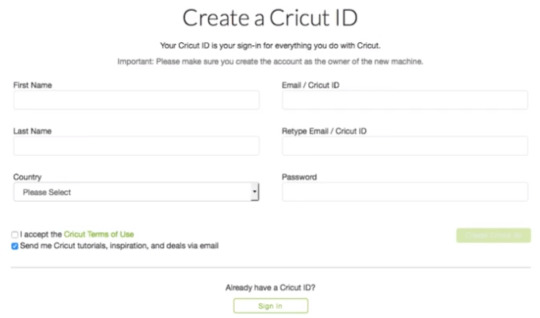
Once everything is done, click on Create User ID.
Lastly, you will be asked some questions, answer them, and proceed by following all the prompts.
FAQs
Question 1: What do I need to do for Cricut setup?
Answer: If you are setting up your Cricut machine, you will need to do the following:
First, you must connect your Cricut to a computer or smartphone using Bluetooth or USB cable. However, you can’t connect to a smartphone with a USB cable.
Second, you need to download the software to setup your Cricut machine.
Question 2: How to sign in to a Cricut account?
Answer: Signing to your Cricut account is a breeze. To sign in, you need to follow the steps below.
Open an internet browser.
On its search bar, you have to search fordesign.cricut.com.
Then, enter the email and password.
Finally, you need to hit the Sign In tab.
Question 3: How to get my Cricut ID and password back?
Answer: In case you have forgotten your Cricut account password, you have to hit the Forgot Password link. You will need to link on the sign-in page on cricut.com, Design Space, or Design Space mobile apps. You will get an email with a link to reset the password.
0 notes
Text
How to Download Cricut Design Space: A Stepwise Tutorial
Crafting with Cricut is fun. Also, pairing your Cricut machine with the Design Space software makes the process easier and time-saving. But what if you don't know how to download Cricut Design Space and install it on a device you want? Luckily, I can help you with all these. I have been into crafting for years and can't explain in words how amazing it is to pair the Cricut machine and its software to get started with DIY projects. However, if you are a beginner, you might find it a bit tedious to download and install the Cricut software on your particular system.
To help you out, I have created this simple tutorial. It explains step-by-step instructions for downloading and installing the Cricut app on Windows and Mac computers. So, if you want to enhance your creativity and create projects in a time-saving way, go for it. Read this well-explained blog post and find out more.
Minimum System Requirements for Cricut Design Space
If you want to run the Cricut software smoothly on your device, you first need to make sure that your systems fulfill the minimum system requirements. In this section, we will discuss the minimum system requirements for Windows and Mac computer users.
Windows
Windows users can check these minimum system requirements to ensure that their systems are compatible with the Cricut Design app. Make sure to consider these Cricut Design Space system requirements for Windows 10 and other versions.
Operating System: Windows 10 upgraded versions
CPU: It should be an Intel Dual-Core or similar AMD processor
Display: Minimum 1024px X 768px screen resolution is needed.
RAM: Minimum 4GB RAM
Connection: USB port or Bluetooth connection feature
Free Disk Space: At least 2GB
Broadband Connection: 1-2 Mbps for uploading and 2-3 Mbps for downloading
After learning about the system requirements for Windows systems, next is the time to cover the requirements for Mac devices.
Mac
Are you a Mac user? Cricut software is also compatible with Mac devices. However, your system must meet the minimum system requirements to run the application. Review the detailed list of minimum system requirements before learning how to download Cricut Design Space.
Operating System: mac OS or the upgraded versions
CPU: It news to be a minimum of 1.83 GHz
Display: Screen resolution should be 1024px x 768px
RAM: Minimum 4GB
Connection: Available USB port or built-in Bluetooth feature
Free Disk Space: 2GB of free disk space available
Broadband Connection: Minimum 1-2 Mbps for uploading & 2-3 Mbps for downloading
Once you are assured of the requirements, you can download and install the Cricut app on your systems. Keep reading it to find the easiest ways to have the Cricut software on your devices. We will start the process with Windows computers.
How to Download Cricut Design Space on Windows?
Looking for the Cricut Design Space download for Windows 10? Luckily, here are some quick steps to help you with the process. Follow them and use the Cricut Design app on your Windows computer.
Begin the process by moving to your Windows computer.
Now, open the browser of your choice.
Next, go to the Cricut's official website.
After that, select the Download option.
Further, start downloading the Cricut Design Space.
Make sure not to stop the downloading process.
Once the downloading process ends, you can see the downloaded file in your browser.
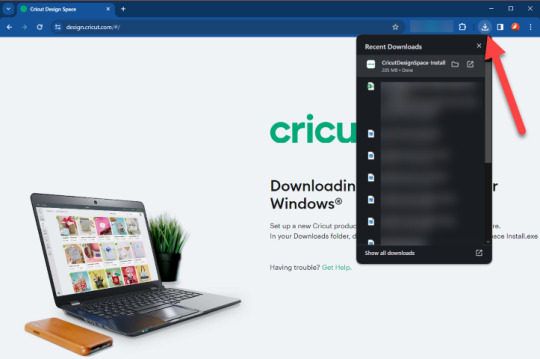
However, if you can't see the downloaded file, move to the Downloads folder.

Thereafter, open the folder and look for the downloaded file.
Once found, double-click on the file.
After that, choose the trust application option.
A setup window will appear, showing the progress of the software.
Go back to your Windows screen.
Now, your job is to open the app and create your account.
Also, type in all the details to create your account.
Alternatively, use your Cricut ID and password.

I hope these steps have helped you to download the Cricut software. After you install the app and create an account, you can start creating projects.
How to Download Cricut Design Space on Mac?
Mac users can also use the Cricut app by downloading and installing it on their systems. Below are the steps that you can follow to start with the software download and install.
First of all, move to your Mac computer.
Now, open the browser.
Move to the Cricut official website on your system.
After that, look for the Cricut Design Space link.
After you find the app link, tap on it.
The Cricut app will then start downloading on your Mac computer.
Now, the app will download on your Mac.
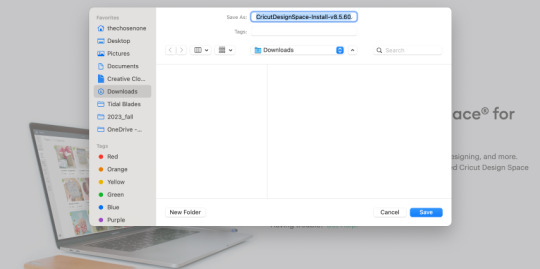
Go to the Downloads folder on your system.

Double-click on the download file.
Thereafter, drag the Cricut app icon to the Applications folder.
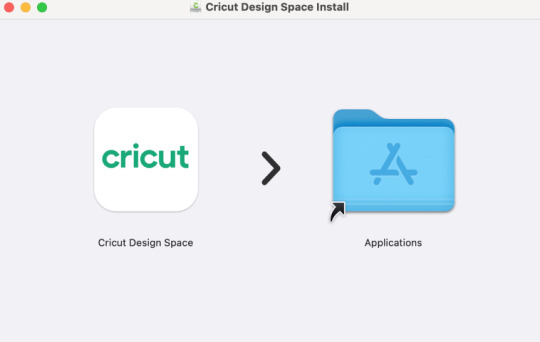
You will see that the installation process has begun automatically.
Open the Applications folder and double-click on the Cricut software.
Tap on Open when the pop-up appears to open the application.
Finally, sign in to your account or create a Cricut account.

With these steps, you can easily download Cricut Design Space for Mac free. The only thing you need to consider is following the steps carefully.
Conclusion
Cricut Design Space can help you create outstanding projects by providing access to various images, fonts, designs, and ready-to-make projects in its library. Crafters can find this Cricut software's compatibility across various Cricut machines and devices more impressive. So, whether you have a Windows or Mac computer, verify the minimum system requirements and learn how to download Cricut Design Space. It will help you carry out your projects with efficiency.
Frequently Asked Questions
How to Create a Cricut Account?
Once you install the Cricut app, you will need to create a Cricut account on your system. Follow these instructions and do it effortlessly.
Firstly, go to Cricut Design Sapce's official website.
After that, click on Let's Get Started.
Then, type in all the details.
Next, hit the Create Cricut ID option.
Click on the Continue button.
Finally, start crafting with your login credentials.
How Can I Download Cricut Software on My Android Phone?
Are you looking for instructions on how to download Cricut software? This app can be downloaded on an Android phone. Perform these steps to download it.
Firstly, find the Play Store on your device and open it.
Now, look for the Cricut Design Space.
Move to the Install button and tap it.
The installation will start automatically.
Now, you can see the app appearing next to other applications.
Lastly, sign in to the Cricut app and begin crafting.
How Do You Log in to a Cricut Account?
After creating your Cricut account, you must log into the app. Go through these steps to log in properly.
Initially, open the Cricut app on your system.
Move to the Cricut Sign-In page, then.
Next, type in your Cricut ID and password.
Now, tap the Sign in button.
#cricut.com/setup windows#cricut design space download#cricut design space#cricut design space login#design.cricut.com/setup#cricut explore 3#cricut machine setup#Install Cricut Design Space App#cricut.com/setup#How to download Cricut Design Space#Download Cricut Design Space for Mac free#Cricut Design Space download for Windows 10#Cricut Design Space system requirements for Windows 10
0 notes
Text
youtube
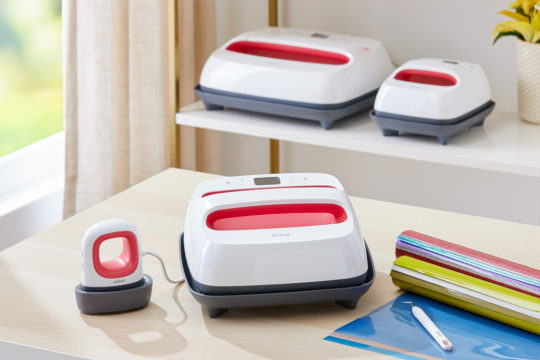
Cricut produces smart DIY cutting machines, including Cricut Maker, Explore, Joy, and various heat presses. These machines work with the intuitive design app Setup Cricut.com, which is easy to use and provides various latest features. With this software, you can create many exceptional designs for your everyday projects, like invitation cards and customized stuff such as T-shirts and bags. Get the Cricut Design Space software and set up your Cricut machine setup as soon as possible to take advantage of its excellent features via cricut.com/setup.
#What is a Cricut Machine#Cricut.com/setup#cricut.com/setup mac#cricut design space#design.cricut.com/setup#cricut explore 3#cricut accessories#Youtube
0 notes
Text
How to Use Cricut EasyPress 2?[A Beginner's Guide]

The Cricut EasyPress is my favorite heat press machine when it comes to making T-shirts. When I bought my first Cricut machine, it took me a while to set up the Cricut EasyPress for the first time. So, when I started my business, I usually used a regular iron for projects. However, as my business grew, I felt the need for a Cricut EasyPress machine. Having used this machine extensively, I will guide you on how to use Cricut EasyPress 2 effectively.
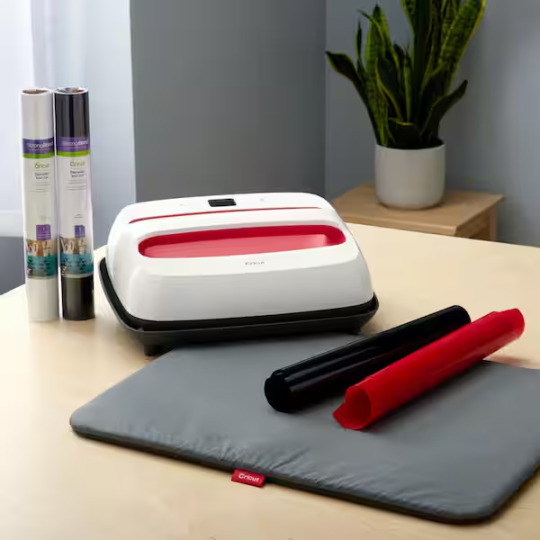
One thing to note for all the beginners thinking about buying this machine is that it is really powerful, with great capabilities to adjust the temperature and time according to materials. Therefore, if you are interested in getting it, I highly recommend it. Let’s learn a little more about it.
Cricut EasyPress 2: An Overview
When I used to make my projects, I never used a heat press. And the regular iron used to take too long to prepare an iron-on project. Also, working with infusible ink with a normal iron is just impossible. So, you will need to buy an EasyPress by hook or by crook.
What Will You Need to Use a Cricut EasyPress 2?
A Cricut machine is in the box already. Apart from this, you will need iron-on vinyl, which you will cut with your cutting machine. Cricut infusible ink is also there in the list, which you will need to make iron-on shirts and other projects.
To clean the projects, you will also need a weeding tool. This tool will clear out the excess vinyl from your final cuts. Lastly, an EasyPress mat is necessary to protect your work surface from heat damage. So, you can place your material on that mat and then apply the heat.
How to Use Cricut EasyPress 2?
Using a Cricut EasyPress 2 is quite easy and doesn’t take much time. I hope you guys know the procedure to cut an iron-on vinyl from your Cricut cutting machine. So, I won’t explain that portion and will start only the process for EasyPress. Below are the instructions to use a Cricut EasyPress 2 machine.
In the first step, I expect you to cut your design and weed out the excess vinyl with a weeding tool. Don’t forget to mirror your design before cutting.
Now, ON your Cricut EasyPress machine, adjust the temperature with the help of a thermometer, and use the arrow keys. (The Cricut Heat guide will help you choose the right temperature for your material)
When you notice the red light turning green, it indicates that the machine is all set. And you will also hear a beep.
Now, put the blank on your EasyPress mat.
Press your blank for about 5 minutes to warm it up for the actual pressing. Plus, a pre-heat will remove the wrinkles from your material.
Next, place your iron-on vinyl onto the blank and make sure that the shinier part is facing up.
It’s time to set up the timer on your EasyPress and learn the process of how to use Cricut EasyPress 2.
Apply gentle pressure while pressing your material.

Once the time is up, a beep will be produced. Then, place your EasyPress back to its base.
Allow your design to cool completely.
Now, remove the plastic backing from the vinyl.
If your material needs more heating, it’s ok to press it for a little longer.
That’s it for the Cricut EasyPress 2. You can try this out and create any of your favorite stuff to utilize the machine.
Conclusion
Do you know how to use Cricut EasyPress 2 now? Hopefully, you do. See, this machine is damn easy to use, and you will feel too comfortable with it once you start using it. However, you must master the cutting part with your Cricut cutting machine. Only then can you utilize a Cricut EasyPress for your projects. When you start using this machine, you will realize how wonderful the machine is.
Frequently Asked Questions
Q.1 How to Use Cricut EasyPress for Beginners?
Beginners should use the Cricut Heat guide/Heat app to learn howto use Cricut EasyPress 2and set the project settings for desired results. You can press the timer and use the +/- buttons to set the required time. To set the required temperature, you can press the temperature button and adjust it with the help of the +/- buttons. When your Cricut EasyPress starts flashing an orange light, it’s getting heated. Make sure to use this machine with caution.
Q.2 How to Use Cricut EasyPress Mini?
Cricut EasyPress Mini is for smaller projects, and it works great. To use this machine, place your material on the shinier side up on the surface. Then, apply heat and start the timer. After that, start using the EasyPress Mini across your material and cover the whole design, such as the edges and center, until the time goes 0.
Q.3 What Can I Use With My Cricut EasyPress?
A Cricut EasyPress machine is a combination of an iron and a heat press. So, it is perfect for your regular DIY projects. It has the capability to provide quality and precise heating without complicated procedures, and you will feel it like a normal iron. Mostly, users use this machine to transfer the iron-on vinyl or HTV to the fabric or other materials. You can also use the infusible ink to create something with your Cricut Heat Press.
0 notes
Text
How to Use Cricut Mug Press: Create a DIY Craft
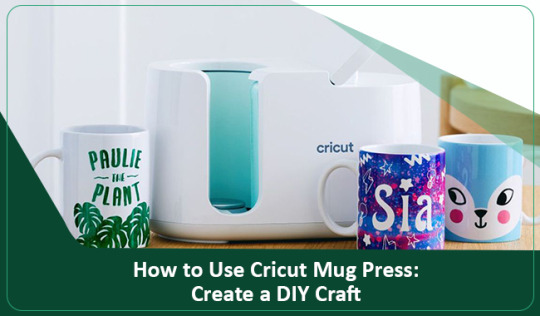
Hey, fellow crafters! Do you want to learn how to use Cricut Mug Press and create awesome projects? If yes, then I am going to help with every crucial information and process to make a custom cup art. The Cricut Mug Press is an easy-to-use machine that helps in achieving brand-like results without prior experience.
However, new users who do not know where to start might need some guidance. As a result, I will give you a stepwise guide to setting up the Mug Press machine and getting the essential supplies before starting to work on the project. So, walk through the whole content carefully and create your first-ever customized mug project now.
Steps to Setup Cricut Mug Press on a Computer
Here are the steps you have to follow to set up your Cricut Mug Press machine.
Initially, go to the Cricut official website on your Mac or Windows computer.
From the website, you have to download and install the Cricut Design Space app.
If you already have the Cricut Design Space app on your device, then open it.
On the app, use your Cricut account credential to sign in. (If you do not have an account, then choose the option to make a new Cricut ID).
Then, the Welcome to Cricut Setup page will appear on the display; choose the options Heat Press > Cricut Mug Press.


Now, perform the prompts on your screen to finish the Mug Press connection process.
Click on the Get Started option when the machine setup is complete and create a mug design.
Materials You Will Need for Creating a Personalized Mug
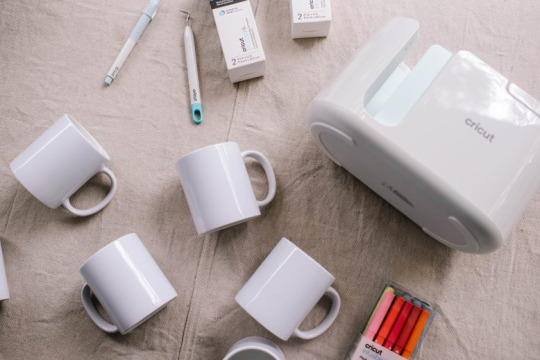
In order to learn how to use Cricut Mug Press, it is necessary to know what essential supplies you require. Let’s see what supplies you require for this project.
Cricut Mug Press machine
Any Cricut cutting machine (I am using the Cricut Maker 3 machine)
Cricut EasyPress mat or towel
Cricut Infusible ink
Weeding tool
Cricut StandardGrip Mat
Cricut ceramic blank cup, and others.
The Process to Create DIY Mugs Using Cricut Mug Press
If you are sure your Cricut Mug Press setup process is complete and you have all the vital supplies, then you can start working on the project. Here is a simple step-by-step guide on how to use Cricut Mug Press to create a DIY craft.
Step 1: Creating a Design for Your Cup
In order to create a customized cup project, the first process involves creating the design.
For that, you have to launch the Cricut Design Space app on the device to which your cutting machine is connected.
You are free to use images, patterns, texts, or even upload your design/image. (If you are making a text design, then don’t forget to mirror the design.)
Now, you can send the design for the cut when it is complete.

Step 2: Cutting Your Design With a Cricut Cutting Machine
Take your infusible ink sheet and lay it on the Cricut mat.
Next, carefully load the mat onto your Cricut cutting machine.
And then, head back to the Cricut Design Space app to choose your cutting machine and material.
After that, follow the instructions and click on the Make It option.
Then, the machine will start cutting the design on your device.
Once the design cut is complete, unload the mat and infusible ink sheet and remove the extra parts with the help of the weeding tools. Now, move to the 3 steps to finish the process of how to use Cricut Mug Press.
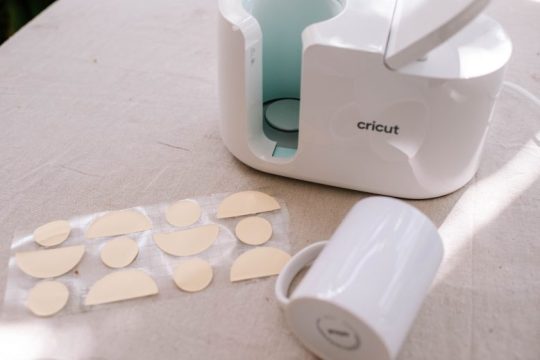
Step 3: Transferring the Design to Your Cup
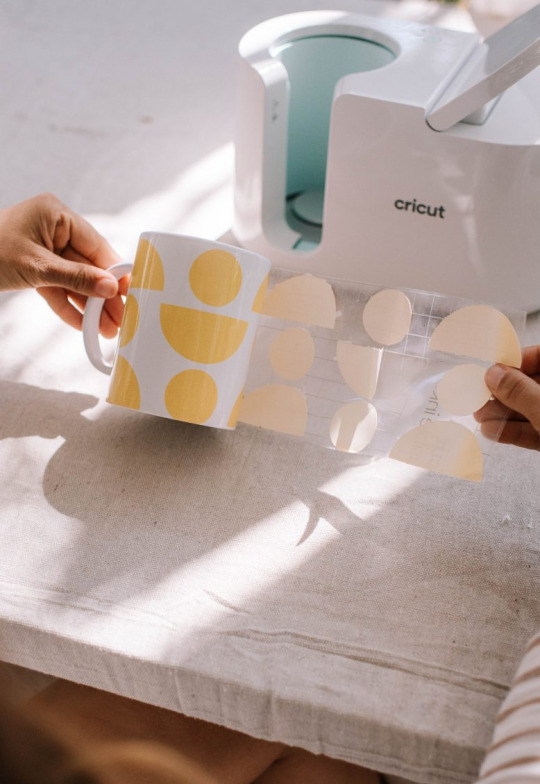
With the help of a clean cloth and lint roller first you have to clean the dust off the Cricut cup blank. (If the cup has dust or dirt, then the design will not come out perfectly.

Now, take the design sheet and carefully wrap it around the cup. (Make sure the design perfectly fits on the cup and is in a straight line.)
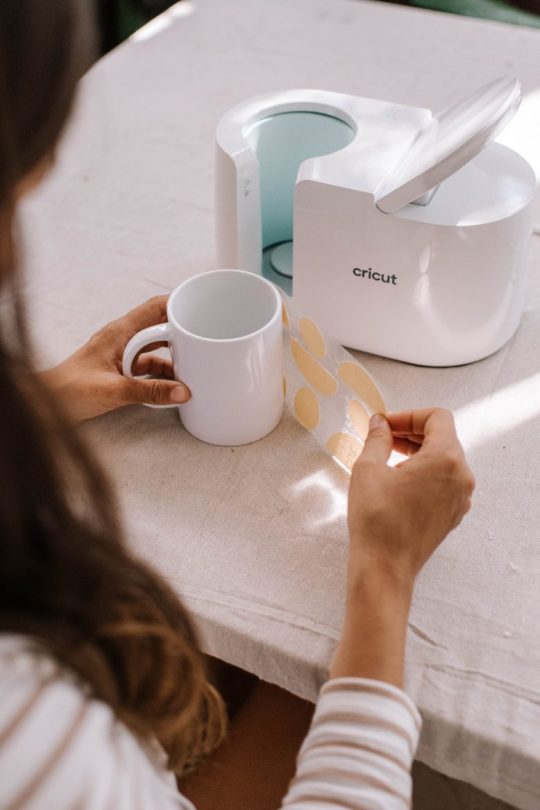
Moreover, load the cup into your Cricut Mug Press machine properly, as shown in the follow-up image.
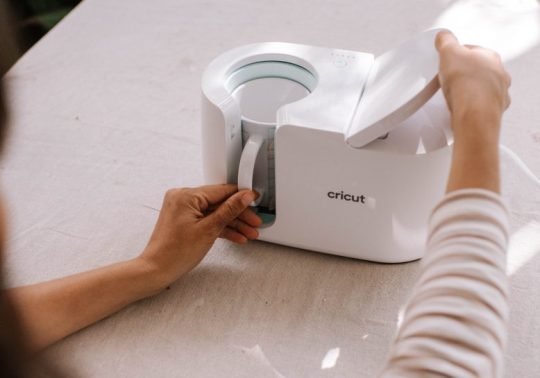
Afterward, the machine will start to make a beep sound, and the power button will start to flash.
Now, lift the machine lever to start the machine and then turn it off when the heat press is complete.
Once the process is complete, remove the cup from your Cricut Mug Press machine and remove the transfer sheet.
Here you go; your DIY cup project is complete.
You can use the same guide to create a variety of other customize cup designs.

Frequently Asked Questions
Q.1 How to Use Cricut Mug Press With Infusible Ink?
These are the complete steps to create a DIY project with the help of a Cricut Mug Press machine and infusible ink.
For the first step, you have to set up the Cricut Mug Press machine. (Also, set your cutting machine)
On the Cricut Design Space app, choose the design, text, or ready-to-make project.
After that, cut the design on an infusible ink sheet with a cutting machine.
Next, apply the sheet to the cup when the cut is complete.
Now, insert the cup into your machine and then transfer the design.
Finally, your cup design will be complete.
Q.2 Why Should I Use Cricut Mug Press for Customized Projects?
Cricut Mug Press is an advanced and easy-to-use machine that provides pro-level cup art. This machine works with the other cutting machine to complete the project. Its simple features make it beneficial to use even if a crafter is a complete beginner. With the help of this machine, carters can explore their crafting passion or set up a small business to earn some extra cash. If you want to create brand-like, long-lasting designs on the cup, then the Cricut Mug Press is a great option.
Q.3 What Are the Basic Supplies You Need to Use Cricut Mug Press?
Here are the basic supplies a crafter must have when they want to create a project with a Cricut Mug Press machine. Also, keep in mind that the supplies can vary according to the design you choose.
● Cricut cutting machine (Cricut Joy, Explore, or Maker)
● Cricut Mug Press machine
● Weeding tool
● Cricut StandardGrip Mat
● Cricut ceramic blank cup
● Cricut Infusible ink
● Cricut EasyPress mat or towel, and others.
#How to use Cricut Mug Press#Cricut Design Space app#Cricut Mug Press setup process#install cricut design space app#cricut.com/setup#cricut.com/create#cricut design space#cricut design space login#cricut design space download#cricut design space for mac#How to setup cricut maker
0 notes
Text
How to Connect Cricut Maker 3 to Bluetooth: Ultimate Guide
The Cricut Maker machine is one of the most versatile and advanced crafting tools. This machine has a plethora of features, and its design is also great. I have been using this tool for a long time now. And I have always preferred this machine to any other cutting machine available on the market. In order to complete the setup of this machine, it is necessary to establish a Bluetooth connection. However, many users do not know the process to connect Cricut Maker 3 to Bluetooth. If you also want to learn the Bluetooth connection on Windows, Mac, Android, and iOS, then keep reading this blog until the end.
Connect Cricut Maker 3 to Bluetooth on Your Computer
The Cricut Maker machine can connect via Bluetooth to Windows and Mac computers. So, below are the guides you can use on your respective device to complete the connection process.
Windows
Please turn on your Cricut Maker machine and ensure that it is within the 15-foot range of your Windows PC.
Now, move to your Windows device and access the Devices window from settings.
Check if the Bluetooth option is ON and then select Add Bluetooth or other device.

On the next page, choose Bluetooth to scan for your Maker machine.
When your Cricut machine name appears on the screen, then select it.

Wait for the Bluetooth pairing of the machine to complete.
After that, you can go to the Cricut Design Space app to complete the machine setup.
Mac
Before you switch on your Cricut Maker machine, place it within a 15-foot range of your Mac system.
Now, move to the Apple menu and choose the System Preferences option.
On the open window, click on the Bluetooth option.
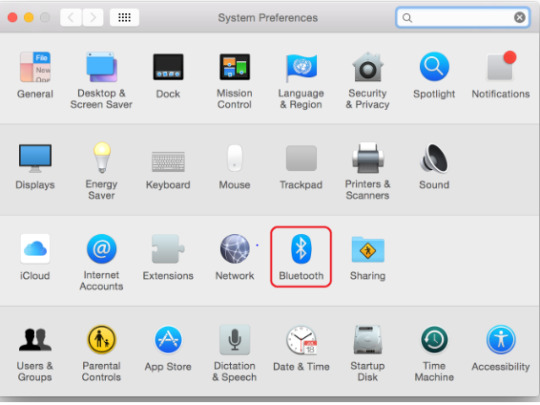
Afterward, ensure the Bluetooth option is enabled, and then select the Maker machine name when you see it on the screen.
Finally, Bluetooth pairing of both devices will be complete.
If you want to perform the Cricut Maker machine setup process, then download or open the Cricut app and select the option Machine Setup.
Connect Cricut Maker 3 to Bluetooth on a Smartphone
If you want to connect the Cricut Maker 3 machine via Bluetooth to an iOS or Android device, then here are the easy procedures you can follow.
IOS
Keep the Maker machine near your iPhone/iPad, then turn it on.
From the home screen of your iOS device, choose the Settings option.

Now, please move to the Bluetooth toggle and ensure that it is on.
When the machine name appears on the screen, then click on it.
After that, the Bluetooth connection between both devices will be complete.
Download and install the Cricut app to complete the machine setup process.
Android
Ensure that your Cricut Maker machine is within the 10-15 feet range of your mobile phone.
After that, please turn on the machine by plugging it into a power source and pressing the power button.
Now, open the Settings window on your Android device and go to Bluetooth.

When you turn on the Bluetooth, your device will start searching for nearby Bluetooth devices.
Once your Cricut Maker machine name appears on the screen, then click on it.
Lastly, your Cricut machine and Android device will be connected via Bluetooth.
Conclusion
Here, you learned about the complete guide to connect Cricut Maker 3 to Bluetooth. You can use the Bluetooth connection process based on the OS device you are using. If you face any issues on the first attempt, then carefully follow the process once again. If the problem persists, then you can contact the Cricut customer care team to clear your queries. In addition, if you require more profound help, then connect to a team of Cricut experts to get instant solutions.
Frequently Asked Questions
Why Is My Cricut Maker 3 Not Connecting to Bluetooth?
In various situations, you may be unable to connect the Cricut Maker 3 machine to a Bluetooth device. The problem can arise due to device incompatibility, devices being far from each other, following the wrong connection procedure, and others. If you are having any issues connecting your device, check all the earlier-mentioned points and try again. If the problem persists, then go to professional help.
Which Devices Are Compatible With Cricut Maker via Bluetooth?
Cricut Maker is a fantastic device that comes with both wired and wireless connectivity options. Crafters can connect this machine to both computer and smartphone devices. This cutting machine easily connects to Windows, Mac, iOS, and Android devices via Bluetooth. However, it does not work with Chromebooks. Plus, you can use the USB cable if you want to establish a wired connection between the machine and your PC/smartphone.
How to Connect Cricut Maker 3 to Bluetooth on Mac?
You can follow these steps if you want to connect Maker 3 to a Mac via Bluetooth.
Switch on the Cricut Maker machine and keep it within 15 feet of a Mac computer.
After that, open the System Preferences window on your system.
Next, choose the Bluetooth option on the open page.
After that, your Mac system will start searching for nearby Maker machines.
Once the right machine name shows up on the screen, click on it.
Lastly, the Bluetooth connection process of your Cricut Maker and Mac will be complete.
0 notes
Text
DIY enthusiasts are highly dependent on Cricut for their crafts. It cuts and crafts the materials extraordinarily. So, enjoy the freedom with Cricut and take your projects to the next level. So, whether you want a portable or a robust machine like Cricut Venture for business, Cricut has all types of cutting machines. However, when you buy a new Cricut, you must set it up. To do this, you need to go to cricut.com/setup. Using this website, you can also set up your Heat Press and cutting machine.
1 note
·
View note
Text
How to Use Cricut Pens and Markers: Start-to-Finish Guide

Welcome! I have been helping my fellow aspiring crafters learn something new about the Cricut machine. In this blog, I will walk you through a comprehensive guide on Cricut pens and markers. Plus I will also give you a step-by-step guide on how to complete a project with Cricut markers and pens.

Cricut pens & markers are specially designed to fit perfectly on Cricut machines to produce stunning results. Follow me through the blog to learn more about them in more depth. So, let’s get started without wasting any further time.
Essential Supplies to Use With Cricut Pens and Markers
In order to learn how to use pens & markers and create a project, it is necessary to understand the essential supplies it requires. These are some supplies you need for that.
Cricut smart cutting machine
Cricut apparel blank (compatible with Infusible Ink)
LightGrip machine mat
Infusible ink pens or markers
Lint roller
Tweezers
Cricut Design Space software on a mobile device or computer
Cardstock (80 lb.), White (colored cardstock not recommended)
Cricut EasyPress, Cricut EasyPress 2, or Cricut EasyPress 3
Heat Resistant Tape
Cricut EasyPress mat
Laser copy paper
Butcher paper
Scissors
Cricut Heat Guide or Cricut Heat app (The app works with only Cricut EasyPress 3)
The Process of Using Cricut Pens and Markers for Creating a Project
Follow the below procedure step-by-step to create designs with the Cricut pens & markers.
Step 1: Drawing a Design on the Sheet
For the first step, keep a laser copy paper on the mat (Cricut LightGrip) and insert it into a Cricut cutting machine.
Now, open the Cricut Design Space app on your device connected to your cutting machine.
Afterward, choose the designs and resize them according to the apparel blank.
Next, you need to set the Linetype to Draw.
Also, choose the color of your Cricut pen and marker. (also, make sure to turn on the mirror toggle before moving forward.)

Go to the browse material section and choose the option of Copy Paper.
Then, specify the cutting machine you are using. (If you are using Explore Air 2 or any other previous device, then choose a Custom option on the dial).
Now, insert the Cricut pens and markers into the clamp of your cutting machine.

After that, follow the process to draw the design on the paper.
Once the process is complete, then unload the mat from the machine.

Step 2: Preparing the Blank Apparel
Take the Cricut EasyPress mat and place your blank material on it.
In order to protect your project and the mat, you can place a sheet of cardstock inside the apparel.
With the help of a fresh adhesive lint-roll the entire surface. (If the apparel surface has any tiny debris or dirt, then it can ruin your project.)

Now, place the butcher paper on your product.
With the help of the Cricut Heat Press machine, remove the moisture from the surface of the blank product. (To learn about the perfect time and temperature, you can refer to the Cricut Heat Press app or Heat Guide.)
Next, remove the butcher paper and let the apparel cool for a while.
Step 3: Applying Your Design on the Apparel
Now, take your design sheet and place it on the blank product. (Make sure to keep the drawing side down, as shown below.)
With the help of the heat resistance tape, fix each corner of the design sheet perfectly on the blank apparel.
Moreover, keep the butcher paper on the top of the design.
Next, heat your Cricut Heat Press machine according to the suggestion of the Cricut Heat app or Heat Guide on the website.
Once your Heat Press machine reaches the right temperature, then apply the heat on the design for the required time.

When you hear the beep sound on the machine carefully remove the Heat Press machine.
Wait for a couple of minutes, and then remove the butcher paper along with the tape and design sheet.

Finally, your Cricut ink and marker project will be complete.

Conclusion
In this blog, I have shared all the need-to-know information on using Cricut pens and markers to create beautiful projects. In addition, this blog has other info, such as necessary supplies and FAQs, that will help you understand the use of these pens and markers more profoundly. If you are planning to create a pens or marks project, the first thing you should do is gather all the supplies. So, don’t wait now grab your crafting arsenal and start working on your dream DIY craft now.
Frequently Asked Questions
Q.1 What Are Cricut Infusible Ink Pens and Markers?
Cricut infusible ink pens & markers are specially designed DIY tools that help in creating infusible projects. With the help of these pens & markers, crafters can create bright, vibrant, and long-lasting projects with the heat transfer method. Cricut infusible ink markers/pens are designed in a way that fits perfectly on the Cricut cutting machines to write and draw on blank apparel, paper, cardstock, and many other materials. These infusible inks are easy to use and are compatible with all Cricut cutting machines the brand offers.
Q.2 How to Use Cricut Pens and Markers to Create a DIY Project?
These are the steps you can follow if you want to use pens & markers for your project.
For the first step, you have to insert the copy sheet into your Cricut cutting machine.
Then, head to the Cricut Design Space app and create the design you want for your project.
Afterward, resize the design as per your choice and then choose the pen color.
Proceed to the steps of drawing the design with the help of a pen or maker.
Once the process is finished, prepare the apparel and Heat Press machine.
With the help of the Heat Press machine apply the design on the apparel.
Finally, the DIY project with pens and markers will be complete.
Q.3 What Are the Supplies Required to Work With Cricut Markers and Pens?
The follow-up list consists of the supplies you need to create a DIY craft using a Cricut pen/marker.
● Any Cricut cutting machine
● Infusible ink markers and pens
● Cricut EasyPress, EasyPress 2 or EasyPress 3 machine
● Cricut blank apparel compatible with infusible ink
● Heat transfer tape
● Lint roller
● Cricut Design Space software (On phone/computer)
● Cricut mat
● Butcher papers
● Laser copy paper
● Cricut Heat Guide or Cricut Heat app (The app works with only Cricut EasyPress 3), and others.
Source URL: – Cricut Pens & Markers
Visit – Cricut.com/setup
Cricut Maker Machine
Cricut Easy Press
Install Cricut Design Space app
#Cricut pens and markers#How to Use Cricut Pens and Markers#Cricut EasyPress#Cricut Heat Press machine
0 notes
Text
How to Make Stickers with Cricut: A Complete Tutorial
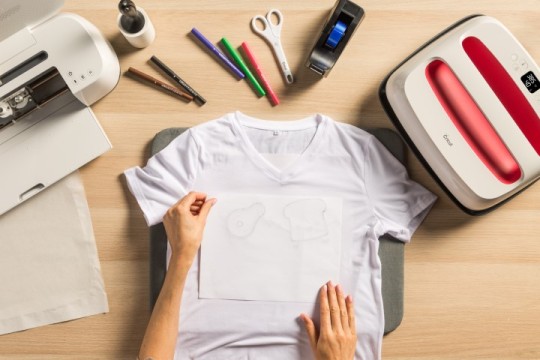
Are your kids asking the same question about how to make stickers with Cricut? If yes, then we are on the same page. Ever since the holidays began, my kids have been asking me so many questions that my head is spinning. But being a mother of two curious kids, I always took it as an opportunity to make them realize that crafting can be fun. For creating custom stickers, I prefer the Cricut Joy Xtra machine.
Apart from introducing them to the concepts of crafting, I took the golden chance and started my own small business. Undoubtedly, it was hard for me to manage everything, but everything started falling into its correct place, helping me expand my business from offline to online. In this tutorial, I will show you all the basic steps to make it easy to create DIY stickers.
What Items Will You Need for Creating Custom Stickers?
There are some essential items that you need to know before discussing how to make stickers with Cricut. Luckily, once you become aware of those items, you can use them for making more projects or more stickers in the future. Refer to the following pointers and get to know the items list.
Cricut Joy Xtra machine
Design Space account
Cricut cutting mat
Material
Sheet
Printer
Lamination sheet
Brayer tool
How to Make Stickers with Cricut Joy Xtra?
Let's proceed toward the total number of steps that you need to take when it comes to creating customized stickers out of the craft plotter. It is okay whether you are a beginner or an expert in creating stickers; it's compulsory to go through the information given below very carefully.
Step 1: Create Stickers in Cricut Design Space
Begin the process of designing personalized stickers by downloading and installing the Design Space on your device. After getting the app, start creating your account on the Cricut app. Now, you need to log in by entering your Cricut ID & password.

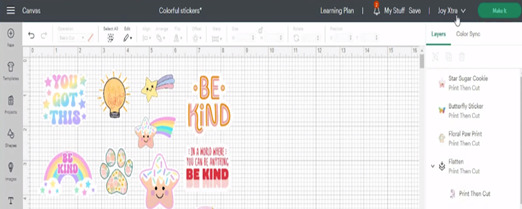
With the successful login, tap the New Project, and you will automatically land on the Cricut app canvas. At the canvas, press the Images icon and search for your image by typing it inside the blank. Next, press Operation Type and tick the Print Then Cut option. After doing that, choose your image from the library and press the Add to Canvas box.

Following this, choose the shooting star design and press the Offset tool given at the top of the canvas. Now, move the offset slider back and forth as per the requirement and tick the Apply box. After doing that, change the border outline from grey to white by opening the Colorbar drop box.
In the process of how to make stickers with Cricut, select both designs and hit the Flatten tool. After hitting the tool, it will instantly turn the design into a sticker, decreasing your workload. Further, repeat the steps for other designs and change their sizes as per your choice. Afterward, click the Make It button visible at the top right side of your Cricut app canvas.
Step 2: Print & Laminate Stickers
Furthermore, calibrate both devices by hitting the Send to Printer option and following the instructions appearing on your device screen. After the calibration comes to an end, switch on your printer and insert the sheet into your printing device. Now, you need to wait till the printer is printing your stickers on the sheet. With the completion of the printing process, let the sheet rest for a few minutes.

Equally important, unbox your Cricut cutting mat and place the sheet on the mat. After doing that, cover the printout sheet with the lamination sheet by using the brayer tool to avoid any bubbles.

Step 3: Load the Mat & Stickers into Your Machine
After designing and printing the stickers, go back to Design Space and choose compatible material from the Browse All Materials list. Keep scrolling down the list, and after locating the material, click it and press the Done option.
Moreover, set the pressure settings to Default and start loading the tools and materials. Following this, the little sensors will recognize the registration marks and will let the machine know where to cut during the cutting process.

Step 4: Use Stickers in a Water Bottle, Fridge, etc.
After the cutting process is complete, unload the mat from the Joy Xtra and peel off the sticker sheet from the mat. Next, peel off the sticker from the sheet and stick it to a water bottle, journal, or planner.

Since you walked through the entire process of how to make stickers with Cricut, you can now make uncountable DIY crafts out of your cutting machine.
Frequently Asked Questions
Question: Can I Start My Own Business by Selling Stickers?
Answer: Yes, you can absolutely start your own business by selling custom-made stickers in your locality. Moreover, you can sell various types of stickers, such as cut-die, waterproof, heat-resistant, and vinyl stickers. All of these stickers can be made out of a Cricut machine with the snap of fingers. Moreover, it would help if you used the correct supplies while making the stickers out of the craft machine.
Question: What Projects Can I Make from My Cricut Joy Xtra?
Answer: Cricut Joy Xtra is the latest craft plotter in the Joy family tree. This upgraded model has more features as compared to its previous models. There are tons of projects that you can make significantly ease with this machine, such as:
Print Then Cut stickers
Greeting cards
T-shirts
Wine bags
Coasters
Decals
Labels
Keychains
Table runners
Paper wall wreaths
Welcome Sign
Question: Can I Make Stickers with Cricut Without Using a printer?
Answer: You can indeed make customized stickers with your craft machine without using a printer. One of the incredible things about Cricut is that it can easily make stickers within a few minutes with ease and accurately. All you need to do is create your design-on-Design Space, load your material into the machine, and let the machine do the rest of the work.
#How to make stickers with Cricut#design.cricut.com#cricut.com/setup mac#cricut.com/setup#cricut explore air 2#cricut design space login#cricut new machine setup#cricut software app#www.cricut.com/setup login
0 notes
Text

Want to be a professional DIYer but need help figuring out where to start? Then Cricut Design Space is here for you. This easy-to-use application motivates the crafter to draw their design or pattern on the canvas. The Cricut design app has a library of images, fonts, and ready-to-use projects that help the crafter transform their ideas into reality. To set up the app, you need to open cricut.com/setup and create the projects.
#Cricut.com/setup#cricut.com/setup mac#cricut design space login#cricut explore air 2#cricut new machine setup#cricut software app#www.cricut.com/setup login
0 notes
Text
To start your crafting journey, it is necessary to set up your Cricut cutting and heat press machine first. You can simply browse the cricut.com/setup and choose the machine name you want to set up. Also, the brand offers companion apps to set up and operate the machine. The apps are Cricut Joy, Cricut Design Space, and Cricut Heat app. On the Cricut website, crafters can choose to download any of these apps according to their choice and complete the setup process. Also, on the website, there are various video tutorials and blogs available that help in the Cricut Auto Press setup process. Visit the Cricut website now to learn about the Cricut machines and their setup process.
#cricut.com/setup mac#cricut.com/setup#cricut software app#cricut design space#cricut new machine setup#cricut explore air 2#cricut.com sign in
0 notes
Text
How to Use Cricut Maker? [Ultimate Guide]

Do you want to know how to use Cricut Maker? If you are new to this machine, then worry not; I am here to assist you. I have over five years of experience as a professional crafter and instructor helping Cricut enthusiasts start their crafting journey. If you also want to get started with the Cricut Maker machine, then this blog is going to be beneficial for you.

If you want to use the Cricut Maker machine, you must learn the essential supplies you need, the basic steps to machine setup, and how to operate the machine. In this blog, you will get all of the extensive knowledge about it. Hence, keep reading the blog till the end!
What Supplies Do You Need for Cricut Maker?
Here are the supplies you have to collect before you start creating a project with your Cricut Maker.
Cricut Maker machine
Any Cricut Heat Press machine
Transfer Tape
Cutting materials
Weeding Tool
Scissors
Cricut Mat
Cricut Pens and Markers
Cricut Design Space app
Adhesive
Base material
Cricut heat guide, and others.
How to Setup Your Cricut Maker on a Computer/Mobile?
Before you learn how to use Cricut Maker, you have to understand the process of setup. Here are the steps you can follow to connect the Maker machine to a device.
For Windows/Mac
First, unbox your Cricut Maker machine and then power it on.
Make sure to keep the machine and computer within the 15-foot range.
Next, connect both devices with the help of a USB cable or using Bluetooth connectivity.
Then, browse the Cricut support website on any web browser on your Windows/Mac.
From the website, download the Cricut Design Space app and then install it.
After that, connect the machine to the app by using the correct option.
Finally, the machine setup will be complete and ready for crafting.
For Android/iOS
Firstly, keep your Cricut Maker machine and then turn it ON.
Then, open the App Store or Play Store option based on your device.
Search for the Cricut Design Space app and then tap on the Download option.
After the download, open the app and sign in with your Cricut account.
Next, choose the option Machine Setup to connect the machine.
From now on, you can create unique designs on the app and cut them with your Cricut Maker machine.
How to Use Cricut Maker to Create Your First Project?
Once the machine setup and supplies part is done, it is time to go for creating your first-ever project. In the below guide, I will tell you the basic operations you need to do while creating a project.
Step 1: Create a Design and Cut
For the first step, open the Cricut Design Space on your computer or smartphone.
Then, tap on the (+) New icon in the left pane to open a new canvas.

After that, use the Cricut app image and text font library to create designs or shapes you like to make.
Also, you can upload your design from your device too.
Once the design is complete make a preview and prepare it for cut. (You can also print the design if you are using the Print Then Cut feature. For that, you need to have a printer.)
Now, prepare your Cricut Maker machine and load the material in it. (You need to use the mat or not based on the material you choose.)
After that, press the Make It option on the app to start the cut.

Then, the machine will start cutting the design on your chosen material.
When the cut is complete, unload the material from the machine.
Step 2: Complete Your Cricut Design
After unloading the materials from the mat, weed out all the extra parts from the cut.
Next, prepare the Cricut Heat Press and base materials like cloth, cups, hats, or anything for the cut.
You need to set the temperature and time in the heat press by referring to the Cricut heat guide.
When the heat press reaches the temperature, then keep the design on the product and apply heat.
After applying the heat, remove the heat press and parchment paper.
Keep the product to cool off and then the product is ready to use.
Note: The images in this guide are for illustration; you can create your own design for your DIY crafts.
You can explore your crafting skills and create ample unique designs and crafts using your Cricut Maker. Also, if you require additional help on how to use Cricut Maker, then you can get in touch with the Cricut support service.
Frequently Asked Questions
Q.1 What Kind of Projects Can I Make With Cricut Maker?
Here are some brilliant Cricut Maker project ideas you can try for crafting.
Handmade greeting cards
Address envelopes and invitations.
Monograms for a mug, cup, or tumbler
Leather earrings and bracelets
Stencils for a painted doormat
Vinyl decals for car windows
Quilt blocks and applique shapes
Custom stickers
Iron-on t-shirts and onesies
Custom-painted wooden signs, and others.
Q.2 How Do I Setup My Cricut Maker Machine?
The simple steps to set up a Cricut Maker machine are given below.
1. First, you have to unbox the machine and keep it near a device to connect.
2. After that, access the Bluetooth option on that device (computer/smartphone) and connect your Cricut machine to it.
3. Or, use the USB cable provided with the machine to connect both devices.
4. From the Cricut website or app download function on mobile, download and install the Cricut Design Space app.
5. Launch the app when the download is complete, and then log into your account. (Create a Cricut account if you do not have one.)
6. Then, connect your Cricut Maker machine to complete the setup
Q.3 How to Use Cricut Maker Machine?
Here are the steps you can follow to use your Cricut Maker machine.
Open the Cricut Design app on the computer/mobile to which the machine is connected.
On the app, use the ready-to-make projects, images, and text fonts to create a design.
Also, upload your design or image if you want.
When the design is complete, prepare it for cutting.
On your Cricut Maker machine, upload the materials and choose the Make It option on the app. (If you are using the Print Then Cut feature, then use a printer.)
After cutting, the material sublimates to a desired product.
Visit - Cricut.com/setup
Cricut Design Space Login
Cricut maker Machine
how to setup cricut explore
Cricut Heat Press
#How to use Cricut Maker#cricut explore air 2#cricut crafts#cricut software#how to setup cricut maker#cricut
0 notes
Text
A Cricut machine opens up a whole new world of creative possibilities with the ability to cut, write, and score over 100 different materials. This machine can be easily connected through Bluetooth or USB. But before you can use it, you'll need to download and install the Cricut Design Space software to create digital files. For this, you can go to cricut.com/setup.
#Help Guides#Cricut mart#cricut.com design space#cricut.com/setup#cricut design space login#cricut crafts#cricut
0 notes
Text
How to Slice with Cricut? [A Complete Guide]
Do you know about the Slice tool in Cricut Design Space? If yes, have you ever used it to cut out letters or images? Well, that is what we are going to cover in this blog post. The Slice tool helps us create new cut paths where two images overlap. In simple words, you can easily split two overlapped images into multiple pieces. It’s exactly like cutting one image from another.
Also, there are some tips and tricks that you must know about, and we will discuss them later in this blog. With this amazing tool, you can also split text and images by another shape. Once you learn how to Slice with Cricut Design Space, you’ll love trying it again and again for different projects.
What Can You Do with the Slice Tool?
Once you start using the Slice tool, you will be amazed to know how much it can do. This Slice function is essentially helpful for those who want to cut out shapes and text from more extensive background shapes.
Plus, it can be used to copy or trim the unwanted features of shapes or images. With this Slice tool, you can easily:
Punch out the shapes and text from shapes.
Create new and custom shapes from two standard shapes.
Crop and remove the unwanted features of an image.
Cut the image into several pieces and keep them separate into different layers.
Modify the ready-made image using the Cricut library.
Easy Guide: How to Slice with Cricut?
Slice is one the best tools that anyone would like to use. The tool is super easy to use and gives the best result for your gift tags and other Cricut projects. Below, we will learn to use the Slice tool to Slice two images.
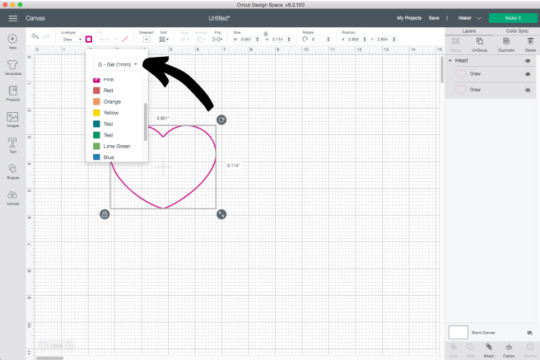
Step 1: Add Any Two Single-Layered Images to Your Canvas
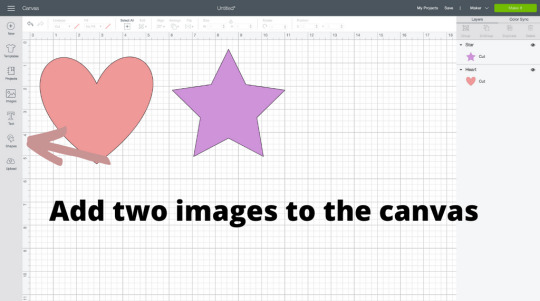
The first thing you have to do is to add two images to your canvas. Make sure images are single-layered. You can Slice at least two images at a time. As you can see, the layer panel is on the right side of the canvas (see the image above). There are two layers for each picture.
Below is an example of an image that is multi-layered. All these different colors belong to different layers. On the right-hand side, you can find the layers divided according to different colors.

Step 2: Overlap Both Images

Now, it’s time to overlap our images. All you need to do is place one image over another. Refer to the picture given above for better understanding. However, there is no exact location to place the star, and it depends on where you want it to cut out.
Step 3: Highlight Both Images

To highlight both images, you need to click and drag the images simply. You can also click on both images at a time while pressing the Command button on your Mac or shift on your windows computer. You will notice the bounding box around these images. Hence, when you finally select them, the Slice tool will be activated.
If you are using a phone or tablet, select both images by tapping on it and dragging a selection box around both layers. Next, click on the Actions button to check the availability of the Slice option.
Step 4: Press the Slice Button
Finally, hit the Slice button on the lower right-hand side corner.
Step 5: See the Result

After hitting the Slice button, it seems like nothing has happened. However, when you drag those stars away, you will find two different stars. After that, you will find the three different layers on the layer panel.
Tips and Tricks for Using the Slice Tool
Now, you have learned how to Slice with Cricut. Let’s now focus on a few tips and tricks that you can keep in mind when using the Slice tool.
You can work on two layers at a time while using the Slice with images. Don’t select more than two layers. Otherwise, the button will be grayed out, meaning you can’t use the Slice function anymore.
Slice works only with overlapped images. So, ensure your images are overlapping.
In case you are working on grouped images, then make sure the other images are hidden. However, slicing a multi-layered group requires you to ungroup the other layers. As a result, you will be able to activate the Slice tool.
Final Words
Finally, we learned how to Slice with Cricut Design Space. The Slice tool is the best tool that anyone can use on the Cricut app. If you want to explore the tools deeply, then this guide is for you. The blog explains the possibilities with the Slice tool. Next, we learned to Slice two images using the Slice tool. The step-by-step instructions given in this write-up are apt for beginner crafters who want to use the Slice tool for the first time.
FAQs
Question 1: How do I use the Slice tool on Cricut?
Answer: To learn how to use the Slice tool on Cricut, follow the steps mentioned below:
Launch the Cricut software on your device.
Go to the Shapes optionfrom the toolbar given on the right side.
Choose any shape, e.g., a circle.
After that, duplicate the circle by clicking on the + sign a duplicate icon.
Next, select the Shape by dragging the mouse icon over the shapes.
After selection, you will notice the two layers.
Then, hit the Slice button.
Finally, you will find several pieces with different layers.
Question 2: How can I Slice letters in Cricut?
Answer: Slicing the letters or text is simple with the given instructions below:
Firstly, choose the shapes and add them to your canvas.
Secondly, overlap the images.
Select the two images.
Then select the Slice button.
Once the images are sliced, you will get the separate images in your layer panels.
This Slice tool allows you to slice only two images at a time.
Question 3: Can Cricut cut out words?
Answer: Here’s how to cut out the words/letters:
You just need to select one letter and the image.
After that, hit the Slice button.
Next, delete all the letters of your slice result.
Then, choose the image part of your slice result and another letter.
Then, you need to slice again.
Repeat the process until your words/letters are cut out.
#www.cricut.com/setup#www.cricut.com/setup login#design.cricut.com#cricut new machine setup#cricut explore air 2#cricut design space login#cricut.com/setup#cricut crafts#How to slice with Cricut
0 notes
Text
Elevate your crafting experience with the Cricut Lamps, designed to illuminate your entire workspace. Featuring an adjustable design for precise light direction, these lamps boast a high Color Rendering Index (CRI) of 95, ensuring vibrant and true colors. The sleek slider allows users to control brightness up to 3000 lux, while the adjustable color temperature caters to any environment. Light up your creativity with Cricut Bright 360 Lamps and see your crafting projects in a whole new light.
Visit — design.cricut.com/setup
cricut account login
cricut login design space
#Cricut Lamps#cricut.com/setup mac#cricut.com/setup#cricut new machine setup#design.cricut.com#cricut explore air 2#cricut design space login#www.cricut.com/setup login
0 notes
Text
How to Use Cricut Joy? [A Complete Guide]
I love using the Cricut Joy machine because of its small size and easy-to-use features. Whenever I create crafts, I use this machine if I don’t have to make a complex project. Also, I recommend all hobbyists and beginners to use this tool to start their crafting journey. The machine is easy to use, but you might require some guidance if you are completely new to the device.

As a professional crafter, I have helped many people create their first craft with the Cricut Joy machine. To help you understand how to use Cricut Joy, I will share everything from the setup process and the tools needed to make DIY projects. So, without any further delay, let’s get started.
Essential Supplies to Use With the Cricut Joy Machine
In order to create projects with the Cricut Joy machine, it is a must to learn what supplies you require. Here is the list of some essential tools you need.
Cricut Joy
Cricut Design Space
Cricut Joy inserts cards
Any Cricut Heat Press machine
Cricut card and StandardGrip mat
Cricut Markers and Pens
Transfer Tape
Cricut weeding tools
Materials and others.
Apart from these tools, you might require some more or less supplies according to the project you choose to create with your Cricut Joy machine.
The Process to Setup Cricut Joy to Your Operating System
Before we move to the process of how to use Cricut Joy, let me help you with the setup process of the machine. For the machine, you need to connect it to a device. Here, I will share the steps to connect the machine to your computer and smartphone device.
Computer
Initially, please turn on the machine and make sure it is within 15 feet range of your computer.
After that, establish the Bluetooth or USB connection between the computer and the Cricut Joy machine.
Next, visit the Cricut support page on your Windows/Mac computer browser.
From the website, you need to download and install the Cricut Design Space app.
Once the installation is complete, launch the app and sign in with your Cricut account.
Then, select the New Machine Setup option to connect your Cricut Joy.
Finally, the process of how to use Cricut Joy is complete. Now, you can start making your DIY craft.
Smartphone
Switch on the Cricut Joy machine and bring it closer to your device.
Then, tap on the Settings icon on the home screen.
After that, select the Bluetooth option and enable it.
Now, connect the Cricut Joy to your phone via Bluetooth. (Also, you can use the USB connection if you want.)
Next, head to the Apple Apple Store and download the Cricut app.
After that, connect the Cricut Joy with your app by tapping on Machine Setup.

Finally, the device will be ready to work on any project you want.
Steps to Create a Project With Your Cricut Joy Machine
The processes can vary from project to project that you create on your Cricut Joy machine. But here are the basic steps that you have to perform while working on simple steps.
First, you have to open the Cricut Design Space app on your device.
Open a new canvas on the app, and then from the search section, look for Christmas light design.
After that, choose the designs from the library that you want to use your design.
Now, organize the design and then prepare it from the cut.
After that, choose the material on which you want to cut your design.
Next, prepare the Cricut Joy cutting machine, then select the Make It option on the app.
After that, load the materials, and then Cricut Joy will start the cut.
Also, prepare your heat press machine and set the temperature & time.
Now, take the cut design and place the design on your sweatshirt or hoodie.
After that, apply the heat with your Cricut Heat Press machine.

When the design is sublimated on the machine, then remove the extra part from that.
You can take the help of crafting accessories to remove the excessive part.
Finally, your first Cricut Joy project will be ready to use or gift someone.

In this project, I used to explain how to use Cricut joy so you can choose to create whatever you want using your creativity and imagination. Also, if you are having any issues or need any help, then you can get the Cricut official support service.
Frequently Asked Questions
Q.1 How to Setup a Cricut Joy Machine?
The Cricut Joy machine is compatible with various devices like computers, smartphones, laptops, and tablets. Plus, it also supports all the prominent operating systems such as Mac, Windows, iOS, and Android. In addition, for connectivity, it provides both Bluetooth and USB connection options. For the setup, Cricut Design Space is important, and you have to download the app on which device you want to connect the machine.
Q.2 How to Use Cricut Joy?
The Cricut Joy machine comes with user-friendly features and specs that allow you to operate the machine efficiently, even if you are a complete beginner. The machine works perfectly in creating designs for small projects like shoes, wallets, cups, handkerchiefs, and others. If you want to use this machine, you have to supply it according to the projects you are going to work on. Also, you need to set the machine to a device via the Cricut app in order to start using it. Create beautiful designs on your Cricut app, and then cut them on your app.
Q.3 What Supplies Do I Need to Make Projects on Cricut Joy?
Some of the basic supplies you must keep with yourself whenever creating a project. Also, the supply requirements can vary from project to project.
Cricut Joy
Cricut Mat
Transfer Tape
Cricut Design Space
Cricut Joy Insert card
Any Cricut EasyPress machine
Cricut card and StandardGrip mat
Cricut Weeding tool
Cricut Markers and Pens
Cutting materials and many more.
Source URL: – how to use Cricut joy
Visit – Cricut.com/setup
Cricut Design Space Login
how to setup cricut explore
how to setup cricut maker
Cricut Joy machine
0 notes