
Don't wanna be here? Send us removal request.
Statistics
We looked inside some of the posts by echo-ichigo05 and here's what we found interesting.
Average Info
Notes Per Post
0
Likes Per Post
0
Reblog Per Post
0
Reply Per Post
0
Time Between Posts
4 days
Number of Posts By Type
Text
17
Last Seen Tumblr Blogs


Fun Fact
69% of Tumblr users are millennials.
Text
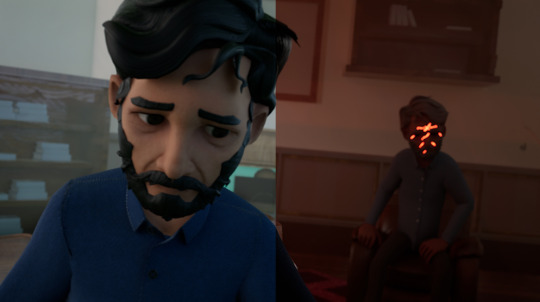
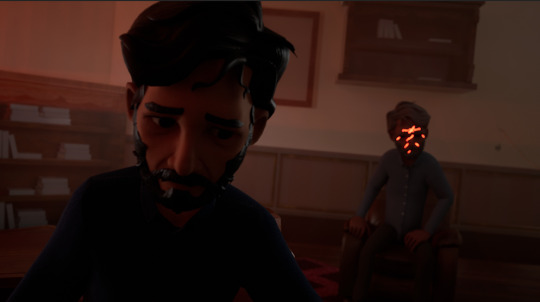
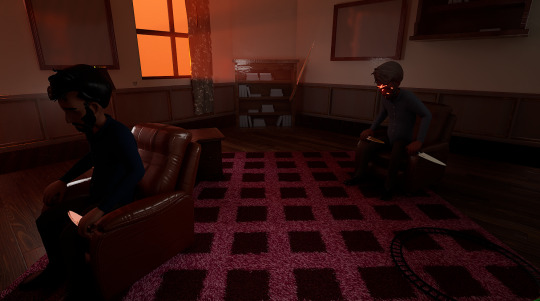
Final output, After all this, I was finally able to finish it. Here is the final output. So thank you, everyone.
0 notes
Text
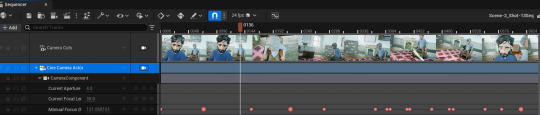
To add some extra spicy things. I had to add Manual Focal Distance to blur in and out. Though in unreal engine the Auto tracker should have worked but it didn't.
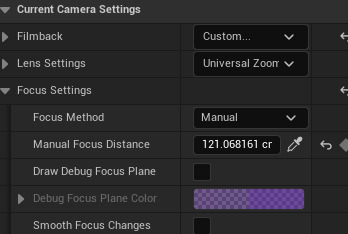
That should be in Focus Method. You have to change it to Tracking.
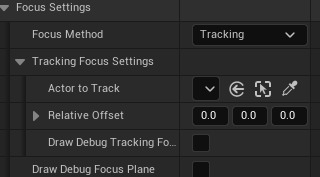
And select the actor. It should Have auto-tracked, But I didn't. I didn;t have time to troubleshoot. Maybe it's something to do with Alembic. So I manually keyed the Manual Focal distance.
0 notes
Text

There was some unwanted problems in Unreal Engine while rendering. There black side coming in when rendering.
So what was the solution. It was simple but it was nerve-wracking.
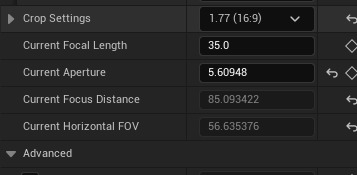
All you had to do was choose Cine Camera Actor and look for Crop Settings. Funny thing was the default for it is no cropping. I would have no cropping would be actually cropping. Thanks to mark for giving the idea, either its aspect ratio or something else. Chose your aspect ratio what you have set actually.
0 notes
Text

After setting up the camera. I had an idea, I may have to go fbx or Alembic. If I go for alembic route. I have to set up each shot again and again. So I had to set it up again and again. If you look closely for the keys. They have adjacent keys. In there, the camera is just changing their position in one frame.

Graph Editor in maya. Where we can adjacent keys in frames 224 and 225 This also saved time for me. Though in Unreal engine. When I rendered the final output. You could see some in between blur where there was supposed to be a Cut to. In Unreal Engine. It happens goes also in 1 frame. But problem is it gives a blur effect, After rendering the shots. Though in the story I kept for some and for some other shots I just deleted to in between frames. In good practice, it shouldn't be there. But for me I had to delete few frames here and there and for other I kept it. Though I could have taken a still of that frame and replaced the sequence image. But I chose to keep it. Or somehow if I could turn of motion blur while rendering, which I couldn't do it.
0 notes
Text
Here is small details of what I did: I opted for Unreal Engine combined with studio Library and Advanced Skeleton. I never did large scale animating before. I had no little to no experience at all. Maybe with some basics.
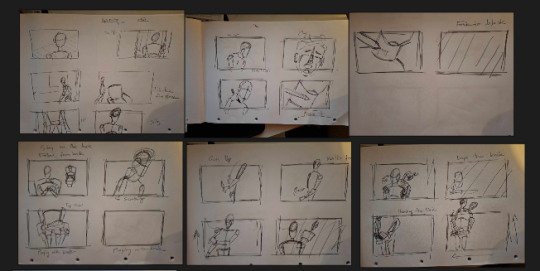
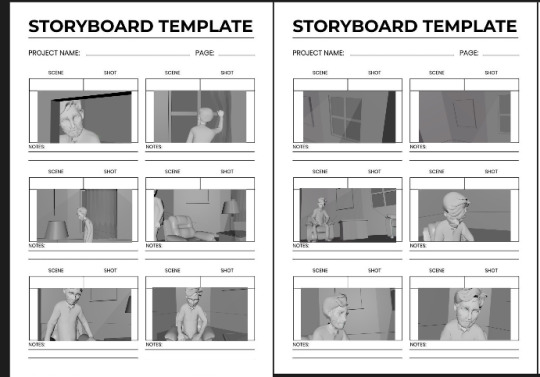
1. I initially Created Poses for my project. Which was acting as storyboard. I didn't wanted to draw initially. But after mark insisted I drew the Storyboard panels. It did helped to visualize a lot. I didn't have to think what I need to do when I was working in maya. I just followed the drawing I made. 2. I extracted the pictures from viewport and pasted the pictures in a Storyboard template.
3. While I was doing that. I was saving each poses in Studio Library. To save poses. All I had to do was use the picker from Advacned Skeleton.
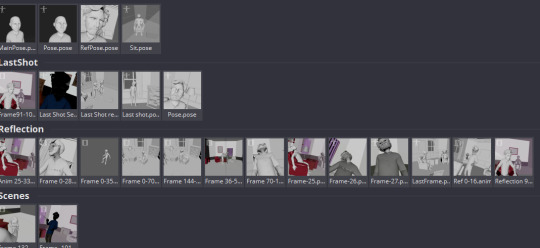
4. Using advanced Skeleton and Studio library together was a good combo. I could reuse the some poses for the reflection character. Since they are almost same. I saved the pose. And reused it and reversed it.

All these saved me a lot of time. Then after that I would make small changes. 5. After that was done. When I was about animate it. Initially all the poses were in 1 frame. So I went to premiere pro took all the snaps and Made animatic which made sense. To maintain the timing, 6. Then I followed those timing in maya. With all the poses I had prior. I knew my animation was slow. When I was making the animatic. These saved me a time. Cause Almost all of the key poses were there. I just needed to adjust the time. 7. And also to adjust the camera animation.
0 notes
Text

Why I choose Unreal Engine? Now I will discuss some of the choices I made. One of the choices was to use Unreal Engine. Why is that? Well, to be more clear. You can render in the Unreal engine really fast. But setting it up might be a problem. Cause there was a learning curve. One of the boon was I could played with lightning so fast and get fast real time result. That was not possible in Maya- Arnold workflow. Though If I did choose that the result would have been significantly better. After a few of the sequences, I needed to work with a set of lightning moods. One in day light another foggy, dark-red light. And through using Unreal Engine, I was able to use it to its finest. However, I had to set up the scene twice. 1. Initially I started with 2 scenes/ levels. Yes for Unreal Engine to keep everything separate, I saved them as a level. Each of these levels had their own sequence.
2. After I split every scene with light sets, which were required to do so. I would start with regular one. 3. Then finishing that one I would jump to the dark one and set up the scene again. And assign the materials again for the alembic assets. What could I have done better: 1. I could have previously saved the light setup and imported it. Then it would have saved me time better, 2. I wasn't able to find what I needed. Probably I could have saved it as a level and then imported it back. I wasn't able to check due to time.
0 notes
Text
The Unreal solution needed some time to think about. Cause I couldn't work with visibility for alembic files. So I opted for the next best. I decided to key scale from the sequence editor.

I had to the scale value for the assets. Just one frame before and after from 0-1 to appear and 1-0 to disappear. Since they were all happening in the same frame. It worked as intended. But if only parent constrain worked properly. I wouldn't have to do all this. But its okay. It worked. Nevertheless
0 notes
Text
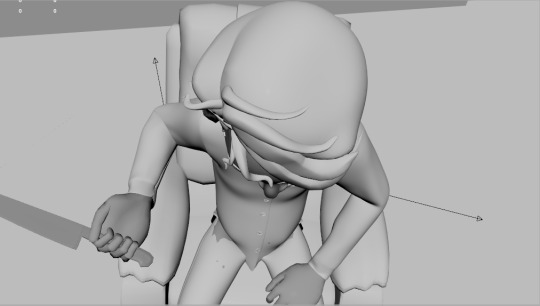
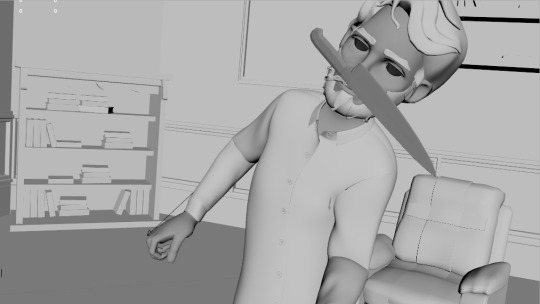
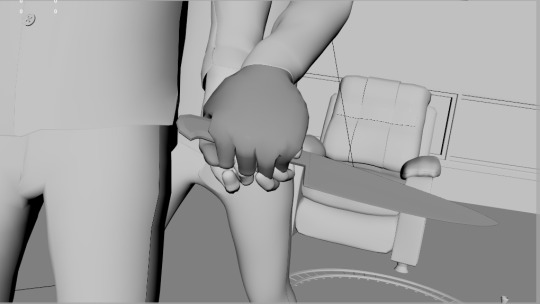
This scene had some challenges. Quite a few in some phases. First challenge was I wasn't able to make parent work. In theiry it should have worked. I needed multiple parent constrain. I had to just parent weight.
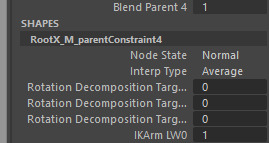
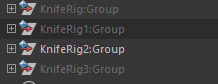
In theory, if I had keyed Blend Parent properly. It should worked but it didn't. I didn't have enough time to experiment. Then I opted for the simple thing. I just duplicated the knife. And parented to the controler. When the knife position changed I chose the other one. And kept the other one hidden. had to key the visibility.
After the animation. When I was rendering this scene in Unreal Engine. It created another issue. Alembic can't key visibility, or maybe it can. I wasn't able to find it.
0 notes
Text

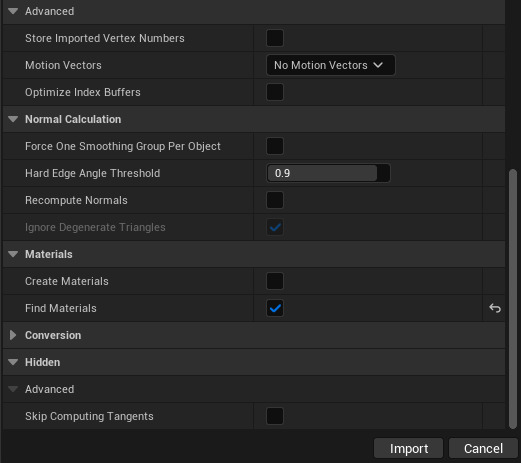
After A lot of hair pullings. And a lot of pain. I was finally able to fix it. All you had to do is uncheck Flatten Tracks. Funny by just reading this you can have no idea. This was the culprit. But it was the culprit. Finally, I was through with my problems. I was able to have material selection. But then another new problem arises. I had to assign material 16 times. And they don't have a name. So I had to find out what and how. And in which order.
So what I did after importing. I combined same object with same materials. Cause few of my objects were sharing same materials. And also we can see that we can see some mesh coming out of shirt. So just deleted the faces. And after deleting and combining. I exported the alembic again. And you can't replace the alembic which you have imported in maya. Cause maya is using it.
After that, I had 6-7 material slots.
This made my work much easier. But I wasn't happy. I am pretty I might be able to use some fancy scripts. With find material. But since I didn't have time I couldn't look into it.
0 notes
Text

I still couldnt solve my material problem. But in the mean time. I worked on the materials in unreal. For subsurface scatter I created sub-surface profile. Then for roughness I used a clamped node. And connected with 2 nodes which has 1 value. You can still convert it to parameter to make it more easy. Clamp node has min and max value. It helps to control the value of roughness. Since I am using PBR workflow. This was a boon.
0 notes
Text
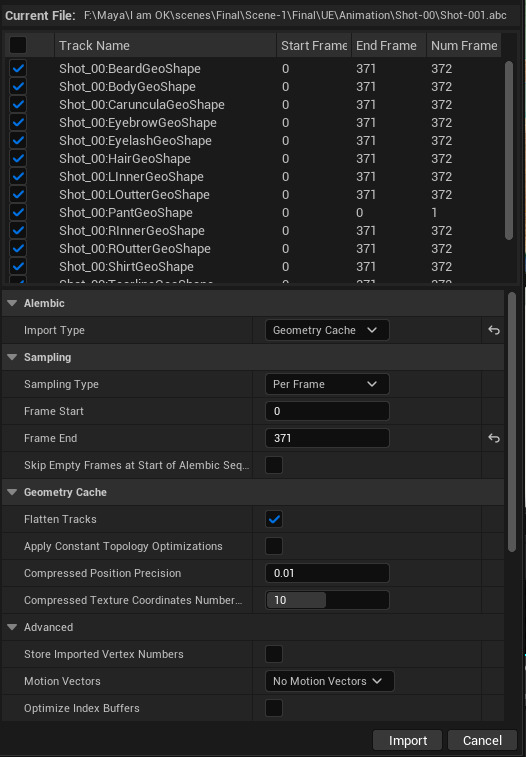
You must select geometry cache. Other options wont work for what we want to do.
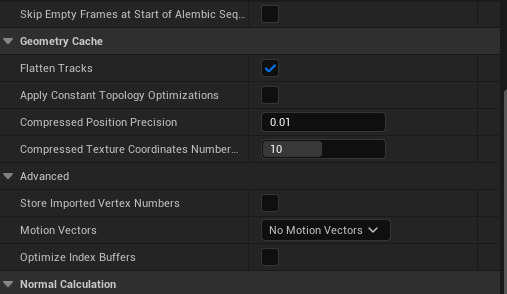
These were the usual options I kept
I checked Find materials and you can also keep create materials checked. But no matter what I did I was only getting only one material slot. Then I had only one option either go back to fbx or I have to export each fbx file separately but that will take so much time. And I almost considered it. But the way I am I would look for a better way. This was the most nerve wrecking. I almost gave up. Thought of doing render in maya. I only 20 days or so. I panicked (well almost)
0 notes
Text
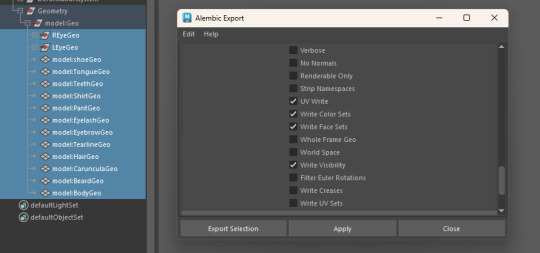
So I opted to use alembic which is known as .abc. After selection, you have to keep this option enabled.
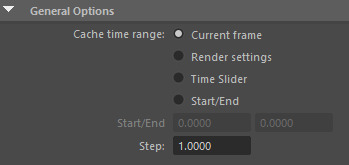
And Also set the time frame. But not every time it is so simple. After I stumbled upon another problem. The material I was getting, I was just getting one material slot. Which turned into a big issue. I almost gave up. Thought of going with fbx again.
0 notes
Text

First I decided to work with Fbx, Though After everything, connecting the map and animation. If you look closely, You can see there is problem with skinning issue. No matter how I imported it or what. It just didn't work. There was skinning issue. Some issues with join limitations or so. If it worked my work would be much easier. I wouldn't have to set up material each time. So I opted for another solution. Which is much more problematic.
0 notes
Text


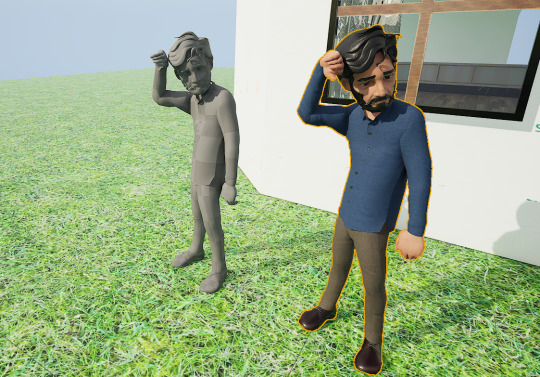
Maybe someday I will be able to render it in Arnold or Unreal with proper groom. The skin shader, the clothes looks very well. The sheen in clothe. But unreal render was okay.
0 notes
Text
Disappointed still happy
So this is almost at the end of my MA. I am mostly done with my film. I couldn't render it in Arnold due to time constraints, And I couldn't used the groom that I made. But still was able to finish the film. Unreal engine was a blessings for me. I was able to make some iterations makes changes so fast. How busy I was and the other responsibilities I had. Unreal engine kind of helped me. At least to finish the film. But I faced a lot of problems during some of the issue.
0 notes
Text
Animation Update. WIP
Really trying to finish the animation. Week by week. It takes so much out of me.
0 notes


