
Statistics
We looked inside some of the posts by farginnoob and here's what we found interesting.
Average Info
Notes Per Post
7K
Likes Per Post
4K
Reblog Per Post
3K
Reply Per Post
4
Time Between Posts
29 days
Number of Posts By Type
Photo
4
Text
12
Video
1
Last Seen Tumblr Blogs


Fun Fact
Users from the US are the majority of Tumblr visitors.
Photo
You may also like Recettear: http://store.steampowered.com/app/70400/
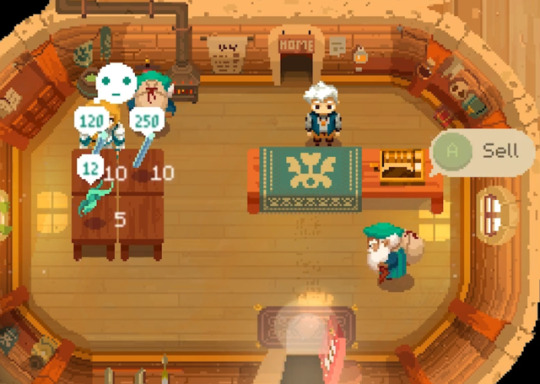


I wrote about Moonlighter last June when I backed it on Kickstarter. Heavily inspired by Zelda: The Minish Cap (can you tell? :)), it pulls a unique twist on the world-exploring, dungeon-crawling formula. Instead of dumping gathered loot to shopkeepers’ inventories (as we’re used to from basically every RPG to date), you take the role of a proud store owner yourself.
The developers, Digital Sun Games (a lovely bunch from Spain), are still working on the running-a-store side of things, but from what I’ve seen it’s reminiscent of things like The Sims 2: Open for Business. You place items from your inventory to store displays and wait for customers to roll in, following by applying correct strategies to influence customers into buying your merchandise.
Digital Sun plans to balance things out and wrap up the game by end of this year, with help from 11 bit studios releasing it on Steam, XB1 and PS4.
654 notes
·
View notes
Photo
Been very busy with work, moving, and prepping for a wedding, so I haven’t had a chance to work on other stuff, but here’s some pixel art I’ve been working on for my stream in the meantime.
1 note
·
View note
Text
Week 15
This week was focused on getting our normal mapping setup so that we could continue down the path of setting up a renderer. To that end, most of the week was spent getting the normal maps drawn and cleaning up some of our code to ensure that we aren’t doing stupid things moving forward.
Day 1
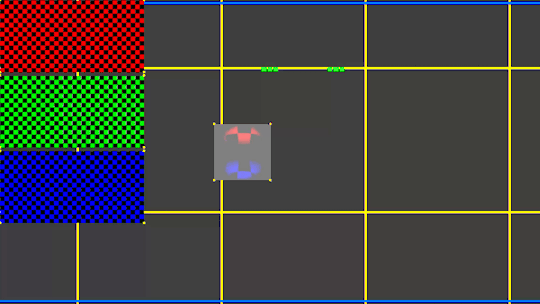
Today’s work was focused on setting up the test diffuse and normal maps so that we could actually see the effect of the environment maps. Our test environment maps were checkered red, green, and blue patterns representing the sky, middle, and ground lighting that would be affecting our normal maps.
This is what we ended up with at the end of the session:
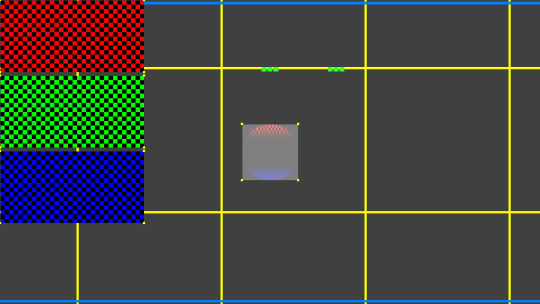
So it’s a start, to be sure, but we have a ways to go. We already have the math set so that it’s pulling from the map in a circular subsection; eventually that’ll be turned into a spherical source.
Day 2
Taking yesterday’s working and expanding upon it, we focused on implementing the directional adjustments from the player’s “eye” to affect our circle and make it more into a sphere. There was some fudge factoring that went into the calculations, particularly because this is work done on a flat 2D plane attempting to give it 3D reflectivity.
With this, we have a movement integrated to show the reflection updating as the source along the environment map is updated. We also have an issue with the bottom map not quite drawing the right way, but we’ll fix that tomorrow.
Day 3
All math, all day. We didn’t spend any time working on the actual project, but we did have a math lesson to go over. This was focused on solving equations that we are or will be using for our graphics adjustments, and how the use of matrices can be an easier way to solve those same equations in a quicker fashion.
Day 4
Our first effort today was adjusting our normals so that they work correctly on a non-uniform scaled object. If you scale an object non-uniformly, the normal actually changes in the opposite direction of the vector that’s being scaled, so you have to adjust that normal correctly to point in the new correct direction.
Secondly for the day, we wanted to investigate why our normal was sampling the top environment map incorrectly, so we drew a debug visualization to the screen to highlight where from the environment map we were actually sampling.
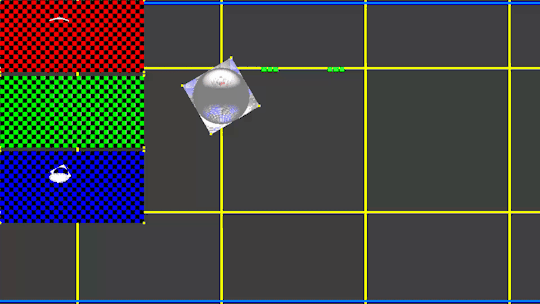
This helped us to figure out what we were doing wrong. As you can see, the normal sample from the top map (red) was just a sliver, when it should have looked closer to the bottom map’s sample (blue).
Day 5
We determined that our normals were being sourced incorrectly because of the 2D nature of the cards we are using. The actual explanation is best seen here. So we had to adjust where on the map we were pulling from and adjust our normals so we were getting them along the correct axes.
Day 6
Spent the day today working on flipping our game to Y-is-up rendering. We were trying to do the opposite to make it easier on ourselves for handling Y, but in the end, it turned out that doing it from the bottom up means we can more easily handle the more involved graphics stuff we will need to handle as time goes on.
Day 7
Finally, we cleaned up some more render stuff to handle pixels vs meters correctly, and cleared out some of the functionality that we had put in but were no longer using. We also updated the loaded_bitmap struct to hold the alignment of the image itself so we can pull from the bitmap rather than passing it in through our functions (thereby eliminating some paths of failure).
And then we added one of our ground texture maps to the environment maps so that we could see something more concrete on our reflections:
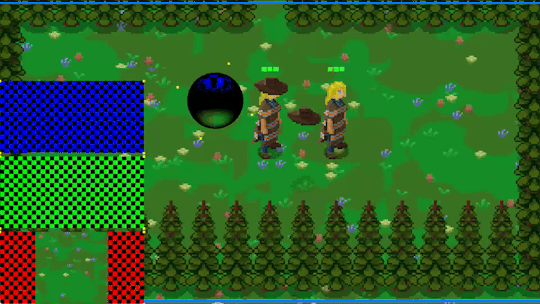
This makes things definitely feel a bit more real, at least on the bottom reflection. All we did for that was draw one of our ground textures that we’d created before into the buffer for our environment map on the bottom. With the flipped Y changes we did today, the sky (blue) is now properly showing on the top of the sphere, rather than the bottom.
Summary
Interesting note, the renderer we have right now is a single-threaded renderer running on the CPU and we’re still able to get a smooth frame rate with nothing more than compiler optimizations turned on. What a difference -Od compared to -O2 makes, even with non-optimized code.
2 notes
·
View notes
Photo
So THIS is what I’ve been working on for the past week.
What you see here is a visual-based event editor for Mydhilde. This will be used to put together scripted events, essentially where actors move around and/or initiate dialogue.
While all of these commands could be done in basic GML, but the important parts that make this more functional is the visual aspect and variable handlers. It’ll be much easier to build branching paths and read the scripts, than if it were pure code.
When I make and export a script written with this editor, it’ll be read by a handler in-game, executing all of these actions as is seen here (except that it’ll be much faster, the stalling is for testing feedback).
110 notes
·
View notes
Text
Week 14
This week was all about filtering and lighting. We learned about the sRGB color space and gamma adjustment, as well as bilinear filtering to smooth out our images and make it possible to have sub-pixel movement, which is particularly great for background movement.
Day 1
This was more work on rotation of assets, but instead of just dots that were moving and rotating, we actually got a filled-in box drawing on screen with full rotation and scaling.
Throw in a little color cycle on there and you have a neat little thing to look at.
Day 2
Based on the previous day’s work, we swapped that primitive with an actual texture; in this case, it was one of the trees, and had it rotating around and scaling in the same space.

(Note: Not sure why this gif isn’t working, but you can find a version that does work here.)
This is your traditional rotation, and one you see in a lot of pixel games when doing rotations. You should notice that the pixels are drawn exactly offset and there’s no blending so it looks like pixels jump and there’s a kind of “wave” that occurs as it gets to a perpendicular angle.
So to fix that, we introduced bilinear filtering that fixes the problem:
(Note: Again, not sure why this gif isn’t working, but you can find a version that does work here.)
The problem with this method though, is that you lose the fidelity of the colors in each of the sprite’s pixels because of the blend. Not sure which one I like for pixel art, but at a certain size, it may not make any difference. I’ll have to compare my desire to have a true pixel look vs a smooth sub-pixel movement. There might also be other methods that give us the best of both worlds; I’m just not sure yet.
Day 3 & 4
We spent a good deal learning about and converting our color implementation to match the sRGB gamma light space. The purpose of this is to fix the color to match what the monitor actually outputs, because the linear color space of RGB and the outputted light space of monitors is different.
This spanned both days 3 and 4, because it also required to handle the gamma-correct premultiplied alpha.
Day 5
Today was spent learning about lighting as it pertains to both the 2D and 3D realms and what various techniques mean. No code was harmed in the learning of this lesson, but it was certainly interesting. If you want to get some good knowledge, check out the video.
Day 6
Today, we started adding normal maps to our pipeline. A normal map, for those who aren’t aware, is a bitmap that indicates which direction all the normals for a given model (or in our case, sprite) are pointing. So because our 2D game is using flat sprites, the normals are an estimate so that we can use dynamic lighting. Most normals are created by the artist on a texture when its created so they can custom craft how the light should respond, but for the start here, we just generated a normal map based on the associated texture data.
Oooh, rainbow.
Day 7
And finally, we spent our time cleaning up the normal code, doing some code condensing, and fixing any issues with the normal maps that came up.
Summary
It’s been a busy couple weeks or so, and I’m glad I was able to get through all this stuff, which is very important and brings up some interesting questions for me in future development of 2D art. Do I want a dynamic lighting engine to handle lighting my sprites or do I want to hand light everything in the game? Maybe a combination of both for various effects that might happen.
Next week’s content should all be about normal maps, so we’ll see what happens!
0 notes
Text
Week 13
This week’s work was attempting to bring things to the transient arena, and the beginnings of what I like to call a “renderer”. Time and time again I run afoul of my own mistakes, particularly when it comes to typos. So in lieu of “Week 13″, let’s call this “Week Typo”, in faux-homage to the thing that (hopefully) ruins so many other programmers’ days.
Day 1
Starting things off by pdating the transient arena. We hadn’t really been using this too much, but we decided it was time to make use of this by putting the ground buffers into it. You remember the ground buffers right? The things we were using to composite our ground sprites onto so we have something of a non-tiled, randomly generated ground texture throughout the world? Yeah, those things. We moved those into the transient arena.
Day 2
We continued our work on moving the ground buffers over to the transient arena. Today’s work, though, was spent on aligning the ground buffers to the world chunks, and cleaning up world chunk creation and handling. This included shrinking the world chunks so they were more manageable; we ended up making them about 1/4 the size of a screen, which means we don’t need to fill them up with as much stuff (and hopefully will increase performance of any given chunk along the way!).
The last thing we wanted to do today was add some debug drawing of the chunks so we could identify where they were and how big they were. Not a huge task, but one that will make our lives easier.
Day 3
We had a few things we wanted to accomplish today. First off, moving the ground buffers to a per-chunk situation means that we saw seams between each buffer/chunk. To solve this, we loop through the nine chunks closest to the player (including the one they’re in) and push buffers to each chunk that overlay across the entire screen from that particular point; this gives us a seamless ground texture everywhere.
The second thing we wanted to do was to evict ground buffers in areas that we’re no longer in so that we can create them in new areas that we’re going to. This lets us continue to have ground textures without having an infinitely-large array to store all of the buffer data. For this one, we just check to see which of the existing buffers is farthest away and then unload it and add a closer, new buffer to the list.
The last thing we did today was to update the code reload to let us know when it’s reloaded so we can see the changes to the grass, instead of having to reload the game.
Day 4
Today’s work was short, but involved converting entity_piece_buffer_groups, which were the things were using the draw stuff to the screen, into render_groups and setting up our push buffer rendering. This is the first step to greatness of creating our software renderer.
Day 5
We continued our renderer work by setting up buffer entry types. This includes the stuff we were already rendering, like clearing the screen, drawing bitmaps, and rectangles, and rectangle outlines. This was mostly just conversion work, and not anything new, but it’s important to get it working with the new format.
Day 6
Did some clean up today, mostly for variables that use x, y, z, w, r, g, b, and a so that the code can be more easily ported to various graphics APIs. We also did some clean up of the rectangle drawing calls, so that they were more efficient and fit into our new render more appropriately.
Finally we put our ground buffers into their own temporary memory so that they are separate and compartmentalized.
Day 7
Finally, today was spent setting up a coordinate system tripod (X/Y/Z that shows you where the axes are) that we can use as a basis for setting up rotation and scaling for our bitmaps going forward.
The first attempt at this:
And the second attempt, after some fiddling, allowed me to create a grid of dots that rotates, giving a kind of mode 7 feel to it:
Overview
Some of my week was spent debugging typos in my code. I hate typos. Always double check your code so that you can avoid the worst bug there is. It’d be preferable if I couldn’t spell, so that at least the compiler would tell me I was an idiot and don’t know how to spell.
In any case, we’re pushing forward on the renderer, so let’s see what happens next!
4 notes
·
View notes
Text
Week 12
Hello! It’s been a busy few weeks. Work is in high gear, which is just great, but leaves me little extra time for working on this project. Add to that building a new PC and all the other odds and ends and I’ve had scarcely the energy to play a game, let alone do other, more meaningful things.
But never fear, because I have a new blog, a new PC, and a new zest for making sure it doesn’t take me as long to get through this stuff. (Seriously, when did life get so complicated? Being a grown up kinda sucks sometimes!)
Day 1
Day one was focused on creating multiple collision volumes per entity. This allowed us to create a concave collision shape for things where we might want collision in one spot but not another. Our test case for this was the stairs, which now has collision along the sides, but not either end. What does this accomplish? It forces the player to go up or down the middle of the stairs instead of coming at the stairs from any angle.
From a mechanics standpoint, the introduction of these multiple collision volumes is important for any number of possible obstacles or enemy types. From a game design standpoint though, I’m not sure I’m keen on the way that stairs are implemented here. Though Casey prefers to make things flow more naturally (in this case, just going up and down stairs leads to the correct floor without loading, fade, etc., I think I may still prefer the implementation of older style games, such as Zelda. We’ll see.
Day 2
A lot of today’s work was spent discussing the differences between Quake and Unreal engines (of yore, not of today).
Quake uses a default filled world, where everything is collision and the level is carved out of that collision. The benefit of this is that you never have to worry about the player falling under the world forever, or otherwise generally being out of bounds. The drawback is that every nook and cranny has to be detailed by the designer, which is more work.
Unreal uses the opposite; a default empty world, where all the collision has to be hand placed. This is also how most modern engines (especially 3D engines) handle level creation. Though you have to account for the player being out of bounds and definitely have to test for cracks, holes, and other issues in geometry, it’s much less front-loaded work to get a level created and in a testable state.
Our solution is going to utilize a series of empty space rooms that are linked together and act as walkable space, but if the player were ever to go outside of these bounds, we would not allow them to do so. So I guess when comparing that to the two above, we’re splitting the difference? Maybe?
Day 3
Today’s efforts were spent handling traversables in the collision loop, so that we properly test for in-box collisions (rooms), where if you try to move outside of the room, we don’t let you, and out-box collisions (entities), so that if you collide with an entity, you properly move according to that collision. This again is just reinforcing the duality of style we started in the previous day.
Day 4
With the basic collision handling done, it was time to start setting up the ground creation with some compositing. I created some lovely test art for use in setting this stuff up:

We weren’t doing anything special with our overlapping creation, just creating a series of bitmaps and laying them on top of one another. Not real compositing, but faux enough that you can’t really tell yet. Our first attempt ended up looking like this:
Not great, but even Rome had to start somewhere.
Day 5
Because we wanted to expand on our compositing capabilities, it was time to introduce a new set of pseudo-random number generators to the mix. For testing purposes, pseudo-random generation gives us the opportunity to get the same random set given the same starting seed. All those games that start you off with a seed number, like Minecraft and its ilk? That’s pseudo-random generation so you can start with the same map layout as your friends.
We also started caching our composited bitmaps so that we weren’t creating and drawing individual background objects every frame.
Day 6
Because our alpha started to suffer with the compositing from yesterday’s work, we had to fix the issue. To do that, we introduced pre-muiltiplied alpha, which handled pre-multiplying the alpha with the color in a given pixel so that we don’t have the wrong alpha after multiple composites. Before we did this, we had a dark outline around our composited image where the alpha was, which is obviously incorrect. After doing so, we got back to the correct looking alpha that you see above.
Day 7
Finally, we started to composite more images together to get a real background, and set the background to move with the player, so that it looks like it’s an actual background, and not one that is stationary with the camera (which is what we had up until now).
We also wanted to handle the player going up and down between levels and the background scaling to match. For instance, if the player is on Floor 1, and then goes to Floor 2 and is able to see Floor 1 below (through a hole in the ground or something), we want the ground from Floor 1 to look smaller. To accomplish this, we do create a background for the room that’s bigger than the room itself so it will still fit correctly when we go upstairs.
When everything’s said and done, we got a background using both dirt and grass that looks like this:
and a background with all grass that looks like this:
Pretty spiffy. Oh yeah, the flowers are all procedural and composited as well.
Overview
This week’s work was a big step in eliminating any particular need for tiled level creation. At first, I thought that I’d want a tiled level, but with the freedom that this provides, it may not be necessary, or even desired. Pretty soon, we should be introducing holes in the ground so we can properly see the parallaxing effect of the floor below; though that may have to wait until we get proper z-sorting and scaling.
As an aside, I’m seeing a bunch of new followers recently, so if anyone has any corrections, questions, comments, or whatever, please feel free to reply or message me directly! Thanks for all the follows!
8 notes
·
View notes
Text
Quick Update
Sorry it’s been a while since the last post. Partly because of long hours at work, and partly because I built a new machine and I’ve had to transition everything over to the new box so I can work on the project on it.
Soon.
0 notes
Photo
“DEADPOOL” for Ryan Reynolds thanks for your MAXIMUM EFFORT!!
7K notes
·
View notes
Text
Week 11
What a long week this one has been. Between work, flying out to see my fianceé for wedding planning, and working on the project, I’m worn out! If only there were a way I could program my way into extending the day to like 36 hours, then I’d have the time!
Anyway, let’s get it started!
Day 1
A day of replacement. We had finally gotten to the point where having a Vec2 for all our XY and a separate Z was just not going to cut it anymore, so we went ahead and created our Vec3 and swapped out the old for the new.
Day 2
Setting up proper inclusion tests for our entities in various chunks. The purpose here is to solve the issue of entities that are outside the bounds of the test area, but whose sprites still overlap with the bounds (which should otherwise include them). We utilize Minkowski testing to handle this, expanding by the size of the largest entity in the game (which we have thus far hardcoded at 5m.
Day 3
I had to spend some time creating a new stair sprite for the stairs so we can start to handle showing them better. Of course, this effort will later be replaced with yellow boxes again, but at least it let me break out of the groove for a while to work on some arts. It’s not pretty by any means, but it wasn’t meant to be; it’s just a placeholder to give me a sense of what it’s going to look like (potentially) later on.

The original is actually a bit darker, but I rather rushed through it and this is really closer to the luminance I was looking for.
Today we also set up temporary overlapping entities support for handling walking up and down stairs. These temporary changes also assisted with some other random collision concerns.
Day 4
Most of the day was spent setting up the code to move a character up and down stairs. As this is a 2D game, handling this was quite interesting. Essentially we set up a lerp that would move the player along the stairs at a given speed from 0 to 1 (from the ground below to the ground above). These stairs allow multidirectional travel instantaneously and without need for loading screens or transition effects.
Day 5
This led into today’s work which was further adjusting the conditional movement based on step heights for stairs. We also set up collision on the stairs so that you could only enter/exit from the top/bottom of the relevant staircase.
Most interesting of all, we were able to set up a basic parallax for the world to better highlight the difference between the levels, so that the one below would move slower and the one above would move faster. I love parallax, so it’s cool that it was such a simple adjustment to get this working.
youtube
Made the thing look 1000 times better already! ;)
Day 6
We determined that we hadn’t had proper heights (along Z) for any entity, so we started setting those up properly. We also changed the height of a given floor from 1.4m to 3m, which would allow greater space in a given layer for entities and doing stuff. So much more room for activities!
The whole of this is so that entities only collide with other entities on their level, rather than colliding with those on the level above or below, which we were running into (the puns!) up until this point.
youtube
Now we’re cooking with gas.
Day 7
Today’s work was more or less cleanup. Part of that clean up was ensuring that the entities were at the correct spot along the Z; essentially that they were hitting the ground in the correct spot, which they weren’t after all the changes we’d made to the collision.
We also spent some time splitting up the stairs so that one section of them will be on one floor and the other half will be on the floor you’re heading to.
Summary
I hope it doesn’t take this long moving forward to get stuff done. Any time I have to fly cross country I have the opportunity to do some more work, but for whatever reason I keep forgetting to bring something; in this case, it was the charger for my laptop.
Oh well, I’m going to keep pushing along, though the updates may be a bit slower for the next couple months as we race on at work towards content complete. End of project is when all the “magic” happens, so I have to be there for that.
Hope you’re having a good time, let’s see what next week’s adventures hold in store!
2 notes
·
View notes
Text
Minor Update
Should have a new blog post in the next couple days. Life and work (especially) has been keeping my very busy and hasn’t given me a lot of extra time to work on the project. Soon though!
2 notes
·
View notes
Text
Week 10
Not a terribly busy week, and no screenshots to show. This week’s work was mostly just continued work on sim regions and other odds and ends.
Day 1
Today’s work was just continuing the conversion process to sim regions. We created a hash function to handle the sim regions in the active region (I’m pretty sure, that whole section was kind of a mess in my brain hole), and we moved some functions around to different files. Terribly boring.
Day 2
We created a new entity file to handle all stuff relating to entities, so that functions are in the file where they make the most sense. We also finished cleaning up the sim region conversion and got things back to (mostly) working. This conversion, while a necessary step, has made the last couple days less than spectacular about which to draw you a word picture.
Day 3
Today we started adding support for non-spatial entities. This change was to allow for ignoring non-spatial entities for collision; I believe it’s also necessary for handling the sim regions outside of the camera bounds.
One other lovely thing happened: http://farginnoob.tumblr.com/post/137406879347/scope
It’s a short read, but the TL;DR is that I didn’t see a secondary variable set in an inner scope and it screwed my game up. I spent a good 3 hours searching for that little bastard.
Day 4
I did a little of my own extra work today. Because we moved the hero into being mostly handled in the sim region, I lost the ability to check her facing direction. So I had to do a little rejiggering to make sure I could keep that and let her continue to shoot in the direction she was facing. Other than that, our odds and ends week continued with minor changes here and little fixes there.
Day 5
Today’s work was all to enforce maximum movement distances. This was primarily (though not exclusively) to handle the sword going the proper distance and despawning. Essentially we had something like this already, but we wanted to rewrite it to properly use the sim region logic and check its remaining distance properly, which wasn’t doing in a good way before.
Day 6
Today was really the most interesting day of this week’s work: creating pairwise collision rules that were stored in a hash table that could be easily accessed, dynamically added and removed, and solves the issue of creating huge switch or if statements to keep track of what can collide with whom.
Each entry simply stores the two entities upon which the rule executes, and whether or not they collide. A simple lookup tells us whether a rule exists for the entities in question or not, and if not, we can create one by default to say it does (or doesn’t). It’s an approach that I would not have considered.
Day 7
We didn’t do much today, just a couple of quick fixes on functions that had small bugs in them. Other than that, we outlined what we plan to do for the next few weeks.
Summary
So that’s it: a very dull, very short week of (almost) no joy and excitement in our programming lives. Hopefully next week is better!
7 notes
·
View notes
Text
Scope
Can you see what's wrong with this code:
// test Vec2 Result = InvalidPos; if (!FlagIsSet(&Stored->Sim, EntityFlag_Nonspatial)) { world_difference Diff = Subtract(SimRegion->World, &Stored->Pos, &SimRegion->Origin); Vec2 Result = Diff.dXY; } return Result;
I missed the inner Result declaration and so my game just stopped working completely. It took me a while of debugging to finally catch that simple little mistake.
Scope, you are a cruel mistress.
0 notes
Text
Week 9
Happy new year everyone! After a bit of extended effort that needed to be pushed at work, and a delightfully restful holiday season, it’s back to the grind! Week 9 took longer than I would have liked (I forgot to take my code with me on holiday so I could work on it), but now it’s finished.
Day 1
The first day consisted of removing a bunch of the old tile-based code so that we could focus on moving into a spatial partition setup. This means that instead of tile chunks, we’re using new entity chunks that hold 16 entities each (for now), starting at their relative position in the world. That means that any given “room”, we might have 4 or more chunks, depending on how many entities are in that room.
I think. I’m not entirely sure how this plays out, because I’m much more a visual learner, and I don’t have a good visual for it, but I estimate that’s how its working.
Day 2
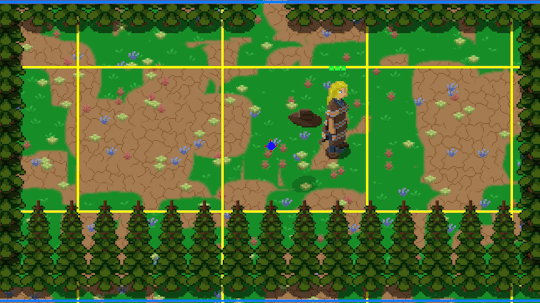
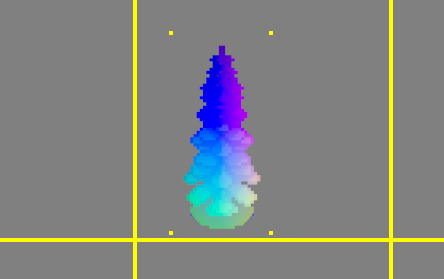
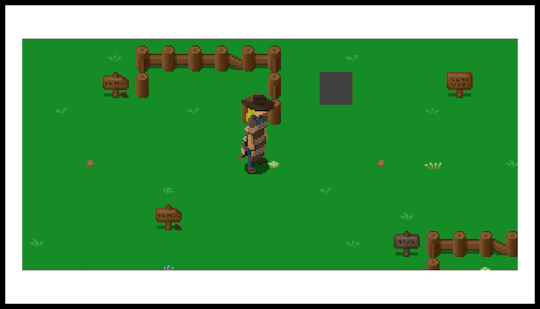
From there, we started using the spatial partitioning to place entities in the world. We also removed the background so we could start setting up the walls using actual entities/art instead of the white blocks from before. That meant creating some new happy little trees to serve as a test wall for the time being. As I go along, it’s nice to have a coding break and work on the art, which led to this happy little guy:

Incidentally, it’s the first tree I’ve been able to make so far that I didn’t feel looked like absolute crap. It’s not perfect, but it’s a step in the right direction. Nature is apparently difficult for me to grok sometimes.
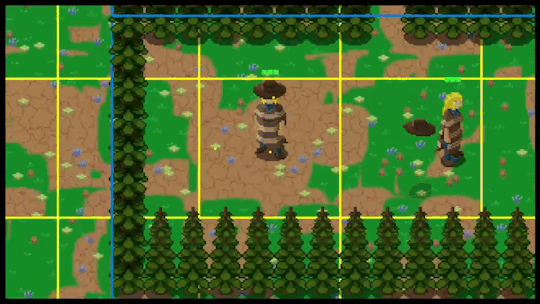
Once the tree was created, that meant I was able to replace my white wall squares with them. It started with the trees being offset in the wrong position and so the whole “room” looked odd, but after some tweaking, I was able to get it into the right position:
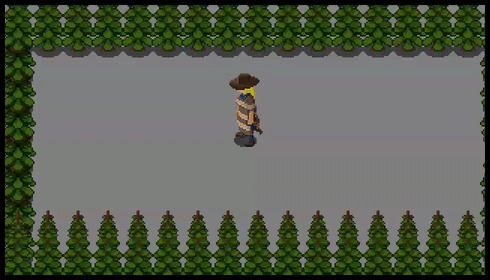
So that’s pretty neat!
Day 3
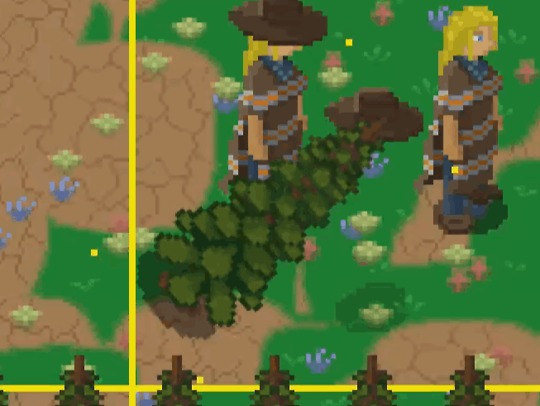
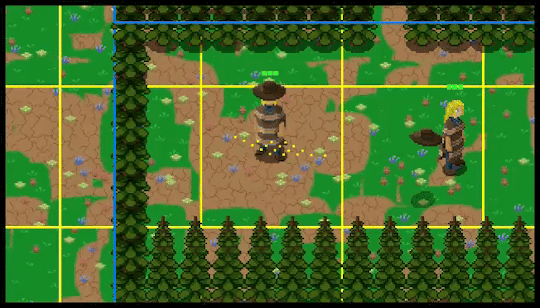
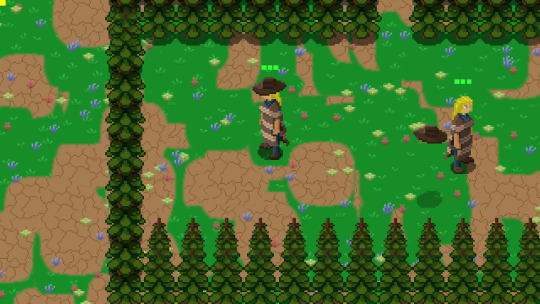
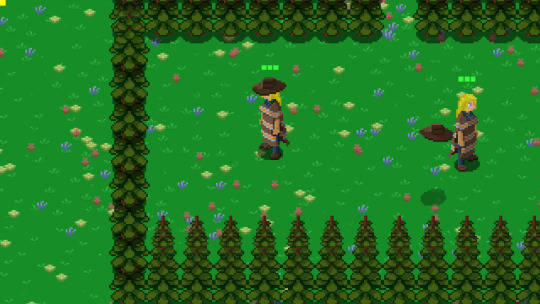
Now that we have entities set up and working (collision in the right spot and everything), it was time to add an enemy and a basic familiar that could follow the player. Since I had already partitioned the character into body, hat, and shadow, I was able to easily create the enemy without a hat (so you know it’s not the player) and a familiar using only the hat and shadow.
The enemy doesn’t do anything at the moment except exist, but the familiar we wanted to feel a bit more alive, so we made it bob. It was just a matter of adjusting its Z position to appear as though it were floating using a sine wave to simulate the motion of the bob. One tiny other little thing was to introduce shadow fade dependent on where in the bob the hat to add to the effect.
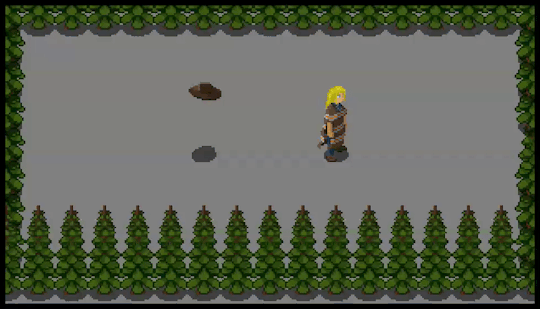
Because our familiar is supposed to follow us, we input our first AI following mechanism to get the familiar to follow the player.
youtube
And once we had one familiar working, it only made sense to have many following us!
youtube
So that was fun to do. In our current renderer though, this many (or more) entities all trying to move around starts to slow things down a bit. We’ll come to that later.
Day 4
For today, we started rearranging how we were drawing things. Whereas before we were drawing each thing directly, now we were going to start pushing each entity that needed to be drawn into a group to be drawn as a group. This should also hopefully allow us easier Z-ordering when it comes to fixing our draw order later on.
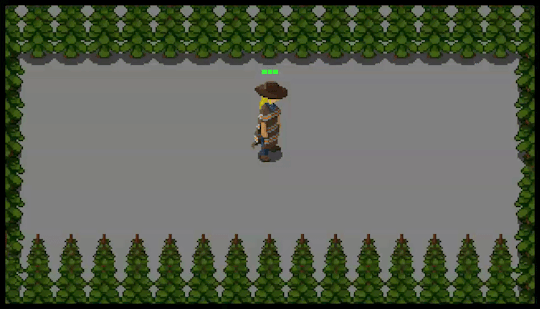
Today was also when we decided to introduce the first concept of hitpoints for our characters. Not only having them, but displaying them on screen in the form of blocks. In typical Zelda-like form, the character will start with three “hearts” and each heart block will have multiple pieces, such that you could take multiple hits per heart of health.
And we finally started introducing Vec3 and Vec4 into the code, so that we can more easily handle those objects that require 3- and 4- component information (RGB/RGBA, XYZ, etc.).
Day 5
Now that we had the health, it was time to put together a simple attack. Once again, that meant going to the drawing board and putting together a weapon. I chose to make a simple wooden sword, if only for simplicity’s sake at the time.
We linked a button press to the sword and it emitted! But only once per game. Well, we’ll get to having it disappear and being reusable tomorrow, I think.
Day 6
Oh hey, what do you know? We put some motion into the sword and had it fly out from the character when you press the button. We’ve got some quirky action that happens if you attack before the previous sword finishes its path, but we’ll fix that later. In the mean time, we have another piece of our Zelda clone in!
It even has a shadow. Awww.
Day 7
And on our final day of the week, we started moving away from the concept of Low and High frequency entity sets... sort of. What we wanted with the high frequency objects was a set of entities in the immediate play field that would move, play animations and update every frame.
Obviously this kind of update would slow the game down at any kind of scale, so it was then important to have the rest of the entities in the world just kind of hang out until they were in range of the player. However, we still wanted these low frequency entities to simulate certain things, such as having a delivery guy wandering from point to point out of the range of the player (and possibly passing through the immediate play field).
Well, the way we have been doing it up til now was not the cleanest way to handle things, pulling them into high and pushing them back out into low. This also meant that some functionality was duplicated to work on both the high frequency and low frequency entities; doubling work like that is never what you want.
So to replace it, we’re moving to the idea that all entities are “stored” entities, and that we’ll be setting up a moving sim region across the playable world that will simulate what entities in that region might do during that frame. The sim region is likely going to be about the size of the camera region, but will occur off screen. This is apparently going to simplify things, but we’ll see how it all works in the coming week.
Summary
For now, the code’s a bit broken because our last change has thrown a bunch of little wrenches into the works. We’ll get it working again soon, but for now, it’s nice that we have a character, an enemy, and a familiar all moving about. It’s also good to have a basic attack set up so we can start to get a feel for some more basic mechanics along the way.
It’s a good start to the new year. Let’s see what’s next!
1 note
·
View note
Video
tumblr
Some little friends. :D
2 notes
·
View notes
Text
Happy Little Trees
Made myself a new tree for art testing purposes. I’m not sure how I feel about it, but I know it’s better than my last attempt.
youtube
2 notes
·
View notes
Text
Week 8
Ladies and gentlemen, welcome to week 8 of our exploration of building a game from scratch, like they did in the pioneer days of Marco Polo and Christopher Columbus. None of this namby-pamby 3rd-party editor nonsense! No! We continue forward, typing in every bit of code ourselves, finding out what makes engines go.
A lot of this week was about conversion; converting collision to entity collision; converting our tilemap system to an entity system; converting our entities to be in different world spaces. Let’s take a look!
Day 1
Today was a lot of math and interesting information about a man named Minkowski and the sum he created to handle collisions. The general idea is that you take a shape and run it around the perimeter of the object on which you want to check collision.
The point here is to more ably see if something could pass through collision or of it can’t. This is particularly helpful with doors so you can check to see exactly where the player could pass through a door, so that everything comes out peachy.
The second part of this is something called G.J.K., which is another collision algorithm to help split up concave shapes into convex pieces and use the Minkowski sum on the smaller pieces. Apparently, it’s much more difficult and time-consuming to try to perform calculations on a concave object than on multiple convex objects. So using the G.J.K. method, you save yourself a lot of processing time; and bonus, this algorithm works on pretty much any randomly shaped object.
Day 2
Once we got to day two, we started implementing entities based on their update status. The update status is described as how often a given entity will be updated while the game is running, with high-frequency entities being updated every frame, low-frequency entities being updated maybe every 60 frames, and dormant entities being updated on a much lower scale, or not at all until they’re moved into the low-frequency set.
High-frequency entities are those that are in the immediate play area and each handles its position, speed, and facing direction. We defined that area as the one on the current screen and in screens up to 1 screen away in any direction; essentially you’d have 9 screens worth of entities that would be updated every frame. For this, we limited the count to just 256 entities, which probably won’t be enough given that for just walls we need something like ~50 per screen; at 9 screens that’s 450 entities just for walls, so we will probably end up increasing this count a bit.
At the moment, we didn’t define what a low-frequency entity incorporated. We did however determine that dormant entities would encompass the rest of the world outside of these screens. We initially set the number of entities out here to 4096, but that was just for testing purposes. Each dormant entity contains reference to its global world position and its size, which we figured we’d need regardless of which set it was in.
Day 3
Most of this day was behind the scenes work to get entities mapped correctly into the camera space, as well as making sure that they move correctly when we shift screens. After all, we don’t want entities staying in their positions off screen we move into a new room!
The other part of the day was implementing jumping for the character.
Though this isn’t very useful right now, I’m going to be able to start using this for my platforming sections. For now though, it’s just cute.
Day 4
Once again, I found myself working on a lot of terribly dull behind-the-scenes things. I was focused on converting walls into entities so that we could further develop our entity system. This also included setting up math functions to handle rectangles so that we could better do collision math. Lastly, we updated the entities to move in and out of the correct frequency sets when they moved in and out of camera range.
Day 5
Today we determined that since we hadn’t yet used low entities, we were going to scrap the 3-tier system of entity storage and convert dormant entities into low-frequency entities.
Day 6
We handled a couple of storage things today. First, we moved the world from unsigned to signed world storage. Previously, we were using this because we had originally intended to allow wrapping of the world, so if you hit the right edge, you’d appear on the left side of the world. But we eliminated that a few days ago because it started to make less and less sense from a complexity standpoint; there were issues with rooms being split, where one part of the room would be on the right side of the world, and the other would be on the left side of the world.
So we removed that and the change today was to allow us to more easily place the starting point of the world at common 0,0,0 coordinates, which makes testing that much more straightforward.
The other thing we did today was to incorporate true sparse storage by using a hashing function to store only those chunks that actually had anything in them and linking them all together. What’s interesting to me was that I wasn’t quite sure how a hashing function might be set up, but we ended up just adding the X, Y, and Z coordinates together (with some multiplying) to get the HashValue. This is interesting because when I was working on my DQ demake, I was using a hash function without even knowing it when trying to identify individual tiles of the map. So that’s pretty neat.
Day 7
Finally today, we moved from a tilemap-based system to an entity system. We still have some of the back end logic so we know where in the whole world our entities are in any given residency (low- or high-frequency), but the rest of the stuff is handled by just entities and the world chunk that they’re currently in.
We also played with upping the number of entities in the low-frequency set that we’re handling, at first figuring that anything over 100,000 entities would start to slow the game down. However we played around with it, trying as many as 10 million entities before figuring that 1) we don’t need that many entities right now, and 2) we don’t need to stall the game out while we process that many, given our method was a simple loop to run over them. So for the time being, we set our limit to 100,000 and we’ll update that later as the need arises.
Summary
So a lot of background work to continue our storage development and figure out how we want our game to run. I was out of town for part of the development time of this week and have had other job obligations (jobligations?) to tend to, so my available time has been cut a bit. However, with Thanksgiving coming up, it’ll give me some extra time to spend working on the game, which I’m looking forward to.
For those of you who are in the states, Happy Thanksgiving! For those of you who aren’t, you’re missing out, but I’m sure you’ll find something to do in the interim. Until next week!
7 notes
·
View notes