
he/him/his | next con: Colossalcon (?) | About
Last active 60 minutes ago
Don't wanna be here? Send us removal request.
Statistics
We looked inside some of the posts by flamingcosplay and here's what we found interesting.
Average Info
Notes Per Post
415K
Likes Per Post
237K
Reblog Per Post
177K
Reply Per Post
350
Time Between Posts
12 days
Number of Posts By Type
Text
6
Photo
10
Note
1
Last Seen Tumblr Blogs


Fun Fact
Tumblr was named as a finalist in Lead411’s New York City Hot 125 in Aug 2010.
Text
Cosplay 101: Adhesives
This is meant as a beginner primer for adhesives (that we use [enough to know a bit about {mostly}]). This is meant as an outline that covers the general details of each kind of adhesive. The links direct to the wikipedia page on the adhesive if you want to know more about the full details.

Cyanoacrylate: CA glue for shorthand, aka Superglue or krazyglue. However, if something is marketed as a super/krazyglue and doesn’t contain cyanoacrylate, it’s not a CA glue. This is our go-to glue. It’s strong, but a bit brittle and can melt the crap out of some materials.
Pros:
Strong
Widely available
Cleans up with acetone nicely
Can glue most things together (EVA foam, paper, styrene all work well)
Many consistencies available (thin, thick, gel)
Quick dry/cure time, can be quickened with CA accelerante
Can be mixed with baking soda for an effective gap filler (CA cement)
Safe to use on EVA foam
Readily available anywhere that sells adhesives
Cons:
Fumes/strong smell, ventilation and/or a respirator required if working with large amounts of CA glue
Brittle and non-flexible
Melts polystyrene (EPS/XPS foam aka Styrofoam)
Fumes can leave cloudy residue
Rapid exothermic reaction with leather, cotton, and wool that can cause burns and even fire
Shelf life of about a year unless kept somewhere dark and cool (like the fridge)

Polyvinyl Acetate: Also known as white glue or Elmer’s glue. Useful but a bit basic and requires open evaporation.
Pros:
Pretty safe, just don’t straight-up drink it or rub it into your eyes or nose
Great for paper and other open structure materials (fabric, some open-cell foams)
Widely available
Water-soluble
Inexpensive
Readily available anywhere that sells adhesives
Cons:
Relatively weak and brittle when cured
Needs open-air evaporation to dry
Water-soluble
Long dry/cure time

Gorilla Glue: We’ve used this one a few times and it seems to work fairly well
Pros:
Strong bond
Non-solvent, won’t melt things most of the time (stable with XPS foam)
Readily available anywhere that sells adhesives
Cons:
Needs clamping/pressure to cure properly
Long cure time
Expands during cure process, can squirt/drool out of joint (might be a good thing too, though)

E6000: A strong and flexible glue, great for fabrics or gluing things to fabrics.
Pros:
Very flexible, can hold up to a little stretching even
Strong bond with a bit of surface sanding
Can glue many kinds of things together (EVA foam, fabric, styrene, paper, leather all work well)
Dries clear (though air bubbles and edges can be visible)
Readily available anywhere that sells adhesives
Cons:
Solvent-based, will eat through polystyrene, pretty pungent smell
Long cure time
Can smear easily during curing
May ooze out of the tube and glue the cap to itself (plies might be required to unscrew the cap if this happens)

JB Weld: An incredibly strong 2-part epoxy. I use this a lot to strengthen a mechanical joint.
Pros:
Incredibly strong, can be used to join engine parts together
Fairly shock resistant
Works great on most surfaces
You can drill, tap, sand and carve it once fully cured
Cons:
Very long cure time, about 24 hours
Not flexible at all
Requires a very good joint and a lot of surface prep
Can be brittle under torsion
Needs more cleanup than single-part adhesives

2-part Epoxy: This is a massive group of adhesives so I’m only going to mark the basics
Pros/Cons:
Strong
Cure time can vary from a few minutes to days
Needs more cleanup than single-part adhesives
Ranges from glass-hard to pretty flexible after it cures

Hot-melt adhesive (aka Hot glue): A craft standard and fairly material-safe way to adhere things together.
Pros:
Works on everything that doesn’t melt or [easily] catch fire
Fairly strong with a good joint surface
Pretty safe if you don’t touch the nozzle or glue while it’s hot
Safe to use on polystyrene
Great for EVA foam armor/props
Inexpensive
Glue itself can be versatile and used for filling molds.
Glue sticks can come in a variety of colors
Cons:
Can be a bit messy, nozzle keeps leaking sometimes and leaves threads of hot glue everywhere
May be visible under thinner materials if the glue isn’t smoothed out
Can straight-up melt or ignite some materials (spot test or look up the melting point of the material)
May be only semi-permanent in some cases, depending on the surfaces
Can melt when exposed to heat (don’t leave pieces glued together with hot glue in a hot car)

Contact cement: An adhesive that is applied to both surfaces, allowed to dry, then pressed together. Barge and Weldwood (US) are brands commonly used in cosplay. Rubber cement is not a contact cement.
Pros:
Very strong, practically permanent once bonded together
Great for EVA foam armor/props (the main go-to for a lot of foamsmiths)
Cons:
Fumes require ventilation and/or a respirator
Requires a ready supply of brushes for application
Shelf life up three months to a year depending on storing conditions. Throw away if the cement begins to set up in the container
Melts polystyrene
Cures in 5-10 minutes, but EVA foam may require a second coat due to its tendency to absorb materials
2K notes
·
View notes
Text
Online Fabric Shopping Tip: Swatches!
Fabric shopping can be extremely difficult for some cosplayers. Maybe the color you need isn’t at Joanns, or the fabric you’re looking for isn’t sold at that one quilting store. Maybe it’s a one-hour or more drive to anyplace that sells fabric. Or even worse: there is nothing nearby. This leaves a lot of cosplayer relying on online stores to get fabric.
But you can’t feel the fabric online. How can I tell what color the fabric really is? In sunlight? Indoors? Is it going to drape the way I need? Am I gambling buying online?
Fear not! There is one amazing solution to ensuring the fabric is what you need!
REQUEST OR BUY SWATCHES!

A swatch is a small square, triangle, or rectangle size of fabric that sellers may either send or sell of the fabric you are looking at.
Though these swatches may not be large, they serve the worries you have about your upcoming project. They…
Tell you how the fabric looks and feels
Or even how it drapes if you are looking for a certain fabric stiffness:

Some sellers may actually have a Swatch Collection in which buying the entire collection of colors is at discount then comparing and contrasting a few colors in between. This is especially good if purchases of a particular brand become a recurring thing.

Also be aware that a lack of a button or section to buying swatches does not meant that the seller will not provide them. Contact the store with the exact fabric you would like to get a swatch and see if they are willing to send a swatch directly to your home. This can also be applied to online sellers on large e-commerce sites like Ebay, Etsy, and many more.
Getting swatches can also be a huge help when hunting for a specific kind of fabric for your cosplay. It gives you a compare and contrast between multiple sellers to try and see if it what you’re 100% looking for.

Swatches aren’t reserved for just fabric! Swatch books are also made for threads!
Although slightly harder to find, many thread companies and thread sellers actually sell swatch booklets of threads.

This can be especially useful for buying threads for embroidery and appliqué where the top stitching color and the shine of the thread may actually matter.
Not sure where to start? Here are a few amazing places.
Syfabric = Good variety for great prices
Spoonflower = Great for custom fabric printing
Distinctive Fabrics = Variety at great prices + lots of fur
Beverly’s = Great variety of fabrics including quilting patterns
Fabric Empire = Lots of great fabrics and deals. Very easy nav search
NY Fashion Center Fabrics = Expansive color assortment, and very helpful staff. Ordering swatches can get you 15% off next order!
Mood Fabric = Higher end items, but lots of sales. Send ‘free swatches’ with orders
Spandex World = Spandex, stretch, and stretch pleather
Minky Boutique = Expansive range of minky furs
Silk Baron = Wide variety of dyed silks and duponi fabrics
Dharma Trading = Undyed Silks and lots of dying inks and tools
Fabrics-Store = Super amazing for linens
HouseFabric.com = Large variety for great prices, including lace and trim
All Stitch = Overwhelming supplies for hand + machine embroidery. Sells Madeira Thread
Wawak = Superstore of sewing supplies at low prices. Sales almost every day
ShineTrim = Large variety of trims and especially bridal trims
Pacific Trimming = Extremely large trimming and notations store
4K notes
·
View notes
Photo

We were born to make history.
Sae as Victor Nikiforov Akatsu as Yuuri Katsuki Rayko as Otabek Altin Hikarii as Yuri Plisetsky Photo taken by Hoka
2K notes
·
View notes
Photo


Chris | Victor | Yuuri | Photo by
543 notes
·
View notes
Text
Me walking into the Joann’s: Hello fabric seller, I am going into battle and I want your strongest fabrics
766 notes
·
View notes
Text
Looking for cosplay posts
Hey! The queue’s getting low again, so if you run a cosplay blog (or have a cosplay tag), reblog this post or leave a reply and I’ll take a look and add stuff to the queue.
Some quick notes:
I’m only reblogging cosplay from the original cosplayer or otherwise have credit.
WIPs are fine, but I’ll use the most recent one if there are multiple WIP posts.
The queue posts 10 times a day on the hour, so if your post doesn’t show up immediately, be patient. I’m also supplementing from other sources.
25 notes
·
View notes
Text
When your super talented friends create new content:

109K notes
·
View notes
Photo


“Sometimes it feels like the whole damn galaxy is trying to kill me”
Commander Shepard: me Photography/Editing: @hallwoot
118 notes
·
View notes
Photo


Creative Mom Dresses Up in Amazing Cosplay to Represent Older Women Characters
150K notes
·
View notes
Photo


Wonder Woman by Cutiepiesensei Cosplay
“ It’s about what you believe in. And I believe in Love.” Cosplayer instagram / facebook / tumblr
Photo by @idruthat
Get the comics here
[Follow SuperheroesInColor faceb / instag / twitter / tumblr / pinterest]
66K notes
·
View notes
Photo


Kiki’s Delivery Service 🕊ig: kieraplease
6K notes
·
View notes
Photo

I’m about a week late for what was apparently Luke Skywalker Appreciation Month (tho let’s be real… I appreciate Luke Skywalker every month) but I wanted to make a lil contribution with my Hoth Luke cosplay!
206 notes
·
View notes
Photo


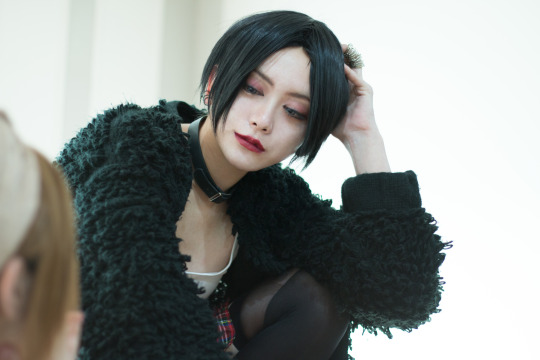

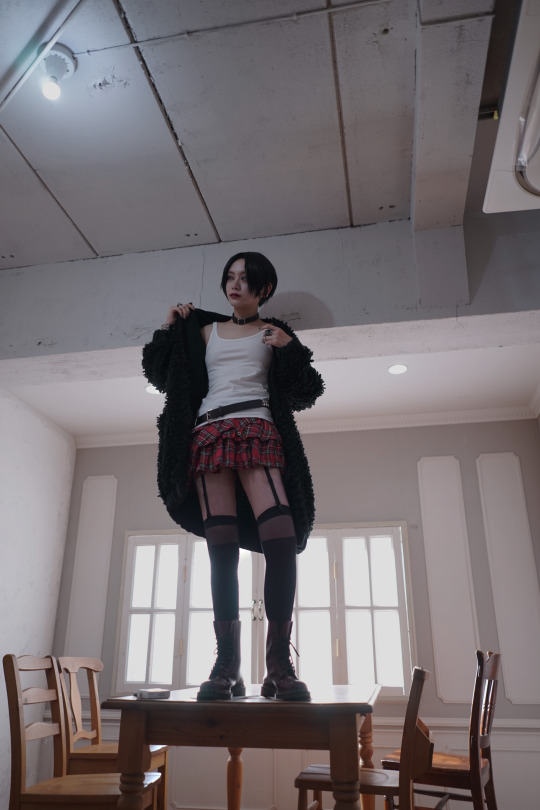
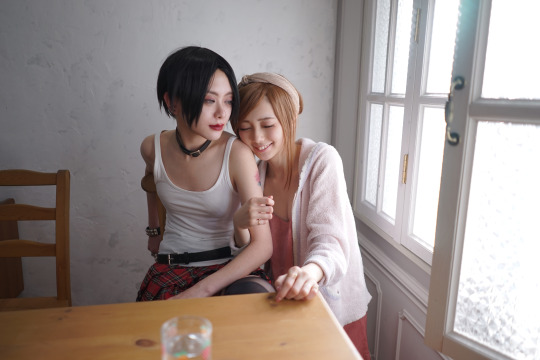


NANA
とびきりかわいいヒロインの名前は奈々
奈々 6番
photo by フジサキ
20K notes
·
View notes
Photo


Gorgeous cosplay of Usagi’s final form in episode 200 by Lo.
23K notes
·
View notes
Text
Hijab is not a barrier to cosplay.
These Muslim women are using their hijabs to transform into superheroes.
It’s called hijab cosplay, inspired by Japanese costume role-play and it’s making waves in Muslim-majority Malaysia.
Nuzaru is one of a growing number of hijab wearers embracing this world of comics, film and video game characters.


She spends weeks planning her costumes.
Today Nuzaru is competing at Malaysia’s first event dedicated to hijab cosplay.
Saakira co-founded the event.

Hundreds are here to watch acts and learn tips from cosplay pros.


Nuzaru’s hard work pays off as she nabs top prize.


This is so great! And this is what we need here in America!
27K notes
·
View notes
Note
how do you decide what to do with your face in pictures? there are a lot of tutorials on posing but they mostly just talk about the body and i feel like my face looks boring or weird in most pictures
AS ALWAYS this stuff takes practice. You get more comfortable the more you do it, but there are tips and shortcuts to help you achieve something more in your control then just smiling and hoping you look right.
My favorite tips are the, “MMMM” “me” “haha” and “you” tricks! And what they are, are words to say to yourself during your pose to help train your face into specific structures. For smiling for example, specifically with your mouth closed, practice saying “MMM” when you pose! It creates a really natural curve to your mouth, without making your cheeks ache and contract when you force yourself into a fake smile. I know this all sounds stupid, but seriously try it. Try it in some selfies, practice agnling your head. Say it out loud if you need to!Here’s me saying “MMMM” to make a closed lipped smile!
For an open mouthed, natural, teeth smile, say “Me” when you pose!! You can either say “Me” as you smile for a prounouced smile, or simply say it as the shutter goes off to catch a more candid looking, happy state of your face.
These are all “me” poses, where im literally saying the word under my breath to train my face.


Saying “You” so youself as you exhale through your lips, creates a very neutral, easy, UN TENSE, looking face. Its my go to for everything. YOU poses are awesome for static poses, where you just need your face to look normal, natural, and pretty. Lol. It’s great cause if you dont do this and keep your mouth closed, you often look boring or too stiff. Sayng “you” activates your muscles and livens your face enough that you dont look dead or lifeless.
These are all You poses. I’m literally saying that word a I pose. And some of these I say YOU while putting a little smile in there by thinking happy thoughts.

I don’t use “HAHA” as much, but it really is just like you might think. Saying HAHA out loud as you pose creates that easy going, natural look of laughing.
As you might tell, Posing is a lot about ACTING as well as knowing your body.
SO GET LOOSE. In between photos im CONSTANTLY moving around. And after a few shots im cosntantly stretching my mouth wide, making fish faces, puffing my cheeks, RELAXING my muscles so they don’t do that horrendous School Day smile that we all dread.
And again PRACTICE. Get in front of that mirror and try out a bunch of stuff. Try DIFFERENT WORDS to see what saying them dos to your expression. Try angles and poses at home, so when the camers in front of you, your ready.
Then youll be able to do more complicated stuff too.
#woah this is so helpful!!!#Im really bad at smiling with my teeth i need to try this#tutorial#posing#modeling
2K notes
·
View notes
Photo


The Gorgeous Court Dresses of the Romanov Sisters in Anastasia The Musical. Designed by Tony Award Winner Linda Cho. Tumblr kills quality so click on the photos to view them in all their glory.
796 notes
·
View notes