
A blog about the tabletop wargaming hobby, its technical, psychological and social aspects all seen from a somewhat unusual perspective.
Don't wanna be here? Send us removal request.
Statistics
We looked inside some of the posts by flowing-paint and here's what we found interesting.
Average Info
Notes Per Post
37
Likes Per Post
24
Reblog Per Post
12
Reply Per Post
1
Time Between Posts
17 days
Number of Posts By Type
Text
17
Last Seen Tumblr Blogs


Fun Fact
Tumblr was attacked by a cross-site scripting worm deployed by the Internet troll group GNAA on Dec 3, 2012.
Text
I'm leaving Tumblr
The few readers that used to follow my hobby tips and wargaming articles probably noticed that I stopped posting back in April. I felt like my content was deserving more exposure but unfortunately, Tumblr is not the right place for this type of blog. I decided to move on and reboot Wargaming Lobby on a new platform (Wordpress). In addition to moving to a new address, I started recording video tutorials for a new companion YouTube channel. If you feel like my content is worth your time, please consider following me using the links below. New blog wargaminglobby.wordpress.com YouTube https://www.youtube.com/channel/UCru7U2MOGwHEz_Jfb-ePIxA Instagram https://www.instagram.com/wargaminglobby/ Twitter https://twitter.com/WargamingLobby Thank you to all the followers that took the time to read my content. I hope you found it useful and you want to know more. Again, I'm not quitting the blog but just this platform so use the links above if you want to stay in contact. See you!
3 notes
·
View notes
Text
Terrain review
Today I have a small review of some pieces of terrain I just bought and I want to share with you guys. They’re such a great value that I cannot even wait until I build and paint them all: I just literally unboxed them and I’m already here to show you. Let’s see what I’ve got.
First of all, this is not a “real” review... I didn’t get asked to review them but the price is more than fair and I like their looks so much that I decided to introduce them to you all. All the pieces come directly from the same manufacturer, World War Scenics: a terrain/accessories company that you probably already know if you’ve been in the hobby for a while. They are well known for their quality coupled with prices substantially lower than the competition. If you don’t know them, check them out on their website here. They also have an eBay store if you’re more that kind of person.
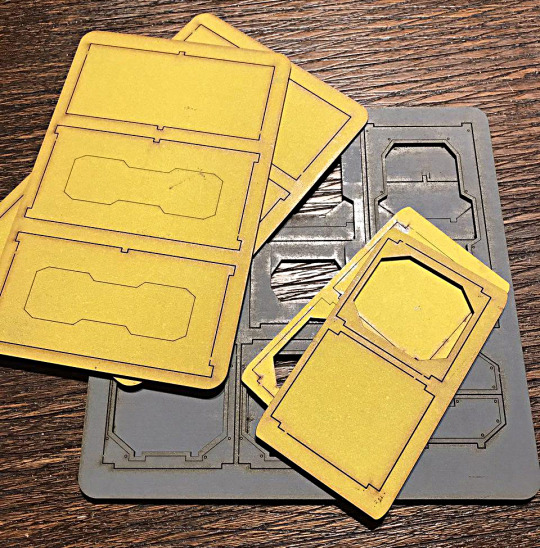
Scatter terrain
The first products I want to show you are these lovely, lovely barricades, boxes etc.
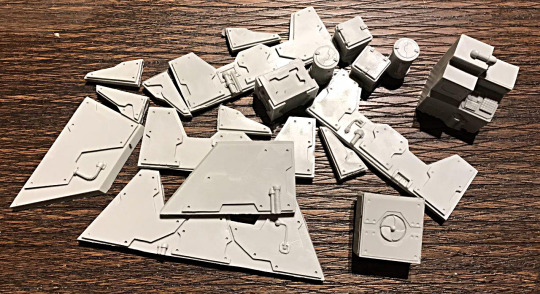
Touching them it feels like they’re made of the standard grey polyurethane resin so I guess I won’t have problems priming/painting them. As you can see from the picture, they’re pretty basic and not overloaded with details. I know this may be a bummer if you’re into the new Necromunda-style terrain but I do believe that a simpler piece can be brought to the tabletop faster thus helping newcomers and all the busy people like me. I’m also a believer in the “less-is-more” approach and I’m really happy I’ve found them. If they paint up easily you can expect many more of these babies!
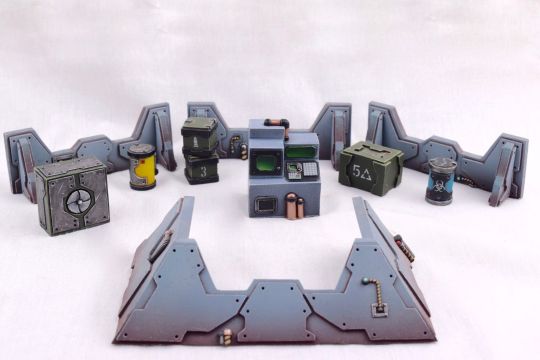
The total price for the complete kit was 15 GBP. Just 15 GBP for this load of terrain! If you cannot imagine the finished product, here is the link to the painted stuff in the eBay auction. They really look amazing.
It’s a pity I don’t have an airbrush so I’m not sure I will be able to give them the same smooth look but I will try my best and see what I come up with.
Fuel tank
If you follow the blog, you probably saw my USCR fuel tank. If you haven’t, you can find it here. While that’s fully handmade from an old chewing gum box, it still looks pretty flat and childish. So, welcome the new fuel tank!
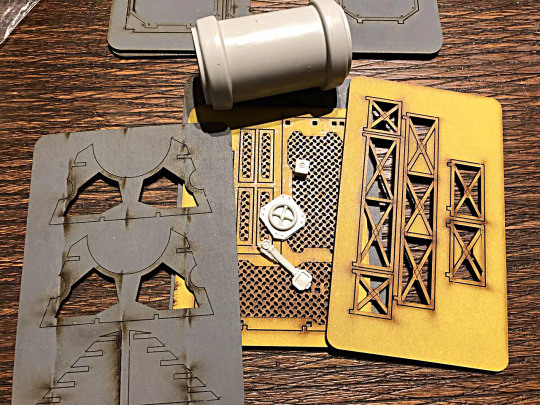
As you can see, if you exclude the tank the supporting structure comes in pre-painted laser cut MDF. As you can see in the picture, the paint job is good and it also comes pre-weathered. It’s a little smelly but nothing unbearable. Unfortunately, it’s hard to imagine the final piece starting from the components alone and this is the biggest drawback of these kits: they, unfortunately, come without any form of build instructions. It’s all left to your imagination. Well, it doesn’t look too difficult and having the picture of the finished piece is probably more than enough. Here is the auction image. Looking absolutely gorgeous.
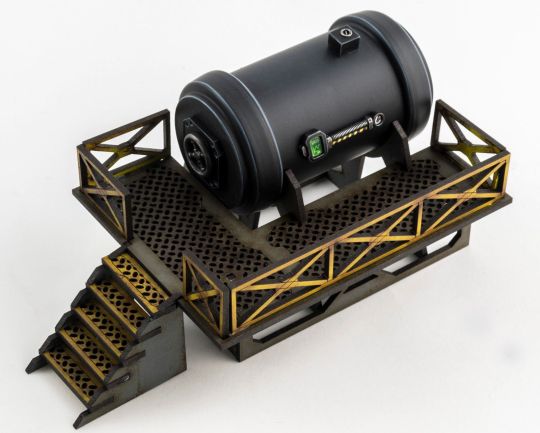
The price is again really small: only 14.99 GBP for the complete kit. Bear in mind that the tank is a huge block of resin, the stairs/walkway are pre-painted and the final terrain piece is pretty big. So, a lot of value IMHO. You can find the kit on eBay here.
Shipping containers
The last piece I want to show you is this kit for two laser cut MDF shipping containers. The come pre-painted/pre-weathered exactly with the same color scheme of the fuel tank so it helps in creating a uniform look on your table.
Again, they don't really look like containers at all if laid flat and before building but they should become one of that near-future kind of containers that usually look good in games like Mercs or Infinity. Again, I took pictures after the unboxing so if you want to see the assembled kit here is the link to picture in the eBay auction.
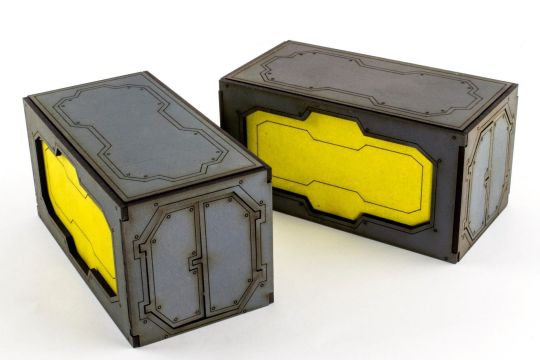
They look really cool if you think they are pre-painted MDF containers. They have fewer details than the armored containers from GW but they still look less gothic and really Sci-Fi. Digging them.
The price for the kit was only 9.99 GBP, again, a steal if you think how much terrain usually cost. You can find the eBay page here if you’re interested in buying one (or more!). I will. Definitely.
Conclusions
It seems WWS made a great set of Sci-Fi kits that will probably be perfect for all 28 mm skirmish games (like Necromunda, Shadow War, Infinity, Mercs, Kill Team, etc). They also have a big set of balconies, stairs, and ladders that mimics the terrain you find in Shadow War Armageddon even though I preferred to start with the small ones before buying it. I will probably buy it now that I have these small sats as I found out that the quality is pretty high while the price is still pretty low. The range is still limited but if the users show WWS some love they will probably expand it.
I will start working on these pieces as soon as I can because I have an upcoming demo game event on May the 19th and I want to have a lot of terrain by that date! Stay tuned to see how they turned out!
... game on!
1 note
·
View note
Text
I want cheaper minis!
Well, that’s no news... who doesn't? The point is that even if they do exist, we always go for the super-expensive and fancy ones reducing the chances their producers will remain in business. Beware: I'm writing this short post on the go because in Japan May is the month where you celebrate young boys and we had to prepare some related stuff in my wife's parents house. I'm therefore writing this while sitting on their sofa, drinking an iced coffee! I’ll try keeping it short and focused.
Many people new to the hobby have a clear equation in mind:
Miniatures = Warhammer
Note that I didn't write GW on purpose because the discovery of that name usually comes a little later. Case in point, my mother used to ask me "are you bringing your Warhammers with you today?" when I was going to see my friends. That's how big this de facto standard in miniatures is. The point is, however, that many other producers are actively developing new games and new miniatures they usually sell waaaay cheaper than GeeDubs. If you are a hoarder like me or you just enjoy painting a lot of stuff and you want to keep buying GW minis, you may need a miniatures loan. Or better, a change in your shopping habits. Why am I writing this you say? Well, I have a couple things running through my head that brought me to explore the web for a new proxy miniature.
IA the Foundation
This is the name of the dude I'm looking for: the boss of the elemental faction in Myth the board game. You can see some pictures here (Boardgame Geek)
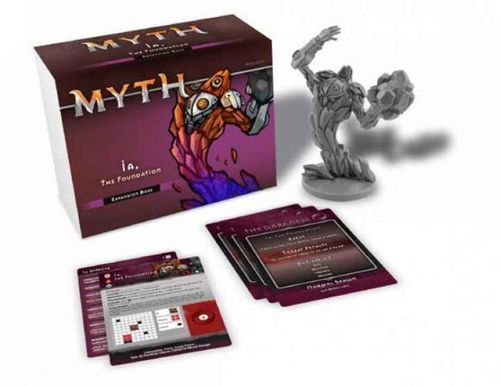
He didn't come in the Kickstarter base pledge and due to the fact that the company is dying, well... he is nowhere to be found. I would really like to have the cards and the traps so I decided to search the internet high and low but I was out of luck. There is only one option. Proxy the hell out of him!
While you can find gazillions of elemental miniatures, I thought the best match would be this new Mantic miniature, the Greater Fire Elemental.
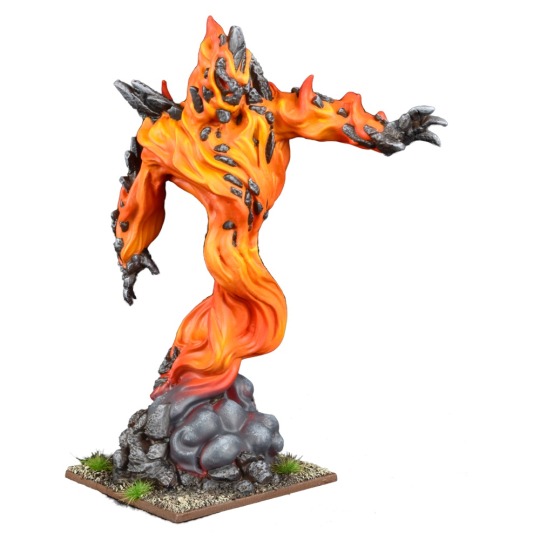
He is a big boy that will tower above the heroes with its 12 cm height and he has a nice dynamic pose together with a slightly cartoonish look that can fit the Myth universe. He was not cheap though: 30 GBP + shipping. I did not hesitate too much though as I decided to paint him and build a lava diorama around him. This way I will also be able to enter him in a local shop painting competition that will happen mid-summer.
Other ranges
While shopping on the Mantic site I made a discovery: they have a science fiction miniature line!!! I know that may be old news for many of you but I lived with the belief that they were mostly doing board games and they had a sharp focus on fantasy games (like Kings of War or Dungeon Saga). Well, it turns out they have a whole range of Sci-Fi miniatures supporting - not one - but three standalone games! You can check them out on the website with these links:
Warpath
Deadzone
Star Saga
The prices in this range are very interesting: they’re so cheap that a full-size tabletop game experience will probably cost you like a board game. Excluding terrain, of course. I’m very happy with this finding even though I am definitely not planning on jumping on board immediately: I have many things going on and almost no free time to get them done so the last thing I need is a new army to paint. I did decide to buy a couple boxes of the humans (Enforcers) though, just to have them in my hands to judge their quality. We are talking about a box of 10 miniatures for 15 GBP! That’s so cheap I won’t even look for a comparison in the GW range! The models depicted on the page look really good but I still want to have a first-hand experience before buying more.
Mercs 2.0
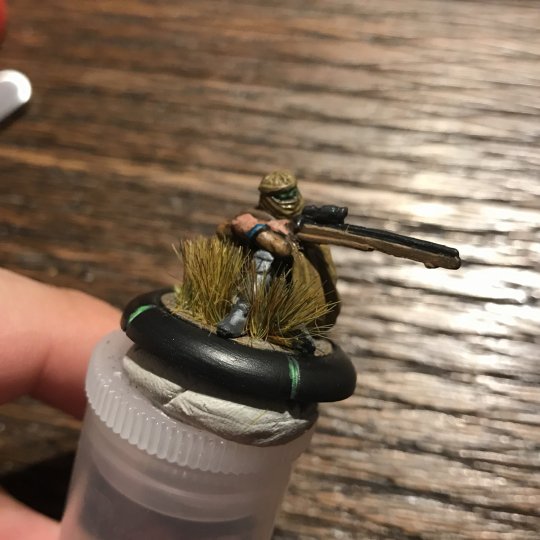
If you follow me on twitter (here is my ID if you don’t) you already noticed that I’m back at work on my Mercs 2.0 miniatures. This time it’s the Texico faction. Here you can see a couple pics of the Leader and the sniper.
I’m not here to talk about this faction but after seeing Mantic SciFi line I just had a brilliant idea: I will use those minis I bought to proxy those factions I cannot buy any more (again: Megacon Games is dying). They look they could work really well for both the Keizai Waza and the CCC factions. The cards are available in the rulebook so this looks like a reasonably cheap way to keep increasing my Mercs factions.
So, getting back to the title of the post, the discovery of Mantic SciFi miniatures line will probably grant me a cheap way to build my Mercs armies and, eventually give me the chance to play a new type of game using their rules.
I will definitely come back with updates regarding this an more than likely, with a detailed review of the painted miniatures. Stay tuned!
... game on!
0 notes
Text
How to paint Rust (Part 2)
I’ve been slacking for a while so I missed the April tutorial due date. I guess that's not a big issue right? Anyway, here we go with the second part of the rust painting how to. I’ll keep it fast, I promise.
First of all, if you missed the first part of the tutorial, you can find it right here. The more interesting techniques can be found there so I insist you give it a show.
So, we left the first tutorial with three rust types still to be covered:
Dark shiny rust.
Rust on metal.
Copper alloys rust.
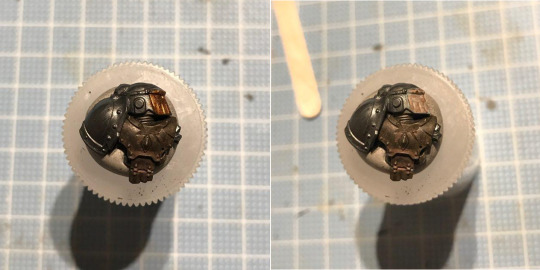
the last one not being exactly rust but I included anyway. Let’s quickly nail them one by one. By the way, I will be using a decorative dead space marine that I was supposed to use on Arhiman’s base but I did not. He will find some love now.
Dark shiny rust
This kind of rust is very uncommon. I see tons of this on working metal surfaces at work but it’s rarely seen outside. Probably it depends on the oily lubrication of the surface or the steel alloy composition itself but it barely looks like rust and more like a brown metal. Let’s see how you paint it.
Well, as you can see in the picture, this is super-easy. First of all, you need to prime your miniature and paint a base coat of semi-dark metal on it. In this case, I primed with German Grey and painted the miniature with Vallejo Model Air Chainmail. After it is dry, you only have to grab some dark brown paint and make a glaze out of it. Any dark brown will work but I suggest you use Model Air Cam. black brown or Armor Brown. The result should be a shiny dark brown still retaining the metallic look, as you can see in the picture. You definitely don’t want to have the brown covering the metal but you want it to just change the color value. To finish this out you have two options:
you carefully drybrush or stipple some metal on the raised area
you stipple some lighter rust on flat areas and recesses.
this will bring you to a semi-new rusted piece or a further weathered piece. Remember that you don’t need to add more rust because when this type strikes, it just covers the entire surface deactivating it. No further rust formation allowed.I decided to accentuate the rust a little bit and this is the result. Really subtle.
We still have shiny metal showing through the brown rust layer and smaller rust clumps where water may pool. This kind of rust works really good on skeletons and undead in general.
Rust on metal
I didn't have the proper model to paint this. Sorry about that. I would have loved a big metal machine like a dread or something similar. I tried to apply this technique to the small piece we are painting so the result may not be super-awesome.
Grab your Riza Rust and dilute it to a thin wash. Exactly. You don’t want it to be a dry paint but you want it to flow into the crevices and tint them exactly as water does.

This doesn't really require any additional explanation. It’s that easy. You want to do this on top of shiny metals but I had Chainmail on this test piece. When I paint my dreadnoughts, the metal is usually painted Vallejo Model Color Oily Steel. The shiniest the metal, the easier will be to sell the effect. Why? Because this type of corrosion usually happens on chrome treated metals or other super slick surfaces. Water collects into the crevices and it rusts. Easy.
Copper alloys rust
Copper always oxidates blue-green and there are many products for you to reproduce the color on your miniatures. I only have one from Vallejo Model Color Verdigris glaze and it doesn’t work super well so I tend to go a step forward. First of all, I just paint copper on the piece then I make a fine glaze out of the Verdigris glaze and cover all over the mask (in this case). I focus on the recesses to get the chalkiness there.
At this point, it doesn’t look super good so I threw a brown wash on top of it to re-establish the contrast and the copper brownish color. The patina will still be there and so will the chalkiness so, still no good. The next step is adding the blue-green to the patina by using... drum rolls: Vallejo model color Blue-green. You want to glaze it, without overdoing it.
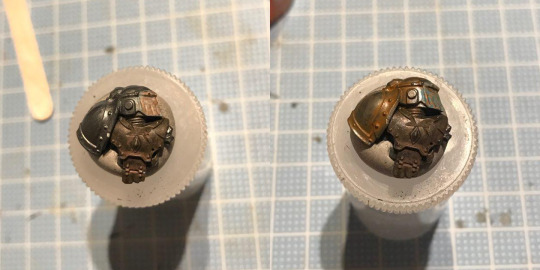
Well, it still looks a little bit dirty but I think it works well for a DIY copper oxidation scheme. I will try to work on this more.
We are don with the tutorial. I know I left the easiest and fastest schemes for this post and it may be a little bit short. I still hope you liked it and you will try to use these rusts on your miniatures.
... game on!
6 notes
·
View notes
Text
Wreck Age - A review
Being the busy man that I am, I almost missed this: a couple months ago, Hyacinth games revealed the new version of their post-apocalyptic tabletop miniature wargame! Yes, we're talking about "Wreck Age", one of the most interesting games in the post-apocalyptic skirmish game scene. This time, in their Second Edition of the rules, Hyacinth Games came out with many new in-game treats that make the universe even deeper and more interesting. I was lucky enough to get a copy of the full rulebook for review so I spent a couple weeks reading it in depth. Here are my thoughts.
Warning: really long post. I tried to keep it short... and this is the result.
First things first: This blog is still young and the reader base is still quite small so I was really surprised when Hyacinth Games accepted my request for a copy of the game to review. Being this the very first time something like this happens and not being a native English speaker, it took me a lot of time and effort to try and make it as enjoyable as possible. These things said, if you feel like you really don't want to read through the whole review, here is the TL:DR:
This game is freaking awesome. Go buy it. Now!
Now that I got your attention, let's move on to the review.
The story
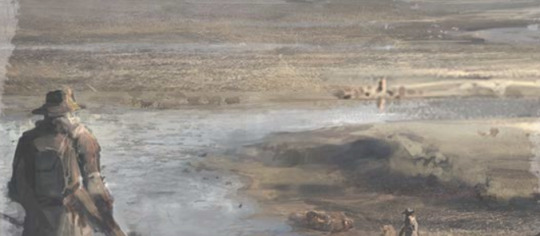
When you first open the book, you immediately find yourself immersed in what looks like the ordinary day of some random people messing around while doing their stuff. Nothing special. Everything feels dry, dusty and incredibly dirty and the post-collapse world feels really desolated. As the story unravels in front of your eyes, you slowly start to realize you were unknowingly assisting to one of the encounters that future-you will play in the game.
So, what's going on in this dusty and pitiful world? The answer is given to you in the form of a collection of historical records that are supposed to help the reader locate himself in the space-time continuum. You, therefore, get to better understand the events that brought humanity on the brink of extinction and you will learn that the game is set in a close future where the most dreadful catastrophic prophecies came true and the worst-case scenario wasn't even close to describing what really happened after the collapse. The elites fled the crumbling society, heading to the stars while leaving behind all sort of fights for resources as well as food and water; people even being forced to cannibalize each other to allow the communities to survive this apocalypse. It is here that you first encounter strange names referring to those groups that came into existence in the disorganized chaos that followed the planet collapse. These factions competing for the world domination or just for their right to existence, are the big groups from which the players will have to choose their characters while creating the rosters to field in the game encounters. I will get back to them in a future post because there are really too many things to discuss here.
Book artwork
Wreck Age artwork is astounding. If you exclude the pictures of the actual models used to explain the rules, all the graphic elements you find in the book have this hand-drawn old-fashioned look that makes them fit perfectly in the story. Muted tones and subtle traits make up for a mix that's really spot-on and will contribute to your full immersion in the post-collapse atmosphere. Just a look at those figures and my imagination started flashing with many ideas for writing my own encounters, stories, and scenarios. In my opinion, this is one of the best aspects of this game as a whole: no matter what you're reading, whether the rules or the fluff, the book is packed with small inspirational bits. They are the fire starter for your dormant ideas. Moreover, if you are familiar with the Fallout franchise, rest assured this book will be able to channel the same kind of sensations without being “just another rip-off” of the famous saga.
The rules
This is not going to be a 1.0 vs. 2.0 rules comparison: I think the first edition is not even available anymore and you should really go buy second anyway. I will just briefly describe the gameplay and point out what I find really interesting in these rules.
Even though it's a skirmish miniature war game, Wreck Age is not particularly lightweight when it comes to the rules. This does not mean that it's rule-heavy either, don't take me wrong. I just mean that we are far away from 40k or AoS where you just keep hurling wheelbarrows full of dice and just go like: "Yay... I'm just here hittin' a bunch of Target Numbers!". Wreck Age, on the other hand, is more RPG oriented, more story-focused and tries to add some realistic element to help you immerse in the game. It feels way more like Mercs 2.0, another really interesting skirmish game: rules are easy to learn but deep/flexible enough to keep you going for a long time. The authors seem to want you to sit down and tell your story through encounters and gave you all the rules you need to set up an RPG-like campaign game. Directly in the main book.
Activation and Actions
The game is based on an IgoUgo activation, where you keep activating one single character after the other until you're done. It's not all about shooting though and each activated character has a certain degree of freedom in what he can do. To show this, the game uses an Action Points based turn activation. This AP system is responsible for adding a lot to the realism of the gaming experience; you can, in fact, spend your turn running around shooting at your foes but also ignore them and just interact with the environment. It goes without saying that highly skilled characters will have more AP available to do more stuff. And believe me: there are a lot of actions you can do. Some really weird like spending 2AP to "Harvest". When I first saw this, I was: yeah, you're shooting at me with a Laser cannon but, hey! I should just sit down and harvest some algae from this pond! Well, don't forget, the importance of the story: harvesting may be worth victory points in that game. Another action I really enjoy envisioning is "Communicate". Your character may shout or use a radio to communicate something to his comrades: do you have to open a locked safe but the combination is stored somewhere else? You split your squad and send one group looking for the code and the other to the safe itself so there's no need to be exposed to enemy fire two times. This also opens up for some nasty tactics. There are also combat-oriented actions like the "Go Prone" that give you a free advantage that also comes with a hidden cost: if you want to get up from prone it will then cost you 2 APs (in-game equivalent of time), meaning that, yes, you may be a harder target to hit from the distance but you may very well also be dead meat if somebody near you decides to come and shoot you point blank. Think about how realistic all this feels: you are prone to the ground, hiding behind a shipping crate. You hear the sound of footsteps on the gravel behind you but you don't have enough time to get up and react. Puff... you're a goner.
Shooting and Fighting
When it comes to shooting and fighting, tabletop wargames usually play very similarly so there's no real need to dive deeply into the mechanics. Also, you can grab that in two seconds when you read the book. I think reviews that do that are kind of missing the point so just a couple of notable feats of the kill-each-other part of the rules.
Cover matters – More: it does matter a lot. Covers come in three different tiers granting you visible benefits against ranged attacks while simultaneously nerfing the attack itself. Don't ask me why but this feat seems to get lost in big games while skirmish games usually implement it. Moreover, you can see a fairly consistent approach to this theme; I mean, if you are a veteran Mercs player, learning how cover works in Wreck Age is a matter of seconds. Easy, fast to apply in-game and realistic. Digging it.
Range – Range is also a thing in Wreck Age. Which is not surprising, to be honest. I'm always more surprised when there is "no" range (do you hear me GW?). Being able to shoot at a long distance is fine and probably a characteristic of your weapon but having the same TN when in close and long range, doesn't make any sense. In Wreck Age, range works like it should and I'm very happy with that.
Overkill – We have seen it in Fallout 1 and 2... you know when you spray a foe with bullets and you see him splattering around? That! The hilarious thing is that your party members with LOS will require a nerves test after seeing this. Because it's a nasty thing to see... which brings us to...
Morale – Morale can affect the outcome of the encounters and it does it incrementally during the game. You can receive suppression markers that limit your actions when you are shot or, as already pointed out when you witness one of your buddies exploding to pieces. You can actually feel the panic building up to the point where your characters will start fleeing the game field.
Weapon malfunctions – Weapons in the Wilds are improvised or really old and beaten up. They can blow up in your face... wear protective goggles!
I think all the above points add to the game atmosphere and its credibility: it's very important to be able to feel/perceive your characters emotions, even if you know that you're just playing a game, that adds a lot to the overall experience. Not to mention that mechanics behave in a realistic way and for me, that's 90% of the overall rating in a game.
RPG aspects
This is the less table-top-ish part of the rules but it's a big part of the game. In Wreck Age, you don't have an "army book" where you go and cherry pick pre-assembled units looking for cost-effective ones or for in-army synergy. Just like you do in RPGs, you create a group of characters putting together various combinations of training levels, archetypes, feats, and traits to obtain a functional team. Easier said than done; at least at first sight. The system is not complicated per se but if you don’t approach the game with a solid RPG background this section of the book may scare you. The after-taste of the character creation is also totally different from, let’s say, 40k or AoS. Characters are not pre-made with 2/3 fixed special abilities and interchangeable weapons. In Wreck Age you can build your guys from scratch. It’s a big step to take for the beginner. Also, always bear in mind you’ll have to pay for your characters and the unit price will be mainly dictated by the extras you got. Note that I used the term "pay" loosely here: there's no currency in the future where Wreck Age takes place. The rules, in fact, use the term Resource Unit, trying to resemble the fact that you actually have a community backing you up, using their resources for giving you training and equipment. The fact authors decided not to go with the standard term "points" and to adopt this system shows you the care for the details in the whole narrative.

Why is the narrative so important? Well, this was a hybrid tabletop/RPG game and this aspect carries on to this second edition. You can play the game as isolated encounters (choosing a scenario, for example) or you can set up a story. That’s why you see in the rules the recurring figure of the “Narrator”: he is basically the DM that tells you the story and moderates the encounters, the interaction with the environment etc. You may decide to stick to a set of pre-designed scenarios or you can choose somebody in your gaming group who likes to tell stories and have him design either the encounters or a full campaign story. The second half of the book gives you all the info to do that. For example, you can find rules that tell you how to train those that survived the encounter, how to restock your used items or how to trade them for additional RUs to use on something else. I think this doesn’t require any explanation because it is also how many video game RPGs play and I’m sure everybody can handle this really easily. More interesting is the how you set up for random encounters during your adventure. This is done with a dice-based system that will lead you to one place or another according to the number of duplicate results you get when rolling dice: you can roll two “1″ and stumble upon a Zoo or with better luck, roll six “6″ and find a survivalist villa! Of course, you also have everything in between. Chances are pretty slim so it is very unlike you will end up in such a gorgeous location but this doesn’t mean you can just play that as a single encounter if you do so desire.
Another really innovative concept that is used in the campaign mode of the game is the “Community Creation”. Yes, that’s right: I said that you can create your community of people. You can simulate the creation of a small village that supports you with dedicated production structures (like farms or a distillery... for booze), sanitary structures to cure your characters (infirmary) or a scrapyard to look for valuable stuff to refurbish. All these structures provide the community with some sort of output usually RUs to be used in the community or for character advancement. Here’s where the concept of using RUs to develop your characters starts to make sense: you have upkeep costs (RUs or other resources) for the facility to produce but you also have to invest in your characters. That’s how life goes by in the Wilds.
In this section of the book, you do indeed get a load of information that it’s hard to digest but will broaden the things you can do up to the level of building and managing your own village. Whether you like it or not, this is a level of depth that is rarely seen in tabletop wargames. It’s there for you to use if you want but it’s not “required” so you can just skip it entirely if you want. I still think you should give it at least a quick read because you can get a lot of inspiration to use when creating your own encounters.
Miniatures
If you read this blog you probably know that I'm a sucker for small indie productions and one of the reasons for this are the high-quality miniatures you usually get. Like the stuff from Megacon Games (seriously, those minis are great!!). The same is true for Wreck Age. From what I can see, minis do not have that ultra-CG look that's getting everywhere these days and they still look hand sculpted like Reaper stuff but more dynamic and with more detail. This goodness, however, comes at a price. Literally. The miniatures are more on the expensive side: just head for Hyacinth web shop and you will soon realize that a figure will cost you around 7-8 bucks. On average. The game is a skirmish so you don't need that many models but still, collecting many factions may be a substantial monetary investment. As a result of this, convincing people around you to start playing this game may be expensive: you will need at least two complete forces to demo the game and that will cost you some money. In addition, you can't neglect shipping costs if you are not in the US. Judging from the eBay costs, international shipping is getting increasingly expensive over time but it looks like Hyacinth Games is shipping your packages almost at cost so, kudos to them for this.... but it will still cost me 25 bucks to ship from the US to Japan.
Final thoughts
If you couldn’t tell it already, I’m really digging this game. Well, at least 85% of it, for sure. Everything starting from the story to the miniatures is spot-on and the rules are easy enough for you to pick up straight from the book. I see a lot of potential and replayability in this title. There are some things I think may be reworked a little bit though. For example, all in this game is geared towards realism and to building the atmosphere, up to the level that the excess of realism sometimes makes the game a little bit too hard. Or too fast. Because you know that in real life a couple shots are more than enough to incapacitate you right? There are no "wounds" in the Wilds and a game’s outcome swings pretty fast with just a matter of a hit or miss shot. If you don't like this kind of game then Wreck Age is probably not for you. But if you like the immersion you get from realistic games... then you're gonna love it! Another good example is the character selection phase. Even if you are guided through the process, there’s still something that may turn down tabletop wargamers purists. I don’t know what it is but character creation requires a good dose of concentration and you don’t have a lot of that during casual games or, worst, when demoing to your friends. You can bypass this problem easily by creating your groups beforehand but this step feels a little bit like an entry barrier. Maybe that’s why they have cards coming with the miniatures; like a “preset character” you just pick up to play. I may investigate more on this aspect.
So, before closing the review here is a bullet list of what I like and what I do not that summarize all the things I said above.
What I like:
Realism at its best
Very good background story.
Easy to learn tabletop rules
Games/Encounters play fast
Customizable (※)
A lot of fancy weapons
Good artwork / Miniatures
Low start cost if compared to other games.
(※) Maybe this depends on your overall preferences with games. You may not like it if you like to be told what to do all the time.
What I don’t like
Sometimes it feels almost too realistic (feels like you are dying too easily, especially if you come from big-scale games).
Character selection may be too complicated for beginners. I would suggest putting a full-fledged tutorial on YT to explain it visually.
I don’t really get the meaning of the cards. They show up at the beginning and then they vanish. Maybe they’re aids for character creation as I said before but it’s not clear.
Not game-related but the company should be more present on the social media. Maybe it won’t change anything. Maybe it will. A lot of people that I know have never heard about the game.
Before concluding this long, long review, I want to thank the guys at Hyacinth games for giving me the rules to review: I enjoyed so much writing the review while also reading the new rulebook as a gamer. And let me tell you that I will definitely try to bring on board some of the players around my area. In the case I succeed at setting up some demo games, I will try to record a couple batreps to give you a visual demo of how the game plays. I also heard that Uncle Atom from Tabletop Minions (link) is kicking around the idea of starting filming Wreck Age batreps. His channel is many degrees of magnitude bigger than my blog so that will definitely help the game to spread a little bit more. It's a real pity that this is not more widespread but I believe in the intrinsic quality of the game and I'm sure that it will eventually take off. If you do believe this game is worth a try, just say it aloud! Show this and other reviews to your social media followers. Tell them it might be a nice game to dive into. Whatever you do, try to keep all this alive because a rules set that gives you this degree of freedom must be promoted as much as possible. I know that, with GW being so over-active lately, this may not be a good time to release new rules but there are people out there that would love this game and don't get a chance to hear about it. Let' bring this to their attention. Meanwhile, here are some links for you to gather more info:
Game homepage and online shop: www.wreck-age.net
Twitter: @WreckAgeRPG
Youtube video demos/tutorials (few, but still...): here.
See you next week, guys.
… game on!
0 notes
Text
Stripping models
Hey guys, it’s Sunday so it’s time for a new Wargaming lobby post. As I already mentioned, a couple weeks ago I received a copy of the new Wreck Age rules to review. As you can tell from the title I’m not done with the review yet so I just put together a tutorial for you to quickly and easily strip your models to give them a new life. This is a great piece of advice especially if you are starting and want to stay low on the investment size so I suggest you keep reading.
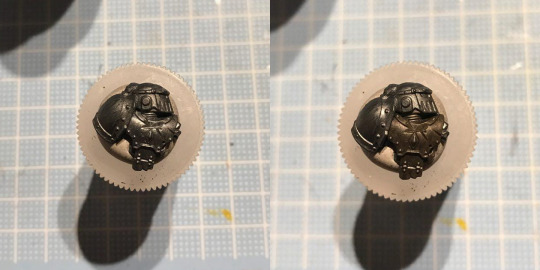
It’s been quite a long time since I last stripped a model so I didn’t have any chance to do a proper tutorial on how to strip your models. However, the other day I found some super-cheap Tyranids on eBay, the deal being that they were quite old and painted horribly. Here you can see a bunch of Termanagts coming out from the lot I bought.
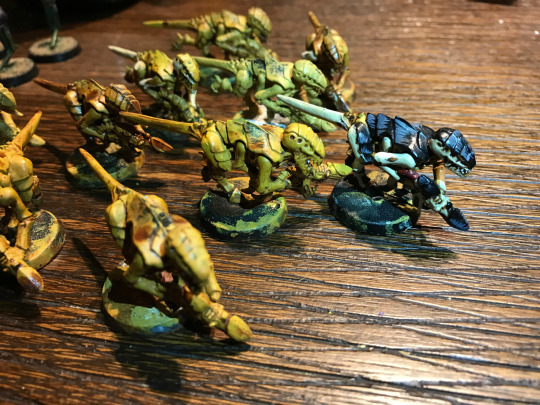
The dude that previously owned these minis did a great paint job on the first one (on the right) but an awful job on the others. They have this kaki yellow/brownish look that makes them feel like roaches, especially those that got dipped in brown, gloss varnish. My wife prohibited me to leave the color scheme as is... they were gross. However, no worries: we can strip them!
Chemicals
I think there are a couple of paint stripping commercial products that you may check out. Here’s a quick list:
Simple Green: one of the most commonly used stripping agents around. It is actually an all-purpose cleaner that seems to work really good to strip miniatures.
Super Clean: the purple stuff Uncle Atom from Tabletop Minions uses to strip. It’s, again, an all-purple cleaner and degreaser and it seems to be really good to strip miniatures.
Dettol: Another cleaner that’s also an anti-bacterial product. Your miniatures will not just be “stripped” but also bacteria-free!
If you have ever hit Youtube looking for stripping miniatures video, chances are good that 80% of the people will address you to one of the above. The problem is that all the above are somewhat restricted to the US/UK market area and are not as easy to find in other countries (aka expensive). I used simple green to strip my stuff here in Japan and, even if you can strip a lot of them by reusing the chemical many times, it loses power over time. It’s super-effective, don’t take me wrong... but it is also super-expensive here.
However, I do believe that stripping should be done with the lowest investment possible. If you are buying common infantry models from eBay and planning to strip them, it probably means you’re fairly poor. It doesn’t make that much of a sense if you are going to dump the money in the stripping agent. This is why I will try to tell you which kind of alternatives you have.
Degreasing agents
what you are looking for here is whatever detergent you can put your hands on that falls into one of the following:
it states on the label that it contains “alcohol” AND that it is alkaline
it says something along the lines of “strong alkaline cleanser”
oven cleaner
strong degreaser
All of the above are fairly strong pain removers because they come with a sort of activated form of alcohol that it’s both mildly solvent and quite aggressive on the acrylic polymers due to the pH. They are also (usually) safe on the miniatures. I have never used these on resin or restic but they usually make miracles with plastic and metal. BTW, this is the category that all of the above brand cleaners fall into.
Effective: acrylics only
Usable on: Plastic, Resin, Restic, Metal
Ethanol
This is an easy one: the pink ethanol used to sanitize and to clean is super effective when you strip miniatures and it’s also super-cheap! I would generally give a try on a test model before throwing all your minis in ethanol but I still have to find a problem with it. Never stripped resin though... If you are scared of ruining your minis, limit this to metal models only.
Effective: Mainly acrylics. Can weaken enamels so you can rub them off
Usable on: Plastic, Metal (Resin? Maybe but don’t quote me on this)
Acetone/Nail polish
This will DESTROY your plastic and resin models so avoid it if you’re not 100% sure you are dealing with a 100% metal model. Bear in mind that some old metal kits came with resin parts that may be hard to identify if you don’t know they are there. If you’re super sure, then acetone will remove all traces of paint from your minis.
Effective: Every pigment you can think about
Usable on: Metal only (Not kidding: it will melt all the plastics it gets to touch)
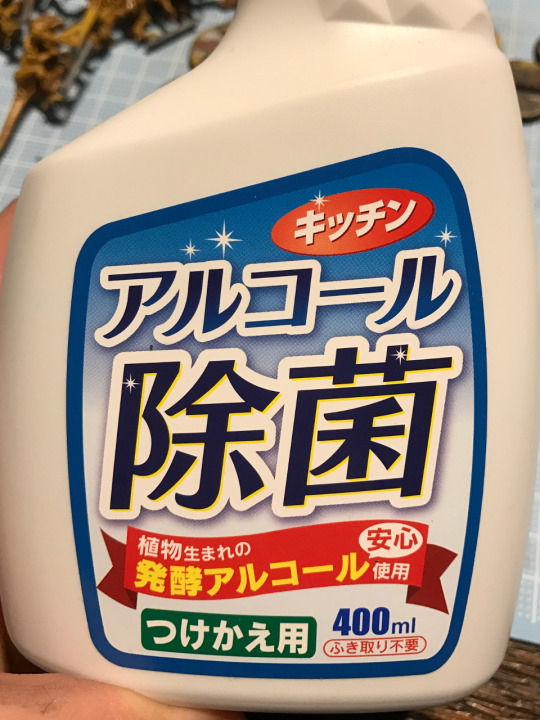
All the above cleaning agents will be perfect model paint strippers and will just cost you few bucks. As an added value, they are probably sold in every supermarket in your country because everybody needs them. So look for one that you like and stick to it. This time I finally drained the used Simple Green and replaced with this one I bought at the 100 Yen shop:
How to strip old miniatures
Whether you’re stripping a cheap model you scavenged on eBay or bidding farewell to the first army you painted back in the days your painting skill sucked, stripping models is really easy. I will tell you how to do it in few steps. Weel, how I do it. I’m pretty sure there are a million different ways.
First of all, get your models off the bases to facilitate the scrubbing later. Models that you buy on eBay usually come with bare plastic bases so there’s really nothing you need to do with them.
Grab your un-based models and dump them into a big jar that you have previously filled with your preferred stripping agent. I use pickles or sauerkraut jars ‘cause they have the mouth big enough so that my hand can slide in to grab them.
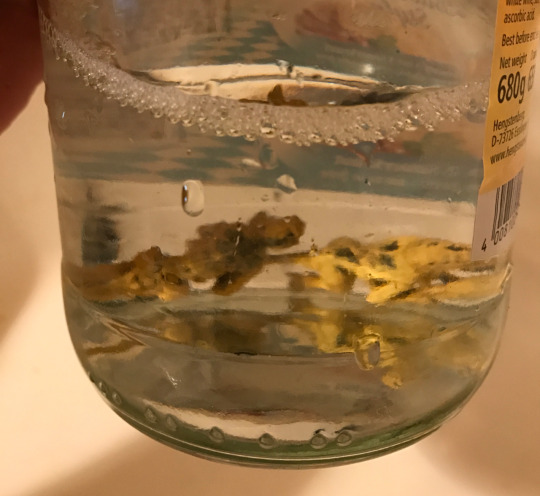
You now close the lid and leave them miniatures in there until you start seeing the paint falling off. It’s that simple. You will understand the correct timing as you will start to see paint flakes floating around when you stir the jar and sometimes you actually see the paint layer bubble from the reaction with the solvents. Don’t worry: if you pick your models too soon you will realize immediately ‘cause paint won’t fall off so... just take it easy. Nothing will happen if you leave them in the jar too long anyway. Another info: if you happen to strip during winter, you probably want to give the process a slight push by submerging the jar in lukewarm water but that’s not strictly required. It will speed up the process though.
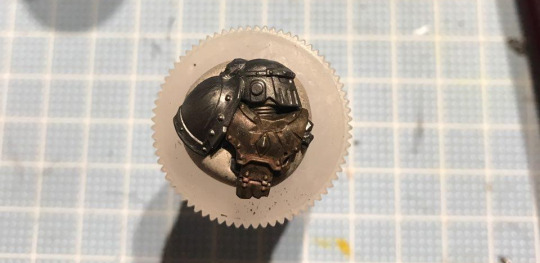
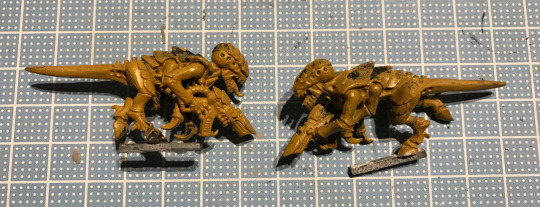
When you think your models are done, you take them out from the jar and start scrubbing with an old toothbrush under some running tap water until you can remove all the paint. You should scrub them gently ‘cause they can break easily, especially if they are old models and the plastic is aged. Mind you: you will not probably be able to remove 100% of the paint, especially if the previous owner covered the models in thick layers. This is how my Termagants turned out after the stripping.
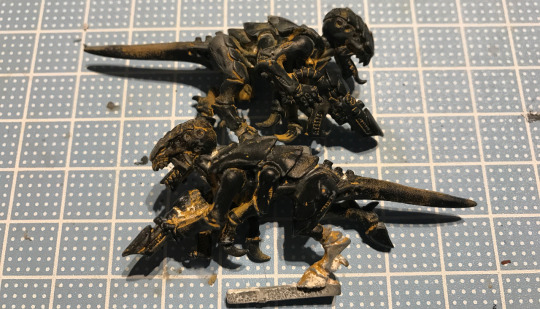
So you will probably end up with a primer-covered model still showing the base coat color inside the nooks and crannies. Don’t worry too much: you can just re-prime the models without losing excessive details. Moreover, infantry models are almost always forgiving when it comes to paint-jobs so you should be good to go. Just remember that you already have one primer coating on and that you want to limit the overall number of layers you put on the mini.

With this thing in mind, I decided to prime with the Vallejo Grey Primer and to try to pull off a good silver-ish color scheme. First of all, take a look at the nice finish of the re-primed model: the base color still shows here and there by the details are pretty much intact and the overall mini almost looks like it’s new. Starting from this point it’s just like painting a new miniature with slightly imperfect surfaces and maybe some strange color showing through the primer. Nothing that a good base coat won’t fix. So, the dude above got repainted in one hour with a simple test color scheme that will probably become the final one. Here’s the final result.
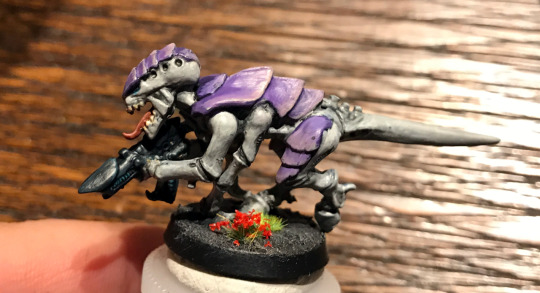
Looking pretty damn good with the new colors on! What do you guys think about it? Remember it was a blob of an ochre base coat and brown gloss varnish...
This silver-ish look inspired me a name: the silver hounds. Sounds good but not really fit for Tyranids.
So, this ends this really easy tutorial on miniature stripping. I hope you will follow the tips on how to choose cheap stripping agents and, of course, on how to strip your models. It’s just a matter of trying it: I can assure you’ll be up and running in no time if you give a good read to all the above info.
It’s time to go painting some Tyranids!
... game on!
13 notes
·
View notes
Text
The importance of DIY
In today’s post, I’m going to talk you about DIY. Despite the fact that the results heavily depend on your manual abilities, DIY can still be extremely rewarding. It can add depth to your miniatures by adding extra details to them or create kick-ass terrain pieces that you game friends would pay for. But it doesn’ end there, you can also add a credible background for your armies through storytelling (fluff-telling?) that may also translate into some fun campaign games. Fun right?
I’ve always been the kind of DIY guy. I built literally everything: from small electronic appliances to large-scale bio-reactors, from electric guitars to home furniture me and my wife use every day (beds, cupboards, etc). This probably came from me growing up as a less-than-rich kid in the countryside but it’s a feat that I’m really proud of and that pairs extremely well with the wargaming hobby.
Do It Yourself
In a hobby where you literally have to build all your stuff from the ground up, being proficient in DIY skills can help you a lot. Painting your own miniatures is already a form of DIY, you know? You could have outsourced the painting to one of the many pro-painters that are popping around everywhere. But think about the feeling you have when you see all those small plastic (or pewter) soldiers and realize you painted each one of them! Drinking from that sensation; don’t you feel energized to keep going cranking out more and more? To go to the extremes, just imagine being able to sculpt your own miniatures! That would require a big time investment but money wise may save you a crapton of monetary resources. To feed your family, for example... That would be definitely the last step to hobby hero. Just imagine being able to show your army to everybody. Well, I have to admit that the set of skills required are so high tier that it’s beyond the possibilities of 99% of the gamers. So, are you with me in that 99% and you think that’s too extreme? Well, what about making your bases then? It’s easy and rewarding. Of course, making your own terrain is another fun and easy activity that can help you to populate your gaming surface with some functional pieces!
Making bases
If you ever bought a miniature in your life, you probably know they usually come with black slightly sand textured bases. Grey if they’re really old GW miniatures. Well, some of the new GW stuff comes on pre-textured bases and even Myth miniatures came with pre-textured desert bases. But as far as I can tell, those are still pretty much the exceptions to the “black, sand textured base” rule. If you follow this blog or you have seen my pictures you already know that I love creating my bases by myself. You can see a quick and easy tutorial on how to make bases here. Well, the bases featured in that tutorial were actually 100% made from scratch. I mean, the base itself was made out of sculpting clay and the additions on top... well, they’re described in the tutorial. Again, I have custom made bases on all my Death Guard models even on Typhus that came packed with a scenic base. Take a look at the model after my base is attached and compare that to one showcased on Forgeworld website. I think mine looks way better. Because of my DIY efforts.
But that doesn’t end here. I’ve been playing around with sculpting my own pre-textured bases to save time when basing stuff from the same army. Let’s say I have a bunch of Stormcast Eternals that I want to be standing and fighting inside an old beaten-up temple: I just gathered some stones, some polymer clay and I made the floor of the temple. Then I textured it, copied using blue stuff and again created the first base out of my mold. And here I ended up with a fucking awesome base that I can attach on a custom made base and use for a big character, for example. Here you have some pics.
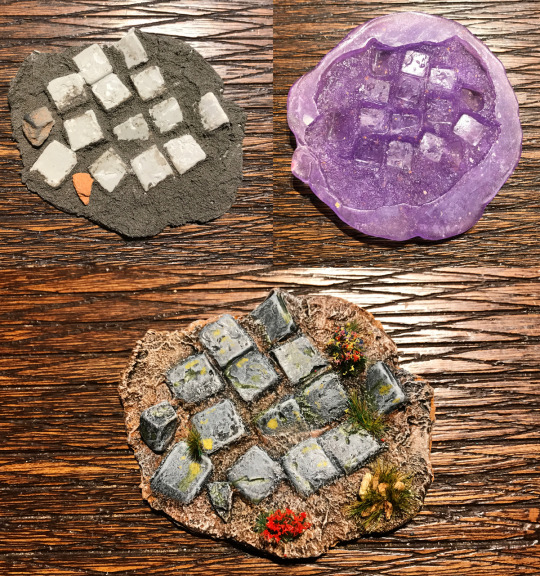
Now that I have a master this big (like 7 cm on the broad side) I can cut out 30 mm discs with any combination I want to stick on the single round bases used in AoS. It’s that simple: my army will have a thematic coherence without spending 10 bucks every 5 bases and, more important, will look amazing. I know I’m going to prepare more of these bases so I will write a proper tutorial in the future.
Making terrain
As I mentioned above, making your own terrain is another fun activity that can help you save a lot of money if you use to play a lot. Well, I say “play a lot” because terrain is only used when you play so if you’re a collector that only painting for fun, this is not super-useful to you. You can still get some ideas to recycle in those beautiful diorama bases you see around though.
So, again, terrain. You shoot your enemies on terrain. You take cover behind terrain when your enemies retaliate. It blocks line of sight. In short: you need it to have fun when playing tabletop wargaming. The only big drawback is the price. Everything in this hobby is pricey but terrain can be pretty absurd. Think about the Realm of Battle game boards from GW: they cost 400 bucks! BTW, no, they are not a standalone table and again, no, they don’t come painted. Can you imagine how much money you can save if you sculpt them by yourself? You can probably get away with 50 bucks of materials if you go to a hobby store or, even better, a home depo. I remember me and my classmates doing dioramas like these back in my elementary school days using old newspapers and watered down PVA glue. It’s that simple. When I was playing Warhammer Fantasy Battles with my friends 20 years ago we just grabbed a couple of old tables, joined them and threw a lot of stuff on top of them... and that was our table. Total cost? I don’t remember but it hardly cost me more than 20 bucks so, roughly 60$ for the three of us and we had a huge playing surface.
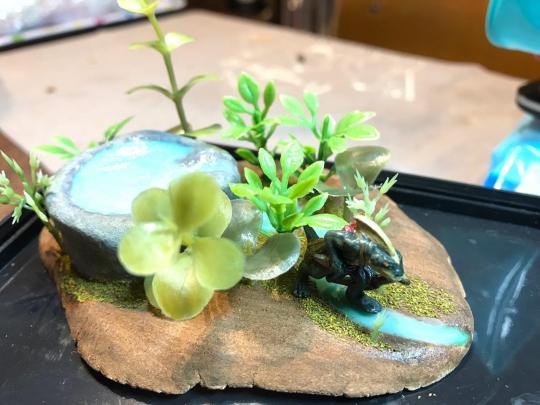
However, this is just about the playing surface.. what about the single terrain features you use in-game? Well, give a look at the GW site and you will find that every single structure will cost you 70$ on an average. And you need plenty of them. Again, what to do? Do it yourself. To date, I have only one tutorial on building your terrain here but I will definitely add more if people will ask for them. Here’s also the picture of a small terrain feature I made for my Seraphon army. A spawning pool.
If you don’t know where to start, why don’t you have a look at the Luke’s APS channel on youtube? Here is the link. This guy makes really cheap and easy pieces of all kind of terrains in easy to follow video how-tos. The techniques he uses are not revolutionary as he states many times in his videos but they are proved to yield great results. I have been using many of those techniques since when I started the wargaming hobby back in the days and I find his channel very useful and well done. Give it a shot.
Writing background stories
Ok, I admit this doesn’t sound really a DIY thing but if you stop and think about it, what are you doing when you choose a chapter for your space marines? Why the Chaos SM are the bad guys and Imperial Guard the good guys? That’s because you're adhering to a background story created by someone that’s telling you what happened in the story and the consequences of those happenings. It is not my nature to follow the mainstream narration, even in real life so, why on Earth should I follow the narration of the game I’m playing? And neither should you... I’m telling you that writing your own stories, creating your own chapters, alien races or whatever can be a super-fun experience. I can tell you for sure that, in my own narration, Death Guard are not the bad guys. They are not even called Death Guard, for the records. I am planning to share my own narrative here on the blog but I still need some more time to write it down but imagining things while walking to work or while having a shower, it’s really entertaining. Have you ever thought about that? If you’re doing it all by yourself, I think it technically still counts as DIY. Mental DIY.
Apart from the creation of the story itself, what can be really rewarding when you move your steps into this kind of word is the creation of long stories arranged in campaigns where every fight your heroes encounter can be actually played on the tabletop. In my opinion, the exercise of putting all this effort in giving life to your plastic soldier is what brings the real fun in the game. That’s why I think about a scenario each and every time I have a battle. Do you remember my MERCS 2.0 battle report? That was all narrative... and I wrote it down as a story. This way you can feel the pain in every dice roll you fail, the joy when you successfully push that button or the electricity the floods the table when you win the game with a super-lucky last-turn roll. Playing stories with the characters is definitely an amazing DIY experience that you should try as soon as you can. You can do this even sticking to the official background story of your favorite game... so you don’t have any excuse not to try it immediately.
To wrap up this post I just repeat once more this statement: bring more DIY in your hobby. Whether it’s building your own bases, converting your miniatures, building your own terrain or creating fantastic stories. I can even tell you that you can create your own game rules or factions or whatever! This is what I really love about this hobby: the ability to personalize everything to your liking and the fact that even a fully custom army can still fit into the general rules of your favorite game. Simply fantastic.
Go have some fun. Now!
... game on!
0 notes
Text
GeeDubs fatigue?
Lately, GeeDubs behaves like a leaking wargaming faucet... that's always dripping new stuff. AoS, WH4k, Specialized games: no matter what the products are about, they are (generally) awesome. Personally, all this continuous tickling my shiny-syndrome-spot is starting to be a little annoying. What about you? If you feel the same, keep reading ‘cause I’ll throw some motivational stuff in the post as well!
I know how this works: the act of continuously teasing buyers with new stuff dramatically rises sales and, being GW a for-profit institution, that is probably the way to go for them to make money. Gamers are happy! Collectors are happy! Producers are happy! Everybody is happy! I mean, really?
Well, I'm not super-sure if I'm really happy or not. It's probably just me being grumpy but I don't see how buyers can be (really) happy with this sales scheme. Let me argument.
Let's imagine a parallel universe where you can afford all the models you want: would you be buying them? If you still have the same life you have in this universe we are now (same number of friends/time) I couldn't imagine the amount of time required to build, paint and play all that stuff! I dare to say that even having all the time you want and hundreds of people to play with, the hobby would easily fill up your entire life. So, that would look more or less like hell to me... or, you know... a job.
Well, these days I am starting to feel a similar sort of pressure coming from the hobby side: I just bought something and there they come again with a new thing I would really like to buy. And then another, and another... it just never ends. Bear in mind that I’m not making this a money-related issue: when I’m staring down the barrel of a thousand minis from various ranges I still have to paint, the last thing I want to hear is how awesome the new boxed set is (yes, I’m talking to YOU Forgebane!). I think I will unsubscribe from the GW mailing list for a while even though reality will still hit me in the face through social media. My situation now is well represented by this old Futurama clip. Just bigger and more subtle.
What’s this rant about?
Sort-of-rant, really.
It is about me starting to think a Warhammer / Star Wars analogy here: I used to be always super-excited when SW stuff was involved but after Disney made its debut in that “galaxy far far away” the merchandise went nuts. You have SW mugs, SW chocolate eggs, SW slippers, SW cereals and a plethora of useless stuff with BB-8 or C3PO or ..... (insert each and every character’s name here). As a consequence, I feel bloated every time I hear something Star Wars related. It doesn’t surprise me the fact I still have to watch the last movie... by the way, I first saw “The force awakens” on the plane back from a business trip. So, nay, not super-excited anymore.
Now I am starting to fear the same thing may happen in my brain with GW products, leading to a nuclear chain reaction that may bring me to the point of no return: hating the hobby. I don’t want this to happen. And I definitely don’t want to feel sick and tired of those miniature worlds I was so eager to bring to life through painting and modeling. The point here is that I feel like I am really bringing my miniatures to life by painting them the best I can and making a small diorama of every single base I make. I write backstories for almost all my characters and I make them come true in battle (in my games). Again, I came to the conclusion that all this “new release” stuff is getting my hobby vector in a direction I don’t like.
Get some damn focus
What to do to run away from the never-ending ads, unboxings, WIPs etc? Well, as I said I have a thousand(s) unpainted minis, various game systems, board games and all this sort of jazz. I also have this blog/website! I will try to combine them and do something to help me focus more. I will try to distract myself from the distraction. It would be really nice if I could manage to do some of the following things. I decided to share them because I think they may be good to motivate you guys too so, let me know if they do or if you have any other good idea!
Close my eBay account - Ok, this is a joke but, seriously, eBay is killing my wallet. Damn!
Blacklist GW newsletter - This is not a joke. I will try to get rid of the daily emails so I can focus on something else then dreaming of buying more grey plastic.
Make an inventory - I’m not entirely sure I would be able to tell you exactly how many minis I have around the house(es) now if you asked. I’ll get this sorted!
Keep a backlog - At the beginning of 2018, I’ve seen a lot of people on the internet talking about paint logs. That’s useful to measure your “progress” but what I need is a way to keep track of my “warehouse stock”. Maybe I’ll separate the miniatures by genre or game or whatever and then try to dig through the pile. I’ll see what I come up with.
Come up with a background for my minis - Short stories, episodes, whatever is needed to make a miniature more alive. When I come up with an idea, I write it on my blog (as a Sunday post but not necessarily).
Play, play, play - And then play more! What got me motivated to paint all those Death Guard models was the need I had to reach 1000 pts to play. If this is true then hitting the goal, playing and setting a new goal will probably help me out painting increasingly more miniatures.
Get some terrain done - This really should come before the play one. You cannot play if you don’t have enough terrain on the table. Getting to build your terrain from scratch is a good way to keep the hobby going while actually doing something else. I want to try my hand at sculpting my stuff from scratch.
Try to bring new people into the hobby - This is tricky... but for what I have seen, trying to teach something to someone will always help you learning and getting new motivation. Now, a suggestion: there are not enough people approaching this ultra-niche hobby so if you find somebody, nurture him/her!
Get more content on the site - The “one tutorial a month” scheme is not super-good because I have many ideas in the pipeline that I am not writing. It is a fail-safe plan, indeed, ‘cause I will never run short of ideas but at the same time it doesn’t motivate me to do more. I will try to post tutorials on Sunday together with other content and figure out where I go from there. Lately, I’ve been thinking about “poster tutorials”: some large size PDFs summarizing the technique useful for offline use. I could write them for the most useful tutorials. For the time being, I still have zero readers so it still sounds like overdoing it. We’ll see.
So, in the end, do you really think this was a completely useless rant? I prefer to see it as a tool for self-motivation and this is ultimately the reason why I decided to write it: maybe other people out there may find it useful.
Now, let’s see if I can do some hobby!
Game on!
Support me if you like what you see.
2 notes
·
View notes
Text
Support in place
So… I just stumbled upon this platform supporting creators with micro-donations and I jumped right on. You can contribute accessing this link:
ko-fi.com/warlob
Not that I expect anything but now that I joined the millions of people begging strangers on the net for money… I feel like I suddenly moved on into the new millennium!
Jokes apart, I will put a non-invasive link in my tutorials and see if I manage to get 5 impressions by the end of 2018!
Game on!
0 notes
Text
Progress and updates
A quick post to update all my (limited) audience on my hobby progresses.
Painting
Death Guard - Warhammer 40K
I am actually committed to finishing 1000 points worth of Death Guard models because I’m planning a game with my WH40K friend by the end of this month. Despite having a lot of painted models, it’s still not enough. I also had to buy more plague marines because those I had were not sufficient. They were not even close to being enough... I will probably have to use my USCR Mercs miniatures as proxies, ‘cause you know: they come in fucking power armor! While counting points and units, I was going through my models and thought I may write a list of what I have and my painting progress.
1x Mortarion (Forgeworld one)
1x Typhus (Painted)
1x Leviathan Dreadnought
2x Contemptor Dreadnought (Painted)
1x Wheelbarrow (Rhino) (Painted)
1x The combine (Plagueburst Crawler)
2x Foetid Bloat Drone
1x Myphitic Blight-hauler
2x Lord of contagion (1 Painted)
10x Plague Marines (only THREE Painted)
10x Baby Plague Marines (4 Painted)
1x Malignant Plaguecaster
1x Noxious Blighbringer
5x Blightlord Terminators (1 Painted)
5x Deathshroud Terminators (2 Painted)
20-ish Poxwalkers (5 Painted)
This is it: all the units I have. It makes me shiver if I think how many of these guys are still in the “grey plastic” stage. Moreover, I paint almost only in subassemblies so all the unpainted models are still on a sprue in the box. Every time I get depressed I take a look at this group picture and I get going again!

Casting
These days I am using my really limited free time trying my hand at silicon mold making. Silicon mold making, the hobo way! I came to this because my wife creates her own molds for soap making with RTV silicone and I felt I could try that. It’s all still too embryonal to write something here but I would like to try to create some scenographic bases for 28mm miniatures and see if I can do some mass (re-)production. For now, I’m just having fun with small bits/trinkets I got at work that I try to copy. Geared wheels, metal fittings, etc... If I will succeed at this stage, I will start producing the masters and then copy them. If I end up with some interesting result I may also think about selling them on the eBay! Not that I’m super sure I will be able to do it but still... I will keep it simple and try to make some sand and stone patterns to use in Age of Sigmar.
New hobby Juice
I want to give a big shout out to this new item I bought the other day on the eBay: Shadow War Armageddon. I guess everybody knows what I’m talking about but for those living on Mars, Shadow War Armageddon was a boxed game in the Warhammer 40k universe released in 2017 that was called by some “Necromunda 2.0″. Here is the picture of the box I just bought:

This boxed set is crazy value for a couple reasons:
It allows you to play with just a bunch of minis. Rules for a lot of factions are available.
It comes packed with some amazing terrain. Take a look here, here and here.
In the box, you get a bunch of Orkboys and some Marine scouts (which represent all the models you will ever need to play this game), the rulebook and those mythical artifacts called “weapon templates”. For the newcomers, they’re not in WH40k 8th edition anymore but I used to use them a lot in Warhammer Fantasy (dragon flames and salamander venomous spit were template based damage).
However, the most interesting thing about this game is not inside the box: it’s how it came out and disappeared in the span of less than on year. The game was released in April 2017 and was welcomed with tons of e-ink in praises and reviews. GeeDubs themselves, impressed by the reaction to the game, decided to release a separate rulebook for those that already had everything needed to play and didn’t want to buy all the stuff. Despite all this, the game went immediately out of production and today you only find the terrain (see links above) and the rulebook in GW website. Let’s see if this theory I came up with makes sense.
The game “Shadow War Armageddon” was only a market test to verify the audience reaction to a possible Necromunda re-launch. Now that we know how the story ended, it is easy to get to some conclusions. Let’s say you have digital designs for the new Necromunda in you pc, people keep asking for it but pulling the trigger means making a lot of new molds, advertising campaigns, etc: a lot of money. So GW came up with a super-cheap / super-effective idea:
we create a bunch of terrain --> We are going to sell it anyway
we grab a couple sprues of high selling factions (SM and Orks)
we grab old Necromunda rules and revamp them
we stuck everything in a big cardboard box.
What’s the cost of doing this? Well, I work in product development and I can tell you that, apart from the design costs (new book, new box) it’s only the cost of the logistics. This means that GW investment in this game was close to zero. So they put themselves in the advantageous situation where they could potentially earn a lot of money because of all those nostalgic gamers while testing the ground for the launch of the new Necromunda. As soon as they saw all the traction this boxed game garnered the New Necromunda project got the green light and got released at the end of 2017. Shadow War Armageddon immediately vanished to avoid cannibalizing the new market but the support still remained online for those who bought it. Does this make sense to you? I think therefore that this set deserves some more attention that it is now receiving... but I know that GW is really heavy in exacerbating our shiny syndrome so that buyers only think about new things.
Well, the post turned to a sort of GW market strategy review when I just wanted to write down some updates instead. If you have any comments please feel free to drop them below!
...game on!
0 notes
Text
Why is color theory important
You always hear artists and pro painters talk about it but do you know what color theory is? And do you know why is so important? I today’s post I will try to talk about it in depth. I mean, to an acceptable degree and especially focusing on miniature painting. I’m definitely not a color scientist but if you want to know more about color theory, just keep reading.
Color theory is fundamental if you are an artist: if you don’ get it, you can’t produce results which are pleasing to the eye of the beholder... and, as we all know, beauty is in the eye of the beholder. We may dare to say that color theory is the foundation of it all... all the advertising, web pages, products and more in general, the whole human iconography is based on color theory. Why is this relevant to you, my fellow hobbyists? Because if you want to paint your miniatures nicely, you must know the basics of color theory. Vince Venturella says something super spot-on in this video from Tabletop Minions when answering a question about the importance of color theory:
you will paint your miniatures, they will look bad and you won’t know why.
I’m sure this is the most prominent problem many painters have, especially if you want to venture beyond the cover-art color scheme. I don’t dare to say am a color theory specialist but I’ve come to think I am grasping the way it works so let me guide you through the basics for beginners.
The color wheel
This is where all the magic happens, where all the colors and their relationships get a visual. You can see what I mean if you take a look at the average image editing software, especially the tool that lets you choose the colors. I found this beautiful color wheel on OpenClipart.org:
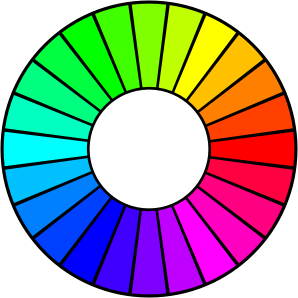
The color wheel represents all the colors we perceive around us and put them on a big loop. The most prominent colors and all their derivatives are placed with a 120 degrees offset and you can jump from on to the “next” one maintaining this angle. This means that you can easily understand the relationships between colors without having to do any math. This particular wheel does not take into consideration all the aspects related to colo but let’s just say we can describe all the colors with the following three parameters:
Hue: The position of the color in the wheel
Saturation: How deep the color is which translates to the vibrancy the final color has.
Value: The brightness of the color, or better, the brightness of the light reflected by the color.
While the first is super-easy to figure out, the other two are not; we will bring them back later.
Color relationships
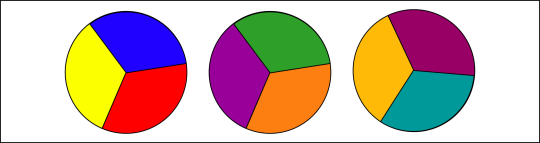
Colors tend to interact in the following patterns but don’t take all these examples as canon: there are many ways to arrange the colors on the color wheel, by representing different hues with wider or thinner slices but the basics are the same. I think. In addition, you usually add local color gradations that bring in a plethora of different colors in the equation so just use your color sense and try to figure out how to use these schemes. I will try to base the images below to the classic color wheel (google one here). It seems like the one that I linked above is more accurate (by modern standards) but the material you usually find on color theory still use the classic one.
Two colors opposite
They have the highest color-contrast possible because they face each other on the color wheel. If used together, they convey strong sensations that you can use to highlight your miniatures. Take a look what happens if you put together blue and orange:
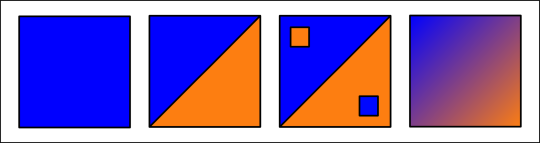
They’re pretty strong together. Also, note that if you mix complementary colors you can get some interesting greys or browns that you can use to personalize your palette.
Tree colors - The Triad
This type of combination is quite popular because it produces high levels of color contrast while maintaining an overall harmony in the composition. They are almost foolproof to use and you can pull out some amazing color scheme if you blend them well together. I quickly made three examples here:
Even if I literally picked up the colors randomly they all look good and really well balanced. You can make use of this combination in miniatures a lot. If you play with saturation by adding white/black in your paints you can go a long distance by just starting from here.
Analogous colors
This is pretty straightforward: you pick up colors that live side-by-side on the color wheel and use them. Sure, you have to limit yourself to a small number of colors (let’s say 3 to 5) because the wheel goes on forever so.... but you are literally allowed to abuse this scheme on your miniatures: this is the base for the best highlight schemes! Let’s see what I mean with a green analogous colors scheme:
You notice that I started combining green and blue-green and then built up jumping to the next color, jacking up the brightness and contrast by using a color that fits. This is a little bit of a trick but... yeah... this is how you should always highlight your models. See the shoulder pads on my Death Guard marines for an example.
Four colors - The Tetrad
This works like the similarly-named Triad but uses four colors sitting on the corner of a rectangle or square. The closer the corners, the more subtle is the result. With this scheme you get more colors, meaning that you do get the risk of screwing everything up by over-crowding the model with contrasting colors. The trick, however, is to choose the main color and progressively add the other while progressively lowering the percentage. Don’t forget to keep an eye on the overall balance. Something close to what I did here:
I chose a gradation on the bottom square (two colors of the tetrad) then placed a big light-orange square with a smaller dark-orange one nearby. This is a nice kind of composition because it lets you self-highlight each color so it’s pretty easy to tackle as a beginner while still getting good results.
Ok, these are all the main color compositions you can think about but don’t forget that you can mix them up easily generating an infinite number of your own variations.
Value and saturation
As promised, I want to spend some words on these two color components that get always misunderstood, especially by those people new to the hobby and painting in general. One of the most common mistakes that painters do is to think that you can lighten any color by adding white to it. Let me tell you: that’s wrong. You should stop doing it immediately. What happens when you add white to the color you are using? You are messing up the value and saturation of your paint. When you add white in the paint, what you obtain as a result is (obviously) a lighter paint but what’s really happening is that you are also diluting the total amount of original pigment. So, let’s say you had 100 points of blue when you started adding white: for each equal amount of white you add to the mix, the blue concentration drops by one half. In addition, the inert particles the white comes packed with, start shading your precious pigments, resulting in a kind chalky blue. This is sub-optimal, especially if you think that miniature paints companies arrange paints with many color gradations where they already adjusted the saturation of the paint for you.
As you can see, starting from the same base color and only adding white (top row) we get a chalky effect while, on the contrary, using fully saturated progressively lighter colors we obtained a more vibrant result. Trust me: you notice this on your miniatures so go to your paint shop and think about the paints to buy from this new perspective. This doesn’t mean you have to stop using white ‘cause it can help in small amounts or in special techniques like NMM but all the other situations? Ditch the white, spend some money on more paints and you will definitely be happier with the result.
I think these are all the things you have to know to start applying some color theory on your everyday painting. I am sure there is more to that (like using paints as filters or using under-highlights) but this is the deepest point can reach for the time being: I am an engineer with literally no artistic background, you know... So, I hope you guys will make good use of this information. Let me know what you think about all this mess and if there’s some mistake!
... game on!
1 note
·
View note
Text
How to paint Rust (Part 1)
It seems incredible but it's already March.... and being today the first Friday, it means I have a fresh tutorial for you guys. This time I'm going to teach you how to paint rust. To be precise, I'll teach you a bunch of techniques you can use to paint basically every type of rust you can imagine. This is going to be long so I'll split the post into a mini tutorial series. Hold on, cause if I make it with the setup and everything I may also make a follow along video tutorial on YouTube!
If you look around you can recognize many different types of rusts, each one coming in different intensities/colors. For this reason, painting rust is a really fun experience. Let's see all the types of rust I can think about:
Sponge rust. Appears on iron when exposed to direct rain/soft water contact. The result is the iconic flaky rust (https://commons.m.wikimedia.org/wiki/File:Rust_on_iron.jpg). Colors vary from deep brown to bright orange.
Chemical rust. Appears when the piece undergoes some chemical-induced oxidization, mainly by means of chlorine.
Dark rust. Appears when steel stays under the rain long enough. The piece does not flake but it gets spots of dusty brown and patches of orangeish dust.
Dark shiny rust. This also happens because of some sort of chemical contact but in high-quality stainless steel alloys. I see this every day at work on my tools and you probably know what I'm talking about.
Rust on metal. Typical of chrome-treated surfaces, it appears as a patina of orange rust over the shiny metal. Rust on the bicycle handle, anybody?
Copper alloys rust. This is not rust but it's still an oxide. The verdigris patina on bronze statues is an example of this.
I'm sure there are real names for these rusts but I'm not a rust scientist.
I'll tackle all of them following the above order and split the tutorial into two parts.
Sponge rust
This one is really easy if you have the right tools. I used to do it completely “manually” before knowing GW Typhus Corrosion. This is a clutch weathering technical paint that practically does all the work for you. I will show you how to quickly create a rusty sewer pipe out of a straw.
We start with a primed “pipe” and we just deliberately slab Typhus Corrosion on it until full coverage.
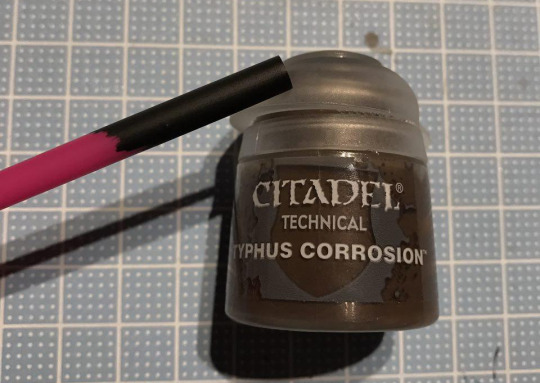
Typhus corrosion adds a nice sandy texture to the piece so now you only have to grab your favorite medium rust color and use it to tint the piece in dark orange. I used the new Vallejo Mecha Light rust wash but you can use Light Rust or really anything you want. The important is that it needs to be a wash.
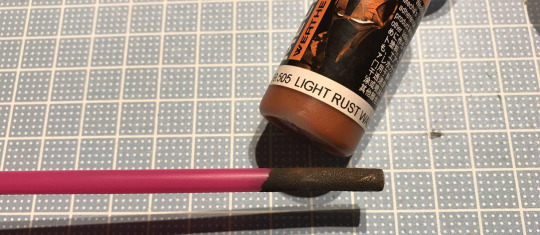
You can also reinforce the contrast by dry brushing some pure metallics on the ridges. You will get a nicely corroded surface with shiny dots of fresh metal and a spongy rust effect. To add more contrast, as a final step you can dry brush the same ridges in some areas where the metal is dull. You can do it with Riza Rust, another GW technical paint, indispensable when you paint rust!
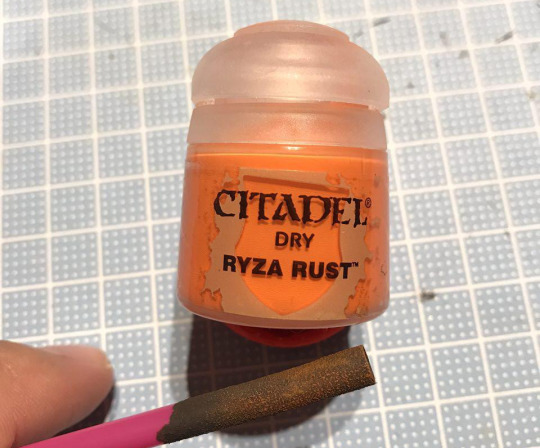
... and we are done with the first type of rust!
Chemical Rust
It’s very easy to spot this kind of rust as we are surrounded by chemicals. It happens in your house if you drop your table sat on the stove etc. I will test it on a big chunk of junk I was planning to paint for my Leviathan Dreadnought.
This technique is ancient. An old train modeler told me how to do something similar back in the days and I adapted to the new paints and technologies we have available now. It will still take you some time but the result is really nice and realistic.
Start taking some Vallejo rust pigments and mix them with thinner medium until you obtain a fine slurry that you can slab directly on your miniature. It should take 2/3 drops and a full paintbrush of pigment dust.
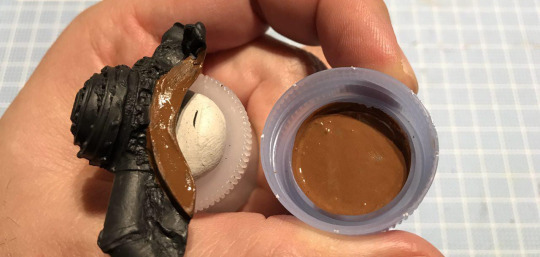
Once the slurry has dried you will see how the miniature is now covered in a subtle texture way way finer than the Typhus corrosion. This makes this technique ideal to paint rust on armors on small miniatures like I do with my Death guard.
Next step is applying a super-light metallic dry brush to pick up that fine texture. This is the step where you decide how “old” the rust is. The more you dry-brush, the younger the resulting piece. So, feel free to push this technique as much as you feel comfortable with but remember, don’t go completely over the base color.
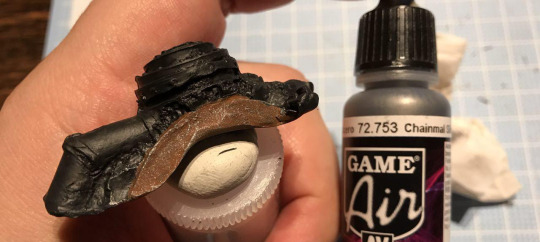
In this picture, I used some Vallejo Air Chainmail and went for a really old look. The next thing you want to do is to darken those pigments with a wash: the problem is that black washes dull everything and we want to avoid this. This is why I devised this trick: wash it with Petrol Spills so that you actually boost the metal areas while darkening the rust.
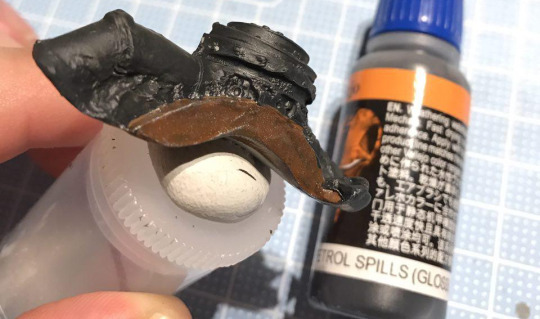
Do you see how shiny the metal still is? Now you can safely apply a Burnt umber wash (diluted 1:1 with Flow improver) to tone it back down. The result will be a smooth old textured rust.
Now the last step. I took this from a Youtube guide by Next Level Painting: Kenny calls this technique “Juicing” an I will do so, to honor the ownership of the technique. What you do is grab a slab of paint from a pot of Riza Rust and dilute it with water in a container. You are aiming for a watery slurry, not a wash. Then you take a small brush and start to randomly add patches on the rust piece you want to weather. The more random, the better. If you execute this correctly by diluting to the proper condentration, the resutl will be pretty muted orange resambling the chemical rust look you are going after.
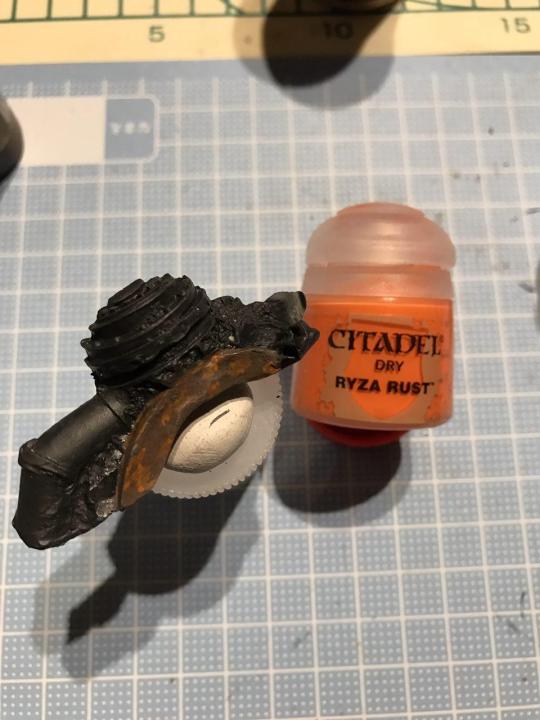
And this is the finished ridge on our scenic piece of rusted junk.
Dark Rust
This is not a very common type of rust but you have probably experienced this if you work with big machinery. I will paint this on the main pipe of the base.
You start by gathering these three weathering Vallejo paints: Cam. Black Brown, Rust, and Orange Rust.
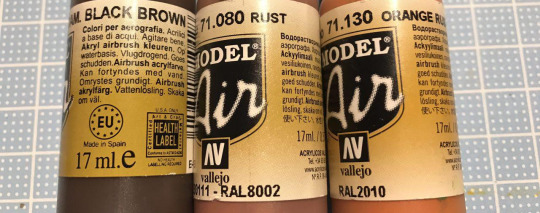
You start layering the Black Brown directly on the primer and let it dry. You then move to a second pass where you start wet blending Black Brown and Rust on the whole surface. Try to be as spotty as you can with Rust because you want to obtain a random pattern of uneven oxidation.
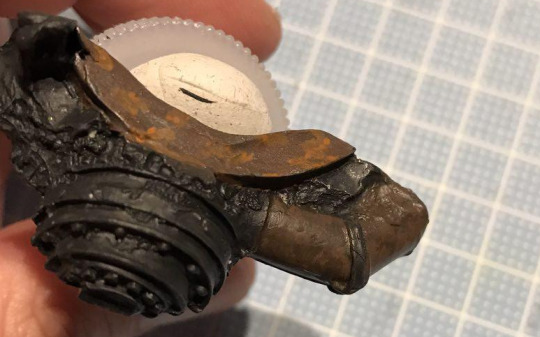
Keep it subtle but keep building up to the more orange rust you want. Remember to be patchy,
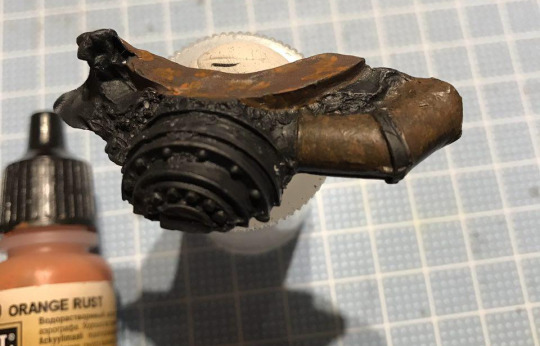
Please note how this rust looks smooth when compared to the chemical one; it doesn’t have the fine texture the pigments gave to the other but if you did your homework, it will look dusty but still pretty homogeneous.
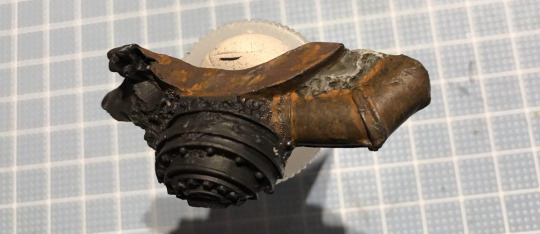
This is the finished pipe with the rock painted (to add contrast) and a final Riza Rust juicing in the crevices along the borders. Notice how the two rusts look similar while still showing different colors and patterns. The beauty of these techniques: you can mix them in the same miniature and obtain a super-realistic result. Probably those tubes were made of different materials, maybe the finish on the ridge was lacking quality... as I see this, they blend in pretty well while retaining their differences.
As I already tackled three of the six types of rust, I just cut down this post so I can keep going the next time with part two. I wasn’t able to record a Youtube video: my wife keeps talking to me and my son is always “very active” so... no video. Sorry. I will try again next time so see you in a month with the rest of the tutorial. Keep practicing weathering your miniatures, you will have the grungiest dudes in your gaming group!
... game on!
2 notes
·
View notes
Text
Stygian priestess done
Here is my take on the Chronopia Stygian priestess. She was painted in Saurus colors as I will use her as an Astrolith bearer in my Seraphon army. A better picture will follow... just need some time to take out the light box. I love how the base turned out.
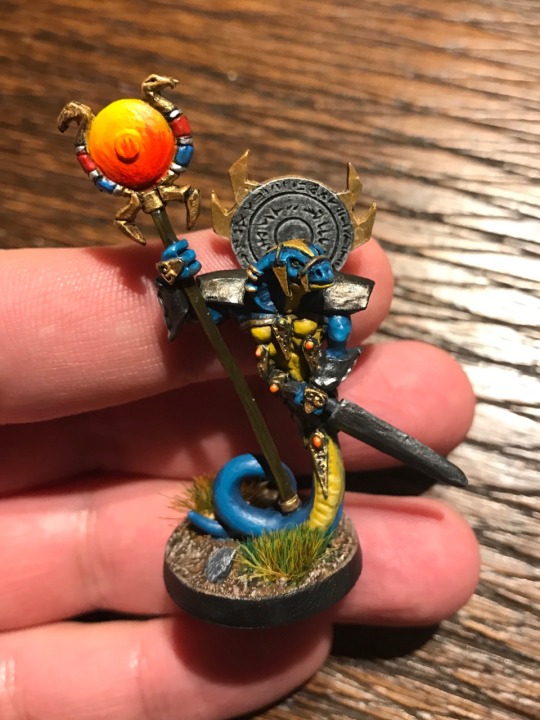
Let me know what you think in the comments!
0 notes
Text
Alternative miniature manufacturers
Riding the wave of last week’s post, I decided to create a collection of all the alternative miniatures manufacturers I know of. You can look for the best proxy using the info in this thread or just start a gang for some minor rules-only game. I wish Tumblr had the possibility to make “sticky posts” but they seem not to exist so I hope Google will index this page for ease of reference. I will, of course, keep it up to date with all my new findings as I stumble upon them.
I had this thread in mind for some time but I still don’t know how to organize the contents to maximize readability. The first solution I came up with is writing the name of the site and link the various section and/or link the more prominent miniatures below. Feel free to suggest improvements if you so wish.
Kromlech
This site has huge amounts of Ork models. I mean... A LOT! And they’re also super-cool so if you are an Ork player, give this a good look. For example:
Goliath mines - cute moving mines. Not being an Ork player I don’t know if they are playable but they are really cute.
Ironshark jetbike - simply wow!
They also carry a wide selection of scenic bases and many Nurgle proxies so you might be interested even if you don’t play Orcs.
Warmonger Miniatures
I came to this site looking for paint combinations. It seems they also have their colors system but they surely have a huge line of fantasy miniatures. They are in the old Warhammer Fantasy Battles style and will probably fit as proxies or additional units for out of production units. The pictures on the site say more than words so, be sure you check out all the different factions! Here I just show you some good looking models:
Plague doctors - They’re simply awesome.
Karliki - I’m not the dwarf type of guy but this dude is great!
Elven spearmen - These can be easily painted to be Dark Elves!
Eureka minis
This is another huge site to source your miniatures. Maybe it’s not ideal to source Warhammer proxies but the amount of figures they sell is so vast that you may easily find something you like in there! Their range of miniatures varies between fantasy miniatures and realistic modern warfare figurines that also come in multiple scales. They have so many minis that you should really sit in front of their site for half an hour to get a grasp of the whole picture. Moreover, they are the home of “Pond Wars” one of the cutest miniatures lines I’ve ever seen. Check it out! Here are some minis I love:
Frog king - Reminds me of WHFB second edition Slann... may work as a replacement too if you don’t own the original.
Ethereal - You can use this in your undead armies, whatever the game you’re playing. It’s just a piece of floating cloth but they make it look so dynamic!
Soviet NCO - A Soviet agent with a gas mask! Fuck yeah!
Ironclad Miniatures
I already mentioned this site in the previous post about proxies because I bought two of their Steam Tanks to use in my Death Guard army. However, they’re not just that: they also carry many 28 mm figurines and terrain pieces like bunkers and trenches.
Ruins - You can use them in all kind of wargames ‘cause, you know... war=ruins, no matter the setting.
British Grenadier - Go and fight with that hat!
Sanwar - Star Wars, anybody?
Miniature Scenery
Another Aussie site that mainly consists of laser cut MDF terrain but also sells vehicles. The quality and complicatedness of the design are awesome... I was seriously thinking about buying their heavy tank for Warhammer 40k purposes but then I moved to the cheaper and more fluff-oriented steam tanks choice. You will agree with me that this tank can easily proxy all those kick-ass Forgeworld tanks easily. It is pricey but I think it is worth. I will probably buy one someday... If you need MDF terrain this site may be one of your best bets.
Imperial ruins - To use in 40k
Pagoda - To use in MERCS or Infinity
Dwelling - To use in Fantasy or Age of Sigmar
Buzzard - Viable Heldrake proxy?
Well, you have a lot of terrain and vehicle choices that do not really look like cheap MDF... they do come at a slightly high price though.
TTcombat Scenics
I have been eyeballing this site for a while because I wanted some cheap MDF terrain pieces for my Warlord death army (the project is sleeping now ‘cause I have nobody playing this game around me). They mainly sell their own MDF terrain but they recently became Dropzone/Dropfleet commander authorized retailers so you can also buy miniatures for those games from them. This is particularly juicy for me as I will need DFC miniatures in the future and I can combine shipping this way! Here I link you some nice products I’ve been looking at for quite some time:
Cyber defense platform - Nice to use as terrain in a Necron army! Too bad I don’t play Necrons...
Industrial Hive - I would like to buy this to combine with my Pegasus Toxic plant but then I will need a full house just to play MERCS or WH40k! It’s super tempting though.
Riftgates - The cheap alternative to the Baleful Realmgates in Age of Sigmar. You save something like 90 $...
Ramshackle Games
This is a small miniature company in Nottingham, like GW back in the days... but way grungier! Take a look at the vast selection of post-apocalyptic miniatures they offer and you will agree with me they can be used in a lot of futuristic miniature games. They have a semi-complete catalog to download here. Take a look at these great miniatures:
Gorillagon - May work as a proxy for some Nurgle dude
Chicken - He may be swollen and overweight but he always eats his cereals for breakfast!
Rhebok tank - This may be the perfect Plagueburst Crawler proxy!
This company does not only make miniatures but they also commercialize games. It seems they also had a successful Kickstarter in 2017 for a game called Mini Gangs but I didn’t hear of it and, therefore, I missed it... looks like an awesome gang game though so, I’m a little salty. I hope they release it soon. Meanwhile, I will download the free version of their Nuclear renaissance game (pdf rules here) and see if it looks interesting. I may buy the book if I find the system interesting and IF I find somebody to play it with...
eBay
I go with this last as everybody knows it. It is not strictly a “miniature” manufacturer but you can find almost everything in here. I usually source the test models for my color schemes on eBay and also many proxies. As I wrote in the previous post, most of my Chronopia proxies come from eBay but I also found 2nd edition 40k models and a bunch of Tyranid gargoyles on sprue for a ridiculously low price. If you are into that kind of thing, “Forgeworld” models are also available for reasonable prices. You should definitely check it out if you can. I write here a couple of shops that always carry interesting deals or interesting models:
The Troll Trader - cheap used GW models
Games Thriftshop - cheap used GW models (This may have somewhat lower quality models but is probably the cheapest. I tend to favor this one)
Warex Mini - Original resin models designed to be used as Warhammer 40k proxies. Mostly Chaos and Tau but they also have all the other factions. You just have to use your fantasy to match the names. Have a look at some completely dope alternative sculpts:
Typhus
Mortarion
Leman Russ
Tau Lady sniper
Ok, let’s say I put an end to this post for today but I want to keep it updated as I find new pages and new miniature manufacturers. I hope you like the idea of having a hub to put all the info together. If you want to contribute, please write your preferred sources in the comments and I will be very glad to add them here!
... game on!
2 notes
·
View notes
Text
Proxies
When I was in Italy I realized something: I love proxies! And I don't mean network interfaces but plain, simple and cheap miniatures you use when you play tabletop war games. It seems that I've been in love with proxies since the very beginning of my hobby addiction. But what about you? Let's put it this way: you want the latest fancy AoS elf character but you don't have money? What about buying a Reaper Bones elf~ish fancy~ish 2$ miniature or something equivalent? In this article I will explain you some of my proxy strategies with various miniatures, some really old, others really fancy and obscure... keep reading if you're interested!
So when Age of Sigmar happened I was sucked back into the tabletop wargaming, GW style, after many years concentrating on other companies. I was really surprised to see such a big paradigm shift coming from GeeDubs where they basically destroyed the old game and price structure, opening the doors to a new system and a lot of new people interested in the tabletop wargaming. I actually started to think that GW products were "affordable". And that, together with the rules getting streamlined was a big shock. To say the least. This is not to say that GW went cheap and the game will spread everywhere: I just mean that now you can play a game even with two troops boxes, a measure and some dice. They also introduced the "start collecting" boxes that contain basically all you need to have some fun with your friends. So, where do they take the money from? Characters. If you want to buy that big honking dragon to kick your friend's ass then it will cost you exactly the same as the rest of your army. Or maybe even more. It's something close to the "freemium" formula you see everywhere nowadays with the only difference that you have to pay for your entry level army and pay (a lot) for the optional-but-required upgrades. Why am I writing this, you ask? Because this is a positive revolution for all those gamers that (like me) don't have too much money to invest in plastic soldiers but still want to enjoy some analog offline gaming with friends.
Proxies aplenty!
So what if you don't want to pay your weight in gold for the newest shiny character? Well, here I have some good news for you! Given the new low-entry Age of Sigmar thing, you can buy all the rank and file troops from GW and then source the big guys from other companies! You can save up to 80% of the cost and end up with some good looking model and the same solid fun. In addition, you will probably be the only one fielding some non-standard unit, attracting everybody's attention and comments. These are the so-called proxies: all those models that you decide to use as a replacement for another one and IMHO represent are one of the most interesting aspects of tabletop wargaming. So let's see some of the proxies I am using or planning to use for my AoS and 40k armies. I won’t pick up pics from around the internet but I will upload them when painted! Until then, follow the links!
Stormcast Eternals Knight Vexillor --> GW official This is a standard bearer on steroids and I'm planning to use the Chronopia Firstborn Standard bearer (Chronopiaworld) as a proxy for him. He is covered in metallic armor and has a standard. I only need to choose the proper colors for him. Perfect replacement!
Paladin retributors --> GW official They use hammers or maces so I went through a Chronopia miniatures multi-listing on eBay and sourced 3 Firstborn Judge and two Knights with mace (modelkits.com.ua). They don’t perfectly fit the description on the warscroll (judges have axes) but I’m usually not super-WYSIWYG. As a bonus, the Judge is one of the best sculptures in the whole Chronopia series and maybe even beyond! Take a look here (Chronopiaworld). I love these dudes...
Dark Elves War Hydra --> GW official Pretty straightforward proxy, the Stygian Sisters of Tiamat (Chronopiaworld) will work great as a War Hydra. I still have to find the models for the crew but I have a lot of Reaper Bones elves (like Terdeleira) around the house and I'm pretty sure I can find something.
Seraphon Astrolith bearer --> GW official Another easy proxy: everything that's holding a standard with lizard-ish looks does the trick. I will use a Stygian priestess (Chronopiaworld) for this. A great deal of the model looks will come from how I paint the insignia.
Update - Here is the proxy finished!
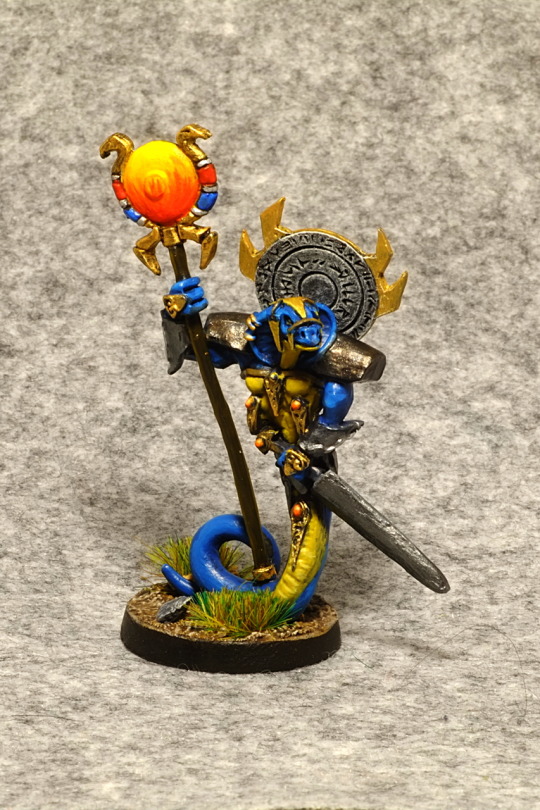
Blades of Khorne Bloodthirster --> GW official He is the big honking daemon that flyes... I was undecided whether I should go for Agramon or Narglauth (Reaper Bones 4)... as they both come from Reaper Bones I just decided to get both of them! And will put two on the table! Yeah!
Death guard Chaos Rhino --> GW official I think Rhinos are really clumsy models (don't ask me why) so I decided to deliberately change the time setting of my death guard army to a steampunk Victorian age-like where they have steam powered transports. I call this Ironclad Miniatures proxy "the wheelbarrow". 'Cause it doesn't look menacing at all!
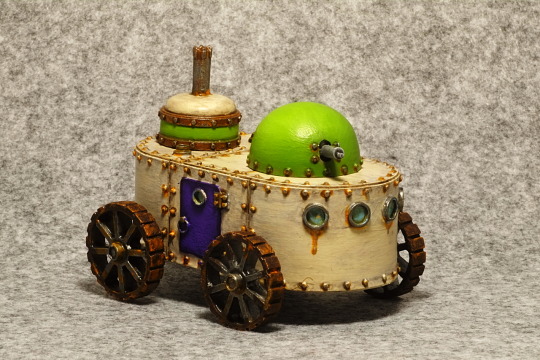
Plagueburst crawler --> GW official I still have to paint mine to match my army colors but this steam tank from Ironclad Miniatures is sooper cool and reminds me of a combine harvester/tractor converted into an improvised tank. I'm digging it so much! They also have a Four-Legged Steam Walker I could use as a Defiler proxy!!
To conclude, proxies are a whole new world if you are just approaching them. Think of proxies as one of the artistic parts of the hobby: finding a unit from another miniature series that actually fits in your army is not easy... but it’s a lot of fun when you find one. Don’t limit yourself and give yourself a chance to run away from the never-ending shiny syndrome the big companies cast on you. Using proxy from older lines also give them miniatures a shiny new life... and the sheer amount of good looking old models can surprise you! So you can sometimes just focus on the fun... fun with proxies!
... game on!
2 notes
·
View notes
Text
Time travel
It’s Sunday again and this means a new post on the blog. I actually lost two weeks worth of posts because of my trip back to Italy but I don’t really care: that was an awesome trip and gave me so many inputs and ideas! It was like traveling back in time to high school. Tabletop wargaming speaking, of course! In this post, I will briefly go over the experience and post some pictures of my really (really) old Warhammer Fantasy models. Wanna see them?? Click on the link below! Just be aware: a lot of pictures, so you’re in for a sloppy paint job ride!
So, I was back to my parents’ house where all my pre-Japan nerd stuff is carefully watched after by my Mom. She is not actively caring for it, of course. She just put all the junk in some big cardboard boxes and stuck it in the basement. Luckily our basement is a wine cellar so we have perfect humidity and temperature year round and my Magic The Gathering cards are still doing fine. My Warhammer figurines ended up in the same basement so, one of the first things I did was going downstairs and start digging through all the boxes to find them.
If you follow me on Twitter (unlikely, I know... but there’s still a remote possibility) you probably saw the pictures I took of my old models. Well, not all of them; just a small amount of representative ones my wife wanted me to upload on the blog. At the beginning, she just wanted to see how “good” I was back in the days mainly because she thought she may win a free “make fun of your nerd husband” ticket. However, after seeing the miniatures she thought it would be nice to upload them here: my painting at the time sucked so much that we thought it may be worthwhile to show it to those beginners on the internet that are just moving their first steps in the hobby. You know... just as some motivational stuff.
Taking proper pictures was hard: as I didn’t bring my light-box with me the picture quality is really bad... but, hey! not that I am blaming the pictures for my sloppy paint jobs. They are barely tabletop standard in some case (Skinks, I’m talking to you!) and lack proper contrast in most of the others. I will upload them here so that you all can see how one can evolve from hobby-zero to hobby-hero! (ok, this last one came out a little bit too presumptuous),
Dark Elves
During high school, I was a great fan of Tolkien books.... I still have all of them in my bookshelf. I really liked Elves as they were the most “likable” faction in all books so when I first approached Warhammer Fantasy, Elves was my to go choice. Still, high elves with all their white and pointy faces did not appeal to me too much and the Wood Elves looked more like Robin Hood imitations. So I naturally ended up with the Dark Elves with all their human sacrifices, blood drinking, and naked boobies. Impressive how teenagers mind works (or really, doesn’t). I went with the color scheme suggested in the army book and ended up with some cool looking models. I just happened to make two big mistakes:
I did not coat them when I was done with the painting. Actively playing with them and storing in sub-optimal conditions led to a lot of paint chipping and the models are now completely covered in blemishes.
I left them on display in a bright spot. The UV from the light slowly ate through the paint and the more delicate pigments just died (especially the blue and the yellows)
Read these two points well and avoid the same mistakes! I am coating the models now but the very first units I didn’t protect are to be fully repainted. Do you really want to do it? No, you don’t. Well, maybe, if they were really bad you can think about it.
So, let’s actually see some pictures!

These are the two leaders Malekith, the Witch King on his black dragon and Morathi the witch on her black pegasus. They look like they’re black only while the wings and some part of the body were painted with a blue-violet gradation.... that’s totally gone. I also urge you to focus on the bases: yes, that was the “only” style back in the days. Goblin green and flock aplenty! I may actually say I was going fancy as you can see a couple of stones and a log on the lady’s base.

Not sure about the name of the first one but the second one is an assassin. I remember using these two guys a lot: they were good at killing big stuff so I recall using them against my friend’s chaos demons. Not that I was able to win easily because, back in the days, chaos was super-overpowered!
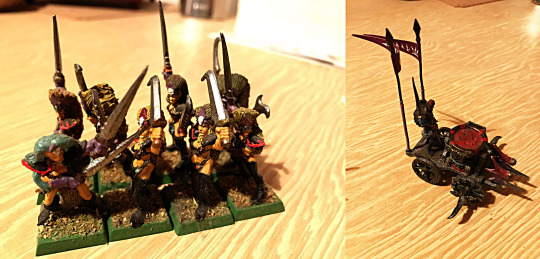
Dark Elves are rich in witches.... like, literally everybody is a witch. Even the supreme commander/king. They use to hang around a boiling cauldron full of blood they used to do sacrifices and magical rituals. I clearly remember the cauldron being one of my favorite models back in the day: the machine itself is still super cool. What I didn’t really like were the witches themselves: they show how bad GW miniatures were then... super ugly. I mean, look at them.... I can’t believe I painted 20 of them...

Last, one of the few ranged units in the army, the Reaper bolt thrower. It was really useful when all other units were basically close combat. I only had a 10 man unit of bolt thrower equipped infantry and I was just flying forward with my big guys and charging with cold ones. Mmmm.. not the best strategy. That’s probably why I didn’t win too much with these guys.
Lizardmen
This is still my favorite army by a long stretch. I won big games with them and I mean that all my friends hated playing against them and kept asking for the Dark Elves... But do you really want to know the best thing of all? I had 90% of the army for free. I’m talking being in the right place at the right time. I was shopping with all my friends in a small shop that was my FLGS at the time and the owner came and asked all of us: anybody into starting Lizardmen? Back in the high school, we didn’t have money and, as you know, GW stuff may be pretty expensive.... so everybody went like “no thanks, I already play xxx”. I was the only one that actually replied differently; something along the lines “No, thanks... I don’t have money. But I wish I had ‘cause they look epic!”. That’s when the store owner replied “Then you’re in luck! I don’ want money for them: here you are. pick this bag and have fun!”. We had just realized the store was going out of business and he was giving away bargains but nobody wanted lizardmen because of the sheer number of dudes required. I just got a bag full of them and my friends kept blabbing about my luck for months. I’m still in love with them, their mesoamerican Aztec-like fluff and their tactics so I am still collecting them even in the new Age of Sigmar. I wish I could rebase them all easily.
Let’s move on to some pics!
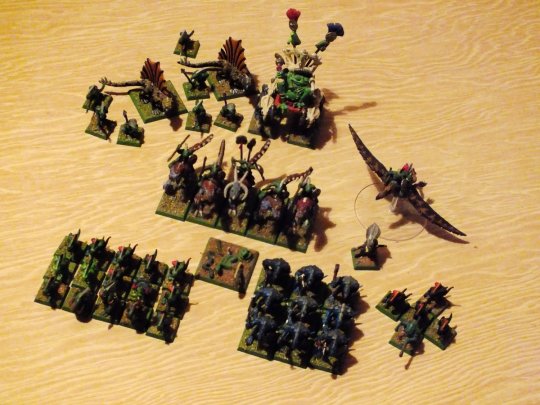
Aerial view of a “typical” battle configuration. With 90% less skinks... I mean, I was fielding 100ds of skins. On average. They were able to fire two arrows in a row and were super-cheap. I like old skinks way more than present skinks. They were actually useful back then.
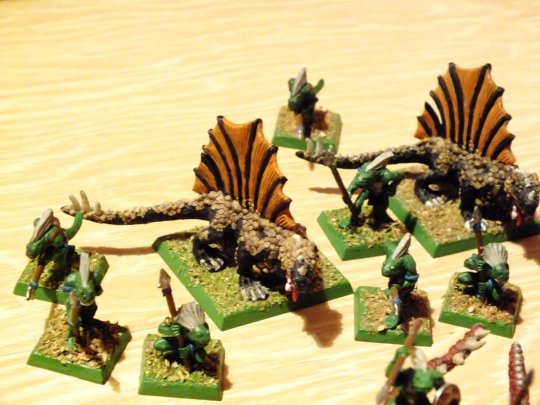
My favorite unit in the whole game. They were three flame throwers.. pretty solid ones! A salamander and 2 handlers got lost somehow... They kept killing tons of foes while being pretty resistant too. I was really happy to see they didn’t get nerfed in the AoS warscrolls! The color scheme was completely original... the suggested colors were greenish IIRC but as you all know I am not a big fan of “standard” colors.
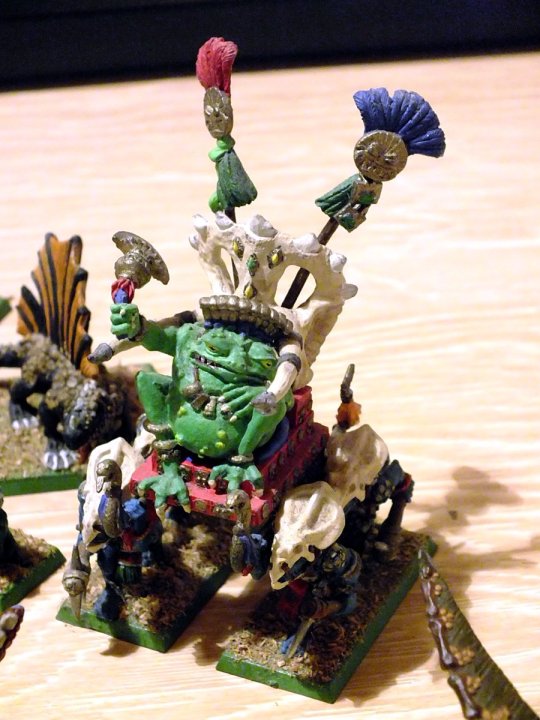
The general of my army, the Slann is being carried around by 4 Saurus temple guards. This dude was a beast! But he actually looks like he was painted with my toes... unfortunately. I remember I had to paint him fast to field him in a game... but now I regret doing it. I should have taken more time to do it better. He is not even washed! Guys, please treat your generals with some more respect than I did....
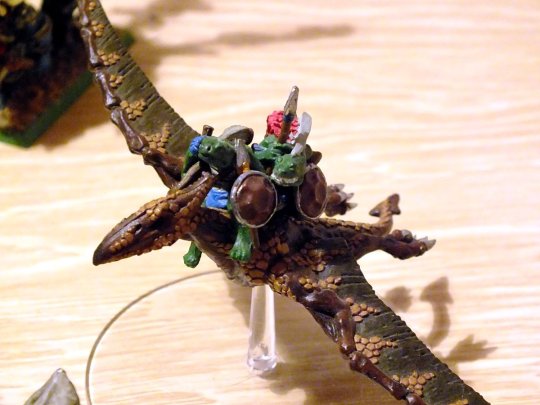
Prehistoric flyers... this model actually looks good. It clearly shows what the protective coat does... he was out in the light with the dark elves but the blue is still there and the red is still bright. Game-wise... Terradon suck. I should try the new flyers, the “ripperdactyls”
I also had a lot of characters to field from the crazy cavalry dude on an enraged horned one (Inxi huinzi) to the snake priest (Tehenhauin) and the blow-machinegun (Oxyotl). I think I had even more but I’m not super-sure. Here are the pics I shot.
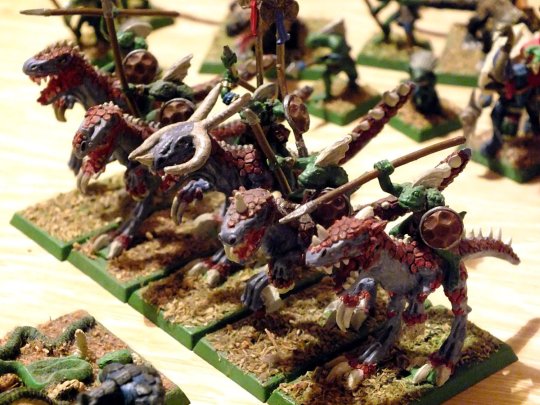

I think we can consider ourselves done with pictures.... I have some more but basically, this is it! What do you guys think? Did looking at this metric crapton of sloppy minis motivate you? I hope it did ‘cause it motivated me to repaint them! Maybe somewhere in the future... who knows. Or maybe I’ll give them to my son when he will grow up and let him have fun with them. After stripping them of course... luckily they are all metal!
To close this long post, I just anticipate that looking at my old minis I also had some proxy ideas for my AoS armies that I will show you next week! Stay tuned!
... game on!
1 note
·
View note
Text
How to make a wet palette
Long time no see everybody! I’m back from my trip to Italy and I’m finally ready to get back on the blog. Today is Friday and I will be writing the belated February tutorial I was supposed to write one week ago. It was the day before we come back so we were packing stuff and didn’t have enough time to sit down and write. Anyway, without any further ado, let’s dive into one of the most important tutorials I will ever post: how to make yourself a wet palette for (almost) free. Interested? Keep reading! Believe me: you want to keep reading this time.
The most complicated task a new painter needs to face is dealing with the physical behavior of the paint. When you use paint straight out of the pot, on a paper plate, it literally dries on you instantly. It maybe takes one to two minutes in general. The solution to this problem is the so-called “ wet palette” and I am going to teach you how to make one almost for free.
What is a wet palette?
A wet palette is just a piece of semi-permeable paper suspended on a wet medium that slowly permeates through, keeping the paint you place on top always moist. You have big ones and small ones, sponge and paper-based ones... meaning that you can find all kind of price ranges to choose from. But what if I told you can make a very usable and super-cheap palette by yourself with salvaged material?
Required materials
Here is the short list of things you will need:
Flat (not-super-deep) Tupperware
A sturdy and water-absorbing paper towel
A small cut of baking sheet (parchment paper).
You probably already have everything around your house now so get to work and let’s build this thing!
Instructions
Here is the container I chose to use as my new wet palette. I chose this because of the shallow design you can also verify here.
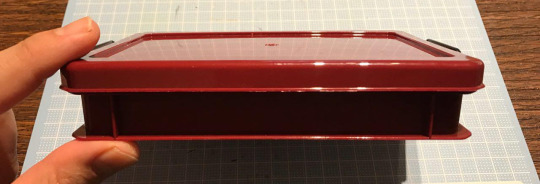
As an added feature it comes with two latches you can use to seal it closed which is an interesting thing to have as there’s water and paint inside and I am planning to carry this around. I bought this dude in a 100Y shop (Japanese dollar store).
The next thing you want to do is to grab a big sturdy piece of paper towel you can fold to exactly fill the container’s bottom. The more you can fold it, the more water it will catch so, better to stay on the safe side here.
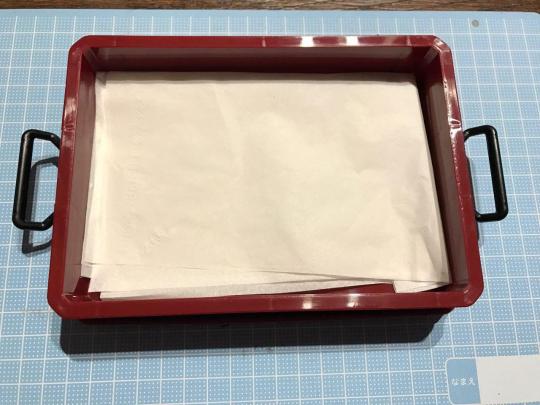
As you can see, as long as you have a wide palette surface, you are not required to be super-precise when folding. Just slab the tissue in the tray trying to cover the biggest surface possible. When you are done, pour abundant water in the container. You want to completely and thoroughly drench the paper towel. Drain it out when you’re done so that you end up with a wet tissue which is not dripping when tilted and without any dry area.
When you get to the right humidity, just layer an appropriate size of parchment paper on top of the tissue and watch it curl up completely. The parchment paper you want is the “silicon coated” type, not the oily type as the latter actually stops water from permeating up in your colors.
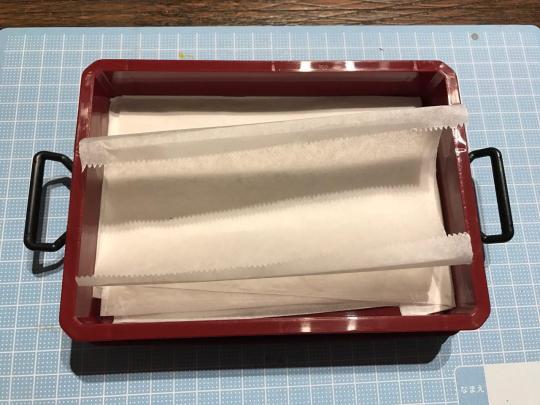
If you give enough time to your parchment paper, it will magically un-roll in front of you and perfectly stick to the wet tissue thanks to water surface tension. Needless to say, you can speed up the process by spreading the paper with your hand but staring at it unfolding is quite fun. The first time, I mean....
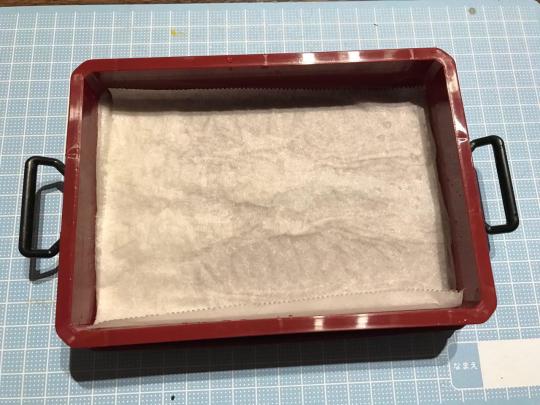
So, this is the final wet palette ready to be used by just pouring the paint into small drops on the surface. You can slightly dilute the paint with your favorite medium (water, medium or flow improver) and the water permeating from the bottom will keep the paint diluted just the right amount. If the paper towel is not super-wet (like after a day of painting) you are able to store the closed palette for weeks and the paint will keep the right consistency.
Advantages of a wet palette
This is just a small bonus section for the undecided ones. Why do you want to use a wet palette?
It automatically dilutes the paint for you to the right concentration
You can mix a lot of paint and consistently use all of it for a long time on many models.
Colors stay wet for hours. Weeks if stored correctly
It is easier to mix colors thanks to the slick surface of the parchment paper.
It’s super-cheap for the advantages it offers.
.... as you can see there is no good reason not to build one!!
Game on!
4 notes
·
View notes