
Welcome to GlowNailBar! 💅✨ Your spot for stunning nail art and flawless manicures. Let your nails shine with style and creativity!
Don't wanna be here? Send us removal request.
Statistics
We looked inside some of the posts by glownailbar and here's what we found interesting.
Average Info
Notes Per Post
0
Likes Per Post
0
Reblog Per Post
0
Reply Per Post
0
Time Between Posts
2 days
Number of Posts By Type
Photo
17
Last Seen Tumblr Blogs


Fun Fact
There are dozens of funny blogs to kill time on Tumblr.
Photo
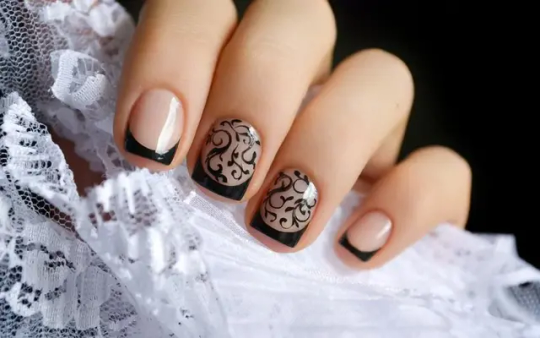
Nude and Black Nail Designs - Perfect Blend of Timeless Elegance
0 notes

Photo
Flower Nails Unveiled: A Comprehensive Guide to Cake Decorating
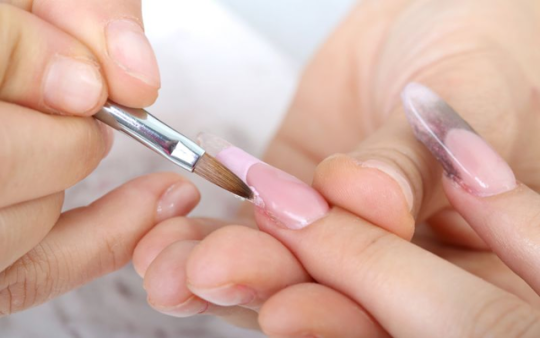
There is something truly captivating about the delicate beauty of flowers. From their vibrant colors to their enchanting fragrances, flowers can uplift our spirits and bring joy to our lives. And what better way to celebrate the allure of flowers than through the art of flower nails? Flower nails, also known as floral nails, are a fascinating form of artistic expression that allows individuals to create stunning floral designs on their nails. Whether you're a professional nail artist or enjoy experimenting with different nail designs, flower nails offer a unique and creative outlet to showcase your love for nature's most beautiful creations. But flower nails are not just about aesthetics. They also hold a deeper meaning for many people. Flowers have long been associated with various emotions and symbolism. For example, roses are often seen as a symbol of love and passion, while sunflowers represent happiness and positivity. By incorporating these symbolic flowers into your nail art, you can express your emotions and beliefs beautifully and personally. In this introductory article, we will delve into the world of flower nails, exploring the techniques, tools, and designs that can help you create stunning floral masterpieces. We will also discuss flower nails' history and cultural significance, shedding light on how this art form has evolved. So, whether you're a seasoned nail artist or someone just beginning to explore the world of nail art, join us as we uncover the enchanting world of flower nails. Get ready to be inspired, captivated, and amazed by the intricate beauty that can be achieved with a few brush strokes.
What Are Flower Nails?
Flower nails are essential tools for creating beautiful and intricate designs on cakes and other baked goods. These small, metal nails have a flat head and a long, pointed end, making them perfect for piping delicate flowers and other detailed decorations. Whether you're a professional baker or enjoy baking as a hobby, flower nails can take your creations to the next level. When it comes to decorating cakes, flower nails offer a level of precision and control that is hard to achieve with other tools. You can create flowers of different sizes and shapes using a flower nail, from simple daisies to intricate roses. The nail acts as a guide for piping the petals, allowing you to create realistic and lifelike designs. To use a flower nail, attach a small square of parchment paper or a flower nail template to the flat head. This provides a non-stick surface for piping the flowers. Then, pipe a small dot of icing onto the parchment paper or template and place the flower nail in the center. From there, you can direct the petals onto the nail, rotating it to create a symmetrical design. One advantage of using a flower nail is that it allows you to work on multiple flowers at once. Since the nail is detachable, you can easily transfer the flowers to a cake or a baking sheet without disturbing the design. This makes it easier to create larger arrangements or work on multiple cake layers.
How Do Flower Nails Work?
Flower nails are essential for cake decorators, allowing them to create stunning and intricate floral designs. These small, metal nails have a flat head and a long, pointed end. But how exactly do flower nails work their magic? When creating beautiful flowers out of icing, flower nails play a crucial role. The pointed end of the nail acts as a base for building the flower. The decorator starts by piping a small amount of icing onto the nail, which serves as the center of the flower. This is typically done using a round piping tip. Once the center is piped, the decorator can begin adding petals. They start by conducting a small amount of icing onto the center and then use a petal-shaped piping tip to create the petals. The decorator rotates the nails as they sing, creating a realistic and three-dimensional flower. The flat head of the flower nail is designed to be held comfortably in the decorator's hand. This allows for precise control and movement while piping the flowers. The nail acts as a handle, making it easier to rotate the flower as it is being created. Flower nails are also useful for creating other decorative elements, such as leaves and vines. Decorators can create a variety of floral designs by using different piping tips and techniques. In conclusion, flower nails are indispensable tools for cake decorators. They provide a stable base for creating intricate and lifelike flowers out of icing. With their pointed end and flat head, flower nails allow decorators to pipe petals and rotate the flower as they work. So, next time you marvel at a beautifully decorated cake, remember the role of flower nails in bringing those stunning floral designs to life.
What Are Flower Nails Used For?
Flower nails are an essential tool in the world of cake decorating. These small, metal nails have a flat head and a long, pointed end. But what exactly are they used for? When it comes to creating beautiful and intricate floral designs on cakes, flower nails are a baker's best friend. They provide a stable base for piping delicate flowers and other decorative elements. Bakers can easily create lifelike petals and leaves by placing a small amount of icing on the nail. One key advantage of using a flower nail is the control it offers. As the nail acts as a handle, decorators can rotate it while piping, allowing them to create symmetrical and evenly shaped flowers. This precision is crucial when it comes to achieving professional-looking designs. Flower nails also help speed up the decorating process. Using multiple nails, decorators can work on several flowers simultaneously, maximizing efficiency. This is particularly useful when working on large cakes or when time is limited. Furthermore, flower nails are versatile tools that can be used for more than just flowers. They can create decorative elements like ruffles, borders, and intricate lace patterns. The possibilities are endless! In conclusion, flower nails are indispensable tools for cake decorators. They provide control, speed, and versatility, allowing bakers to create stunning floral designs and other decorative elements. Whether you're a professional baker or a hobbyist, adding a flower nail to your cake-decorating toolkit is necessary.
How Do You Use a Flower Nail?
Flower nails are essential for cake decorators, allowing them to create stunning and intricate floral designs. You've come to the right place if you're new to cake decorating or simply curious about flower nails. This article will dive into how to use a flower nail effectively. To begin, it's important to understand what a flower nail is and how it works. A flower nail is a metal tool with a flat top and a pointed end. It is typically used with a piping bag and various icing tips. The nail acts as a base for creating delicate flowers, petals, and other decorative elements. To use a flower nail, start by attaching a small square of parchment paper or a flower nail template to the flat surface of the nail. This will prevent the icing from sticking to the nail and make it easier to transfer the design onto the cake later. Next, fill a piping bag with the desired icing color and attach a petal or leaf tip. Hold the flower nail with one hand and pipe a small dot of icing onto the center of the parchment paper or template. This will serve as the base for your flower. Then, using the piping bag, pipe petals or leaves around the base dot, rotating the nail as you go. By varying the number and size of the petals, you can create different flower shapes. Once you're satisfied with the flower design, carefully transfer it onto the cake using a spatula or a pair of tweezers. Gently press the flower onto the cake, making sure it adheres well. Repeat the process to create more flowers or other decorative elements as desired.
What Size Flower Nail Should I Use?
Using a flower nail is essential when creating beautiful and intricate flower designs on cakes. But with so many different sizes available, knowing which one to choose can be overwhelming. In this article, we will explore the various sizes of flower nails and help you determine which one is right for your needs. One of the most popular sizes of flower nails is the 1.5-inch nail. This size is perfect for creating smaller flowers and delicate petals. It allows for precise control and is ideal for beginners just experimenting with flower designs. If you want to create larger, more elaborate flowers, a 2-inch flower nail may be more suitable. This size provides a larger surface area for working with bigger petals and allows for more intricate details. It's a great choice for experienced decorators who want to take their flower designs to the next level. For those who prefer to work with medium-sized flowers, a 1.75-inch flower nail is a great option. This site balances the precision of the 1.5-inch nail and the larger surface area of the 2-inch nail. It's versatile and can be used for various flower designs. It's important to note that the size of the flower nail you choose will also depend on the size of the cake you're working on. If you're decorating a small cake, a smaller flower nail may be more appropriate, while a larger cake may require a bigger nail to accommodate larger flowers. In conclusion, choosing the right size flower nail is crucial for creating beautiful cake designs. Consider the size of the flowers you want to make, your level of experience, and the size of the cake you're working on. With the right nail, you can bring your cake decorating skills to new heights.
Can I Use a Flower Nail for Other Decorations?
Flower nails are commonly used in cake decorating to create beautiful, intricate floral designs. Their unique shape and size make them perfect for piping delicate petals and leaves. But can flower nails be used for other decorations? Let's explore the possibilities. One creative way to use a flower nail is to create buttercream rosettes. By attaching a piping tip to the top of the nail, you can swirl the buttercream around it to create stunning rosette designs. The nail provides stability and control, allowing you to generate uniform and symmetrical rosettes easily. Another decoration idea is to use a flower nail to make chocolate decorations. By pouring melted chocolate onto the nail and allowing it to cool and harden, you can create intricate chocolate designs that can adorn cakes, cupcakes, or even desserts. The nail's shape acts as a mold, allowing you to create various shapes and patterns. Flower nails can also be used to craft sugar flowers. By attaching a small piece of gum paste or fondant to the nail, you can shape and mold it into a variety of flower petals. The nail's pointed end allows for pse detailing and shaping, resulting in realistic and lifelike sugar flowers. In addition to these ideas, flower nails can be used to create marzipan decorations, royal icing flowers, and even modeling clay designs. Their versatility makes them a valuable tool for any decorator looking to add intricate and unique designs to their creations. In conclusion, flower nails are not limited to just creating floral designs. With a little creativity, they can be used for various decorations, from buttercream rosettes to chocolate designs and sugar flowers. So, if you want to expand your decorating skills, don't be afraid to experiment with flower nails and explore their endless possibilities.
Do I Need a Flower Nail for Every Flower?
When it comes to creating beautiful and intricate floral designs on cakes, flower nails are an essential tool for many cake decorators. But do you need a flower nail for every flower? Let's delve into the world of flower nails and find out. Flower nails are small metal tools with a flat head and a long, pointed end. They are used to create lifelike flowers and other decorative elements out of buttercream or royal icing. The nail supports the flower as you pipe the petals and leaves, allowing you to easily rotate the nail to access all angles of the design. While having multiple flower nails can be convenient, having a separate nail for every flower is unnecessary. With a single flower nail, you can create a variety of flowers by piping the petals directly onto the nail and then transferring them onto the cake once they are complete. This saves time and reduces the need for multiple nails. However, having multiple flower nails can be beneficial when working on a large cake with various flowers or intricate designs. It allows you to work on different flowers simultaneously, increasing efficiency and speed. When using a flower nail, it is important to remember to keep it clean and dry between uses. This prevents any unwanted residue or moisture from affecting the stability and appearance of your flowers. In conclusion, while having a flower nail for every flower is unnecessary, having multiple nails can be advantageous for more complex designs. Whether you use one or numerous flower nails, the key is to practice and experiment to create stunning floral decorations on your cakes. Happy decorating!
Can I Decorate Cakes Without a Flower Nail?
Flower nails are a popular tool cake decorators use to create stunning floral designs on cakes. But what if you don't have a flower nail? Can you still achieve beautiful cake decorations? The answer is yes! While flower nails can help create intricate designs, they are not essential. Some alternative methods and tools can be used to achieve similar results. One option is to use piping tips with a petal or leaf shape. These tips can indicate petals and leaves directly on the cake. Hold the piping bag at a 45-degree angle and apply gentle pressure to create the desired shape. With practice, you can create a variety of flowers using different piping tips. Another option is to use fondant or gum paste to create flowers and decorations. These pliable materials can be shaped into intricate designs and placed on the cake. You can mold petals and leaves by hand or use cutters to create uniform shapes. Once the decorations are dry, they can be attached to the cake using edible glue or royal icing. You can also use fresh flowers to decorate your cake if you prefer a more natural look. Choose safe flowers for consumption and ensure they are properly cleaned and prepared before placing them on the cake. Fresh flowers can add a beautiful touch to any cake, requiring no special tools or techniques. In conclusion, while flower nails can be useful for cake decorators, they are unnecessary when creating stunning cake decorations. You can still achieve beautiful and intricate designs on your cakes with alternative methods and tools such as piping tips, fondant, gum paste, or fresh flowers. So don't let the absence of a flower nail hold you back from creating amazing cake decorations!
Conclusion
Flower nails are essential for any cake decorator looking to create stunning floral designs. Throughout this post, we have covered various aspects of flower nails, including what they are, how they work, and what they are used for. We learned that flower nails are metal nails with a flat head and a pointed end. They are used with a piping bag and a small flower nail to create delicate and intricate cake designs. By rotating the flower nail while piping the icing, decorators can achieve lifelike floral decorations that add a touch of elegance to any cake. We also discussed the importance of choosing the right size flower nail for your desired design. Depending on the size and complexity of the flower, different sizes of flower nails should be used to ensure the best results. While flower nails are primarily used for creating flowers, they can also be used for other decorative elements such as leaves and borders. Their versatility makes them a valuable tool in any cake decorator's arsenal. It is worth noting that although flower nails are highly recommended for creating professional-looking floral designs, it is still possible to decorate cakes without them. However, using a flower nail can greatly enhance the precision and detail of your designs. Read the full article
0 notes
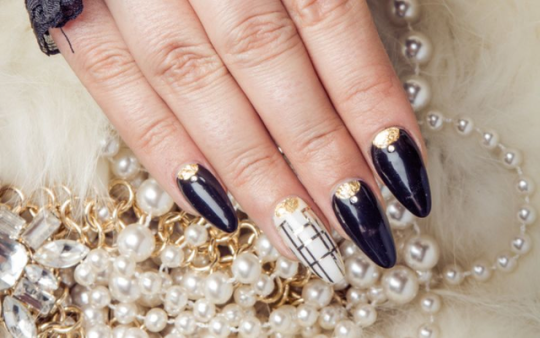
Photo
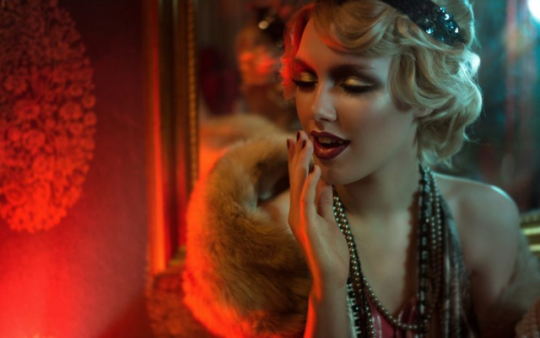
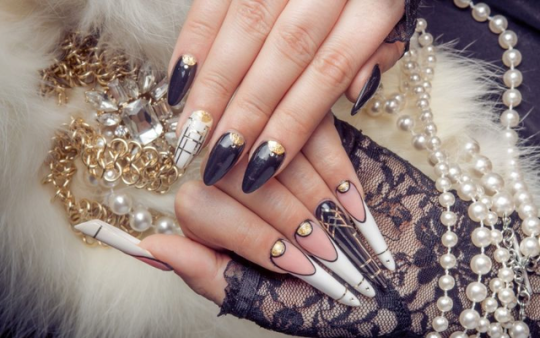
Gatsby Nails: Everything You Need to Know
Regarding fashion and beauty trends, there's always something new and exciting to explore. One such trend that has taken the world by storm is "Gatsby Nails." These stunning nail designs are inspired by the glamour and luxury of the Roaring Twenties, capturing the spirit of the iconic Great Gatsby era. With their intricate details and dazzling embellishments, gatsby's nails have become a favorite among fashion-forward individuals looking to make a statement. The allure of Gatsby's nails lies in their ability to transport us back to a time of glitz and glamour. Just like the extravagant parties thrown by Jay Gatsby, these nails are a true reflection of the decadence and luxury of the era. From art-deco patterns to shimmering sequins and pearls, gatsby's nails celebrate elegance and sophistication. What sets Gatsby's nails apart is their versatility. Whether you prefer a subtle nod to the era with a single accent nail or a full-on display of artistry on all ten fingers, there are endless possibilities to explore. The intricate designs can be customized to suit any occasion, from a formal event to a night out. With the right combination of colors, textures, and embellishments, gatsby's nails can elevate any outfit and make a lasting impression. To achieve the perfect Gatsby nails, it's important to find a skilled nail technician who understands the intricacies of this trend. From choosing the right colors and patterns to mastering the art of embellishments, a professional can bring your Gatsby nail dreams to life. Additionally, proper care and maintenance are crucial to ensure your nails stay flawless and stunning for as long as possible. In conclusion, gatsby's nails are a captivating trend that allows us to channel the glamour and elegance of the Great Gatsby era. With their intricate designs and dazzling embellishments, these nails are a true work of art. So, whether you're attending a special event or want to add a touch of sophistication to your everyday look, Gatsby Nails is the perfect choice. Get ready to step into the world of luxury and make a statement with these stunning nail designs.
What Are Gatsby Nails?
Gatsby's nails are a trendy nail art style inspired by the glamour and luxury of the Roaring Twenties. Intricate patterns, bold colors, and luxurious embellishments characterize this unique nail design. One of the key features of Gatsby's nails is the use of geometric shapes and lines. These designs often incorporate Art Deco elements, such as chevron patterns, triangles, and intricate swirls. The combination of these geometric shapes creates a visually stunning and eye-catching look. To achieve the Gatsby nail look, technicians use various techniques and materials. Some popular choices include foil, glitter, and metallic polishes. These elements add a touch of sparkle and shine, further enhancing the overall glamorous effect. Another characteristic of Gatsby's nails is bold and vibrant colors. Classic shades like gold, silver, and black are often used to create a striking contrast against the base color. These rich colors evoke a sense of luxury and decadence, reminiscent of the extravagant parties and fashion of the 1920s. In addition to the intricate designs and bold colors, Gatsby's nails often feature luxurious embellishments. Rhinestones, pearls, and sequins are commonly used to add an extra layer of glamour and sophistication. These embellishments are strategically placed to enhance the overall design and create a dazzling effect. Gatsby's nails have gained popularity recently due to their unique and glamorous aesthetic. They are a perfect choice for special occasions, parties, or simply for those who want to add a touch of vintage elegance to their nails. In conclusion, Gatsby's nails are a stunning nail art style inspired by the Roaring Twenties. With their intricate patterns, bold colors, and luxurious embellishments, they offer a glamorous and eye-catching look that will make a statement. So, why not try this trendy nail art style and channel your inner Gatsby?
How Long Do Gatsby Nails Last?

Gatsby's nails have become incredibly popular recently, with many people opting for this glamorous and stylish nail design. But one question that often comes up is, how long do Gatsby's nails last? The answer to this question can vary depending on various factors. The first factor to consider is the type of nail polish used. Some nail polishes are more long-lasting than others, and this can directly impact the longevity of your Gatsby nails. It is recommended to choose high-quality nail polishes that are known for their durability. Another factor to consider is the application process. Gatsby's nails require intricate designs and meticulous attention to detail. If the application is done properly, the nails can last longer. However, if the application is rushed or not done correctly, the nails may chip or peel sooner. Additionally, the daily activities and lifestyle of the individual can also affect the lifespan of Gatsby's nails. Activities such as washing dishes, typing on a keyboard, or using harsh chemicals can cause the nails to weaken and chip faster. It is important to take extra care when engaging in activities that may stress the nails. On average, Gatsby's nails can last anywhere from one to two weeks. However, with proper care and maintenance, they can potentially last even longer. It is recommended to moisturize the nails and cuticles regularly, avoid excessive exposure to water, and wear gloves when engaging in activities that may damage the nails. In conclusion, the longevity of Gatsby's nails depends on various factors such as the quality of the nail polish, the application process, and the individual's lifestyle. By taking proper care and following these tips, you can enjoy your Gatsby nails for an extended period.
Are Gatsby Nails Damaging to Natural Nails?
Gatsby's nails, also known as "Gatsby manicure," have gained popularity recently. This trendy nail style, inspired by the glamour of the 1920s, features a combination of metallic colors, intricate designs, and embellishments. However, many people wonder if this fashionable nail trend is damaging to natural nails. One of the main concerns regarding Gatsby's nails is using acrylic or gel extensions. These extensions are often applied to achieve the desired length and shape. While they can enhance the overall look, improper application or removal can lead to nail damage. It is crucial to visit a skilled and experienced nail technician who can ensure the extensions are applied and removed correctly, minimizing the risk of damage. Another aspect to consider is the weight of the embellishments used in Gatsby's nails. Rhinestones, beads, and other decorative elements can add extra weight to the nails, potentially causing them to weaken or break. It is important to choose lightweight embellishments and avoid excessive use to prevent unnecessary strain on the natural nails. Furthermore, the frequent application and removal of Gatsby's nails can weaken the natural nails over time. The use of harsh chemicals during the removal process, such as acetone, can strip the nails of their natural oils and moisture, leading to dryness and brittleness. To mitigate this, it is advisable to give the nails a break between nail art applications and maintain a proper nail care routine. In conclusion, while Gatsby's nails can be a stunning and eye-catching nail trend, proper care and maintenance are crucial to prevent damage to natural nails. By seeking professional help, choosing lightweight embellishments, and allowing the nails to rest between applications, individuals can enjoy the beauty of Gatsby's nails without compromising the health of their natural nails.
Can Gatsby Nails Be Done at Home?

Gatsby's nails have become a popular trend in recent years, with their glamorous and vintage-inspired look. Many people wonder if it's possible to achieve this style at home without the help of a professional. While it may seem daunting, with the right tools and techniques, you can give yourself a stunning set of Gatsby's nails in the comfort of your own home. To start, you'll need a few essential items. A nail file, buffer, and cuticle pusher are necessary for prepping your nails. You'll also need a base coat, a metallic nail polish in your desired shade, and a top coat for a long-lasting finish. Additionally, you can add some extra flair with nail art tools like rhinestones, glitter, or nail stickers. Begin by shaping your nails with the file, creating a classic square or rounded shape. Push back your cuticles gently with the cuticle pusher, being careful not to damage the nail bed. Once your nails are prepped, apply a thin layer of base coat to protect your natural nails from staining. Next, it's time to apply the metallic nail polish. Start with a thin layer and let it dry completely before applying a second coat for a more opaque finish. If you want to add some decorative elements, now is the time to get creative. Use nail art tools to create intricate designs, or add a few rhinestones for glamour. Finish off your Gatsby nails with a top coat to seal in the color and add shine. This will also help your manicure last longer. Allow your nails to dry completely before using your hands. While it may take some practice to perfect the technique, doing Gatsby's nails at home is achievable. With the right tools, patience, and creativity, you can rock this vintage-inspired style and turn heads wherever you go. So why not give it a try and unleash your inner Gatsby?
What Shapes Can Gatsby Nails Be?
Gatsby's nails have become a popular trend in nail art. These glamorous nails are inspired by the elegance and luxury of the 1920s, a time known for its lavish parties and extravagant fashion. Regarding the shapes of Gatsby's nails, there are several options, each adding its unique touch to this vintage-inspired style. One of the most common shapes for Gatsby's nails is the almond shape. This shape mimics the silhouette of an almond, with a narrow base and rounded tip. Almond-shaped Gatsby nails give a feminine and sophisticated look, perfect for channeling the glamour of the Roaring Twenties. Another popular shape for Gatsby's nails is the stiletto shape. This shape is long and pointed, resembling a stiletto heel. Stiletto-shaped Gatsby nails exude confidence and power, making a bold statement wherever you go. For those who prefer a more classic look, the square shape is a great option for Gatsby nails. This shape features straight sides and sharp corners, creating a clean and polished appearance. Square-shaped Gatsby nails are versatile and can be worn for any occasion. If you're looking for something more unique, the coffin shape is a great choice for Gatsby nails. This shape is tapered at the tip and squared off, resembling a coffin. Coffin-shaped Gatsby nails add an edgy and modern twist to this vintage-inspired style. In conclusion, Gatsby's nails can come in various shapes, allowing you to express your style and embrace the glamour of the 1920s. Whether you prefer the elegance of almond-shaped nails, the boldness of stiletto-shaped nails, the classic look of square-shaped nails, or the uniqueness of coffin-shaped nails, there is a shape for everyone to enjoy. So go ahead and embrace the Gatsby trend, and let your nails shine with vintage glamour.
Can Gatsby's Nails Be Customized with Nail Art?

Gatsby's nails have become increasingly popular in recent years, with their glamorous and decadent aesthetic reminiscent of the Roaring Twenties. But can these stylish nails be customized with nail art? The answer is a resounding yes! One of the great things about Gatsby's nails is their versatility. While the classic look is typically achieved with a metallic or glittery base, there are endless possibilities for adding your personal touch with nail art. Whether you prefer intricate designs, bold patterns, or delicate embellishments, Gatsby nails can be customized to suit your style. When it comes to nail art for Gatsby's nails, the options are truly limitless. You can incorporate elements inspired by the Art Deco movement, such as geometric shapes, lines, and symmetry. Alternatively, you can opt for more playful designs with feathers, pearls, or miniature flapper dresses. The key is to embrace the luxury and extravagance of the era while adding your unique twist. To achieve the best results, it's important to choose the right colors and materials for your nail art. Metallic shades like gold, silver, and bronze are ideal for capturing the glamour of the Gatsby era. You can also experiment with different textures, such as holographic or chrome finishes, to make your nail art stand out. In terms of application, nail art for Gatsby's nails can be done by a professional nail technician or as a fun DIY project at home. There are countless tutorials and step-by-step guides available online to help you create stunning designs. Just remember to have patience and practice, as nail art can be a bit tricky to master. In conclusion, Gatsby's nails can be customized with nail art. Whether you prefer a subtle accent or a bold statement, adding your unique flair to these glamorous nails is a great way to express your style. So unleash your creativity to create stunning Gatsby-inspired nail art that will turn heads wherever you go.
How Much Do Gatsby Nails Typically Cost?
Gatsby's nails have become a popular trend in nail art. Inspired by the glitz and glamour of the Roaring Twenties, these nails are characterized by their opulent and luxurious designs. But how much does it typically cost to get Gatsby's nails? The cost of Gatsby's nails can vary depending on several factors. One of the main factors determining the price is the salon or nail technician you choose. Higher-end salons in upscale areas may charge more for their services, while smaller local salons may offer more affordable options. Additionally, the level of expertise and experience of the nail technician can also affect the cost. Another factor that can influence the cost is the complexity of the design. Gatsby's nails often feature intricate patterns, embellishments, and unique color combinations. The more elaborate the design, the more time and skill it requires, which can increase the price. On average, you can expect to pay anywhere from $50 to $150 for a set of Gatsby nails. This price usually includes the cost of the nail extensions or enhancements, the nail polish or gel, and the nail art itself. However, it's important to remember that additional services, such as nail repairs or removal, may come at an extra cost. To ensure you're getting the best value for your money, it's always a good idea to research and read reviews before choosing a salon or nail technician. Look for professionals who specialize in Gatsby's nails and have a portfolio of their previous work. In conclusion, Gatsby's nails can be stylish and glamorous for those looking to make a statement with their nails. While the cost may vary depending on various factors, it's important to find a skilled professional who can bring your Gatsby nail dreams to life.
Are Gatsby's Nails Suitable for All Nail Lengths?
Regarding nail trends, Gatsby's nails have been making waves recently. Inspired by the glamour of the Roaring Twenties, Gatsby's nails are characterized by intricate designs and bold colors. But are they suitable for all nail lengths? Let's find out. Gatsby's nails can be a great choice for short and long nails. For shorter nails, opt for designs that are more minimalistic and delicate. A simple geometric pattern or a touch of metallic accents can add a touch of elegance to shorter nails. On the other hand, longer nails provide more canvas for intricate and detailed Gatsby designs. Think art deco patterns, feathers, or even rhinestones for a glamorous look. One of the great things about Gatsby's nails is their versatility. They can be customized to suit any nail length and shape. Whether you have square, oval, or almond-shaped nails, there's a Gatsby design that will complement your style. Regarding colors, Gatsby's nails are known for their bold and vibrant shades. Classic colors like gold, silver, black, and red often create a dramatic effect. However, don't be afraid to experiment with other colors that suit your style. Pastel shades can add a soft and feminine touch to Gatsby's nails, while bright neon colors give them a modern twist. In conclusion, Gatsby's nails are suitable for all nail lengths. Whether you have short, medium, or long nails, there's a Gatsby design that will enhance your style. So embrace the glamour of the Roaring Twenties with a stunning set of Gatsby nails. In conclusion, "Gatsby nails" are a popular nail trend gaining attention in recent years. Throughout this post, we have explored various aspects of Gatsby's nails, including what they are, how long they last, and whether they damage natural nails. We have learned that Gatsby's nails are a type of nail enhancement that combines a gel polish base with loose glitter or metallic foil accents. They provide a glamorous and eye-catching look that is perfect for special occasions or those who want to make a statement with their nails. One of the key points covered was the longevity of Gatsby's nails. While they can last up to two weeks with proper care, it is important to note that regular maintenance and touch-ups may be required to maintain their appearance. Furthermore, we discussed whether Gatsby's nails are damaging to natural nails. When done by a professional and properly cared for, gatsby's nails should not cause significant damage. However, it is essential to give your natural nails a break in between applications to allow them to breathe and recover. For those interested in trying Gatsby nails at home, it is possible to achieve this look with the right tools and techniques. However, it is recommended to seek professional help for the best results and to avoid any potential mishaps. We also explored the different shapes that Gatsby's nails can be, from classic square to trendy almond or stiletto shapes. Additionally, we touched upon the possibility of customizing Gatsby's nails with nail art, allowing for endless creativity and personalization. Regarding cost, gatsby's nails can vary depending on the salon and location. On average, they typically range from $40 to $80, considering the complexity of the design and any additional nail art. Lastly, we discussed whether Gatsby's nails suit all nail lengths. The good news is that Gatsby's nails can be adapted to different nail lengths, whether you prefer short and chic or long and dramatic nails. As Gatsby's nails continue to gain popularity, it is important to stay updated on future developments or trends that may impact this nail style. This could include new techniques, materials, or even variations of the Gatsby nail design. Read the full article
0 notes
Photo

Gatsby Nails: Everything You Need to Know
Regarding fashion and beauty trends, there's always something new and exciting to explore. One such trend that has taken the world by storm is "Gatsby Nails." These stunning nail designs are inspired by the glamour and luxury of the Roaring Twenties, capturing the spirit of the iconic Great Gatsby era. With their intricate details and dazzling embellishments, gatsby's nails have become a favorite among fashion-forward individuals looking to make a statement. The allure of Gatsby's nails lies in their ability to transport us back to a time of glitz and glamour. Just like the extravagant parties thrown by Jay Gatsby, these nails are a true reflection of the decadence and luxury of the era. From art-deco patterns to shimmering sequins and pearls, gatsby's nails celebrate elegance and sophistication. What sets Gatsby's nails apart is their versatility. Whether you prefer a subtle nod to the era with a single accent nail or a full-on display of artistry on all ten fingers, there are endless possibilities to explore. The intricate designs can be customized to suit any occasion, from a formal event to a night out. With the right combination of colors, textures, and embellishments, gatsby's nails can elevate any outfit and make a lasting impression. To achieve the perfect Gatsby nails, it's important to find a skilled nail technician who understands the intricacies of this trend. From choosing the right colors and patterns to mastering the art of embellishments, a professional can bring your Gatsby nail dreams to life. Additionally, proper care and maintenance are crucial to ensure your nails stay flawless and stunning for as long as possible. In conclusion, gatsby's nails are a captivating trend that allows us to channel the glamour and elegance of the Great Gatsby era. With their intricate designs and dazzling embellishments, these nails are a true work of art. So, whether you're attending a special event or want to add a touch of sophistication to your everyday look, Gatsby Nails is the perfect choice. Get ready to step into the world of luxury and make a statement with these stunning nail designs.
What Are Gatsby Nails?
Gatsby's nails are a trendy nail art style inspired by the glamour and luxury of the Roaring Twenties. Intricate patterns, bold colors, and luxurious embellishments characterize this unique nail design. One of the key features of Gatsby's nails is the use of geometric shapes and lines. These designs often incorporate Art Deco elements, such as chevron patterns, triangles, and intricate swirls. The combination of these geometric shapes creates a visually stunning and eye-catching look. To achieve the Gatsby nail look, technicians use various techniques and materials. Some popular choices include foil, glitter, and metallic polishes. These elements add a touch of sparkle and shine, further enhancing the overall glamorous effect. Another characteristic of Gatsby's nails is bold and vibrant colors. Classic shades like gold, silver, and black are often used to create a striking contrast against the base color. These rich colors evoke a sense of luxury and decadence, reminiscent of the extravagant parties and fashion of the 1920s. In addition to the intricate designs and bold colors, Gatsby's nails often feature luxurious embellishments. Rhinestones, pearls, and sequins are commonly used to add an extra layer of glamour and sophistication. These embellishments are strategically placed to enhance the overall design and create a dazzling effect. Gatsby's nails have gained popularity recently due to their unique and glamorous aesthetic. They are a perfect choice for special occasions, parties, or simply for those who want to add a touch of vintage elegance to their nails. In conclusion, Gatsby's nails are a stunning nail art style inspired by the Roaring Twenties. With their intricate patterns, bold colors, and luxurious embellishments, they offer a glamorous and eye-catching look that will make a statement. So, why not try this trendy nail art style and channel your inner Gatsby?
How Long Do Gatsby Nails Last?
Gatsby's nails have become incredibly popular recently, with many people opting for this glamorous and stylish nail design. But one question that often comes up is, how long do Gatsby's nails last? The answer to this question can vary depending on various factors. The first factor to consider is the type of nail polish used. Some nail polishes are more long-lasting than others, and this can directly impact the longevity of your Gatsby nails. It is recommended to choose high-quality nail polishes that are known for their durability. Another factor to consider is the application process. Gatsby's nails require intricate designs and meticulous attention to detail. If the application is done properly, the nails can last longer. However, if the application is rushed or not done correctly, the nails may chip or peel sooner. Additionally, the daily activities and lifestyle of the individual can also affect the lifespan of Gatsby's nails. Activities such as washing dishes, typing on a keyboard, or using harsh chemicals can cause the nails to weaken and chip faster. It is important to take extra care when engaging in activities that may stress the nails. On average, Gatsby's nails can last anywhere from one to two weeks. However, with proper care and maintenance, they can potentially last even longer. It is recommended to moisturize the nails and cuticles regularly, avoid excessive exposure to water, and wear gloves when engaging in activities that may damage the nails. In conclusion, the longevity of Gatsby's nails depends on various factors such as the quality of the nail polish, the application process, and the individual's lifestyle. By taking proper care and following these tips, you can enjoy your Gatsby nails for an extended period.
Are Gatsby Nails Damaging to Natural Nails?
Gatsby's nails, also known as "Gatsby manicure," have gained popularity recently. This trendy nail style, inspired by the glamour of the 1920s, features a combination of metallic colors, intricate designs, and embellishments. However, many people wonder if this fashionable nail trend is damaging to natural nails. One of the main concerns regarding Gatsby's nails is using acrylic or gel extensions. These extensions are often applied to achieve the desired length and shape. While they can enhance the overall look, improper application or removal can lead to nail damage. It is crucial to visit a skilled and experienced nail technician who can ensure the extensions are applied and removed correctly, minimizing the risk of damage. Another aspect to consider is the weight of the embellishments used in Gatsby's nails. Rhinestones, beads, and other decorative elements can add extra weight to the nails, potentially causing them to weaken or break. It is important to choose lightweight embellishments and avoid excessive use to prevent unnecessary strain on the natural nails. Furthermore, the frequent application and removal of Gatsby's nails can weaken the natural nails over time. The use of harsh chemicals during the removal process, such as acetone, can strip the nails of their natural oils and moisture, leading to dryness and brittleness. To mitigate this, it is advisable to give the nails a break between nail art applications and maintain a proper nail care routine. In conclusion, while Gatsby's nails can be a stunning and eye-catching nail trend, proper care and maintenance are crucial to prevent damage to natural nails. By seeking professional help, choosing lightweight embellishments, and allowing the nails to rest between applications, individuals can enjoy the beauty of Gatsby's nails without compromising the health of their natural nails.
Can Gatsby Nails Be Done at Home?
Gatsby's nails have become a popular trend in recent years, with their glamorous and vintage-inspired look. Many people wonder if it's possible to achieve this style at home without the help of a professional. While it may seem daunting, with the right tools and techniques, you can give yourself a stunning set of Gatsby's nails in the comfort of your own home. To start, you'll need a few essential items. A nail file, buffer, and cuticle pusher are necessary for prepping your nails. You'll also need a base coat, a metallic nail polish in your desired shade, and a top coat for a long-lasting finish. Additionally, you can add some extra flair with nail art tools like rhinestones, glitter, or nail stickers. Begin by shaping your nails with the file, creating a classic square or rounded shape. Push back your cuticles gently with the cuticle pusher, being careful not to damage the nail bed. Once your nails are prepped, apply a thin layer of base coat to protect your natural nails from staining. Next, it's time to apply the metallic nail polish. Start with a thin layer and let it dry completely before applying a second coat for a more opaque finish. If you want to add some decorative elements, now is the time to get creative. Use nail art tools to create intricate designs, or add a few rhinestones for glamour. Finish off your Gatsby nails with a top coat to seal in the color and add shine. This will also help your manicure last longer. Allow your nails to dry completely before using your hands. While it may take some practice to perfect the technique, doing Gatsby's nails at home is achievable. With the right tools, patience, and creativity, you can rock this vintage-inspired style and turn heads wherever you go. So why not give it a try and unleash your inner Gatsby?
What Shapes Can Gatsby Nails Be?
Gatsby's nails have become a popular trend in nail art. These glamorous nails are inspired by the elegance and luxury of the 1920s, a time known for its lavish parties and extravagant fashion. Regarding the shapes of Gatsby's nails, there are several options, each adding its unique touch to this vintage-inspired style. One of the most common shapes for Gatsby's nails is the almond shape. This shape mimics the silhouette of an almond, with a narrow base and rounded tip. Almond-shaped Gatsby nails give a feminine and sophisticated look, perfect for channeling the glamour of the Roaring Twenties. Another popular shape for Gatsby's nails is the stiletto shape. This shape is long and pointed, resembling a stiletto heel. Stiletto-shaped Gatsby nails exude confidence and power, making a bold statement wherever you go. For those who prefer a more classic look, the square shape is a great option for Gatsby nails. This shape features straight sides and sharp corners, creating a clean and polished appearance. Square-shaped Gatsby nails are versatile and can be worn for any occasion. If you're looking for something more unique, the coffin shape is a great choice for Gatsby nails. This shape is tapered at the tip and squared off, resembling a coffin. Coffin-shaped Gatsby nails add an edgy and modern twist to this vintage-inspired style. In conclusion, Gatsby's nails can come in various shapes, allowing you to express your style and embrace the glamour of the 1920s. Whether you prefer the elegance of almond-shaped nails, the boldness of stiletto-shaped nails, the classic look of square-shaped nails, or the uniqueness of coffin-shaped nails, there is a shape for everyone to enjoy. So go ahead and embrace the Gatsby trend, and let your nails shine with vintage glamour.
Can Gatsby's Nails Be Customized with Nail Art?
Gatsby's nails have become increasingly popular in recent years, with their glamorous and decadent aesthetic reminiscent of the Roaring Twenties. But can these stylish nails be customized with nail art? The answer is a resounding yes! One of the great things about Gatsby's nails is their versatility. While the classic look is typically achieved with a metallic or glittery base, there are endless possibilities for adding your personal touch with nail art. Whether you prefer intricate designs, bold patterns, or delicate embellishments, Gatsby nails can be customized to suit your style. When it comes to nail art for Gatsby's nails, the options are truly limitless. You can incorporate elements inspired by the Art Deco movement, such as geometric shapes, lines, and symmetry. Alternatively, you can opt for more playful designs with feathers, pearls, or miniature flapper dresses. The key is to embrace the luxury and extravagance of the era while adding your unique twist. To achieve the best results, it's important to choose the right colors and materials for your nail art. Metallic shades like gold, silver, and bronze are ideal for capturing the glamour of the Gatsby era. You can also experiment with different textures, such as holographic or chrome finishes, to make your nail art stand out. In terms of application, nail art for Gatsby's nails can be done by a professional nail technician or as a fun DIY project at home. There are countless tutorials and step-by-step guides available online to help you create stunning designs. Just remember to have patience and practice, as nail art can be a bit tricky to master. In conclusion, Gatsby's nails can be customized with nail art. Whether you prefer a subtle accent or a bold statement, adding your unique flair to these glamorous nails is a great way to express your style. So unleash your creativity to create stunning Gatsby-inspired nail art that will turn heads wherever you go.
How Much Do Gatsby Nails Typically Cost?
Gatsby's nails have become a popular trend in nail art. Inspired by the glitz and glamour of the Roaring Twenties, these nails are characterized by their opulent and luxurious designs. But how much does it typically cost to get Gatsby's nails? The cost of Gatsby's nails can vary depending on several factors. One of the main factors determining the price is the salon or nail technician you choose. Higher-end salons in upscale areas may charge more for their services, while smaller local salons may offer more affordable options. Additionally, the level of expertise and experience of the nail technician can also affect the cost. Another factor that can influence the cost is the complexity of the design. Gatsby's nails often feature intricate patterns, embellishments, and unique color combinations. The more elaborate the design, the more time and skill it requires, which can increase the price. On average, you can expect to pay anywhere from $50 to $150 for a set of Gatsby nails. This price usually includes the cost of the nail extensions or enhancements, the nail polish or gel, and the nail art itself. However, it's important to remember that additional services, such as nail repairs or removal, may come at an extra cost. To ensure you're getting the best value for your money, it's always a good idea to research and read reviews before choosing a salon or nail technician. Look for professionals who specialize in Gatsby's nails and have a portfolio of their previous work. In conclusion, Gatsby's nails can be stylish and glamorous for those looking to make a statement with their nails. While the cost may vary depending on various factors, it's important to find a skilled professional who can bring your Gatsby nail dreams to life.
Are Gatsby's Nails Suitable for All Nail Lengths?

Regarding nail trends, Gatsby's nails have been making waves recently. Inspired by the glamour of the Roaring Twenties, Gatsby's nails are characterized by intricate designs and bold colors. But are they suitable for all nail lengths? Let's find out. Gatsby's nails can be a great choice for short and long nails. For shorter nails, opt for designs that are more minimalistic and delicate. A simple geometric pattern or a touch of metallic accents can add a touch of elegance to shorter nails. On the other hand, longer nails provide more canvas for intricate and detailed Gatsby designs. Think art deco patterns, feathers, or even rhinestones for a glamorous look. One of the great things about Gatsby's nails is their versatility. They can be customized to suit any nail length and shape. Whether you have square, oval, or almond-shaped nails, there's a Gatsby design that will complement your style. Regarding colors, Gatsby's nails are known for their bold and vibrant shades. Classic colors like gold, silver, black, and red often create a dramatic effect. However, don't be afraid to experiment with other colors that suit your style. Pastel shades can add a soft and feminine touch to Gatsby's nails, while bright neon colors give them a modern twist. In conclusion, Gatsby's nails are suitable for all nail lengths. Whether you have short, medium, or long nails, there's a Gatsby design that will enhance your style. So embrace the glamour of the Roaring Twenties with a stunning set of Gatsby nails. In conclusion, "Gatsby nails" are a popular nail trend gaining attention in recent years. Throughout this post, we have explored various aspects of Gatsby's nails, including what they are, how long they last, and whether they damage natural nails. We have learned that Gatsby's nails are a type of nail enhancement that combines a gel polish base with loose glitter or metallic foil accents. They provide a glamorous and eye-catching look that is perfect for special occasions or those who want to make a statement with their nails. One of the key points covered was the longevity of Gatsby's nails. While they can last up to two weeks with proper care, it is important to note that regular maintenance and touch-ups may be required to maintain their appearance. Furthermore, we discussed whether Gatsby's nails are damaging to natural nails. When done by a professional and properly cared for, gatsby's nails should not cause significant damage. However, it is essential to give your natural nails a break in between applications to allow them to breathe and recover. For those interested in trying Gatsby nails at home, it is possible to achieve this look with the right tools and techniques. However, it is recommended to seek professional help for the best results and to avoid any potential mishaps. We also explored the different shapes that Gatsby's nails can be, from classic square to trendy almond or stiletto shapes. Additionally, we touched upon the possibility of customizing Gatsby's nails with nail art, allowing for endless creativity and personalization. Regarding cost, gatsby's nails can vary depending on the salon and location. On average, they typically range from $40 to $80, considering the complexity of the design and any additional nail art. Lastly, we discussed whether Gatsby's nails suit all nail lengths. The good news is that Gatsby's nails can be adapted to different nail lengths, whether you prefer short and chic or long and dramatic nails. As Gatsby's nails continue to gain popularity, it is important to stay updated on future developments or trends that may impact this nail style. This could include new techniques, materials, or even variations of the Gatsby nail design. Read the full article
0 notes
Photo
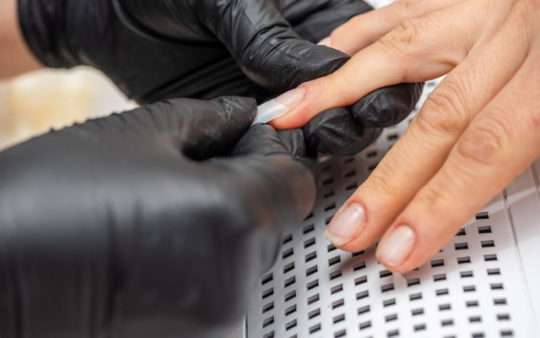
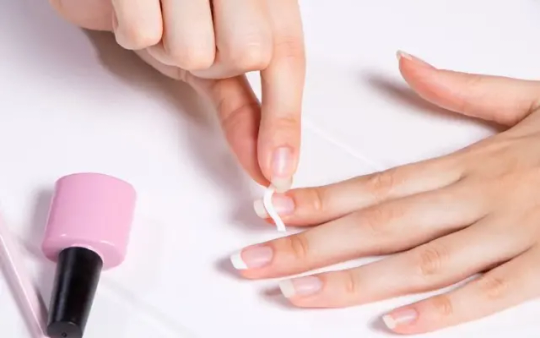
How to Put on Nail Stickers: A Guide to Perfect Nail Art
Nail stickers have become a popular trend in the world of nail art. They offer a quick and easy way to achieve intricate designs without the need for professional skills or expensive salon visits. Whether you're a beginner or a seasoned nail enthusiast, learning how to put on nail stickers can elevate your manicure game to the next level. In this comprehensive guide, we will walk you through the step-by-step process of applying nail stickers like a pro. First and foremost, let's talk about the basics. Nail stickers, also known as nail decals or nail wraps, are thin adhesive designs that can be applied directly onto your nails. They come in various shapes, sizes, and patterns, allowing you to express your unique style and creativity. From floral motifs to geometric patterns, the options are endless. To get started, you'll need a few essential tools. These include a set of nail stickers, a pair of tweezers or a toothpick, a base coat, and a top coat. It's important to ensure that your nails are clean and free from any oils or residues before applying the stickers. This will help them adhere better and last longer. Now, let's dive into the application process. Begin by applying a thin layer of base coat to your nails. This will create a smooth surface for the stickers to adhere to. Once the base coat is dry, carefully peel off the desired nail sticker using tweezers or a toothpick. Gently place the sticker onto your nail, starting from the cuticle and pressing it down towards the tip. Smooth out any air bubbles or wrinkles using your fingertip or a cuticle pusher. Once the sticker is in place, apply a generous layer of top coat to seal and protect the design. This will also give your nails a glossy finish. Allow the top coat to dry completely before going about your daily activities. In conclusion, nail stickers offer a fun and creative way to enhance your manicure. With a little practice and the right tools, you can easily achieve salon-worthy nail art in the comfort of your own home. So why not give it a try and let your nails do the talking? Stay tuned for our upcoming articles where we'll explore advanced techniques, tips for long-lasting wear, and creative design ideas. Happy sticker-ing!
How to Put on Nail Stickers
Nail stickers are a fun and easy way to add some flair to your nails. Whether you're looking to create a unique design or simply want to switch up your nail look, nail stickers are a great option. In this article, we will guide you through the process of applying nail stickers for a flawless finish. First, start with clean and dry nails. Remove any old polish and make sure your nails are free from any oils or lotions. This will ensure that the stickers adhere properly and last longer. Next, choose the nail stickers you want to use. There are countless designs and patterns available, so pick one that suits your style. Make sure the size of the stickers matches the size of your nails for a perfect fit. Gently peel the sticker off the backing paper, being careful not to bend or fold it. Place the sticker on your nail and press down firmly to secure it in place. Smooth out any air bubbles or wrinkles with a cuticle pusher or your fingertips. Once all the stickers are applied, trim any excess with a nail file. This will give your nails a neat and polished look. To make the stickers last longer, apply a clear top coat over them. This will protect the stickers from chipping and peeling. To remove the stickers, simply peel them off gently from the edge. If there is any residue left behind, use a cotton swab dipped in nail polish remover to clean it off. And there you have it - a simple and effective way to put on nail stickers. Experiment with different designs and have fun creating unique nail looks. With a little practice, you'll be a nail sticker pro in no time!
Tips for Applying Nail Stickers
Nail stickers are a fun and easy way to add some flair to your nails without the hassle of painting intricate designs. Whether you're a beginner or a seasoned nail art enthusiast, here are some tips to help you achieve a flawless application. Firstly, it's important to start with clean and dry nails. Remove any old polish and wash your hands thoroughly to ensure a smooth surface for the stickers to adhere to. If your nails are oily, you can use a nail polish remover or rubbing alcohol to remove any excess oils. Next, choose the right size sticker for each nail. It's better to go slightly smaller than larger, as you can always stretch the sticker to fit your nail. Gently peel the sticker from the backing and place it on your nail, starting from the cuticle and pressing it down towards the tip. Smooth out any air bubbles or wrinkles with a cuticle pusher or your finger. To make your nail stickers last longer, apply a top coat over them. This will seal the edges and prevent them from peeling off. You can also use a clear base coat before applying the stickers to create a smoother surface. If you want to create a more intricate design, you can layer different stickers or combine them with nail polish. Get creative and experiment with different patterns and colors to achieve a unique look. Remember to take care of your nails and avoid activities that may cause the stickers to lift or chip. Avoid excessive hand washing or using harsh chemicals without gloves. With proper care, your nail stickers can last up to a week. In conclusion, applying nail stickers is a simple and fun way to create beautiful nail art. By following these tips, you can achieve a professional-looking manicure in no time. So go ahead, unleash your creativity, and have fun with nail stickers!
Common Nail Sticker Mistakes to Avoid
Applying nail stickers can be a fun and convenient way to add some flair to your nails. However, there are some common mistakes that people often make when using nail stickers. By avoiding these mistakes, you can ensure that your nail stickers look flawless and last longer. One common mistake is not properly preparing your nails before applying the stickers. It's important to clean your nails thoroughly and remove any old polish or oils. This will help the stickers adhere better and prevent them from peeling off prematurely. Another mistake is not sizing the stickers correctly. Nail stickers come in various sizes, so it's important to choose the ones that fit your nails perfectly. If the stickers are too big or too small, they won't adhere properly and may start to lift at the edges. Using too much pressure when applying the stickers is another common mistake. You should gently press the stickers onto your nails, ensuring that they are smooth and free of any air bubbles. Applying too much pressure can cause the stickers to wrinkle or tear. Not sealing the stickers with a top coat is another mistake to avoid. A top coat will not only protect the stickers from chipping but also give them a glossy finish. It's important to apply the top coat over the entire nail, including the edges of the stickers, to ensure they stay in place. Lastly, removing the stickers incorrectly can also lead to mistakes. It's important to gently peel off the stickers from the edges, rather than pulling them off forcefully. This will prevent any damage to your natural nails and ensure a clean removal. By avoiding these common mistakes, you can achieve a flawless and long-lasting nail sticker application. With a little practice and attention to detail, you'll be able to create beautiful and eye-catching nail designs using nail stickers.
Removing Nail Stickers Safely

Nail stickers are a fun and easy way to add some flair to your nails. They come in a variety of designs and colors, allowing you to express your personal style. However, when it comes time to remove them, it's important to do so safely to avoid damaging your nails. Here are some tips on how to remove nail stickers without causing any harm. First, gather all the necessary tools. You will need a nail polish remover, cotton balls or pads, a cuticle pusher or orange stick, and a nail file. Make sure these tools are easily accessible before you begin. Start by soaking a cotton ball or pad in nail polish remover. Place the soaked cotton on your nail and wrap it with aluminum foil. This will help to loosen the adhesive on the nail sticker. Leave it on for about 10 minutes to allow the nail polish remover to work its magic. After 10 minutes, remove the foil and cotton ball. Gently push back your cuticles using a cuticle pusher or orange stick. This will help to lift the nail sticker from your nail bed. Next, use a nail file to gently file away any remaining adhesive or residue. Be careful not to file too aggressively, as this can damage your nails. Take your time and be patient. Once all the adhesive is removed, wash your hands thoroughly to remove any residue from the nail polish remover. Apply a moisturizing hand cream or cuticle oil to hydrate your nails and cuticles. And there you have it! By following these steps, you can safely remove nail stickers without causing any harm to your nails. Remember to always take your time and be gentle when removing them. Happy sticker removal!
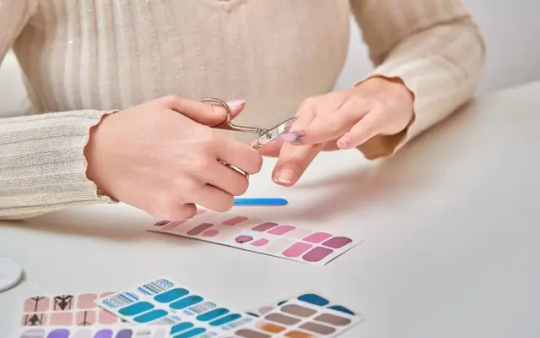
Choosing the Right Nail Sticker Design
Nail stickers have become a popular trend in the world of nail art. They offer a quick and easy way to achieve stunning nail designs without the need for intricate painting skills. However, with so many options available, it can be overwhelming to choose the right nail sticker design. In this article, we will guide you through the process of selecting the perfect nail sticker design for your style and occasion. Firstly, consider the occasion for which you will be wearing the nail stickers. Are you attending a formal event or simply looking to add some fun to your everyday look? For formal occasions, opt for elegant designs such as floral patterns or metallic accents. If you're looking to make a statement, go for bold and vibrant designs like animal prints or geometric patterns. Next, consider your personal style and preferences. Are you someone who likes minimalistic designs or do you prefer bold and intricate patterns? Nail stickers come in a wide range of styles, from simple and understated to elaborate and eye-catching. Choose a design that reflects your personality and complements your overall look. Another important factor to consider is the length and shape of your nails. Certain designs may look better on longer nails, while others may be more suitable for shorter nails. Additionally, the shape of your nails can also influence the design choice. For example, geometric patterns may look better on square-shaped nails, while curved designs may suit rounded nails. Lastly, take into account the colors that you usually wear. Nail stickers come in a variety of colors, so it's important to choose a design that complements your wardrobe. If you tend to wear neutral tones, opt for nail stickers in shades of nude or pastel. For those who love vibrant colors, go for bold and bright designs that will make a statement. In conclusion, choosing the right nail sticker design is all about considering the occasion, your personal style, the length and shape of your nails, and the colors you usually wear. By keeping these factors in mind, you can easily find the perfect nail sticker design that will enhance your overall look and make a lasting impression.
Prepping Your Nails for Nail Stickers

Nail stickers are a fun and easy way to add some flair to your manicure. Whether you're looking to create a unique design or simply want to add a pop of color, nail stickers are a great option. But before you start applying them, it's important to properly prep your nails to ensure that the stickers adhere properly and last longer. First, start by cleaning your nails. Remove any old polish and make sure your nails are clean and dry. This will help the stickers adhere better and prevent any dirt or oil from interfering with the adhesive. Next, gently push back your cuticles using a cuticle pusher or a wooden stick. This will create a clean canvas for the stickers and prevent them from lifting or peeling off. After pushing back your cuticles, lightly buff the surface of your nails using a nail buffer. This will help remove any ridges or unevenness, creating a smooth surface for the stickers to adhere to. Once your nails are clean and buffed, it's time to apply a base coat. This will not only protect your nails from staining but also provide a smooth base for the stickers. Allow the base coat to dry completely before moving on to the next step. Now, it's time to apply the nail stickers. Carefully peel them off the sheet using tweezers and place them onto your nails. Gently press down to ensure they adhere properly. If needed, you can use a small brush or toothpick to smooth out any air bubbles or wrinkles. Finally, seal the stickers with a top coat to protect them and make them last longer. Apply a generous layer of top coat, making sure to cover the entire nail and the edges of the stickers. Allow the top coat to dry completely before touching anything. And there you have it! Your nails are prepped and ready for some fabulous nail stickers. Enjoy your new manicure and have fun experimenting with different designs and colors!
Sealing Nail Stickers for Long-lasting Wear
Nail stickers are a fun and easy way to add some flair to your nails. Whether you're looking for a quick and temporary nail art solution or want to experiment with different designs, nail stickers are a great option. However, to ensure that your nail stickers last as long as possible, it's important to seal them properly. In this article, we will discuss some tips and tricks to help you achieve long-lasting wear with your nail stickers. One of the most important steps in sealing nail stickers is to apply a top coat. This will not only protect the stickers from chipping and peeling but also give them a glossy finish. Make sure to apply the top coat evenly, covering the entire surface of the nail sticker. Allow it to dry completely before moving on to the next step. Another tip to enhance the longevity of your nail stickers is to avoid exposing them to excessive moisture. While nail stickers are generally water-resistant, prolonged exposure to water can cause them to loosen or peel off. To prevent this, try to avoid activities that involve a lot of water, such as swimming or doing dishes without gloves. If your nails do come into contact with water, gently pat them dry with a towel instead of rubbing. Additionally, it's important to be gentle with your nails when wearing nail stickers. Avoid using your nails as tools or engaging in activities that could cause them to chip or break. By treating your nails with care, you can help ensure that your nail stickers stay intact for longer. In conclusion, sealing nail stickers is essential for achieving long-lasting wear. By applying a top coat, avoiding excessive moisture, and being gentle with your nails, you can enjoy your nail stickers for an extended period of time. So go ahead and have fun experimenting with different designs and styles, knowing that your nail stickers will stay put and look fabulous!
Adding a Top Coat for Extra Durability
Nail stickers are a fun and trendy way to add some pizzazz to your nails. They come in various designs and are easy to apply. However, to ensure they last as long as possible, it's important to take some extra steps. One of these steps is adding a top coat for extra durability. A top coat acts as a protective layer over the nail stickers, preventing them from chipping or peeling off. It also adds shine and prolongs the life of the stickers. To apply a top coat, follow these simple steps: - Start by applying the nail stickers as instructed. Make sure they are properly aligned and smooth out any air bubbles. - Once the stickers are in place, wait for them to dry completely. This usually takes a few minutes, but it's important not to rush this step. - Next, take your chosen top coat and apply a thin layer over the entire nail. Make sure to cover the edges of the stickers to seal them in. - Allow the top coat to dry completely. This usually takes a few minutes, but it's worth the wait to ensure a long-lasting result. - For added durability, you can repeat steps 3 and 4 to apply a second layer of top coat. This will provide an extra barrier against wear and tear. By adding a top coat to your nail stickers, you can enjoy them for a longer period of time. The top coat will protect the stickers from everyday activities such as typing, washing dishes, or even just regular wear and tear. Remember to choose a high-quality top coat for best results. Look for one that is specifically formulated for nail art or stickers. This will ensure that it adheres well to the stickers and provides maximum durability. So, the next time you apply nail stickers, don't forget to add a top coat for extra durability. Your nails will thank you! In conclusion, this post has provided a comprehensive guide on how to put on nail stickers. We have covered various topics such as tips for applying nail stickers, common mistakes to avoid, removing nail stickers safely, choosing the right design, prepping your nails, sealing for long-lasting wear, and adding a top coat for extra durability. By following the techniques and tips mentioned in this post, you can easily achieve a professional-looking manicure with nail stickers. Whether you are a beginner or an experienced nail enthusiast, these step-by-step instructions will help you achieve flawless results. It is important to emphasize the significance of nail stickers in today's beauty industry. They offer a convenient and affordable alternative to traditional nail art techniques. With a wide range of designs available, you can easily express your personal style and creativity. As with any beauty technique, there are common mistakes to avoid. By being aware of these pitfalls, you can ensure a smooth and successful application. Additionally, we have provided insights on how to safely remove nail stickers without damaging your nails. Looking ahead, the nail sticker industry is constantly evolving with new designs and trends. Keep an eye out for innovative developments such as holographic or 3D nail stickers. These advancements will continue to enhance the nail art experience and provide even more options for self-expression. Thank you for taking the time to read this post. We hope that you have found it informative and helpful. We encourage you to leave any comments or feedback, as we value your input. Share your experiences and tips with fellow readers, and let us know if there are any specific topics you would like us to cover in future posts. Read the full article
0 notes
Photo
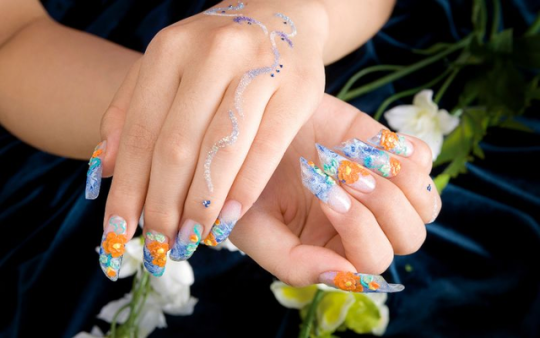
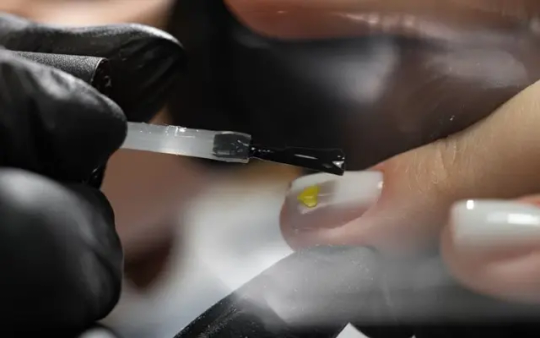
Tropical Nails Design: A Burst of Color and Creativity
Tropical nail design has become a popular trend in nail art, and it's not hard to see why. With its vibrant colors, playful patterns, and exotic motifs, this style allows you to bring a touch of paradise to your fingertips. Whether you're heading to a beach vacation or want to add some sunshine to your everyday life, tropical nail design is the perfect way to express your individuality and embrace the spirit of summer. From palm trees and flamingos to tropical flowers and vibrant fruits, the possibilities are endless for creating a tropical-themed nail design. Whether you prefer a more minimalist approach with subtle hints of the tropics or want to go all out with bold and eye-catching patterns, there is a tropical nail design that will suit your taste and style. One of the great things about tropical nail design is its versatility. You can keep it simple with a single accent nail featuring a tropical motif, or you can go for a full set of nails adorned with an array of low elements. The choice is yours, and that's what makes this style so exciting and unique. Not only does tropical nail design allow you to showcase your creativity, but it also adds a fun and playful element to your overall look. Whether lounging by the pool, attending a summer party, or simply going about your day, your tropical-themed nails will turn heads and spark conversations. In the following articles, we will dive deeper into a tropical nail design. We will explore different techniques and tips for achieving the perfect low look and even delve into the history and cultural significance of this popular nail art trend. So, join us on this quiet nail journey and get ready to unleash your inner artist!
What Are Tropical Nails?
Tropical nails are a popular nail design trend that captures the essence of a tropical paradise. With vibrant colors and playful patterns, these nails are perfect for those who want to add a touch of summer to their style. Whether you're heading to the beach or want to brighten up your day, tropical nails are a fun and fashionable choice. One of the key features of tropical nails is the use of bold and bright colors. Think of vibrant shades like coral, turquoise, and neon yellow. These colors are reminiscent of the tropical flowers, fruits, and landscapes that inspire this nail design trend. By incorporating these vibrant hues into your manicure, you can instantly transport yourself to a sunny island getaway. In addition to bold colors, tropical nails often feature playful patterns and designs. From palm trees and pineapples to flamingos and hibiscus flowers, there are endless options. These whimsical patterns add a touch of fun and personality to your nails, making them a great conversation starter. To achieve the perfect tropical nail design, you can experiment with different techniques and nail art tools. Gradient nails, for example, create a beautiful ombre effect that mimics the colors of a tropical sunset. You can also try stamping or freehand painting to create intricate designs that capture the essence of the tropics. In conclusion, tropical nails are a vibrant and playful nail design trend that allows you to embrace the beauty of a tropical paradise. With bold colors, playful patterns, and endless design options, these nails are a fun and fashionable choice for anyone who wants to add a touch of summer to their style. So why not embrace the tropical vibes and give your nails a vacation-inspired makeover?
How to Create Tropical Nails Design?
Tropical nail design is a popular trend that brings a touch of paradise to your fingertips. With vibrant colors, exotic patterns, and playful elements, this style is perfect for those looking to add a tropical flair to their manicure. In this article, we will explore how to create your low-nail design. To start, gather all the necessary materials. You will need a base coat, tropical-themed nail polish colors such as bright oranges, blues, and greens, a thin nail art brush, a dotting tool, and a top coat for a glossy finish. Begin by applying a base coat to protect your nails and create a smooth canvas. Once the base coat is dry, choose tropical colors and paint each nail a different shade. You can opt for a gradient effect or paint each nail with a distinct low pattern, such as palm leaves, hibiscus flowers, or pineapples. To add some extra flair, use the thin nail art brush to create intricate designs on your nails. You can draw palm trees, waves, or even a tropical sunset. Let your creativity run wild! Next, use the dotting tool to add accents to your design. Create small dots in contrasting colors or use them to create the center of a flower. This will add dimension and interest to your tropical nails. Once your design is complete, allow it to dry completely before applying a top coat. The top coat will seal your design and give it a glossy finish. This will also help your tropical nails last longer. In conclusion, creating a tropical nail design is a fun and creative way to bring a touch of the tropics to your manicure. With the right materials and patience, you can achieve a stunning and vibrant tropical look. So go ahead, unleash your inner artist, and create your tropical paradise on your nails!
What Colors Are Used for Tropical Nails?
Tropical nails are all about vibrant, eye-catching colors that evoke the spirit of a tropical paradise. When it comes to choosing the perfect colors for your low-nail design, there are a few key shades that are commonly used to achieve that exotic and tropical look. One of the most popular colors for tropical nails is turquoise. This vibrant blue-green shade instantly brings to mind the crystal-clear waters of a tropical beach. It's a versatile color that can be used as a base for your nail design or as an accent color to add a tropical flair. Another color that is often seen in tropical nail designs is coral. This warm, peachy-pink shade reminisces beautiful coral reefs in tropical destinations. It adds a touch of femininity and elegance to any nail design, making it a popular choice for those who want a more sophisticated, low look. Yellow is another color that is commonly used in tropical nail designs. This sunny and cheerful shade is perfect for adding energy and brightness to your nails. Whether you choose a soft pastel yellow or a bold and vibrant shade, yellow nails will make a statement. In addition to these key colors, tropical nail designs often incorporate bright and bold shades, such as hot pink, lime green, and electric blue. These colors add depth and dimension to your nail design, creating a tropical and exotic look. When creating your tropical nail design, don't be afraid to mix and match these colors to create a unique and personalized look. The key is to embrace the vibrant and playful nature of tropical colors and let your creativity shine. So, to add a touch of the tropics to your nails, consider using colors like turquoise, coral, yellow, and other bright and bold shades. With these colors, you can create a stunning tropical nail design that will transport you to a sunny paradise whenever you look at your hands.
What Are Some Tropical Nail Art Ideas?
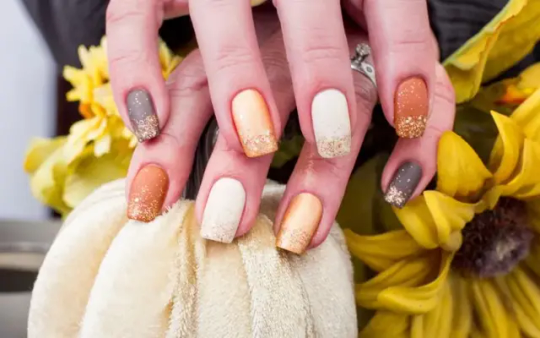
Tropical nail art is a fun and vibrant way to add a touch of summer to your fingertips. Whether you're heading to a beach vacation or want to embrace the tropical vibes, there are plenty of nail art ideas. In this article, we will explore some popular low-nail art designs that will make your nails stand out. One popular tropical nail art idea is to create a palm tree design. Start by painting your nails with a light blue base to represent the sky. Then, using a thin brush, draw a brown vertical line in the center of your nail to represent the palm tree trunk. Next, add a few green strokes to the trunk to create the palm leaves. Finish off the design by adding small dots of white to represent coconuts. Another tropical nail art idea is to create a sunset design. Begin by painting your nails with a yellow or orange base color to represent the setting sun. Then, using a sponge, dab on some pink, purple, and blue polish to create a gradient effect. Next, add some palm tree silhouettes using black nail polish. This design will give your nails a tropical sunset vibe. If you're looking for something more colorful, try a tropical floral design. Start by painting your nails with a white base to make the flowers pop. Then, using a thin brush, create various tropical flowers such as hibiscus, plumeria, or orchids. Use bright and bold colors like pink, orange, and yellow to create a tropical feel. Finish off the design by adding some green leaves and vines. In conclusion, tropical nail art lets you express your love for summer and the beach through your fingertips. Whether you create palm trees, sunsets, or floral designs, these tropical nail art ideas will make a statement. So grab your favorite nail polish colors and get ready to embrace the tropical vibes on your nails!
How to Take Care of Tropical Nails?
Tropical nails are a fun and vibrant way to express your style and embrace the summer vibes. Whether you have a vacation planned or want to bring a touch of the tropics to your everyday life, taking care of your tropical nails is essential to ensure they stay looking fabulous. In this article, we will explore tips and tricks to help you maintain your tropical nails and keep them looking their best. One of the most important aspects of caring for tropical nails is proper maintenance. Regularly trim and shape your nails to prevent them from becoming too long or prone to breakage. Add nourishing cuticle oil to keep your cuticles healthy and moisturized. This will help prevent dryness and promote healthy nail growth. Regarding tropical nail designs, it's important to choose high-quality products that will last. Opt for long-lasting nail polishes and top coats specifically formulated to withstand the wear and tear of daily activities. This will ensure that your tropical nails stay vibrant and chip-free for longer. Another crucial aspect of tropical nail care is protecting them from damage. Apply a clear base coat before applying any color to create a barrier between your nails and the pigment. This will help prevent staining and discoloration. Additionally, wear gloves when doing household chores or engaging in activities that expose your nails to harsh chemicals or excessive moisture. Lastly, don't forget to moisturize your hands and nails regularly. Use a rich hand cream that contains nourishing ingredients such as shea butter or coconut oil. This will help keep your nails and surrounding skin hydrated, preventing them from becoming dry and brittle. In conclusion, taking care of tropical nails requires regular maintenance, choosing high-quality products, protecting them from damage, and keeping them moisturized. By following these tips, you can ensure that your tropical nails stay vibrant and beautiful for as long as possible. So go ahead and embrace the tropical vibes with confidence!
Can I Get Tropical Nail Designs at a Salon?
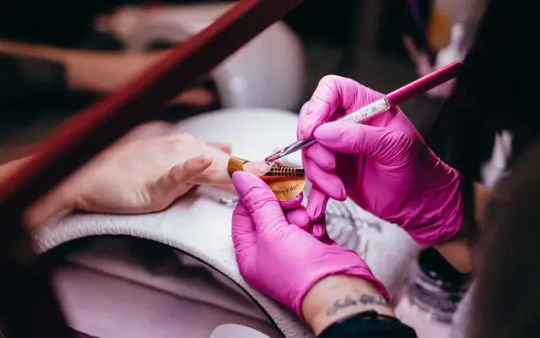
Tropical nail designs are a popular choice for those looking to add a touch of summer to their manicure. The vibrant colors and playful patterns make for a fun and eye-catching look. But can you get tropical nail designs at a salon? The answer is yes! Salons are well-equipped to create various nail designs, including tropical ones. Whether you are looking for palm trees, hibiscus flowers, or colorful fruits, a skilled nail technician can bring your tropical nail dreams to life. They have access to various nail polishes, tools, and techniques that can help create the perfect low design for you. When visiting a salon for a tropical nail design, it's important to communicate your vision clearly to the nail technician. Bring inspiration pictures or describe the specific elements you want in your design. This will ensure that the technician understands your preferences and can create a design that matches your vision. Additionally, don't be afraid to ask for recommendations or suggestions from the nail technician. They are experienced in creating various nail designs and may have ideas you haven't considered. Their expertise can help enhance your tropical nail design and make it even more unique and eye-catching. In conclusion, if you want tropical nail designs, a salon is the perfect place to go. With their expertise and access to a wide range of tools and techniques, they can bring your tropical nail dreams to life. So why not treat yourself to a tropical manicure and embrace the summer vibes all year round?
What Are Some Tips for DIY Tropical Nails?
Tropical nails are a fun and vibrant way to express your style. Whether you're going on vacation or want to add a touch of the tropics to your everyday look, creating your tropical nail design can be a great DIY project. Here are some tips to help you achieve the perfect tropical nails. First, start with a clean canvas. Make sure your nails are clean and free from any old polish or residue. This will ensure that your tropical design goes on smoothly and lasts longer. Use a gentle nail polish remover to clean your nails thoroughly. Next, choose your tropical colors. Bright and bold colors are key when it comes to tropical nails. Think vibrant pinks, oranges, yellows, and blues. These colors will give your nails that tropical feel. You can also consider adding tropical-inspired patterns like palm leaves or hibiscus flowers. Once you have your colors and patterns chosen, it's time to get creative. Use a thin nail brush or a toothpick to create intricate designs on your nails. You can make flowers, palm trees, or even tropical fruits. The possibilities are endless! Don't be afraid to experiment and have fun with your design. After you've created your tropical nail design, let it dry completely. This will ensure that your design doesn't smudge or smear. Applying a clear top coat to seal your design and add extra shine. Lastly, take care of your tropical nails. Apply a cuticle oil regularly to keep your nails healthy and moisturized. Avoid harsh chemicals or acetone-based nail polish removers, as these can damage your nails. In conclusion, creating your tropical nail design can be a fun and creative project. By following these tips, you'll be able to achieve the perfect tropical nails that will make you feel like you're on vacation all year round. So go ahead, embrace your inner island goddess, and show off your tropical nails with pride!
Where Can I Find Tropical Nail Design Inspiration?
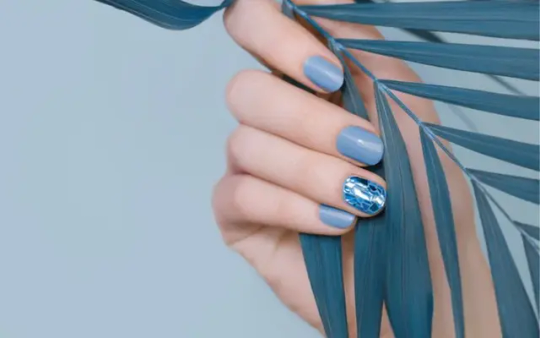
Are you looking for fresh and vibrant nail designs to add a touch of the tropics to your style? Look no further! In this article, we will explore some of the best sources of tropical nail design inspiration that will leave you feeling like you're on a beach vacation all year round. One of the easiest ways to find tropical nail design inspiration is browsing social media platforms such as Instagram and Pinterest. These platforms are filled with talented nail artists and enthusiasts who regularly share their latest creations. By following hashtags like #tropicalnails or #summernails, you can discover a treasure trove of tropical nail designs that will inspire you. Another great source of inspiration is nail art blogs and websites. Many talented nail artists have blogs or websites where they showcase their work and provide step-by-step tutorials. These platforms not only offer a wide range of tropical nail designs but also provide valuable tips and tricks to help you recreate the looks at home. If you prefer a more hands-on approach, attending nail art workshops or classes can be a fantastic way to find inspiration. These workshops often feature experienced nail artists who will teach you various techniques and help you create stunning tropical nail designs. Additionally, interacting with other participants can spark new ideas and provide a supportive community to share your passion for nail art. Lastly, don't forget about the power of nature itself. Stroll on the beach, visit botanical gardens, or spend time outdoors in tropical settings. The colors, patterns, and textures found in nature can be a limitless source of inspiration for your low-nail designs. In conclusion, finding tropical nail design inspiration is easier than ever before. From social media platforms to nail art blogs, workshops, and even the great outdoors, countless sources are waiting to ignite your creativity. So go ahead, explore these sources, and let your nails transport you to a tropical paradise! In conclusion, tropical nail design is a fun and vibrant way to express your personality and embrace the beauty of tropical destinations. Throughout this post, we have covered various aspects of low nail design, including what they are, how to create them, the colors commonly used, and some creative nail art ideas. We have also discussed the importance of caring for your tropical nails to ensure longevity and beauty. Whether you visit a salon or try a DIY approach, there are plenty of tips and tricks to help you achieve the perfect tropical nail look. Additionally, we have explored different sources of inspiration for tropical nail designs, from social media platforms to nail art websites. These resources can provide endless ideas and help you stay up-to-date with the latest trends in low-nail art. Looking ahead, we anticipate that tropical nail design will continue to evolve, incorporating new techniques, colors, and patterns. As more people embrace this trend, we expect a wider range of tropical-inspired nail art. We thank you for taking the time to read this post. We hope that the information provided has been helpful and inspiring. We encourage you to leave any comments or feedback, as we value your input. Remember, with tropical nail design, the possibilities are endless. So go ahead and unleash your creativity, and let your nails transport you to a tropical paradise. Read the full article
0 notes
Photo
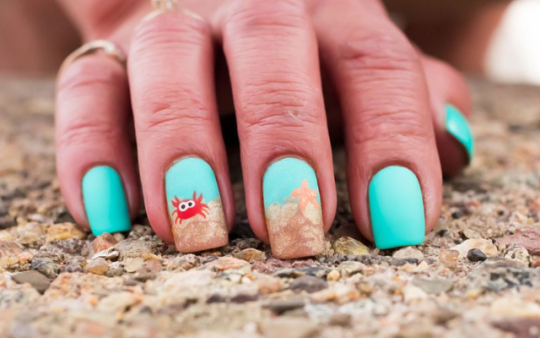
Beach Theme Nails: Dive into the World of Ocean-inspired Nail Art
Beach-theme nails have become a popular trend in nail art. With their vibrant colors, intricate designs, and playful motifs, these nails instantly transport you to a tropical paradise's sandy shores and crystal-clear waters. Whether you're heading to the beach or want to add a touch of summer to your everyday look, beach theme nails are the perfect way to express your love for all things coastal. The possibilities for beach theme nails are endless, from seashells and starfish to palm trees and tropical flowers. With the right tools and creativity, you can transform your nails into a mini canvas, showcasing your style and love for the beach. Whether you prefer a subtle, understated design or a bold, eye-catching statement, beach-theme nails offer something for everyone. One of the best things about beach-themed nails is their versatility. Whether you're a fan of bright and bold colors or prefer a more muted and natural look, there are countless options to suit your taste. You can opt for a classic French manicure with a twist, adding a touch of beach-inspired flair to the tips of your nails. Or, you can go all out and create a tropical paradise at your fingertips, complete with palm trees, waves, and colorful fish. In addition to their aesthetic appeal, beach theme nails serve as a form of self-expression. They allow you to showcase your personality, interests, and love for the beach uniquely and creatively. Whether you're a beach enthusiast, a surfer, or simply someone who enjoys the tranquility of the ocean, beach theme nails can be a fun and exciting way to express yourself. So, whether you're a seasoned nail art enthusiast or a beginner looking to dip your toes into the world of beach theme nails, get ready to dive in and explore the endless possibilities. From simple and elegant designs to bold and adventurous creations, beach-themed nails offer a world of creativity and self-expression. So grab your nail polish and let your imagination run wild as you embark on a journey to create your beach-inspired masterpiece.
How to Create Beach Theme Nails
Are you longing for the beach but can't yet make it there? Why not bring the beach to your fingertips with stunning beach-themed nail art? In this article, we will guide you through the steps to create beautiful beach-themed nails that will transport you to a tropical paradise. To start, gather all the necessary supplies. You will need a base coat, various nail polish colors in shades of blue, white, and sandy beige, a top coat, a thin nail art brush or toothpick, and some nail art decorations like seashells or starfish. Begin by applying a base coat to protect your nails and ensure a smooth application. Once dry, paint your nails with a light blue polish to represent the clear ocean waters. Allow this coat to dry completely before moving on. Next, dip your thin nail art brush or toothpick into white nail polish. Create gentle waves or swirls on each nail to mimic the movement of the sea. Be creative and experiment with different patterns on each nail for a unique look. Once the white polish is dry, it's time to add some sandy beaches. Use a sandy beige polish and create a curved line at the base of each nail to represent the shoreline. You can also add some texture by sprinkling a bit of real sand onto the wet polish. Apply a top coat to seal your design and add shine to the finishing touch. If desired, add nail art decorations like seashells or starfish to enhance the beach theme. Now, sit back, relax, and admire your beautiful beach-themed nails. With these simple steps, you can bring a touch of the beach wherever you go. So show off your stunning nails, and let the beach vibes flow! Remember to take care of your beach-themed nails by applying a fresh top coat every few days to ensure they last longer. Enjoy the summer and keep the beach spirit alive with your fabulous nails!
What Are the Best Colors for Beach Theme Nails
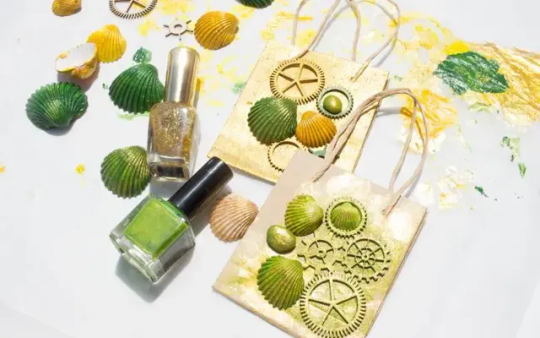
When it comes to beach-themed nails, choosing the right colors is essential to create a vibrant and summery look. Whether you're heading to the beach or want to bring a touch of the ocean to your fingertips, here are some of the best colors to consider. One of the most popular colors for beach-themed nails is turquoise. This blue-green shade perfectly captures the ocean's color and instantly gives your nails a tropical vibe. It pairs well with other beach-inspired colors like coral and sandy beige, creating a stunning combination reminiscent of a beach sunset. If you're looking for a more vibrant and playful look, consider using bright shades of yellow and orange. These colors remind you of the warm rays of the sun and can instantly brighten up your nails. Pair them with a palm tree or seashell nail art for a fun and tropical twist. Opt for nude or sandy shades for a more subtle and sophisticated beach theme. These colors mimic the color of the sand and create a natural and effortless look. They are versatile and can be paired with beach-inspired nail art or accessories. Another popular choice for beach-themed nails is pastel shades. Soft pinks, blues, and purples create a dreamy, ethereal look perfect for a beach vacation. Pair them with seashell or starfish nail art to complete the beachy vibe. In conclusion, when it comes to beach-themed nails, the best colors are turquoise, coral, sandy beige, bright yellow, orange, nude, sandy shades, and pastels. Experiment with different color combinations and nail art to create your unique beach-inspired look. So, next time you hit the beach, make sure your nails are ready to make a splash!
How to Do a Beach Theme Nail Art
Beach-theme nails are a fun and creative way to bring summer vibes to your fingertips. Whether you're heading to the beach or want to add a touch of the ocean to your look, this nail art style is perfect for you. In this article, we will guide you through the step-by-step process of creating your beach-themed nails. First, prepare your nails. Remove any old nail polish, trim, and shape your nails to your desired length. Next, apply a base coat to protect your nails and create a smooth surface for the nail art. Once the base coat is dry, creating the beach theme is time. Choose a light blue nail polish to represent the ocean. Apply two coats of blue polish, allowing each coat to dry completely before applying the next. You can use beige or nude nail polish to create the look of sand. Apply the polish to the tips of your nails, creating a gradient effect. You can add texture by sprinkling fine sand or glitter over the wet polish. Next, it's time to add some beach-inspired designs to your nails. You can use a thin nail art brush or a toothpick to create palm trees, seashells, starfish, or even a beach ball. Get creative and let your imagination run wild! Finally, finish off your beach theme nail art with a top coat to seal in the design and add shine. This will also help your nail art last longer. Beach-theme nails are a great way to express your love for the ocean and summer. With some creativity and patience, you can create your beach paradise right at your fingertips. So grab your nail polish and dive into beach-themed nail art!
What Are Some Beach Theme Nail Designs

Beach theme nail designs are a popular choice for those looking to embrace the summer vibes and add a touch of tropical beauty to their fingertips. Whether you're heading to the beach or want to bring a slice of paradise to your everyday life, plenty of stunning designs exist. In this article, we will explore some of the most popular beach-theme nail designs that will make you feel like you're on vacation all year round. One of the classic beach-theme nail designs is the palm tree design. This design features palm tree silhouettes against a vibrant sunset or ocean backdrop. It instantly transports you to a tropical paradise and adds a touch of elegance to your nails. Another popular design is the seashell design, which incorporates delicate seashell patterns onto your nails. This design is perfect for those who want to embrace the beauty of the ocean and its treasures. You can opt for a beach ball design if you want something more playful. This design features colorful beach balls painted onto your nails, adding a fun and vibrant touch to your look. Another playful option is the flip-flop design, which showcases cute flip-flop patterns on your nails. It's perfect for those who want to show off their love for summer footwear.
What Are the Essential Tools for Beach Theme Nails
Having the right tools is essential when creating stunning beach-themed nails. Whether you're heading to the coast or want to bring the beach vibes to your fingertips, these tools will help you achieve the perfect look. First and foremost, you'll need a good-quality base coat. This will not only help your nail polish last longer but also protect your natural nails from potential damage. Look for a quick-drying base coat that provides a smooth surface for your beach-inspired designs. Next, you'll need a selection of nail polishes in various shades. Think of the colors you associate with the beach - blues, greens, and sandy neutrals. These will form the base of your designs and allow you to create intricate patterns and designs that capture the essence of the beach. Invest in a few nail art brushes to add depth and dimension to your beach-themed nails. These thin brushes will allow you to create fine lines, intricate details, and realistic beach scenes. They are a must-have for any nail enthusiast looking to take their beach-themed designs to the next level. In addition to brushes, you'll also need some dotting tools. These tools will help you create perfect polka dots and other circular designs that mimic seashells or bubbles. They are versatile and can be used to develop various beach-inspired patterns. Lastly, don't forget about the top coat! A good-quality top coat will seal in your design and add shine and protection to your nails. Look for a quick-drying, long-lasting top coat to ensure your beach-themed nails stay fresh for as long as possible. In conclusion, creating beach theme nails requires a few essential tools. From base coats to nail polishes in beach-inspired shades, nail art brushes to dotting tools, and a high-quality top coat, these tools will help you create stunning beach-themed designs that will make a splash. So, gather your tools and dive into the world of beach-themed nails!
How to Maintain Beach Theme Nails
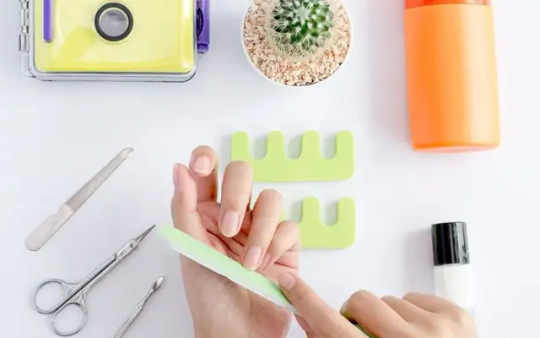
Beach-theme nails are a fun and vibrant way to express your love for the ocean and summer. Whether you have just gotten your nails done or are planning to get them done soon, it is important to know how to maintain them properly. This article will discuss tips and tricks to help you keep your beach-themed nails looking fresh and beautiful. First and foremost, it is important to protect your beach-themed nails from potential damage. When doing household chores or any activities that may put stress on your nails, be sure to wear gloves. This will prevent chipping and breakage, ensuring that your nails stay intact for longer. Additionally, it is important to moisturize your nails and cuticles regularly. Saltwater and sun exposure can dry, so applying a nourishing cuticle oil or cream will help keep your nails hydrated and prevent them from becoming brittle. When it comes to maintaining the design of your beach-themed nails, avoid using harsh chemicals or abrasive tools. Instead, use a gentle nail polish remover and a soft brush to clean your nails. This will help preserve the design and prevent any damage or fading. Lastly, it is important to schedule regular touch-ups with your nail technician. Over time, the beach theme design may fade or chip, so periodic touch-ups will help keep your nails looking fresh and vibrant. In conclusion, maintaining beach-themed nails requires some extra care and attention. By following these tips and tricks, you can ensure your nails stay beautiful and vibrant for longer. So, show off your love for the beach with stunning beach-themed nails!
What Are Some Beach Theme Nail Art Ideas
Beach-theme nails are a popular trend in the world of nail art. Whether you're heading to the beach or want to bring a touch of the ocean to your fingertips, there are plenty of creative and fun designs to choose from. In this article, we will explore some beach-themed nail art ideas that will leave you feeling like you're on a tropical getaway. One popular beach-theme nail art idea is to create a design inspired by the waves. You can achieve this look using shades of blue nail polish to create a gradient effect. Add some white accents to represent the foam of the waves, and you'll have a stunning beach-inspired manicure. Another fun idea is to create a beach scene on your nails. You can use a light sandy color as the base and add palm trees, seashells, and even a little beach umbrella. This design is perfect for those who want to showcase their love for the beach. If you're feeling adventurous, why not try a mermaid-inspired design? Use shades of blue and green to create a mesmerizing underwater effect. Add some glitter or rhinestones to represent the shimmering scales of a mermaid tail. This design is sure to make a splash wherever you go. You can opt for a simple seashell design for a more subtle beach theme. Use a nude or pastel color as the base, then paint delicate seashell shapes on each nail. This design is elegant and perfect for any occasion. In conclusion, there are countless ideas for beach-themed nail art. Whether you prefer a bold and vibrant design or something more subtle and elegant, there is a beach-inspired manicure for everyone. So grab your favorite nail polish and dive into the world of beach-themed nails.
What Are Some Beach Theme Nail Accessories

Regarding beach-themed nails, countless accessories can help you achieve the perfect summer look. From seashell decals to starfish charms, these accessories stand out. Here are some popular beach-theme nail accessories that you can try: - Seashell Decals: These tiny decals can be applied to your nails for a beachy touch. They come in various shapes and sizes, allowing you to create unique designs. - Starfish Charms: Adding a starfish charm to your nails can instantly give them a tropical vibe. These charms can be easily attached using nail glue or a clear top coat. - Palm Tree Stickers: Palm trees are synonymous with the beach, and adding palm tree stickers to your nails can bring that vacation feeling to your fingertips. - Sand Nail Art: Use textured nail polish or powders to create a sandy beach look. This will give your nails a realistic sandy texture that is perfect for each theme. - Pearl Embellishments: Pearls are a classic choice for beach-themed nails. You can glue individual pearls onto your nails or use pearl nail studs for a more subtle look. - Mermaid Scales: Create a mermaid-inspired look on your nails by using nail foils or stamping plates to create scales. This will give them an enchanting and mystical appearance. - Beach Umbrella Nail Charms: These cute little charms can be attached to your nails for a fun and playful beach theme. They come in various colors and designs, allowing you to customize your look. Remember, the key to achieving the perfect beach theme nails is to have fun and be creative. Experiment with different accessories and designs to find what works best for you. So go ahead, embrace the summer vibes, and show off your bea,ch-themed nails!
Conclusion
Beach-themed nails are a fun and creative way to express your love for the beach and summer vibes. Throughout this post, we have discussed various topics related to beach-theme nails, including how to create them, the best colors to use, different nail art techniques, popular designs, essential tools, maintenance tips, art ideas, and accessories. Creating beach-themed nails is a simple process that allows you to unleash your artistic side. Following the step-by-step instructions, you can achieve stunning results that will transport you to a tropical paradise. Experimenting with different colors is key to achieving the perfect beach look, with shades like turquoise, coral, and sandy beige being popular choices. Regarding nail art, there are countless possibilities for creating beach-inspired designs. The options are endless, from palm trees and seashells to waves and starfish. By using the right tools, such as dotting tools, nail brushes, and nail stickers, you can easily bring your beach-themed nails to life. To maintain your beach-themed nails, taking proper care of them is important. This includes protecting them from excessive water exposure, moisturizing regularly, and avoiding harsh chemicals. By following these simple tips, you can ensure that your beach-themed nails stay vibrant and beautiful for longer. Looking ahead, the world of beach-theme nails is constantly evolving. New trends and developments in nail art are always emerging, offering even more possibilities for creative expression. It is important to stay updated on the latest techniques and designs to keep your beach-themed nails fresh and exciting. Read the full article
0 notes
Photo

Beach Theme Nails: Dive into the World of Ocean-inspired Nail Art
Beach-theme nails have become a popular trend in nail art. With their vibrant colors, intricate designs, and playful motifs, these nails instantly transport you to a tropical paradise's sandy shores and crystal-clear waters. Whether you're heading to the beach or want to add a touch of summer to your everyday look, beach theme nails are the perfect way to express your love for all things coastal. The possibilities for beach theme nails are endless, from seashells and starfish to palm trees and tropical flowers. With the right tools and creativity, you can transform your nails into a mini canvas, showcasing your style and love for the beach. Whether you prefer a subtle, understated design or a bold, eye-catching statement, beach-theme nails offer something for everyone. One of the best things about beach-themed nails is their versatility. Whether you're a fan of bright and bold colors or prefer a more muted and natural look, there are countless options to suit your taste. You can opt for a classic French manicure with a twist, adding a touch of beach-inspired flair to the tips of your nails. Or, you can go all out and create a tropical paradise at your fingertips, complete with palm trees, waves, and colorful fish. In addition to their aesthetic appeal, beach theme nails serve as a form of self-expression. They allow you to showcase your personality, interests, and love for the beach uniquely and creatively. Whether you're a beach enthusiast, a surfer, or simply someone who enjoys the tranquility of the ocean, beach theme nails can be a fun and exciting way to express yourself. So, whether you're a seasoned nail art enthusiast or a beginner looking to dip your toes into the world of beach theme nails, get ready to dive in and explore the endless possibilities. From simple and elegant designs to bold and adventurous creations, beach-themed nails offer a world of creativity and self-expression. So grab your nail polish and let your imagination run wild as you embark on a journey to create your beach-inspired masterpiece.
How to Create Beach Theme Nails
Are you longing for the beach but can't yet make it there? Why not bring the beach to your fingertips with stunning beach-themed nail art? In this article, we will guide you through the steps to create beautiful beach-themed nails that will transport you to a tropical paradise. To start, gather all the necessary supplies. You will need a base coat, various nail polish colors in shades of blue, white, and sandy beige, a top coat, a thin nail art brush or toothpick, and some nail art decorations like seashells or starfish. Begin by applying a base coat to protect your nails and ensure a smooth application. Once dry, paint your nails with a light blue polish to represent the clear ocean waters. Allow this coat to dry completely before moving on. Next, dip your thin nail art brush or toothpick into white nail polish. Create gentle waves or swirls on each nail to mimic the movement of the sea. Be creative and experiment with different patterns on each nail for a unique look. Once the white polish is dry, it's time to add some sandy beaches. Use a sandy beige polish and create a curved line at the base of each nail to represent the shoreline. You can also add some texture by sprinkling a bit of real sand onto the wet polish. Apply a top coat to seal your design and add shine to the finishing touch. If desired, add nail art decorations like seashells or starfish to enhance the beach theme. Now, sit back, relax, and admire your beautiful beach-themed nails. With these simple steps, you can bring a touch of the beach wherever you go. So show off your stunning nails, and let the beach vibes flow! Remember to take care of your beach-themed nails by applying a fresh top coat every few days to ensure they last longer. Enjoy the summer and keep the beach spirit alive with your fabulous nails!
What Are the Best Colors for Beach Theme Nails

When it comes to beach-themed nails, choosing the right colors is essential to create a vibrant and summery look. Whether you're heading to the beach or want to bring a touch of the ocean to your fingertips, here are some of the best colors to consider. One of the most popular colors for beach-themed nails is turquoise. This blue-green shade perfectly captures the ocean's color and instantly gives your nails a tropical vibe. It pairs well with other beach-inspired colors like coral and sandy beige, creating a stunning combination reminiscent of a beach sunset. If you're looking for a more vibrant and playful look, consider using bright shades of yellow and orange. These colors remind you of the warm rays of the sun and can instantly brighten up your nails. Pair them with a palm tree or seashell nail art for a fun and tropical twist. Opt for nude or sandy shades for a more subtle and sophisticated beach theme. These colors mimic the color of the sand and create a natural and effortless look. They are versatile and can be paired with beach-inspired nail art or accessories. Another popular choice for beach-themed nails is pastel shades. Soft pinks, blues, and purples create a dreamy, ethereal look perfect for a beach vacation. Pair them with seashell or starfish nail art to complete the beachy vibe. In conclusion, when it comes to beach-themed nails, the best colors are turquoise, coral, sandy beige, bright yellow, orange, nude, sandy shades, and pastels. Experiment with different color combinations and nail art to create your unique beach-inspired look. So, next time you hit the beach, make sure your nails are ready to make a splash!
How to Do a Beach Theme Nail Art
Beach-theme nails are a fun and creative way to bring summer vibes to your fingertips. Whether you're heading to the beach or want to add a touch of the ocean to your look, this nail art style is perfect for you. In this article, we will guide you through the step-by-step process of creating your beach-themed nails. First, prepare your nails. Remove any old nail polish, trim, and shape your nails to your desired length. Next, apply a base coat to protect your nails and create a smooth surface for the nail art. Once the base coat is dry, creating the beach theme is time. Choose a light blue nail polish to represent the ocean. Apply two coats of blue polish, allowing each coat to dry completely before applying the next. You can use beige or nude nail polish to create the look of sand. Apply the polish to the tips of your nails, creating a gradient effect. You can add texture by sprinkling fine sand or glitter over the wet polish. Next, it's time to add some beach-inspired designs to your nails. You can use a thin nail art brush or a toothpick to create palm trees, seashells, starfish, or even a beach ball. Get creative and let your imagination run wild! Finally, finish off your beach theme nail art with a top coat to seal in the design and add shine. This will also help your nail art last longer. Beach-theme nails are a great way to express your love for the ocean and summer. With some creativity and patience, you can create your beach paradise right at your fingertips. So grab your nail polish and dive into beach-themed nail art!
What Are Some Beach Theme Nail Designs
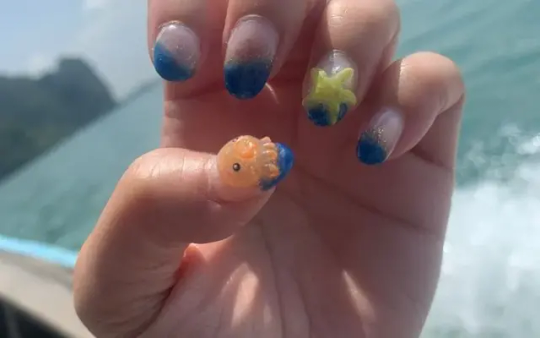
Beach theme nail designs are a popular choice for those looking to embrace the summer vibes and add a touch of tropical beauty to their fingertips. Whether you're heading to the beach or want to bring a slice of paradise to your everyday life, plenty of stunning designs exist. In this article, we will explore some of the most popular beach-theme nail designs that will make you feel like you're on vacation all year round. One of the classic beach-theme nail designs is the palm tree design. This design features palm tree silhouettes against a vibrant sunset or ocean backdrop. It instantly transports you to a tropical paradise and adds a touch of elegance to your nails. Another popular design is the seashell design, which incorporates delicate seashell patterns onto your nails. This design is perfect for those who want to embrace the beauty of the ocean and its treasures. You can opt for a beach ball design if you want something more playful. This design features colorful beach balls painted onto your nails, adding a fun and vibrant touch to your look. Another playful option is the flip-flop design, which showcases cute flip-flop patterns on your nails. It's perfect for those who want to show off their love for summer footwear.
What Are the Essential Tools for Beach Theme Nails
Having the right tools is essential when creating stunning beach-themed nails. Whether you're heading to the coast or want to bring the beach vibes to your fingertips, these tools will help you achieve the perfect look. First and foremost, you'll need a good-quality base coat. This will not only help your nail polish last longer but also protect your natural nails from potential damage. Look for a quick-drying base coat that provides a smooth surface for your beach-inspired designs. Next, you'll need a selection of nail polishes in various shades. Think of the colors you associate with the beach - blues, greens, and sandy neutrals. These will form the base of your designs and allow you to create intricate patterns and designs that capture the essence of the beach. Invest in a few nail art brushes to add depth and dimension to your beach-themed nails. These thin brushes will allow you to create fine lines, intricate details, and realistic beach scenes. They are a must-have for any nail enthusiast looking to take their beach-themed designs to the next level. In addition to brushes, you'll also need some dotting tools. These tools will help you create perfect polka dots and other circular designs that mimic seashells or bubbles. They are versatile and can be used to develop various beach-inspired patterns. Lastly, don't forget about the top coat! A good-quality top coat will seal in your design and add shine and protection to your nails. Look for a quick-drying, long-lasting top coat to ensure your beach-themed nails stay fresh for as long as possible. In conclusion, creating beach theme nails requires a few essential tools. From base coats to nail polishes in beach-inspired shades, nail art brushes to dotting tools, and a high-quality top coat, these tools will help you create stunning beach-themed designs that will make a splash. So, gather your tools and dive into the world of beach-themed nails!
How to Maintain Beach Theme Nails

Beach-theme nails are a fun and vibrant way to express your love for the ocean and summer. Whether you have just gotten your nails done or are planning to get them done soon, it is important to know how to maintain them properly. This article will discuss tips and tricks to help you keep your beach-themed nails looking fresh and beautiful. First and foremost, it is important to protect your beach-themed nails from potential damage. When doing household chores or any activities that may put stress on your nails, be sure to wear gloves. This will prevent chipping and breakage, ensuring that your nails stay intact for longer. Additionally, it is important to moisturize your nails and cuticles regularly. Saltwater and sun exposure can dry, so applying a nourishing cuticle oil or cream will help keep your nails hydrated and prevent them from becoming brittle. When it comes to maintaining the design of your beach-themed nails, avoid using harsh chemicals or abrasive tools. Instead, use a gentle nail polish remover and a soft brush to clean your nails. This will help preserve the design and prevent any damage or fading. Lastly, it is important to schedule regular touch-ups with your nail technician. Over time, the beach theme design may fade or chip, so periodic touch-ups will help keep your nails looking fresh and vibrant. In conclusion, maintaining beach-themed nails requires some extra care and attention. By following these tips and tricks, you can ensure your nails stay beautiful and vibrant for longer. So, show off your love for the beach with stunning beach-themed nails!
What Are Some Beach Theme Nail Art Ideas
Beach-theme nails are a popular trend in the world of nail art. Whether you're heading to the beach or want to bring a touch of the ocean to your fingertips, there are plenty of creative and fun designs to choose from. In this article, we will explore some beach-themed nail art ideas that will leave you feeling like you're on a tropical getaway. One popular beach-theme nail art idea is to create a design inspired by the waves. You can achieve this look using shades of blue nail polish to create a gradient effect. Add some white accents to represent the foam of the waves, and you'll have a stunning beach-inspired manicure. Another fun idea is to create a beach scene on your nails. You can use a light sandy color as the base and add palm trees, seashells, and even a little beach umbrella. This design is perfect for those who want to showcase their love for the beach. If you're feeling adventurous, why not try a mermaid-inspired design? Use shades of blue and green to create a mesmerizing underwater effect. Add some glitter or rhinestones to represent the shimmering scales of a mermaid tail. This design is sure to make a splash wherever you go. You can opt for a simple seashell design for a more subtle beach theme. Use a nude or pastel color as the base, then paint delicate seashell shapes on each nail. This design is elegant and perfect for any occasion. In conclusion, there are countless ideas for beach-themed nail art. Whether you prefer a bold and vibrant design or something more subtle and elegant, there is a beach-inspired manicure for everyone. So grab your favorite nail polish and dive into the world of beach-themed nails.
What Are Some Beach Theme Nail Accessories
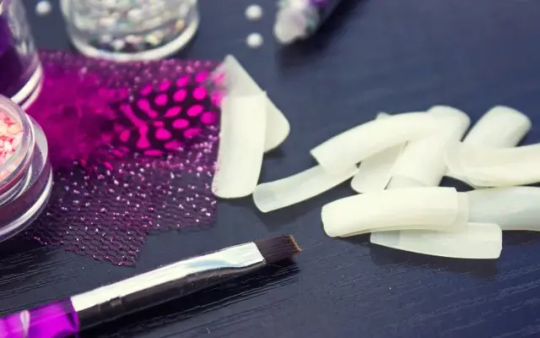
Regarding beach-themed nails, countless accessories can help you achieve the perfect summer look. From seashell decals to starfish charms, these accessories stand out. Here are some popular beach-theme nail accessories that you can try: - Seashell Decals: These tiny decals can be applied to your nails for a beachy touch. They come in various shapes and sizes, allowing you to create unique designs. - Starfish Charms: Adding a starfish charm to your nails can instantly give them a tropical vibe. These charms can be easily attached using nail glue or a clear top coat. - Palm Tree Stickers: Palm trees are synonymous with the beach, and adding palm tree stickers to your nails can bring that vacation feeling to your fingertips. - Sand Nail Art: Use textured nail polish or powders to create a sandy beach look. This will give your nails a realistic sandy texture that is perfect for each theme. - Pearl Embellishments: Pearls are a classic choice for beach-themed nails. You can glue individual pearls onto your nails or use pearl nail studs for a more subtle look. - Mermaid Scales: Create a mermaid-inspired look on your nails by using nail foils or stamping plates to create scales. This will give them an enchanting and mystical appearance. - Beach Umbrella Nail Charms: These cute little charms can be attached to your nails for a fun and playful beach theme. They come in various colors and designs, allowing you to customize your look. Remember, the key to achieving the perfect beach theme nails is to have fun and be creative. Experiment with different accessories and designs to find what works best for you. So go ahead, embrace the summer vibes, and show off your bea,ch-themed nails!
Conclusion
Beach-themed nails are a fun and creative way to express your love for the beach and summer vibes. Throughout this post, we have discussed various topics related to beach-theme nails, including how to create them, the best colors to use, different nail art techniques, popular designs, essential tools, maintenance tips, art ideas, and accessories. Creating beach-themed nails is a simple process that allows you to unleash your artistic side. Following the step-by-step instructions, you can achieve stunning results that will transport you to a tropical paradise. Experimenting with different colors is key to achieving the perfect beach look, with shades like turquoise, coral, and sandy beige being popular choices. Regarding nail art, there are countless possibilities for creating beach-inspired designs. The options are endless, from palm trees and seashells to waves and starfish. By using the right tools, such as dotting tools, nail brushes, and nail stickers, you can easily bring your beach-themed nails to life. To maintain your beach-themed nails, taking proper care of them is important. This includes protecting them from excessive water exposure, moisturizing regularly, and avoiding harsh chemicals. By following these simple tips, you can ensure that your beach-themed nails stay vibrant and beautiful for longer. Looking ahead, the world of beach-theme nails is constantly evolving. New trends and developments in nail art are always emerging, offering even more possibilities for creative expression. It is important to stay updated on the latest techniques and designs to keep your beach-themed nails fresh and exciting. Read the full article
0 notes
Photo
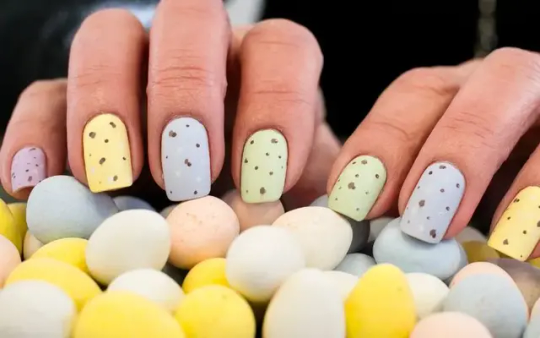
Easter Color Nails: Get Ready for a Festive and Vibrant Look!
Easter is a time of renewal and celebration, and what better way to embrace the spirit of the season than with a fresh and colorful manicure? Easter color nails are all the rage, offering a fun and festive way to express your style and add a pop of color to your look. Whether attending Easter brunch, an egg hunt, or simply enjoying the day with loved ones, these vibrant nail colors will make a statement. From pastel hues to bright and bold shades, Easter color nails offer endless possibilities for creativity. Pastel pinks, baby blues, and soft yellows are reminiscent of blooming flowers and the gentle arrival of spring. These delicate shades are perfect for those who prefer a subtle and elegant look. If you're feeling adventurous, why not try some bolder colors? Vibrant purples, electric greens, and sunny oranges will turn heads and make a statement. These eye-catching shades are perfect for those who want to stand out and embrace the joyful spirit of Easter. To take your Easter color nails to the next level, consider adding some fun and playful designs. From cute bunnies and colorful Easter eggs to intricate floral patterns, countless ways exist to express creativity and make your nails unique. In addition to the aesthetic appeal, Easter color nails can serve as a conversation starter. They provide an opportunity to share your love for the holiday and engage in discussions about traditions, family gatherings, and the joy that Easter brings. So, whether you're a nail art enthusiast or simply looking to add a touch of festive flair to your look, Easter color nails are a must-try. Get ready to embrace the vibrant and joyful spirit of the season with a stunning manicure that will leave everyone in awe. Stay tuned for our upcoming articles, where we'll delve deeper into specific nail designs, techniques, and tips for achieving the perfect Easter color nails.
What Colors Are Popular for Easter Nail Designs?
Easter is a time of renewal and celebration, and what better way to express your festive spirit than with a stunning Easter-themed manicure? Regarding Easter nail designs, certain colors are particularly popular and on-trend. In this article, we will explore the most sought-after colors for Easter nail designs, ensuring your nails will envy everyone at your Easter gathering. Pastel shades are synonymous with Easter, and they are a classic choice for nail designs during this time of year. Soft pinks, baby blues, and mint greens are popular options that evoke the freshness and beauty of spring. These colors are perfect for creating delicate floral patterns or adding a touch of elegance to your nails. The vibrant hues of Easter eggs inspire another popular color palette for Easter nail designs. Bright and cheerful colors like yellow, orange, and purple can instantly add a playful and festive touch to your manicure. These colors are great for creating fun and eye-catching designs, such as polka dots or stripes. Metallic shades are also a trendy choice for Easter nail designs. Gold, silver, and rose gold can add a touch of glamour and sophistication to your manicure. These colors are perfect for creating intricate patterns or adding a touch of sparkle to your nails. In addition to these popular color choices, some people like to incorporate Easter-themed nail art into their designs. Adorable bunnies, colorful Easter eggs, and delicate flowers are just a few possibilities. These designs can be done using various colors or by incorporating techniques such as stamping or freehand painting. In conclusion, when it comes to Easter nail designs, there is a wide range of colors and styles to choose from. Whether you prefer pastels, vibrant hues, or metallic shades, there is something for everyone. So, get creative and let your nails be a reflection of the joy and beauty of Easter!
How to Create a Pastel Easter Nail Look

Easter is when we celebrate new beginnings and the arrival of spring. What better way to embrace the season than by adorning your nails with beautiful pastel colors? In this article, we will guide you through the steps to create a stunning pastel Easter nail look that will turn heads. Start by prepping your nails. Remove any old polish and shape your nails to your desired length and shape. Push back your cuticles and apply a base coat to protect your nails. Next, choose your pastel colors. Easter is known for its soft and delicate hues, so opt for shades like baby blue, mint green, pale pink, and lavender. These colors will give your nails a fresh and youthful look. Once you have your colors ready, it's time to start painting. Begin with a thin layer of your chosen base color. Allow it to dry completely before moving on to the next step. This will ensure that your nail polish goes on smoothly and lasts longer. Now, it's time to get creative. Use a small brush or a toothpick to create intricate designs on your nails. You can try polka dots, stripes, or even floral patterns. Let your imagination run wild, and experiment with different designs on each nail. After you finish the designs, finish off with a top coat to seal in the colors and add shine. This will also help your nail art last longer and prevent chipping. Voila! You now have a beautiful pastel Easter nail look perfect for the season. Show off your nails and embrace the festive spirit of Easter. In conclusion, creating a pastel Easter nail look is a fun and creative way to celebrate the season. With the right colors and designs, you can achieve a stunning manicure that will prepare you for any Easter gathering. So go ahead, grab your favorite pastel shades, and let your nails be the highlight of your Easter ensemble.
What Are Some Easter Nail Art Ideas?
Easter is a time for celebration and creativity, and what better way to show off your festive spirit than with some colorful and fun nail art? Whether you're attending an Easter brunch or want to add a touch of holiday cheer to your everyday look, there are plenty of nail art ideas that will make your nails stand out. From pastel hues to cute Easter-themed designs, here are some ideas to inspire your Easter nail art. Pastel Perfection: Easter is synonymous with pastel colors, so why not incorporate them into your nail art? Opt for soft shades of pink, blue, yellow, and green to create a delicate and feminine look. You can paint each nail a different pastel shade or create a gradient effect by blending two or more colors. Egg-cellent Designs: Easter eggs are a classic holiday symbol, so why not incorporate them into your nail art? Paint your nails a solid color and then use a thin brush to create intricate egg designs. You can go for traditional patterns like polka dots or stripes, or get creative and paint mini Easter scenes on each nail. Bunny Love: Bunnies are another iconic Easter symbol, and they make for adorable nail art designs. Paint your nails a light shade of pink or white, then use a thin brush to create bunny faces on each nail. Add cute details like whiskers and a little pink nose to bring your bunnies to life. Spring Flowers: Easter is also a celebration of the arrival of spring, so why not incorporate some floral designs into your nail art? Paint your nails a neutral shade, then use a thin brush to create delicate flowers on each nail. You can opt for daisies, tulips, or any other spring blooms you love. Incorporating Easter-themed nail art into your look is a fun and creative way to celebrate the holiday. Whether you opt for pastel shades, egg designs, bunny faces, or spring flowers, your nails will surely be the talk of the town. So get your nail polish and let your imagination run wild this Easter!
How to Do an Easter Egg Nail Design
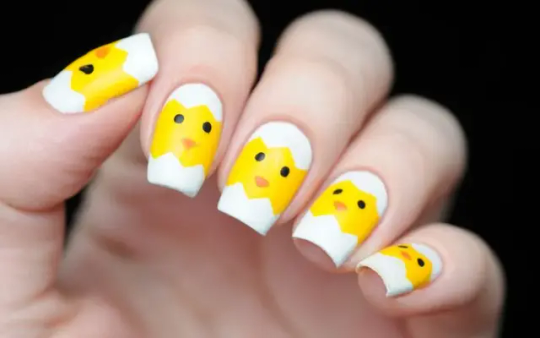
Easter is a time of vibrant colors and joyful celebrations, and what better way to embrace the festive spirit than by adorning your nails with an Easter egg design? Whether you're attending an Easter brunch or want to add a whimsy to your everyday look, this nail art will make a statement. In this article, we will guide you through the steps to achieve a stunning Easter egg nail design. Firstly, gather all the necessary supplies. You will need a base coat, various pastel nail polishes, a dotting tool or toothpick, and a top coat. Once everything is ready, apply a base coat to protect your nails and ensure a long-lasting manicure. Next, choose your desired pastel colors. Easter is synonymous with soft hues like baby pink, mint green, and sky blue. Apply a different color to each nail, creating a colorful canvas for your Easter egg design. Once the base colors are dry, it's time to get creative with your Easter egg design. Using a dotting tool or toothpick, create small dots and lines on your nails to mimic the patterns and shapes of Easter eggs. Experiment with different designs, such as polka dots, zigzags, or even intricate floral patterns. Allow your design to dry completely before applying a top coat. This will seal your design and provide a glossy finish. The top coat will also help your manicure last longer and prevent chipping. And there you have it – a beautiful Easter egg nail design! Show off your festive nails with pride and enjoy the compliments. Remember, the key to a successful Easter egg nail design is to have fun and let your creativity shine. Happy Easter!
What Are Some Spring-inspired Nail Colors for Easter?
Easter is a time of renewal and celebration, and what better way to embrace the spirit of the season than with a fresh manicure? As the flowers bloom and the weather warms up, it's the perfect opportunity to experiment with fun and vibrant nail colors. Whether you're attending a family gathering or want to add a touch of spring to your everyday look, here are some spring-inspired nail colors perfect for Easter. Pastel shades are a popular choice for Easter nails, as they evoke feelings of softness and femininity. Light pinks, baby blues, and mint greens are all excellent options for creating a delicate and whimsical look. These colors are versatile and can be paired with any outfit, making them a go-to choice for many. If you're looking for something bolder, consider opting for bright and vibrant shades. Coral, lemon yellow, and lavender are all eye-catching colors that will make a statement. These shades are perfect for those who want to stand out and add a pop of color to their Easter ensemble. For those who prefer a more understated look, nude and neutral shades are always a classic choice. These colors are elegant and sophisticated, and they pair well with any outfit. Whether you choose a light beige or a soft taupe, you can't go wrong with a neutral manicure. Incorporating nail art into your Easter manicure can also add an extra touch of creativity. Floral designs, Easter eggs, and bunny motifs are all popular choices for nail art during this time of year. You can either visit a nail salon or try your hand at DIY nail art to create a unique and personalized look. As you prepare for Easter festivities, don't forget to pay attention to your nails. By choosing a spring-inspired nail color, you can add a festive touch to your overall look and embrace the joy and vibrancy of the season. So go ahead and experiment with different colors and designs, and have fun celebrating Easter with beautiful nails.
How to Achieve a Floral Easter Nail Design
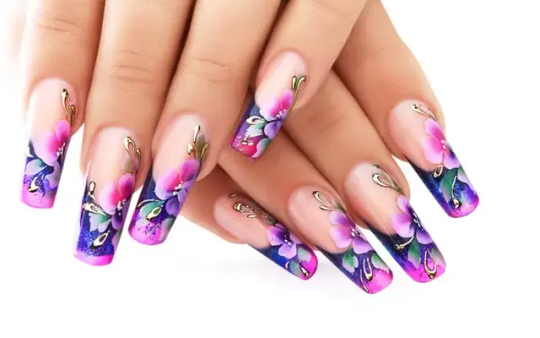
Easter is a time of vibrant colors and fresh blooms, making it the perfect occasion to experiment with floral nail designs. Whether you're attending a family gathering or want to embrace the festive spirit, these tips will help you achieve a stunning Easter nail look. Start by prepping your nails. Remove any old polish and shape them to your desired length and style. Apply a base coat to protect your nails and ensure the longevity of your design. Next, choose a color palette that reflects the essence of Easter. Pastel shades like lavender, baby blue, and mint green are popular. These soft hues will create a delicate backdrop for your floral design. To create the floral pattern, you can use various techniques. One option is to paint small flowers directly onto your nails using a thin brush. Alternatively, you can use nail stamps or stickers for a quicker and easier application. Experiment with different flower sizes and arrangements to find a design that suits your style. Once your flowers are in place, add some extra details to make them pop. You can use a dotting tool to create the centers of the flowers or add tiny leaves for a realistic touch. Don't forget to seal your design with a top coat to protect it and give it a glossy finish. To complement your floral Easter nails, consider adding some accent nails. You can paint them in a coordinating color or even add some glitter for extra sparkle. Remember to take care of your nails throughout the Easter festivities. Moisturize your cuticles regularly and avoid activities that may chip or damage your design. With these tips, you'll be able to achieve a beautiful floral Easter nail design that will surely impress. Embrace the season's spirit and let your nails bloom with color and creativity!
What Are Some Easter Nail Stamping Designs?
Easter is a time of vibrant colors and joyful celebrations. One way to embrace the festive spirit is by adorning your nails with beautiful Easter nail stamping designs. These designs are not only eye-catching but also a fun way to express your creativity. In this article, we will explore some popular Easter nail stamping designs that you can try out this season. One of the most popular Easter nail stamping designs is the Easter egg pattern. You can create this design using pastel-colored nail polishes and stamping plates with intricate egg patterns. The result is a cute and playful look that is perfect for the holiday. Another popular choice is the bunny design. This design features adorable bunny shapes stamped onto your nails. You can use different colors for the bunnies' bodies and add details like eyes and whiskers using a thin brush. This design is perfect for those who want a cute and whimsical look. If you prefer a more elegant design, you can try the floral pattern. This design features delicate flowers stamped onto your nails. You can use different colors for the flowers and add some glitter for a touch of sparkle. This design is perfect for those who want a sophisticated and feminine look. For those who want a playful and colorful design, the rainbow pattern is a great choice. This design features vibrant rainbow stripes stamped onto your nails. You can use different colors for each stripe and add some rhinestones for extra bling. This design is perfect for those who want to make a bold statement. In conclusion, there are plenty of Easter nail stamping designs. Whether you prefer cute and playful or elegant and sophisticated, there is a design for you. So, why not embrace the festive spirit and try beautiful designs on your nails this Easter season?
How to Create a Bunny-themed Easter Nail Design
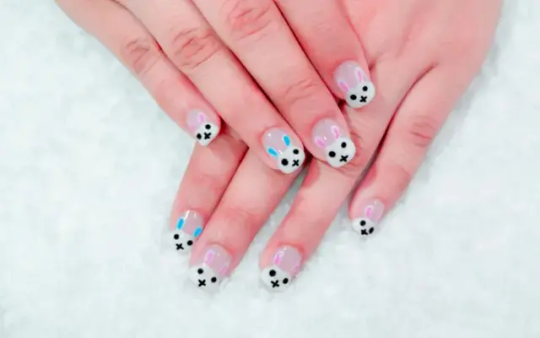
Easter is just around the corner, and what better way to celebrate than with a festive bunny-themed nail design? Whether you're attending an Easter brunch or want to add a whimsy to your everyday look, these bunny-inspired nails will make a statement. In this article, we'll guide you through the steps to create your adorable Easter nail design. To start, gather your supplies. You'll need a base coat, pastel nail polish in your desired color, white nail polish, black nail polish, a dotting tool or toothpick, and a top coat. Once you have everything ready, it's time to begin. Begin applying a base coat to protect your nails and ensure a longer-lasting manicure. Once the base coat is dry, apply two coats of pastel nail polish color. Allow each coat to dry before applying the next. Next, it's time to create the bunny design. Using the white nail polish, carefully paint a small oval shape near the base of your nail. This will serve as the bunny's body. Then, using the dotting tool or toothpick, create two small dots for the eyes using the black nail polish. Above the eyes, create two larger dots for the bunny's ears. Finally, add a small dot for the nose. Once the design is complete, allow it to dry completely before applying a top coat to seal in your design and add shine. And voila! You now have a cute and festive bunny-themed Easter nail design. Remember, practice makes perfect, so don't be discouraged if your first attempt isn't perfect. With a little patience and practice, you can create an adorable bunny design that's perfect for Easter or any time you want to add a touch of whimsy to your nails. So go ahead, try it, and have fun creating your own bunny-themed Easter nail design! In conclusion, Easter color nails are a fun and festive way to celebrate the holiday season. Throughout this post, we have explored various topics related to Easter nail designs and art ideas. One of the key points discussed was the popular colors for Easter nail designs. Pastel shades such as baby blue, soft pink, and mint green are all the rage this time of year. These colors not only represent the freshness of spring but also add a touch of elegance to your nails. We also delved into how to create a pastel Easter nail look. From choosing the right shades to experimenting with different patterns and designs, there are endless possibilities to express creativity and style. Moreover, we explored various Easter nail art ideas, including Easter egg designs and floral patterns. These designs are not only eye-catching but also capture the essence of the holiday spirit. Additionally, we discussed Easter nail stamping designs and bunny-themed nail art. These techniques allow you to showcase your love for Easter uniquely and playfully. As we look to the future, there are exciting developments and trends on the horizon for Easter color nails. Nail artists are constantly pushing boundaries and experimenting with new techniques and designs. So, watch for upcoming trends that may inspire your next Easter nail look. Thank you for taking the time to read this post. We hope you found it informative and inspiring. We encourage you to leave any comments or feedback you may have. And most importantly, have fun experimenting with different Easter color nail designs and let your creativity shine! Read the full article
0 notes
Photo

Vacation Nail Designs: Embrace Your Stunning Nail Art
Are you ready to embark on a journey of style and self-expression? Look no further than vacation nail designs; they are the perfect way to add a touch of wanderlust to your fingertips. Whether you're jetting off to a tropical paradise or simply daydreaming about your next getaway, these nail art ideas will transport you to a world of beauty and adventure. From vibrant beach-inspired patterns to delicate floral motifs, vacation nail designs offer endless possibilities for creativity. Imagine the feeling of dipping your toes into the warm sand with nails adorned in a sunset-inspired ombre design. Or perhaps you prefer a more whimsical approach, with palm tree silhouettes and tropical fruit accents. Whatever your destination or personal style, there's a vacation nail design to suit every taste. But vacation nail designs are about more than just aesthetics. They're a way to express your love for travel and exploration, even when you're not on the go. Each brushstroke and color choice tells a story, reminding you of past adventures and inspiring new ones. With a simple glance at your nails, you can transport yourself to a sun-soaked beach or a bustling cityscape. In this introductory article, we'll explore different themes, techniques, and trends in vacation nail designs. We'll discuss how to choose the perfect design for your next vacation and tips for achieving a salon-quality look at home. We'll also explore the benefits of nail art as a form of self-expression and share inspiring examples from nail artists worldwide. So, whether you're a seasoned nail art enthusiast or new to vacation nail designs, get ready to be inspired. Let your imagination run wild as we explore the endless possibilities of nail art and embrace the spirit of wanderlust. Get ready to embark on a nail art journey like no other.
How to Choose the Perfect Vacation Nail Design
Planning for a vacation involves many details, from choosing the destination to packing the right outfits. However, one thing that often gets overlooked is the perfect vacation nail design. Your nails can be a fun and creative way to express yourself while on vacation, so choosing a design that complements your destination and personal style is important. In this article, we will discuss some tips on how to select the perfect vacation nail design. When selecting a vacation nail design, it's essential to consider the destination. If you're heading to a tropical beach, vibrant and colorful designs that reflect tropical vibes can be a great choice. Think palm trees, exotic flowers, and bright sunset colors. On the other hand, if you're going on a city break, a more sophisticated and elegant design may be more suitable. Consider classic French tips, minimalist patterns, or metallic accents to match the urban atmosphere. Another factor to consider is your style. Do you love bold, statement-making designs, or do you prefer something more subtle and understated? If you like bold designs, opt for intricate patterns, geometric shapes, or nail art with crystals and rhinestones. If you prefer a more low-key look, pastel shades, ombre designs, or simple floral patterns can be a great choice. Lastly, don't forget to consider the length and shape of your nails. If you have shorter nails, opt for designs that elongate your fingers, such as vertical stripes or diagonal patterns. For longer nails, you have more room to play with intricate designs and bold colors. In conclusion, choosing the perfect vacation nail design involves considering the destination, your style, and the length and shape of your nails. By following these tips, you can ensure your nails are vacation-ready and make a stylish statement wherever you go. So, experiment with different designs and colors to find the perfect vacation nail design!
What Colors Are Trending for Vacation Nail Designs?
When it comes to vacation nail designs, choosing the right colors can make all the difference. Whether you're lounging on a tropical beach or exploring a vibrant city, your nails can reflect your vacation style. So, what colors are currently trending for vacation nail designs? Let's find out! One color that is always popular for vacation nail designs is turquoise. This vibrant blue-green shade instantly brings crystal-clear waters and sunny skies to mind. It's perfect for beach getaways or poolside lounging. Pair it with gold accents or white patterns to create a stunning tropical look. Another trending color for vacation nail designs is coral. This warm, peachy shade is reminiscent of beautiful sunsets and tropical flowers. It adds a touch of warmth and femininity to any vacation look. Try pairing it with a neutral base color or some floral nail art for a tropical vibe. If you're looking for something bold and eye-catching, neon colors are a great choice for vacation nail designs. Neon pinks, oranges, and yellows can add a fun and playful touch to your nails. They're especially popular for music festivals and beach parties. Combine them with some geometric patterns or glitter accents for an extra dose of excitement. For those who prefer a more understated look, pastel shades are a timeless choice for vacation nail designs. Soft pinks, blues, and lilacs can create a delicate and feminine look that is perfect for any destination. Add some floral decals or a touch of shimmer for an extra touch of elegance. In conclusion, when it comes to vacation nail designs, the current trending colors include turquoise, coral, neon shades, and pastels. These colors can help you create the perfect vacation look for a tropical vibe or a more understated elegance. So, experiment with these trending colors to find the ideal vacation nail design!
How to Achieve a Tropical Nail Design for Vacation?
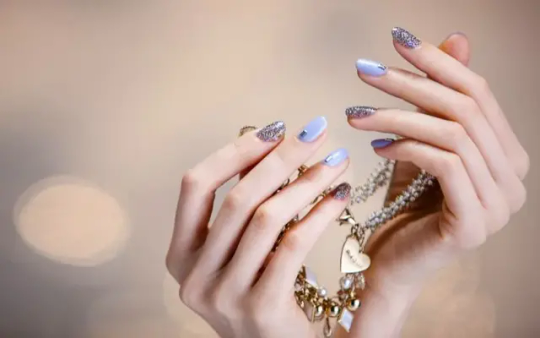
Are you planning a vacation? Don't forget to add some tropical flair to your nails! A vibrant and eye-catching nail design can be the perfect accessory for your vacation look. Whether you're heading to a beach destination or want to bring a touch of paradise to your everyday life, here are some tips on achieving a tropical nail design for your vacation. Start by choosing the right colors. Tropical nail designs often feature bright and bold hues inspired by nature. Think of shades like turquoise, coral, lime green, and sunny yellow. These colors will instantly transport you to a tropical paradise. Next, consider incorporating tropical motifs into your design. Palm trees, hibiscus flowers, pineapples, and flamingos are popular choices. You can either hand-paint these designs or use nail stickers for a more precise and professional look. Consider using different textures and finishes to add some extra dimension to your tropical nail design. You can try a glossy top coat for a shiny and polished look or experiment with matte or metallic polishes for a more unique and trendy vibe. Remember nail care! Before applying polish, ensure your nails are clean, trimmed, and shaped. Moisturize your cuticles to keep them healthy and prevent dryness or peeling. This will ensure that your tropical nail design looks flawless and lasts throughout your vacation. In conclusion, achieving a tropical nail design for your vacation is about embracing vibrant colors, incorporating tropical motifs, and experimenting with different textures and finishes. So, let your nails be the ultimate vacation accessory, and show off your tropical style wherever you go!
What Are Some Beach-themed Nail Designs for Vacation?
Are you planning a beach vacation and looking for fun, stylish nail designs to complement your getaway? Look no further! We have gathered some fabulous beach-themed nail designs to make your holiday more memorable. From playful palm trees to vibrant seashells, these designs will transport you to the sandy shores and sunny skies. One popular beach-themed nail design is the tropical sunset. This design features a gradient of warm colors, starting with a bright yellow at the base and gradually fading into shades of orange and pink. To add a touch of whimsy, you can paint silhouettes of palm trees against the sunset backdrop. This design is perfect for capturing the essence of a tropical paradise. You can opt for a seashell-inspired design if you prefer a more subtle look. Paint your nails in a soft, pastel shade and add delicate seashell decals or hand-painted designs. You can even incorporate some glitter or rhinestones to add a touch of sparkle. This design is elegant and sophisticated, perfect for a beachside dinner or a romantic stroll along the shore. A tropical floral design is a great choice for those who love vibrant colors and bold patterns. Paint your nails bright, summery colors, and add hand-painted flowers in contrasting shades. To create a unique and eye-catching look, you can also experiment with different floral patterns, such as hibiscus or plumeria. This design is fun and playful, perfect for a day of beach activities. In conclusion, there are countless beach-themed nail designs for your vacation. Whether you prefer a subtle and elegant look or a bold and vibrant design, there is something for everyone. So unleash your creativity, and let your nails be the perfect accessory for your beach getaway!
How to Create a Vacation Nail Design at Home?
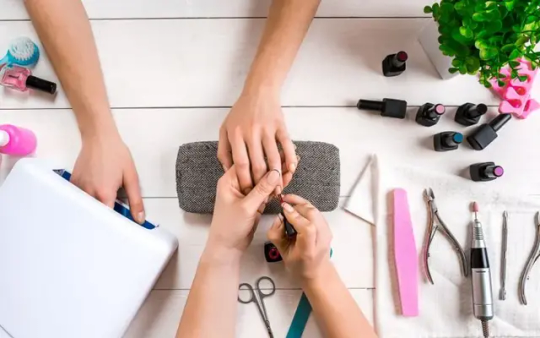
Are you dreaming of a tropical getaway but can't yet make it to the beach? Why not bring the vacation vibes to your fingertips with a stunning vacation nail design? Creating a vacation-inspired manicure at home is easier than you might think. In this article, we'll guide you through the steps to achieve the perfect vacation nail design that will transport you to paradise. Start by prepping your nails. Trim and shape them to your desired length and remove rough edges. Next, apply a base coat to protect your nails and ensure your design lasts longer. Choose a color that complements your vacation theme, such as a vibrant coral or a cool turquoise. Now it's time to get creative! One popular vacation nail design is the tropical palm tree. To create this look, use a thin nail art brush or a toothpick to draw palm tree silhouettes on your nails. Start with a brown polish for the trunk, and then add green leafy fronds. You can also add some coconuts for an extra touch of authenticity. Another vacation-inspired design is the beach sunset. Begin by painting your nails with a gradient of colors, starting with a light yellow at the base and gradually transitioning to orange and then a deep purple at the tips. Once the base is dry, use a small brush to create a silhouette of a palm tree or a beach umbrella against the sunset background. Consider adding tropical fruits like pineapples or watermelons for a more playful vacation nail design. Use bright colors and small brushes to create these fruity patterns on your nails. You can also experiment with nail art techniques like stamping or stenciling to achieve a more intricate design. Finish off your vacation nail design with a glossy top coat to seal in your artwork and add a professional touch. Now, you can show off your vacation-inspired manicure wherever you go! Creating a vacation nail design at home is a fun and creative way to bring a touch of paradise to your everyday life. So grab your nail polish and embark on a nail art adventure!
What Are Some Nail Art Accessories for Vacation Nail Designs?
Adding some accessories can take your manicure to the next level when it comes to vacation nail designs. Several nail art accessories can help you achieve the perfect vacation-themed nails, from beach-inspired motifs to tropical patterns. Here are some ideas to get you started: - Seashell Charms: Add seashell charms to your nails to bring the beach vibes. These tiny accessories can be easily attached to your nails using nail glue or a top coat. They instantly give your manicure a summery and tropical feel. - Palm Tree Stickers: Palm trees are synonymous with vacations and tropical destinations. You can find palm tree stickers in various sizes and colors to match your nail design. Apply them on your nails and seal them with a top coat for a long-lasting vacation-inspired manicure. - Glitter: Nothing says vacation like a little bit of sparkle. Add some glitter to your vacation nail designs to make them stand out. You can apply glitter polish to your nails or use loose glitter to create unique patterns and designs. - Tropical Nail Decals: Nail decals are a quick and easy way to achieve intricate designs without artistic skills. Look for tropical-themed decals such as flamingos, pineapples, and hibiscus flowers. Apply them on your nails and seal them with a top coat for a vibrant and eye-catching manicure. - Mermaid Scale Foils: Try using mermaid scale foils for a mermaid-inspired vacation nail design. These iridescent foils can be applied over a base color to create a mesmerizing effect. Seal with a top coat to ensure longevity. Incorporating these nail art accessories into your vacation nail designs will help you achieve a fun and festive manicure. Whether lounging on the beach or exploring a new city, your nails will be the perfect accessory to complete your vacation look. So get creative with your nail art, and have a fabulous vacation!
How to Maintain Vacation Nail Designs for Longer Durability?
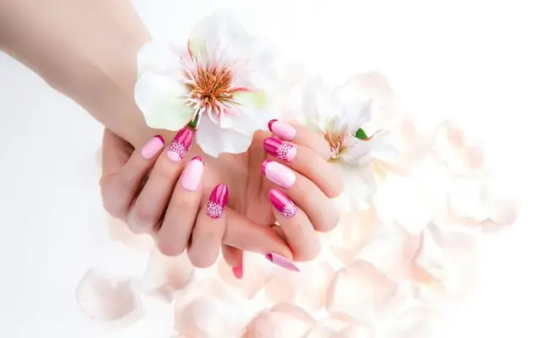
Having stunning vacation nail designs is a great way to show off your style and creativity while enjoying your time away. However, it can be disheartening when your beautiful designs chip or fade after just a few days. To ensure that your vacation nail designs last longer and stay vibrant throughout your trip, here are some tips to help you maintain their durability. First and foremost, it's essential to start with a good base. Before applying nail polish or design, ensure your nails are properly prepped. Remove old polish, and gently file your nails into your desired shape. Apply a base coat to protect your nails and create a smooth surface for the design to adhere to. When choosing nail polish for your vacation designs, choose high-quality brands with long-lasting formulas. Look for polishes that are chip-resistant and have a glossy finish. Additionally, consider using gel or shellac polishes, as they tend to have better-staying power than regular polishes. Once your vacation nail designs are complete, be mindful of how you use your hands. Avoid activities that can cause excessive wear and tear on your nails, such as opening cans or using your nails as tools. Wear gloves when doing household chores or engaging in activities that may damage your nails. To further protect your designs, apply a top coat every few days. This will help seal the design and add an extra layer of protection against chipping and fading. Additionally, moisturize your nails and cuticles regularly to keep them healthy and prevent them from becoming brittle. By following these tips, you can ensure that your vacation nail designs stay intact and vibrant for longer. You can enjoy your beautiful nails throughout your vacation with a little extra care and attention. So go ahead and show off your creativity with confidence! In conclusion, vacation nail designs are a fun and creative way to add flair to your holiday look. Throughout this post, we have covered various topics related to vacation nail designs, providing valuable information and tips to help you achieve the perfect design. We started by exploring some popular vacation nail designs, showcasing a range of options from bold and vibrant colors to intricate patterns and designs. We then delved into choosing the perfect vacation nail design, emphasizing the importance of considering your destination, personal style, and overall theme. Next, we discussed the trending colors for vacation nail designs, highlighting the popularity of bright and tropical shades such as coral, turquoise, and neon yellow. We also provided insights on achieving a tropical nail design for your vacation, including tips on using palm tree decals, floral patterns, and vibrant colors that mimic the beauty of a tropical paradise. For those looking for beach-themed nail designs, we shared some creative ideas, such as seashell patterns, mermaid scales, and beach sunset gradients. We also provided a step-by-step guide on creating a vacation nail design at home, encouraging readers to unleash their creativity and experiment with different techniques and tools. We discussed various nail art accessories such as glitter, rhinestones, and nail wraps to enhance your vacation nail designs. We suggested incorporating these elements into your designs for added glamour and sparkle. We also emphasized the importance of maintaining your vacation nail designs for longer durability, providing tips on proper nail care, and using top coats and sealants. Looking ahead, we anticipate that vacation nail designs will continue to evolve, with new trends and techniques emerging. Whether incorporating sustainable materials or experimenting with unique textures and finishes, there are endless possibilities to explore. Thank you for taking the time to read this post. We hope that you have found it informative and inspiring. We encourage you to leave any comments or feedback, and we look forward to hearing about your vacation nail design experiences. Happy vacationing! Read the full article
0 notes
Photo
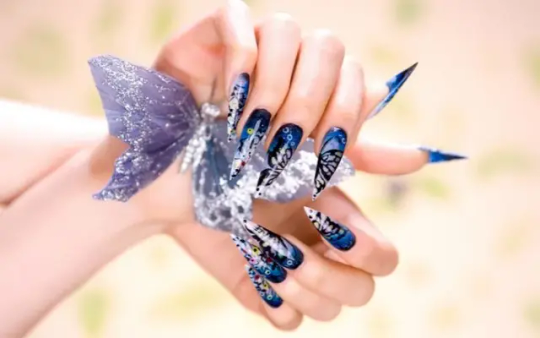
Witchy Nail Designs: Unleash Your Inner Sorceress with Nail Art
Are you ready to spell style and mystery with your nails? Look no further than the captivating world of witchy nail designs. From mystical symbols to dark and captivating colors, these nail art creations are the perfect way to embrace your inner sorceress. With their origins rooted in ancient folklore and modern witchcraft, witchy nail designs have gained popularity in recent years. They offer a unique and magical twist to traditional nail art, allowing you to express your individuality and unleash your creativity. Whether you're a seasoned witch or fascinated by the occult, these designs will captivate and inspire you. One of the most popular trends in witchy nail designs is using mystical symbols and sigils. These intricate and meaningful patterns can be traced back to ancient civilizations and are believed to hold special powers and energies. From pentagrams to crescent moons, each symbol tells a story and adds a touch of mysticism to your nails. But it's not just the symbols that make witchy nail designs so enchanting. The color palette plays a crucial role in creating the perfect witchy vibe. Deep, dark shades like black, burgundy, and deep purple evoke a sense of mystery and magic. Metallic accents and glittery finishes add a touch of glamour and sparkle reminiscent of a starry night sky. Whether you're attending a Halloween party or want to embrace your witchy side year-round, witchy nail designs offer endless possibilities for creativity and self-expression. So grab your nail polish and let your inner sorceress shine through. In the following articles, we'll delve deeper into the world of witchy nail designs, exploring different techniques, inspiration sources, and tips for achieving the perfect witchy manicure. Get ready to cast a spell with your nails and embrace the magic within.
What Are Witchy Nail Designs?
Witchy nail designs have become increasingly popular in recent years, offering a unique and mystical way to express oneself through nail art. These designs draw inspiration from witchcraft, magic, and all things supernatural, allowing individuals to embrace their inner witch and showcase their love for the occult. One of the most common elements in witchy nail designs is dark and mysterious colors. Black, deep purple and rich burgundy are often used as base colors, representing the darkness and mystery associated with witchcraft. These colors provide a striking contrast against the skin and create a bold statement. In addition to the dark colors, witchy nail designs often incorporate symbols and imagery related to witchcraft. This can include pentagrams, crescent moons, spell books, and cauldrons. These symbols not only add an element of mysticism to the design but also serve as a way for individuals to connect with their spiritual side. Another popular trend in witchy nail designs is using crystals and gemstones. These can be incorporated into the design either by using nail stickers or by creating intricate hand-painted designs. Crystals such as amethyst, obsidian, and moonstone are often used, as they are believed to possess magical properties and enhance one's spiritual energy. When it comes to the actual application of witchy nail designs, there are endless possibilities. Some individuals prefer a minimalist approach, with subtle symbols and designs, while others go all out with elaborate and intricate patterns. The choice is entirely up to the individual and their style. In conclusion, witchy nail designs offer a unique and enchanting way to express oneself through nail art. Whether you're a practicing witch or drawn to the mystical world, these designs allow you to embrace your inner magic and showcase your individuality. So go ahead, let your nails cast a spell, and embrace the witchy side of life.
How to Create Witchy Nail Designs?
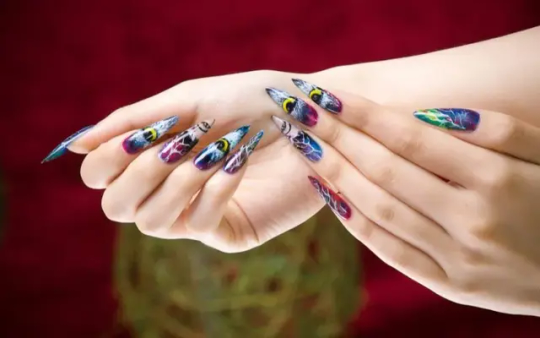
Witchy nail designs have become increasingly popular, allowing individuals to express their love for all things magical and mysterious. If you want to create your witchy nail designs, you've come to the right place. In this article, we will explore different techniques and ideas to help you achieve the perfect witchy manicure. One of the key elements of witchy nail designs is the color palette. Dark, moody shades such as black, deep purple, and burgundy create an eerie and mystical atmosphere. You can also incorporate metallic shades like silver or gold for glamour. To add a witchy touch to your nails, consider incorporating symbols and patterns associated with witchcraft. Pentagrams, crescent moons, and stars are popular choices. You can use nail art brushes or stencils to create these designs with precision. Don't be afraid to experiment with different shapes and sizes to create a unique look. Another way to enhance your witchy nail designs is by adding texture. Matte top coats can give your nails a velvety finish, while glitter or holographic nail polishes can add a touch of magic. You can also experiment with nail powders or foils to create a mesmerizing effect. When it comes to witchy nail designs, the possibilities are endless. From spellbinding ombre gradients to intricate witchy landscapes, let your creativity run wild. Don't forget to seal your designs with a good-quality top coat to ensure they last longer. In conclusion, creating witchy nail designs is a fun and creative way to express your love for all things mystical. By choosing the right colors, incorporating symbols and patterns, and adding texture, you can achieve the perfect witchy manicure. So grab your nail polish and get ready to cast a spell with your stunning witchy nails.
What Colors Can I Use for Witchy Nail Designs?
When it comes to witchy nail designs, the color palette plays a crucial role in creating the perfect mystical and enchanting look. Whether you're a witchy enthusiast or simply looking to add a touch of magic to your nails, choosing the right colors is essential. In this article, we'll explore some of the most popular colors used in witchy nail designs. One of the classic colors often associated with witchcraft is black. Black nails can evoke a sense of mystery and power, making them a staple in witchy nail designs. Pairing black with dark shades like deep purple or navy blue can create a spellbinding effect. If you want to incorporate a touch of nature into your witchy nail design, earthy tones are perfect. Shades of green, brown, and gray can represent the elements of the earth, connecting you to the natural world and its magical energies. For a more ethereal and mystical look, consider using metallic shades like silver or gold. These colors can add a touch of glamour to your witchy nail design, making them perfect for special occasions or celebrations. In addition to these classic colors, don't be afraid to experiment with bold and vibrant shades. Deep reds, purples, and blues can represent the supernatural and add a dramatic flair to your nails. Remember, witchy nail designs are all about expressing your individuality and embracing your inner enchantress. So, mix and match colors, add glitter or rhinestones, and let your creativity run wild. In conclusion, there is no shortage of colors for witchy nail designs. Whether you prefer dark and mysterious shades or vibrant and bold colors, the key is choosing colors that resonate with your style and capture the essence of witchcraft. So go ahead, experiment, and let your nails cast a spell of beauty and magic.
What Symbols Can I Include in Witchy Nail Designs?
Witchy nail designs have gained popularity in recent years, allowing individuals to express their love for all things mystical and magical through their manicures. If you're looking to add some enchanting symbols to your witchy nail designs, here are a few ideas to inspire you. - Moon Phases: The moon is significant in witchcraft, symbolizing feminine energy and life cycles. Incorporating different moon phases, such as crescent or full moons, can add a touch of celestial beauty to your nails. - Pentagram: The pentagram is a powerful symbol often associated with witchcraft. It represents the five elements (earth, air, fire, water, and spirit) and can be a striking addition to your nail art. - Triple Goddess: The triple goddess symbolizes the three stages of a woman's life - maiden, mother, and crone. This symbol can be incorporated into your nail designs to honor the divine feminine and celebrate the different phases of womanhood. - Tarot Cards: Tarot cards are often used for divination and guidance. Including images of tarot cards, such as the High Priestess or the Moon, can add a mystical touch to your nails. - Runes: Runes are ancient symbols used in Norse mythology and witchcraft. Each rune has its meaning and energy. Adding runes to your nail designs can infuse them with ancient wisdom and mysticism. - Crystal Shapes: Crystals have long been associated with healing and spiritual energy. Incorporating crystal shapes, such as points or geodes, into your nail art can bring earthy magic to your fingertips. Remember, the symbols you choose for your witchy nail designs should resonate with you and reflect your connection to the mystical world. Let your creativity soar, and embrace the magic at your fingertips!
How to Take Care of Witchy Nail Designs?
Witchy nail designs are a popular trend that allows individuals to express their unique style and embrace their love for all things magical. However, it's important to properly care for these intricate designs to ensure they last as long as possible. In this article, we will explore tips and tricks for maintaining witchy nail designs and keeping them looking fabulous. One of the most important aspects of caring for witchy nail designs is to protect them from chipping or peeling. To do this, it's essential to apply a top coat after the design has been completed. This will help seal the design and provide an extra layer of protection. Additionally, it's important to avoid activities that may cause damage to the nails, such as excessive typing or using your nails as tools. Another key aspect of maintaining witchy nail designs is to moisturize regularly. Dry nails are more prone to breakage and damage, so it's important to keep them hydrated. Applying cuticle oil or hand cream daily can help prevent dryness and keep your nails looking healthy and vibrant. In addition to moisturizing, it's important to regularly clean your nails to remove any dirt or debris that may accumulate. Use a gentle nail brush or a soft toothbrush to scrub your nails and keep them clean gently. This will not only help maintain the overall appearance of your witchy nail designs but also prevent any potential infections. Lastly, it's important to be mindful of the products you use on your nails. Harsh chemicals and acetone-based removers can strip away the design and cause damage to your nails. Opt for gentle, non-acetone removers, and be cautious when using other nail products. In conclusion, taking care of witchy nail designs is essential to ensure they last and look their best. By following these tips and tricks, you can maintain your nail designs and embrace your witchy style with confidence.
What Tools Do I Need for Witchy Nail Designs?
When creating enchanting and mystical nail designs, having the right tools is essential. Whether you're a beginner or a seasoned nail artist, having the right equipment can make all the difference in achieving the perfect witchy look. In this article, we will explore the must-have tools for creating stunning witchy nail designs that will leave everyone spellbound. First and foremost, you'll need a good set of nail art brushes. These brushes come in various sizes and shapes, allowing you to create intricate and detailed designs. Look for brushes with fine bristles and a comfortable grip to ensure precision and control during application. From thin lines to intricate patterns, these brushes will be your trusty companions in bringing your witchy nail designs to life. Next, you'll need a set of dotting tools. These tools are perfect for creating dots, circles, and other small details on your nails. They come in different sizes, allowing you to experiment with various dot sizes and patterns. Whether creating a celestial design or a potion-inspired pattern, dotting tools will help you achieve the perfect finishing touches. To add a touch of magic to your nail designs, invest in some nail stencils. These stencils come in various shapes and designs, such as moons, stars, pentagrams, and witch hats. Place the stencil on your nail and apply your desired nail polish color. Once you remove the stencil, you'll be left with a perfectly shaped design that's sure to impress. Lastly, remember the essentials: a good base coat and a top coat. A base coat will help protect your nails from staining and provide a smooth surface for your designs. A top coat will seal in your design, add shine, and extend the life of your nail art. In conclusion, creating witchy nail designs requires a few essential tools. With nail art brushes, dotting tools, nail stencils, and the right base and top coat, you'll be well-equipped to create stunning and magical nail designs that leave everyone spellbound. So gather your tools and let your creativity soar as you embark on your journey into the world of witchy nail art.
Can I Wear Witchy Nail Designs for Everyday?
Witchy nail designs have become increasingly popular in recent years, with their mystical and enchanting aesthetic capturing the attention of many. But can you wear these designs for everyday occasions? The answer is a resounding yes! With the right approach and creativity, witchy nail designs can be a stylish and unique addition to your everyday look. One of the great things about witchy nail designs is their versatility. From simple and understated to bold and intricate, there are endless possibilities to suit your style. Whether you prefer dark and moody colors or vibrant and whimsical designs, there's a witchy nail design for everyone. When it comes to wearing witchy nail designs every day, it's important to consider the practicality and durability of the design. Opt for high-quality nail polishes and top coats to ensure your design lasts longer and remains intact throughout the day. Additionally, remember your daily activities and choose a design that won't hinder your ability to perform tasks. To seamlessly incorporate witchy nail designs into your everyday look, consider coordinating your nails with your outfit or accessories. This can create a cohesive and put-together appearance that showcases your style. Experiment with different colors, patterns, and textures to find the perfect combination that suits your mood and outfit. In conclusion, wearing witchy nail designs every day is not only possible but also a great way to express your individuality and add a touch of magic to your look. Embrace the versatility and creativity witchy nail designs offer, and you'll be sure to turn heads wherever you go. So go ahead, unleash your inner witch, and rock those enchanting nails!
Where Can I Find Inspiration for Witchy Nail Designs?
When it comes to witchy nail designs, finding inspiration is key. Whether you're a nail artist or someone who loves experimenting with different nail looks, having a wide range of ideas to draw from is essential. So, where can you find inspiration for witchy nail designs? Let's explore some options. One of the best places to find inspiration is social media. Platforms like Instagram and Pinterest are treasure troves of nail art ideas. By following hashtags such as #witchynails or #halloweennails, you can discover many witchy designs created by talented nail artists. You can also join nail art communities and groups where members share their creations and provide tips and tricks. Another great source of inspiration is fashion magazines and blogs. Many fashion publications feature nail art trends, including witchy designs, especially during the Halloween season. Flip through the pages or browse online to find unique and eye-catching nail looks that you can recreate or modify to suit your style. If you prefer a more hands-on approach, attending nail art workshops or classes can be a great way to learn new techniques and get inspired. These workshops often feature demonstrations by experienced nail artists who can guide you in creating stunning witchy nail designs. Additionally, interacting with fellow participants can spark creativity and provide new ideas. Lastly, don't forget about nature. The mystical and enchanting elements associated with witchcraft can be found all around us. From moon phases to mystical creatures, nature offers endless inspiration for witchy nail designs. Walk in the woods, visit botanical gardens, or observe the night sky to gather ideas for your next nail art masterpiece. In conclusion, finding inspiration for witchy nail designs is all about exploring different sources. Whether it's social media, fashion publications, workshops, or nature itself, there's no shortage of ideas to fuel your creativity. So, go ahead and dive into the world of witchy nail art – the possibilities are endless! In conclusion, "witchy nail designs" are a captivating and mystical way to express your individuality and embrace your love for all things witchy. Throughout this post, we have explored various aspects of witchy nail designs, including what they are, how to create them, and what colors and symbols you can incorporate. We discussed the importance of understanding the meaning behind witchy nail designs and how they can serve as a form of self-expression. By embracing these designs, you can tap into your power and connect with the magical world. Creating witchy nail designs is a fun and creative process that allows you to experiment with different colors and symbols. We provided step-by-step instructions on creating these designs, ensuring that even beginners can achieve stunning results. When it comes to colors, the options are endless. From deep and mysterious shades like black and purple to earthy tones like green and brown, you can choose colors that resonate with your witchy aesthetic. Symbols play a significant role in witchy nail designs, allowing you to incorporate elements of witchcraft and spirituality. From pentagrams to crescent moons, these symbols add a touch of enchantment to your nails. Taking care of your witchy nail designs is crucial to ensure they last longer. We shared tips on maintaining their beauty, including using a top coat and avoiding harsh chemicals. To create these designs, you will need a few essential tools, such as nail polish, dotting tools, and nail art brushes. These tools will help you achieve intricate and detailed designs. While witchy nail designs are perfect for special occasions, there's no reason why you can't wear them every day. Embrace your inner witch and let your nails reflect your unique style. Looking ahead, we anticipate that witchy nail designs will continue to gain popularity. Read the full article
0 notes


