
Welcome to Amanda Witt and Rachel Lillyman's blog combining the world of art with gardening. Here you can find how-to’s on sketchbook ideas, collages, tips for watercoloring, drawing, and more. You can also learn to care for plants and start your own garden, along with many garden DIY ideas. We hope to inspire you to get creative with your artistic side and to learn the joys of gardening.
Don't wanna be here? Send us removal request.
Statistics
We looked inside some of the posts by horticultureandfineart and here's what we found interesting.
Average Info
Notes Per Post
0
Likes Per Post
0
Reblog Per Post
0
Reply Per Post
0
Time Between Posts
5 days
Number of Posts By Type
Text
15
Photo
2
Last Seen Tumblr Blogs


Fun Fact
The average Tumblr user visits about 67 pages every month.
Text
Sculpture
Sculpture - Amanda Witt
Scupture is a medium that I really like because you can do whatever you want with it. There’s a lot of freedom with sculpture and there’s something special about being able to look at an art piece that in 3D. Being able to work with your material in your hands to really manipulate it is something I find to be really fun in sculpture. Instead of working on a something flat you’re building in space and working with form. There are so many different types of sculptures out there, but in this post, I’m going to talk about some the artists that I really like and draw inspiration from, along with some little pieces I’ve done.
Nikki McClure
Nikki McClure is an author who writes and illustrates her own children’s books. She uses black paper with an X-acto knife to cut out shapes to make her pieces. While her work is 2D, she cuts and uses the paper in a way that’s like with sculpture. She uses the negative and positive spaces to create beautiful pieces of art that give sort of a whimsical feel to them. I really love her work and the overall feel they give. Her lines are clean and the pieces are simple, but intricate at the same time. I really like how most of her scenes are set in nature, and there’s an overall movement. I love her work a lot and while it isn’t really sculpture, I still draw a lot of inspiration from her in my own mixed media and 3D pieces from her overall style and how she handles paper.


Gavin Worth
Gavin Worth is a sculptor who works with wire. He’s from Zimbabwe and all of his sculptures are on a larger scale. After seeing his work, I immediately wanted to work with wire. His pieces are very minimal, but there is beauty in the simplicity of his art. His pieces really capture the beauty of people, mostly women, and does it in a way where he’s drawing with the wire. The detail is simply conveyed with lines, yet he’s able to capture so much emotion in them


After seeing Gavin Worth’s art, I wanted to do a wire sculpture in the same vein as his, drawing with the wire. I decided to do a spider, with somewhat exaggerated proportions. Starting I cut out a thicker wire to be the outline. Kinda like the skeleton for the sculpture. Then I took a small gauge of wire and put it on to fill in the details. I used the wire like I was drawing in aid with one line carefully filling in the details without making it too complicated. This was my first experience using wire and I really liked it. I hope to do more with it in the future.
Another piece I did was a small section of a women’s body’s this time out of clay. The clay we used was the type you keep wet and then have to fire when you’re done. Again, this was the first time I’ve worked with a medium. It took a while to get used to, but eventually, I was able to mold it into a shape I liked. After molding it, I left it the harden for a bit just by air drying it. Now that it was harder, I could use wooden and metal tools to sculpt and carve it. When using this type of clay, you have to be careful about how thick the clay is, if it’s too thick then it could explode in the kiln, too thin it could shatter. So after I made my body, I carved out the inside from the bottom to make sure it wasn’t too thick. I also decided that I wanted to add in a wire cage surrounding the body, so I poked some small holes in it before sending it off to be fired. When it was done, I painted it white and made the cage. The cage was done by twisting pieces of wire and then tying them together with more wire. I then wanted to use a found object in my piece and found a ring that I cut and glued on top. Found objects can really help bring a piece together, and some sculptures are made completely of found objects. I like to keep old jewelry and go to antique stores to look for anything that catches my eye so I can save it for possible future sculptures.

Another sculpture I did was for my recent history project about the Rape of Nanking. During the massacre, women were the main targets and the ones who suffered the most, so I wanted to make a piece that really reflected that. I was feeling inspired by clay sculpted dolls that I’ve seen on Pinterest, so I wanted to make a shattered China doll. To do this I used polymer clay, which is different than the clay I used to make the other piece. The other clay is also used in pottery, and you have to keep covered and wet or it will dry up. Polymer clay feels more like rubber and won’t harden unless you bake it. Again, it took a while to get used to, it wasn’t as moldable as the other clay, but after warming it up with my hands it because pretty easy to use. I also learned a trick to use rubbing alcohol to help blend the clay and soften it. Starting this piece I began with making an armature with aluminum foil. I made a base for the head and a base for the body and began sculpting. I even added realistic looking eyes I got online to make her feel more real. I used wooden and metal clay tools, along with toothpicks, Q-tips, and a paintbrush to use with the rubbing alcohol. I sculpted the head and baked it, then I sculpted the hair on top of it. I did it this way so that when I was sculpting the hair, I wouldn’t accidentally mess up the head. I then made the body and added in cracks to make her look shattered and baked that as well. Once everything was harden, I painted it all. I painted on more traditional makeup and I wanted to keep her face pretty to represent the before of the massacre. On her body, I deepened the cracks by adding different shades of gray for the different weight of the cracks. Once I finished painting, I went to work on her headpiece. Her headpiece is made of found objects, old jewelry, beads, and string. I took apart some necklaces and used the beads and some other smaller beads and attached it to some string to make the earrings, and the hanging part of her headpiece. The rest of her headpiece I put together with more found objects, and after gluing them on I was finished.


0 notes
Text
Advice I’ve Gotten
Advice I’ve Gotten - Amanda Witt
When creating art or being an art student there are lots of struggles along the way. From losing motivation to create art and having bad art days, to worrying about possible future art schools. While I’m still learning myself, there’s a lot I’ve already learned. In this blog post, I want to talk about some things to keep in mind while going through your artist path. Some of these tips can apply to not just art, some can help in whatever interest or major you may have. There’s still a lot for me to learn in the future, but these are some things I’ve kept in mind and that have certainly helped me from time to time.
Losing inspiration or motivation to create art and putting art to side. This has happened to me many times over the years. Where I would sit down open up my sketchbook and not be able to draw anything. Or I would walk into drawing class and not have the motivation to start any new projects or even keep working on old ones. Sometimes I’ll have a project in mind but never start it or get around to doing it. This is bad for several reasons, for one, it prevents you can creating more art pieces and from growing. After not doing art or putting off projects for a while and then looking back, it feels like accomplishing nothing. Sometimes with art, you just have to do it, or else it’ll never get done. When it comes to finding ways to motivate myself, I like to think of how when I’m done I’ll feel more accomplished and be able to add another piece of art to my finished works, or another page in my sketchbook. If I still need extra motivation I’ll set deadlines for myself for certain projects, that way it pushes me to work on something if I find myself having any free time. If I have the motivation to create, but can’t think of anything, I go online to find inspiration. Looking through Pinterest for ideas or other artists online always helps me for when I need to feel inspired. You can even look up art projects online, or sketchbook prompts. For art students, you can even go to one of your teachers an ask for extra projects an see what they give you. There are lots of resources for ideas and projects out there, it just takes some willpower to be able to create sometimes.
Having bad art days. It happens to everyone, where you’re trying to create but whatever you’re doing isn’t working or falls flat. This can be really discouring and even frustrating to the point where you don’t even want to create any more. A lot of times I end up left feeling like my art sucks or it’s not good enough. When overcoming this I just try to remember that everyone has off days and this is just an off day for me. I try to keep in mind that I’m not the only one who struggles and that one bad art day doesn’t devalue all my other works. If I’m working on a project and find that I’m getting frustrated with, then I like to take a short break or work on something else. After looking at a piece for so long and trying to work on it while being frustrated, it’s good to step back for a bit and take your mind off of it. Sometimes if I’m in a mood where I want to create but I’m just having an off day, I’ll go into my sketchbook and create an art dump page. Here I write all of my thoughts and sketch and doodle whatever I like, even if it’s bad. Think of it as getting the bad art out in a way. Doing this allows me to work on something and like create, even if it’s a quick little sketchbook page I still feel like I’m doing something. And if I really don’t like it I can just tear it out and start again. Making little art dump pages can even be fun, being able to doodle without thinking too much about it and just doing it. It’s a way to keep busy and create when having an off day, or if your bored and want to draw.
Finding what your own style is. This is something that I’m still working on, but it’s important. Finding your own style is a way to make your own brand and create art that reflects who you are. When creating portfolios it’s good to develop your style so it shows what you like to create and how you do it. It can also show your own original ideas. Taking inspiration from other artists is good, but when you’re able to have your own style and your own idea, then it’s completely yours. For me, it’s difficult because there are so many different things to try in art and I want to experiment with all of them. There are definitely certain things I can find myself liking more, but I’m still in the process of finding a style that’s completely me. I find myself liking lots of different mediums and I want to find a way to developing a style that I’m able to communicate through multiple mediums. When trying to find your own style, just experiment with different things. After finding what you gravitate towards most, work on that to make it your own. See what mediums you like the most and what style you work best in, even the subject of your art can reflect your own style. Trying different things and taking what you like and making it your own is a great way to finding your own style.
Worrying about the future. This is something I find myself doing a lot. In the future for me, I want to go to an art college, but after that I’m not sure what will happen. Getting from this point now to an art college will be a challenge in itself. There is some advice I’ve gotten from teachers and seniors, and even friends currently in an art college. One of the things is to have a plan, but be flexible. Start by looking at your options and finding which schools you want to apply to. Do research and go in tours to get an idea. If you still haven’t decided what you want to major in, that’s okay, you can start in one thing and change it during later on. Even if you decide you don’t want to go to college that’s okay, figure out a plan for after school that works for you. Just get a general plan as to what you want to do so you aren’t completely in the dark. Another thing is if you’re looking at art schools, try to start putting together your portfolio as soon as you can. This way you’ll be able to think about how you want to bring it all together and you’ll have plenty of work to show. Colleges can also be really expensive, and to help with that try and apply to different scholarships. You never know if you might get it, and any amount helps. Another thing is to put yourself out there. This is not only good for just college, but in life. This can be in volunteering, leadership positions, and even showing support in the community. Having experience is things like these can really help you become well-rounded and possibly help for jobs or school. Even showing support at an art gallery or introducing yourself can be a way to get your name out. This way people can know about you and perhaps be interested in working with you. After planning and figuring out an idea for life after school, you need to learn to be flexible. Maybe you didn’t get into your top college pick, or you can’t go for financial reasons, or you decide college may not be the best for you. That’s all okay. Just because you run into an obstacle like this doesn’t mean you can be successful or have a good life. Be flexible and figure out a new plan.
This is all advice and things I’ve learned from my own experiences and from things I’ve learned from others. It doesn’t stop here, and I still have a lot to learn. Just by trying new things and asking others you can still learn a lot.
0 notes
Text
Unknown to Famous
Unknown to Famous by Rachel L.
Creating art is one thing. Getting recognized for your artwork is another. Many many artists, including myself, create lots of good art, and yet nobody knows who they are. The truth is, getting out there can be difficult. But, there are many different ways to get yourself known.
One thing you have to know is that you can not be modest. If you want people to know about your work, you have to show it off. Now, don’t be completely full of yourself and think your better than other people, because that is just annoying. But you cannot put down yourself or your work, or else people will listen to what you say and agree with you. If someone gives you a compliment, you can’t say, “Oh, no, I hardly tried on that one. It’s so bad.” This will not work. Sometimes, people act modest like that just to get attention and praise, thinking that people will say, “What! Don’t say that! It’s so good,” but in the art community, if you want people to like your work, you cannot be modest or fish for compliments.
One way to get recognized is to create a social media account. There, you can post all of your artwork that you want to show off. Some good platforms are Instagram, Snapchat, or Tumblr. Instagram or Tumblr would be more long term displays of your artwork, because you have all of your art on one page and it doesn’t go away until you make it go away. Snapchat would be for more quick little snippets of your work, just to get it out there and get eyes on it, because photos on Snapchat delete immediately.
Another platform to put your art on would be a website. You can create your own website for not very much money, and on it you can show off all your work, and maybe advertise some of your art that is for sale! This does have it’s disadvantages, though, because it’s not as out-there or as accessible as it is on social media, because on social media, your art might just show up on peoples feed, so they are directly exposed to it. But, with a website, it doesn’t just pop up, you have to search for it. So, websites are typically better once you are more well known.
You can also enter your art into art contests, such as scholastic art and writing awards. If you get an award in a contest, everyone involved and more will see your art. That is very good publicity right there. Also, if someone is interested in buying some of your artwork, you can tell them, “Yeah, I won these awards and such and such,” and they will know that your art is popular and credible, so they will snatch it up.
Another way to get your art seen is to have it put up in galleries. To do this, you must contact the owner or manager of an art gallery, and tell them about you and about your work, and ask if they will set up your work for their next exhibition. If you get your art into a gallery, it will be very helpful for making you well known because every single person who walks in there will see your name and your art. If they like it, they will tell there friends to go check it out. You can also sell your art when it is in a gallery, because since everyone is seeing it, there will be more people who know about it and have easy and direct access to buying it.
If you have farmer’s markets or local artisan markets in your area, you should try to see if you can set up a table / stand in the market. This is prime territory for selling art, because you have crowds of people there who are ready to buy stuff.
Once you are better known, if you are offered a commission, you should definitely accept it. This is because if you do commissions for people and you do a good job, then they will spread the word that you did that art piece, so you are more likely to get more commissions from more people.
In summary, getting your art to be well known is hard, but definitely possible if you use all your options and don’t stop ‘till you reach the top.
0 notes
Text
Art and Plants, Connected
Art and Plants, Connected. By Rachel L.
So far, in this blog, we have talked about art, or about plants, but never have we talked about both art and plants in the same context, at the same time. This blog is here to change that.
How plants influence art:
Art is a very broad subject, and it is highly influenced by plants and nature, physically and abstractly. Physically, plants can play a major role in creating art. Mediums such as pigmentation, paper, and wood all can come from plants and are all vital parts of creating art. Pigment is used to create color in pastels, markers, colored pencils, paint, and ink. Paper, obviously, is the backbone of almost all two-dimensional art. And, wood is very helpful when making sculptures. Plants can also be used in art, not just as a medium. Dried flowers make great photographs or sculptures. Pressed flowers or leaves can be used in two-dimensional art such as a multimedia painting, embellishments in a sketchbook, or the front of a greeting card. But, plants also have an enormous effect on art in a not-physical way. A lot of art is about plants, where plants are the subject matter, nature is used as color schemes, or the art is made of organic shapes and lines. If art has plants as it’s subject matter, that means that the peice of art is about plants - it depicts or renders plants. If nature is used as a color scheme in an artwork, then the colors in the art will be colors found in nature, such as dark green + dark blue + light grey + dark grey would be a mountain forest color scheme, or such and such. Also, art can have its foundations in plant-like principles, meaning organic (irregular, not geometric) lines and shapes.

How art influences plants
Now, this subject is more difficult, because plants aren’t really influencable since they don’t have eyes or ears. But, we can pretend like they are influenced by art! So, you could make a garden involving decorative pots with a fence made out of mosaicked wood, and the plants would be influenced by the art because the art is giving them a place to stay. Or, the garden’s architecture could be very fancy and artistic.

0 notes
Text
How Art Took Over
How Art Took Over by Amanda Witt
I’m not entirely sure of when or how my love for art began, in fact, I believe it was always there. I think that everyone has a yearning for creativity, at least when they’re a kid.
When you’re little, you’re taught to use your imagination in order to develop certain thinking skills. Being creative just goes hand in hand with having a good imagination. You then learn how to write and are encouraged to draw in order to develop the muscles in your hands. With learning to draw and having this young creative energy, of course, anyone would want to create. This energy can be focused towards many other things, not just art, in fact, in 2nd grade I was interested in learning to play the piano. The point is, when you’re a kid, you have an unlimited creative energy. You don’t care what other people think, or if your work is good or not, you just want to have fun and to create. It isn’t until you grow older that this energy wears off. Around the age of 10 you start to get an understanding of if your work is good or not. You draw something and look at it, then realize that it doesn’t look like the actual thing. It’s at this point where most people stop at trying to create. Their work isn’t as good as they thought or were told, and that becomes discouraging, causing them to quit. However, if you have the passion and the drive to keep trying, the creative energy doesn’t die.
When I was little, my favorite thing to do was to draw. I had a pretty impressive collection of colored pencils, crayons, and construction paper, courtesy of my grandma, and would draw random little drawings and give them to family members as gifts or hang them on the fridge. These drawings weren’t anything impressive, but that didn’t matter to me, I just loved doing it. In about 4th grade, however, I began to notice a difference between me and the other kids in my class. Every Thursdays we went to the art room for about 47 minutes to work on some art project, and I noticed I was the only one really taking the projects seriously. While the other kids drew random, nonsensical objects to try and get a laugh out of their friends, I focused really hard on my piece, trying to get it to look right. The other kids, my parents, and my art teacher began to notice this as well. After each project, our work was displayed by the library and compared to everyone else in my grade, mine seemed to stand out. One of my art teacher’s favorite pieces I did was an oil pastel drawing of some sunflowers. At each table, she put a jar of sunflowers in the center for us to draw, inspired by Van Gogh’s Sunflowers. Everyone else drew a pretty standard stereotypical jar of sunflowers, bright yellow petals, the face of the flower facing straight forward, maybe one flower facing to the side. However, mine seemed to be more realistic. It wasn’t anything seriously impressive, but for a 4th grader, it was pretty good. My sunflowers faced in all different directions, the petals had lots of colors in it for shading and dimension, and it seemed I had a pretty good grasp of form. My art teacher would talk to my parents and say how she could tell I really have a passion for art, and that it really showed in my work. This is around the time where I began to take art more seriously. I recognized that compared to the other kids, my work was better and I was proud of that. I wanted to keep that going, not just because I wanted to be the best, but because I felt a real passion for it and felt good at something.
When I was 11, I began to take art lessons at a local art studio. It was in a small building close to where we live next to the courthouse, my dad was driving by and happened to see it. We stopped by, and not too long after I was signed up to go there twice a week for the summer. This is when my art skills really developed and it wasn’t just talent. I feel like all creators have real talent in their field, but raw talent alone will only get you so far. It also takes skill, driven by hard work, practice, and passion to really be successful. Anyone can create a painting, take a nice picture, or play an instrument, but it takes lots effort to be successful at it. During these art lessons, I was able to learn in-depth about creating works of art and the thinking process behind it. The studio was a self-run business owned by a sweet lady. She did commissions for different people while giving out art lessons to kids and teens. After a couple of weeks there, she began to see the passion I had for art and wanted to help me take my art a step forward. She taught me how to use charcoal, pastels, graphite, and how to paint. When the summer ended, I continued to take lessons there, once a week after school. During these lessons, I really began to push myself and my art. As soon as I finished one thing, I immediately wanted a new challenge. My skill began to grow, and so did my passion, I decided that I wanted to find a way to make art my living.
One day in 7th grade, I noticed my art teacher talking to a girl about creating a large portfolio. When they were done talking I asked what the portfolio was for, my teacher explained to me that she was trying to get into a governor’s school for the arts. This is when I learned about Appomattox Governor's School. She explained that there’s a whole school dedicated to the arts and the girl was applying for visual arts. This sounded like an amazing opportunity for me to learn even more about art, once I heard about this I immediately told my dad about it. He and my teacher talked and she told him everything we needed to know about the school and how to apply. This was so exciting for me, the opportunity I was looking for to really improve my art and the first step to commit to becoming an artist. A year later I worked on creating a portfolio, got all the papers in order, practiced taking the interview, and went in for adjudication. A few weeks later of waiting and crossing fingers, the letter came in the mail announcing my acceptance.
I’m now here in this story, in the process of seriously thinking about my art and my future. I’m learning what it takes to be serious about art and how to make my pieces mean something. I’m not completely sure what I want to do with my life, but I know for sure it will include art. This topic can be a little daunting to talk about, having a job as an artist. Of course, there’s the issue of income and the reality that most artists don’t make much and it can be hard to find work. I don’t have a plan B when it comes to a future job, and creating art is really the only thing I know I’m good at. Right now, I just want to focus on the passion I have for creating and not worry about how to make a living off of it. It’s not impossible to do, there are many artists right now doing a pretty good job of just creating and doing what they love, so perhaps there is hope for me. I recently watched a video on meaning, called Meaning is a Jumper That You Have to Knit Yourself. It talks about how humans should strive for a sense of purpose, rather than happiness, in order to feel whole. The video goes on about how individually we have to find our own meaning, our purpose in life, even if it means creating it ourselves. When I dream about my future, I see myself living in my own space, with my own studio. I see my work in museum exhibits, in local art galleries, on prints being sold to people. My work is completely my own, aside from some commissions, I’m not working for any big business, I’m just doing what I love. People are looking at my work and really feeling something, they see the emotion in it, or maybe they see a message being spread through it. I believe that being able to be a serious artist and creating what I want is what I’m meant to do. I’m willing to put in the work to make this dream my reality and to fully let art take over my future.
0 notes
Text
Portraits
Portraits by Amanda Witt
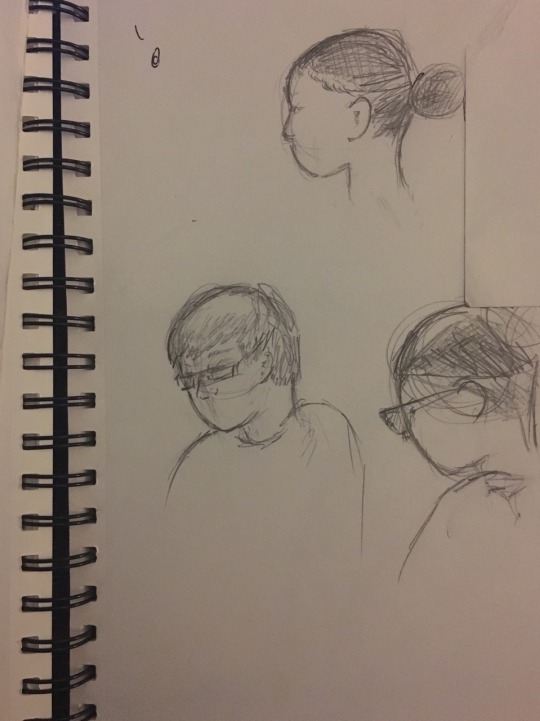
Creating a portrait is a way of capturing a person’s likeness, personality, and emotion. Whether it’s a self-portrait, a picture of a friend, or even fanart of someone you admire, portraits are aimed at showing a likeness and even setting a mood. They can be done in many styles, from realistic to more stylized versions, to the abstract. I personally find drawing faces to be very challenging and also incredibly fun. Everyone has unique features and I love being able to capture them. Sketching out eyes, noses, and mouths to create a beautiful piece is something I love to do. Faces show so much emotion, and creating a work of art out a face can add so much to it. You can really capture the feeling of the person and create an overall mood of the piece itself. However while doing this you still have to show a likeness, this is the hard part. You have to keep the distinct features of the person, be sure add in what makes the person them. This doesn’t have to necessarily be a perfect recreation of them, but enough to show a likeness, to make it feel like them.
This post will be different than Rachel’s post on Steps to Drawing a Face, instead of showing each step to drawing a face, I’m going to talk about different types of portraits styles and things to keep in mind when creating one.
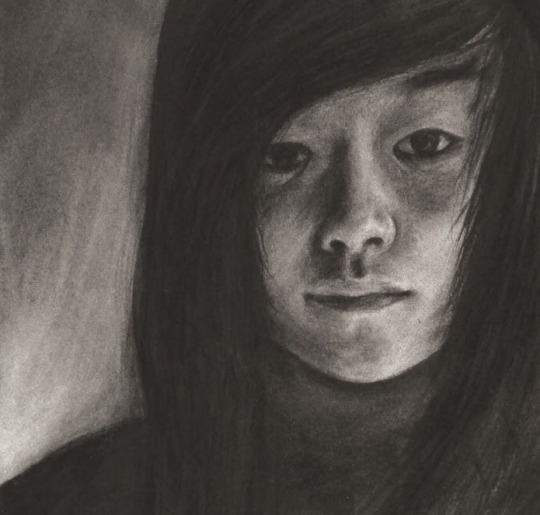
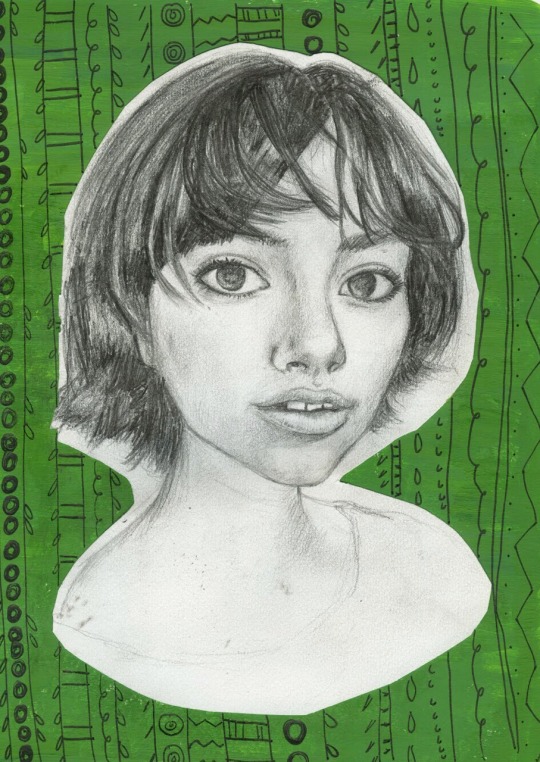
There are many ways to approaching portraits, one of the first steps is choosing what style you want to draw in. Each style can show a different emotion. A common way is to simply do a realistic style. Realism can be a great way to capture someone and can be done in many types of mediums. Different mediums can give it a different feel. I’ve done a few realistic portraits using graphite, and charcoal. The charcoal portrait I did was of myself, I did it by covering the paper completely in charcoal and then drew in the face by removing the charcoal with erasers, tissues, and smudge stumps. The charcoal piece had a larger range of values, by being able to use really soft, dark charcoal and then contrasting it by adding in lightness with erasers. The larger contrast and use of blending gave it a darker, more intense feel. The graphite portrait I did was in my sketchbook. I drew a picture using a reference online and then cut it out and placed it against a green background.While drawing this one, the shading on her face is left to be more subtle, and light, while the hair is kept darker in contrast to the unfinished bottom. Using graphite I was able to keep the piece light and more detailed. With her features, they’re bigger, she appears more doe-eyed. In this piece, I get the feeling that she’s gently looking into your soul, almost with a face of innocence By using the same style, but just a different medium, I was able to create two different moods and feelings of portraits.
You can also make your portraits more stylized. This can be more impressional/post-impressional like a Van Gogh style, or completely abstract like a Picasso. Maybe try simplifying the face and the features to create a minimalist style portrait. Play with different colors, maybe even adding blues and reds to the face. Create your own style by combining elements of realism and abstract. One of my favorite artists does a great job of this in his portraits, Henrik Aarrestad Uldalen. Henrik is able to create beautiful surrealistic portraits, painting a realistic face or figure, and then having it fade away, almost like they are dissolving. His work shows the subject in a dream-like, limbo sorta of state, and he is still able to capture his subject perfectly.

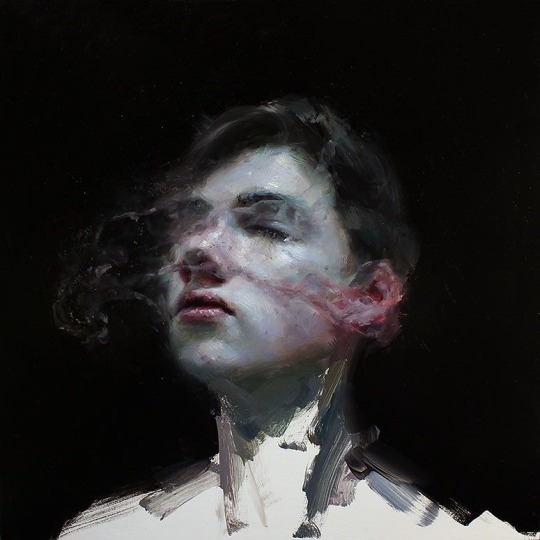
Henrik Aarrestad Uldalen
Another one of my favorite artists who does a beautiful job at portrait painting is Elly Smallwood. I personally love her work, and I draw a lot of inspiration from her. I love her bold use of color and her unique style. One of the features of her painting that I especially love is how she layers the color, leaving it so you can see each brushstroke, and even leaving some empty space. Her artworks for me really capture the emotion of her subject, and even herself. For our current painting project, we are painting portraits of our classmates in a certain type of style that we chose. For mine, I chose to recreate Elly Smallwood’s style. By following her style, I’m using simple, bold brushstrokes, using different colors, and layering on the paint without much blending, even adding in some random brushstrokes.


Elly Smallwood
The hard part when creating a portrait is creating a likeness of the person you’re drawing or painting. Look at their features, what key elements make them, them? Look at their face shape. Do they have a long and narrow face, or is it more short and wide? Are the features soft and round, or is it sharp and angular? What about their eyes? Are they sunken in, or do they pop out? Is the shape long and narrow, or they more round? Pay attention to how the eyelid shape is, is it a deep crease, or is it more hooded? How about the nose? Is it short and round, or long and pointy? Look at how the nostrils are shaped. Next study the lips and the mouth. Is the bottom lip bigger than the top? Look at the lip shape, is there a prominent cupid’s bow, are the lips thin? Ask yourself these questions to really look at and study your subject’s features. Keep in mind proportions, such the space between the eyelid and the eyebrow, and how far the nose is from the lips. Be sure to add any other specific features your subject may have. These could be freckles, birthmarks, scars, wrinkles, moles, facial hair, piercings, dimples, and even hairstyle. All of these elements together make up a person, and if you’re able to capture these features then you’ll definitely be able to capture their likeness no matter what style you depict them in.
I really like drawing portraits because of the simple beauty in faces. Every day we see hundreds of different faces, it’s something common that everyone has seen. I really like being able to recreate such a common thing in a way that’s beautiful. Faces themselves are beautiful and interesting. Things like learning about the skull underneath the face and how the eye sits in the eye socket are fascinating and also helps improve knowledge of how faces work. Looking at and studying faces is something I find myself doing often. At school drifting off, on my phone looking at other people’s selfies, or hanging out with friends, I look at people’s faces to see how they work. My eye follows the outline of their skull, how the head curves in and out to create the cheekbone and how the nostrils connect with the tip of the nose, how different eyelids fold in unique ways. I constantly look at faces to get a better understanding of how they work, and what makes a face a face. When sketching out a face, I really try hard to capture these qualities and to make it interesting. Again, faces are such a common thing that everyone’s seen and many artists draw because they can be so meaningful, finding a way to make the portrait be interesting is important to making the artwork really stand out.
0 notes
Text
Photography
Photography - Rachel L.
I’m new to photography. I haven’t yet taken a class about it, but I am taking film photography 1 next year at school. Although I am uneducated in it, I still like to take pictures because it’s fun and interesting, and I am currently trying my best to take good pictures and work on my skills without guidance or instruction.
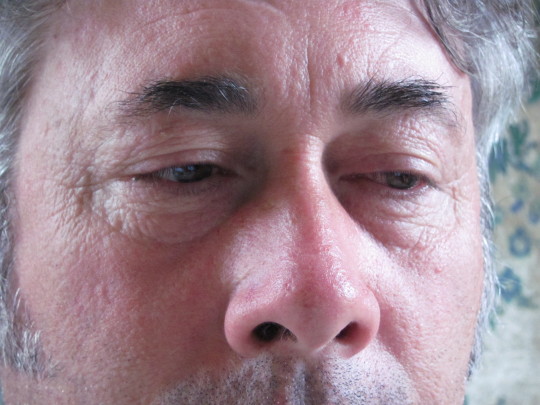
I like to take pictures people’s faces, specifically my family because I am around them the most. I’m very interested in faces because of the planes and angles of the face (and how these translate from 3D [real life] to 2D [a photograph]), and the colors of the highlights, shadows, and undertones of a person’s hair and skin. Also, because faces are very interesting in how they perfectly sum up a person’s mood and emotions. Below is a picture of my father, and I like it because he looks very thoughtful and maybe even a little melancholy. I also like how you can see the details of his skin and how the light reflects on the different angles and edges of his face.
I also enjoy taking pictures of our pets and animals, because they are such a challenge to get a good picture of them since they move so much. To get one good picture of my cat, I end up taking at least fifteen bad ones in the process. Below is a picture of my cat, Richard Parker. I like this picture because the composition is nice, the colors are nice, and I like his pose.

I like to photograph the sky, because it is beautiful, dramatic, interestingly differences at different times of the day (or night), and I love the way that the clouds look, because they mostly look flat since they’re so far away, but if you try, you can see them dip closer to the earth in some places.

And finally, I like to photograph plants because they are pretty easy to photograph since they don’t move, but it can be a little challenge to get good composition with them. If your composition is bad with a photo of a plant, and the picture is basically just trashy and unprofessional.

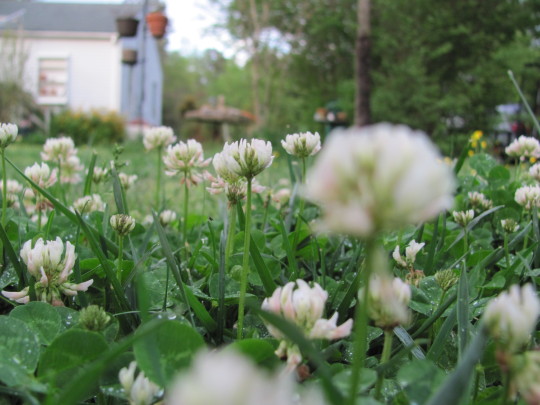
One thing that tripped me up when I first started taking pictures was the difference between zoom and focus. I soon learned that zoom is the size of the object on the screen, and focus is the crispness - blurriness of the photo. I still now get tripped up by trying to take good photos with good composition, and at first, I will think a picture that I took is good, then when I go back and look at it later, it is not very good at all. Trashy even. My camera is a Canon PowerShot SX120 IS, and I would not recommend it. It takes low quality/resolution photos, the colors get washed out, and you cannot manually focus it. For example, in this picture below, I wanted the camera to focus on the closest and biggest clover, but my camera automatically focuses and won’t let me choose what to focus on, so I can never get the cool pictures that I want to take.
According to Man Ray (a famous photographer), photography is not artistic. I don’t know if I agree with this since photography is considered an art form in most cases, but I understand what he was saying because oftentimes photographs are just pretty, but not expressive for the artist at all. No matter, I still like taking photographs and I will not stop.
0 notes
Text
Plants
Plants - Why I love them and How I connect with them. By Rachel Lillyman
I love plants. I prefer to be outdoors. I enjoy planting and gardening more than watching tv or scrolling through mindless information on my phone. When I use electronics a lot at one time, my heart feels sad and bad, and my brain gets foggy, cloudy and clogged. When I am doing something that involves outside and plants, my heart feels light and warm and free, and my mind feels clear and
sharp. For instance, about a week ago, I was sitting around my house, watching Netflix, wasting my time away, and feeling rather trashy in my head and heart. Then, my mother gave me an early birthday present, and it was a matching set of 3 planting pots, each of them white with a different insect pictured on it. She took me to Lowe’s to get 3 little plants, and when I got home, I planted them in my pots and I sat with them on my front porch for a long time. By the end of this, my heart felt loving and my head felt clear. Being outside with my plants at that moment was so much better than being stuck indoors.
As I was growing up, I spent almost all of my time outside. We had a huge tree - the biggest catalpa tree in Virginia - in our backyard. It’s branches extended over and past our ¾ acre plot of land, and from them hung rope swings which I spent most of my time on. As I spent so much time on those back there, I grew to love that tree. It’s towering trunk split into two at 8 feet up, and its base had to be at least 20 feet around, if not more. Sadly, that tree was cut down. But I think being exposed to it so much as a kid helped me grow fond of all plants and recognize that spiritual connections don’t only have to be between animal and animal. I now feel as if I can connect to plants very well, sometimes better than people. When I am trying to connect with a plant, first I try to get my mind on the same wavelength as it’s. I go up to it and I look at it for a while, sit with it for a while, you know, just be with it. Then, I sit and try to send mind waves to it. I imagine seeing our aura’s, like faint clouds around us, and little tendrils of mine shooting off into it’s. This takes tremendous focus, but once I am sure that I have done it, I try to see (with my mind’s eye) if the plant is sending its tendrils to me. Oftentimes, I don’t feel or “see” anything, and this can be rather sad because I just wasted all the energy and time “talking” to something that didn’t notice me or didn’t care. But sometimes, I will feel the plant calling back to me, shooting its little tendrils at me. When this happens, I know that we are connected, and it is one of the most beautiful and raw moments that I have experienced.
When I find that I don’t seem to have time in my schedule for going outside and appreciating plants and nature, I always shift around what I am doing or I change some things so that I can be outside. For instance, if it was a school night and I just got home and I hadn’t gone outside all day and I had so much homework that I didn’t have time to go outside, I would switch up what I was doing and take my homework outside with me. I did this the other day, when I was trying to study for SOLs but being inside with my computer was killing me, I took and blanket and my computer, and I set up right on my front porch and for over two hours I just laid there working on SOLs, but outside nonetheless. In fact, I am doing something like that right now as I am writing this blog. It is about 9 AM, a beautiful spring morning - the grass has droplets of dew on it, the birds and bugs are chirping, and the sun is out with not a cloud in the sky. Every few minutes or so, when I have written all that I can think of, I go outside and just putter around with my bare feet in the grass. Then I will think of some more stuff to write, go write it, then come back outside. This is quite often how I do my work, and I find it more productive than just sitting there until I’ve finished. My bare feet in the wet and chilly grass refreshes my mood, body, and mind.
0 notes


Text
Sketchbooks
Sketchbooks by Amanda Witt
When it comes to drawing in your sketchbook, it’s up to you to put in whatever you’d like. Sketchbooks are a way to be creative and try out new forms of art and to develop your own style. You can use them to experiment with composition, style, and problem-solving. Sketchbooks can allow you to capture images from your imagination, they give you complete freedom to create whatever you want. In this post, I’ll give some examples and inspiration on what to put in your sketchbook.
Sketchbooks are completely your own, and you can do whatever you want in them. Some like to add in quick sketches and thumbnails for larger projects, other prefer to make every sketchbook page into a finished piece. Everyone approaches sketchbooks in a different way, and for some, it can be challenging to decide on what to put in it. One thing I’ve noticed that helps me whenever I want to add something in my sketchbook is to not overthink it. Especially when starting in a brand new sketchbook, overthinking and focusing too much on figuring out what you want to put in can take away from the creative process. Just go with whatever you feel like doing, once you start creating, you’ll become motivated to keep adding. If you’re not still what to add, look for some inspiration. Go to Pinterest, look up artists online, find inspiration in others artwork to get your mindset in a creative mood. If you’ve just gotten a new sketchbook and you’re worried about ruining it or figuring out what to put in it, skip a few pages and then start. This way, there won’t be so much pressure to create something perfect for the first page. Keep in mind, this is completely yours. If you create something you end up not liking, tear out the page, erase it, paint over it, cover it up with another page. Drawing and creating is learned from trial and error, from experimenting with new concepts to push your skills and learning from it. If something isn’t perfect, that’s okay, try it again. Put it down and come back to later with a new mindset.
When it comes to what subject matter to add to your sketchbook, the possibilities are endless. You can draw people, faces, flowers, dogs, buildings, tables, really anything that you want to. Drawing from life, or creating an observation drawing, is a great way to build up your drawing skill. This is much more difficult than drawing from a picture. Drawing from life is transferring a 3D object onto a 2D plane while drawing from a picture is 2D to 2D. You have to be able to show form, volume, and space, while in a picture it’s already done. This isn’t to discredit drawing from a picture reference, in fact, I find myself drawing from photos most of the time, but just to say that observation drawings are good practice. I recommend adding a few observational drawing into your sketchbook, this way you can really work on your drawing skill and learn to create more realistic drawings.
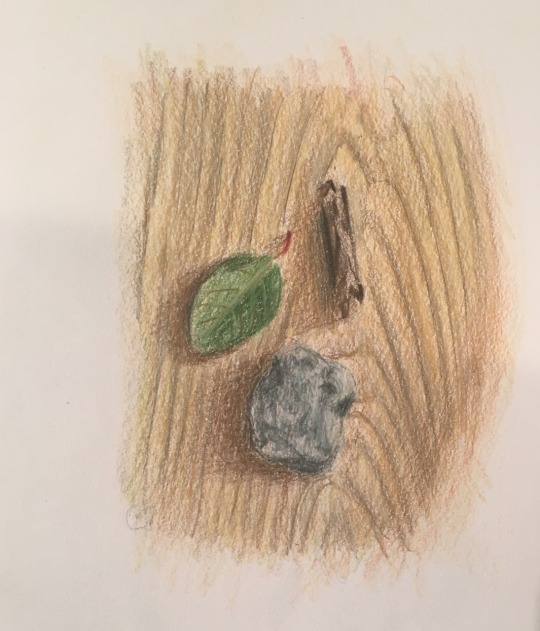
Observational Drawing by Rachel
Drawing from life can be anywhere from creating a still life and working on it for a few days, to quickly sketching someone in a cafe for 5 minutes. During class, I like to quickly sketch someone for about a minute before they move, after that I move on to drawing someone else. You can also get with a friend and take turns posing for each other for about 5 minutes. This fast pace drawing allows you to think less about what you’re doing so you can just do it. Try practice gesture drawings, a quick scribble of something that captures the form. When you want to slow it down and take your time on something, gather some objects into a little still life. Do a couple of studies of some still lifes to help improve your skill.

Gesture drawings (top Rachel’s, bottom mine)
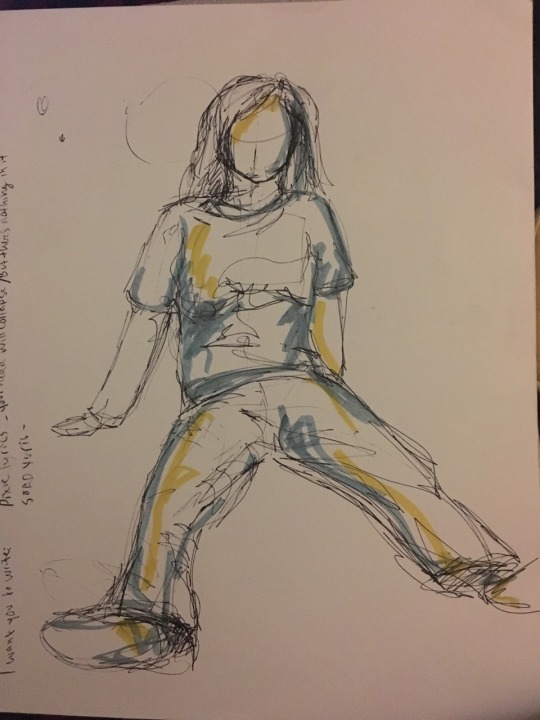
Drawing from life, along a quick doodle by Rachel
If realism isn’t your thing, feel free to doodle. Doodling can be relaxing and allow you to develop a unique drawing and style without a plan. This can be creating images from your mind, different characters or scenes. Don’t focus too much on making it realistic, have fun and create more stylized images. I like to play around with different faces, creating different types of characters. The way you draw a face can completely alter the feel and look you get from them. If drawing people isn’t your thing, then try animals. Maybe even mix two animals together, or create your own original species.

You can even fill your sketchbook with prints and patterns. Try playing with different mediums, using paint, markers, pens, or pencils. You can create drawings on separate pieces of paper and later glue them into your sketchbook. Use color to make your sketches really pop, or create monochromatic doodles for a different feel. Maybe paint in a color study, or practice using colored pencils. If you don’t want to draw, add in collages or pictures and cutouts. You can give extra meaning to your pages by adding in quotes, passages, song lyrics, or sayings. Try adding washi tape for an added pattern, or even pressed flowers and other objects.

There is no right or wrong way to handle sketchbooks, it’s all up to you. These are just a few tips to get some ideas going.

Art credit above is Rachel’s
-Amanda Witt
0 notes
Text
Watercoloring Plants
Watercoloring Plants by Amanda Witt
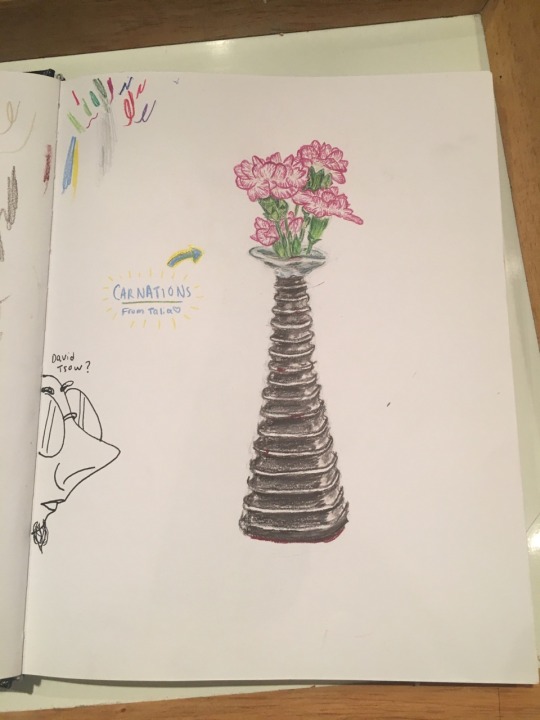
Watercoloring can be a fun and relaxing way to paint. The pigments are in a water-based solution and can be used to create more light and watery effects. By using water,you’re able to make the paint blend, layer, and spread in ways you can’t with acrylics. For this post, Rachel and I met together to paint some plants and to give some tips on how to watercolor.

For this, you’ll need a jar of water, brushes, some paper towels, watercolor paper, and watercolors. I recommend having 2 jars of water, one for clean water and one for dirty water. The one for dirty water is used for cleaning your brushes, and the one with clean water is used for painting. This way you can dilute a color without adding another color that's been mixed with the water. For brushes, I like to use ones that have softer bristles and can carry water well. Paper towels can be used for cleaning brushes or wiping off excess water. Watercolor paper is necessary for watercolors, normal paper, and even sketchbook paper isn’t thick enough to hold in water. Watercolor paper or mixed media paper is much thicker and is made to hold lots of water. For watercolor sets, there are several types. You have pan paint and tube paints. Pan watercolor paints are dried and in little pans, the type that little kids commonly use in school. They can range from being very cheap to more higher prices. Even though some are made for little kids, there are also artist grade quality paints. These appear less dried and have added gum arabic into the pans. They are more gel-like when water is added, these are the ones Rachel and I worked with. Tube watercolors are just like they sound, they come in a tube, like acrylics. These you squeeze out a bit of color onto a pallet to use. A pallet can be optional if you are using pan watercolors, they can be used for mixing color, you can use any type of plastic surface for a pallet. You can even use watercolor paper as a pallet, just add more water if your colors begin to dry.
To begin your painting, start off with a light sketch. Keep it light, this way you won’t be able to see the pencil underneath the paint. If you prefer the look of pencil underneath watercolor, then you can make it darker, but a light sketch will make it so you can’t see it. If you try to erase the pencil after putting paint on top of it, the paint with act as a barrier to the pencil and you won’t be able to erase it. If drawing lightly if difficult, then you can make your sketch and lightly erase it after.


After drawing out your subject, block in colors. Chose a base color and lightly block it in, adding more water to make it lighter. Start with light a base, this way it won’t be too dark, it’s easier to start lighter and add darkness than it is to start dark and lift up color to add light. After putting down a base color, you can start to build up layers and add shading and details. This is where you can add more depth to the piece, adding darker colors to make it pop. The way you add details is up to you. I like to blend out the colors and keep it lighter, whereas Rachel added darker layers without much blending. Here you can really play around with the paint and the wet and experiment with different effects. You can use the water to dilute the paint, adding subtle tints of color, or lay down a layer of water and add the color to create more of a wash or gradient. You can add a light layer of color on top of each other and see how they look layered or blend them all together in a smooth transition. Figure out what your painting style is and just go for it.


Once you’ve finished, the last thing is to add final details. This can be used with pens, colored pencils, or even markers to create extra dark shadows, highlights, or details you can’t create with the paint. To add in highlights you can use a white gel pen or paint marker. Rachel drew in some white highlights with a paint marker to give her plant some shine and make it really pop. For mine, it didn’t look very readable so I took a Micron 02 fine liner to outline it and give it more dimension and detail. After doing this it really made the piece stand out and you can see each part of the plant more easily. Adding in finishing touches such as highlights and an outline can really add to a piece. Using other mediums with watercolor can be really fun and give some really beautiful effects.


Watercolors is a really fun way to paint, and for me is more relaxing than regular acrylics. You don’t have to worry about the paint drying out or using too much of it, it doesn’t create a huge mess, and you can create beautiful finishes fairly simply. Anyone can create beautiful works of art with watercolors and I hope to encourage others to try it.
Mine and Rachel’s own art
-Amanda Witt
0 notes
Text
Image Transfer
Image Transfer by Rachel Lillyman
Image transfer, as previously mentioned in Amanda’s Collage blog, is a form/media of art involving the transfer of a printed image onto tape. Image transfer is very unique and interesting because the images on the tape are kind of transparent, so they can be overlapped with each other or colored paper or anything else flat you can think of.
The materials you will need in image transfer are scissors, clear packaging tape, images (from books, magazines, newspapers, anything works so long at it’s ink on paper), blank paper, a cup or spray bottle of water, and a clean hard surface that you can spill water on. Once you have all of these materials gathered, choose your first image. You should be very sure that you want to use this image, because once you’ve transferred it, the paper that the image was on is destroyed. Also, make sure you don’t want to use the image on the back either because it will be destroyed too.
Once you have your image selected, stick some tape over it to cover the parts that you want. If it’s a small or slender image, you may only need one piece of tape, but if you image is big, just overlap multiple pieces of tape until it’s as big as you need. Make sure that the tape and the paper don’t get wrinkled, or else you will get blank creases in your transferred image. It’s always a good idea to rub your thumbnail over the top of the tape to make sure that paper and tape are stuck together good. If you don’t do this, you may end up with blank blotches in your transferred image.
The next step is where it gets fun. Turn your taped paper upside down on your clean hard surface, so the tape is facing down and the back of the paper is facing upwards. And then, pour water all over it! The purpose of this is to get the paper wet.

Once the paper’s wet, start rubbing the paper with your fingers. Eventually, the paper will start nubbing up and rolling off of the tape. This part get pretty gross, so just be prepared for that.

Make sure that by the end of it you have gotten all the paper off completely. Now, you have transferred your image! All that should be left of your selected picture is the ink on the tape.

Now, you can take your tape image and stick it to blank paper, some colored paper, another picture, or another transferred image! Just be aware that where your picture was light colored, your transferred image will be clear. This is a good method of creating collages, mixed media projects, or just about anything else you can think of.

0 notes
Text
Container Gardening
Container Gardening by Rachel Lillyman
Have you ever wanted to grow plants, but never had the space outdoors? Turns out, you don’t need it! Say hello to container gardening. “What is container gardening?” you may ask. Well, container gardening (a.k.a. pot gardening) is when you grow plants in some sort of container, as opposed to in the ground. The benefits are as follows: 1) Putting potted plants around your home can act as a beautiful decoration and add life to any room. And, 2) You don’t need space outdoors! You can pot, grow, and keep plants entirely within your home.

The first step to container gardening is choosing the right container! This can be tricky if you don’t know what you’re doing, but hopefully this post will make things a lot easier for you. The most common types of containers that people choose are clay pots, hanging baskets, and troughs. Terracotta and other types of ceramic (clay) pots are very common and easy, although when you buy one, be sure it’s high quality (when your scratch it, it doesn’t leave marks). If your terracotta pot is cheap, it will start to desintigrate once it has moist dirt in it. Hanging baskets are very lovely, as long as you have somewhere to hang them from. Most people hang them from their porch ceilings, but if you plan on hanging it indoors, you had better be sure that it is water tight or else it may leak all over your floor. If you do go with a hanging basket, draping or bushy plants (like ivy or fern) will look the best. Troughs work well when they are ledged outside of your windows, and add a sweet home-style feel to your home.
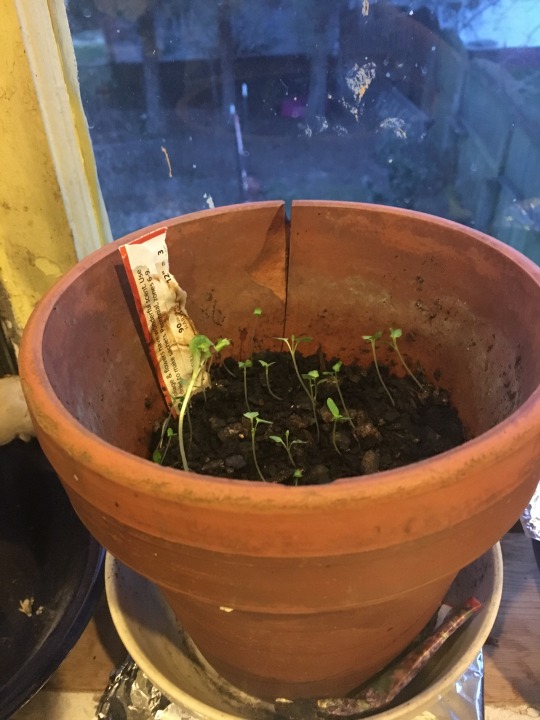
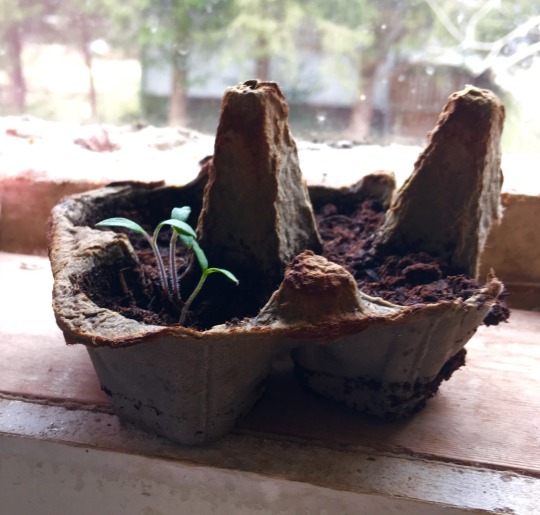
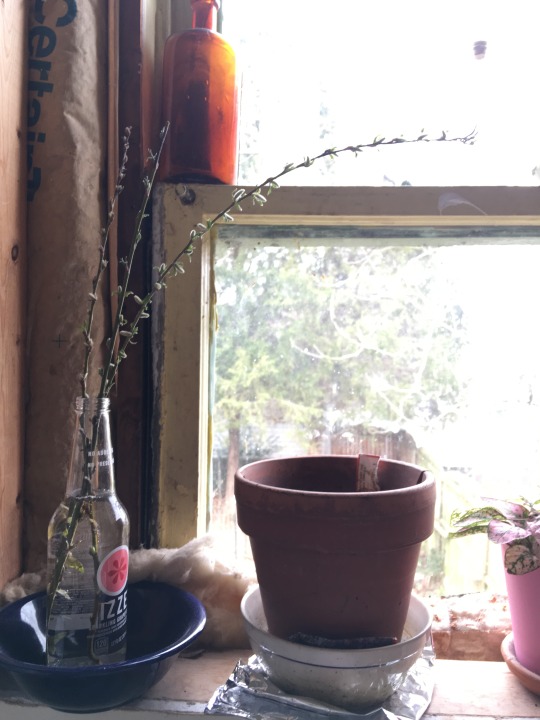
If you like to help the environment, try upcycling containers! Upcycling is taking something old, used, or unwanted and giving it a new purpose. Anything that holds water works! Some things you can upcycle as plant containers are old bottles, the bottom half of milk jugs, jars, and egg cartons. Using these not only helps the environment, but also adds individuality to your home. Here are some examples below.


The next step is choosing what plants to put into your containers! You can put herbs, vegetable plants, flowering plants, cacti, plants with just greenery, or an arrangement of plants. I usually put just one plant per container because I find it to be easy and classy. But, if you are looking for something more showy, try doing an arrangement of multiple plants in one container! You can put them in anyway you like, but one method that works very well is called TFS - thriller, filler, and spiller. The TFS method requires 3 different plants. One will be considered the “thriller” meaning that it is tall and flashy. One example is the oriental lily, because it has height and drama to it.

The filler means a plant that is medium/short, bushy and billowy, and not very flashy. A good example of this is the fancy leaved caladium.

And lastly, the spiller is a low, trailing plant that will drape over the outside edges of the container. A good example of this is the ceropegia woodii.

When you plant all three in the same pot, it creates a very attractive arrangement.

The final step is finding a good place to put them in your house. Since everyone’s home is different, this part is more subjective. Just find a place to put your plants where they will look good and won’t get hurt.
0 notes
Photo


Some little encaustics we did ✨
0 notes
Text
Guide to Easy Indoor Plants
Guide to Indoor Plant By Rachel Lillyman
This blog will be about the best plants to have indoors, and how to care for them. I have struggled with this question a lot because I always want plants in my house, but I never know which kinds are best or how to take care of them. Because of that, I have done a fair amount of research into the world of houseplants and now I will share my information with you! FYI- the plants listed below are not in any sort of order, just random.
Plant #1 - Spider Plant (Clorophytum Comosum)

Background and Information: The Spider Plant is originally from Central and Southern Africa. It has long, thin, pale green leaves with a white stripe down the middle of each. The leaves all shoot out from a center attached to the roots, and it has little white flowers that are so adorable and delicate and beautiful.
Benefits: This plant is very easy to care for. It also purifies the air of carbon monoxide and other harmful gasses. This plant is safe for pets, adds a fun burst of life and color to any room.
Care: Place the plant in an area with lots of indirect sunlight. Make sure to water it often, but it must be in a well-drained holder or else the roots will get soggy and rot. Letting it dry out in between waterings occasionally is good for it as well.
Plant #2 - Fern (Polypodiopsida)

Background and Information: The Fern is a plant that originated somewhere in the tropics. It has lots of stems shooting up from the center, with lots of little leaves coming off of the stems. Ferns reproduce with spores, meaning they don’t use pollen or anything to reproduce.
Benefits: Ferns remove lots of toxins from the air, are relatively easy to care for, and not hosts to many pests known in our mild climates. This plant, when brought into your home, will add an element of natural vibrancy that can be hard to achieve indoors.
Care: When planting a fern, be sure not to give it a small pot, and make sure the pot has holes on the bottom. The soil should be well drained - if it is not, the roots may begin to rot and this will quickly kill the plant. Keep the plant in a humid room, such as a kitchen or bathroom, where water runs frequently. Water your fern often, not too much though, only until water drips out of the bottom of the pot. But, on the other hand, never let the soil dry out.
Tip for Understanding Your Fern: Imagine the fern in its natural climate (the rainforest/tropics). This climate is warm, humid, and very rainy. If you try your best to simulate these conditions for your fern, it will be happy and grow to it’s fullest potential. Then you and the fern can be best friends because you can appreciate its beauty and it will appreciate your care.
Plant #3 - Aloe Vera (Aloe Vera)
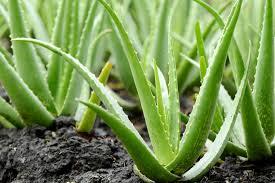
Background and Information: The Aloe Vera Plant originated from the Arabian Peninsula, and now grows in most tropics around the world. This plant has no stem, like the other two plants previously listed, and instead has very thick fleshy leaves that range from a lively warm green to a pale grey-green. The leaves also have little spikes all along the edges, but they are not sharp enough to do any harm.
Benefits: Aloe Vera is a very medicinal plant. The inside of the leaves is sort of a gel, and it has many uses. When you break open a leaf and put the gel on a cut or burn, it will help to soothe and heal your wound. Interestingly enough, aloe vera gel is used in many healthcare products.
Care: When you water your Aloe plant, give it a lot of water, but allow the soil to dry almost completely between waterings or else the roots will rot. Also be sure to put this plant in a somewhat sunny area. Otherwise, Aloe doesn't really want much else (besides your love and attention of course).
Plant #4 - English Ivy (Hedera Helix)

Background and Information: This plant is native to Europe and western Asia. It is a crawling plant, meaning that it has a bunch of long winding stems that spread out everywhere and the ground and also crawl up walls or other crawlable things. The leaves are dark green with three points and pale green veins.
Benefits: Ivy’s flowers are very wonderful for outdoor insects and animals. Clearly, when ivy is inside it can’t attract buggies, but it is none-the-less a very beautiful and fancy plant to have in your house.
Care: Keep your ivy in an area with medium-light, with preferably no direct sunlight. Ivy will conform well to most any indoor temperatures so long as the temperature is consistent and does not change a lot. Water it frequently to keep the soil moist.
All of the plants I have written about above are my top four favorites. As you can see, I tend to like plants that have no stems or have super long stems. My other favorites are Jade plants and Orchids, but those are rather hard to care for.
P.S. - Succulents are also very easy to take care of and very cute. The only reason I didn’t include them in this blog was that everyone talks about and has lots of succulents, and I think these other plants are just as lovely (if not more) and deserve much more attention.
0 notes
Text
Steps to Drawing a Face
Steps to Drawing a Face By Rachel Lillyman
In this post, I will be showing you a basic step-by-step process on how to draw a face. There will be a picture with each step, as well as a description and explanation of what to do.
Tips before starting: Firstly, use pencil (at least to start with). If you are using something permanent, there’s no going back and all mistakes will be stuck there. Secondly, if you mess up, don’t sweat it! You can always erase it or try again. If you find yourself getting angry or upset because your drawing isn’t working, then take a break! There’s no shame in coming back to it later.
Step I: The Basic Shapes. First and foremost, we must give a basic outline for the shape of the head and all of the smaller shapes with in it. This is possibly the most crucial step to drawing almost all realistic things - if you don’t have a well structured foundation, your drawing will probably turn out lopsided or wonky. The top part of the head will just be a big circle. The bottom part of the head will be some sort of trapezoidal shape, with a point at the bottom representing the chin, and this part will be attached to the bottom of the big circle. Then, just above the bottom of the big circle, we put one small circle in the middle with two smaller circles outside of it, and this represents the shape of the nose. Half-way up the big circle, put two medium-small circles with an equal distance between them and the outside edges. Also put two smaller circles in these medium circles. These represent the eyes. Next, halfway between the bottom of the big circle and the bottom of the trapezoid, put a triangle of three small circles, which represents the lips. Lastly, we must include a basic outline of the hair.

Step II: The Basic Lines. We must fill in our head with the basic lines. First, draw some upper and lower eyelids from the inner to the outer corners of the eye balls, just touching the irises. Then, draw some nostrils, which will be upside down slightly curved lines, angled outwards, that connect each small circle with the middle circle on the nose. And give with outside edges of the small circle some darker curved lines around them, and draw the bridge of the nose with faint vertical outwardly-curved lines. Next, draw three short U-shaped lines right on top of the lips, in the middle, and on the bottom. Also, draw two more of these lines a little to the right and the left of the main lip area. Lastly, sketch the placement and shape of the eyebrows.

Step III: Basic shading. This part is more subjective, because the shading may be different for each drawing depending upon the angle of the light on your subject. This part is always important, though, because shading is what truly adds form, definition, and 3D-ness to your art. This drawing that I am doing has light coming from the above and the front, so that is how I will tell you to shade yours. To make the shading effect, just fill in the desired dark area with a medium-light amount of graphite. We will add areas / patches of shading under the cheekbones, under the nostrils, under the eye-bag area, under where the hair lays across the face, and in two symmetrical areas under the lower lip. We will also add areas of shading on the outside of the nostrils, the sides of the nose bridge, in the upper inner eye area, the upper outer eye area, and on the top lip.

Step IV: Erasing the Guide Lines. This is a short step. All it is is just erasing the unnecessary leftover markings from the basic shapes and lines. All we will erase here is the symmetry line, top of big head circle, bottom of big head circle that is in the cheeks, and the visible / unused parts of the dots in the nose.

Step V: Detailed Shading: This step is to give the form more definition and precision. First, you must very lightly fill in the whole face with graphite, because everyone’s skin is darker than the color of paper. Then we will blend the cheekbone shading and the under-hair shading. Next, we will make both of the lips a shade darker than they were before, do the same with under the eyes, and darken more around the middle ball area of the nose. Lastly, we will darken the outer and inner edges of the top eyelids. Also, fill in some color for the eyebrows.

Step VI: Strategic Erasing. This step will give highlight to the face. You can use a nice eraser, or the eraser on top of your pencil. Any kind would work as long as it can erase in precise (small) areas and won’t leave ugly marks. We are going to erase the lower forehead, underneath of the eyebrows, center of nose bridge, nostrils and ball of nose, above the lips, in the mid cheeks, on the chin, along the tops of the cheek bones, and in the center of the upper eye lids.

Step VII: The Eyes. This step focuses on only the eyes, and giving them more detail. First, we must add some darkness (very dark) around the edges of the irises and in the center of the irises as well. Then, fill in the iris with a bunch of lines all pointing towards the center of the iris. Lastly, draw a dark line in the lash line of the top and bottom eyelids.

Step VIII: The Hair. This step just focuses on the hair. I cannot be too very specific with this step, because everybody’s hair is going to be different, so I will just be describing here what I did for my piece. First, I filled in some basic shading, that is darker around the bottom half, edges, and right near the part. Then I filled in detailed lines, going with the flow of the hair, that represent the individual strands and hair texture. Next, I added more specific darkness around the edges of the hair and the bottoms. And lastly I erased some streaks on the top area of the hair to convey shine and highlight.

Step IX: Finishing Touches. This step is very different for each person, so I will not guide you through how to do this. You should just look at your drawing and see what you think need to be improved, added, of fixed. For example, I changed and darkened the mouth, added eye lashes and eye lid creases, and gave her some freckles. This step really lets you add your own personal style, so go crazy!

For some final thoughts, I want you to remember that you can always come back to this drawing later, after your eyes have had a break, and fix it up some more. Be creative! Don’t restrict yourself!
By: Rachel
0 notes
Text
Acrylic Painting Tips
Acrylic Painting Tips By Amanda Witt
Acrylic paint is a commonly used form for painting, from children’s crafts to finished masterpieces. However, there can be many complications and frustrations with the medium. In this post, I will share some tips and techniques that you use while painting to help with some common problems of painting.

Before beginning, you must know the paint, what is acrylic? Acrylic paint is a water-soluble polymer-based paint. It dries quickly and when a thick layer is dried together, it can form a glossy plastic-like blob. Because acrylic dries fast, when laying out colors you must remember to only put down a little at a time, adding as you go. There are a few methods to prolong the drying time of acrylics. One of them is adding an acrylic medium to your paint that will prevent it from drying out. This can be useful for being able to blend out your color on your board or canvas for longer like with oil paints. An alternative to this is just by using water. Keep a spray bottle filled with water by your station and occasionally give your palette a spritz of water. The water will keep your palette wet, letting you use the colors for longer before they dry out. Another method is to wrap up your paints. If you have a palette with perfectly mixed colors on it and you’re taking a break from painting for a while, take some plastic wrap and cover your palette. This will seal in your paints, preventing air from getting in, preventing them from drying.
Those are some ways to allow paint to last longer, what about using color? Applying, seeing, and using color can be another tricky thing to work with. Even seeing color, think about the objects undertone. You can stare at a piece of paper and see that it’s white because you know it’s white, but look closer. Think about the tones, is it lighter or darker? What temperature is it? Is it cool or does it lean towards the warm side? What other colors can you see in it? This may sound strange at first, but when painting from real life, objects can have other colors in them. This can be from the color itself, the lighting, or from other objects reflecting on them. Some blues can have yellow and green in them, and some grays can have blue in them. This can be tricky to find, but by thinking in color and looking closely at objects, you can start to see color everywhere.
With the color in mind, be careful mixing them. You can start to use a palette knife if you need a lot of mixed paint and it keeps getting stuck in the bristles. Try using different combinations of tubes of paint to see which will bring you closer to your desired hue. When making a color darker, don’t just go straight to adding black, try a little aquamarine blue and burnt umber a little at a time. By adding color to change a tone, you can really make your painting pop. Also, keep in mind that shadows are the absence of light in the world. Because of this, an object with warm-toned lighting will have a cool toned shadow, and vice versa.
Acrylic will dry quickly once it’s on and it will dry darker than how it was wet, be sure to keep this in mind as you mix. Colors also need context in order to be the correct color. By this, I mean that a color by itself will look different once you add another color next to it. The context of the color will change how your brain sees it. Think to different optical illusions.
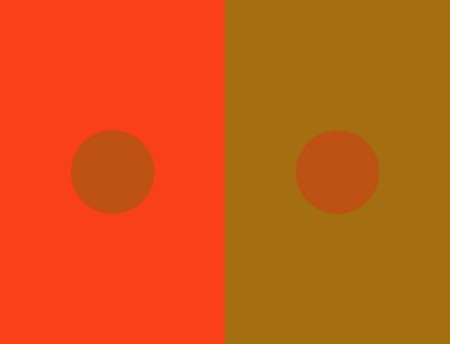
In the one shown here, there are two circles which seem to be completely different colors. If you were to remove the background, however, you will find that they are exactly the same. The same principle applies to painting. A color will change completely with given context.
With color figured out you can move to applying the paint. If the paint becomes too thick, it won’t spread out evenly. This can be easily solved by adding some water. Water can also be used to create light washes and to add overall tones and other cool effects. Water can also be used to fix mistakes. If you were painting and accidentally made a mark on top an already painted area, you can use water to erase it. Quickly take a clean brush and dip it in water, then take the brush and use it to wipe away the mark. Since acrylic is water-soluble, the water will dissolve the paint and the brush will wipe it away. You can about use your hands to help wipe away the paint and water.

When painting, it can be difficult to create clean, straight lines and edges. One method of achieving this can be to use a flat edged brush. Press the straight end against the canvas, kinda wiggling the brush a little, and work your way down the line, instead of trying to swipe the brush in a straight line. By swiping the brush in a line, your hand can wobble and the pressure you’re holding down can change, altering your line. By pressing the end of the brush down, you can slowly build your line, knowing that it will be straight. Another method of creating a straight edge is to use painter’s tape. Simply lay down your tape and paint over it, peel it off before the paint dries and you will have a nice clean line. If you do get a few bumps along the line, wet a clean flat edged brush to clean it up.

When painting in general and to get smooth lines, you have to let your body be loose and move around. This same principle can be applied to drawing. When painting, feel free to stand up and move around your canvas. Let your arms have enough room and keep your hand steady. Don’t hold your brush the same way you do when writing. Back up on the handle, but get in close for more control when it comes to small details. You can help keep your hand steady by pressing your pinky against the painting, you can now pivot your hand with your pinky.
Sometimes you leave and come back to working on a painting. When this happens you are leaving your creative mindset and coming back with a whole new one. To help keep you on track on what you should be doing, write yourself notes on what you’re working on and what you need to fix before you leave. This way, when you get back you can quickly get back into your creative mindset.
You also want to be sure to clean up well and keep your things organized. When clean brushes, use soap and warm water. Be sure to work out the paint, especially where the bristles connect to the rest of the brush near the handle. When packing up paints, double check to make sure the cap is on tight. When you get back, sometimes you can find it hard to get the cap off. This is caused by paint the getting between the cap and the bottle where it screws and drying. This seals the cap to the bottle, making it difficult to get off. You can unscrew by using clothes for added friction, or if the ridges of the cap hurt your hand. Another method is to stick the paint in where the door closes by the hinges, close the door and twist the tube. The door will swing and hold it against the door frame, allowing you to twist open the paint easily.
With all the challenges it brings, painting with acrylics can be a lot of fun. There are many techniques and tricks that you begin to pick up as you learn. These are just a few things to keep in mind that may help with some paintings.
-Amanda Witt
0 notes