
Don't wanna be here? Send us removal request.
Statistics
We looked inside some of the posts by ideahood58-blog and here's what we found interesting.
Average Info
Notes Per Post
0
Likes Per Post
0
Reblog Per Post
0
Reply Per Post
0
Time Between Posts
3 days
Number of Posts By Type
Text
17
Last Seen Tumblr Blogs


Fun Fact
Tumblr has a 66 index score for customer satisfaction in the US.
Text
Tips For Eating Healthy At Happy Hour
One of the questions I’m most frequently asked about is how to enjoy a meal when out on the town, without falling off the health wagon. Many wonder…is it actually possible to attend happy hour with friends and not completely derail your healthy eating goals?
My response is always a resounding, “Absolutch.”
To read about more tips on how to eat healthy at happy hour, head on over to SELF to check out the full article on A Registered Dietitian Shares Her 8 Best Tips For Eating Healthy At Happy Hour
Source: https://foodheavenmadeeasy.com/eat-healthy-at-happy-hour-tips/

0 notes
Text
Firecracker Salmon with Peach Avocado Salsa
Sep 10
Delicious baked sweet and spicy firecracker salmon topped with an unbelievable delicious peach avocado salsa. A healthy weeknight meal that everyone will love!
Who else is ready to slide into cozy slippers, put on fleece pajamas (or an adorable oversized sweater), make a cup of hot chocolate, watch reruns of Felicity and get ready for some beautiful crisp fall weather?
Same!
However, we’ve still got a few weeks of delicious end-of-summer produce to enjoy including juicy peaches, fresh garden herbs and heart-healthy creamy avocados. Thankfully, I’ve got a delicious healthy recipe for you to enjoy before summer ends.
Say hello to this beautiful salmon recipe with a scrumptious, fresh peach avocado salsa. I have literally never been more obsessed with a fruit salsa in my life.
Can we talk about the delicious firecracker marinade for a sec?! It makes the salmon taste both sweet + a little spicy and pairs well with the sweetness of the peaches and the creaminess of the avocado. Healthy eating has never been this beautiful.
By the way, if you still have extra peaches leftover, I highly suggest my gluten free peach crisp for dessert!
Now I know that a lot of us get intimidated when cooking salmon, but it’s easier than you think. First, I recommend baking salmon — it’s an easy way to ensure that it stays moist and together. There are plenty of other methods but this is by far my favorite.
How to bake salmon:
Step 1: Preheat oven to 400 degrees F.
Step 2: Line a baking sheet with parchment paper.
Step 3: Place marinated or seasoned salmon skin side down on baking sheet.
Step 4: For every inch of thickness, bake for 15 minutes. Generally my salmon is usually perfect around 18 minutes.
Step 5: Flake salmon with a fork and serve!
What to serve salmon with:
I suggest brown rice, black forbidden rice (my fav), quinoa, veggies, or a side salad. It’s totally up to you though.
I hope you love this delicious salmon recipe. If you make it, leave a comment below and don’t forget to rate the recipe so others can see how you liked it!
Firecracker Salmon with Peach Avocado Salsa
Author: Monique of AmbitiousKitchen.com
Recipe type: Salmon, Gluten Free, Healthy Dinner
Prep time: 15 mins
Cook time: 15 mins
Total time: 30 mins
For the salmon
1 ½ pounds salmon
2 tablespoons avocado oil or olive oil
2 tablespoons reduced-sodium soy sauce
2 tablespoons balsamic vinegar
1/2 tablespoon honey
3 cloves garlic, finely minced
1 teaspoons red pepper flakes
1/2 teaspoon cayenne pepper
1 teaspoon freshly grated ginger
For the peach salsa
1 avocado, diced
1 peach, diced
3 tablespoons finely diced red onion
1 jalapeño, seeded and diced
2 tablespoons finely diced cilantro
1 lime, juiced
Salt & freshly ground black pepper, to taste
Make your salmon marinade: In a small bowl whisk together avocado oil, soy sauce, balsamic vinegar, honey, garlic, crushed red pepper, and ginger.
Add your salmon to a large bowl skin side up (so that the salmon sits in the sauce) and pour marinade over the top. Cover and place salmon in the fridge for no more than 1 hour
While your salmon is marinating, make your peach salsa. Add avocado, peach, red onion, jalapeño, cilantro, lime juice, salt, and pepper to a medium sized bowl and mix until well-combined.
Once ready to bake salmon, preheat your oven to 400 degrees F. Place salmon on a large baking sheet lined with parchment paper, and place marinated salmon skin side down. Bake for 15-20 minutes or until salmon easily flakes with fork. Top salmon with peach avocado salsa and serve with brown rice, black rice quinoa, or extra veggies for a full meal. Serves 4.
Directions for grilling the salmon: Preheat a gas grill over medium-high heat. I would also lightly brush both sides of the salmon (including the skin) with a bit of olive oil to prevent sticking. Be sure to also generous oil your grill. Place salmon skin side down first on grill, close grill lid and grill about 6-8 minutes. Carefully flip salmon and cook 6-8 more minutes or until cooked well. Salmon is tricky, but it's best to undercook rather than overcook your filets.
3.5.3251
Pin this salmon recipe:

Source: https://www.ambitiouskitchen.com/firecracker-salmon-with-peach-avocado-salsa/
0 notes
Text
Easy Oven Roasted Asparagus with Hollandaise Sauce
Prepared with just a few simple ingredients, this Oven Roasted Asparagus is a delicious springtime side dish perfect for Easter, Mother’s Day, or any day!
Need a vibrant vegetable side dish to go with your meal? Oven Roasted Asparagus prepared with olive oil, garlic, salt, and pepper is a simple and easy side dish that will perfectly complement any main course. Top with a warm, lusciously rich Hollandaise Sauce, and eating your veggies has never been more delicious.
Two minutes to prep + Twelve-ish minutes to cook = ONE DELICIOUS side dish! It couldn’t be easier to whip up this versatile vegetable, and you’ll love the fresh and vibrant flavor.
If I could eat this every day for forever, I’d be OK with that. It’s just hard to go wrong with roasted vegetables, especially asparagus. I LOVE Asparagus. Perfectly tender, salty, and browned to a sweet perfection, you can’t NOT enjoy them.
But we don’t stop there. I like to plop a nice helping of Hollandaise Sauce all over these beautiful green spears, right before serving. Results? HEAVEN.
HOW DO YOU ROAST ASPARAGUS
We start with trimming the ends of the asparagus and placing the asparagus on a baking sheet.
Drizzle with olive oil and toss to coat.
Sprinkle with minced garlic, salt, and pepper, and spread in a single layer.
Roast at 425F for 12 to 15 minutes, or until tender, but crisp. Cooking time will depend on the thickness of the asparagus spears.
Remove from oven and transfer to a plate.
If you want, drizzle with Hollandaise Sauce – you won’t go wrong with that idea – and serve.
HOW LONG IS ASPARAGUS GOOD FOR
Raw asparagus keeps well in the fridge for up to 4 days. You can also freeze fresh asparagus for up to 3 months.
Cooked asparagus keeps well in the fridge for 3 to 4 days. You can freeze cooked asparagus for up to 6 months.
Roasted Asparagus with easy blender Hollandaise Sauce is a quick and easy Keto, low carb side dish perfect for entertaining. You’ll be amazed at how a few simple ingredients turn asparagus into a really delicious vegetable side dish.
MORE ASPARAGUS RECIPES
ENJOY!
TOOLS USED IN THIS RECIPE
Oven Roasted Asparagus
Prepared with just a few simple ingredients, this Oven Roasted Asparagus is a delicious springtime side dish perfect for Easter, Mother’s Day, or any day!
Course: Side Dish
Cuisine: American, French
Keyword: asparagus recipe, easter side dish, gluten free, holiday side dish, hollandaise sauce, keto side dishes, low carb recipe
Servings: 4
Calories: 56 kcal
Ingredients
1 pound asparagus spears
1 tablespoon olive oil
3 cloves garlic, minced
salt and fresh ground pepper, to taste
Instructions
Preheat oven to 425F.
Line a baking sheet with parchment paper or foil, and set aside.
Wash and pat dry the asparagus.
Break off the tough ends on the asparagus and discard.
Arrange the asparagus spears in a single layer on previously prepared baking sheet.
Drizzle with olive oil and toss to coat.
Season with salt and pepper and sprinkle with minced garlic; rub over the asparagus with your hands to evenly coat.
Roast for 12 to 15 minutes, or until tender but crisp. Cooking time will depend on the thickness of the spears; start checking for doneness around the 12 minute mark.
In the meantime, prepare this Blender Hollandaise Sauce. <-- click here
Remove asparagus from the oven and transfer to a serving plate.
Drizzle Hollandaise Sauce over the asparagus and serve.
Recipe Notes
WW FREESTYLE POINTS: 1
HOW TO STORE COOKED ASPARAGUS
Cooked asparagus keeps well in the fridge for 3 to 4 days. You can freeze cooked asparagus for up to 6 months.
Hollandaise Sauce not included in Nutritional Analysis
Nutrition Facts
Oven Roasted Asparagus
Amount Per Serving
Calories 56 Calories from Fat 27
% Daily Value*
Total Fat 3g 5%
Sodium 2mg 0%
Potassium 238mg 7%
Total Carbohydrates 5g 2%
Dietary Fiber 2g 8%
Sugars 2g
Protein 2g 4%
Vitamin A 17.1%
Vitamin C 8.5%
Calcium 3.1%
Iron 13.5%
* Percent Daily Values are based on a 2000 calorie diet.
Want To Save This Recipe?
SUBSCRIBE TO GET FREE UPDATES & A FREE ECOOKBOOK!
GET AN EMAIL WHEN THERE'S A NEW RECIPE

Source: https://diethood.com/oven-roasted-asparagus/
0 notes
Text
The James Beard Journalism Awards Still Favor Privilege Over Diversity
Earlier this week, the James Beard Foundation (JBF) announced that it is making a series of changes to its annual award selection process for 2019 in an attempt to make the so-called “Oscars of food” more diverse and inclusive. While some alterations are wholly positive, like eliminating the uber-insular Who’s Who of Food and Beverage in America, others seem like little more than lip service — particularly for food journalists. One of these changes, as first reported by the New York Times, is waiving the $150-per-story submission fee for first-time award entrants as a means of “attracting new voices.”
Almost immediately, in text messages and on social media, culinary writers — the very people the JBF is, ostensibly, trying to help — started talking about how the shift seems somewhat haphazard. In addition to the fee waiver for first-time entrants, the Beards will welcome early submissions in the cookbook, broadcast, and design categories by waving the entry fee entirely. But restaurateurs and chefs continue to be able to nominate themselves for free, while journalists and food writers outside the narrow number of first-time entrants will still be required to shell out money to be considered. And any entry fee at all means that the awards continue to be a pay-to-play system that ensures the majority of voices are left out of the conversation.
For those not in the industry, it might be hard to see how much a James Beard Award can mean to a food writer. Though anyone with access to the internet can write about food — self-publishing has democratized media, mostly for the better — a Beard Foundation nomination or win opens many, many doors, especially for young writers and editors who otherwise might not be noticed by the industry. Award winners can command higher rates, more lucrative book deals, and access to chefs and contacts they might otherwise never have met.
But the $150 submission fee for the chance to even be nominated for a Beard award — let alone win — is ludicrously high, and as such has long been exclusionary for writers from underrepresented communities, freelancers, and those just starting out. Freelance writers are notoriously underpaid, with one study by Payscale reporting that the average annual take home pay is $38,915, or just over $24 per hour.
Any entry fee at all means the awards are a pay-to-play system that ensures the majority of voices are left out of the conversation
The first time I submitted a piece for the Beards on my own dime, I had been paid $300 for it — total — so lost half my income just for the chance to win a prestigious, and hopefully career-boosting, award. I had to weigh the cost against the other things $150 could go toward — rent, groceries, electric bills, health insurance — and finally, tentatively, decided to go through with it. I wasn’t nominated, and probably should’ve just bought groceries. Another year, I truly couldn’t justify spending the money, and my parents gave me the entry fee as my Christmas present. (I wasn’t nominated then, either.)
The Beards are the tip of the iceberg of a sprawling, complex field (journalism) that’s historically easier to navigate if you’re someone of means. I was born and raised in Eastern Kentucky, and have never lived in New York City, the country’s major media hub. It might sound a little naive, but I have always been surprised — and, honestly, continue to be — by just how many of my peers were able to take unpaid or low-paying internships as a first step towards breaking into the industry. Food journalism — all journalism, really — continues to assume that all its writers have a safety net of monetary support to fall back on, or are young and hungry enough to take whatever’s given and gut it out in hopes of one day being invited into the inner sanctum of a staff job (or those dwindling publications that offer a dollar a word). Do you have an aging parent to care for and, in turn, can’t pay your own travel to report a story? Can’t afford daycare on the $200 offered for a heavily-reported, 2,000-word story that takes a month of research? That’s a personal issue, the industry will tell you, so you’re out of luck. But don’t worry, there’s always someone else out there who is willing to do it on the cheap.
The roots of the barrier-to-entry issues in food journalism might run deep, and this plays out in other media awards, as well. The American Society of Magazine Editors charges an absurd $395 per entry, while the Online Journalism Awards costs $175 to enter. (The contest for the Pulitzer Prize, it should be noted, is free; it’s funded by Columbia University.) But there is an opportunity for the James Beard Foundation, as a highly visible platform in food media, to set an example — and that could start by completely waiving the submission fee for writers.
As several writers suggested on Twitter, the Beards could allow writers to submit their stories for free — all writers, regardless of previous entry — while continuing to charge a fee for publications. If they’re really worried about the coffers running dry by losing out on writer submission money, there could be a nominal fee for those journalists who are previous award winners. And if some kind of fee is an absolute must, they could make more concerted efforts to offer financial assistance to freelancers or more-seasoned writers with limited means.
But I know — and have long known — the system is rigged towards the well-off: the legacy food publications and the deeply insular community of writers and editors in cities like New York continue control the tides of award-giving and, more importantly, who is even given the chance to tell their story in the first place.
And I know, though we’ve made baby steps towards greater diversity and inclusion over the past couple of years, that without a great upswell of writers who are willing to stand up to machinations of a well-oiled food prestige machine, it’s likely that paltry offerings — like, say, waving a $150 award fee for first-timer submitters — will continue to be seen by groups like the Beards as very forward-thinking and generous. But until the Beards are accessible to everyone who is courageous enough to submit their story for consideration — freelancer or staffer, just-started-out or seasoned veteran — the award is nothing more than a shiny necklace of privilege.
Sarah Baird is a writer whose work has appeared in the Washington Post, GQ, The Guardian, The Atlantic and more. She divides her time between New Orleans and Kentucky.
Eater.com
The freshest news from the food world every day
By signing up, you agree to our Privacy Policy and European users agree to the data transfer policy.

Source: https://www.eater.com/2018/10/4/17934186/james-beard-awards-media-journalism-diversity-access-fee
0 notes
Text
How Andrew Zimmern Brings Big Ideas to the Small Screen
After striking gold with a hit show, some TV hosts kick back and enjoy the ride — but Andrew Zimmern is not one of those people. Although he’s been seemingly omnipresent on the Travel Channel for the last decade, Zimmern is constantly busy spinning off new projects.
So far this year, the culinary expert has starred in a new restaurant recommendation show called The Zimmern List, as well as fresh episodes of Bizarre Foods and its spinoff Bizarre Foods: Delicious Destinations, which just got a 52-episode order from the Travel Channel. In two weeks, Zimmern’s first Food Network show, Big Food Truck Tip, will hit the air. And in between working on all of these series, Zimmern is also flexing his muscle as a producer of non-food shows through his five-year-old production company Intuitive Content.
Eater recently hopped on the phone with Zimmern to chat about his food TV rules, how he brings an idea to the small screen, and where he turns to when he needs creative inspiration.
When you’re putting together a new season of one of your shows, how does the process start? Does it begin with a list of places? Or themes?
It begins with trying to hash out what it is that hasn’t been done in the marketplace before, that we believe strongly enough in doing: Where can we, through food-travel-adventure-learning television, make a difference? Now, it’s a lot easier when I’m making Zimmern List, Big Food Truck Tip, or Driven By Food, because I produce all of those. With Bizarre Foods and Delicious Destinations, I created the show, I’m the executive producer, etcetera, etcetera, etcetera, but another company provides the production services, and so that becomes very tricky in trying to enroll them.
Now, with Delicious Destinations, it was fascinating because the network came to me and said, “Okay, you do these shows where you’re off in the jungle and you’re here and you’re there, and, yes, sometimes you’re doing a city, but even then you’re doing experiences that other people can’t have. A family invites you in to do a matanza, where you’re butchering a whole hog on this farm. Normal people can’t do that, and we want to develop a snackable, half-hour recommender show.” So that’s how that show started.
I came back to them with some parameters — and this is usually how it works with everything. I said, “Okay, I met with my team, we hashed everything out. We can’t do a show where we recommend the best steak frites in Paris, because no one can tell you the answer to that question. So you’re damned if you do, or you’re damned if you don’t.” And I said, “The thin line that we straddle in Delicious Destinations, is when you go to Paris, here are the things that you need to eat while you’re there.”
We go to a place, but we don’t hit you over the head with what that place is. We happened to go to Bistrot Paul Bert. I think they do a phenomenal steak frites — because we’re not going to go to a place that does a crappy one, right? But we don’t care whether you do it anywhere else. The important thing is that if you go to Paris for the first time, and you don’t eat steak frites in a bistro, you’re not doing Paris right.
You mentioned the word “snackable.” I feel like If I go over to a relative’s house, they might have one of your shows on, and it’s entertainment. But I know that you really dig in, as well. Like take the recent Las Vegas episode of Delicious Destinations. You went to a buffet, but you also went off-Strip, and you go to the Italian restaurant that’s been there for four generations…
Oh my god, how great was that?
I didn’t even know that it existed, and I read Eater Vegas fairly frequently. It seems like there’s a certain texture or variety of places that you want to throw into the mix. Is that usually the case?
Yeah, you have to. We look at all the other shows in the genre, and we make a real, concerted effort to decide, how are we’re going to be different? And, what is our best tactic for all the things we do well? Like, for example, making sure that two or three of our selections are “hidden finds.”
“There are some people who have a hard life, they come home from work, and they just disappear into TV — and I want to help those people.”
Some people just put on entertainment television as wallpaper, and I love that. There are some people who have a hard life, they come home from work, and they just disappear into TV — and I want to help those people. If they like food and travel, this show is a great show. A lot of my shows are great shows to disappear into.
Then there’s some people who are watching them who actually write down the stuff or go on the Travel Channel website, and they say, “Oh my god, that Italian red sauce place, that’s perfect, we love that.” And some people are into the Asian place that I’m going to discover up at the mall. So we really do try to provide a mix of things for people, and it’s proven to be very successful.
The new show is all about food trucks, a world that you’ve covered in the past on Driven By Food. Why did you double down? What stories are you excited about telling now?
So, Food Network came to us and said, “All of our research and everything has shown that we have a lot of people who want to see this world of food trucks, and food trucks aren’t going away. We have a great show with Tyler Florence in the Great Food Truck Race, and we want to create a companion show, not to air alongside it, but another food truck show and we want there to be stories. We want there to be that narrative, and we want there to be that sense of discovery. But it’s Food Network, so we still want some competition in there.” And we’re like, “Okay.” You’ve basically been given an assignment from a client.
When you only have half an hour, and the parameters that the network gave were “three trucks and we want you to give a prize.” How do you then give a prize to someone in a format like that, and not do the same thing that people have seen in dozens and dozens of other shows? A lot of those shows will say, “Okay, remember, we’re judging by food, creativity, and appearance” or whatever it is, so that the audience is clued in as to what what the decider is going to do. We don’t do that.
We take three food trucks, and I spend some time with them. I eat their food, I talk with them beforehand, I go on their truck afterwards, I find out a little bit about them, and my criteria for giving them the money is entirely based around two things. There’s the food, but I can’t have them competing, in a sense, against each other, because if I go to a city, and I do Greg Morabito’s Barbecue Truck, Amanda Kludt’s Vegan Salads & Smoothies, and Billy Bob’s Asian Noodle Truck, it’s apples to oranges to pears, right?
But what I can do — because, I dunno, I’ve been around the block a couple of times — is say, “Okay, Greg’s barbecue is going to be evaluated on the quality of his food in ratio to what his potential is, for his barbecue.” In other words, “Wow, he’s nailed his ribs and all this other stuff, but his sides could use some work.” I need to judge everybody based on what they’re capable of doing themselves, and then I select the winner.
I hope the audience likes it; they’re fun to do. It’s an incredible world of entrepreneurs; I teach entrepreneurship at Babson College, and I’m involved in a lot of that. It is an inexpensive way for young entrepreneurs who really want to seize the moment, get out there, and be responsible for their own success. It’s an incredible world of people who are all the most glass half-full folks I’ve ever met. Everyone believes that they can do it because you don’t have to operate a whole restaurant. If you’re like, “I make the best clam chowder in the world,” well, you need to figure out a couple styles of clam chowder, but if you want a clam chowder truck? Go for it.
Are there any influences, cinematic or television-wise, that you turn to when you’re feeling creatively tapped out? Or is there a new source that you draw inspiration from?
We’re trying to borrow from the people who I’ve learned from and inspired me. And that’s everyone from Ken Burns’s group, to what Lydia [Tenaglia] and Chris [Collins] have done at Zero Point Zero — I look to them as incredible leaders in our community. They’re friends of mine, and I did a pilot with them many years ago called Border Check, which was one of my favorite hours of TV I’ve ever made. We’ve remained friends over the years, and I watch everything they make, and I have the opportunity to pick up the phone and call them and say, “Wow, what were you thinking about with that?” Or when I see them, we talk about work.
You have... I don’t want to call them mentors, but I look at them that way, as leaders who have done things the right way. If you say to yourself, “I don’t know everything, I need to learn from other people,” I think that’s a really great place, stylistically, as a creative person, to take off from. You try to learn from everybody.
When you go out and meet with your fans, is there a moment from one of your shows that people ask you about? One thing that keeps sticking out?
I’ve been lucky enough to be on TV, on major cable, for 13 or 14 years now, so there’s more than one. Everybody always asks me about the show in Botswana, where I had an out-of-body experience with the shamans there. Because they can tell, they know that we shoot our show as “live.” We don’t rehearse, we don’t script anything. It’s just me having an experience. And so, they’re always asking me, “That couldn’t really have been true, was it?” And I say, “Yeah.” I mean, I’m a cynical Jewish New Yorker. When I went in there, I was like, you know, no fucking way. What they say is going to happen... is not possible.
We sat there — and a lot of people don’t pick up on it, but we were there for four or five or six hours in this ceremony — watching all this stuff and seeing some really amazing things, but nothing really happened... until it did. And in the show, I think I said, “I can remember really clearly, it was like electricity shot through my body, I was floating above me, about 10 feet above, I could see that this guy was looking at the pictures of my life in my head.” It was insane. And people are always asking me about that, because I think it strikes them as being really true. They’re watching something like, holy shit, is this really happening? I would say that’s the one that comes up the most.
This interview has been edited and condensed for clarity.
• Fall Food TV Preview: 9 Shows to Watch [E] • All Food TV Coverage [E]
Eat, Drink, Watch.
Food entertainment news and streaming recommendations every Friday
By signing up, you agree to our Privacy Policy and European users agree to the data transfer policy.

Source: https://www.eater.com/2018/9/7/17823768/andrew-zimmern-food-network-big-food-truck-tip-show-bizarre-foods-delicious-destinations-interview
0 notes
Text
Glazed Chicken With Broccoli And Mashed Sweet Potatoes
When you think of chicken with broccoli on the side, your mind might automatically remember a long-ago meal of dried-out chicken breasts with soggy stems of broccoli. We’ve all had that one dish that didn’t turn out quite right, yet we ate it anyway – to please the chef, to not waste food. Tonight, however, you are in for one tasty plateful of spicy-herb-glazed chicken with perfectly cooked broccoli, just follow the directions and all will be right with your meal.
As always, start with the highest quality ingredients you can find. Pastured, or free-range, poultry is the best, and if you can find it locally, then that is wonderful news! If it must come from farther, you can order it online. The bottom line? Don’t stress too much about where your meat comes from. Do the best you can with what you have, use vegetables that are in season and choose organic whenever possible. Drink plenty of water, get enough sleep, you know the drill. For us, to keep Paleo food exciting and entertaining, we like to use plenty of spices. And having abundant spices in the kitchen will help to nourish your sophisticated herbal palate. Dried onion and red pepper flakes, crushed coriander – toss it all in!
You’ll love the mashed sweet potatoes under the broccoli and chicken, it is the essence that holds the dish together. If you are searching for a lower-carb option, why not try some cauliflower rice instead?
Serves: 4Prep: 20 minCook: 20 min
Values are per portion. These are for information only & are not meant to be exact calculations.
Add to Meal Plan
Ingredients
3 chicken breasts, boneless and skinless, sliced into strips
1 broccoli head, cut into florets
2 green onions, sliced
2 tbsp. paprika
1/2 tbsp. dried garlic
1/2 tbsp. dried onion flakes
1/2 tbsp. crushed coriander
1 tsp. crushed red pepper flakes
1/4 cup chicken stock
Sliced almonds (for garnish)
Cooking fat
Sea salt and freshly ground black pepper
Mashed Sweet-Potatoes
4 sweet potatoes, peeled and diced
4 tbsp. ghee
Sea salt and freshly ground black pepper
Preparation
Place the diced sweet potatoes in pot of boiling water and boil until soft, about 20 minutes.
Drain sweet potatoes and place in a large bowl; add the ghee, season to taste and mash until smooth.
In a bowl combine the paprika, dried garlic, dried onion, coriander and red pepper flakes, then season to taste.
Season the chicken pieces with the spice mixture.
Melt cooking fat in a skillet over medium heat, cook the chicken on both sides until cooked through, about 8 to 10 minutes.
Set the chicken aside on a plate and add some more cooking fat to the skillet.
Add the broccoli, pour in the chicken stock and cook until the broccoli is soft, 4 to 5 minutes.
Bring the chicken back to the skillet, sprinkle with green onions and cook until warm, about 2 to 3 minutes.
Serve the chicken and broccoli on top of the mashed sweet potatoes.
P.S. Have a look at Paleo Restart, our 30-day program. It has the tools to let you reset your body, lose weight and start feeling great.
+ The Paleo Leap Meal Planner is now also available. Put your meal planning on autopilot!
Source: https://paleoleap.com/glazed-chicken-broccoli-sweet-potatoes/
0 notes
Text
Beef Enchiladas Recipe
These Beef Enchiladas are so tasty and easy, you’ll never go back to canned enchilada sauce. Corn tortillas filled with flavorful ground beef, melty cheese and a killer homemade red enchilada sauce.
Beef Enchiladas Made Simple
This beef enchilada recipe is really so simple, that you might have all the ingredients you need already on hand. Start with a pound of extra lean good quality ground beef. I prefer to sauté the onions and jalapeños, then add the garlic just before adding the ground beef. This brings out the flavors of the aromatics. A small amount of sugar balances the acidity of the tomato sauce.
How to Make Beef Enchiladas – Time Saving Tip!
Prepare as much as you can ahead, dice and shred and have everything laid out. Once you have everything prepared, set up an assembly line to make the enchiladas. In this enchilada recipe, the beef and sauce is cooked together in one pot. For assembly, rather than separating the meat and the enchilada sauce, I use a slotted spoon to spoon the meat mixture into each tortilla, then top with cheese and roll. Once the beef has been evenly divided into the tortillas, use the remaining sauce in the pan to top the enchiladas and bake.
Good Quality Spices and Fresh Herbs
I love the flavor of cilantro, but if you don’t you can certainly skip it. For freshness, try chopped fresh parsley instead. I also like the extra flavor of smoked paprika in this recipe, but you can substitute regular paprika as well.
Frying the Tortillas for Enchiladas
In a small frying pan, lightly fry tortillas in a shallow amount of vegetable or canola oil. You just want the tortillas to be soft and pliable, not crispy. Lightly frying the corn tortillas prevents them from getting soggy once you bake the enchiladas. The oil acts as a barrier and keeps tortillas from absorbing too much liquid from the sauce.
Beef Enchiladas Recipe
The best part of this recipe is that it’s easily doubled or tripled. It’s a great dinner to make and take. Make one for home and one for a friend or neighbor. These beef enchiladas freeze really well too! Just assemble, let cool completely, cover tightly and freeze.
Ground Beef Enchilada Recipe
Course: Dinner
Servings: 6
Author: Melissa
Ingredients
1 tablespoon vegetable oil plus additional for frying tortillas
1/2 cup onion finely diced
1 jalapeno minced and seeds removed
4 cloves garlic minced
1 pound 93/7 lean ground beef
1 cup beef broth low sodium
2 8 oz cans tomato sauce good quality
2 tablespoons chili powder
1 teaspoon smoked paprika
1 tablespoon sugar
1 teaspoon cumin
1 teaspoon kosher salt
1/2 teaspoon freshly ground black pepper
2 tablespoons cilantro chopped
12 corn tortillas
16 oz Colby-jack cheese shredded
sour cream for serving
Instructions
In a large skillet, sauté onions and jalapeño over medium low heat until onions start to soften and turn translucent, 2-3 minutes. Stir in garlic and cook 1 minute more. Increase heat and add ground beef to skillet and brown until cooked through. Add beef broth, tomato sauce, chili powder, sugar, cumin, salt and pepper to pan and stir to combine. Let simmer over low heat for 10 minutes or until sauce has reduced slightly.
Meanwhile in a second smaller skillet, lightly fry corn tortillas in hot vegetable oil. Tortillas should still be pliable for rolling. Set tortillas aside with paper towels between each layer. Once sauce has reduced slightly, stir in 2 tablespoons of chopped fresh cilantro.
Preheat oven to 400 degrees and spray a 9x13 baking dish with non stick cooking spray.
To assemble enchiladas, start by adding 1/2 cup of enchilada sauce mixture in bottom of baking pan. Use a slotted spoon to evenly divide meat mixture into each of the tortillas, then divide 8 oz of cheese between all 12 enchiladas, roll and place seam side down in baking dish. Pour remaining enchilada sauce over rolled enchiladas and top with remaining cheese.
Cover dish with foil and bake at 400 degrees for 20-30 minutes, or until heated through and hot and bubbly. Sprinkle with additional fresh cilantro and serve with sour cream.
5 Easy Dinner Ideas for Busy Weeknights
My five FAVORITE recipes for busy families!
Quick to make
Light on your budget
Easy to clean-up
and...most important...absolutely DELICIOUS
<![CDATA[/* Layout */ .ck_form /* divider image */ background: #fff url(data:image/gif;base64,R0lGODlhAQADAIABAMzMzP///yH/C1hNUCBEYXRhWE1QPD94cGFja2V0IGJlZ2luPSLvu78iIGlkPSJXNU0wTXBDZWhpSHpyZVN6TlRjemtjOWQiPz4gPHg6eG1wbWV0YSB4bWxuczp4PSJhZG9iZTpuczptZXRhLyIgeDp4bXB0az0iQWRvYmUgWE1QIENvcmUgNS41LWMwMTQgNzkuMTUxNDgxLCAyMDEzLzAzLzEzLTEyOjA5OjE1ICAgICAgICAiPiA8cmRmOlJERiB4bWxuczpyZGY9Imh0dHA6Ly93d3cudzMub3JnLzE5OTkvMDIvMjItcmRmLXN5bnRheC1ucyMiPiA8cmRmOkRlc2NyaXB0aW9uIHJkZjphYm91dD0iIiB4bWxuczp4bXA9Imh0dHA6Ly9ucy5hZG9iZS5jb20veGFwLzEuMC8iIHhtbG5zOnhtcE1NPSJodHRwOi8vbnMuYWRvYmUuY29tL3hhcC8xLjAvbW0vIiB4bWxuczpzdFJlZj0iaHR0cDovL25zLmFkb2JlLmNvbS94YXAvMS4wL3NUeXBlL1Jlc291cmNlUmVmIyIgeG1wOkNyZWF0b3JUb29sPSJBZG9iZSBQaG90b3Nob3AgQ0MgKE1hY2ludG9zaCkiIHhtcE1NOkluc3RhbmNlSUQ9InhtcC5paWQ6MUQ5NjM5RjgxQUVEMTFFNEJBQTdGNTQwMjc5MTZDOTciIHhtcE1NOkRvY3VtZW50SUQ9InhtcC5kaWQ6MUQ5NjM5RjkxQUVEMTFFNEJBQTdGNTQwMjc5MTZDOTciPiA8eG1wTU06RGVyaXZlZEZyb20gc3RSZWY6aW5zdGFuY2VJRD0ieG1wLmlpZDoxRDk2MzlGNjFBRUQxMUU0QkFBN0Y1NDAyNzkxNkM5NyIgc3RSZWY6ZG9jdW1lbnRJRD0ieG1wLmRpZDoxRDk2MzlGNzFBRUQxMUU0QkFBN0Y1NDAyNzkxNkM5NyIvPiA8L3JkZjpEZXNjcmlwdGlvbj4gPC9yZGY6UkRGPiA8L3g6eG1wbWV0YT4gPD94cGFja2V0IGVuZD0iciI/PgH//v38+/r5+Pf29fTz8vHw7+7t7Ovq6ejn5uXk4+Lh4N/e3dzb2tnY19bV1NPS0dDPzs3My8rJyMfGxcTDwsHAv769vLu6ubi3trW0s7KxsK+urayrqqmop6alpKOioaCfnp2cm5qZmJeWlZSTkpGQj46NjIuKiYiHhoWEg4KBgH9+fXx7enl4d3Z1dHNycXBvbm1sa2ppaGdmZWRjYmFgX15dXFtaWVhXVlVUU1JRUE9OTUxLSklIR0ZFRENCQUA/Pj08Ozo5ODc2NTQzMjEwLy4tLCsqKSgnJiUkIyIhIB8eHRwbGhkYFxYVFBMSERAPDg0MCwoJCAcGBQQDAgEAACH5BAEAAAEALAAAAAABAAMAAAICRFIAOw==) repeat-y center top; font-family: "Helvetica Neue", Helvetica, Arial, Verdana, sans-serif; line-height: 1.5em; overflow: hidden; color: #000000; font-size: 16px; border-top: solid 20px #3071b0; border-top-color: #3071b0; border-bottom: solid 10px #3d3d3d; border-bottom-color: #1d446a; -webkit-box-shadow: 0px 0px 5px rgba(0,0,0,.3); -moz-box-shadow: 0px 0px 5px rgba(0,0,0,.3); box-shadow: 0px 0px 5px rgba(0,0,0,.3); clear: both; margin: 20px 0px; .ck_form, .ck_form * -webkit-box-sizing: border-box; -moz-box-sizing: border-box; box-sizing: border-box; #ck_subscribe_form clear: both; /* Element Queries — uses JS */ .ck_form_content, .ck_form_fields width: 50%; float: left; padding: 5%; .ck_form.ck_horizontal .ck_form_content border-bottom: none; .ck_form.ck_vertical background: #fff; .ck_vertical .ck_form_content, .ck_vertical .ck_form_fields padding: 10%; width: 100%; float: none; .ck_vertical .ck_form_content border-bottom: 1px dotted #aaa; overflow: hidden; /* Trigger the vertical layout with media queries as well */ @media all and (max-width: 499px) .ck_form background: #fff; .ck_form_content, .ck_form_fields padding: 10%; width: 100%; float: none; .ck_form_content border-bottom: 1px dotted #aaa; /* Content */ .ck_form_content h3 margin: 0px 0px 15px; font-size: 24px; padding: 0px; .ck_form_content p font-size: 14px; .ck_image float: left; margin-right: 5px; /* Form fields */ .ck_errorArea display: none; #ck_success_msg padding: 10px 10px 0px; border: solid 1px #ddd; background: #eee; .ck_label font-size: 14px; font-weight: bold; .ck_form input[type="text"], .ck_form input[type="email"] font-size: 14px; padding: 10px 8px; width: 100%; border: 1px solid #d6d6d6; /* stroke */ -moz-border-radius: 4px; -webkit-border-radius: 4px; border-radius: 4px; /* border radius */ background-color: #f8f7f7; /* layer fill content */ margin-bottom: 5px; height: auto; .ck_form input[type="text"]:focus, .ck_form input[type="email"]:focus outline: none; border-color: #aaa; .ck_checkbox padding: 10px 0px 10px 20px; display: block; clear: both; .ck_checkbox input.optIn margin-left: -20px; margin-top: 0; .ck_form .ck_opt_in_prompt margin-left: 4px; .ck_form .ck_opt_in_prompt p display: inline; .ck_form .ck_subscribe_button width: 100%; color: #fff; margin: 10px 0px 0px; padding: 10px 0px; font-size: 18px; background: #0d6db8; -moz-border-radius: 4px; -webkit-border-radius: 4px; border-radius: 4px; /* border radius */ cursor: pointer; border: none; text-shadow: none; .ck_form .ck_guarantee color: #626262; font-size: 12px; text-align: center; padding: 5px 0px; display: block; .ck_form .ck_powered_by display: block; color: #aaa; .ck_form .ck_powered_by:hover display: block; color: #444; .ck_converted_content display: none; padding: 5%; background: #fff; /* v6 */ .ck_form_v6 #ck_success_msg padding: 0px 10px; @media all and (max-width: 403px) .ck_form_v6.ck_modal .ck_close_link top: 30px; @media all and (min-width: 404px) and (max-width: 499px) .ck_form_v6.ck_modal .ck_close_link top: 57px; .ck_powered_by display: none !important; ]]> Source: https://www.number-2-pencil.com/beef-enchiladas-recipe/

0 notes
Text
The Most Important Thing You Need for Success on the Anti Candida Diet
I’ve heard it over and over from so many of my clients. They start out really well on an anti-candida diet and really stick with it. Over time, they begin to feel better (yay!). They’re determined to be clear of candida forever.
Over time, their symptoms improve, or maybe disappear entirely. And they really do feel free of candida.
And so, they go back to living their lives. They work, they spend time with family and friends, they go out to eat, they have celebrations. . . all the usual things.
But I’ve noticed a pattern. Eventually, little by little, the old foods make their way back into the diet. At first, this doesn’t seem to be a problem. After all, they feel good.
But little by little, symptoms return. Maybe it’s the same symptoms they had before; maybe they’re different. And this time, they’re a little bit worse. And they take a longer–and a little more effort–to clear them.
I’ve worked with clients who’ve gone through this cycle multiple times. And each time, their overall health is compromised a bit more.
In today’s video, I talk about what it takes to break the cycle, and to begin to eat and live as someone who embraces the anti-candida diet (or whatever your own “restricted” diet happens to be).
Question: Have you been on an anti-candida diet, and slipped up? How did you get back on track?
Highlights:
The cycle that happens too often on the ACD–and can be dangerously unhealthy
How we tend to think about healing on an anti-candida diet
Why it gets harder and harder to clear your candida each time
Why we can keep at the diet for the short term but tend to mess up over the long term
The shift that needs to take place to set the stage for success
How cognitive dissonance plays a role
The major switch I made last time I was diagnosed–and why that one stuck
What a typical day’s food used to be like for me “in the old days”
Resources:
Disclosure: Links in this post may be affiliate links. If you choose to purchase using those links, at no cost to you, I will receive a small percentage of the sale.
Subscribe for health information, products and promotions about healthy eating and holistic living, and recipes without sugar, gluten, eggs or dairy! Click here to subscribe to RickiHeller.com via email. You’ll receive emails sharing information and recipes as soon as they’re posted, plus weekly updates and news about programs and upcoming events. A healthy lifestyle CAN be sweet!

Source: https://www.rickiheller.com/2018/07/most-important-thing-you-need-for-success-anti-candida-diet/
0 notes
Text
SPOTTED ON SHELVES (SEASONAL EDITION) – 11/14/2018
Here are some new seasonal products found on store shelves by your fellow readers. If you’ve tried any of them, share your thoughts in the comments.
(Spotted by Amanda Y at Target.)
(Spotted by Sarah R at Trader Joe’s.)
Our reviewer Rachel covered these when they were shown at the Summer Fancy Food Show. (Spotted by Rachel L at Harmon Face Values.)
(Spotted by Dan at Woodman’s Markets.)
(Spotted by Sylvia at Rite Aid.)
(Spotted by Sylvia at CVS.)
(Spotted by Robbie at Walmart.)
(Spotted by Rachel C at Target.)
(Spotted by Amanda Y at Kroger.)
(Spotted by Caitlin J at Walmart.)
(Spotted by Crystal N at Safeway.)
Thank you to all the photo contributors! If you’re out shopping and see an interesting new product on the shelf, snap a picture of it, and send us an email ([email protected]) with where you found it and “Spotted” in the subject line. Or reply to us (@theimpulsivebuy) on Twitter with the photo, where you spotted it, and the hashtag #spotted. If you do so, you might see your picture in our next Spotted on Shelves post.
Also, if you want to send in photos and are wondering if we’ve already covered something, don’t worry about it. Let us worry about it.
Here are a few posts that might interest you:

Source: https://www.theimpulsivebuy.com/wordpress/2018/11/14/spotted-on-shelves-seasonal-edition-11-14-2018/
0 notes
Text
Instant Pot Cheesy Broccoli Soup
I am really having fun using my Instant Pot. I’m so glad I finally took the plunge and started using it. Granted, there are some things that I don’t think are worth making in it but this soup recipe is not one of them.
This cheesy broccoli soup comes together so fast! I love how easy it is to make. Now, we don’t have a Panera yet in Utah. However, this recipes is said to be better than Panera’s cheesy broccoli soup. Since I haven’t tried it, I can’t say whether the claim is true or not.
Life is even easier with this soup if you buy the broccoli already in florets. Same thing with the carrots, I buy them in a bag already cut into matchsticks. I even use pre-shredded cheese. If you do all of this, the hardest part of the recipe is dicing the onion!
Instant Pot Cheesy Broccoli Soup
3 cups chicken broth
¾ cup minced onion
4 cups broccoli florets
1½ cups matchstick carrots
1 tsp minced garlic
salt and pepper, to taste
2 cups heavy cream
2 cups sharp cheddar cheese
2 Tbsp cornstarch
¼ cup water
To the Instant pot, add the chicken broth, onion, broccoli, carrots, garlic, salt and pepper.
Set to manual for 2 minutes. Allow a natural pressure release for 3 minutes then manually release the remaining pressure.
Remove lid and stir in the heavy cream. Turn on to saute and heat until it almost begins to simmer. Turn the Instant Pot to off. Stir in the cheese. Ten mix the cornstarch and water together. Slowly stir it to the soup until thickened. Serves 4.
Recipe adapted from Cooking with Karli. Source: https://www.realmomkitchen.com/26663/instant-pot-cheesy-broccoli-soup/
0 notes
Text
Rosemary Roasted Potatoes
$3.58 recipe / $0.90 serving
Rosemary Roasted Potatoes are a classic recipe that everyone needs to know how to make. They’re so easy that you’ll likely memorize the process on the first try, and their versatility means they can go with just about any meal you’re preparing. While they do take a little bit of time to fully cook, it’s mostly hands off time and the resulting flavor and texture is well worth the wait!
Originally posted 10-24-09, updated 9-5-18.
What Potatoes Should I Use?
I got a little fancy today and bought these tri-colored baby potatoes from Aldi, which are definitely more expensive than your basic russet, but they create such a pretty presentation and I love their delicate texture. That being said, you can use just about ANY type of potato for this recipe. See what I mean by flexible? Whether you go with russet, red, or even Yukon gold, you’ll probably cut the cost of this recipe considerably compared to these pretty baby potatoes. Just make sure that whatever potato variety you use, cut them into about 3/4-inch pieces. The size of your potato pieces will determine how long they take to roast.
Can I Use Different Herbs?
Absolutely! If you’re not a fan of rosemary, or don’t have any available, feel free to swap it out with your favorite herb. Again, this recipe is extremely flexible. And yes, you can use fresh rosemary instead of dried (use about 1/2 tsp chopped).
Rosemary Roasted Potatoes
Rosemary Roasted Potatoes are an easy, flexible, and DELICIOUS side dish that can be paired with just about any meal. Keep this go-to recipe handy!
Servings 4 about 3/4 cup each
1.5 lbs. potatoes* $2.99
1 Tbsp olive oil $0.16
2 cloves garlic, minced $0.16
1 tsp dried rosemary $0.10
1/2 tsp salt $0.02
freshly cracked pepper $0.03
1 handful parsley, chopped (optional) $0.12
Preheat the oven to 400ºF. Wash your potatoes well, then cut them into 3/4-inch cubes or pieces.
Place the potatoes in a large bowl and add the olive oil, minced garlic, dried rosemary, salt, and some freshly cracked pepper (about 15 cranks of a pepper mill). Toss the potatoes until they are evenly coated in oil and spices.
Spread the potatoes out over a baking sheet so that they are in a single layer. Transfer the potatoes to the oven and roast for 15 minutes, then stir and roast for an additional 15 minutes.
After 30 minutes total roasting time, stir once again and if additional browning is desired, roast for an additional 5-10 minutes. Serve with a handful of fresh, chopped parsley sprinkled over top, if desired.
*Use any potato variety you like, making sure to cut them into small, even-sized cubes.
Step by Step Photos
Start by preheating your oven to 400ºF. Wash 1.5 pounds of potatoes well. I used these tiny tri-colored potatoes from Aldi that don’t have many crevices or eyes, but if you’re using a larger variety, make sure to get in those cracks to get all the dirt out!
Cut the potatoes into 3/4-inch cubes or pieces. The larger the pieces, the longer they’ll take to cook, so keep that in mind. Add the potatoes to a large bowl along with 1 Tbsp olive oil, 2 cloves minced garlic, 1 tsp dried rosemary, 1/2 tsp salt, and some freshly cracked pepper (about 15 cranks of a pepper mill). Toss the potatoes until they are evenly coated in oil and spices.
Spread the seasoned potatoes out onto a baking sheet so that they are in a single layer. Transfer the potatoes to the oven.
Roast the potatoes for 15 minutes, then stir and roast for an additional 15 minutes. After 30 minutes total, remove them from the oven, and if you want them a little more brown, simply stir and roast for an additional 5-10 minutes.
If desired, sprinkle a handful of chopped fresh parsley over the Rosemary Roasted Potatoes just before serving. Serve hot!
posted on September 5, 2018 in Dairy Free, Egg Free, Gluten free, Potatoes, Recipes, Recipes under $5, Side Dish, Soy Free, Under $1 per serving, Vegan, Vegetables, Vegetarian Recipes
Source: https://www.budgetbytes.com/rosemary-roasted-potatoes/
0 notes
Text
Vegan Maple Cashew Cream Cheese Frosting Paleo
A Simple and Easy way to make Vegan Maple Cashew Cream Cheese Frosting! A Paleo friendly and delicious dairy free cream cheese frosting alternative.
So I guess this is dessert week, because this maple cashew cream frosting recipe is basically a dessert itself, just grab a spoon. No shame, no stress,. But seriously, we’re rockin the maple, dates, and unrefined natural sugars in October ya’ll! It’s allllll good!
Tell me. Were you that kid who only ate the frosting on cake and cupcakes? You know, the one that purposely asks for the end piece just so you can get more frosting. Ya, that was me. FOR SURE. In fact, I once tried to tell my mom that my whole bowl of cream cheese frosting was just yogurt. Haha, she didn’t buy it, but let me eat it anyways to learn my lesson. The lesson where you eat so much you get sick. *Raises hand*
Thank goodness my love for junk-ified frosting has died down. Otherwise I might have a bajillion cavities by now. Right? And I’d also like to thank my seasonal allergies and constantly trying to improve my gut health for expanding my “dairy free and vegan” horizon! Hence this vegan maple cashew cream cheese frosting! It’s cinnamony (that’s a word), it’s rich but light, it’s just plain divine! Hey, sometimes limiting dairy and eggs can bring you into a whole new world of sweets and baking. I’m always up for that challenge.
This challenge isn’t only for myself, it’s for my niece as well. Heck it’s for all those who also have to limit dairy or eggs or casein. Those pesky food allergies, gah, sometimes they just make being a kid so hard.
But have no fear because the magic of CASHEW cream is here, dairy free deliciousness!
Yes –> EASY PEASY vegan CASHEW Cream cheese frosting. All you need is a little natural sugar and spice and we blend it all nice. Haha! Let’s do this!
Print
<![CDATA[ .tasty-recipes-image float: right; .tasty-recipes-print-button background-color: #666677; display: inline-block; padding-left: 1em; padding-right: 1em; padding-top: 0.5em; padding-bottom: 0.5em; text-decoration: none; a.tasty-recipes-print-button color: #fff; a.tasty-recipes-print-button:hover color: #fff; .tasty-recipes-rating.tasty-recipes-clip-10 -webkit-clip-path: polygon(0 0, 10% 0%, 10% 100%, 0% 100%); clip-path: polygon(0 0, 10% 0%, 10% 100%, 0% 100%); .tasty-recipes-rating.tasty-recipes-clip-20 -webkit-clip-path: polygon(0 0, 20% 0%, 20% 100%, 0% 100%); clip-path: polygon(0 0, 20% 0%, 20% 100%, 0% 100%); .tasty-recipes-rating.tasty-recipes-clip-30 -webkit-clip-path: polygon(0 0, 30% 0%, 30% 100%, 0% 100%); clip-path: polygon(0 0, 30% 0%, 30% 100%, 0% 100%); .tasty-recipes-rating.tasty-recipes-clip-40 -webkit-clip-path: polygon(0 0, 40% 0%, 40% 100%, 0% 100%); clip-path: polygon(0 0, 40% 0%, 40% 100%, 0% 100%); .tasty-recipes-rating.tasty-recipes-clip-50 -webkit-clip-path: polygon(0 0, 50% 0%, 50% 100%, 0% 100%); clip-path: polygon(0 0, 50% 0%, 50% 100%, 0% 100%); .tasty-recipes-rating.tasty-recipes-clip-60 -webkit-clip-path: polygon(0 0, 60% 0%, 60% 100%, 0% 100%); clip-path: polygon(0 0, 60% 0%, 60% 100%, 0% 100%); .tasty-recipes-rating.tasty-recipes-clip-70 -webkit-clip-path: polygon(0 0, 70% 0%, 70% 100%, 0% 100%); clip-path: polygon(0 0, 70% 0%, 70% 100%, 0% 100%); .tasty-recipes-rating.tasty-recipes-clip-80 -webkit-clip-path: polygon(0 0, 80% 0%, 80% 100%, 0% 100%); clip-path: polygon(0 0, 80% 0%, 80% 100%, 0% 100%); .tasty-recipes-rating.tasty-recipes-clip-90 -webkit-clip-path: polygon(0 0, 90% 0%, 90% 100%, 0% 100%); clip-path: polygon(0 0, 90% 0%, 90% 100%, 0% 100%); .tasty-recipes-nutrition ul list-style-type: none; margin: 0; padding: 0; .tasty-recipes-nutrition ul:after display: block; content: ' '; clear: both; .tasty-recipes-nutrition li float: left; margin-right: 1em; .tasty-recipes-plug text-align: center; margin-bottom: 1em; display: -ms-flexbox; display: flex; -ms-flex-align: center; align-items: center; -ms-flex-pack: center; justify-content: center; .tasty-recipes-plug a text-decoration: none; box-shadow: none; .tasty-recipes-plug a img width: 150px; height: auto; margin: 5px 0 0 8px; display: inline-block; @media print .tasty-recipes-no-print, .tasty-recipes-no-print * display: none !important; .tasty-recipes border: 5px solid #666677; margin-top: 6em; margin-bottom: 4em; .tasty-recipes.tasty-recipes-has-plug margin-bottom: 1em; .tasty-recipes-plug margin-bottom: 4em; .tasty-recipes-print-button display: none; .tasty-recipes-image-shim height: 69.5px; clear: both; .tasty-recipes-entry-header background-color: #666677; color: #FFF; text-align: center; padding-top: 35px; padding-bottom: 1.5em; padding-left: 2.5em; padding-right: 2.5em; .tasty-recipes-entry-header.tasty-recipes-has-image padding-top: 0px; .tasty-recipes-entry-header .tasty-recipes-image float: none; text-align: center; transform: translateY(-115px); margin-bottom: 1em; /* Decide if we need this */ .tasty-recipes-entry-header .tasty-recipes-image img -webkit-border-radius: 50%; -moz-border-radius: 50%; border-radius: 50%; border: 5px solid #666677; height: 150px; width: 150px; display: inline-block; .tasty-recipes-entry-header h2 font-size: 2em; font-weight: 400; text-transform: lowercase; margin-bottom: 0; text-align: center; color: #FFF; margin-top: 0; padding-top: 0; padding-bottom: 0; .tasty-recipes-has-image .tasty-recipes-entry-header h2 margin-top: -115px; .tasty-recipes-entry-header hr border: 1px solid #B7BBC6; background-color: #B7BBC6; margin-bottom: 1em; margin-top: 1em; .tasty-recipes-entry-header div.tasty-recipes-rating text-decoration: none; border: none; .tasty-recipes-entry-header .tasty-recipes-rating:hover text-decoration: none; .tasty-recipes-entry-header div.tasty-recipes-rating font-size: 1.375em; display: block; .tasty-recipes-entry-header .tasty-recipes-rating p margin-bottom: 0; .tasty-recipes-entry-header span.tasty-recipes-rating margin-left: .25em; margin-right: .25em; color: #FFF; .tasty-recipes-entry-header .rating-label font-style: italic; color: #B7BBC6; font-size: .6875em; display: block; .tasty-recipes-entry-header .tasty-recipes-details margin-top: 1em; .tasty-recipes-entry-header .tasty-recipes-details ul list-style-type: none; margin: 0; .tasty-recipes-entry-header .tasty-recipes-details ul li display: inline-block; margin-left: .5em; margin-right: .5em; font-size: 1em; line-height: 2.5em; color: #fff; @media only screen and (max-width: 520px) .tasty-recipes-entry-header .tasty-recipes-details .detail-icon height: .8em; margin-top: .4em; .tasty-recipes-entry-header .tasty-recipes-details ul li font-size: .875em; line-height: 1.75em; @media only screen and (min-width: 520px) .tasty-recipes-entry-header .tasty-recipes-details .detail-icon height: 1em; margin-top: .6em; .tasty-recipes-entry-header .tasty-recipes-details ul li font-size: 1em; line-height: 2.5em; .tasty-recipes-entry-header .tasty-recipes-details .tasty-recipes-label font-style: italic; color: #B7BBC6; margin-right: .125em; .tasty-recipes-entry-header .tasty-recipes-details .detail-icon vertical-align: top; margin-right: .2em; display: inline-block; .tasty-recipes-entry-content padding-top: 1.25em; .tasty-recipes-entry-content .tasty-recipes-buttons margin-bottom: 1.25em; margin-left: 1.25em; margin-right: 1.25em; .tasty-recipes-entry-content .tasty-recipes-buttons:after content: " "; display: block; clear: both; .tasty-recipes-entry-content .tasty-recipes-button-wrap width: 50%; display: inline-block; float: left; box-sizing: border-box; .tasty-recipes-entry-content .tasty-recipes-buttons a text-transform: uppercase; text-align: center; display: block; color: #FFF; background-color: #666677; font-size: 1em; line-height: 1.375em; padding-top: 1em; padding-bottom: 1em; font-weight: bold; margin-top: 0; border: none; border-radius: 0; text-decoration: none; .tasty-recipes-entry-content a img box-shadow: none; -webkit-box-shadow: none; .tasty-recipes-entry-content .tasty-recipes-buttons a:hover background-color: #979599; text-decoration: none; .tasty-recipes-entry-content .tasty-recipes-buttons img vertical-align: top; .tasty-recipes-entry-content .tasty-recipes-buttons img.svg-print, .tasty-recipes-entry-content .tasty-recipes-buttons img.svg-pinterest height: 1.25em; margin-right: .375em; margin-bottom: 0; background: none; display: inline-block; @media only screen and (min-width: 520px) .tasty-recipes-entry-content .tasty-recipes-button-wrap:first-child padding-right: .625em; .tasty-recipes-entry-content .tasty-recipes-button-wrap:last-child padding-left: .625em; @media only screen and (max-width: 520px) .tasty-recipes-entry-content .tasty-recipes-button-wrap width: 100%; .tasty-recipes-entry-content .tasty-recipes-button-wrap:nth-child(2) padding-top: 1em; .tasty-recipes-entry-content h3 text-transform: uppercase; font-size: .75em; color: #979599; margin-bottom: 1.5em; .tasty-recipes-entry-content h4 font-size: 1em; padding-top: 0; margin-bottom: 1.5em; margin-top: 1.5em; .tasty-recipes-entry-content hr background-color: #EAE9EB; border: 1px solid #EAE9EB; margin-top: 1em; margin-bottom: 1em; .tasty-recipes-entry-content .tasty-recipes-description, .tasty-recipes-entry-content .tasty-recipes-ingredients, .tasty-recipes-entry-content .tasty-recipes-instructions, .tasty-recipes-entry-content .tasty-recipes-keywords padding-left: 1.25em; padding-right: 1.25em; .tasty-recipes-entry-content .tasty-recipes-description p margin-bottom: 1em; .tasty-recipes-entry-content .tasty-recipes-ingredients ul, .tasty-recipes-entry-content .tasty-recipes-instructions ul list-style-type: none; margin-left: 0; margin-bottom: 1.5em; padding: 0; .tasty-recipes-entry-content .tasty-recipes-ingredients ul li, .tasty-recipes-entry-content .tasty-recipes-instructions ul li margin-bottom: .625em; list-style-type: none; position: relative; margin-left: 2.5em; line-height: 1.46; .tasty-recipes-entry-content .tasty-recipes-ingredients ul li:before, .tasty-recipes-entry-content .tasty-recipes-instructions ul li:before background-color: #666677; -webkit-border-radius: 50%; -moz-border-radius: 50%; border-radius: 50%; height: .5em; width: .5em; display: block; content: " "; left: -1.25em; top: .375em; position: absolute; .tasty-recipes-entry-content .tasty-recipes-ingredients ol, .tasty-recipes-entry-content .tasty-recipes-instructions ol counter-reset:li; margin-left: 0; padding: 0; .tasty-recipes-entry-content .tasty-recipes-ingredients ol li, .tasty-recipes-entry-content .tasty-recipes-instructions ol li list-style-type: none; position: relative; margin-bottom: 1em; margin-left: 2.5em; line-height: 1.46; .tasty-recipes-entry-content .tasty-recipes-ingredients ol li:before, .tasty-recipes-entry-content .tasty-recipes-instructions ol li:before content:counter(li); counter-increment: li; position: absolute; background-color: #666677; -webkit-border-radius: 50%; -moz-border-radius: 50%; border-radius: 50%; height: 1.45em; width: 1.45em; color: #FFF; left: -1.25em; transform: translateX(-50%); line-height: 1.5em; font-size: .6875em; text-align: center; top: .1875em; @media only screen and (max-width: 520px) .tasty-recipes-entry-content .tasty-recipes-ingredients ol, .tasty-recipes-entry-content .tasty-recipes-instructions ol margin-left: 0; .tasty-recipes-entry-content .tasty-recipes-notes padding: 1.25em; background-color: #EDF0F2; .tasty-recipes-entry-content .tasty-recipes-notes ol counter-reset:li; margin-left: 0; padding: 0; .tasty-recipes-entry-content .tasty-recipes-notes ul margin-left: 0; padding: 0; .tasty-recipes-entry-content .tasty-recipes-notes p, .tasty-recipes-entry-content .tasty-recipes-notes ul li, .tasty-recipes-entry-content .tasty-recipes-notes ol li background-color: #FFF; padding-left: 1.5625em; padding-right: 1.5625em; padding-top: 1.25em; padding-bottom: 1.25em; position: relative; -webkit-clip-path: polygon(20px 0, 100% 0, 100% 100%, 0 100%, 0 20px); clip-path: polygon(20px 0, 100% 0, 100% 100%, 0 100%, 0 20px); margin-bottom: 1.5em; @media only screen and (min-width: 520px) .tasty-recipes-entry-content .tasty-recipes-notes p, .tasty-recipes-entry-content .tasty-recipes-notes ul li, .tasty-recipes-entry-content .tasty-recipes-notes ol li padding-left: 2.5em; .tasty-recipes-entry-content .tasty-recipes-notes p:before, .tasty-recipes-entry-content .tasty-recipes-notes ul li:before content: "i"; display: block; background-color: #666677; -webkit-border-radius: 50%; -moz-border-radius: 50%; border-radius: 50%; height: 1.3em; width: 1.3em; font-size: .75em; line-height: 1.3em; text-align: center; color: #FFF; position: absolute; left: 1.167em; top: 1.9em; .tasty-recipes-entry-content .tasty-recipes-notes ol li:before content:counter(li); counter-increment: li; position: absolute; background-color: #666677; -webkit-border-radius: 50%; -moz-border-radius: 50%; border-radius: 50%; height: 1.45em; width: 1.45em; color: #FFF; left: 2em; transform: translateX(-50%); line-height: 1.5em; font-size: .6875em; text-align: center; top: 2em; .tasty-recipes-entry-content .tasty-recipes-notes p:last-child margin-bottom: 0; .tasty-recipes-entry-content .tasty-recipes-keywords background-color: #EDF0F2; padding-bottom: 1em; padding-top: 1em; .tasty-recipes-entry-content .tasty-recipes-keywords p font-size: 0.7em; font-style: italic; color: #979599; margin-bottom: 0; .tasty-recipes-entry-content .tasty-recipes-keywords p span font-weight: bold; .tasty-recipes-nutrifox text-align: center; margin: 0; .nutrifox-label background-color: #EDF0F2; .tasty-recipes-nutrifox iframe width: 100%; display: block; margin: 0; .tasty-recipes-entry-content .tasty-recipes-nutrition padding: 1.25em; color: #666677; .tasty-recipes-nutrition .tasty-recipes-label font-style: italic; color: #B7BBC6; margin-right: .125em; font-weight: 400; .tasty-recipes-nutrition ul text-align: center; .tasty-recipes-nutrition li float: none; display: inline-block; line-height: 2em; .tasty-recipes-entry-footer background-color: #666677; padding-top: 1.5625em; padding-bottom: 1.25em; padding-left: 2.5em; padding-right: 2.5em; text-align: center; .tasty-recipes-entry-footer .tasty-recipes-footer-content display: inline-block; .tasty-recipes-entry-footer img width: 65px; .tasty-recipes-entry-footer h3 color: #B7BBC6; font-size: 1.25em; line-height: 2.25em; margin-top: .5em; margin-bottom: .125em; padding: 0; line-height: 1em; .tasty-recipes-entry-footer p margin-bottom: 0; color: #FFF; font-size: .75em; .tasty-recipes-entry-footer p a color: #FFF; text-decoration: underline; box-shadow: none; border-bottom: none; .tasty-recipes-entry-footer:after content: " "; display: block; clear:both; @media only screen and (max-width: 520px) .tasty-recipes-entry-footer h3 margin-top: .5em; margin-bottom: .5em; .tasty-recipes-entry-footer text-align: center; @media only screen and (min-width: 520px) .tasty-recipes-entry-footer img float: left; .tasty-recipes-entry-footer h3, .tasty-recipes-entry-footer p margin-left: 90px; clear: none; text-align: left; /* Print view styles */ .tasty-recipes-print-view font-size: 11px; background-color: #fff; .tasty-recipes-print-view .tasty-recipes-print-button display: inline-block; .tasty-recipes-print padding:0; font-size: 11px; .tasty-recipes-print-view .tasty-recipes margin-top: 1em; .tasty-recipes-print .tasty-recipes-entry-header background-color: inherit; color: inherit; padding-bottom: 0; padding-left: 1em; padding-right: 1em; padding-top: 1em; .tasty-recipes-print .tasty-recipes-entry-header .tasty-recipes-image float: right; transform: none; .tasty-recipes-print.tasty-recipes-has-image .tasty-recipes-entry-header h2 margin-top: 0; .tasty-recipes-print .tasty-recipes-entry-header h2 color: inherit; margin-bottom: .5em; .tasty-recipes-print .tasty-recipes-entry-header hr display: none; .tasty-recipes-print .tasty-recipes-entry-header span.tasty-recipes-rating color: #000; .tasty-recipes-print .tasty-recipes-entry-header .tasty-recipes-details ul padding: 0; clear: none; .tasty-recipes-print .tasty-recipes-entry-header .tasty-recipes-details ul li line-height: 1.5em; color: #000; .tasty-recipes-print .tasty-recipes-entry-header .tasty-recipes-details .detail-icon display: none; .tasty-recipes-print .tasty-recipes-entry-content img max-width: 50%; height: auto; .tasty-recipes-print .tasty-recipes-entry-content .tasty-recipes-ingredients ul li, .tasty-recipes-print .tasty-recipes-entry-content .tasty-recipes-ingredients ol li margin-bottom: 0.25em; line-height: 1.1; .tasty-recipes-print .tasty-recipes-entry-content .tasty-recipes-instructions ul li, .tasty-recipes-print .tasty-recipes-entry-content .tasty-recipes-instructions ol li margin-bottom: 0.5em; line-height: 1.1; .tasty-recipes-print .tasty-recipes-entry-content .tasty-recipes-ingredients ul li:before, .tasty-recipes-print .tasty-recipes-entry-content .tasty-recipes-instructions ul li:before top: 0.3em; .tasty-recipes-print .tasty-recipes-entry-content .tasty-recipes-ingredients ol li:before, .tasty-recipes-print .tasty-recipes-entry-content .tasty-recipes-instructions ol li:before top: 0; .tasty-recipes-print .tasty-recipes-entry-content .tasty-recipes-notes p, .tasty-recipes-print .tasty-recipes-entry-content .tasty-recipes-notes ul li, .tasty-recipes-print .tasty-recipes-entry-content .tasty-recipes-notes ol li padding-top: 0; padding-bottom: 0; background-color: #EDF0F2; clip-path: none; .tasty-recipes-print .tasty-recipes-entry-content .tasty-recipes-notes p:before, .tasty-recipes-print .tasty-recipes-entry-content .tasty-recipes-notes ul li:before top: 0; clip-path: none; margin-bottom: 0.5em; @media print .tasty-recipes-print .tasty-recipes-entry-footer img display: none; .tasty-recipes-print .tasty-recipes-source-link text-align: center; ]]>
Description
Small Batch Maple Cashew Cream Cheese Frosting Vegan, Paleo
Ingredients
3/4 cup raw cashew halves
1 tsp vanilla extract
1/4 cup maple syrup
dash of sea salt
1-2 tsp cinnamon
1 tsp lemon juice
1 tbsp coconut oil or melted vegan butter spread
optional add -in for more sweetness – 1/2 tbsp powdered sugar (avoid if paleo)
optional add in to taste more flavorful – 1/4 tsp maple extract
Instructions
First soak your cashews in purified water for 1-2 hrs.
Next remove cashews from water then combine cashews and vanilla in food processor or blender.
Blend on and off again for 5 minutes. Scraping sides.
Once smooth, remove from processor and stir in remaining ingredients.
Stir/Mix until thick like texture frosting is formed.
This makes a small 1/2 cup batch. Feel free to double for more!
Store in fridge until ready to serve. Thaw out for 20 minutes before spreading onto cakes or muffins.
Notes
This makes a small 1/2 cup batch. Feel free to double for more! Store in fridge until ready to serve. Thaw out for 20 minutes before spreading onto cakes or muffins.
Keywords: frosting, vegan, cashew, gluten free, healthy, easy, dessert, paleo, dairy free
Nutritional Nerd Alert You didn’t think I’d forget this part, did you?
Sure, soaking the cashews and then blending into a cream with a little maple, cinnamon, and extracts equals AMAZINGNESS! But… did you know that soaking the cashews makes it easier to digest and absorb nutrients? I didn’t ever think the words frosting and nutrient dense would go together, but with this cashew frosting, THEY SO DO!
Okay lovelies, be sure to save this recipe for the upcoming holiday season! Try out cashew cream cheese frosting on cakes, mini cakes, muffins, waffles, cupcakes, etc. I don’t think you’ll be disappointed. If my dairy loving family and friends approve, then I know you will too. And your tummy might thank you. Just don’t eat it by the bucket full.
Ever made a vegan cashew cream or cream cheese frosting?
Cheers!
Have questions about this recipe? Send me an email. Let’s discuss!
Source: https://www.cottercrunch.com/vegan-maple-cashew-cream-cheese-frosting-recipe/
0 notes
Text
Rice Cooker Teriyaki Shrimp and Rice
$6.28 recipe / $1.57 serving
Rice cookers are a convenient and inexpensive way to cook food for those confined to small spaces or without access to conventional kitchens, so I’m going to develop a few recipes specifically for rice cookers, starting with this super easy Teriyaki Shrimp and Rice. This ultra simple dish is similar to shrimp fried rice that you’d get from your local take out joint, except it’s steamed not fried, and therefore way less caloric. The ultra short ingredient list means you don’t have to have a lot of ingredients on hand, and most of them can be kept indefinitely either in your pantry or freezer.
This post may contain affiliate links which won’t change your price but will share some commission.
What Rice Cooker am I Using?
I chose to work with one of the most popular and most basic rice cookers on the market to make sure the recipes I develop have the broadest compatibility. That begin said, every model rice cooker is slightly different, and may yield slightly different results. I’m using the Aroma Housewares 8 cup cooked/4 cup uncooked Digital Rice Cooker.
Can I Make This in an Instant Pot?
Using the “rice” function on your Instant Pot will cook food in the same manner as a rice cooker, so this recipe should work just fine in an Instant Pot, providing you are using the rice function and not a pressure cooking function. That being said, I have not had a chance to actually test this recipe using an Instant Pot.
Rice to Water Ratios
There is a lot of conflicting information about what the proper rice to water ratio is for rice cookers, partly due to differing needs for different rice varieties and variations in the way different rice cookers work. I’ve tested this particular recipe several times with different rice to water ratios, and found that 1:1.33 worked best for me. Again, if using a different model rice cooker or a different variety of rice, the ratio may need to be adjusted.
Rice Cooker Teriyaki Shrimp and Rice
By adding a few extra ingredients to your rice cooker, you can cook an entire meal at once. This Teriyaki Shrimp and Rice is an easy and healthy alternative to take out.
1/2 lb. raw medium shrimp (41/50 size)* $4.00
1 small onion $0.33
1 cup frozen peas $0.38
1.5 cups uncooked jasmine rice $0.99
2 cloves garlic, minced $0.16
1 tsp grated fresh ginger $0.10
2 cups water $0.00
1/4 cup soy sauce $0.24
2 Tbsp brown sugar $0.08
If your shrimp is frozen, thaw it first by placing in a colander and running cool water over it until thawed (this only takes a few minutes).
Finely dice the onion and place it in the bottom of the rice cooker along with the frozen peas (I did not thaw my peas). Add the uncooked rice, minced garlic, and grated ginger. Stir these ingredients together.
Add the shrimp to the top of the rice mixture, then pour in 2 cups water. Close the lid and set the cooker to the "white rice" setting. The rice cooker will begin to heat and once the contents inside reach the appropriate temperature, it will begin to count down the cooking time (12 minutes for my model).
Once the rice cooker finishes its cooking cycle, let it rest for an additional 5-10 minutes on the keep warm cycle before opening the lid. While waiting, stir together the soy sauce and brown sugar.
Finally, open the lid and pour the soy sauce mixture over the contents in the rice cooker. Use a rice paddle to gently fold the sauce into the rice. Serve hot, with sriracha or sliced green onions if desired.
*You can use peeled or shell-on shrimp, but make sure it is raw. Deveining can be tedious, so I suggest purchasing shrimp that is already deveined. I used shell-on shrimp that I quickly peeled once thawed, but I left the tail on for visual appeal.
Step by Step Photos
If using frozen shrimp, thaw them first by placing them in a colander and running cool water over top until thawed (this only takes a couple of minutes). Finely dice one small onion and place it in the rice cooker along with 1 cup frozen peas (I did not thaw the peas).
Add 1.5 cups white jasmine rice to the cooker, along with two cloves of garlic (minced) and about 1 tsp grated fresh ginger. Stir these ingredients together until everything is evenly combined.
Add 1/2 lb. medium shrimp (41/50 size) to the rice cooker, then pour 2 cups water over top.
Close the rice cooker and set it to the “white rice” function. The rice cooker will begin to heat up, and once it reaches the appropriate temperature it will begin to count down the actual cooking time (mine is 12 minutes for the white rice function). Depending on the temperature and volume of the ingredients in the cooker, it can take a different amount of time to come up to temperature before it begins counting the actual “cooking time.”
After the cooking cycle has finished, make sure to let it sit without opening the lid for an additional 5-10 minutes. This really helps give you more even results because it gives the steam a chance to settle in the cooker. While waiting for the rice to rest in the cooker, stir together 1/4 cup soy sauce and 2 Tbsp brown sugar in a small bowl. It’s okay if the sugar doesn’t totally dissolve.
Pour the soy sauce mixture over the contents of the rice cooker, then use your rice paddle to gently fold the sauce into the shrimp and rice.
If you’re at the max volume of your rice cooker, like I was, it may be easier to transfer everything to a large bowl to fold in the soy sauce, but that’s up to you. Once the sauce is incorporated, the Teriyaki Shrimp and Rice is ready to eat!!
Of course I topped mine with some sriracha, but that’s optional! A couple sliced green onions or cilantro would also be nice if you have them on hand.
Dig in!!
posted on September 2, 2018 in Dairy Free, Egg Free, Global, Main Dish, Meat, One Pot Meals, Quick, Recipes, Recipes under $10, Rice, Seafood, South-East Asian, Under $3 per serving

Source: https://www.budgetbytes.com/rice-cooker-teriyaki-shrimp-and-rice/
0 notes
Text
The Easiest Veggie Sandwich
All you need to make the best and easiest veggie sandwich is whole grain bread, hummus, avocado, and any fresh veggies you like. The result is a nutrient-packed, filling, and healthy sandwich that just so happens to be very pretty, too. (387 calories or 8 Weight Watchers Freestyle points)
When I tell you that this is the easiest veggie sandwich, I mean it. It’s so simple that even writing down a recipe for it feels silly. But if nothing else, I’m here to encourage you to make unfussy, healthy, delicious things, so here goes.
Use whatever fresh veggies you enjoy or have on hand, but my favorite mix includes lettuce (I like green leaf or romaine), cucumber, bell pepper (any color), tomato, red onion, carrot, and sprouts. For flavor, I tuck a few dill pickles inside, and for heft and staying power, I slather my bread with hummus and mashed avocado. Feel free to swap out the hummus for cream cheese, add a slice of cheese or two, use store-bought guacamole in place of avocado, and skip the pickles altogether if you can’t stand them.
The veggies are pleasingly crisp and crunchy, with their own unique tart or sweet or even zesty flavors, but it’s the whole grain bread, the hummus, and the rich, creamy avocado that really provide satisfaction. The sandwich just isn’t substantial enough without them, so don’t skimp on these three.
The Easiest Veggie Sandwich

Ingredients
½ cucumber
½ tomato
½ yellow bell pepper
½ carrot
½ avocado
Salt and pepper
4 slices whole grain bread
¼ cup prepared hummus
2 leaves romaine or green leaf lettuce
¼ cup dill pickle slices
½ cup sprouts
Instructions
Slice the cucumber and tomato thinly. Slice the bell pepper into thin strips. Using a box grater, grate the carrot.
Cut the avocado in half and remove the pit. Using a spoon, scoop the flesh into a bowl and mash with a fork to a chunky texture. Add a pinch of salt and pepper and stir.
Toast your bread and spread the mashed avocado on 2 slices. Spread the hummus on the remaining 2 slices (2 tablespoons on each). On the hummus-covered slices, layer with equal amounts of lettuce, cucumber, tomato, bell pepper, carrot, pickles, and sprouts. Top with the avocado slices. Cut the sandwiches in half and serve.
Nutrition Information & Notes:
For 1 sandwich: 8 WW Freestyle points 387 calories, 53g carbs, 11g fiber, 15g fat, 13g protein, 572mg sodium, 12g sugar
http://www.andiemitchell.com/easiest-veggie-sandwich/

Source: http://www.andiemitchell.com/easiest-veggie-sandwich/
0 notes
Text
Product Review: NEW Big Green Egg Modular Nest Systems
[FTC Standard Disclaimer] I received no compensation for this review.
I have needed a new table for my oldest Egg for a while. My old table was 10 years old. It was so worn out and wobbly that it was practically unsafe to move by myself.
As soon as I read about the new Big Green Egg Modular Nest Systems, The features and design of this new expandable modular table had me sold instantly. I called Mannix Pools and Grills in Winter Haven, FL and ordered a set.

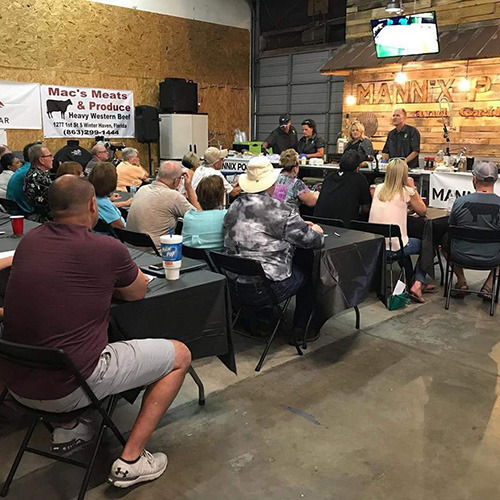
I finally got to pick my table up this weekend when we were at Mannix Pools and Grills to teach a grilling glass.
Assembly
Putting the nest together was relatively easy. On a "swearing scale" I would give it a 1 out of 5 swear words (an excellent rating, the fewer swear words, the better).

Since this is modular, the individual packages were manageable to move by oneself.

Unboxing the Egg frame. The instructions are just two pages long because they are simple. I like that they use the same sized screw for this unit, that always makes assembly easier for me. Also, no extra tools are required, the only tools you need are included.

You can put the carts together using the hand tool that they provide but power tools make it much faster and easier.

Egg frame put together. It is very rigid and secure.

The Egg frame and expansion frame connect via 6 metal brackets.
Egg in his new digs.
Design
The modular design is simple, expandable, and customizable.
This system epitomizes the saying, "Simple is the ultimate sophistication."
These are expandable so you can just start with a single egg frame and then later add the expansion frame to create a table like mine. Or if you buy a second Egg, you can add on to your existing cart. You can add some more expansion frames and make an L-shaped table. It's all up to what you want - any configuration of 30" squares.
These are customizable. You get to mix and match whichever inserts you want. I went with 3 stainless grid inserts and 1 stainless steel insert. But they also have 2 wooden options, too.
I appreciate the design details. For example, the optional stainless steel top has rubber contact points to reduce the noise of metal on metal. Another example is that the stainless steel grids can either be a shelf or if you turn them upside down they are a wire basket.
Features/Benefits
I mean....it's just a table so this might be more appropriately titled "Things I like about my new table".
This table has significantly more usable work space than my previous full-size table - almost 100 more square inches.
The extra storage space underneath the Egg means my adjustable rigs finally have a home!
The frame top and legs are made of powder-coated aluminum so they are lightweight and rust resistant.
The cross braces and lower shelf frames are made of steel, making them rugged and sturdy. These legs won't be wobbly in 10 years.
The table-top surfaces are non-porous so they are grease resistant and easy to clean.
The surfaces (at least mine, I didn't do any wood inserts) are immune to popping embers so I won't have the inevitable pinhole burns (Pink Floyd shoutout).
The stainless steel components are made out of the higher quality 304 stainless steel.
The stainless grid shelves that I chose don't hold water or dirt like wood slats do, so they will stay cleaner and won't mildew.
We opted for the heavy duty caster wheels instead of the adjusting feet.
The configuration flexibility will be a huge plus when I expand the table to include my other Eggs down the road.
So is there anything that I don't like about the new BGE Modular Nest Systems? Not really but here are a few things.
Because it's the same length but 4 inches wider than my existing table, the cover doesn't fit. In fact, I don't see on the BGE website that they carry a cover for this setup.
The downside to the aluminum frame is that they are non-magnetic. Not a big deal, I just keep trying to stick my Thermoworks Timesticks on the legs.
They are pricey but what isn't when it comes to Eggs.
As soon as I got my table put together, I had to christen it for it's maiden voyage. I chose a nice pair of ribeye steaks from Food City.

Trimmed, oiled, tied, and seasoned. My seasoning was finely ground NMT Umami seasoning recipe.
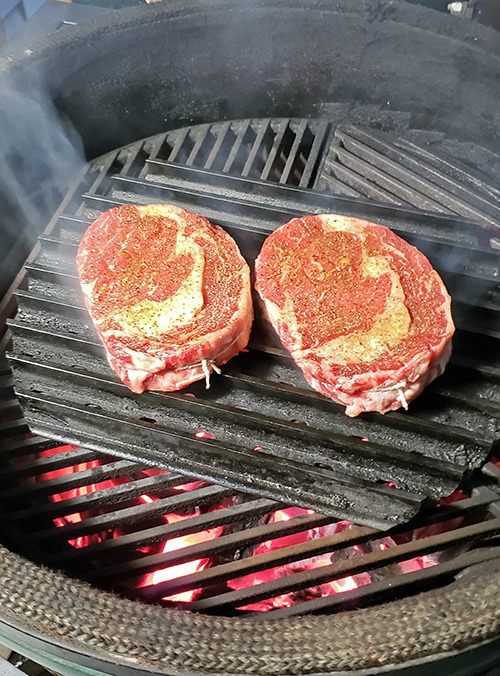
I grilled them for 4 minutes a side at about 475°f on GrillGrates. I was using B & B Oak lump charcoal.
They turned out beautifully.
So my initial thoughts about the new BGE Modular Nest System are that I think they look great, I love the extra space and so far, I'm thrilled to have one. I can't wait to buy my next pieces later this Summer.
If you're interested in these, check out your local dealers, such as;
Wassi's Meat Market (Melbourne, FL)
Mannix Pools and Grills (Winter Haven, FL)
Escambia Electric (Pensacola, FL)
Pinch A Penny (St Johns/Jacksonville, FL)
Elder Ace Hardware (East Tennessee)
Source: http://www.nibblemethis.com/2018/07/product-review-new-big-green-egg.html

0 notes
Text
Want to Make Restaurant-Level Pizza at Home? Here Are the Pro Tools to Buy
Unless you’re living the dream and have a wood-fired oven in your backyard, pizza made at home rarely seems to taste as good as the pizza from that local artisan pizza shop. Perfectly topped, perfectly crispy, perfectly divided pizza with perfectly melted cheese can feel out of reach for even the most adept gourmand hobbyist.
There’s at least one good reason for that: Home ovens typically only go as high as 550 degrees, which is 250 degrees lower than recommended for making crispy pies. But before you go building a brick oven, know that there are also tools that can help you reach pizzaiolo-level pizza. Here, pizza experts tell us their favorite products (to save you from springing for a pallet of bricks from Home Depot).
A baking stone
The very first kitchen addition you’ll need is a baking stone, in lieu of a basic aluminum pan or sheet. “Aluminum is not a good conductor of heat — your pizza won’t be crispy at all,” says Joe Beddia, head pizza chef at Philly’s Pizzeria Beddia (set to reopen in spring) and author of Pizza Camp. “You want something that’s able to absorb and conduct heat.”
Beddia recommends The New York Bakers’ baking stone, as it is a little thicker than your average stone, is made from cordierite (the same material used to make a kilns), and comes in two sizes. “I like having a stone that is the size of the shelf in my oven,” says Beddia. “I don’t have a fancy oven or anything, and I can make the same pizza at home as I make in my restaurant.”
Buy The New York Bakers A Great Baking Stone, $59.99
… or a pizza steel
Instead of a baking stone, Anthony Falco, former head pizza chef at Roberta’s in New York and now an “international pizza consultant,” suggests using a baking steel — which transfers heat a little more quickly than a ceramic or cordierite stone — while putting a ceramic baking stone on the rack above it, to make an oven inside of an oven. “The heat will travel up and hit the top stone and it creates a sort of hot box,” says Falco. If your oven has a broiler, that will work just as well, as long as you have either a preheated steel or a stone underneath your pies.
One tip, whether you use a stone or steel: For a crispy crust, Beddia recommends preheating the stone or steel for 45 minutes at 550 degrees, or as high as your oven will go.
Buy The Original Baking Steel, $79

Baking Steel pizza steels
Baking Steel
A pizza peel
So how do you go about getting your beautiful pizza dough onto the stone, especially when you’ve just preheated it to over 500 degrees? Up your game with a pizza peel. “You stretch your dough, lay it on the pizza peel, dress it, and that’s what you use to transfer the pizza onto your preheated baking steel,” says Mark Bello of the pizza peel’s utility.
Mark and Jenny Bello teach pizza-making courses at Pizza School NYC, a school and shop on New York’s Lower East Side. For their peels, they recommend buying from Epicurean.
“Rather than being an actual piece of wood, [Epicurean’s pizza peel] is a wood composite,” says Bello. That’s because Epicurean, based in Wisconsin, started out making eco-friendly skateparks, and eventually began using their leftover materials to make kitchen supplies. “[Epicurean peels] don’t warp like wood pizza peels,” he says. “They’re a lot thinner. They don’t absorb smells. And they can go in the dishwasher.”
Buy Epicurean Pizza Peel, $37
Metal is another option. Giorgia Caporuscio of Keste in New York City prefers metal pizza peels from Gi.Metal, an Italian pizza tools manufacturer, because they’re easy to clean, and also really light. This is essential to consider before you start loading up your stretched dough with toppings, as uncooked pizza can get pretty heavy pretty fast. The lightness of the Gi.Metal peel, Caporuscio said, is a major advantage when you’re sliding pizzas in and out of an oven all day — “then you don’t get so tired.” (That said, they are rather pricey.)
Buy Gi.Metal Perforated Rectangular Pizza Peel, $566.50

Epicurean pizza peel
Epicurean
Rice flour
It’s not a tool per se, but don’t forget to sprinkle your peel liberally with flour before you begin building your pie. “At home, the hardest thing is stretching the pizza and getting it into the oven off of the pizza peel,” Daniela Moreira of Timber Pizza in D.C. says. “Rice flour is the slickest flour and will change that!” The 2017 Eater Young Gun buys Florida Crystal rice flour in bulk for the restaurant, though she says that Bob’s Red Mill rice flour is a perfectly reasonable substitute for at-home cooks.
Buy Florida Crystals Long Grain Brown Rice Flour, $9.95 for five pounds
A professional-grade pizza cutter
Your pizza’s in the oven. It smells great. It looks great. So you take it out with your fancy new pizza peel. But you’re not likely to tear into it with your bare teeth (though no one would blame you if you did). There are many different kinds of pizza cutters: see-saw blades, pizza wheels with circular handles, pizza wheels with straight handles, pizza wheels shaped like bikes. The Bellos recommend the Dexter-Russell P177A not just because the model number looks like the word “pizza,” but because it’s sharp and sturdy.
Buy Dexter Russell P177A 4" Pizza Cutter, $24.99
Falco, on the other hand, recommends Quality By Liones’ single wheel SpeedKnife. “There are shit cutters and then there is one good one. We were dying with shitty pizza cutters,” he says of the early days at Roberta’s. “The shitty ones are made with a screw in the center and the wiggle from the screw becomes more pronounced over time,” says Falco, whereas the $20 SpeedKnife is well-built with ergonomic ball bearings.
Buy Quality by Liones SpeedKnife Single Wheel Pizza Cutter, $19.99

SpeedKnife single wheel pizza cutter
Quality by Liones
With a durable pizza cutter, an easy pizza peel, and a heat-friendly baking steel or stone, you’ll be as close to Italian-chef’s-kiss pizza as the experts. Just keep in mind, says Falco, a good pizza requires more than just the right tools (“only buying Air Jordans isn’t going to help me dunk,” as he put it) — don’t forget to get great ingredients, too.
Eater.com
The freshest news from the food world every day
By signing up, you agree to our Privacy Policy and European users agree to the data transfer policy.
Vox Media has affiliate partnerships. These do not influence editorial content, though Vox Media may earn commissions for products purchased via affiliate links. For more information, see our ethics policy.
Source: https://www.eater.com/2018/10/5/17932410/homemade-pizza-tools-home-cooking

0 notes
Text
Catherine Lowe from ‘The Bachelor’ used to be a vegan food blogger
When Catherine Giudici saw Sean Lowe on Emily Maynard’s season of “The Bachelorette” via her TV, she was smitten. A year later, the Seattle native landed a spot on “The Bachelor” as a contestant competing for Sean’s heart. For her introduction, producers wanted her to ride in on a unicycle. Instead, she exited the limo, walked up to the man of her dreams and said, “Meet me inside for a dance” — something she now finds embarrassing considering nobody’s dancing in the California mansion.
10 Reasons Married People Live Longer
“My first impression of her was, she’s super cute and kind of giggly,” Sean told The Daily Meal during a recent press opportunity as part of an upcoming Subway promotion. “She had this energy about her where I knew I wanted to spend more time with her. I want to hang out with this girl. I don’t know much about her, but I want to hang out with her.”
The Lowes have been happily married for five years now, living in Dallas with their two sons, 2-year-old Samuel and 8-month-old Isaiah. While the baby’s primarily eating pasta (because it fills him up, which makes him sleep longer), Samuel has an appetite for whatever’s on the menu for Mom and Dad. Catherine commandeers the kitchen though, while Sean promises a trade-off of doing the dishes.
“I love to experiment with anything we have in our pantry or in our fridge,” Catherine said. “I’m always trying to think of, like, how to make it into something. So I always have to find a protein, a carb that goes with it and then a vegetable.”
Filipino, Italian and Thai foods made from scratch are just a few of her culinary specialties. Prior to her career as a graphic designer, the now 32-year-old worked in a Thai restaurant and blogged about vegan fare for the The Seattlite.
“Really any food is so exciting to me because the seasoning is so different for every cuisine and it just gets me so excited,” she said. “I love talking about food, I love making food and he [Sean] loves eating food.”
What he doesn’t love is picking up all the sticky rice Samuel spills on the floor, he says with a laugh. Every Saturday morning, the father-son duo have a sweet tradition of walking down the street to Top Pot for apple fritters and chocolate and blueberry cake doughnuts. Coincidentally, the bakery launched in Catherine’s hometown of Seattle before expanding to Dallas.
As far as date night goes, the couple enjoys going out for casual Tex-Mex or a nice dinner at a steakhouse. They both like their meat cooked medium-rare. Anything above that “is a sin,” Sean jokes. Ideally, the meal would end with a warm chocolate chip cookie baked in a skillet with ice cream on top.
When they’re just relaxing at home — watching murder documentaries or the Smithsonian Channel, depending on who has the remote — takeout options typically include pad thai or pizza.
“We’re so embarrassing with pizza,” Catherine says, to which Sean reveals, “We order Dominos a lot. I think Dominos is great. Their pan pizza is awesome.”
So what’s on top? For Catherine, it’s mushrooms and olives. Sean is aware his order is slightly controversial. The 35-year-old says, “A lot of people have a hard stance on pineapples, but I’ll do Hawaiian.”
Apart from risky pizza toppings and the fact that they met and fell in love on TV, the Lowes are refreshingly normal. He calls her Gaya (a nickname given by her family) and Mama, and she calls him Daddy — “in a sweet way, not a creepy way,” she insists, because of their kids. The only complaint Sean has about his wife is that if she tries on 10 shirts, instead of hanging them up, they’ll all go on the floor. Girl problems, right? And Sean’s bad habit is that he… uses too many Q-Tips?
“People tell me it’s bad, but I don’t care. I have to use a Q-Tip on my ears every time I get out of the shower. Every time,” he said. “Because I can kind of feel the water in there if I don’t. People always tell me how terrible Q-Tips are, but I love them.”
“How many people are you getting out of the shower with to tell you that Q-Tips are terrible?” Catherine asked, to which Sean replied, “I’ve had a few tweets about my love for Q-Tips and inevitably, people tell me they’re awful.”
Another bad habit, he adds, is that he just won’t let up with the super-cheesy dad jokes, “especially if I can tell it’s just starting to aggravate her. It’s a lot of puns. I think dads enjoy puns, but sometimes I think it just starts to get under her skin.”
Funny enough, Catherine’s familiar with pun usage, too. On Sean’s season of “The Bachelor,” she famously slipped him a note that said, “I’m vegan but I like the beef.” Now, she uses similar sayings on cards made by her stationary brand, Lowe Co.
Anyone who has ever been in a relationship knows that those aren’t real problems. But that doesn’t go without saying there weren’t challenges to overcome after stepping out from in front of the camera.
“She had to give up her life in Seattle, move away from friends, family, work,” Sean said. “Any time you meet in an unorthodox way and you’re kind of melding two lives together, it’s going to bring its own set of challenges, so in the beginning there was a learning curve.”
Piggybacking off of that, Catherine said that after moving from Seattle to Dallas, “you don’t know the people you’re hanging out with, you don’t have a lot of friends in your new city, so there are definitely a lot of factors that can bring about conflict in relationships. That’s why it’s so hard to keep a relationship from the show because you really don’t have anything going for you except your own love, and maybe that’s enhanced because of the circumstances. You’re thrust into this real-life situation and are like, ‘OK, figure it out,’ and you don’t have the assistance that hopefully you would’ve thought you might have. It’s really just about committing, and that’s why we’re together still — because we decided we would be together and that was just the end of it.”
In addition to being committed and overcoming the obstacles that come with great change, both Catherine and Sean are aware of and grateful for how loving and compassionate they are. Sean’s favorite quality about his wife is not her shiny hair, her pretty face or perfect lashes. It’s how big her heart is.
“When she cares about someone or something, she really cares about it on such a deep, intense level,” he said. “I don’t have that, personally. I would say most people, 99.99 percent, do not have the ability to love as deeply as she loves. So that’s a testament to her love, not a knock against me. It’s really, really impressive.”
Similarly, Catherine points to her husband as a genuinely caring person. When they were filming “The Bachelor” together, she took note of how Sean knew the entire production crew by name.
“He knew everybody’s names and was very respectful of them,” she said. “Knowing that’s how a person treats other people — it’s so sweet and it’s like, I look up to that in him. You see that in a partner and you’re like, ‘Wow, you’re a good person.’”
For anyone who’s thinking about sending in an application for an upcoming season of “The Bachelor” or “The Bachelorette,” Catherine says it’s important that it be a supplement to your life instead of banking everything you have on the opportunity.
“You can tell when people want to be famous and when they want all these perks from the show. They might get voted off the first night, then you’re going to be really humble after that,” she said. “So the way I thought of it is, I have a great life. This is just a really fun experience that I’m getting to have and to kind of think of it as a supplement and not as your only way of living.”
Sean’s advice? Just have fun.
“Back when we were on it [the show], Instagram wasn’t nearly as big of a thing as it is now. So people weren’t doing it to make money on Instagram ads after the show, so it’s probably a different beast now,” he said. “But it’s a once-in-a-lifetime opportunity. You might be able to travel the world and do a lot of cool things you wouldn’t experience otherwise, so just have fun.”
If you are single, but the limelight (and potential drama) isn’t quite for you, don’t sweat it. Sean says to “be patient and try to enjoy the chapter of life that you’re in. Marriage is awesome and it’s fantastic and so rewarding and things like that, but being single has its advantages. I can look back on my 20s when I was single, and I spent a lot of time with friends and it’s just a different chapter and that chapter’s also fun. Don’t be in a hurry to rush to the next chapter. Enjoy the chapter you’re in.”
“Enjoy your family while you can and doing things on your own time, because now, you have to think about the other person, you have to think about your children, and of course that’s amazing, but go be selfish and go travel and experience life,” Catherine added. “It’s so much fun when you get to do things by yourself and have something a little more to bring into a relationship like more worldly experiences and a different outlook.”
To experience one of “The Bachelor” franchise’s most beloved couples in real life, fans can feel the love on February 14 when the pair will appear at Subway’s Ultimate Valentine’s Day Experience from 6 p.m. to 9 p.m. at the Omni Hotel in Dallas, Texas. Tickets are currently sold out, but there’s an option to sign up for the wait list for free. The event serves to promote the chain’s Meatball Marinara and Ultimate Spicy Italian sandwiches on cheesy garlic bread.
After the event, the couple literally has no other plans to celebrate the commercial holiday. They just really love food, so the timing and nature of the partnership works. If you want to treat your sweetie to a nice dinner at a chain restaurant, give it all you’ve got with these 20 places offering dope V-Day Deals.
Source: https://www.thedailymeal.com/entertain/sean-catherine-lowe-subway/021219
0 notes