
Any IT professional knows it's a job that requires a lot of trial and error. Here are some of my experiences with playing around with things, googling error messages, and generally ignoring tech support. Hopefully it will help prevent others from duplicating my efforts.
Don't wanna be here? Send us removal request.
Statistics
We looked inside some of the posts by itinsider and here's what we found interesting.
Average Info
Notes Per Post
12
Likes Per Post
10
Reblog Per Post
2
Reply Per Post
0
Time Between Posts
8 months
Number of Posts By Type
Text
4
Last Seen Tumblr Blogs


Fun Fact
Tumblr posted its first advertisements in May 2012 and subsequently earned $13M in revenue.
Text
How to: Chromecast Audio with Apple Music / AirPlay

The Sabrent Wi-Fi Audio Receiver is the Chromecast Audio for Apple Music users.
When Google recently released an audio-only version of their popular Chromecast wireless streaming device, I was pretty excited. I had tried using a Bluetooth audio receiver in the past, but decided it was more trouble than it was worth. The quality sucked, there were always problems pairing, and you couldn’t move your phone too far from the speakers. The Chromecast Audio promised to revolutionize connecting your phone to a pair of speakers or home entertainment system, so I ordered one right away.
Unfortunately, there was a big problem - Chromecast Audio doesn’t support Apple Music. I am a recent Apple Music convert, and as I expect that platform to grow in the future, Chromecast Audio isn’t going to be a viable option for a lot of iPhone users.
After some digging, I discovered that there is already a product which is functionally identical to the Chromecast Audio, except for Apple’s AirPlay standard instead of Google’s Chromecast - the Sabrent Wi-Fi Audio Receiver. I swapped this in for the Chromecast Audio on my speakers, and was thoroughly impressed by the product. It provides exactly the same functionality as the Chromecast Audio, but supports virtually any audio app on your iPhone or other AirPlay device. The best part is it also supports other steaming services like Spotify and Google Play Music on both iPhone and Android, so it is a universal connection point for everyone in my household. And at $20 on Amazon, it is much more affordable than Apple’s official solutions, the AirPort Express and AirPort Extreme base stations.
Hopefully this will save you from searching, I highly recommend the Sabrent Wi-Fi Audio Receiver for any iPhone users.

1 note
·
View note
Text
Using a Google Drive spreadsheet as the back end for a PHP web form
Google Drive (formerly Google Docs) documents are a great way to collaborate with others to interact with your shared data online. While it lacks some of the advanced features that a SQL database has, the quick and easy collaboration environment that Google Drive documents provide makes them an interesting back end option for a web form, and Google provides a nice set of APIs for integrating with them.
Here's how you can easily create a web form that writes to a Google Drive spreadsheet.

1.) Be sure you have a web server that has PHP installed on it.
If you buy hosting from an online hosting company, you are almost certainly all set. PHP is very common on the internet today and it's pretty much industry-standard to have it running on your web server. In case you are setting up your own hosting and haven't used PHP yet, you can download it at php.net.
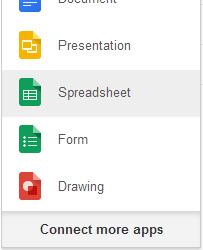
2.) Create a Google account (if you don't already have one), log in to Drive, and create a spreadsheet with the columns you want.
If you go to https://drive.google.com, you can either sign in with your existing Google account or click the "Sign Up" button in the top right corner to sign up for an account. Once you are signed in, click the "Create" button and then "Spreadsheet" to create a new spreadsheet:
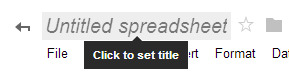
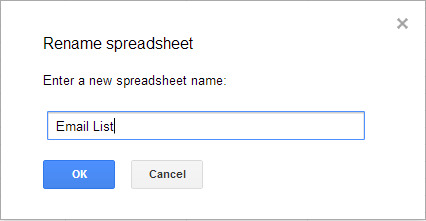
Next, click on "Untitled spreadsheet" to give your new document a name:
Finally, type your column headers in row 1 (this will correspond to the fields you want to appear on your web form):
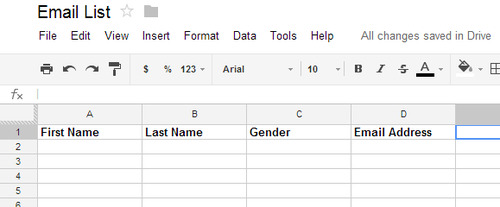
The changes will automatically be saved. You can share this document with others on your team you wish to collaborate with, among the other cool things you can do with Google Drive documents.
3.) Download the Zend Gdata Framework and the PHP helper class, and upload them to your web server.
The Zend Framework is a popular open-source framework for PHP web applications. Dimas at farinspace.com has written a nifty helper class (which uses Zend) that makes writing to and reading from a Google Drive spreadsheet super easy.
Download the Zend_Gdata Framework here:
https://packages.zendframework.com/releases/ZendGdata-1.12.3/ZendGdata-1.12.3.zip
And the Google_Spreadsheet.php helper class at either of these two links:
https://github.com/farinspace/google-spreadsheet
http://webscripts.softpedia.com/script/PHP-Clases/Google-Spreadsheet-PHP-Helper-Class-76290.html
Now, extract the ZendGdata zip file and copy the "Zend" folder from inside the "library" subdirectory. Upload the "Zend" folder and Google_Spreadsheet.php to a folder on your web server:
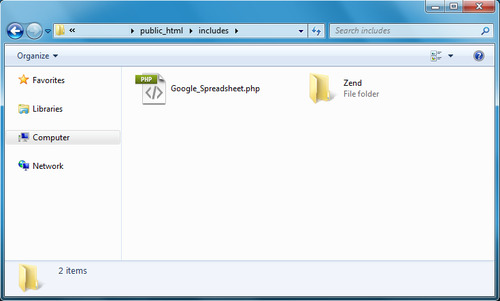
Important: Make sure you upload the Zend library folder only and make sure it is in the same folder as the Google_Spreadsheet.php file, so the helper class knows where to find it.
4.) Write your PHP web form.
There are a lot of ways you can do this, but I'm going to use a simple HTML form that submits to itself and uses a PHP script to process the submitted information. Give the file a .php extension so your web server knows it contains PHP code, although this may not be necessary depending on your server's configuration. Your code will look something like this.
A basic HTML header with any CSS you want to use:
<html> <head> <title>My Web Form</title> <link rel="stylesheet" href="css/style.css" type="text/css" /> </head>
Next, a PHP script to handle the submitted form and write to the Google Drive spreadsheet:
<body> <?php include_once("Google_Spreadsheet.php"); $user = 'MYUSERNAME'; $pass = 'MYPASSWORD'; $ss = new Google_Spreadsheet($user, $pass); $ss->useWorksheet("Sheet1"); $ss->useSpreadsheet("Email List"); $submitted = $_POST['submitted']; if ($submitted == 1) { $firstname = $_POST['first_name']; $lastname = $_POST['last_name']; $gender = $_POST['gender']; $email = $_POST['email']; // Do some error checking here if you want if (!$email) { echo "<h3><font color='red'>*Email Address is required</font></h3>"; } else { // No errors, continue processing registration $row = array ( "First Name" => $firstname , "Last Name" => $lastname , "Gender" => $gender , "Email Address" => $email ); if ($ss->addRow($row)) { // Display success page here echo "<h1>Thanks for registering!</h1>"; // Send a confirmation email here if you want } else { // Failed to write to the spreadsheet echo "<h1>Sorry there was an error processing your request.</h1>"; } } } ?>
Finally, the HTML for the form itself:
<form id="email_list_form" method="post" action="MYFILENAME.php"> <h2>Sign up for our email list!</h2> <label for="first_name">First Name: </label> <input id="first_name" name="first_name" type="text" value="<?php echo $firstname; ?>"/><br/> <label for="last_name">Last Name: </label> <input id="last_name" name="last_name" type="text" value="<?php echo $lastname; ?>"/><br/> <label for="gender">Gender: </label> <span> <label for="gender_m">Male</label> <input id="gender_m" name="gender" type="radio" value="male"/> <label for="gender_f">Female</label> <input id="gender_f" name="gender" type="radio" value="female"/> <br/> </span> <label for="email">Email Address: </label> <input id="email" name="email" type="text" value="<?php echo $email; ?>"/><br/> <input type="hidden" name="submitted" value="1" /> <br/><input type="submit" value="Submit"> </form> </body> </html>
That's it. Be sure to substitute your own values for the bold parts of the code. When someone submits the form, it will write the information to the next free row in your Google Drive spreadsheet, where anyone you share it with can view and/or manipulate it as needed. Hopefully this unique approach to a back end will be a useful addition to the options available to you. Let me know what you think.
9 notes
·
View notes
Text
Using a Verizon 4G modem with a SonicWall firewall
If you briefly scan the internet or ask SonicWall support, or even worse buy the equipment and try it like I did, you would think this is impossible. However, after nearly a week of trial and error, I have gotten this to work fairly stably. Here is what you need to do.
Note: Many of these tips are probably still useful if you use a different brand of firewall (the power boosting part, for example).

1. Use a Pantech UML290 instead of a Novatel 551L.

It turns out the 551L is a piece of junk. I found it nearly impossible to use with anything but a Windows PC.
Once you get your UML290, hook it up to a PC to go through the activation process and make sure it is working properly.
2. Obtain the SonicWall HotFix firmware.
This came from a SonicWall TechNote on using the Novatel 551L with a SonicWall, which was removed because of all the problems people were having with getting it to work.
You'll need to buy a support contract for your firewall if you don't have one already. Then contact support and request the specific HotFix version (listed below) for your firewall. They will tell you that this version isn't supported anymore and won't want to give it to you, but convince them to send it to you anyway. You definitely need the HotFix version to get this to work. Here are the HotFix numbers:
HF113649-2o for TZ 200, TZ 210, TZ 210W, NSA 240, NSA 3500, NSA 4500, NSA 500, NSA E5500, NSA E6500, NSA 7500, NSA E8500.
HF113649-1o for TZ 215, TZ 215W, NSA 220, NSA 220W, NSA 250M, NSA 250MW.
HF113649-8o for TZ 105, TZ 105W, TZ 205, TZ 205W.
Once you have the HotFix firmware, go ahead and install it on your firewall. I used a SonicWall TZ 200.
3. Configure the SonicWall using the secret HotFix settings.
These settings came from the aforementioned TechNote which is no longer available.
When the SonicWall recognizes the modem, the navigation menu item "3G/4G/Modem" will change to "3G/4G". You may need to refresh the browser for this change to be reflected. Click on "3G/4G", then on "Connection Profiles".
Under "Connection Profiles", click on "Add". Select "USA", "Verizon", and "4G/LTE" for Country, Service Provider, and Plan Type, respectively. Leave the rest of the settings at the defaults and it should look like this:

Click "OK" and then "OK" again to make this your primary profile. You can also set up a secondary 3G profile, but I'm assuming you only want to use 4G if the device will be stationary and you are in a 4G area.
Place the "U0" network where you want it under Network --> Failover & LB. This will vary depending on whether you want to use this as an emergency backup or your primary WAN connection.
4. If you need a static IP address, get one from Verizon and set it in the Connection Profile.
Getting a static IP address will enable you to do things like set up 2-way VPN connections with other locations. You can obtain a static IP address from Verizon for a one-time fee of $500 (no additional monthly charges). Contact your Verizon rep or technical support.
Once you have your static IP address, set it by editing your "Verizon (4G/LTE)" Connection Profile and going to the "IP Address" tab.
5. Boost the power to the 4G modem (Important!).
This is super important, and I would bet this is the reason why SonicWall thinks Verizon 4G doesn't work with their devices. The USB port on the SonicWall was designed to be used with 3G modems, and 4G radios require a lot more juice. I found that if I didn't boost the power to the modem, it would consistently drop the connection under heavy data load.
To boost the power, buy a Y-type USB cable like this one:

You'll then need a USB power adapter so you can plug the extra power end into an outlet. The complete system will look like this:

I also found that if I plugged this system into a power strip and then plugged the SonicWall and my laptop into the same power strip, the modem wouldn't get enough power and would start dropping the connection again. So I'd suggest dedicating an outlet or extension cord to the extra power cord.
6. Lock the UML290 in 4G only mode.
Again, I am assuming you only want to use 4G since the device is stationary and you are in a 4G area. Since we only configured a 4G Connection Profile, we can lock the modem in 4G mode so it doesn't try to switch to 3G. To do this, connect the modem to a PC running VZAccess Manager (VZAM). With VZAM open, press Ctrl-D, and enter the password "diagvzw" when prompted. It will disconnect you from the network if you are connected. When the "Support" box pops up, click on "Settings". Then select "LTE Only" under "Preferred Operating Mode":

Click "OK" and "Close" and it will write the settings to the device.
If you follow these steps, you should be able to get your Verizon 4G modem working fairly stably with your SonicWall firewall. Hopefully this tutorial, which contains a lot of information not readily available on the internet, will be helpful to other IT professionals to bring these two industry-leading technologies together. Let me know what you think.
2 notes
·
View notes
