feels good, feels organic. thank you ❥ — tracking #emilyblr
Don't wanna be here? Send us removal request.
Statistics
We looked inside some of the posts by katebeckets and here's what we found interesting.
Average Info
Notes Per Post
75K
Likes Per Post
44K
Reblog Per Post
31K
Reply Per Post
24
Time Between Posts
3 hours
Number of Posts By Type
Text
15
Note
2
Last Seen Tumblr Blogs


Fun Fact
Tumblr Inc. is using 66 technologies for its website.
Text


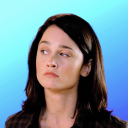
FOX MULDER | 1.02
35 notes
·
View notes
Text


castle & beckett being castle & beckett [151/?] ⤷ 4.06 — “Demons”
#the way he just walks right in alskslsmsl#candb#em.castle#castle#castleedit#my gifs#caskett#caskettedit#addys-beth#fourteenthofaugust#iwonderifyouwonderaboutme#renegadesstuff#singinprincess#tuserkers#userelliee#useremsi#usernalu#userspencereid#userteresa#usermaria#i want queue believe
17 notes
·
View notes
Text


how to say "I love you" in x-files [234/?] ⤷ 4.23 — “Demons”
#not her looking so tired when she is the exact same way LOL#scully wants to take care of him as much as he wants to take care of her and both of them just refuse#they love each other so much I need to go lie down for ten years#txf ily#em.txf#my gifs#the x files#txfedit#dailytxf#msr#msredit#useremsi#useralf#usernessa#singinprincess#usereerie#usernooshin#userveronika#userteresa#poangpals#I want queue believe
54 notes
·
View notes
Text
it’s so crazy how many mid movies r made every year that u wouldve never learned abt if ur mutual didnt want to fuck an actor that plays in them
36K notes
·
View notes
Text


CHAPPELL ROAN // THE SUBWAY
147 notes
·
View notes
Text
what do you mean you didn’t know i was unstable you met me on tumblr
19K notes
·
View notes
Text
gonna rant for a second 🙂↕️
I am so, so very irritated that in both of the exchanges I ran in July, there was someone who didn’t complete their gift and didn’t communicate with me about it. It’s in the instructions—that if you’re not going to be able to do it, to let us know asap so we can make sure everyone gets something—but it’s also just common courtesy. If you commit to something and you’re not going to be able to do it, you tell them! You don’t just not do it! And it’s especially frustrating for me because I’m one of the people who didn’t get something, and even though it’s got nothing to do with me, it feels humiliating. And makes it harder to check in about if someone is going to finish their gift because it just feels awkward to nag someone about making their thing for me (one of them is someone else, and that one is easier to check in about because I feel bad that another person didn’t get something).
11 notes
·
View notes
Text
“August evenings are especially stricken with melancholy - as if the ghosts of all past summers came rushing to haunt my heart”
from Letters of Summer Past (Listy Tamtego Lata) VI
10K notes
·
View notes
Text
The great thing about Gus is that he perfectly oscillates from playing the annoyed straight man to Shawn’s general insanity to yes-anding to an insane degree. For every moment where he says no Shawn, you did not hear that both ways there’s a moment where he, with no prompting, claims that his fictitious grandmother with a broken hip was teaching a line dancing class. For every time he says Shawn, stop messing around at work, there is a time where after Shawn says he’s been “looking at the man in the mirror”, Gus, in a move that never ever fails to make me laugh, with a completely straight face and no impact on the conversation, does the Michael Jackson “he-he”. He’s insane. He thinks he’s normal. He does 11 point turns. He’s a sympathetic crier.
8K notes
·
View notes
Text
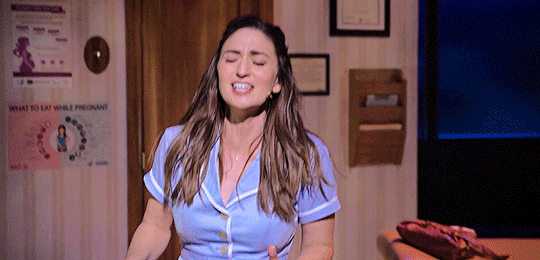
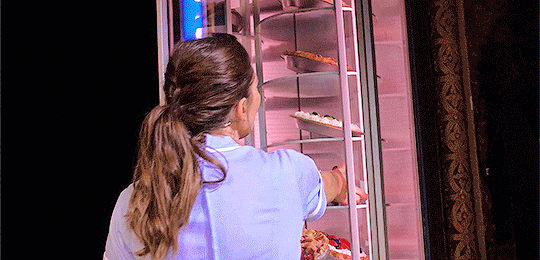
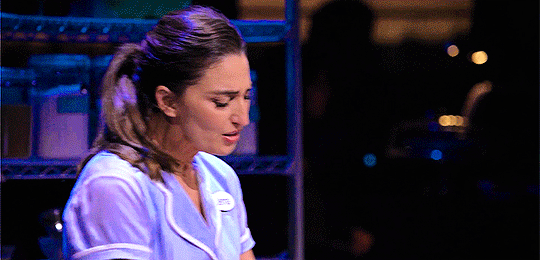
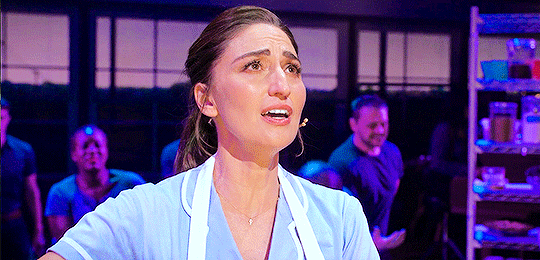
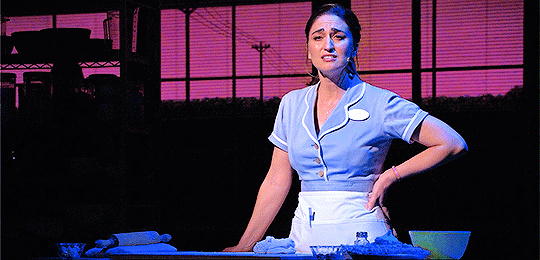
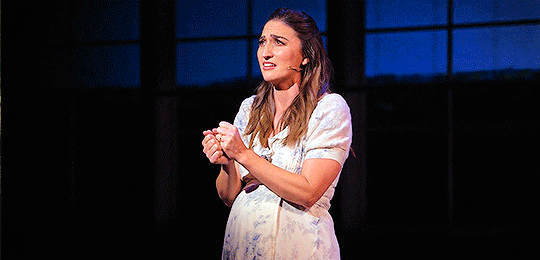


SARA BAREILLES as JENNA HUNTERSON in Waitress (2023)
in time, maybe i can heal and i can breathe, because i can feel myself believe that everything changes.
335 notes
·
View notes
Note
hi, would you please post a tutorial on how to do the typography effects and colour in the third gif it’s so cool!!
https://katebeckets.tumblr.com/post/789488227445784576/pscentral-event-40-typography-quotes-kate
Hi! Thanks so much for asking <3 The gif referenced is below and the tutorial is below the cut! This is my first tutorial, so hopefully everything is clear enough.
Feel free to tag me using #emilyblr if you try it! If this is helpful, I'd appreciate you liking and/or reblogging this post to let me know. 🩵

NOTE: If something doesn't make sense or you don't see the settings, click on the photo! They are cropped in order to unify the size, however if you click on it you will see the full picture I included. EDIT: For some reason, the formatting gets messed up for me when you click the read more on the dashboard. But if you go to this post on my blog, the photos seem to be in the correct places!
I. Create Your Base Text


First I create a new text layer and figure out my font settings (font, size, etc.). The text color should be white. The picture on the right shows my settings—I like to unify the layer position and effects so that it applies to my entire gif (note: I make frames from layers so it's necessary for me; I'm not sure if it is necessary if you do the text in timeline).


Change the blending mode to exclusion (right), which gives you the image on the left.


Right click on the text layer and go to blending options. First I select drop shadow and use the settings in the photo on the top right. Add gradient overlay. For this particular gifset, I used overlay for the blend mode (bottom left). The blend mode I use for the gradient changes based on the gif and the coloring, so play around with what blend mode looks best to you! Add color overlay. I also play around with the blend mode and opacity for each gif; in this case, I set it to color burn and 50% opacity.

This is what we have so far.
II. Create Text Outline


Right click your text layer and duplicate the layer. Open blending options and de-select drop shadow, gradient overlay, and color overlay (alternatively, you can right click and clear effects before opening blending options, but this is the way I do it). Go to the blending options panel and set fill opacity to 0%. Add stroke with the settings pictured in the bottom right picture (1px, white, inside, normal blend). The opacity for this gif is set to 58%, but I play around with the opacity for each gifset.

Use the arrow keys to offset the outline however you would like. I usually move it slightly to the left and up, as shown above.
III. Masking


Create a new text layer and style it how you would like. In this case, I just added a drop shadow with the settings pictured on the right. Move the text layer to where you would like it to be (left).


Use the rectangular marquee tool to select the area with your text layer (top left). Make sure you have the base text layer selected (top right). With your text area selected, add a mask by clicking the third button from the left in the layers panel (bottom right). Now we have the image on the bottom left.


Select the mask you created and invert it, which gives you the image on the top left. Hold the option key and drag the mask for your base text layer to the outline layer.
IV. Finishing Touches

Now that the focal text has been added, I can finish adding the rest of the text. And that's it!
26 notes
·
View notes
Text


how to say "I love you" in x-files [233/?] ⤷ 4.23 — “Demons”
#medical hair stroking™#and just general touchiness#also. they were on the phone on Friday. after work. they are so much#txf ily#em.txf#my gifs#the x files#txfedit#dailytxf#msr#msredit#useremsi#useralf#usernessa#singinprincess#usereerie#usernooshin#userveronika#userteresa#poangpals#I want queue believe
141 notes
·
View notes
Text


♡
264 notes
·
View notes
Note
hi, would you please post a tutorial on how to do the typography effects and colour in the third gif it’s so cool!!
https://katebeckets.tumblr.com/post/789488227445784576/pscentral-event-40-typography-quotes-kate
Hi! Thanks so much for asking <3 The gif referenced is below and the tutorial is below the cut! This is my first tutorial, so hopefully everything is clear enough.
Feel free to tag me using #emilyblr if you try it! If this is helpful, I'd appreciate you liking and/or reblogging this post to let me know. 🩵
NOTE: If something doesn't make sense or you don't see the settings, click on the photo! They are cropped in order to unify the size, however if you click on it you will see the full picture I included. EDIT: For some reason, the formatting gets messed up for me when you click the read more on the dashboard. But if you go to this post on my blog, the photos seem to be in the correct places!
I. Create Your Base Text
First I create a new text layer and figure out my font settings (font, size, etc.). The text color should be white. The picture on the right shows my settings—I like to unify the layer position and effects so that it applies to my entire gif (note: I make frames from layers so it's necessary for me; I'm not sure if it is necessary if you do the text in timeline).
Change the blending mode to exclusion (right), which gives you the image on the left.
Right click on the text layer and go to blending options. First I select drop shadow and use the settings in the photo on the top right. Add gradient overlay. For this particular gifset, I used overlay for the blend mode (bottom left). The blend mode I use for the gradient changes based on the gif and the coloring, so play around with what blend mode looks best to you! Add color overlay. I also play around with the blend mode and opacity for each gif; in this case, I set it to color burn and 50% opacity.
This is what we have so far.
II. Create Text Outline
Right click your text layer and duplicate the layer. Open blending options and de-select drop shadow, gradient overlay, and color overlay (alternatively, you can right click and clear effects before opening blending options, but this is the way I do it). Go to the blending options panel and set fill opacity to 0%. Add stroke with the settings pictured in the bottom right picture (1px, white, inside, normal blend). The opacity for this gif is set to 58%, but I play around with the opacity for each gifset.
Use the arrow keys to offset the outline however you would like. I usually move it slightly to the left and up, as shown above.
III. Masking
Create a new text layer and style it how you would like. In this case, I just added a drop shadow with the settings pictured on the right. Move the text layer to where you would like it to be (left).
Use the rectangular marquee tool to select the area with your text layer (top left). Make sure you have the base text layer selected (top right). With your text area selected, add a mask by clicking the third button from the left in the layers panel (bottom right). Now we have the image on the bottom left.
Select the mask you created and invert it, which gives you the image on the top left. Hold the option key and drag the mask for your base text layer to the outline layer.
IV. Finishing Touches
Now that the focal text has been added, I can finish adding the rest of the text. And that's it!
#em.gif#answered#anonymous#chaoticresources#usergif#completeresources#allresources#pscentral#carolook#usertj#usercats#usereerie#tuserella#gif tutorial#gif making#photoshop tutorial
26 notes
·
View notes
Text


EM’S ANNIVERSARY CELEBRATION
TIME STAMP ROULETTE @profwonderbearthementalista asked: BONES | 10.10 — "The 200th in the 10th" ⤷ 4:12, 11:51, 14:03, 16:07, 18:56, 26:14, 36:09, 41:33
#emae25#my gifs#em.bones#bones#bonesedit#bones tv#bonescenter#singinprincess#tuserjana#tuserkers#userelliee#userkayjay#usernalu#userpenny#userteresa#usertreena#userseeleybooth#renegadesstuff
46 notes
·
View notes
Text


August slipped away into a moment in time 'Cause it was never mine... ⤷ Painting: Kustlandschap te Corsica by Charles William Meredith van de Velde (1828-1892)
#ashleeeyyyyyy this is a vision#tswift#folklore#happy salt air and the rust on your door#I want queue believe
448 notes
·
View notes