
Complete Web Design Web & Apps Development IT software solutions | Wordpress expert dedicate team and Support from India
Don't wanna be here? Send us removal request.
Statistics
We looked inside some of the posts by lathiyawebsolutions-blog and here's what we found interesting.
Average Info
Notes Per Post
19
Likes Per Post
19
Reblog Per Post
0
Reply Per Post
0
Time Between Posts
9 days
Number of Posts By Type
Text
17
Last Seen Tumblr Blogs


Fun Fact
Forty percent of Tumblr users are between the ages of 18 to 25.
Text

How to Transfer Your WordPress Domain to a New Registrar
At some point, you might decide to move your domain from one registrar to another. Whether it’s for better pricing, improved customer support, or consolidated domain management, transferring your domain is a straightforward process when you know the right steps.
In this guide, you’ll learn how to transfer your domain registered with a WordPress website to a new registrar without disrupting your site or email services.
Step 1: Check Domain Eligibility
Before beginning the process, make sure your domain is eligible for transfer. Most domains must meet these requirements:
Registered for more than 60 days
Not locked or on hold due to disputes or expired status
Administrative contact information is up to date
Some top-level domains may have specific rules, so it’s important to review them with your current and future registrar.
Step 2: Unlock Your Domain
Log in to your current domain registrar account. Navigate to the domain management section and locate the option to unlock your domain. This step is necessary to allow the transfer to proceed.
Unlocking may take a few minutes to reflect in the system. If your domain is managed through WordPress.com, the domain settings can be found under "My Site" > "Upgrades" > "Domains".
Step 3: Get the Authorization Code
Also known as the EPP code or transfer key, this unique code is required to approve the domain transfer. You’ll typically find it in your domain settings. If not, request it from your current registrar.
Once received, keep this code secure—it’s needed when initiating the transfer with the new registrar.
Also Read: Understanding WordPress Themes vs Plugins: What’s the Difference?
Step 4: Start the Transfer with the New Registrar
Go to the website of the registrar you’re transferring to. Begin a new domain transfer request, usually by searching for the domain name and selecting the “Transfer” option.
You’ll be prompted to enter the domain name and the authorization code. Some registrars may ask you to create an account or log in before proceeding.
Step 5: Confirm the Transfer Request
After initiating the transfer, you’ll receive an email to the administrative contact listed on the domain. This message will ask you to approve or deny the transfer. Confirm the request to continue.
In some cases, both registrars (old and new) may send separate emails for verification. It’s important to approve all required steps to avoid delays.
Step 6: Wait for the Transfer to Complete
Once confirmed, the domain transfer will begin. It usually takes between 5 to 7 days to complete, though some may finish sooner depending on registrar policies.
During this time, your website and email should remain unaffected, especially if your DNS records are managed outside your current registrar.
Step 7: Verify and Update Domain Settings
After the transfer completes, log in to your new registrar account and:
Confirm the domain is listed and active
Review DNS settings to ensure they’re accurate
Re-enable domain privacy, if desired
Check the domain’s expiration and auto-renew settings
These steps help avoid any interruptions in service.
Final Thoughts
Transferring a domain is a routine process, but it requires attention to detail. By following the steps above and allowing time for the transfer to process, you can move your domain to a new registrar without hassle.
Always make sure your contact information is current and that your site’s DNS remains stable during the transition. With the right preparation, the process will be smooth and secure.ALSO READ: Building an E-commerce Store with Divi and WooCommerce : A Comprehensive GuideOdoo for Small Businesses : Affordable Services to Help You GrowHow to Hide SKU on woocommerce product pages?How to Contact WooCommerce Customer Support
0 notes
Text

6 Essential Steps to Develop Your AI-Powered SaaS Product
The world of Software as a Service (SaaS) continues to expand rapidly, and integrating Artificial Intelligence (AI) into your SaaS product can unlock tremendous potential. AI-powered SaaS products offer scalable, efficient solutions that can help businesses automate tasks, improve decision-making, and personalize user experiences. Whether you're building a customer service tool, a data analytics platform, or a content creation solution, integrating AI can elevate your product offering and set you apart in a competitive market.
If you're ready to develop your own AI-powered SaaS product but don't know where to begin, you're in the right place. In this guide, we'll take you through the 6 essential steps to develop your AI-powered SaaS product and provide insights into key considerations at every stage.
Step 1: Define the Problem You Want to Solve
Before you dive into the complexities of AI and SaaS development, you need to identify a clear problem that your product will solve. This is the foundation of your AI-powered SaaS product and the key to ensuring it provides real value to your users.
Questions to Consider:
What problem or pain point does your target audience experience?
How does this problem impact their business or personal life?
Can AI help solve this problem more efficiently than existing solutions?
Example: If you're building an AI-powered analytics platform, the problem you might solve is businesses struggling to process large datasets and extract meaningful insights quickly.
By defining the problem, you set clear expectations for your product and begin to shape the functionality and features of your AI-powered SaaS product.
SEO keywords: AI SaaS product, AI-powered SaaS, problem-solving with AI
Step 2: Identify the Right AI Technology
Once you've defined the problem, the next step is to choose the appropriate AI technology that will power your solution. AI is a broad field, and not all AI tools or models are suited for every application. Your choice will largely depend on the problem you're solving, the data you need to process, and the complexity of the task at hand.
Common AI Technologies in SaaS:
Machine Learning (ML): Algorithms that allow your system to learn and improve from experience (e.g., recommendation systems).
Natural Language Processing (NLP): Enables understanding and generation of human language (e.g., chatbots, sentiment analysis).
Computer Vision: Processes visual data (e.g., object detection, facial recognition).
Deep Learning: Advanced neural networks used for complex tasks (e.g., image recognition, speech processing).
Choosing the right AI technology will influence both the performance and scalability of your product, so ensure it aligns with the problem you're solving and your long-term goals.
SEO keywords: AI technology, machine learning for SaaS, natural language processing SaaS
Step 3: Build a Data Strategy
AI-powered applications are only as good as the data they are trained on. A solid data strategy is critical to the success of your AI-powered SaaS product. You'll need to gather, clean, and organize large amounts of data to train your AI models effectively.
Key Considerations:
Data Sources: Where will you source your data? Will it come from internal databases, third-party providers, or user-generated content?
Data Quality: Is the data clean, structured, and relevant to the problem you're solving? Poor-quality data can lead to inaccurate predictions and unreliable performance.
Data Privacy and Compliance: Make sure you comply with relevant regulations like GDPR, CCPA, and HIPAA to protect your users' privacy.
Developing a robust data strategy ensures your AI models have the foundation they need to function correctly and deliver the value your customers expect.
SEO keywords: data strategy for AI, data collection AI SaaS, data privacy in AI-powered products
Also Read: How to add post ratings for WordPress : star rating plugin wordpress
Step 4: Develop the SaaS Platform
With your AI technology and data strategy in place, it's time to start developing the SaaS platform itself. This stage involves the architecture and user interface (UI) design that will deliver a smooth experience for your customers.
Key Components to Focus On:
Backend Architecture: Ensure your infrastructure can handle the AI models, large data sets, and user demands.
Frontend Design: Create an intuitive, user-friendly interface. Your users should easily navigate the platform, access AI-driven insights, and take action.
Integration with AI: Implement the AI models and algorithms into the platform, making sure they work seamlessly with the other components.
A well-built SaaS platform ensures that the AI capabilities are accessible and deliver value in a way that makes sense to your customers. Consider using cloud services like AWS, Google Cloud, or Microsoft Azure to ensure scalability and flexibility for AI integration.
SEO keywords: SaaS platform development, AI SaaS architecture, frontend design for AI apps
Step 5: Test and Optimize Your AI Models
AI-powered products require continuous testing and optimization to ensure they remain effective and efficient over time. Testing will help you identify bugs, improve model accuracy, and enhance user experience.
Testing Methods:
A/B Testing: Test different versions of your AI models or product features with real users to see what works best.
Model Evaluation: Regularly assess the performance of your AI models. Are they generating accurate results? Are they improving over time as they learn from data?
User Feedback: Collect feedback from beta users and early adopters to identify pain points and opportunities for improvement.
Optimization is an ongoing process. As new data is collected and your product evolves, your AI models should also improve to provide increasingly accurate and valuable insights.
SEO keywords: AI model testing, optimizing AI models, continuous testing in SaaS
Step 6: Launch, Monitor, and Scale
The final step is to launch your AI-powered SaaS product to the market, but the work doesn't end there. Post-launch activities, including monitoring, user support, and scaling, are critical to ensuring long-term success.
Key Activities After Launch:
Monitoring Performance: Keep track of the performance of both your AI models and the overall SaaS platform. Use tools like Google Analytics, Datadog, or New Relic for performance monitoring.
User Support: Provide support channels for users who encounter issues with the AI features or need assistance.
Scaling the Product: As your customer base grows, ensure that your infrastructure can scale. Consider using cloud-based solutions to handle increasing traffic and data storage needs.
Scaling may involve adding new AI models, expanding your feature set, or optimizing your data processing capabilities as the business grows.
SEO keywords: scaling AI SaaS, SaaS product launch, AI product monitoring, post-launch AI SaaS
Conclusion
Developing an AI-powered SaaS product in 2025 is an exciting and challenging endeavor. By following these six essential steps—defining the problem, selecting the right AI technology, building a data strategy, developing the platform, testing and optimizing your AI models, and launching and scaling—you can ensure your product delivers real value to users while standing out in a competitive market.
By combining AI technology with the SaaS business model, you can create a product that is not only scalable but also able to provide smarter solutions to users. As AI continues to revolutionize the software industry, now is the perfect time to build an AI-powered SaaS product that can change the way businesses operate.
Also Read: how to highlight code in blogger
Frequently Asked Questions (FAQs)
1. What are the best AI technologies to use in SaaS? Popular AI technologies for SaaS include machine learning, natural language processing (NLP), and deep learning. Choose the technology that best aligns with the problem you're solving.
2. How much data is needed to train an AI model for SaaS? The amount of data required depends on the complexity of your AI model. Typically, larger datasets lead to more accurate and effective models, but it’s important to prioritize data quality over quantity.
3. Can AI SaaS products be scaled easily? Yes! Cloud platforms like AWS and Google Cloud offer scalable infrastructure to support the growth of AI-powered SaaS products, making it easy to handle increasing demand.4. How do I test my AI models for accuracy? You can use A/B testing, cross-validation, and performance metrics (e.g., precision, recall) to evaluate and improve the accuracy of your AI models.
0 notes
Text
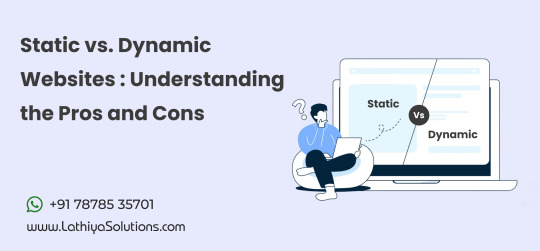
Static vs. Dynamic Websites: Understanding the Pros and Cons
When it comes to building a website, one of the first decisions you'll face is whether to create a static or dynamic website. Each type comes with its own set of advantages and disadvantages, and understanding these differences can help you choose the best option for your needs. Whether you're building a personal portfolio, a blog, or a business site, knowing the right approach can save you time and resources in the long run.
Let’s break down the key differences, along with the pros and cons of each.
What Is a Static Website?
A static website is one where the content is fixed and doesn’t change unless manually updated by the site owner or developer. These websites are typically built using HTML, CSS, and sometimes JavaScript, with the content coded directly into the files. Every user sees the same content when they visit the page.
Advantages of Static Websites:
Fast Loading Speed Since static websites are made up of fixed content, there is no need for server-side processing. This means pages load faster, offering a better user experience, especially for mobile users.
Easy to Develop Static websites are often simpler to create. You don't need complex back-end systems or databases. With tools like basic HTML editors, creating a static site can be done quickly, even by those with limited coding experience.
Low Hosting Costs Static websites don’t require a server to process dynamic content, so hosting costs are usually lower. You can host them on less expensive platforms like GitHub Pages or other simple hosting services.
Increased Security Without a server-side database or complex back-end system, static websites are less vulnerable to security breaches. This makes them a good option for sites that don't require frequent updates or interactive features.
Also Read: Why Your Business Needs a Website Redesign in 2025
Disadvantages of Static Websites:
Limited Interactivity Static websites lack features like forms, search bars, or live chat because they can’t interact with databases or external servers in real time. They are ideal for informational sites, but not for businesses needing customer interaction or personalized experiences.
Difficult to Scale As your website grows, manually updating each page can become tedious. Adding new content or features requires more development work and doesn't scale well if you plan on frequently changing or updating your site.
No Content Management System (CMS) Static websites don’t typically include CMS, making them less user-friendly for content updates. Non-technical users might find it harder to make changes without developer support.
Looking to build a static website? Our expert team can help you create a fast, secure, and cost-effective site tailored to your needs.
What Is a Dynamic Website?
A dynamic website, on the other hand, can update content in real time and respond to user input. These websites rely on back-end programming languages (like PHP, Python, or Ruby) and often use databases like MySQL to store content, which can be modified, added, or deleted dynamically. Social media platforms, e-commerce sites, and blogs are examples of dynamic websites.
Advantages of Dynamic Websites:
User Interaction and Personalization Dynamic websites allow for greater interactivity. They can respond to user actions, such as submitting a form, logging into an account, or adding products to a shopping cart. This creates a more personalized experience for users.
Easier Content Management With a Content Management System (CMS) like WordPress or Drupal, dynamic websites make it easier for non-developers to update and manage content. This is especially beneficial for businesses or individuals who want to frequently add new posts, products, or pages without needing coding knowledge.
Scalability and Flexibility Dynamic websites are easier to scale. You can add new features, products, or content without redesigning the whole website. The back-end systems allow you to manage large amounts of content and users with more flexibility than static sites.
SEO Benefits Dynamic websites can be better optimized for search engines, as they can include personalized content like blog posts, product recommendations, and dynamic landing pages that appeal to various user segments. This can boost your SEO performance.
Disadvantages of Dynamic Websites:
Slower Load Times Since dynamic websites require the server to process the content each time a page is requested, they are generally slower than static websites. This can affect user experience, especially if the website is not optimized properly.
Higher Costs Building and maintaining a dynamic website typically requires more time and resources. You’ll need a skilled developer to manage the back-end, and your hosting costs will be higher due to the complexity and storage required for dynamic content and databases.
Security Risks Dynamic websites are more vulnerable to security breaches because they rely on databases and server-side scripts. These sites need more rigorous security measures, such as regular updates and backups, to avoid issues like hacking or data leaks.
More Complex to Develop and Maintain Developing a dynamic website requires a higher level of technical knowledge and experience. You’ll need both front-end and back-end development skills to create and maintain these types of sites. Additionally, you���ll need to monitor the server and database performance regularly.
Looking to build a dynamic website? We provide professional development services to create interactive, scalable, and feature-rich websites tailored to your needs.
Which One Should You Choose?
The choice between a static and dynamic website ultimately depends on your needs, budget, and future goals.
Choose a static website if you have a simple website with minimal content that doesn’t require frequent updates or user interaction. It’s a good option for personal portfolios, small informational websites, or landing pages where security and speed are key priorities.
Choose a dynamic website if you need more interactivity, personalized content, or frequent updates. This option is ideal for e-commerce sites, blogs, or business websites where user engagement and scalability are important.
Both static and dynamic websites have their place, and the right choice depends on what you aim to achieve with your online presence. Weighing the advantages and disadvantages will help you make the best decision for your specific needs.
Conclusion
Understanding the differences between static and dynamic websites can help you make an informed decision when building your site. Whether you opt for a simple, fast static website or a more complex, interactive dynamic site, the key is to choose the one that aligns with your goals, budget, and the user experience you want to create.
1 note
·
View note
Text

How to Set Up Your First Real Estate Website Using WordPress
Setting up a real estate website can seem like a daunting task, especially if you're doing it for the first time. However, with the right tools and guidance, you can have a fully functional, attractive site up and running in no time. WordPress is one of the most popular platforms for building websites, and it’s particularly well-suited for real estate businesses. If you’re considering creating your first real estate website, WordPress website development services can provide you with the technical expertise needed to make the process seamless. In this guide, we’ll walk you through the essential steps to get your website live and functioning smoothly.
1. Choose the Right Hosting Provider
Before you begin building your real estate website, the first step is to select a reliable hosting provider. Hosting is where your website files will live, and choosing the right provider can impact your site’s performance, speed, and security. Many hosting companies offer special packages for WordPress websites, and some even provide one-click installations to make the process easier.
When choosing a hosting provider, make sure to look for one that offers strong customer support, fast loading speeds, and excellent uptime guarantees. A good hosting provider will also allow for easy scalability, ensuring that your website can grow with your business.
2. Install WordPress
Once you’ve chosen a hosting provider, the next step is installing WordPress. Many hosting services offer a one-click installation option, which simplifies the process significantly. If your hosting provider doesn’t offer this, you can download WordPress directly from their website and manually install it. Once WordPress is installed, you can access the backend of your website by logging into the WordPress dashboard.
3. Select a Real Estate WordPress Theme
The theme you choose will dictate how your website looks and feels. It’s essential to pick a theme that suits your brand and business needs. For a real estate website, look for themes specifically designed for property listings, with features like customizable property pages, advanced search options, and built-in IDX (Internet Data Exchange) integration for displaying MLS listings.
If you want something unique and tailored to your specific needs, you might consider real estate website development services to help you create a custom theme that reflects your business identity and provides an optimized user experience.
4. Customize Your Website
Once you've selected a theme, it’s time to customize it. WordPress allows you to easily modify your website's colors, fonts, and layout through its built-in customization options. If you're not familiar with design principles, you can either use a pre-designed template or work with a professional designer to create something truly unique.
With WordPress, you can also add various plugins that enhance the functionality of your site. For real estate websites, important plugins might include IDX integration for displaying MLS listings, lead capture forms, property sliders, and SEO tools. These features are critical for engaging visitors and ensuring your site is user-friendly.
At this stage, working with experts in WordPress website development services can help ensure that all elements of your site are functioning perfectly, from the design to the back-end functionality.
5. Add Essential Pages and Content
Now that your site is set up, it’s time to start adding content. The essential pages for a real estate website typically include:
Home Page: A welcoming page that clearly conveys who you are and what you offer. This page often features a property search bar or featured listings.
Property Listings: A page showcasing your current property listings, with detailed information about each property.
About Us: A page that explains who you are, your experience in real estate, and what sets you apart from competitors.
Contact Us: A page with all necessary contact information, including forms for visitors to inquire about properties or ask questions.
Make sure each page is well-organized and easy to navigate, and include high-quality images of your properties to create a professional look.
6. Optimize for Mobile and SEO
In today’s world, most people browse websites on their mobile devices. That's why it’s crucial to have a responsive website design that looks great on smartphones and tablets. Luckily, most WordPress themes are responsive out of the box, but it’s still a good idea to check and test your site on multiple devices before launch.
Additionally, search engine optimization (SEO) is critical for making sure your website is visible to potential clients. Use plugins like Yoast SEO to optimize your website content, meta descriptions, and keywords. This will help improve your website’s ranking on search engines, making it easier for people to find you.
7. Regularly Maintain Your Website
Launching your real estate website is just the beginning. To keep it running smoothly and securely, you'll need to regularly maintain it. This includes updating WordPress, plugins, and themes, as well as performing security checks. Keeping your website up to date ensures that it performs well and reduces the risk of security vulnerabilities.
This is where WordPress website maintenance services come in handy. By partnering with professionals who specialize in WordPress maintenance, you can ensure that your site is always running at peak performance. These services typically include regular updates, backups, security monitoring, and troubleshooting, so you can focus on running your business while they take care of the technical details.
Building your first real estate website with WordPress is an exciting project that can significantly benefit your business. By following these steps and leveraging WordPress website development services and ongoing WordPress website maintenance services, you’ll create a site that not only looks great but also performs seamlessly for your clients.If you're looking for more tips on how to grow your real estate business online, consider following us on Instagram for regular updates and insights.
1 note
·
View note
Text

Key WooCommerce Security Tips for 2025
1. Use Strong Passwords and Enable Two-Factor Authentication (2FA)
A weak password is often the first point of vulnerability for any website. To protect your WooCommerce store, ensure that you and your team members use strong, unique passwords for all accounts related to your store. Additionally, enabling two-factor authentication (2FA) adds an extra layer of protection, requiring a second verification step when logging in.
While 2FA may seem like an added hassle, it is a powerful tool that prevents unauthorized access, even if someone obtains your password. Implementing 2FA will drastically reduce the likelihood of a security breach.
2. Keep WordPress, WooCommerce, and Plugins Updated
Regular updates to WordPress, the WooCommerce plugin, and any other installed plugins are critical for maintaining security. These updates often include security patches to fix newly discovered vulnerabilities. By updating your software regularly, you ensure that your store is protected against the latest threats.
If you don't have the time or expertise to handle updates yourself, consider seeking WooCommerce Development Services to keep your store secure and functioning smoothly. A professional team can handle the updates while ensuring no disruption to your store’s operations.
3. Implement SSL Encryption for Secure Transactions
SSL (Secure Socket Layer) certificates encrypt sensitive data that flows between the server and the user’s browser. This encryption ensures that your customers’ personal and financial details are protected. In 2025, having an SSL certificate isn’t just a security measure—it’s also essential for maintaining customer trust and improving your site’s SEO ranking.
If you're unsure how to integrate SSL encryption, a WooCommerce Developer can help set it up to ensure secure transactions and smooth customer experiences.
4. Install a Web Application Firewall (WAF)
A Web Application Firewall (WAF) acts as a barrier between your WooCommerce store and malicious traffic. It filters out harmful requests, preventing hackers from exploiting vulnerabilities in your site’s code. Implementing a WAF can block attacks such as SQL injection, cross-site scripting (XSS), and brute-force login attempts, which are common methods used by cybercriminals.
To configure the best WAF for your store, you can work with professionals who specialize in website security.
5. Backup Your Store Regularly
Data loss is one of the most detrimental effects of a cyberattack. If your store is compromised or experiences a system failure, having a recent backup ensures that you can restore your website with minimal downtime and data loss. Regular backups also give you peace of mind knowing that even in the worst-case scenario, you can recover your site quickly.
To streamline this process, WordPress Support Services often include backup solutions, providing continuous backups to keep your store secure and your data safe.
6. Limit Login Attempts
Brute force attacks involve hackers attempting to guess your login credentials by trying different combinations repeatedly. One effective way to prevent these attacks is by limiting the number of failed login attempts before temporarily locking out the user. This drastically reduces the chances of a hacker successfully gaining access to your store.
This is a simple yet effective security measure, and integrating it into your site can be done by a WooCommerce Developer who can ensure the right settings are in place to block these types of attacks.
Ongoing Maintenance and Monitoring for WooCommerce Security
Maintaining a secure WooCommerce store is an ongoing process. Regular security checks, audits, and proactive monitoring are essential to keep your site protected. Without routine maintenance, new vulnerabilities can arise, and hackers will always find new ways to exploit them.
By leveraging WordPress Website Maintenance Services, you can ensure that your store is continually monitored and updated, helping to safeguard it from emerging threats.
Conclusion
In 2025, the security of your WooCommerce store should be a top priority. By adopting strong passwords, implementing SSL certificates, enabling two-factor authentication, and keeping your software up to date, you can significantly reduce the risk of a breach.
For more advanced security measures and ongoing support, working with WooCommerce Development Services and WordPress Support Services ensures that your site remains secure, protected from the latest threats, and optimized for performance.
Let’s work together to make sure your WooCommerce store is as secure as possible in 2025 and beyond.
1 note
·
View note
Text

Divi for Beginners: A 2025 Guide to Building Beautiful WordPress Sites
Divi has long been a favorite among WordPress users for its intuitive design capabilities, drag-and-drop builder, and vast customization options. For beginners stepping into website creation in 2025, Divi offers an ideal balance of power and simplicity. Whether you're launching a personal blog, a portfolio, or a business site, Divi makes it easy to create professional and visually stunning websites—without needing to code.
Starting your journey with Divi is even more rewarding when paired with a reliable WordPress website development service from India, a process that helps you build a strong foundation from day one.
Why Choose Divi as a Beginner?
Divi stands out for several reasons:
Visual Builder: A true front-end editing experience that lets you design live.
Pre-made Layouts: Hundreds of ready-to-use designs that can be customized to fit your brand.
Responsive Design: Mobile-friendly options are built in.
Support and Community: Massive support network and a large online community.
Regular Updates: Divi continues to evolve, with new features added regularly.
These features make Divi one of the most beginner-friendly WordPress themes out there. Its visual simplicity masks the powerful capabilities under the hood.
Getting Started with Divi in 2025
To begin using Divi:
Install WordPress on your chosen hosting provider.
Purchase and upload the Divi theme from Elegant Themes.
Activate Divi and access the visual builder.
Choose a layout or start from scratch.
Customize content using the drag-and-drop interface.
Even if you’re not tech-savvy, Divi makes site setup remarkably intuitive. From adding sections to adjusting styles, the learning curve is surprisingly gentle.
If you're aiming for a unique look, investing in custom WordPress theme design can give your site a completely tailored feel while maintaining ease of use.
Easy Wins for Beginners with Divi
Here are a few tips to speed up your learning process:
Use Layout Packs: These are bundled design templates that save hours of work.
Global Styles: Set fonts and colors globally to maintain consistency across your site.
Responsive Preview Mode: See how your site looks on mobile and tablet before publishing.
Save Your Designs: Reuse sections or pages you've designed by saving them to your Divi Library.
Use the Wireframe View: When layouts get complex, this view helps manage modules easily.
Experiment Safely with Divi Cloud: Store designs in the cloud to test and reuse across projects.
These small steps make a big difference in reducing development time and improving design efficiency.
Essential Divi Modules to Explore
Divi’s modules are content blocks you can add to your site. Some beginner-friendly ones include:
Text and Image Modules – Ideal for basic content and visuals.
Buttons and Calls to Action – Drive engagement with clear clickable prompts.
Sliders and Galleries – Perfect for showcasing images or featured content.
Forms for Lead Capture – Use these to collect emails or feedback.
Testimonials, Counters, and Blurbs – Great for service-based or portfolio websites.
Each module is customizable, and real-time editing means you always see what the final result will look like.
Divi Theme Tips for Better Design
Use Whitespace: Don’t overcrowd sections. Give elements room to breathe.
Stick to a Color Palette: Keep design cohesive with a limited color range.
Choose Readable Fonts: Prioritize clarity over style.
Compress Images: Use tools or plugins to reduce file size and speed up loading times.
Add Animations Sparingly: Animations can enhance UX but overusing them distracts users.
Avoiding Common Beginner Mistakes
Overcomplicating the Layout: Keep your designs simple. Less is more.
Ignoring Mobile Optimization: Always check how your site looks on smaller screens.
Skipping Backups: Use a plugin or service to back up your site regularly.
Not Using Global Elements: These help maintain design consistency and save editing time.
Forgetting SEO Basics: Use good titles, alt tags, and clean URL structures.
Neglecting Site Speed: Optimized media and minimal plugins help maintain performance.
Blogging and Content Management with Divi
If you're building a content-heavy site like a blog or online magazine, Divi has excellent support:
Blog Module – Display posts with different layouts.
Category Filters – Organize content by topics.
Search and Sidebar Widgets – Improve navigation and user experience.
Custom Post Layouts – Create a unique look for blog entries.
Starting your blog on Divi also familiarizes you with WordPress’s content management strengths.
Expanding Your Divi Site
Once your site is live, consider enhancing it with:
Third-party Divi plugins to extend functionality.
E-commerce integrations with WooCommerce.
Landing pages for lead capture and marketing.
Email marketing services integration like Mailchimp or ConvertKit.
Scaling a Divi site is easy as your needs grow.
When to Seek Expert Help
As you grow more confident with Divi, you might want to implement more advanced features. That’s when it makes sense to hire Divi theme expert who can help you scale your site’s functionality and aesthetics without losing simplicity. Whether it's custom modules or deeper design tweaks, a skilled professional can save you time and stress.
Conclusion
Building a WordPress site with Divi in 2025 is a rewarding experience—especially for beginners. Its visual builder, flexibility, and built-in features make website creation approachable and enjoyable.
By learning the basics, exploring its modules, and applying thoughtful design practices, you can craft a professional-looking website without needing a background in web development. Use this guide to kick-start your journey and evolve your skills over time. Happy building!If you’re interested in how I use Divi for various web projects or want to see real-world designs, feel free to check out some of the examples I occasionally share over on Instagram.
1 note
·
View note
Text
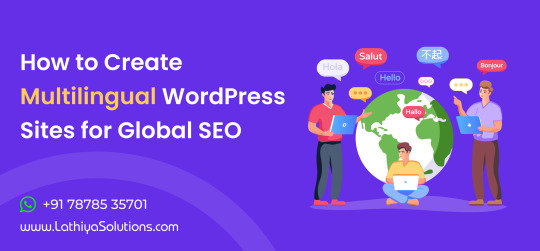
Creating a multilingual WordPress website in 2025 isn’t just a luxury - it’s a smart strategy for global reach. With more audiences browsing the web in their native language, offering content in multiple languages helps your site connect with international users, boosts engagement, and improves search engine visibility across different regions.
Let’s explore how to build a multilingual WordPress site optimized for global SEO, the tools you need, and the best practices for implementation.
1. Why Go Multilingual?
A multilingual website allows you to cater to audiences in various regions by presenting content in their native languages. It breaks down language barriers and opens the door to more traffic, better conversions, and improved user trust.
From a global SEO perspective, search engines prioritize content that resonates with local search intent. Localized pages with region-specific keywords have a higher chance of ranking in country-specific search results.
2. Benefits of WordPress for Your Business Website
WordPress remains the most popular CMS in 2025, not only for its user-friendly interface but also for its flexibility and scalability. Whether you're managing a personal blog or an international eCommerce brand, WordPress gives you full control over how your content is created and delivered.
The benefits of WordPress for your business website include its plugin ecosystem, SEO-friendly structure, and support for multilingual capabilities. With the right setup, you can turn a single-language site into a global powerhouse with minimal hassle.
3. Choosing the Right Approach: Subdomains vs. Subdirectories vs. TLDs
Before diving into plugin selection, decide how you want to structure your multilingual site:
Subdomains (fr.example.com)
Subdirectories (example.com/fr/)
Top-level domains (example.fr)
Each option has pros and cons. Subdirectories are easier to manage and are often preferred for SEO due to centralized domain authority. TLDs are best for region-specific branding but require more resources to maintain.
4. Take WordPress Multi Lingual Plugin Support
When you're ready to start building a multilingual site, the best way is to take WordPress Multi Lingual Plugin Support Services. Plugins like WPML, Polylang, and TranslatePress offer robust solutions for adding multiple languages without compromising performance or design.
These plugins allow you to translate posts, pages, custom post types, taxonomies, and even WooCommerce products. Some also offer auto-translation services through services like DeepL and Google Translate, with manual override for quality control.
5. Recommended Multilingual Plugins for WordPress
Let’s take a closer look at the most trusted plugins in 2025:
WPML (WordPress Multilingual Plugin)
Paid plugin with powerful translation management.
Compatible with most themes and plugins.
SEO-friendly URL customization and hreflang tag integration.
Polylang
Freemium model.
Great for manually translating content.
Supports language switchers and custom slugs.
TranslatePress
Visual interface for front-end translations.
Integrates with Google Translate for automatic translation.
Useful for developers and content creators alike.
Each of these tools helps maintain language consistency while also addressing SEO elements like meta titles, descriptions, and canonical URLs.
6. Multilingual SEO Best Practices
Creating a multilingual site is only the first step. Optimizing it for search engines in every language is what sets successful global websites apart. Here are some best practices:
Use hreflang Tags: Tell search engines which version of a page to show users based on language or location.
Translate SEO Metadata: Titles, meta descriptions, and image alt texts should be localized.
Avoid Auto-Translation: Machine translations can be inaccurate. Always review and refine translations.
Language-Specific Sitemaps: Submit separate sitemaps to Google Search Console for each language version.
This ensures your content gets indexed properly and reduces the risk of duplicate content penalties.
7. Design and UX Considerations
A well-designed multilingual site keeps navigation simple and intuitive. Use clear language selectors (preferably in the header), allow users to easily switch between languages, and ensure your design accommodates text expansion for languages like German or Arabic.
Multilingual UX goes beyond translation. It involves understanding cultural nuances and adjusting visuals, calls to action, and even color schemes to match local expectations.
8. Multilingual WooCommerce Stores
If you run an eCommerce website with WooCommerce, going multilingual opens the door to international sales. Plugins like WPML and TranslatePress offer seamless WooCommerce integration for translating product titles, descriptions, variations, and checkout fields.
For more advanced setups or when you need help customizing your multilingual WooCommerce store, it’s a smart move to hire WooCommerce development services. They can help integrate payment gateways, local tax rules, and region-specific shipping options while ensuring SEO best practices are followed.
9. Multilingual Content Strategy
You can’t just translate your homepage and call it a day. A global content strategy means:
Creating dedicated landing pages for different markets.
Localizing blog posts, case studies, and testimonials.
Aligning keywords with regional search trends.
Adapting tone, formality, and cultural references.
This localized content resonates better with users and drives engagement, time on site, and conversion rates.
10. Performance Optimization for Multilingual Sites
Having multiple languages can impact your website speed if not managed correctly. Optimize your multilingual site by:
Using a CDN to deliver content globally.
Lazy loading media and compressing images.
Caching translated pages.
Minimizing the use of unnecessary plugins.
These steps ensure a fast experience across all language versions.
11. Testing and QA for Multilingual Websites
Before going live, thoroughly test each language version:
Check for broken links or untranslated elements.
Test forms, search, and navigation in all languages.
Verify that hreflang tags and metadata are implemented correctly.
Also, get feedback from native speakers if possible. They can spot nuances and readability issues that machine tools might miss.
12. Monitoring and Analytics
Use Google Analytics 4 to track how users interact with each language version. Monitor bounce rates, conversion paths, and popular content per region.
You can also segment traffic based on geolocation or language preference to fine-tune your content and SEO strategy.
Final Thoughts
Creating a multilingual WordPress site is more than just translation - it’s about localization, SEO alignment, and user-centric design. With the right plugins, a well-planned content strategy, and careful testing, you can unlock new audiences, expand your reach, and build a truly global web presence.
From understanding user intent to delivering tailored content across different markets, multilingual WordPress sites are a cornerstone of international SEO in 2025.
Whether you're a solo entrepreneur or an enterprise brand, a multilingual website can be a game-changer in building long-lasting relationships with a global audience.Let’s connect! If you found this guide helpful or have questions about multilingual WordPress strategies, feel free to connect with me on LinkedIn. I’d love to hear your thoughts and insights!
1 note
·
View note
Text

In today’s mobile-first world, having a responsive website is no longer enough. Users are increasingly relying on mobile apps for better speed, performance, and convenience. If your business already has a website and you're thinking about expanding your digital presence, converting your site into a mobile app can be a game-changing move.
But where do you start? How do you make the transition smooth, effective, and worth the investment?
This step-by-step guide walks you through everything you need to know to successfully convert your website into a mobile app.
Why Convert Your Website into a Mobile App?
Before we dive into the “how,” let’s quickly look at the “why.” Mobile apps offer:
Faster load times and smoother performance
Offline access to certain features and content
Push notifications to engage users in real time
Deeper integration with device features like camera, GPS, or contact lists
Improved UX/UI tailored specifically for mobile devices
Apps are also more likely to foster brand loyalty and repeat visits, which can boost retention and sales.
Step 1: Evaluate Your Website’s Structure and Content
Not all websites are equally ready for app conversion. Start by assessing:
Is your website mobile-responsive?
Is the user experience smooth on smartphones and tablets?
What features do you want to keep, remove, or enhance in the app?
The more streamlined and purpose-driven your site is, the easier it will be to transform it into a functional app.
Step 2: Decide Between a Native App or Hybrid App
There are two main approaches to app development:
Native Apps: Built specifically for iOS or Android using platform-specific languages (Swift for iOS, Kotlin/Java for Android). Offers the best performance and integration but requires more resources.
Hybrid Apps: Developed using frameworks like Flutter, React Native, or Ionic. They run on both platforms with a single codebase — faster and more cost-effective but slightly less optimized than native apps.
If you're unsure where to begin, it helps to consult a mobile app developer who can assess your business needs and recommend the best development path.
Step 3: Choose the Right Development Approach
You have several options here:
Hire a professional app developer or agency – Ideal for custom, scalable apps tailored to your needs.
Use app builder platforms – Like AppMySite, Convertify, or BuildFire, which allow you to convert a site into an app with minimal coding.
In-house development – If you have a dev team, you can build it yourself using your preferred tech stack.
Some businesses choose to take expert Android application development solutions for advanced features and performance, especially when targeting a large Android user base.
Step 4: Design a Mobile-First User Experience
Even if your website looks great on mobile, a mobile app interface must be designed differently. Think about:
Touch navigation and gesture controls
Simplified menus and clean layouts
Thumb-friendly buttons
Fast-loading content and minimal distractions
User expectations on apps are higher — so smooth navigation and performance are key.
Step 5: Integrate Core Features for Mobile Use
Some features work better in apps than on websites. These include:
Push notifications
Offline content support
Location tracking
In-app messaging or chat
Payment gateway integrations
Whether you’re planning to build complex features or just want to build a simple Android app with clean navigation and core functionality, starting with a feature roadmap will help streamline development.
Step 6: Connect the App with Your Website (If Needed)
If you want the app to sync with your existing website — for example, pulling blog content, user logins, or product data — you’ll need to set up APIs or use headless CMS structures.
This ensures real-time updates and keeps your app aligned with your website’s backend.
Step 7: Test Across Devices and Platforms
Before launching, thoroughly test your app on both Android and iOS devices. Check for:
Bugs and crashes
Layout issues
Navigation and usability flaws
Load times and responsiveness
You can use tools like Firebase Test Lab or Appium for automated and manual testing. This is especially critical for businesses planning both Android and iPhone application development, ensuring consistency across platforms.
Step 8: Prepare for App Store Submission
Each app store has its own set of guidelines:
Apple App Store: Very specific and strict on UI, quality, and functionality
Google Play Store: Slightly more flexible but still has clear policies
You’ll need to create a developer account, prepare app descriptions, screenshots, privacy policies, and other assets for submission.
Step 9: Promote Your Mobile App
Once live, you need to promote it! Here’s how:
Add app download banners on your website
Promote via social media and email marketing
Offer incentives for early users (discounts, loyalty points)
Collect feedback for continuous improvement
Early adoption is crucial — and so is encouraging reviews and ratings on the app stores.
Step 10: Maintain and Update Regularly
Post-launch, don’t go silent. Monitor performance, gather user feedback, and roll out updates consistently.
This includes fixing bugs, optimizing performance, and adding features based on real-world usage. Many businesses also set up analytics tools to track app engagement and behavior.
Final Thoughts
Converting your website into a mobile app can dramatically improve user experience, customer retention, and overall business growth. But it’s not just about copying and pasting your site into an app shell — it’s about reimagining your online presence for a mobile-first audience.By following a thoughtful, strategic approach — and working with the right professionals — you can ensure your app delivers real value to your users while reinforcing your brand in a competitive digital landscape. Want to see real examples and tips in action? Follow us on Instagram for mobile app insights, client stories, and behind-the-scenes of our latest projects.
1 note
·
View note
Text
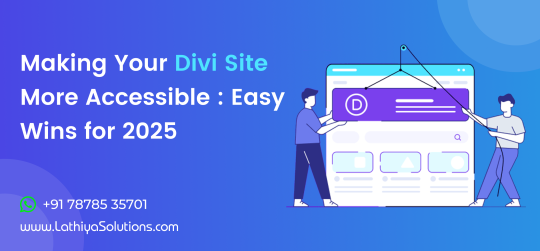
Making Your Divi Site More Accessible : Easy Wins for 2025
In today’s digital landscape, making your website accessible is no longer just a choice—it’s a necessity. Divi, one of the most popular WordPress themes, provides an easy way to create beautiful websites. However, when it comes to accessibility, it's crucial to follow best practices to ensure that everyone, including users with disabilities, can navigate and enjoy your site. This guide will walk you through some simple and effective steps to make your Divi site more accessible in 2025.
Why Accessibility Matters for Your Website
The goal of website accessibility is to ensure that all users, regardless of their physical abilities, can access and use your content. An accessible website not only expands your audience but also complies with legal standards and boosts SEO. Ensuring your Divi site is accessible provides a better experience for all users, leading to higher engagement and improved site performance.
If you're unsure where to start or need help implementing accessibility features, you might want to consider hiring a Divi theme developer who specializes in accessibility.
1. Use Accessible Fonts and Colors
One of the most important aspects of accessibility is text readability. Divi offers several customization options to help you choose fonts and color schemes that enhance visibility. Ensure that your text contrasts well with the background, making it easier for users with visual impairments to read. Additionally, opt for sans-serif fonts like Arial or Helvetica, which are generally easier to read.
By improving the readability of your website, you’re not only making it more accessible but also enhancing the overall user experience, which can contribute to better retention and engagement on your site.
2. Add Alt Text for Images and Media
Alt text (alternative text) is crucial for users who rely on screen readers. It helps describe images, videos, and other media for those who cannot see them. Divi makes it easy to add alt text to images in the settings panel.
For each image or media item on your site, make sure you add a meaningful description. Not only does this improve accessibility, but it also benefits SEO by allowing search engines to index your content properly.
If you need assistance with optimizing your images for accessibility, you could take WordPress development services to ensure everything is set up correctly and efficiently.
3. Ensure Proper Heading Structure
Headings (H1, H2, H3, etc.) are essential for both accessibility and SEO. They provide structure to your content, making it easier for users to navigate. Divi automatically assigns the H1 tag to your page title, but it's important to use H2 and H3 tags for subsections to maintain a logical hierarchy.
By ensuring your content is properly structured, you make it easier for screen readers to interpret your website and provide a better user experience for those with disabilities.
4. Add Keyboard Navigation for All Interactive Elements Not all users can use a mouse or touchpad to navigate your site. That’s why it’s essential to make sure all interactive elements, like forms and buttons, are keyboard accessible. Divi offers options to customize and add accessible navigation features. You can use plugins or custom code to enable better keyboard navigation, ensuring your website remains fully functional for all users. Regular updates and testing are key to maintaining accessibility.
5. Provide Clear and Simple Navigation A clear and easy-to-understand navigation structure is vital for accessibility. Ensure that your menus, links, and buttons are easy to find and use. Avoid cluttered layouts and focus on a streamlined user experience. Divi’s built-in navigation options allow you to create menus that are both user-friendly and accessible. For enhanced navigation, you may consider professional assistance to implement changes more efficiently.
6. Use Descriptive Link Text
Instead of generic phrases like "click here," use descriptive text that tells users exactly what they can expect when they click the link. For example, "Learn more about our services" is far more accessible than just "click here." This is important for users who rely on screen readers to navigate your site.
By making these small adjustments to your link text, you can significantly improve accessibility and ensure that all users understand where links will take them.
7. Test Accessibility Regularly
Once you've made the necessary changes to improve your Divi site's accessibility, it's essential to test it regularly. You can use tools like the WAVE Web Accessibility Evaluation Tool or the Axe Accessibility Plugin to check your site’s accessibility score. Regular testing will help you identify and fix any issues that may arise.
For those who manage multiple websites or require ongoing support, WordPress maintenance services can assist in ensuring that your site remains accessible and compliant with the latest web standards.
Conclusion
Making your Divi site more accessible is not just about adhering to legal requirements - it’s about providing a better experience for all users. By implementing these simple steps, you can ensure your website is accessible to everyone, regardless of their abilities. From improving font readability to ensuring keyboard navigation and testing regularly, there are plenty of ways to enhance accessibility.
If you find accessibility implementation challenging or time-consuming, there are professionals who can help you make your site more inclusive. Additionally, regular updates and maintenance are crucial to keeping your site accessible and up to date.
0 notes
Text

Common WPML Issues and How to Troubleshoot Them
WPML (WordPress Multilingual Plugin) is a powerful tool that allows WordPress websites to operate seamlessly in multiple languages. From businesses expanding into global markets to bloggers looking to reach new audiences, WPML offers flexible translation and localization options. However, like any complex plugin, it isn’t immune to issues — especially on larger or more customized sites. That's why many businesses rely on WPML – WordPress Multi Lingual Plugin Support Services to ensure smooth operation and timely troubleshooting.
This guide will walk you through the most common WPML issues and provide clear steps on how to fix them. Whether you're a site owner or a project manager working with WordPress, understanding these challenges will help you maintain a smooth multilingual experience.
1. Pages Not Translating or Displaying Properly
One of the most frequently encountered problems with WPML is when translated pages fail to display or are not linked correctly to their original versions. This can cause confusion for users and create issues with SEO if search engines see broken or duplicate content.
Troubleshooting:
Check Translation Status: Ensure that translations are marked as complete. Incomplete translations may not show up publicly.
Use the WPML Translation Editor: Avoid using the default WordPress editor for translations. WPML’s Advanced Translation Editor maintains the proper connections between original and translated content.
Sync Menus and URLs: WPML has a built-in tool to sync menus and URL slugs across languages. Run this tool after adding or editing content.
2. Language Switcher Not Working Correctly
The language switcher is what allows users to move between language versions of your site. If this feature breaks or disappears, it can leave users stuck in one language and create a poor user experience.
Troubleshooting:
Check Theme Compatibility: Some themes override header settings, which can hide the language switcher. Use WPML-compatible themes or add the switcher manually to your menu or widget area.
CSS or JavaScript Conflicts: Plugin or theme scripts can sometimes interfere with the switcher’s display. Use browser developer tools or disable other plugins temporarily to identify the issue.
Update Permalinks: Go to Settings > Permalinks and click “Save Changes” without editing anything. This often refreshes the rewrite rules and restores functionality.
3. SEO Settings Not Applying to Translated Pages
Translated content should have its own meta titles, descriptions, and slugs to perform well in search engines. Sometimes, WPML users notice that these fields remain blank or are not indexed properly.
Troubleshooting:
Use an SEO Plugin Compatible with WPML: Plugins like Yoast SEO and Rank Math work well with WPML. Make sure both are updated to the latest versions.
Manually Set Meta Information: WPML allows you to set SEO titles and meta descriptions per language. Use the SEO tab in the Translation Editor to fill in these fields.
Generate Language-Specific Sitemaps: With the right SEO plugin, WPML can produce a separate sitemap for each language — which improves indexing.
These SEO-related issues often stem from a lack of ongoing updates and monitoring, which is where WordPress Website Maintenance Services become crucial. A reliable maintenance strategy helps prevent minor issues from escalating into major SEO problems, and ensures that plugins like WPML continue to function smoothly after every update.
4. WooCommerce Product Translation Errors
If you’re running a multilingual eCommerce store, WPML and WooCommerce integration is essential — but not always perfect. Product descriptions, prices, or variations might not show up correctly in the translated versions.
Troubleshooting:
Install WooCommerce Multilingual Add-On: This extension is designed specifically to make WPML work smoothly with WooCommerce. Without it, product data can behave unpredictably.
Synchronize Product Variations: Go to WooCommerce > WooCommerce Multilingual > Status and click “Synchronize” to align product details across languages.
Update Product Translations After Edits: Any time you change the original product, make sure to also update its translations to reflect those changes.
5. Theme or Plugin Compatibility Issues
Some WordPress themes and plugins aren’t built with multilingual support in mind. This can lead to broken layouts, untranslated elements, or unexpected bugs after plugin updates.
Troubleshooting:
Use WPML-Compatible Themes: Choose themes from WPML’s official compatibility list or test thoroughly before deploying.
Scan Themes and Plugins for Translatable Strings: WPML allows you to scan any theme or plugin for text strings. You can then translate them manually.
Disable and Re-Enable: Sometimes, simply deactivating and reactivating WPML-related plugins helps reset integration and fixes rendering issues.
In more complex cases, it’s worth it to hire professional WordPress developer support — especially when your business depends on the site's stability and multilingual capability. An experienced developer can quickly identify deeper compatibility issues and customize WPML to work with advanced themes or plugins.
6. Missing Translations in Widgets or Custom Fields
Widgets and custom fields are often overlooked when translating a site. Users may see parts of the site in their selected language, while other sections remain in the original language — creating a confusing and inconsistent experience.
Troubleshooting:
Enable String Translation Module: WPML includes a String Translation module that lets you translate theme options, widget content, and more.
Manually Add Translations: For custom fields and widgets, navigate to WPML > String Translation, and search for the content you need to translate.
Check Theme Documentation: Some themes store widget content in locations not automatically picked up by WPML. Refer to theme documentation or consult with support for guidance.
7. Site Slowing Down After Adding WPML
A common concern with WPML is performance. Multilingual sites are larger and require more database queries, which can slow things down if not optimized.
Troubleshooting:
Use Caching Plugins: WPML works well with most major caching solutions like WP Rocket or W3 Total Cache.
Optimize the Database: WPML adds extra data to your database. Periodic cleanups can improve performance.
Minimize Active Languages: Only add the languages you actually need. Every additional language increases the load.
If performance issues persist, a broader look at your website development services — including server configuration, image optimization, and database health — can reveal deeper issues affecting speed.
Conclusion
WPML is a powerful plugin that brings multilingual functionality to your WordPress site, but it’s not without its challenges. Many of the issues you may encounter stem from configuration errors, plugin conflicts, or missed translations. With the right troubleshooting steps, however, most of these problems can be resolved quickly and effectively.Whether you're running a content-heavy blog or a multilingual WooCommerce store, taking the time to properly maintain and troubleshoot your WPML setup ensures a smoother experience for both users and search engines. And for ongoing insights and tips to strengthen your WordPress site, don’t forget to follow us on Instagram — where we regularly share updates to help you get the most out of your online presence.
#lathiyasolutions#WPML#Services#websitedevelopment#wordpress#businessgrowth#wordpress support#services in india#business#services provider#strategies
1 note
·
View note
Text

How to Optimize Your Web Hosting for Better SEO Results
When it comes to SEO, many website owners focus on content, keywords, and backlinks. While these factors are essential, one crucial element that can significantly impact your SEO performance is your web hosting. The right hosting can boost your website's speed, security, and overall reliability, all of which play a key role in your rankings on search engines.
This guide will walk you through how to optimize your web hosting for better SEO results, helping you improve user experience, enhance page load speeds, and make sure your website is positioned for long-term success.
1. Understanding the Importance of Web Hosting for SEO
Web hosting is where your website files live and how they’re served to your visitors. While it may seem like an afterthought compared to other SEO strategies, the quality of your hosting provider plays a massive role in your website’s SEO performance. Here's how:
Page Load Speed: Faster websites rank better. Search engines like Google prioritize sites that load quickly, as it improves user experience.
Uptime and Reliability: A website that's frequently down hurts your SEO. The best web hosting services provide reliable uptime guarantees, ensuring your site stays online and accessible.
Security: Google gives priority to secure websites. If your hosting doesn’t offer proper security protocols, it can negatively affect your SEO rankings.
Server Location: If your hosting provider’s server is geographically distant from your target audience, it could slow down your site, which can impact user satisfaction and rankings.
2. Choosing the Right Hosting Type for SEO
When it comes to SEO, your choice of hosting can make or break your website’s performance. Let's explore the different types of hosting that can affect your site’s SEO.
Shared Hosting
Shared hosting is the most affordable option but comes with limitations. Since you share server resources with other websites, a spike in traffic from another site could affect your website’s load times. This could hurt your SEO and increase bounce rates, so shared hosting is better suited for smaller sites with low traffic.
VPS Hosting
Virtual Private Server (VPS) hosting gives you more control and dedicated resources than shared hosting. It’s a great option for growing websites and e-commerce stores, as it ensures better performance and fewer chances of being affected by traffic from other websites.
Dedicated Hosting
With dedicated hosting, your website has an entire server to itself. This offers the best performance and security, making it ideal for large websites, e-commerce sites, or websites with high traffic volumes. A reliable WordPress development services provider may even suggest this option for websites that demand maximum performance.
Cloud Hosting
Cloud hosting allows you to scale resources based on demand. This is a great choice for growing websites that need the flexibility to handle fluctuations in traffic. Cloud hosting also distributes your website across multiple servers, improving performance and reducing the risk of downtime.
Managed WordPress Hosting
If you’re using WordPress, consider managed WordPress hosting. This option offers a fully optimized environment for WordPress websites, with benefits such as automatic updates, enhanced security, and faster load times—all important for maintaining solid SEO performance.
3. Essential Features for Optimizing Hosting for SEO
Once you’ve selected the right hosting provider, it’s crucial to optimize the features that impact SEO. Here’s a breakdown of the hosting features that matter most for your SEO efforts:
Page Load Speed
Site speed is one of the most important SEO factors. Search engines want to provide users with the best possible experience, so they prioritize websites that load quickly. If your website takes too long to load, visitors will bounce, and your search rankings will drop. An SEO mistake you should avoid is neglecting site speed, as it can significantly hurt your SEO efforts.
To optimize load speed:
Use a Content Delivery Network (CDN) to serve content from servers close to the user’s location.
Compress images to reduce file sizes without losing quality.
Minimize HTTP requests by reducing the number of files your site needs to load.
Uptime and Reliability
Search engines favor websites that are consistently available. Frequent downtimes can hurt your rankings, so it’s vital to choose a hosting provider with a good uptime guarantee (at least 99.9%).
Reliable hosting ensures that your website stays online, which helps improve both user experience and SEO rankings.
Security and SSL Certificates
Web security is increasingly important for SEO. Google favors sites with HTTPS encryption. An SSL certificate ensures your website is secure and helps protect user data. It’s a key ranking signal for Google.
Make sure your hosting plan includes an SSL certificate. Most web hosting services offer this feature, and it’s essential for maintaining a secure website.
Backup and Restore Options
Website backups are essential for protecting your data in case of issues. Hosting providers that offer automated backups allow you to restore your site quickly if something goes wrong, minimizing downtime and preventing SEO setbacks.
Scalability
As your website grows, so should your hosting. If your website starts receiving more traffic, you’ll need a hosting plan that can scale up. Scalable hosting solutions allow you to add resources like bandwidth and storage, ensuring your website remains fast and reliable as traffic increases.
4. Optimizing Hosting for WordPress Websites
For WordPress users, there are several ways you can further optimize your hosting to enhance SEO performance.
Use a WordPress-Optimized Hosting Plan
Choosing a WordPress hosting provider that’s specifically optimized for WordPress websites can give you a significant SEO advantage. These hosting plans come with features like automatic updates, optimized caching, and better security—features that improve your website’s speed and performance.
Caching Plugins
To speed up your WordPress site, install a caching plugin like WP Rocket or W3 Total Cache. Caching reduces server load and improves page load times, which is essential for SEO.
Database Optimization
As you publish more content on your WordPress site, your database can become cluttered with unnecessary data. Regularly clean and optimize your WordPress database to maintain fast performance and ensure your site runs smoothly.
Lightweight Themes
The theme you choose for your WordPress site can have a major impact on speed. Choose a lightweight, optimized theme that’s designed for performance. Avoid bloated themes with too many features that you don’t need.
5. SEO-Friendly Web Hosting Practices
Here are some practical SEO tips for hosting your website:
Choose the Right Server Location: If most of your audience is located in a specific region, choosing a server close to that area will improve load times, which can positively affect SEO.
Ensure SSL is Enabled: As mentioned earlier, securing your website with HTTPS is essential for SEO. Google gives preference to secure sites.
Optimize Your Database Regularly: Over time, your database will accumulate unnecessary data. Optimizing it regularly ensures your website runs smoothly and improves SEO.
6. How Professional Help Can Enhance Your SEO Strategy
Optimizing your hosting for SEO might seem straightforward, but it's not always easy. For those who want to take their SEO strategy to the next level, it’s a good idea to seek professional SEO and web hosting services. By partnering with an experienced provider, you can ensure that your website is set up for success from the beginning and stays optimized over time.
Final Thoughts
Optimizing your web hosting for better SEO results is an essential aspect of running a successful website. By choosing the right hosting, focusing on key features like speed, security, and reliability, and regularly maintaining your hosting setup, you’ll set your website up for long-term success in search engine rankings.If you’re looking for professional advice on optimizing your hosting or improving your SEO strategy, consider reaching out to experts in the field. For regular updates and tips, feel free to stay connected with us on social media Don’t forget to follow us on Instagram for more insights on web hosting and SEO best practices.
1 note
·
View note
Text

Top 5 Benefits of WordPress for Your Business Website
There are many reasons why you should use WooCommerce for your eCommerce website, and one of the key factors is the flexibility and power it brings to your online store. Whether you're just starting your business or looking to scale, WooCommerce integrates seamlessly with WordPress to give you a robust platform that grows with your business. In this blog post, we’ll explore the top 5 benefits of using WordPress for your business website and why it’s the best choice for entrepreneurs looking to establish a strong online presence.
From its ease of use to its highly customizable nature, WordPress offers a perfect foundation for building and maintaining your site. But if you want to stay updated with more insights into website development and digital marketing, don’t forget to check out my Instagram for tips and inspiration.
1. User-Friendly and Easy to Manage
One of the most significant advantages of using WordPress for your business website is its ease of use. You don’t need to be a technical expert to set up or manage a WordPress website. The platform is designed to be intuitive, with a user-friendly interface that allows business owners to manage their websites without requiring coding knowledge.
With WordPress, you can easily create pages, write blog posts, add images, and manage other aspects of your site with just a few clicks. The dashboard is simple to navigate, and most tasks are as easy as dragging and dropping elements.
Key Features of WordPress:
WYSIWYG Editor: WordPress uses a "What You See Is What You Get" (WYSIWYG) editor, allowing you to visually build your website content without worrying about code.
Content Management: The CMS enables easy content management, from editing text to uploading multimedia such as images, videos, and PDFs.
Themes and Plugins: WordPress has thousands of themes and plugins available, so you can easily customize the look and functionality of your website.
For business owners who don’t have the time or technical expertise to manage their websites, WordPress provides an efficient solution. You can handle the day-to-day management of your website and focus more on growing your business, leaving the complex coding tasks to a WordPress developer if needed.
2. Cost-Effective Solution for Small and Medium Businesses
Launching and maintaining a website can be expensive, especially for small businesses with limited budgets. WordPress is a cost-effective option because it is an open-source platform, meaning that you don’t have to pay for the software itself. While some features may require premium themes or plugins, the overall cost of building a WordPress website is significantly lower compared to custom-built websites.
Furthermore, since WordPress has a large community of developers, designers, and content creators, the availability of affordable resources is abundant. This enables businesses to create a high-quality website without breaking the bank.
Here are a few ways WordPress helps save costs:
Free Themes and Plugins: Many WordPress themes and plugins are free or come at a low cost, offering a wide range of features without additional expenses.
No Licensing Fees: Unlike other proprietary CMS platforms, WordPress doesn’t require any licensing fees, making it accessible for all business owners.
Affordable Hosting: WordPress works well with most hosting providers, and many of them offer specialized WordPress hosting at affordable rates.
For small and medium businesses, cost savings are essential, and WordPress provides a solution that allows you to create a professional-looking website without the hefty price tag.
3. SEO-Friendly Platform
Search engine optimization (SEO) is crucial for the success of any website. A well-optimized website has a better chance of ranking high on search engine results pages (SERPs), which means more organic traffic and more opportunities for sales. WordPress is built with SEO in mind, making it easier for businesses to optimize their websites for search engines.
Here’s how WordPress helps improve SEO:
Clean and Simple Code: WordPress generates clean code that search engines love. The platform is built with standards-compliant HTML and CSS, which makes it easier for search engines to crawl and index your site.
SEO Plugins: WordPress has various SEO plugins such as Yoast SEO and All in One SEO Pack that help optimize your content. These plugins allow you to add meta tags, titles, descriptions, and keywords to each page, making it easier for search engines to understand the content of your website.
Mobile Optimization: WordPress offers responsive themes that ensure your website looks great on all devices. Since Google now uses mobile-first indexing, having a mobile-friendly website is essential for SEO success.
Permalink Structure: WordPress allows you to customize the URL structure of your pages and posts, helping you create SEO-friendly URLs that improve your rankings.
XML Sitemap: WordPress can automatically generate an XML sitemap, which helps search engines index your website more efficiently.
In addition to these powerful SEO features, WordPress also encourages businesses to engage with their audience through content and social media. For example, platforms like Instagram can help amplify your content and drive traffic to your website. By maintaining an active presence on Instagram, you can share valuable insights and direct followers to your website, contributing to higher engagement and better SEO outcomes. So, if you're looking for more tips on optimizing your online presence, make sure to check out my Instagram page for the latest updates and strategies!
With its built-in SEO capabilities, WordPress gives businesses the tools they need to improve their visibility on search engines, increase website traffic, and ultimately boost revenue.
4. Customizable and Scalable for Growing Businesses
As your business grows, your website’s needs will evolve. WordPress offers a high level of customization and scalability, allowing your website to expand as your business does. Whether you’re adding new products to your e-commerce website or introducing a blog section to engage with your audience, WordPress can handle it all.
Customization Options:
Themes: WordPress offers a wide selection of themes, both free and paid, that can be customized to match your brand’s identity. Whether you’re running an e-commerce store, a blog, or a corporate site, there’s a theme for every business.
Plugins: Plugins are extensions that add functionality to your website. WordPress has thousands of plugins available for virtually any feature you can imagine, from contact forms and booking systems to advanced e-commerce features like WooCommerce and Shopify integration. You can also add custom forms, galleries, and SEO features with ease.
Custom Development: If your business requires unique features or functionality, you can work with a WordPress developer to create custom plugins or themes tailored to your needs.
WordPress is highly scalable, meaning it can grow with your business. Whether you're starting small or planning for large-scale expansion, WordPress provides a flexible platform to meet your needs.
5. Strong Security Features
When you run a business website, security is paramount. A breach in security can lead to data loss, financial consequences, and damage to your brand's reputation. WordPress takes security seriously and offers several built-in features and best practices to help protect your website from potential threats.
Here are some ways WordPress ensures your website’s security:
Regular Updates: WordPress frequently releases updates to patch security vulnerabilities and improve the platform’s overall performance. It is essential to keep WordPress core, themes, and plugins updated to ensure the latest security features are in place.
Security Plugins: WordPress offers a range of security plugins such as Wordfence and Sucuri, which help protect your website from malware, hacking attempts, and spam. These plugins provide features like firewall protection, login security, and regular malware scans.
Two-Factor Authentication: You can enable two-factor authentication (2FA) on your WordPress site, adding an extra layer of security to your login process.
SSL Certificates: WordPress supports the use of SSL certificates, which encrypt data between your site and your visitors. An SSL certificate not only secures your website but also boosts your SEO rankings, as Google gives preference to secure sites.
WordPress also allows you to set user roles and permissions, which can prevent unauthorized access to sensitive areas of your website. With these security features in place, WordPress helps keep your business website safe from potential threats.
Conclusion
WordPress is an incredibly versatile and powerful platform that offers numerous benefits for businesses looking to create a professional, functional, and scalable website. From its user-friendly interface to its customization options, SEO capabilities, and security features, WordPress is an ideal choice for businesses of all sizes.
Whether you are a small business owner looking to establish your first online presence or a large enterprise in need of a highly customizable website, WordPress has the tools and resources to help you succeed. Its flexibility, scalability, and cost-effectiveness make it one of the best website development platforms available today.
If you’re unsure about how to get started with WordPress or need help with WordPress development or WordPress theme setup, consider hiring a WordPress developer. A professional can guide you through the process and ensure that your website is optimized for success.
So, if you're ready to take your business to the next level, choosing WordPress as your website platform is an investment that will pay off in the long run.
1 note
·
View note
Text

How to Set Up Your E-Commerce Store Using WooCommerce
If you're looking to start selling products online, setting up an e-commerce website is essential. One of the most popular platforms for creating an online store is WooCommerce, a powerful and flexible plugin for WordPress. With WooCommerce, you can build a fully functional e-commerce site with ease, even if you don’t have extensive technical experience.
Here’s a step-by-step guide to help you set up your WooCommerce store.
Step 1: Install WordPress and Choose a Hosting Provider
Before you can install WooCommerce, you need a WordPress website. You can either set up a new WordPress site or use an existing one. For beginners, many hosting providers offer WordPress hosting that comes with pre-installed WordPress and one-click setup. Hosting platforms like Bluehost, SiteGround, or WP Engine are great choices for WooCommerce stores.
Once you have your WordPress site ready, you can move forward with the WooCommerce installation.
Step 2: Install the WooCommerce Plugin
To begin setting up your online store, you’ll need to install the WooCommerce plugin. Here’s how:
Log into your WordPress dashboard.
Go to the Plugins section on the left-hand menu and click Add New.
Search for “WooCommerce” and click Install Now.
Once installed, click Activate.
After activation, WooCommerce will walk you through a setup wizard that helps configure your store, such as choosing your store location, currency, and preferred payment methods. If you encounter any technical difficulties during installation, WooCommerce support or a WordPress customer support service can be helpful.
Step 3: Choose a WooCommerce-Compatible Theme
Your website’s design plays a significant role in attracting and retaining customers. WooCommerce is compatible with many WordPress themes, but it's important to choose one that's optimized for e-commerce.
There are many responsive themes specifically designed for WooCommerce, like Storefront, Astra, or OceanWP, which provide customizable features and layouts that suit online stores. Once you’ve chosen a theme, you can customize the design to match your brand. If you face challenges with theme customization, reaching out to WooCommerce support can help you resolve any issues.
Step 4: Add Your Products
Now that you have your site set up, it's time to add your products. In your WordPress dashboard, go to Products and click Add New. You’ll be able to add product details, including:
Product name
Description
Price
Product images
Inventory status
Shipping options
You can also categorize products and add tags to make them easy for customers to find. If you’re unsure about how to manage your product listings or need guidance on adding multiple variations, WooCommerce support is there to assist you.
Step 5: Set Up Payment Gateways & Avoid WordPress Development Mistakes
To accept payments on your store, you'll need to configure your payment gateways. WooCommerce supports several payment options, such as PayPal, Stripe, and credit card payments. During the setup process, WooCommerce will prompt you to set up your preferred payment gateway.
WordPress Development Mistakes to Avoid: When configuring your payment gateways and developing your store, make sure to avoid common mistakes such as neglecting security, failing to optimize for mobile, not testing payment methods, ignoring international payment support, and not considering speed optimization. Taking these steps will help ensure your store operates smoothly and provides a positive experience for your customers.
If you run into any issues with payment configurations or development mistakes, WooCommerce support is available to assist you in resolving payment-related issues.
Step 6: Configure Shipping Options
Next, set up your shipping methods. WooCommerce provides flexible shipping options that you can customize based on regions, weights, and product types. You can offer free shipping, flat rate shipping, or integrate with services like UPS or USPS to calculate shipping costs dynamically.
In your WooCommerce settings, go to Shipping and configure the shipping zones and methods that apply to your products and customers. This ensures your customers get accurate shipping rates at checkout.
Step 7: Set Up Taxes
If your business is subject to sales tax, WooCommerce makes it easy to configure tax rates. WooCommerce can automatically calculate taxes based on your store’s location and the customer's location. You can enable tax calculation by going to WooCommerce > Settings and then navigating to the Tax tab. Be sure to enter your local tax rates if applicable.
Step 8: Test Your Store and Optimize Page Speed
Before launching your store, it's important to test the entire buying process to ensure everything works smoothly. Go through the checkout process, try different payment methods, and check for any issues with shipping rates or taxes.
Additionally, ensure your website speed is optimized. A slow website can negatively impact user experience and conversions. Use tools to check your page speed optimization, like Google PageSpeed Insights, and make the necessary improvements to keep your store running efficiently. Many WordPress development services or page speed optimization services can help if you encounter difficulties in speeding up your store.
Make sure your WooCommerce website is mobile-friendly and that all product images and links are functioning properly.
Step 9: Launch Your Store
Once everything is set up and tested, it’s time to launch your store! Announce your launch on social media, your email list, and any other channels you use to reach your audience. With WooCommerce support, you'll be able to make adjustments and updates as needed, ensuring a smooth shopping experience for your customers.
Step 10: Ongoing Maintenance
After your store is live, it’s important to maintain it regularly. This includes keeping WordPress and WooCommerce up to date, backing up your website, and monitoring site performance. You may also want to optimize your website speed by reducing large images and utilizing caching plugins.
Additionally, offering excellent customer support will help you retain customers and build long-term relationships. If you face technical challenges, WooCommerce support is always available to help you ensure your site remains fully functional, and your customers have a positive experience.
Setting up an e-commerce website with WooCommerce is a powerful way to start selling online. With the right setup and attention to detail, your online store can provide a seamless shopping experience for your customers.
Keep optimizing your store for ease of use and performance to ensure its success. Additionally, exploring SEO strategies can significantly improve your site's online visibility. For valuable tips, insights, and inspiration on growing your e-commerce business, you should follow Instagram pages related to e-commerce and SEO, where you can find the latest trends and expert advice. Staying connected with these pages will help you stay ahead in the competitive e-commerce landscape.
1 note
·
View note
Text

✨ Website Design at Its Best! ✨
Check out one of the stunning websites we’ve built! 💻
Whether you need a responsive website 🌐, e-commerce store 🛒, or a custom WordPress solution 🔧, we’ve got you covered!
We specialize in: 🔹 Website Development 🔹 WordPress Development 🔹 E-Commerce Websites 🔹 Custom Designs 🎨 🔹 Website Maintenance & Support 🛠️
With our 24/7 customer support, we ensure your site runs smoothly, anytime! 🌙💬
Ready to bring your business online? Let’s create something amazing! 💥
📩 DM us for more info or to get started today!
🌐 Visit us: https://lathiyasolutions.com
#LathiyaSolutions#WebDesign#WebsiteDevelopment#EcommerceDesign#WordPressDevelopment#TechSolutions#DigitalDesign#OnlineBusiness#ResponsiveDesign#24x7Support#WebMaintenance#SEO#BusinessGrowth#CustomWebsites#IndiaTech
3 notes
·
View notes
Text
🚀 Experience a Dedicated Team for Divi Theme Design, Development & Support! 🎨✨

Looking for a stunning, high-performing WordPress website with the Divi theme? Our expert Divi developers bring your vision to life with custom designs, seamless development, and 24x7 support. ✅ Custom Divi Theme Design & Development ✅ Pixel-Perfect & Responsive Layouts ✅ Bug Fixing & Performance Optimization 🚀 ✅ Divi Theme Customization & Updates ✅ WooCommerce Integration for eCommerce 🛒 ✅ 24x7 Expert Support & Maintenance
🎯 With 15+ years of expertise, we craft modern, engaging, and SEO-friendly WordPress websites using Divi.
📞 Let’s Build Your Dream Website Today! 📲 WhatsApp: +91 7878 5357 01 🌍 Visit: www.lathiyasolutions.com
✨ Experience the Power of Divi with Our Dedicated Team! 💻
2 notes
·
View notes
Text

🌙✨ On this auspicious night of Maha Shivratri, we at Lathiya Solutions wish you peace, positivity, and divine blessings. May Lord Shiva’s light illuminate your path, bringing strength and new beginnings. 🙏💫
Embrace the calm and the power of transformation. 🌿🕉️
2 notes
·
View notes
Text

🎨 Convert Your Figma, PSD, Sketch & XD Design into a Pixel-Perfect WordPress Website! 🌐 Have a beautiful design in Figma, PSD, Sketch, or XD? Let us bring it to life with a fully responsive, pixel-perfect WordPress website! 💻✨ ✅ 100% Exact Design to WordPress Conversion ✅ Fully Responsive & Mobile-Friendly ✅ SEO-Optimized for Better Rankings ✅ Fast & Secure Website Development ✅ WooCommerce Integration for eCommerce 🛒 ✅ 24x7 Expert Support & Maintenance 🎯 With 15+ years of expertise, we ensure your website matches the design perfectly while delivering speed, security, and scalability. 📞 Let’s Build Your Dream Website Today! 📲 WhatsApp: +91 7878 5357 01 🌍 Visit: www.lathiyasolutions.com ✨ From Design to Reality–-We Make It Happen!
2 notes
·
View notes