Don't wanna be here? Send us removal request.
Statistics
We looked inside some of the posts by lisa-mathew and here's what we found interesting.
Average Info
Notes Per Post
2
Likes Per Post
2
Reblog Per Post
0
Reply Per Post
0
Time Between Posts
20 days
Number of Posts By Type
Text
10
Last Seen Tumblr Blogs


Fun Fact
Post activity is at the highest at 4:00 pm EDT; notes peak at 10:00 pm EDT.
Text
Tips to Connect HP Printer To Wifi.
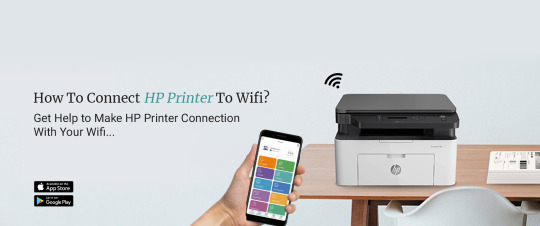
To connect HP printer to WiFi, you must install the HP smart app on your smartphone. From the app, you can create your account, and log in. After logging in, you can add the device and connect it to the WiFi. You can also connect the printer to the WiFi via the WPS button. Just ensure your router has the WPS button as well.
0 notes
Text
Quick and Easy Ways to Access the Eufy Log In Account.
To proceed with the Eufy log in, you must install the Eufy app on your smartphone. Through the app, you can log into your account. If you don’t have an account, you can create one. After logging into the app, you can add the camera and set up the camera accurately. Just ensure to connect the camera to a stable WiFi connection.
0 notes
Text
How to Fix D-Link Wifi Extender Blinking Orange Light?
When the D-Link wifi extender blinking orange light, it is because of a firmware fault. There could be some other small issues with your extender as well. You don’t have to worry, it doesn’t mean there’s anything majorly wrong with your extender. The D-Link extender flashing orange light is quite common.
You need to fix this issue as soon as possible. As you don’t want it to get too worst. If you want to fix this issue, you don’t need to worry! In this blog, we’ll guide you through the troubleshooting methods.
Troubleshooting D-Link Extender Flashing Orange Light Issue
There are three ways to fix the D-Link wifi extender blinking orange. You need to follow these methods carefully so as to not worsen the issue. These methods are as follows:
Power Cycle the Router
First, you need to power off the D-Link wifi extender.
Next, unplug it from the electrical outlet.
Then, wait for some time and then plug it back in and power it on.
Afterward, give it some time to come back to life.
Update the Firmware
First, you need to download the latest firmware of the extender.
Next, the file can be downloaded from the official website.
You just need to go to downloads enter the model number and download the file.
Then, using a web browser, log into the extender’s admin panel.
After that, go to the ‘Firmware Upgrade’ page and then you can follow the given instructions.
When the upgrade is complete, the D-Link extender flashing orange light issue should be resolved.
Reset the Extender
Firstly, you need to locate the reset button on the extender.
Secondly, using a pin or a similar sharp object, press the reset button.
Thirdly, release the button after 10 seconds.
Then, give the extender some time to turn back on.
These are the methods that you can try to fix the D-Link Wifi extender blinking orange. Just keep in mind, after the reset, you will have to configure the extender again. Resetting the router restores the factory default settings of the extender.
If you are still facing any issues, you can contact our team. We’ll help you resolve the issue.
0 notes

Text
How to Setup Comfast Wifi Repeater?
A Wifi repeater is a device that repeats the signal of your current Wifi network and extends it to the dead zones. The Comfast Wifi repeater is a renowned networking device. This repeater is great for huge buildings and big offices. By executing the Comfast repeater setup, you will be eliminating all the dead zones in your house or workplace.
If you want to know how to proceed with the Comfast Wifi repeater setup then keep reading ahead! On this page, we’ll go through the entire process.
Steps for the Comfast Repeater Setup
There are two ways you can set up the repeater. One is through the web browser and the other is through the WPS button. However, if your router doesn’t support this feature then you will have to set it up using the web browser method. For this method, you require the IP address, username, and password of your extender.
You can execute with the Comfast extender setup by following the steps below:
Comfast Repeater Setup via the Web Browser
First, connect a device to the extender’s network. You can connect it wirelessly or via an ethernet cable.
Next, on the device connected to the extender, open a web browser.
Then, enter the IP address in the address bar of the browser.
When a login page appears, enter the username and password of the extender.
Now, you are logged in to the extender’s setup page.
After that, you can connect your extender to the router’s network.
Then, set a name and password for your extender’s network.
When you are done with this, you can connect your devices to the extender’s network.
This is the procedure for the Comfast extender setup. When you are done with the setup, you can relocate the repeater. You need to place it between the router and the dead zone, for proper coverage.
Comfast Wifi Repeater Setup
Firstly, place both the extender and the router in the same room.
Secondly, press the WPS button on your router, and within the next 2 minutes, press the WPS button on the extender as well.
Thirdly, give them some time to establish a connection.
When the connection’s established, you can relocate the router.
This is the Comfast Wifi repeater setup via the WPS method. If your router doesn’t support this feature then you will have to set it up using the first method.
If there’s any issue you are facing with the Comfast repeater setup, reach out to our experts right now!
0 notes
Text
How to Login to Arlo Camera?
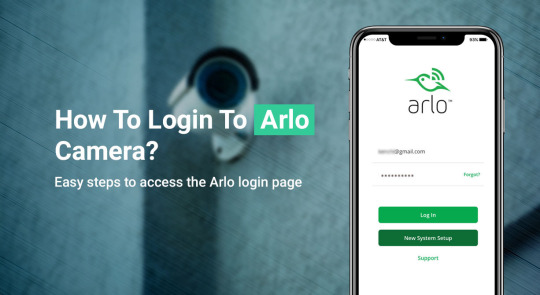
The Arlo camera is one of the best security cameras. You can watch over your home and family from anywhere and anytime. However, to get the best out of your camera, you need to proceed with the Arlo camera login. By logging in, you will have complete access to the camera’s features and settings.
Through the login, you can watch the live stream anytime you want. Not limited to this, you will receive alerts regarding any unusual activity happening on your property. In this blog, we’ll go through the thorough procedure for the Arlo login.
Login through the Arlo App
To login to Arlo camera through the Arlo app, follow the steps below:
First of all, you need to install the Arlo app on your phone.
Next, the Arlo login page will display.
Then, enter the email address and password to login to Arlo account.
Afterward, tap on ‘Login’.
This is the procedure for the Arlo camera login.
Login through the My.arlo.com
You can login to Arlo camera through the my.arlo.com address as well. The steps are as follows:
First, open a web browser on any device.
Next, enter my.arlo.com in the address bar of the browser.
Then, the Arlo login page will appear and you can enter the email address and password of your account.
After that, tap on ‘Login’ to log in successfully.
You are successfully logged into the Arlo camera.
How to Create Arlo Account?
If you are a new user and you don’t know how to create your Arlo account then don’t worry! Below are the steps to create your Arlo account:
Firstly, you can either open the Arlo app or the my.arlo.com address.
Secondly, when the login page appears, you can select the ‘Create an Account’ option.
Thirdly, provide the information prompted by the app.
Fourthly, you can follow the in-app instructions to successfully create an account.
These are the steps to create an Arlo account for your camera.
Why can’t I Login to Arlo Camera?
If you are trying to proceed with the Arlo camera login and you are not able to, then you can try the following troubleshooting methods:
You need to check your Wi-Fi connection and ensure that it's working fine.
Check that the camera’s properly connected to Wi-Fi and working properly.
You can try power cycling the camera. All you need to do is turn off the power supply for 5 minutes then turn it on again.
There might be an issue with the app as well. You can try uninstalling the app and then reinstalling it.
Ensure you are using the correct email address and password for your account.
Try logging in through the web address and see if you are able to log in then.
You can try using a different device for the Arlo camera login.
If none of these methods are working then you need to reset the camera.
These are some troubleshooting methods you can try. Just remember after the reset, you will have to reconfigure the camera again.
If there’s any other issue you are having, our experts are always here for you. Contact us now!
0 notes
Text
How to Login to Nest Camera?
The Nest Camera Login process can help you get done with the hectic login steps online. You’ll need to access the login page and then follow the key steps to modify the details online and get done with the troubleshooting steps. For help with the login process, you can always reach out to the team at our end.
1 note
·
View note
Text
How to Login to Nest Camera?
The first step is to log in to your Nest camera or nest camera login from another device. This will allow you to use your camera and access all of its settings from anywhere. Next, navigate to your Account Settings.
To do so, use the drop-down menu in the top right corner or the three-dot icon. Scroll to the bottom to find "Nest Services." Click "Connect to other services" when you get to the bottom.
Select "Auto-access" from this menu to enable or disable Auto-access for your account. As a result, you will be able to access your account from any device. You can take the following actions:
Before you begin using your Nest Cam, make sure it is connected to your home Wi-Fi network.
To get your camera up and running i.e nest camera login , follow these steps:
1. Turn on your Nest Cam and plug it into a power source using a USB cable.
2. After that, plug in the power adaptor.
3. Now, on your phone, download the Nest mobile app.
4. It is available in all major app stores. Go to the Nest Camera App Download Page to get the app.
TIP: If you don't want to use the Nest app, you can use a web browser to access nest.com.
5. If you don't already have a Nest app on your phone, make sure it's up to date.
Open the app after it has been downloaded.
7. Click nest camera Login and enter your username and password to log in.
8. By selecting the Settings option in the top right corner, you can make any changes you want to the app's settings.
This is how to nest camera login and get going.
In case you have any further doubts, feel free to contact the team.
1 note
·
View note
Text
How To Perform Wyze Camera Setup Process?
Wyze cameras are among the most recent home surveillance devices you can get for yourself. You can configure the camera settings easily by logging in through the Wyze app.
This page will walk you through some important information to complete the Wyze camera setup process. They have features like motion and sound detection, 24/7 recording, smoke and CO alerts, etc. The Wyze cam Setup process is given here for your assistance.
Things You’ll Need For Setup
You will need the Wyze camera app and a high-speed internet connection to line up your camera. You will also need a Wyze account to manage all of your cameras from one place. If you're using Android, you'll download and install the app from the play store or the app store just in case of iOS.
When you launch the app, tap on the Sign-up button to make an account with Wyze by providing the specified details just like the email address, and assigning a robust password. Once done, tap on the continue button, and your account is successfully created.
How To Setup Your Wyze Camera? (Methods)
If you're going to set up your Wyze camera outdoors, you can set up a Base Station. Here are some steps to follow to attach your camera to the wifi network at your home :
Launch the Wyze camera app and tap on the house button. Tap Cameras and select Wyze Base Station. Plug one end of the coax cable into the bottom station and then the other end into the rear of your router device. The status light will flash blue and eventually intercommunicate solid blue when connected to the network.
The base station of your Wyze camera is now ready. After that, select the radio button next to "The status light is solid blue" and tap on the subsequent button to complete the installation of your camera.
Wyze Camera Setup Instructions
The Wyze camera box contains the camera, a USB cable, an influence adapter, and a user manual. Initially, plug the Wyze cam into an influence outlet using the ability adapter. When the camera is powered on, the camera is going to be ready for the setup process. Once done, launch the Wyze app and tap on the house button to induce a start.
If you're employing a Wyze camera, you'll have to drag the bottom from the camera and press the Setup button on the underside once. You will hear the sound 'Ready to Connect' play on the camera. Simply, tap on the button and check the box next to the "I heard, able to Connect" button.
Wyze Camera Network Configuration
Wyze app shows you the available wireless networks within the area. Select the network band of the camera and set up a new wifi network you want to attach to. Hold your camera up for the phone to scan the QR code and say "QR code scanned, Please wait" and "setup complete".
The Wyze Camera Setup process is now complete. Now, on the Wyze app, select the radio button next to "I heard, QR Code Scanned" and tap on the subsequent button. If you face issues during the Wyze cam setup process, you may elicit help from our end.
0 notes
Text
How To Factory Reset Nest Camera?
There are numerous ways of finishing up the Reset Nest Camera procedure. Users have the option to reset their Google Nest cameras if they encounter any problems with their cameras. Although Nest cameras are among the foremost effective and most dependable security cameras, they occasionally experience problems.
You can see about the Nest Cam reset process following the directions during this post.
Resetting The Device Using Nest App
Install the Nest app on your phone from Playstore.
It will get automatically installed.
The Nest camera webpage will then appear. Select cameras.
Next, select Settings from the menu within the top-right corner of the app's screen.
REMOVE DEVICE is visible within the centre of your app's screen.
A confirmation message will then appear.
The app won't include the Nest Camera. That indicates that your device has successfully reset.
Resetting Nest Cam employing a Push Button
You will hear a confirmation tone from your camera once it has been reset to its original settings. Hold down the switch for 10 seconds. Press and hold the push.
Now you've successfully reset Google Nest camera to its original settings.
Why to Reset The Camera To Factory Default Settings?
The Nest reset process removes everything from your cameras, including personalised configuration, video history, network logs or connection, etc. Once the reset is successfully performed, it comes back to its factory default settings. Any hardware issue cannot be fixed with just a reset. Only the issues that are active within the firmware or configuration of your camera can be fixed with it.
How To Reset Nest Cam After A Failed Attempt?
Nest camera settings are often reset using the Google Nest app or by navigating to the CAMERA section if you're using the Nest app on your phone.
Most camera models include a button that's found somewhere on the inside of the frame of the camera. In some it should be present normally with a button outside the frame. If you've a model that has the button inside the image frame, make sure you press the button with the help of a paperclip.
Bottom line
While it is vital to search out the way to reset Nest camera, it's equally important to follow the steps carefully. If you encounter any issues while attempting to reset the camera, please be at liberty to contact our support team. So here we bring to a close the post about the Nest Cam reset process and a guide on how to troubleshoot any possible issues which can occur on your device.
0 notes