Statistics
We looked inside some of the posts by mahou-riddler and here's what we found interesting.
Average Info
Notes Per Post
3K
Likes Per Post
2K
Reblog Per Post
1K
Reply Per Post
13
Time Between Posts
10 days
Number of Posts By Type
Text
16
Photo
1
Last Seen Tumblr Blogs


Fun Fact
In Q3 of 2020, 31% of US users access the Tumblr app daily.


Photo


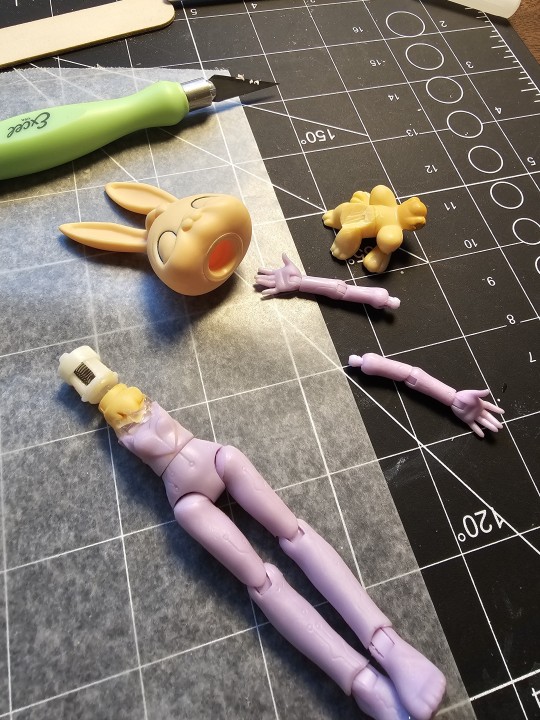
amazing 3d printed doll body by @aimai_middle
943 notes
·
View notes
Text

The sun was out and so was my motivation 💪 I had the flowers pinned to this skirt for like 2 months and I finally attached them (this is made from the hoard of flowers I got for the first dress, I can probably make at least one more, I couldn't stop buying pretty flowers;;;;)
26 notes
·
View notes


Text


This brave little bird flew on ny dragon guy's antler! And I was just 1m away 🤩🤩
Dollzone Mr Loong on Doll Chateau body in green
138 notes
·
View notes
Text


ID credit: 1619045537 on 小红书
(please like, reblog and give proper credit if you use any of my gifs!)
44 notes
·
View notes
Text


some sweater-centric flatlays for the click and doll prompt “favorite sweater” from shimiro on ig 🌟
the sweaters/outfits belong to sina, raymonde, lottie, and lemon :)
135 notes
·
View notes


Text
So here is a mini breakdown of how I created the BJD eye cups.
First off, you’re going to need some sort of backing to round out the eyeball. I split wooden beads apart and glued them to the backs. This is going to help the eyeball rotate.

Now you are going to need some half spheres. They need to be larger than your eyeball so the can move freely once padding is added. I made these with hot glue and two metal measuring spoons, one inside the other. This created the mold for the sphere. Have ice water handy because a quick cool down makes it easier to peel the glue out. They don’t have to be perfect, you can always trim if need be.
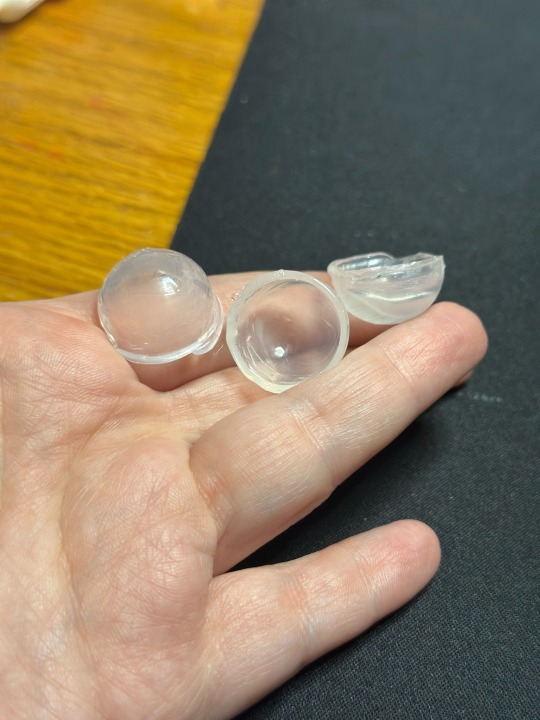
Fluff time. I gently tugged apart a cotton makeup wipe to create the pillow we need. How much you’re going to need will vary and you will need to experiment with how much is going to work for the eyeball. Lots of trial and error here. You want to set it in the half-spheres lightly, do not pack it in.
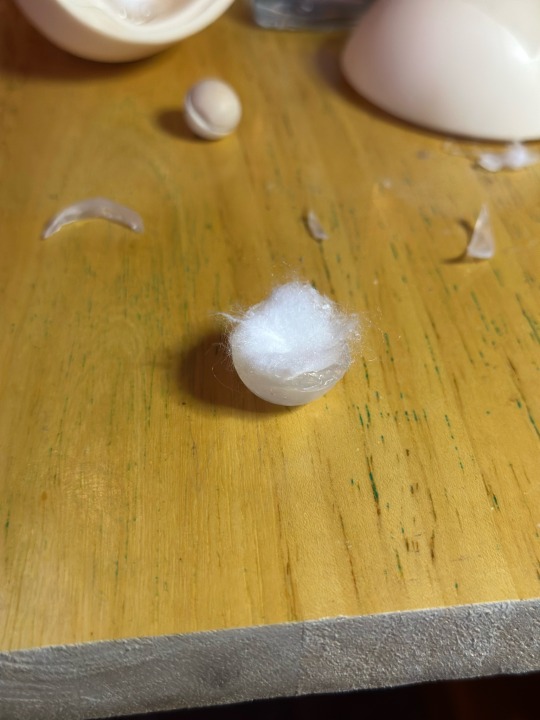

Position your eyeball. This is also trial and error. You want it center with enough room to move. You will have to put the cup on and experiment. Have a toothpick like object and a little bit of tac to do a trial run on the eyeballs movement. Add/remove fluff as needed. You want a semi-firm cushion but not so much to hinder movement. You may need to adjust position of the cup to either side as well for optimal movement.
I very much recommend Faber-Castell blue tac it. It doesn’t leave marks on the pupils as you move the eye around.

Mnnn

Did you find a prime position? Glue the cap in. I know magnets are usually used, but I’m being cheap here. A couple spots of hot glue holds the cup in and is easily pulled out for change and repositioning. Just trim off the excess glue and start again.
Some heads may be more difficult to place the cups side by side. You will have to use your best judgement to trim and move as necessary. For a couple I had to trim some of the side of the cup off because of the angle.

Got them both in? Great! Replace the head and admire your work.
Side note: I did notice some eyewells were deeper than others (looking at you Dante) I did have to do a little bit of pre padding carefully around the eyeball before placing the cap, just to help keep the eye in position. Be sure to check often to make sure there is no stray fluff peeking around the eye.
This was a quick and dirty explanation of how I did this. It isn’t pretty, but it works. Now the dolls have more expression than ever from sultry, to suspicious, to downright deviant.
Feel free to use or make improvements upon this concept. It’s meant to be a cheap and easy project.
119 notes
·
View notes