
From the beginning, Cricut had only one dream: to help people with creative mindsets come out of their comfort zones. Launching various products gives them a golden chance to make their do-it-yourself projects look more fun and easy. To begin the crafting project, the DIYer needs to set up their devices by visiting Cricut Design Space.
Don't wanna be here? Send us removal request.
Statistics
We looked inside some of the posts by mannydesignspace and here's what we found interesting.
Average Info
Notes Per Post
2
Likes Per Post
2
Reblog Per Post
0
Reply Per Post
0
Time Between Posts
2 months
Number of Posts By Type
Text
5
Last Seen Tumblr Blogs


Fun Fact
Tumblr.com rank in the US is 25.
Text
How to Download Images From Cricut Design Space: Full Guide

If you are new to the Design Space app and want to know how to download images from Cricut Design Space, then you are in the right place. Most beginners and crafters wish to learn how to download and upload images to the Cricut app. But let’s know a bit about the Design Space app. It is a free digital design app that allows you to cut and draw for the Cricut machine and is compatible with desktop and mobile devices. And to cut with it, you need to use Cricut cutting machines.
Suppose you intend to learn the full download process of the image. Read this blog.
Functions of the Cricut Design Space App
This app allows you to create your designs online and offline. We have compiled the software’s functions and then read them to learn.
It lets you make your designs, cut, and edit your craft projects with the help of easy tools.
You can use pre-designed images and fonts for your crafts.
You can edit the pre-made projects if required.
You can connect to Cricut Explore and Cricut Maker machines using Bluetooth.
It has a feature to auto-save projects.
How to Download Images From the Cricut Design Space App
Follow the below steps to learn the process of the Cricut Design Space app:
Step 1: Search and Download an Image
First, switch on your device and search for the image you want to download in the search engine. When you are done searching and choosing the picture, right-click on it and click the Save as Image to Downloads option. The image will be successfully downloaded to your downloads folder.
Step 2: Upload the Image to the App
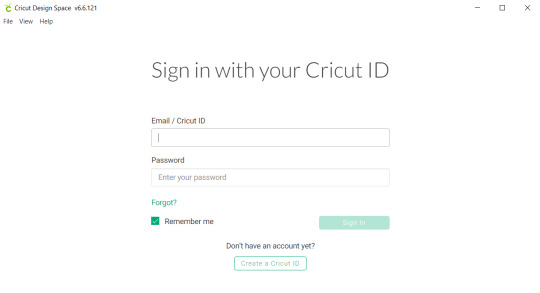
Now, open your Cricut Design Space app and sign in with your Cricut ID and password. Next, a new web page will appear. Click on the New Project at the top right-hand corner of the page.
On the left side of the page, under the Menu bar, click on the Upload tool to upload the image, and then browse to open the downloaded pictures in your folder.
Step 3: Remove Background From the Image
To remove the background, use the background remover tool and select the background of the downloaded image. Then, click on the places you want to make the changes and click the Apply and Continue button on the bottom right side of the page. Another method to remove the background image is to choose the Cut Image and remove the background of your downloaded image.
Step 4: Upload the SVG File to the Design Space App
After following the above steps, tap the Upload button at the bottom right side of the page. Navigate to Recently viewed images, and you can locate your edited photos. Then, choose the image and click on the Add to Canvas button to add it. Then, resize and select the Make It option. Select the image on the cutting mat and proceed towards the cutting process.
Methods to upload images
Here are the steps you need to follow to upload basic and vector images on Design Space app:
Method 1: Uploading Basic Image
Choose the basic JPG, GIF, or PNG images and drag them to your Design Space app Upload window. Then, choose the image type and click on the Continue option. Next, select the Crop tool to remove, erase, or restore unwanted background. If you wish to preview the edited image, look at the preview button on your screen and modify it according to the project’s needs. Afterwards, select the Continue option.
Method 2: Uploading the Vector Image
On the contrary, if you use vector and complex images, .svg or .dxf file to the file selector and select the Open option. Then, drop the file in the image upload window, give it a name, and click on the Upload box. Then, search for your vector file by inserting its name inside the search bar.
Then, choose the file. It will be directly moved to your Cricut app canvas. Finally, the images designed with layers will appear as grouped images. After ungrouping the photos, you can move and change their size separately according to your project.
Conclusion
After reading this guide, you will know how to download images from the Cricut Design Space app. It opens the possibility of making your projects with the Design Space app, and you can do endless projects with it. Keep designing and using the cutting machine to unleash your creativity and make new projects.
FAQs
Where can we find uploaded images in Cricut Design Space?
Follow the steps below to learn how to find the uploaded images in Cricut Design Space.
First, open your Cricut Design Space app.
Then, under the Menu panel, click on the given Images option.
Now, from the list, you can find all the downloaded and uploaded images by name.
Also, you can find the image in the Upload section.
Can you search for the project without an internet connection?
No, you cannot search or browse through the projects or images without an internet connection. However, you can use the offline features if you have saved the downloaded file to your computer. You can find your saved projects on the home screen, or you can also click View All to see all your saved projects.
How do you download free images from the Cricut Design Space app?
There are some quick and easy steps by which you can download free images:
Open the Design Space app in your system.
Create a new project.
Then, click on the images from the bottom navigation.
Now, select free under Highlighted Categories.
All the free images will be displayed.
#how to download images from cricut design space#cricut design space app#cricut design space download#cricut design space software#install cricut design space app#cricut software app#cricut new product setup
1 note
·
View note
Text

Discover the limitless possibilities of crafting with Cricut machines. Great for custom t-shirts, greeting cards, and home decor, Cricut allows you to bring your creative visions to life with ease. The Cricut Design Space software provides a vast library of images and text fonts to improve your DIY projects. Navigate to install cricut design space app, then download the Cricut app on your device and set up your machine. Whether you are a novice or a pro crafter, Cricut makes it simple to create stunning designs and projects.
#Cricut Design Space#cricut design space login#install cricut design space app#cricut design space app
0 notes
Text

Cricut is a top-selling cutting machine that makes various meaningful, personalized crafts. Cricut offers a huge lineup of cutting machines, including the Cricut Maker series, the Cricut Explore series, the Cricut Joy, and a range of Cricut heat press machines. Users can select from these machines and work on their favorite projects easily. Get started with a Cricut machine by visiting Cricut Design Space and installing the Design Space software. Then, you can sign in to your Cricut account and start crafting.
#Cricut Design Space#cricut new machine setup#cricut design space app#cricut design space login#install cricut design space app
0 notes
Text

Why put so much effort and a lot of hard work and the same old traditional crafting method when there are machines to work at your fingertips for everything? Indeed? If you agree, the Cricut machine is suitable for all craft work. It helps you to manage and save your precious time and produce more DIY projects with its sharp edge rotational blades, which rotate in all directions to give you the perfect and smooth cut. It allows you to cut over 100 different types of materials. You can set up the Cricut machine on your mobile device and computer from Cricut Design Space to get started on your first project.
#Cricut Design Space#install cricut design space app#cricut design space app#cricut.com/setup mac#cricut explore 3#www.cricut.com setup login#cricut explore air 2#cricut.com/setup
0 notes
Text
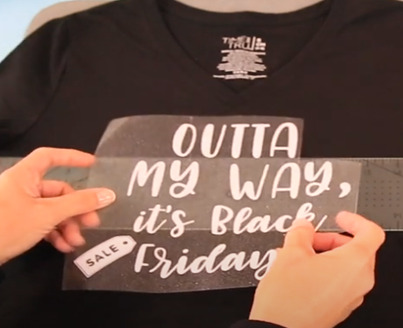
How to Make Cricut T-shirt Designs for Black Friday?
Are you looking for T-shirt designs Black Friday? If yes, then I am here to help you. With the help of this blog, I will share with you the basic steps to create a custom Black Friday T-shirt. Since Black Friday is around the corner, everyone's aim is to buy a Cricut machine along with other supplies at a reasonable price.
With such attractive offers, buyers start shopping for Christmas and New Year. If you are a DIYer and looking for Cricut Black Friday T-shirt designs, then I am available for your service. Keep reading this blog for step-by-step instructions on how to make Black Friday custom T-shirts.
Step 1: Create a Design on the Cricut App
Before proceeding toward the cutting and printing process, you need to create the design on the Design Space app. In the following steps, I've written all the steps that will help you make or upload the T-shirt design.
First, sign in to your Design Space app with your login details.
Second, press Templates and choose the design that you want to insert on your T-shirt.
After choosing the design, move it to the Canvas and change its color from the Color panel.
In case you want to highlight a particular item, then highlight it and change its color as per your wish.
Step 2: Finalize Your Design Draft
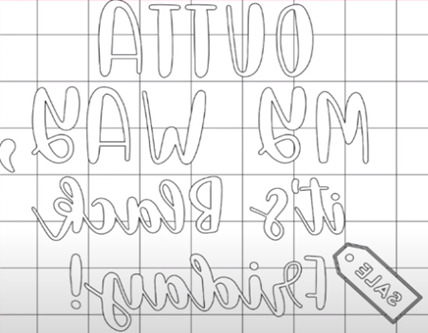
Now, I will take you to the cutting mat preview page, where you’ve to press the Mirror button.
Also, you will notice that the text won’t be in a proper manner.
Next, press the Cancel option visible on the bottom right side of the page.
Following this, select the whole text and then click the Attach button.
Afterward, press the Make It box, and you will get to see your final text on the mat.
Now, I will again click the Mirror option, and your whole text will flip over.
Following this, click the Continue button to proceed towards the next step.
Step 3: Choose the Cricut Mat
Further completing steps 1 & 2, I will choose the compatible Cricut cutting mat. The steps below will help you decide which material is going to be perfect for forming your Black Friday custom T-shirt.
Begin the process by choosing the materials from the Favorites/ Popular section.
Apart from that, tap Browse all Materials and choose the material from the master list.
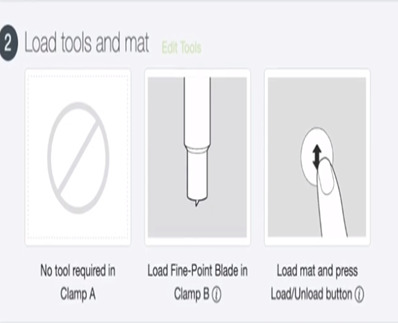
Now, load the tool (if needed) and then mat on your separate cutting machine.
After choosing the compatible Cricut cutting mat, I will upload the material into my cut-die machine.
Step 4: Load the Material onto Your Machine
In this stage, learn about the steps for loading materials onto the cutting machine for T-shirt designs Black Friday:
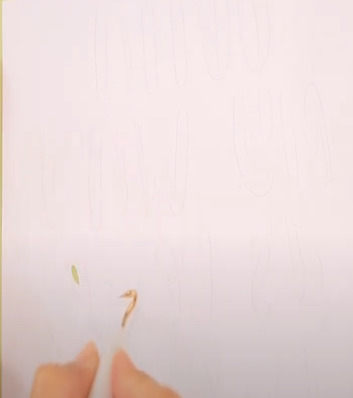
First, start placing the material on the Cricut mat using your finger or scraper tool.

After sticking the compatible material, load the mat into your craft plotter.
Next, unload the mat very slowly to avoid any damage to the mat or material.
Following this, start weeding out the access material from the design using the weeding tool.
After weeding the Black Friday custom T-shirt idea from the mat, I will preheat my heat press.
Step 5: Apply the Design on a Blank T-Shirt
Finishing the T-shirt designs Black Friday above-said steps; I will provide the steps to apply the design on the material.
After making the final design, place it in the middle of your T-shirt blank using the measurement scale.
Following this, remove the scale and place the Cricut heat press on your design.
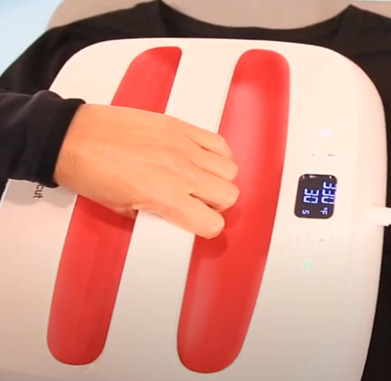
Now, select the time & temperature via the Heat App using the Bluetooth feature.
After the pressing process comes to an end, softly peel off the material.
Lastly, you will get to see the final T-shirt design in front of you.
On the whole of the T-shirt designs Black Friday blog, I covered complete details that will help you create more custom shirts for Black Friday 2023.
FAQs
Question: What Supplies Do I Need to Make My Black Friday Custom T-shirts?
Answer: To make the Black Friday custom T-shirt designs, all the DIYers must buy some of the Cricut supplies. Those materials will assist you in transforming your idea into reality:
● Cricut machine
● Design Space account
● Cricut material and cutting mat
● Blade and tools
● T-shirt blank
● Scraper tool
● Weeding tool
● Cricut Heat app
● Measurement tape
● Cricut Heat press
● Cricut trimmer
● Heat press mat
Question: How Can I Make Custom T-shirts for Black Friday With Cricut?
Answer: Have a look at the following steps to make custom T-shirts for Black Friday:
First, sign in and create your design on the Cricut software.
Next, change the design color and resize it as per your choice.
Now, choose your material and load the mat into the cutting machine.
After that, insert your design on the blank and use the Heat press.
At last, peel off the material, and your final T-shirt design will be ready.
Question: Where Can I Find Free Cricut T-shirt Designs for Black Friday?
Answer: If you are a newbie or an expert in creating customized crafts, then you can easily find the Cricut T-shirt designs Black Friday on the Cricut app/ Design Space. Along with the Cricut app, you will also get a free-to-use library from where you can use designs, images, or fonts for your projects. Besides, the Cricut Access plan also helps in using the items available inside the ever-growing library for modifying their projects.
Visit: install cricut design space app
Cricut Design Space
cricut.com/setup mac
Source: T-shirt designs Black Friday
#cricut setup#install cricut design space app#Cricut Design Space#cricut design space download#cricut design space app#cricut design space setup#cricut design space for mac
1 note
·
View note