
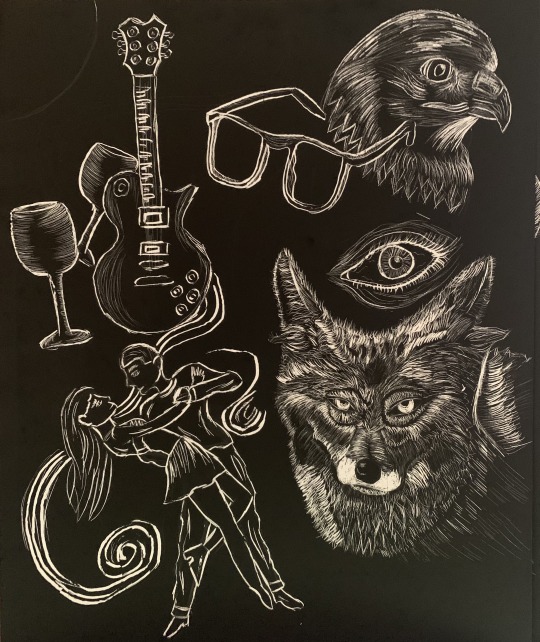
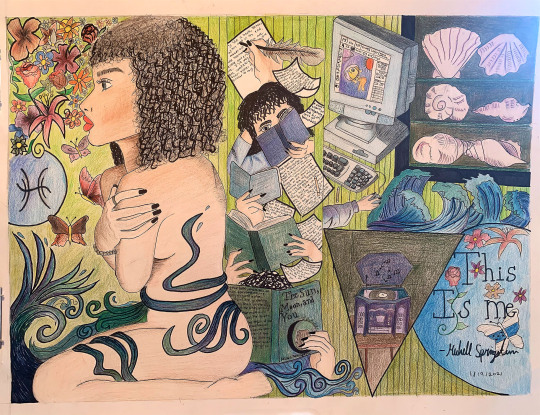
this is a page where I upload all of my art. I go by Michell Springstun or MS
Don't wanna be here? Send us removal request.
Statistics
We looked inside some of the posts by michellsart and here's what we found interesting.
Average Info
Notes Per Post
139K
Likes Per Post
88K
Reblog Per Post
51K
Reply Per Post
136
Time Between Posts
30 days
Number of Posts By Type
Photo
13
Text
4
Last Seen Tumblr Blogs


Fun Fact
Tumblr was attacked by a cross-site scripting worm deployed by the Internet troll group GNAA on Dec 3, 2012.
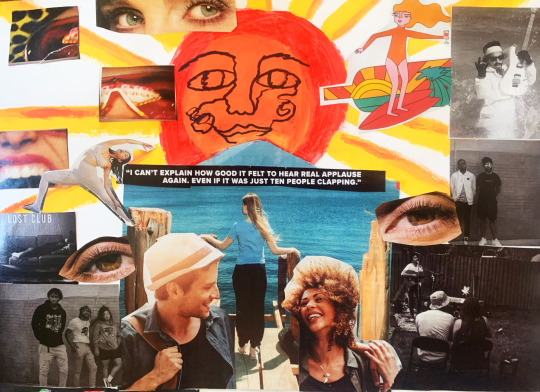
Photo
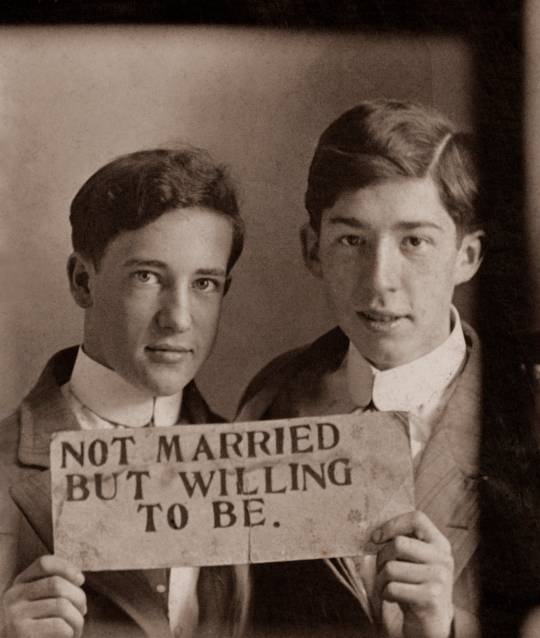
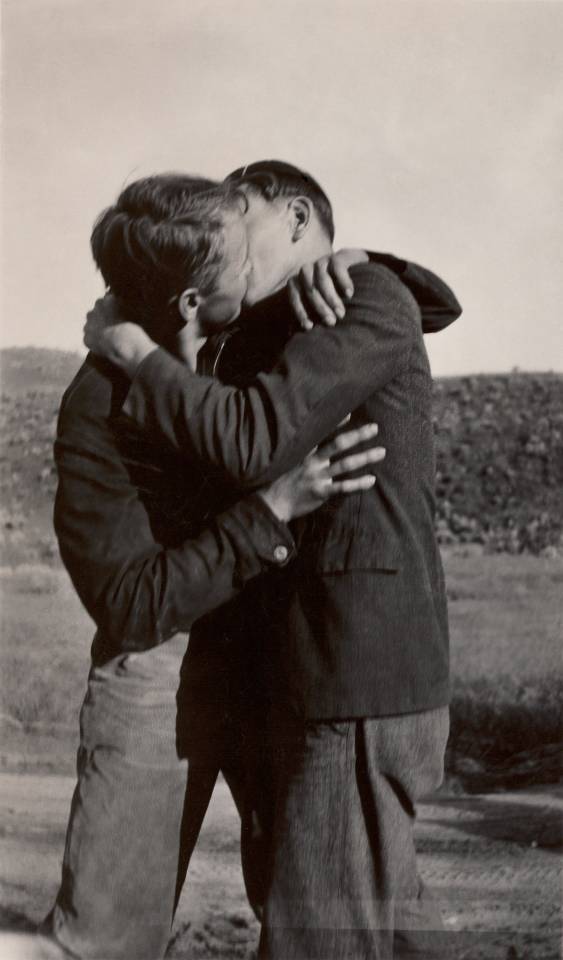
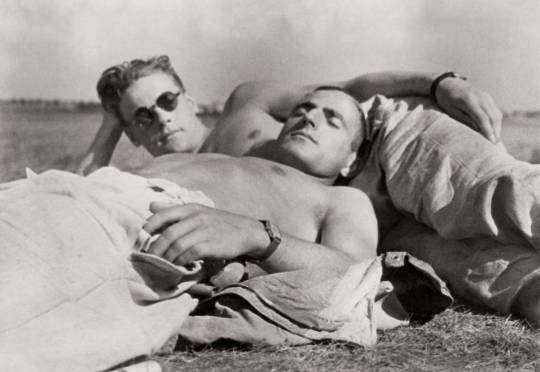
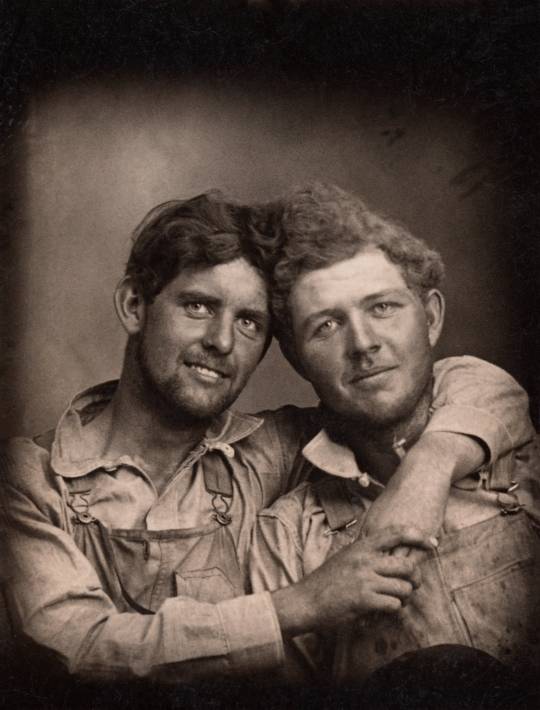

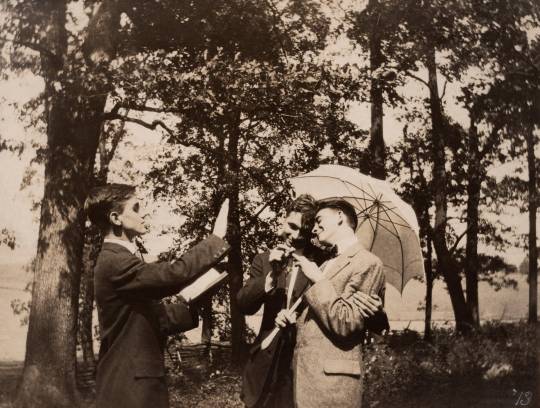

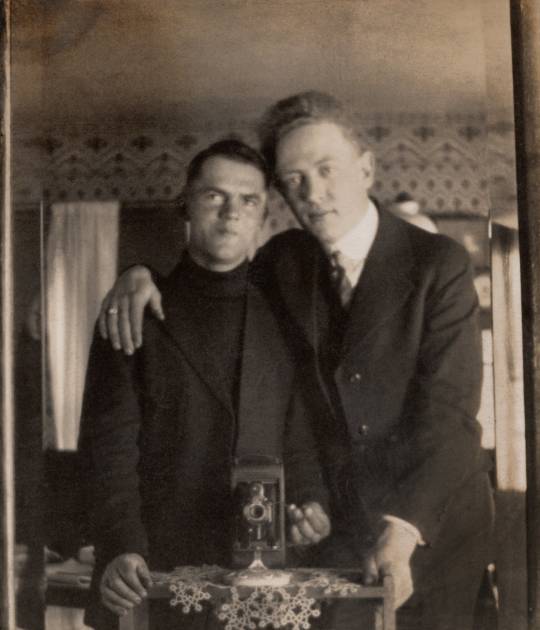
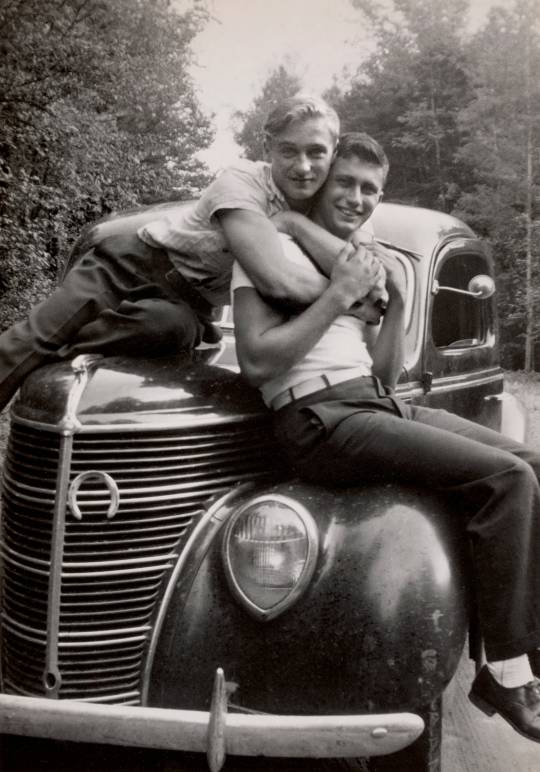
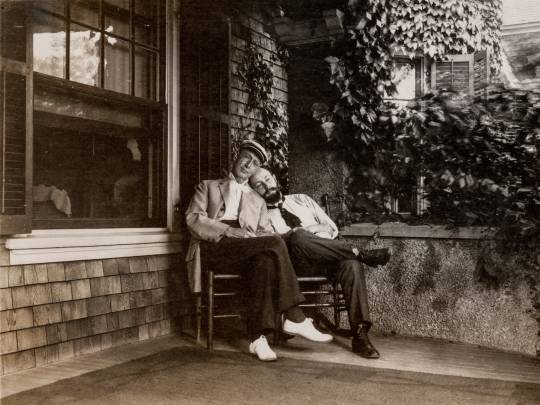
Taken from Loving: A Photographic History of Men in Love 1850s–1950s
139K notes
·
View notes
Text
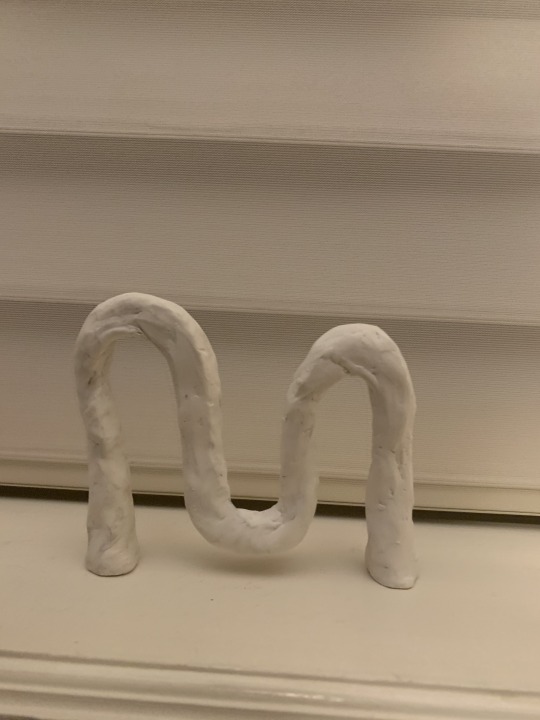
“The Snake” Plaster 3D Project
Size: 5 ft stretched out and 17 inch regular
Materials: Copper coil, plaster, chicken wire, light sand paper, zip ties, and 100% cotton cloth
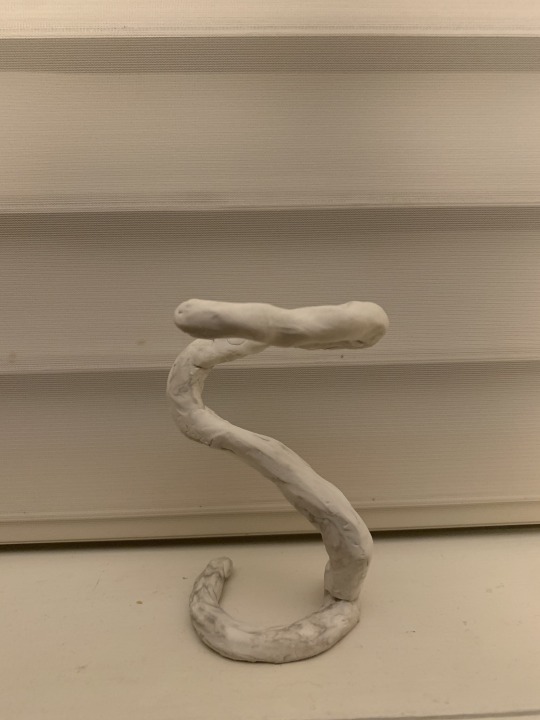
The image above was what I was trying to ultimately achieve. I wanted to do something that was dynamic yet simplistic. I had 2 other designs that had 2 ends touching the ground where as this one, it only has 1 end on the surface. My classmates and my professor urged me to do this one since it looked like it could be executed well!
Inspirations:


Unfortunately, I couldn't find the name of the artists but I felt that these really inspired me to do “The Snake”. I was fascinated with the idea of swirls and movement and I thought I could integrate that into my piece!


My first step was to create the base! I used a copper coil because I thought it would be bendable and sturdy enough to hold it (That’s what I thought). I then tied the chicken wire around a PVC pipe so it can be even. After that, I slid the wire through the base and I went straight to work the next day!


The next day, I added zip ties so I could secure the wire to the base! I thought this method was effective because since the ties were inside the piece, it wouldn't touch the cloth and make it look lumpy.


During this step, I did experience some issues but later on I resolved them! The first problem was that I cut the cloth too short so it wouldn't wrap around the whole wire. It became difficult because they kept falling off because they had nothing to hold on top. Once I got to the middle section of the piece, I cut longer pieces and it became easy as I got to the bottom!
My other problem was that the plaster I was using was too wet! I learned later from my professor that I got a defected bag of plaster so that meant I had to learn a new way of dealing with plaster. I realized that the plaster on the cloth had clumps on it as well which is a symptom of defected plaster or high humidity!

When I got to the step of adding plaster was when I experienced major problems. After I applied 1-2 coats of plaster to the standing piece, the top part was leaning to the side causing instability! I had to lay it flat because the unstableness was causing plaster to fall down.

The weight of the plaster and cloth was causing the object to crack in certain places where there was no support. I was concerned at the time so I immediately contacted my professor!

Another issue was that it was taking more than an hour to dry! It took 1-3 days to dry all together and once I applied more plaster hoping to smooth it out and fix the cracks, the old plaster kept falling and more cracks erupted.


After a while, it got too much to handle! My professor advised me to redo the sections where the cracks were the worst at. I reapplied fresh cloth and repeated the process once again. The outcome turned out that it sort of helped but not enough because every time I moved the structure, it would crack again.


The first picture is when I reapplied fresh cloth and plaster with the old cloth and plaster.
The second picture is when I got so upset because after all that work, it cracked and fell apart once again!
At this point, I felt helpless and like that I couldn't make it work and resolve it quickly. I asked myself, “Why is this happening to me??!!”

It got to the point where every-time I was finished working on my project, I had to add support to a section because if I didn't, it would keep cracking.
When it started to get near the deadline, I decided to pick myself up and to stop sitting around being upset because nothing was working. What I did was on all the weak places, I added ANOTHER layer of cloth/plaster. The outcome of that was that it wasn't perfect, but at least it dried quicker and was a tad bit stronger than before.


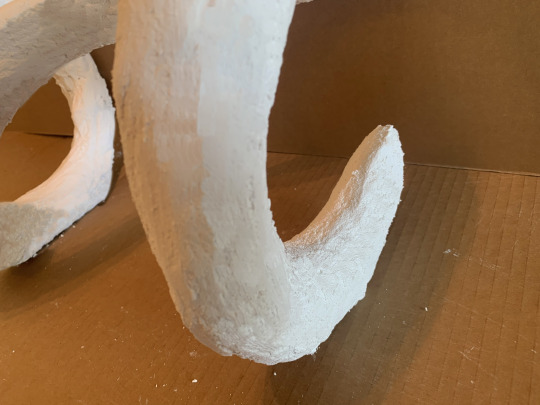


These are the end results! Overall, when I sanded it down one last time, it took away the grain and unnecessary texture. There are some lumps underneath parts of the middle section and it reminds me of some type of sea sponge or coral!
Struggles Conclusion:
My struggles were that the base turned out to not be sturdy as I thought, the plaster wasn't drying quickly, the cloth in the beginning stage was too short so it would fall off, and cracks and graininess at the almost finished product.
Successes Conclusion:
I was able to figure out a way to make the object hold up without cracking during the final steps. I was also able to problem solve throughout the way with the help of my professor. I also figured out how to work with the defected plaster
What I learned:
I learned that there are always solutions to problems and that I shouldn't give up! Even though the project didn't turn out like I hoped, it came out as how I wanted with the circumstances.
0 notes


Text
Cardboard Model~ 3D Design
Hello everyone! For my second project in my 3d Design class, we were assigned to create a cardboard model of a design that we’ve designed.
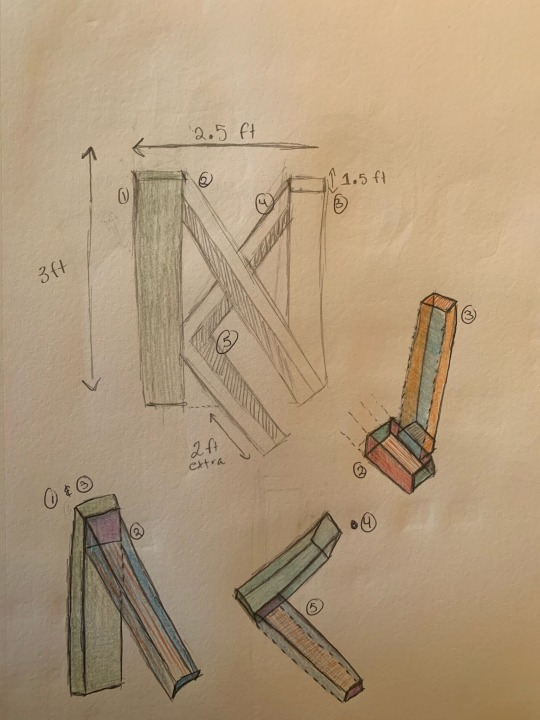
This was my first design on paper and overtime I had to change and modify this sketch in order to create it in in real life! On number 4 and 5 in the photo, I had to change those columns to be laid onto a flat surface instead of it being slanted in the air. I also made the slanted pieces 3 ft instead of the 2 straight up columns
My inspirations were from an artist named Mark Di Suvero and 2 unknown students at UNF


These designs inspired me because I really liked the look of simple shapes (rectangular and square) to make a more complex looking design. These designs in my opinion were thought out and well crafted and I wanted to do something similar!
The materials I used were cardboard, water activated tape, sponge + water, latex house paint, paint rollers/paint brush, sandpaper, utility knife, a cutting mat, and a glue gun!

This was my final piece that I created! For the smaller piece on the grass, the measurements were 18 inches long for the left side since it is on an angle, 15 3/4 inches on the right side, and 5 in width all around. For the columns going up straight, they were both 27 inches tall and 5 inches wide all around. For the slanted columns, the top side is 3ft (36 in) long and the bottom (underneath) is 24 3/4 in long).
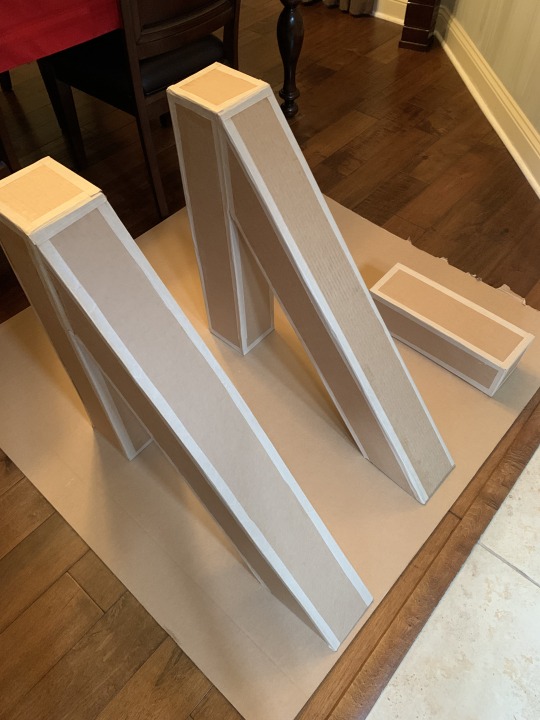
My in-progress shots:


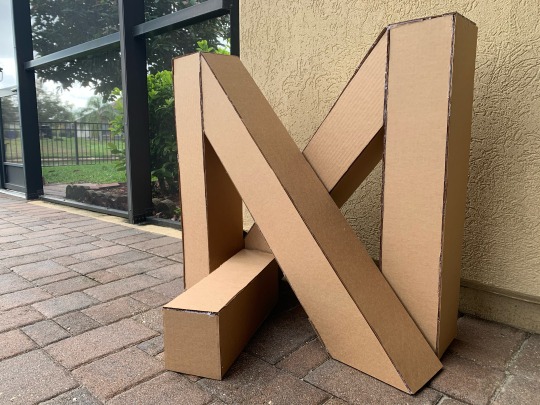
My final documentation:
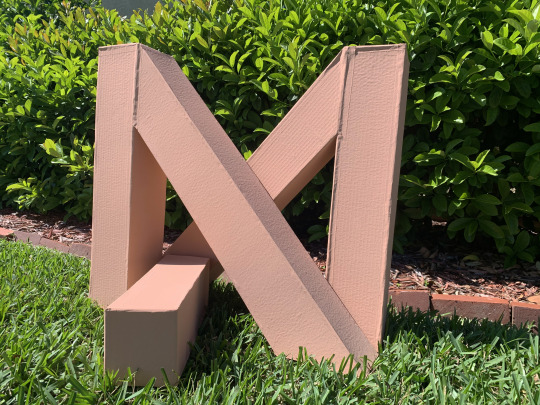


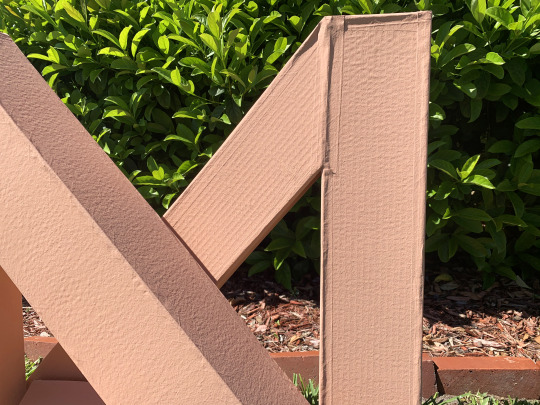
The reason why I decided to create the design the way it is, is because I thought it would look interesting if it were shaped like a letter. Since my name starts with a “M”, I wanted something that represents myself but I also wanted to challenge myself to put a creative twist to the letter M!
My struggles:
For this project, I didn't have too many struggles unlike the wire project which i was thankful for! But there were a couple of things that I was scared of doing because I didn’t want to mess up. At first, I was scared to cut the cardboard because I felt like I would mess up and wouldn't cut a straight line. Another issue was when I was gluing the cardboard together, I put too much hot glue and once it all dried, the connections were a little bit bumpy and thick of hot glue. To fix that though, I used light sandpaper on those connections to smooth it out before I added the tape and paint. Another thing I was scared of doing was cutting the angles and making sure the angles I cut would fit nicely. Again, I just took my time and calmed myself down and believed in myself that I could do it!
My successes:
I had a-lot of successes in this project and I am so proud of myself! After a while, I gained confidence and I felt like an expert! At first of course, I was unsure but after I while I got a hand at it and I enjoyed it a-lot. My favorite part of this project was cutting the tabs and gluing them! My second favorite part was painting the entire thing. For many of my struggles, I had quick and easy solutions which is one of my great successes.
What I learned:
What I learned throughout my project is that things can be simpler then what it seems. For example, Instead of using a protractor or a measuring tool to calculate the angle of the small piece and the slanted columns, I used the objects and tools around me to get it done. For the slanted columns, I put the piece of a cut out cardboard on the side and put it against the straight columns and I drew a line at the part where I needed to cut off. I also learned that instead of using a utility knife or scissors to cut off parts of the hot glue at the connections, I just rubbed sand paper over it to make it smoother.
0 notes


Text
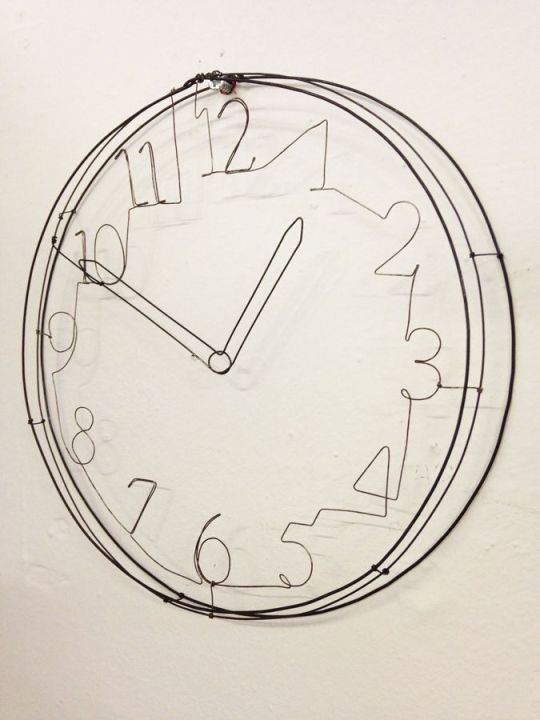
3D Design- Wire Clock
Hey everyone! I was assigned to make a wire object in my 3d Design class and I went with a clock that I found in my house. Before I chose the clock, I had 2 other options which were a radio and an odd-shaped jewelry box. I decided to make this object because all of my classmates said I should so I said, “Why not?!”
The first step I had to do was scale up the clock. My final dimensions were: H (18.8 in), W (11.07 in), D (8.4 in).
Materials: Plain, black wire
My first inspiration was from another student named Annie.

Unfortunately, I couldn't find an artist name for my other 2 inspirations.

The struggles that I had when working on this project is definitely craftsmanship and the fact that I had no confidence. It was my first time using a power tool, using pliers to twist the wire, using the jig, and actually scaling up the object. I was so worried that mine was going to turn out horrible that I couldn't allow myself to relax and have fun on some parts. In the end, I am happy with the way my project turned out. Even though some parts aren't perfect and well crafted, I think thats what makes it unique and special. The successes I had with my work was that I had everything planned before I took my next step in the process. I knew which shapes I needed to have, which connections needed to be where, and how long or wide things needed to be too. Finally, I learned a-lot from this project. I learned so much about myself and how my brain works and I am so happy that I did this project and actually liked the way it looks! This is the first project in a while where I thought I did good in! I put in a-lot of hard work and I am proud of myself. In some parts of the process, I thought, “I hate this so much! Why did Lance (my professor) assigned us something so hard!?”. Now, I dont think that way anymore because again, it taught me a-lot about myself.
Here are my results!


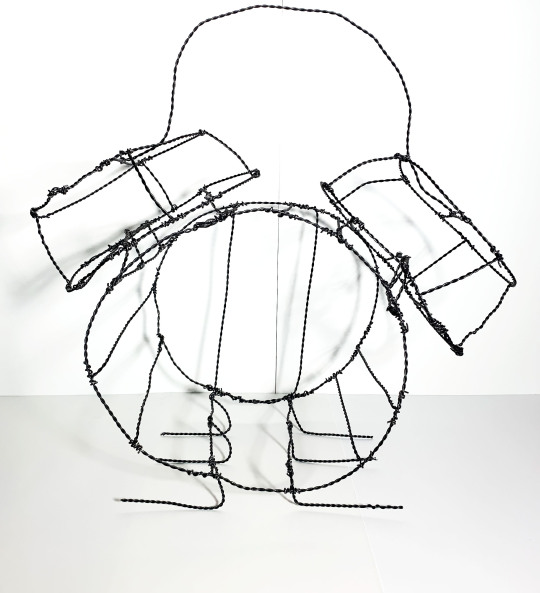

My in progress shots are:


0 notes