Hello, I'm Mellow. Here you will find stuff regarding BL/BLVN, occasional translations, personal scans, and other things along those lines.
Don't wanna be here? Send us removal request.
Statistics
We looked inside some of the posts by moeteki and here's what we found interesting.
Average Info
Notes Per Post
2K
Likes Per Post
1K
Reblog Per Post
169
Reply Per Post
23
Time Between Posts
1 month
Number of Posts By Type
Text
16
Video
1
Last Seen Tumblr Blogs


Fun Fact
Kazakhstan’s Minister of Communications and Informatics has blocked the Tumblr site because it contained 60 sites of terrorism, extremism, and pornography in 2015.
Text
IMPORTANT: Regarding the use of my Nitro+Chiral/BL/BLVN Scans
I know I do not use Tumblr at all in the past year (but plan to be active on here again soon), but I feel as if I need to put this on here as well, given that what I want to say has to do with scans I have uploaded and provided onto here in the past.
If you’re going to reupload any scans of mine I did in the past (and future), I ask for a link back to my postings.
(cont. below)
Reason why I am saying this is that I recently came aware of a Twitter user reuploading some of my old scans without linking back or credit. This user, whom I will not name for privacy for now, has been doing this not only with my works, but my other friends/mutuals within the Nitro+Chiral fandom. It's severely saddening and disappointing, and I'm speaking up not only for myself, but my friends/mutuals as well.
I do not have an issue with sharing my scans; I share them and for the reasons of wanting others to see content that may be hard to get a hold of. What I DO have an issue with is the lack of credit/linking credit. I know what my scans look like; I do them a particular way.
I understand how hard it is for many fans especially (in the N+C fandom outside of Japan) to get hands on items, and I don’t mind the sharing of my scans I created for people to have access, but all I ask at the very LEAST is a link back to my original upload. Just a link. That's all I ask for.
I want to provide content for people who cannot afford/be able to get their hands on it due to items being so old they are out of production. Not crediting me is a major disrespect as I have put a lot of money, time and effort too, into providing scans of content. A lot of my items I have purchased have come from Japan itself, it's an expensive and long time going out in effort to search for a lot of the stuff I have gotten. I've even pulled all-nighters translating content (in the past).
Because of this, I have decided from here on out, when I do upload a scan it will be watermarked in some form. Scans will have watermarks on every single page possibly in multiple areas (mostly hidden), and translations from here on out will have hidden watermarks if they are done solely by me. My translations already come with a credit page, but that doesn't seem to be enough anymore unfortunately.
I was planning on returning part-time to translating and providing scans of content in the next coming months due to time in my personal life finally letting up. What I was not expecting, however, was an individual pretty much reposting my old scans without credit. I hate to do this, but all they had to do was literally just post a link back to my scans.
So the good news, expect this account to become more active in the coming months (hopefully) with new scans and translations and such. Unfortunately though, what will be provided will be watermarked from here on out.
If the individual whom I am referring to happens to see this, since they seem to be pulling content from Tumblr mostly (which is why I am popping on here to say something); please just credit where credit is due. Not just with my stuff, but other's as well. Saying "idk who OP is" is not the right thing to do when you know you are posting content you haven't scanned or taken pictures of yourself. Reverse image search to find the sources.
I hope you understand, and I appreciate you all that have stuck around and continue to. Hope to be active on here again soon to provide content for you all.
Much appreciated, Mellow (Meru)
Reminder that I am far more active on my Twitter.
12 notes
·
View notes
Text
All done with Rei and Taku's; Madarame and Fujieda's will be done by Saturday night latest. It took longer as I was spending time with family today.
Happy holidays for those who celebrate~
NOTE: Updating Slow Damage Guide
I will be updating Taku and Rei's routes today. I am starting with Taku, and then I will be doing Rei's. I will updating this as I update each route.
20 notes
·
View notes
Text
NOTE: Updating Slow Damage Guide
I will be updating Taku and Rei's routes today. I am starting with Taku, and then I will be doing Rei's. I will updating this as I update each route.
20 notes
·
View notes
Text
All done! I made two main translation changes from my original ones to match Jast's:
-Yellow King St -> Kouou St -Pink Street -> Nightlife District
All the route choices are still the same. Thank you all!
Currently editing Route Guides;
I am currently going through the guides and updating to be complaint with the Jast Translation. Please bear with me for a moment; I will repost this and update when I am done.
Thank you!
7 notes
·
View notes
Text
Currently editing Route Guides;
I am currently going through the guides and updating to be complaint with the Jast Translation. Please bear with me for a moment; I will repost this and update when I am done.
Thank you!
7 notes
·
View notes
Text
Slow Damage Route Guide
Hello guys! Reminder that I do have a guide available for Slow Damage. I will pin it as a top post to my Tumblr, however you can access it it if that's easier for you.
If you need any help regarding the guide/etc, I do not answer messages on my Tumblr. You can grab my attention via. Discord (not through DM's) in my Server or send a reply to this tweet on my Twitter. I will try to help you when I am available.
Thank you! Have fun on ENG release tomorrow!
#sd#slow damage#vn#visual novel#スロウ・ダメージ#トワ#towa#taku#rei#madarame#fujieda#n+c#nc#nitroplus#nitro+#nitrochiral#nitro+chiral#bl#blvn#guide
9 notes
·
View notes
Text
Slow Damage DramaCD Vol.2: Rei Afterstory

Translation Summary of Slow Damage's Vol.2 Drama CD Rei After Story, from AmazonJP.
See below cut:
After finishing the life-threatening Money Match, Rei now spends his free days traveling around with Towa. However, one day when they return to Shinjinkai from their travel destination, they pick up a runaway boy named Kouki.
To Kouki, who doesn’t want to return to his home, Rei proposes that he works temporarily at “Rost”. On the other hand, Towa expresses to be more vigilant.
At first, Rei was watching over Kouki, but he gradually began to feel uncomfortable. Through Kouki, Rei once again faces the question of what body art means to him…
The second volume of the Drama CD is available for preorder from the following links (some with preorder bonuses, so act fast).
It has a release date of 6/21/22.

#slow damage#sd#slowdamage#スロウ・ダメージ#スロウダメージ#スロダメ#nitro+chiral#nitrochiral#nitro chiral#translation#bl#blcd#blvn#n+c#nitro+#rei#towa#nc
38 notes
·
View notes
Text
Slow Damage DramaCD VOL.2: Rei After Story
I translated the audio for the Slow Damage's Vol.2 Drama CD Rei After Story.
Please enjoy! 楽しんでくれるといいな!
#スロウダメージ#スロダメ#slow damage#sd#nitro+chiral#nitrochiral#nitro chiral#スロウ・ダメージ#blvn#bl#dramacd#blcd#translation#rei#towa#n+c#nc
28 notes
·
View notes
Text
Slow Damage Guide: Index
This is a guide to Nitro+Chirals recent BL game, Slow Damage.
This guide serves a purpose to those who need help with the choice system and how to get Good and Bad Endings. This guide, of course, will spoil when these endings take place and what the answers are to said endings and routes. Proceed with caution when viewing this guide.
Although this guide was made during my gameplay of the Japanese version of Slow Damage, this can be used with the English release once it is out! There shouldn’t be too many differences.
How to use the guide:
When reading the guides per character route, for exploration parts, they will look like this:
Exploration #1: • Murase Clinic >Negative • Special E Zone • Doraku Dori >Positive • Towa’s Room >Negative
Positive/Negative responses yield possible Inspiration, which is used during Psychological Dives in Euphoria. The choices indicated under certain responses are the ones that yield correct choices for Inspiration. For chapter one, these choices are highly important for which character’s route you end up on, hence why there are differences within the choices of chapter one of all routes.
Italiced exploration choices mean there are no positive/negative choices to be made. It’s still highly advised to visit the places, however, as it gives lore to the story or a unique short dialogue.
Further into the story, sometimes choices do not yield Inspiration. This means either a Positive or Negative response can be used as it doesn’t affect the outcome of the story. Just slight differences in the dialogue you receive, if anything.
Slow Damage is a VERY different game from Nitro+Chiral’s past BL games regarding the choice system, so I tried my best to make this guide as comprehensible as possible.
Common Routes:
• Rei’s Route Guide
• Taku’s Route Guide
Locked Routes:
These can only be played once Rei and/or Taku’s routes are completed
• Madarame’s Route Guide
• Fujieda’s Route Guide*
*Note: Can only be played once completion of ALL three Routes.
#sd#slow damage#スロウ・ダメージ#Surō Damēji#nc#n+c#nitroplus#nitro chiral#nitro+chiral#bl#blvn#guide#game guide#vn guide#blvn guide#visual novel guide#COMPLETE#good end#bad end#taku#rei#madarame#fujieda#murase taku#izumi rei#madarame kei#fujieda ryo#和泉礼#村瀬巧真#斑目圭
214 notes
·
View notes
Text
Slow Damage Guide - Taku’s Route
The following are choices that are made to get onto Taku’s route and the choices you make during Taku’s route. These will both lead to the Bad and Good ends.
These are the choices I made, and I double checked over again for all choices possible for the maximum best playthrough.
These choices are based off the Japanese release of Slow Damage. However, I have updated the translation to fit the English release (for the names of the Districts and inspiration answers, at least).
SPOILERS AHEAD WHICH TELL WHEN THE ENDINGS ARE! Proceed with caution if you wish to use this guide!
Chapter 1: Fraise
Exploration #1: • Murase Clinic >Positive • Residential Area • Shopping St. >Positive • Towa’s Room >Positive • Tajima’s (Finish)
Exploration #2: • Shopping St. >Positive • Emoto Park >Negative • Murase Clinic >Negative • Yanagawa Cafe • Rose >Positive
Exploration #3: • Murase Clinic • Residential area >Negative • Shopping St. >Positive • Hagoita St. >Negative • Kokioko bridge >Positive • Emoto Park >Positive
Exploration #4: • Murase Clinic (Confirmation for Taku’s route)
Psychological Dive: Ikuina • Positive • What’s gotten... • Positive • Positive • Say Nothing • Flower
• Negative • No problem... • Positive • Speak Nothing • Positive • Speak Nothing • Positive • Speak Nothing • Scars
Chapter 2: Doctor
You will know you are on Taku’s route if you get on this chapter.
Exploration #1: • Emoto Park >Negative • Hagoita St. >Positive • Murase Clinic >Positive • Tajima’s >Positive • Roost • Nightlife District >Positive • Kouou St. >Negative • Takanokuchi Clinic • Towa’s Room (End)
Psychological Dive: Asakura (Part 1) • Positive • Say nothing • Negative • Say Nothing • Negative • Negative • Say nothing • Same University
• Positive • Positive • Positive • Past Incidents
Exploration #2 • Hagoita St. >Positive • Kouou St. >Positive • Abaro Alley >Positive • Nightlife District • Takanoguchi Clinic • Tajima’s • Roost (End)
Psychological Dive: Asakura (Part 2) • Positive • Hiding something... • Negative • Say nothing • Positive • Say nothing • Negative • Hayato
• Positive • Say nothing • Say nothing • Positive • Say nothing • Positive • Say nothing • Positive • Say nothing • Negative • Angel
Chapter 3: Taku
Exploration #1: • Murase Clinic >Negative • Shopping St. >Positive • Emoto Park >Negative • Kokinoko Bridge >Negative • Hagoita-St. • Kouou St. • Tajima’s • Police Station (End)
Exploration #2 [Ending Branch]: • Kouou St. >Positive (For Mayu’s Ending) >Negative (To continue on Taku’s Route)
Psychological Dive: Taku (Part 1) • Negative • Negative or Positive • Might die... (Kotaro’s Words) • Say nothing • Positive • Are you interested... (Mayu’s Words) • Say nothing • Studying
• Positive • Say nothing • Positive • Say nothing • Positive • Positive • Say nothing • Overprotection
Exploration #3: • Murase Clinic • Yanagawa Cafe >Negative • Shopping St. >Negative • Rose >Positive • Emoto Park >Positive • Hagoita St. • Kouou St. • Roost • Tajima’s >Positive • Residential Zone • Takago-gumi Office • Hagoita St. • Seaside • End exploration
Psychological Dive: Taku (Part 2) • Negative • Negative • Don’t you dare... • That’s the answer... • Positive • Say nothing • Drugs
• Negative • Say nothing • Negative • Say nothing • Negative • Say nothing • Makes me think... • Positive • Don’t you dare run... • Negative • Say nothing • Surrogate Goldfish
Psychological Dive: Taku (Part 3) [Ending Branch] • Positive • No choice but... • Makes me think... • Negative • None • Positive • Overprotection
• Positive • Don’t you dare run... • No choice but to give up... • What do you want... • Don’t see it...
For the Bad End: • Overprotection • Studying [Hourglass crack] • I’ve seen it all the time
For the Good End: • I’ve seen it all the time
#sd#slow damage#スロウ・ダメージ#Surō Damēji#slow damage guide#COMPLETE#blvn#game guide#visual novel guide#bl#vn#taku#taku murase#村瀬#村瀬巧真#visual novel
361 notes
·
View notes
Text
Slow Damage Guide: Rei’s Route
Hu

The following are choices that are made to get onto Rei’s route and the choices you make during Rei’s route. These will both lead to the Bad and Good ends.
These are the choices I made, and I double checked over again for all choices possible for the maximum best playthrough.
These choices are based off the Japanese release of Slow Damage. However, I have updated the translation to fit the English release (for the names of the Districts and inspiration answers, at least).
SPOILERS AHEAD WHICH TELL WHEN THE ENDINGS ARE! Proceed with caution if you wish to use this guide!
Chapter 1: Fraise
Exploration #1: • Murase Clinic >Negative • Residential zone • Shopping St. >Positive • Towa’s Room >Negative • Tajima’s (Finish)
Exploration #2: • Murase Clinic >Positive • Residential Zone • Yanagawa Cafe • Shopping St. >Positive • Rose >Negative • Emoto Park >Positive • Tajima’s •Towa's Room (Finish)
Exploration #3 • Murase Clinic • Residential Zone >Positive • Shopping St. >Negative • Emoto Park >Negative • Kokinoko Bridge >Negative • Hagoita St. >Positive • Roost (Finish)
Exploration #4 •Roost (Confirmation for Rei’s Route)
Psychological Dive: Ikuina • Positive • What’s gotten... • Positive • Positive • Say Nothing • Flower
• Negative • No problem... • Positive • Speak Nothing • Positive • Speak Nothing • Positive • Speak Nothing • Scars
Chapter 2: Brother
You will know you are on Rei’s route if you get on this chapter.
Exploration #1 • Hagoita St. >Positive • Abaro Alley >Negative • Roost • Nightlife District >Negative • Takanoguchi Clinic • Tajima’s >Positive • Kouou St. (End)
Exploration #2 • Hagoita St. >Positive • Kouou St. (special dialogue) • Abaro Alley >Positive • Roost (End)
Psychological Dive: Mizuno • Positive • Negative • Say nothing • Negative • Say nothing • Nakamura • Negative • Positive • Sounds fun... • Positive • Say nothing • Positive • Kirihara
Exploration #3 • Hagoita St. • Kouou St. >Positive • Abaro Alley >Positive or Negative • Nightlife District >Positive • Takanoguchi Clinic • Police Station >Positive or Negative • Towa’s Room (Finish)
Psychological Dive: Kirihara • Negative • Pretty fucked... • Negative • Say nothing • Positive • Positive • Pretty fucked... • Negative • The same • Positive • Say nothing • Positive • Say nothing • Negative • Say nothing • Positive • Birds of a Feather
Chapter 3: Rei
Exploration #1 • Murase Clinic >Positive • Hagoita St. • Kouou St >Negative • Abaro Alley • Roost • Nightlife District • Station North Exit >Positive • Takago-gumi Office • City Ruins >Negative • Deathmatch Arena >Negative
Exploration #2 [Ending Branch] • Nightlife District >Positive (Kotaro Ending) >Negative (To continue Rei’s route)
Psychological Dive: Rei (Part 1) • Positive • No can... • Say nothing • Negative • Something... • Say nothing • Negative • Positive • I got it... • Say nothing • Rei’s Father • Positive • Is it the right... • Say nothing • Positive • Say nothing • Negative • Debt
Exploration #3 • Murase Clinic • Hagoita St. • Kouou St >Negative • Abaro Alley >Postive • Nightlife District >Positive • Tajima’s >Positive • Shopping St. • City Ruins • Deathmatch Arena • Roost (End)
Psychological Dive: Rei (Part 2) • Negative • Something... • Positive • That much... • Say nothing • Negative • Say nothing • Negative • Positive • Say nothing • Money Match • Negative • That much... • Positive • I just can’t... • No can do... • Negative • Death is... • Human trafficking
Psychological Dive: Rei (Part 3) [Ending Branch] • Positive • Say nothing • Positive • Positive • Say nothing • Positive • Something... • That much... • Contradiction • Positive • Positive • Is it the right... • There is always... • Positive • Say nothing • Negative • Negative • Say nothing • Body modification • Positive • Say nothing • Negative • Something... • Say nothing • Negative • Say nothing • Positive Bad Ending: • What do you want... (Tono’s Words) [HOURGLASS CRACK] • Say nothing • Rei’s Father
Good Ending: • Say nothing • Rei’s Father
Psychological Dive: Casino • Negative • Negative • Positive • Positive • Positive • Negative • I won’t call it
#sd#slow damage#Surō Damēji#スロウ・ダメージ#COMPLETE#slow damage guide#good end#bad end#game guide#rei#rei izumi#和泉#和泉礼#nc#nitroplus#nitro chiral#n+c#nitro+chiral#blvn#vn#visual novel guide#bl
420 notes
·
View notes
Text
Slow Damage Guide: Madarame's Route

The following are choices that are made to get onto Madarame's route and the choices you make during Madarame's route. These will both lead to the Bad and Good ends.
These are the choices I made, and I double checked over again for all choices possible for the maximum best playthrough.
These choices are based off the Japanese release of Slow Damage. However, I have updated the translation to fit the English release (for the names of the Districts and inspiration answers, at least).
SPOILERS AHEAD WHICH TELL WHEN THE ENDINGS ARE! Proceed with caution if you wish to use this guide!
Before you can start Madarame's Route, you must have one of the following Routes (recommended you complete both): • Taku • Rei
Once you have completed the above, to start Madarame's Route, start the game as if you were starting a regular route.
Chapter 1: Fraise
Exploration #1 •Murase Clinic •Towa's Room >Positive •Doraku-dori Shopping Street >Positive •Candy Store (Finish)
Exploration #2 •Murase Clinic >Negative •Doraku-doru >Positive •Emoto Park >Negative •Towa's Room (Finish)
Exploration #3 •Garden Residential Ara >Positive •Emoto Park >Positive •Bridge >Negative •Special D-Zone >Positive •Roost (Finish)
Sasaki Encounter [Make sure you get this; you NEED it for Madarame's route]
Exploration #4 •Murase Clinic
Exploration #5 •Ahaji-cho
Psychology #1: Ikuina •Positive •For how long... •Positive •Say Nothing •Negative •Say Nothing •Flower
•Negative •If you are... •Positive •Say Nothing •Positive •Say Nothing •Positive •Say Nothing •Stick in the Heart [Madarame's Route choice]*
*Note: If you choose "Scratches", you will continue onto Taku or Rei's route instead.
Chapter 2: Madarame
Exploration #1 •Murase Clinic >Positive •Special D-Zone >Negative •Kouou St >Positive or Negative •Ahaji-cho >Positive •Nightlife District •Takago-gumi Office •Ruined City •Deathmatch Arena >Positive or Negative •Towa's Room (Finish)
Exploration #2 •Special D-Zone >Positive •Kouou St >Negative •Ahaji-cho •Roost >Positive •Nightlife District •Candy Store >Negative •Special C-Zone >Negative •Takago-gumi Office •Ruined City •Deathmatch Arena >Positive •Towa's Room (Finish)
Psychology #1: Taku •Negative •What is your purpose... (Words of Arata) •Say Nothing •Negative •Positive •How long will you be silent... (Words of Old Woman) •Say something... (Words of Rei) •Positive •Speak quickly... (Words of Eiji) •Positive •Say Nothing •Tell me more... (Words of Manager) •Positive •Is it your hobby to not rush... (Words of Eiji) •Fainted Taku
•Negative •Say Nothing •Positive •Negative •Positive •Say Nothing •Positive •There's more to say... (Words of Manager) •Positive •Taku is lying
Psychology #2: Madarame [Ending Branch] •Negative •How long do you intend to stay... (Words of Old Woman) •Did you have a purpose... (Words of Arata) •Say Nothing •Positive •Say Nothing •Negative •Positive •Say Nothing •Positive •Madarame's Oil Lighter
•Positive •It was an early decision... (Words of Eiji) •Say Nothing •Negative •If that's the case, tell me soon... (Words of ---) •Say Nothing •Positive •How long... (Words of Old Woman) •Say Nothing •Positive •Was Kaga bad... (Words of Rei) •Kaga was more... (Words of Manager)
Bad End: •Positive [continues Psychological part] •Three Person Portrait
Note: Any option you choose from here on DOES NOT MATTER. You’re guaranteed the Bad End no matter what you do.
Good End: •Negative [ends Psychological part]
#slow damage#sd#スロウ・ダメージ#Surō Damēji#nc#nitrochiral#nitroplus#n+c#nitro+chiral#bl#blvn#slow damage guide#madarame#madarame kei#斑#斑目圭#COMPLETE#good end#bad end#game guide
134 notes
·
View notes
Text
Slow Damage Guide: Fujieda’s Route

The following are choices that are made to get onto Fujieda’s route and the choices you make during Fujieda’s route. These will both lead to the Bad and Good ends.
These are the choices I made, and I double checked over again for all choices possible for the maximum best playthrough.
These choices are based off the Japanese release of Slow Damage. However, I have updated the translation to fit the English release (for the names of the Districts, at least).
SPOILERS AHEAD WHICH TELL WHEN THE ENDINGS ARE! Proceed with caution if you wish to use this guide!
Before you can start Fujieda’s Route, you must have completed the following Routes: •Taku •Rei •Madarame
Once you have completed the above, to start Fujieda’s Route, click on the ball joined doll in the main menu.
Chapter 0 - Desire
Exploration #1 • Clinic >Positive • Dora-Dori Shopping Street >Positive • Special D-Zone >Negative • Kouou St >Negative • Nightlife District >Positive • Roost (Finish)
Psychology #1: Vampire •Negative •But isn’t it hard... (Words of Igarashi) •Negative •I know what you’re looking for (Words of Taku) •I know (Words of Junko) •Positive •The word ‘Vampire’... (Words of Sasaki) •I also want to drink... (Words of Rei) [CHOOSE THIS FOR FUJIEDA’S ROUTE]* •Positive •Positive •Say nothing •Thirsty
*If you do not choose this answer, you will continue onto Chapter 1: Ikuina.
The Final Chapter
Exploration #1 •Murase Clinic •Doraku-dori Shopping Street >Negative •Special D-Zone •Kouou St >Positive •Nightlife District •Special C-Zone [GO HERE; SPECIAL DIALOGUE] •Special B-Zone •Ruined City •Roost (Finish)
Exploration #2 •Towa’s Room •Murase Clinic •Coffee Shop >Negative •Special D-Zone >Positive •Ahaji-Cho •Takaguichi Clinic >Positive •Special C-Zone •Special B-Zone •Ruined City •Kouou St (Finish)
Exploration #3 •Murase Clinic >Negative •Coffee Shop [GO HERE; SPECIAL DIALOGUE] •Doraku-dori •Special D-Zone •Kouou St •Candy Store >Positive •Special C-Zone >Negative •Special B-Zone •Ruined City >Negative •Towa’s Room (Finish)
Psychology #1: Towa
Note: These answers have to be EXACT. Any answer other what’s listed below will result in a regular madness end. I recommend doing it once, however, to collect the CGs.
• Positive • I finally said it or Say nothing • Positive • Say nothing • Positive • Say nothing • Say nothing • Positive • Say nothing • Positive • Say nothing • Positive • Say nothing • Girl’s Photo
• Positive • Say nothing • Positive • Say nothing • Positive • Say nothing • Yuzuki Mei
Psychology #2: Sasaki [Ending Branch]
• Positive • Say nothing • Positive • Say nothing • Positive • Positive • Say nothing • Positive • Say nothing • Positive • Say nothing • Positive • Positive • Say nothing • Positive • Say nothing • Positive • Are you okay... • Say nothing • Positive
Bad End: • Are you okay... [Hourglass Crack] • Say nothing • Maya
Good End: • Say nothing • Maya • Towa*
*Note: If you choose “Maya” instead of “Towa”, you get the Bad End once again.
Congratulations! You have finished Slow Damage!
#slow damage#sd#スロウ・ダメージ#Surō Damēji#Fujieda#藤枝#Fujieda Ryo#藤枝涼#Fujieda Route#Slow damage guide#good end#bad end#COMPLETE#blvn#vn#bl#boys love#guide#game guide#Slow Damage route#nc#n+c#nitroplus#nitro chiral#nitro+chiral
121 notes
·
View notes
Text
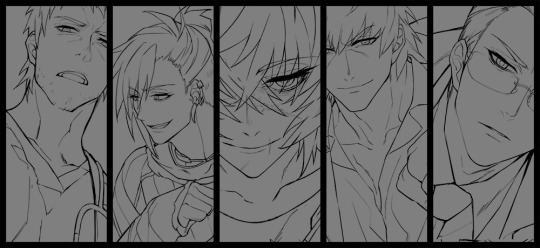
Slow Damage Calendar 2022-2023

A 2022-2023 calendar with new visuals of the Slow Damage characters is to be released!
Spoilers under the cut.
The calendar will contain new illustrations drawn by the game artist, Uiro Yamada. Illustrations depicting after-endings of each character route are to be included, along with many others!

Preorders are being accepted overseas on the Nitro+Chiral international store for the calendar! Preorders can be made until February 15th at noon (JPN time).
Nitro+Chiral Global Store Nitro+Chiral Japan Store
Dimensions of Calendar: A2(W420mm×H594mm)/7 sheets (including the cover)
Price: 2,200円 (~$22USD)
Release date: 3/25/2022
#slow damage#towa#taku#rei#madarame#fujieda#スロウ・ダメージ#スロウ#スロウダメージ#Surō Damēji#nc#n+c#nitro+#nitrochiral#nitro+chiral#bl#boys love#yaoi
65 notes
·
View notes
Text
Nitro+Chiral Fan Server: Invite Link

If you haven’t already joined the Discord server, you’re more than welcome to! We have daily conversations ranging from Nitro+Chiral content, other BL games and media, and even conversation outside of BL such as anime, manga, and video games!
We are a growing server with custom emojis and stickers, and would love to have you! If you wish to join, you may do so by clicking here.
Please note you must be 18 or older to join the server.
#nc#nitrochiral#nitro+#nitro+chiral#bl#boys love#visual novel#visual novels#yaoi#discord server#dmmd#dramatical murder#ドラマティカル マーダー#slow damage#sd#スロウ・ダメージ#Surō Damēji#tnc#togainu no chi#blood of the reprimanded dog#咎狗の血#sweet pool#スウィート プール#lamento#lamento: beyond the void
7 notes
·
View notes
Video
youtube
Translation of Taku’s dialogue from the official trailer of Slow Damage Drama CD Volume One “Taku”:
Slow Damage Drama CD Volume One. — Towa is waiting for me to be released. And I soon return to the real world of Shinokumi, Where I am faced with a clinic that remains closed. I… I can’t decide whether I should reopen the clinic or not. Is this really the right thing to do? Can I… Can I be a Doctor? — The Drama CD that depicts the story of Towa with main characters after the game. First release decision.
Release date: 3/25/2022
View information on ordering here.
#slow damage#translation#sd#towa#taku#drama cd#bl#boys love#yaoi#スロウ・ダメージ#Surō Damēji#nc#n+c#nitrochiral#nitro+#nitro+chiral
15 notes
·
View notes
Text
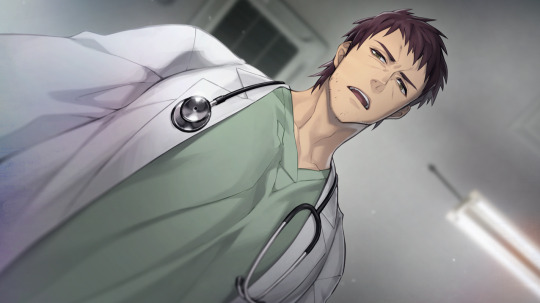
スロウ・ダメージ DramaCD Vol.1 Taku AfterStory(メガジャケ付)

Volume one of Slow Damage’s After Story Drama CDs has been announced!
Translation of the Taku's After Story summary, from AmazonJP:
Taku who was in prison is released, and reunites with Towa who was waiting for his return. However, Sakaki, leader of the Takago group, offered support for reopening the "Murase Clinic", so it seems that it wouldn't be too long before Taku returned as doctor again.
However, Taku for some reason does not wish to reopen the clinic. Because of his unsuccessful attitude, Towa asks Taku and he runs away after they have a quarrel. Later, there is a report that a person had collapsed... What is Taku's decision?
A new song “ predawn” by THE ANDS will be included on CD 2.
You can preorder VOL.1 of The Slow Damage After Story Drama CD from the following:
Nitro+Chiral Store Amazon Japan Stellaworth AmiAmi Animate DLSite
Each website has a preorder bonus while supplies last. View preorder bonuses here.
Release date: 3/25/2022
#nitrochiral#nitro+#nitro+chiral#bl#slow damage#taku#towa#drama cd#translation#sd#スロウ・ダメージ#Surō Damēji#boys love#yaoi
22 notes
·
View notes