
Don't wanna be here? Send us removal request.
Statistics
We looked inside some of the posts by pandemicperipatetics and here's what we found interesting.
Average Info
Notes Per Post
4
Likes Per Post
4
Reblog Per Post
0
Reply Per Post
0
Time Between Posts
1 month
Number of Posts By Type
Text
17
Last Seen Tumblr Blogs


Fun Fact
The Tumblr app for Google Glass was released on May 16, 2013.
Text
Italy III: Dolomites Trek (2/2)
Continued from the previous post on the Dolomites Trek...
Day 4: We hiked most of the popular Sassolungo Circuit Hike, starting at Rifugio Valentini and ending at Rifugio Sasso Piatto. Sassolungo (“long stone”) is a notable mountain that is large enough to make a day out of circumnavigating it.
Sassolungo
The beginning was mostly flat and downhill through a beautiful area that looked like a botanical garden.
Mountain views near the "botanical garden"
After an ~hour we hit a Mercedes-sponsored rifugio that had very luxurious bathrooms (uplighting, etc.).
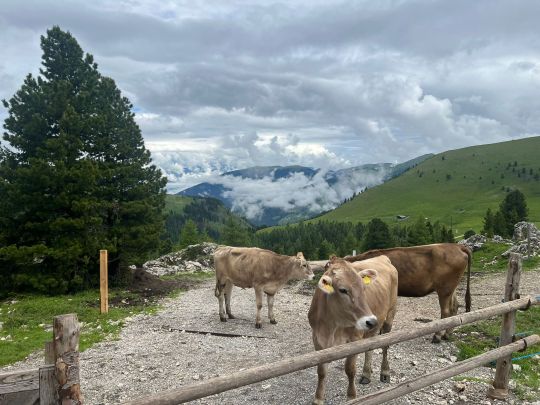
Cows by the Mercedes rifugio
From there we walked uphill for a couple hours, mostly along the side of the cliff with stunning views of the valley below, and then stopped for lunch at Rifugio Vicenza along the way (the gnocchi was great).
Walking uphill along Sassolungo

Valley views
View of Rifugio Vicenza
After lunch we continued for a couple hours to Rifugio Sasso Piatto – I don’t really remember this part of the hike. This was one of our easier and shorter hiking days, and given the popularity and comparative ease of this trail, we encountered many more tourists, and more Americans than any other day of the trek.

More walking
Rifugio Sasso Piatto was the most crowded rifugio we stayed at, and we had to stay in a shared dormitory (bunk beds with 10 spots, though luckily 4 spots remained empty) because the private rooms were booked out by the time we reserved our trek ~6 weeks in advance. The shared dormitory was not quite as bad as expected (Nyquil + Loop earplugs + eye mask did the trick) and the food was pretty good.
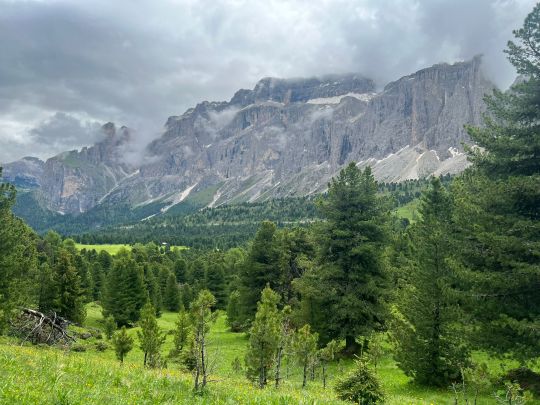
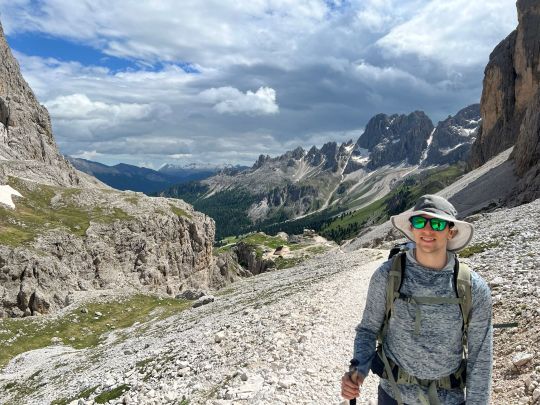
Day 5: This was the most epic day, and the most difficult. Pretty much every part of this ~9-hour day was surreally beautiful, starting with the first couple of hours through Alpine meadows dotted with sheep, cows, and horses. There were a few times we had to walk right by cows and bulls that were not fenced in and seemed skittish.
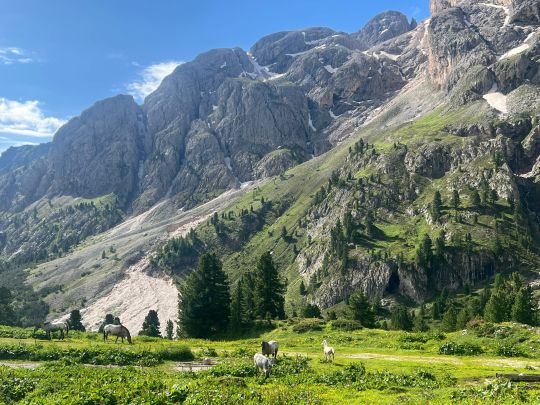
We saw a horse scaring off a skittish bull
Sassolungo
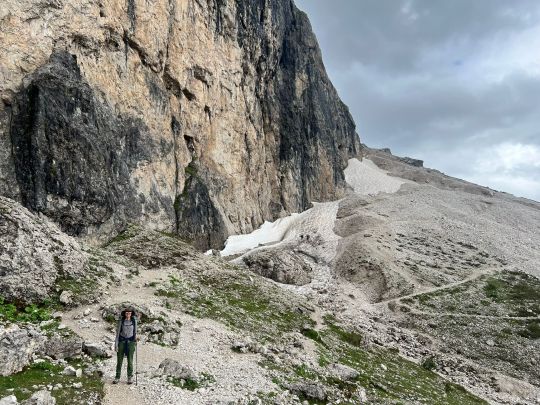
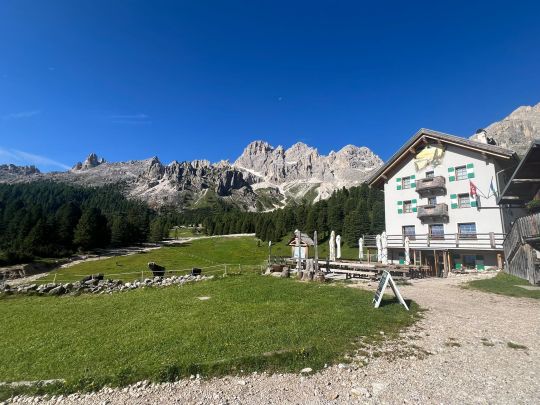
About 4 hours in, by the time we reached Rifugio Antermoia, the landscape had really changed.
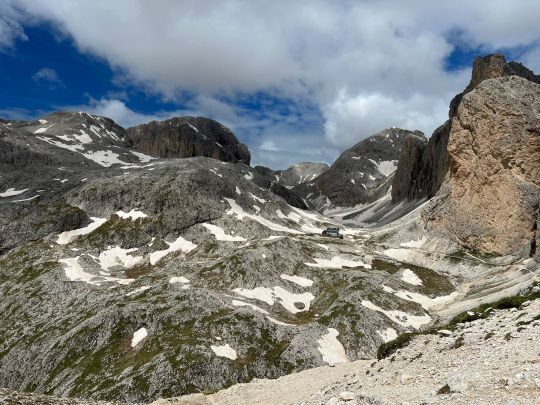
Rifugio Antermoia
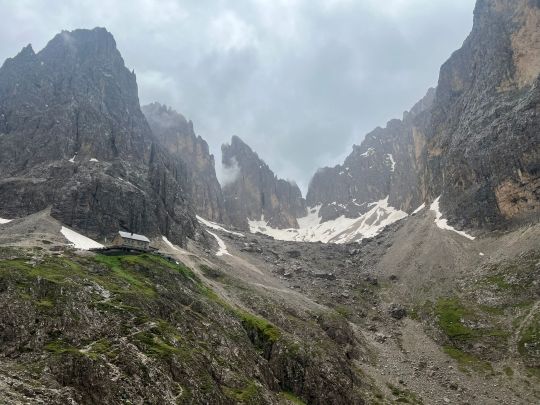
We walked around an insane glacial lake (strong Banff teahouse hike vibes) to encounter Passo d’Antermoia – a pass that our trek organizer had warned us might require us to walk in snow up to our knees, and that stood between us and the recommended lunch spot, Rifugio Passo Principe.
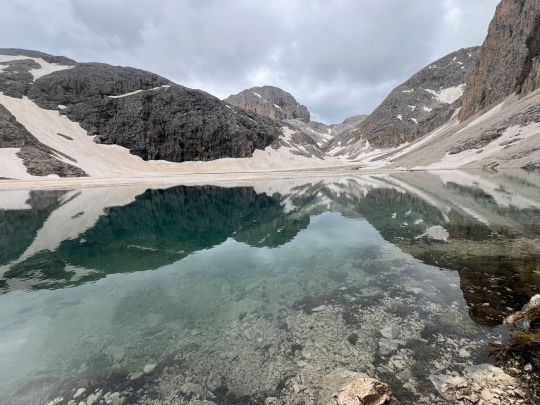
The glacial lake
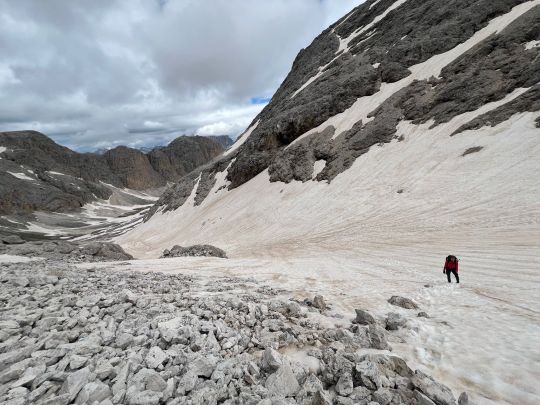
Trying to make it up Passo D'Antermoia
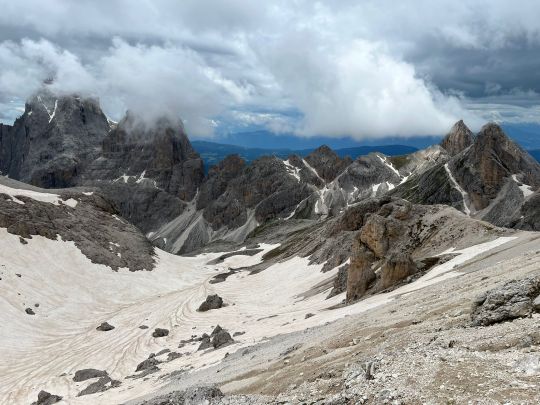
View from the top of the pass
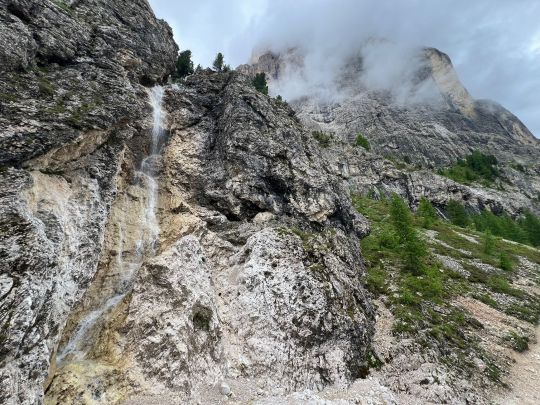
Despite the organizer’s caveat, I had not expected that we’d effectively be walking up a ski slope so steep that it would have been difficult without the snow (particularly with a pack weighing 20-25% of my body weight), let alone now slipping and sliding down it in the wintery conditions, even with crampons. This Sisphyean hike was the first time in the trek that I was not sure I would make it to the next rifugio – the second time being when we eventually reached the top and saw that we had to descend just as steep a downhill, which we found even harder and resulted in many slips and falls (thankfully cushioned by lots of snow).
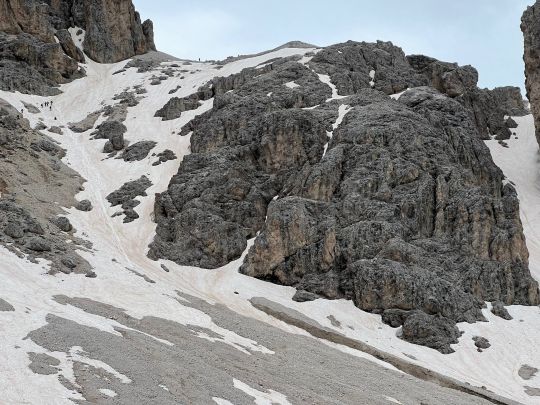
Some of the perilous downhill (this photo does not do it justice)
We saw almost no one else on this path, though we did spot a few via ferrata hikers who actually donned their helmets for this descent. It took us 2x the budgeted amount of time to complete, and when we finally, miraculously reached Rifugio Passo Principe, we were more than a little disappointed to find that it was closed and under construction. So much for lunch after 7 hours of intense hiking!
Heading down from Passo Principe
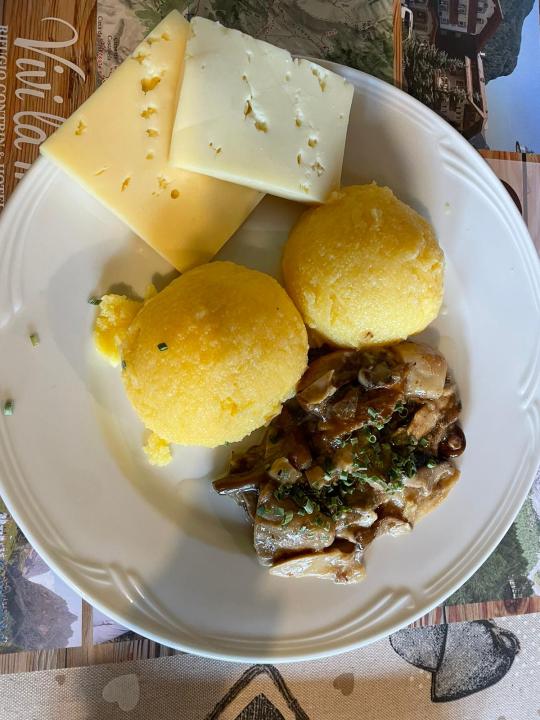
Luckily, after continuing along down a scenic valley surrounded by mountains for about 40 minutes, we encountered Rifugio Vajolet, which had the first and only vegan food menu we found in the Dolomites. The food was a delight, and couldn’t have been a more timely reward for us.
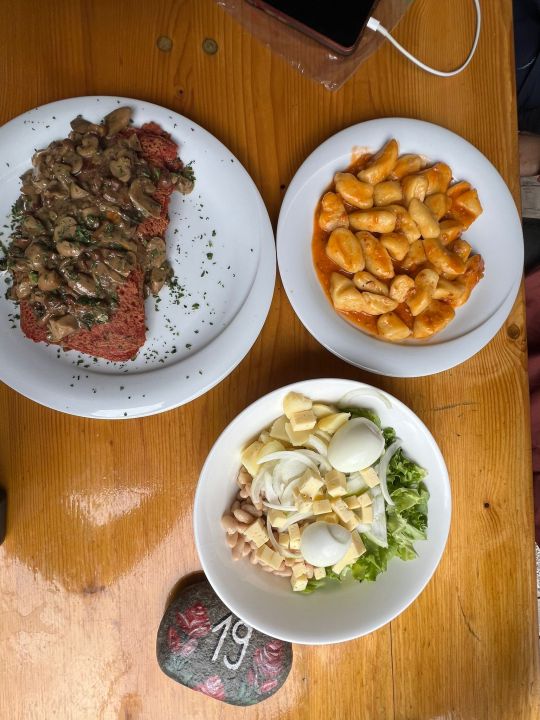
Rifugio Vajolet's vegan crepe with mushrooms, gnocchi with soy ragu, and salad with eggs, beans, and cheese really hit the spot.
After this, we had just another ~40 minutes descent to Rifugio Stella Alpina, where the very sweet proprietress welcomed us and just 1 other guest for the night. The rifugio was comfortable and clean, with some of the more basic food we ate. It was quite an experience waking up to cows mooing and jangling their bells.
Rifugio Stella Alpina
Day 6: Sadly, our last day’s hiking itinerary was almost entirely disrupted due to snow. We only hiked about an hour from Stella Alpina over to the town of Ciampedie, where we took a quick cable car down to Vigo di Fassa, the largest town we had seen all week.
From there we took a ~30 minute bus ride down to Lago di Carezza, a very clear, highly Instagrammable lake with a flat ~25 minute walk around its circumference. Both the bus and the lake were very crowded with tourists. It was nice, but in my opinion, didn’t hold a candle to any of the hikes we did.
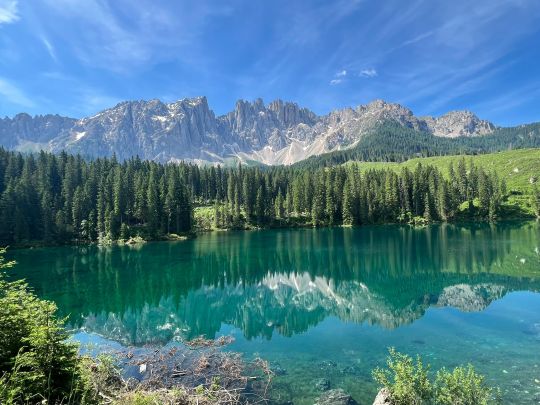
Lago di Carezza
We ended our trip with a bus ride up to Castel Latemar, the basic hotel that we were put up in for our first and last nights. We grabbed a pretty good lunch nearby at Hennenstal Restaurant, whose menu thankfully offered a few non-Tyrolean food options (pizza! Grilled vegetables!) – refreshing after a week of eating the same few things every day.
Food
We were expecting to eat delicious Italian food every day in the Dolomites. In reality, we mostly ate Tyrolean food, which we came to learn is quite different. As vegetarians, our options were limited to a few common dishes that were available at pretty much every hut:
Fried eggs with slices of baked potato
Polenta with sauteed mushrooms and thick slices of swiss cheese
A very basic “mixed salad” of lettuce, raddichio, shredded carrots, corn (and a few lucky times, beans). Two of our rifugios also had a salad bar at dinner, which thankfully had more ingredient options.
Canederli – a traditional dumpling-like dish that was delicious and also the most buttery thing I have ever eaten in my entire life
Pasta (sometimes) – the pro tip here is to always get the types of pasta that are made fresh (e.g., tagliatelle, gnocchi, ravioli) and not those that are dry pastas (e.g., spaghetti, penne). The fresh pastas we ate in the Dolomites were generally pretty good, if typically not as good as Italian food we’ve had in other parts of Italy, whereas the dry pastas tasted like American “Italian” food.

The spaghetti at Rifugio Contrin was a bit like a kids' meal at an Olive Garden...
Cheese plate – A couple of places had a “cheese plate” but this really only consisted of various cheeses and maybe a jam, without the expected fruit or nuts we’re accustomed to in the U.S.
Desserts: Tiramisu, apple strudel, ice cream – though we usually skipped these and asked for fruit. Tyrol is known for its apples, and Rifugio Dolomia served us really delicious apples for dessert.
Breakfast: We always had the same thing – bread + cheese + boiled egg (except for Rifugio Contrin, which didn’t even offer eggs) and yogurt + muesli (only Rifugio Valentini offered any fresh fruit at breakfast). There were usually also various pastries and jams available.
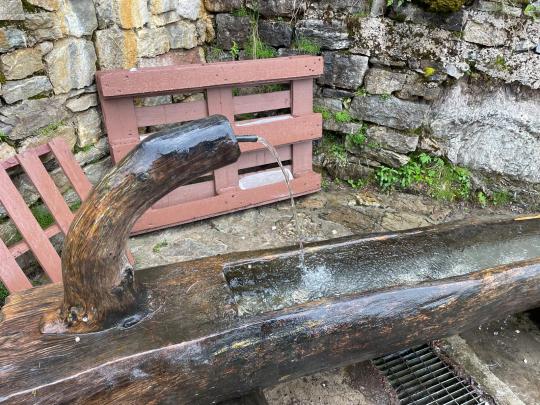
A note on water: Some of the rifugios had potable water and others didn't. Sometimes they had these structures for refilling water bottles and bladders, but the water from these spouts was sometimes not potable -- always worth asking first!
We were very glad to have packed lots of protein-heavy snacks for the trek (protein powder, nuts, edamame, vegan jerky, protein bars). By the end, we were relieved to return to a greater variety of food options and availability of fresh fruit and vegetables (yay fiber!).
Overall, the Dolomites trek was one of the coolest ways I’ve ever spent a week. It made me a bit more confident in my backpacking abilities, and it was also humbling to encounter many incredibly fit hikers (Europeans set a high bar!). It was helpful having the trip organized by a knowledgeable operator and traversing less crowded areas than many of the standard Dolomites day hikes. I’d gladly go back to the Dolomites – they are vast and there are so many other parts to explore!
0 notes
Text
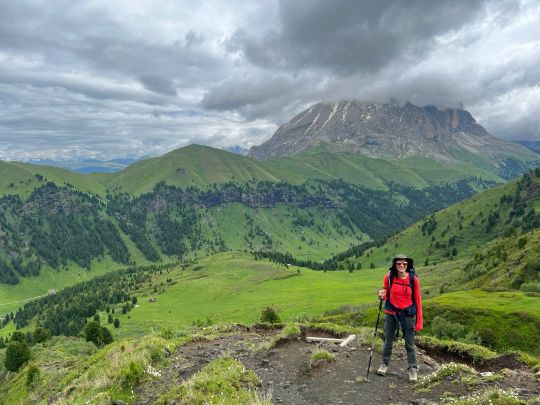
Italy II: A Week Hiking the Dolomites (1/2)

View from Lago Fedaia at sunset
Our 6 day / 7 night “hut to hut” trek in the Dolomites was maybe the most epic hike I’ve done. We hiked 12-18 km / 2-3k feet of elevation per day with our hiking packs containing clothes, water, snacks, toiletries, gear, etc. – it was mostly manageable, occasionally easy, and at times quite difficult. The views were phenomenal and varied, reminding us of parts of some of our favorite hikes (the tea plantations of Munnar, glacial lakes of Banff and Glacier National Park, meadows of the Swiss Alps and parts of New Zealand, etc.).
I say “hut to hut” because the beautiful refugios we stayed in hardly qualify as huts – they were as nice as and probably cleaner than the U.S. national park hotels we’ve stayed in (Grand Canyon, Glacier), with hearty meals, friendlier owners/staff, and much lower prices. Many of them appeared to be family-run. We were pleasantly surprised by how comfortable the accommodations were relative to our low expectations.

View from the hike between Rifugio Sasso Piatto and Rifugio Antermoia (Day 5)
Logistics:
We booked the trip with MONT Trekking, which set our route and booked our lodging for us. This meant we basically did 0 planning, besides booking our travel to the Dolomites and buying the gear on MONT Trekking’s packing list.
For 5 of the nights we stayed in refugios (some had shared bathrooms and one was in a shared dorm) and for the 2 nights at the start and end of the trip we were in a simple hotel accessible by bus.
Since we went right at the beginning of the hiking season in the Dolomites (late June), some of our itinerary needed to be changed to avoid trails that were still impassable due to snow. It was helpful to have MONT Trekking’s guidance for this, and they were available 24/7 via WhatsApp to answer any questions. There was occasional cell service along the hike and at refugios, and some refugios had wifi.
Itinerary:
We hiked part of the Alta Via 2 route of the Dolomites. We started by the town of Karersee/Carezza (German/Italian) in South Tyrol, an autonomous province that was gifted to Italy by the Allies at the end of WWI. Although Tyrol is technically part of Italy, it sometimes felt more German than Italian, and both are official languages of the province.
Day 1: We took a bus from our hotel near Karersee to a place called Sauch, the starting point of the hike. We hiked for ~1/2 day, with some challenging uphills and downhills, to the incredibly scenic Rifugio Contrin. (Note: This rifugio can also be reached via cable car + a walk from the nearby town of Alba). The rifugio was comfortable, but a cautionary word, the food was the worst of our trip.

That time I hiked with a ninja...
Rifugio Contrin

Small side hike from Refugio Contrin

Our room at the refugio
Day 2: We hiked steeply uphill through a stunning valley from Rifugio Contrin via Rifugio San Nicolo to the town of Ciampie, where we stopped for a basic lunch. We then had a fun cable car ride down to the town of Alba, where we picked up another trail that was at first deceptively flat, and eventually took us very steeply, almost impossibly uphill, until we reached Rifugio Dolomia along Lago Fedaia. The lake was gorgeous at sunset, and this was my favorite rifugio – the people working there were so nice, the room had a private bathroom, there was a washer & dryer to clean our clothes, and unlike many places, they offered a nice assortment of fresh fruit & vegetables at meals.

En route to Rifugio Dolomia

Bulls hanging out near Alba

View of Rifugio Dolomia at sunset

Lago Fedaia at sunset
Day 3: From Rifugio Dolomia we hiked steeply, painfully uphill (Roy’s Peak vibes) until we reached a flat, crowded trail along the side of a cliff with stellar views (reminiscent of the Skyline Trail at Glacier). From there we descended steeply to Passo Pordoi, where we ate a decent lunch at Rifugio Maria. There was the option to take a cable car up to an even more scenic viewpoint, but it was a bit cloudy so we skipped this. We then took a short bus ride (due to snow blocking our original route) towards the town of Canazei, getting off along the way to hike a reasonably steady, unmemorable uphill to Passo Sella, where we stayed at Rifugio Valentini.

View of Lago Fedaia after our long ascent

Matchy match

Last long uphill to Passo Sella
The food at this rifugio was pretty good – the presentation was a bit fancy, and we were grateful to have fresh fruit for dessert given its rarity on our trip. That said, the staff were somewhat less friendly than elsewhere and it was our first time in a rifugio that didn’t offer any potable water other than the 1L glass bottles for 4 Euros. We instead stopped at the nice hotel a 10-min walk from our rifugio, where a kind staff member at the restaurant refilled our hiking water bladders with filtered water on tap.
Days 4-6 continued in the next post...
1 note
·
View note
Text
Italy Part I: 24 Hours in Milan
Italy is one of my favorite countries to visit, and this trip reminded me of why. It’s so beautiful, people are nice, it’s easy to navigate, the food is delicious (if not exactly healthy)…
We started our trip with a brief stay in Milan (this post) and then continued on to the Dolomites for a week-long trek (next post).
Days 1-2: 24 Hours in Milan
We only spent 24 hours in Milan, about half of which was spent sleeping after our redeye from NYC. We still really enjoyed our time there – we found some delicious vegetarian food, cute neighborhoods, and friendly people.
Lodging
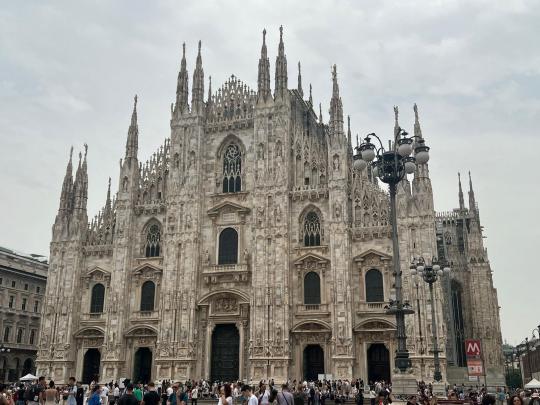
We stayed at STRAF Design Hotel (a Marriott hotel, on points) in Duomo, the most touristy neighborhood right next to the city’s famous Gothic church, the Duomo. The hotel room had one of the most unusual designs we’ve ever seen (stone walls, cave vibes) and there was a small gym. The staff were very nice and helpful. It was very conveniently located just a 2 minute walk from the Duomo subway station and lots of shopping and food.

If I returned to Milan, I’d love to stay in a somewhat quieter and cuter neighborhood, but STRAF was a good option as well.
Vegetarian Food
Hygge – Eating in Duomo seemed akin to eating in Times Square, so we tried to get a little bit out of the area to find decent food. Hygge was great for a casual brunch with a few vegetarian options – their Spanish tortilla was especially delicious and unique. Portions were relatively small, so we stopped at a grocery store afterwards, where we happily discovered that the flavored Fage Greek yogurt in Italy tastes rather like gelato.

JuiceX – In search of protein shakes after a workout, we really liked their chocolate protein smoothie. It was reasonably priced and proportionately portioned (i.e., European size vs. American size). The aesthetic had strong Barry’s vibes (we did not have time to check out Barry’s Milan while we were here). Just 2 mins’ walk from our hotel.

Luini Panzerotti – We stopped by here for a snack of baked panzerotti, which were a bit like empanadas (you can get them fried if you prefer). The tomato mozzarella one was pretty good, and the vegetable one was a bit of a disappointment. It’s mostly bread, but pretty good bread. Also 2 mins’ walk from the hotel / the Duomo church.
Cooking class – The highlight of our culinary experience was the cooking class we booked to make gnocchi, ravioli, and tiramisu. I’m not a huge fan of gnocchi or tiramisu in the U.S., but this food was absolutely phenomenal. Our takeaway was that the ingredients they use in Italy are much better – i.e., unprocessed “00 flour” instead of bleached flour, better produce (the tomatoes on the ravioli were insanely flavorful), better dairy (the mascarpone in the tiramisu was undoubtedly better than American heavy cream).

The best tiramisu we've ever had, hands down
It was somewhat difficult to find somewhere with an egg dish, which seemed to be the main vegetarian protein option (admittedly we didn’t do our usual Google Maps search for tofu since we wanted to eat at least somewhat local food). We did pass a restaurant called Eggs Milano about a 20 minute walk north of our hotel, which looked good (shakshuka, etc.) and was on a very cute street, Via Solferino (Paris left bank vibes; would totally stay here if we found a nearby hotel). I’m sure there are also some wonderful Italian food options in Milan that we just didn’t have time to explore.
For our train from Milan to Verona (en route to the Dolomites), we were short on time and couldn’t find a decent grab & go option near Duomo with protein, but the grocery store in the Milano Centrale train station was adequate (i.e., vegetarian quiches, Greek yogurt, fruit).
Activities
We didn’t do a lot – it was lovely to just relax, walk around, and window shop on cute streets like Via Solferino. We could have spent an entire day shopping for clothes, furniture, and art, there were so many stylish boutiques and galleries (and we say this having proximate access to SoHo).
Back when I visited in 2012, I did enjoy seeing the Duomo (it’s really stunning Gothic architecture, almost as impressive as the Gaudi church in Barcelona in my view), doing a guided tour to see The Last Supper (I had thought this would be boring, but it was actually very cool), and taking a boat ride on the canals (yes, Milan has canals, and there are apparently some fun bars near there though we didn’t have time to explore).

The grand shopping mall next to the Duomo -- major Timothee Chalemet Willy Wonka vibes
There are also a few art museums that could be interesting to explore, and the famous opera house, Teatro alla Scala.
Relative to many other popular parts of Italy, Milan isn’t known for being as interesting to visit, but it’s a great jumping off point for scenic areas like Verona, Lake Como, and getting out to the Dolomites.
Transit
From the airport: From Milan Malpensa airport, it was a ~30 min ride into the city center on the Malpensa Express train (found under T1 & T2, Euro 13 per person, it’s easy to buy tickets in the Trenord app or at the physical kiosk by the train). From there we could have connected to the subway, but we chose to walk ~20 mins to see the city a bit en route to our hotel. Due to traffic, this was quite a bit faster (and cheaper) than taking a taxi or Uber (no Lyft in Milan yet).
In the city: It was easy to take the subway – you can tap your credit card to get in and out, without needing to buy a subway ticket at the kiosk. Door to door, and with a short ~4 min wait for the subway, it took ~15 mins to get from Duomo to Milano Centrale, the main train station from where we left the city.
Leaving Milan by train: Milano Centrale was rather large, and it took 10-15 minutes just to walk from the subway to the train platform. We had booked seats that turned out to be on the last car of the train, and it was a 5-10 minute walk from the front to the back of the train. We had ~50 minutes to get from our hotel to the train, including a stop at the grocery store to buy lunch, and we needed all of that time. The train to Verona was very comfortable (1st class had air conditioning, plugs for charging, comfortable seats) and had clean bathrooms on board.
0 notes
Text
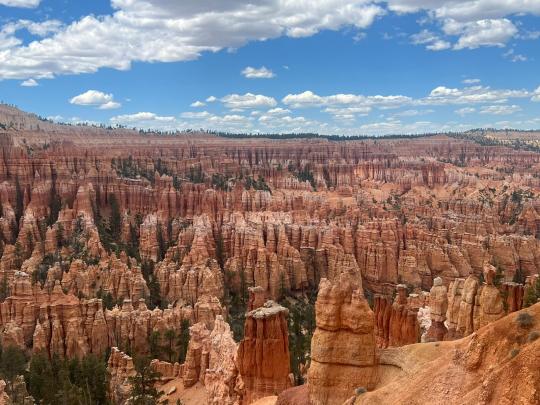
Weekend in Bryce Canyon National Park
Overview
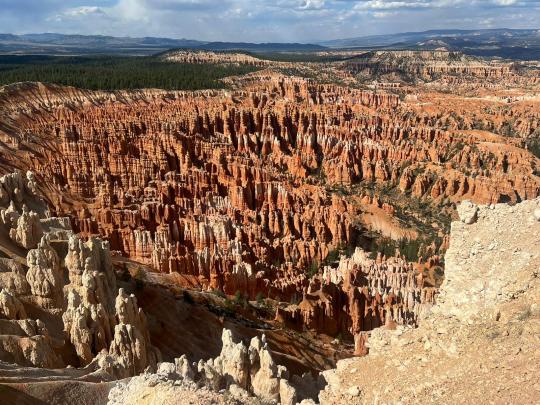
A classic view of Bryce Canyon from the Rim Trail
Bryce Canyon was epic. The main hikes descend into the canyon, which felt similar to the hikes at Grand Canyon, although the scenery looks different given Bryce’s hoodoos. I would rank this among the most stunning national parks we visited, alongside places like Grand Canyon, Grand Teton, Big Bend, and Mount Rainier. There are also some nice places to visit nearby – we enjoyed Willis Creek Slot Canyon (kind of a random hike, no official entrance or fees) and Kodachrome Basin State Park (although hiking there in the baking sun at mid-day was tough).
More classic views of the national park
We visited in mid-May, and it was already very hot and sunny during the daytime, though still cold at night. I think going earlier in the season would be more pleasant for hiking (though not too early, given potentially icy conditions/road closures). We booked our trip about ~6 weeks ahead of time and all of the decent-seeming hotels and nearby campgrounds were fully booked out, so we glamped at Under Canvas, which was totally fine (unique and luxurious in some ways and a downgrade from a regular hotel in others). That said, the park didn’t feel very crowded – despite getting a late start (~10am arrival), there wasn’t much of a line to get in, which we observed even around noon (when we accidentally exited the park), and we didn’t have difficulty finding parking throughout the day.
Bryce Canyon Hikes
We spent Friday visiting the national park. Bryce has quite a few options for hikes, but the big ones that caught our attention were the Queen’s Head/Navajo Loop Trail (most popular hike in the park), Peekaboo Trail (much less crowded and very nice), the Fairyland Trail (8 miles, we wanted to try it out but didn’t have time), and the Rim Trail (like Grand Canyon’s Rim Trail, this one is relatively flat and goes around the rim of the canyon). The Rim Trail connects several pretty lookout points such as Sunrise Point, Sunset Point, Bryce Point, and Inspiration Point. Most of these lookout points also have hikes that start from them.
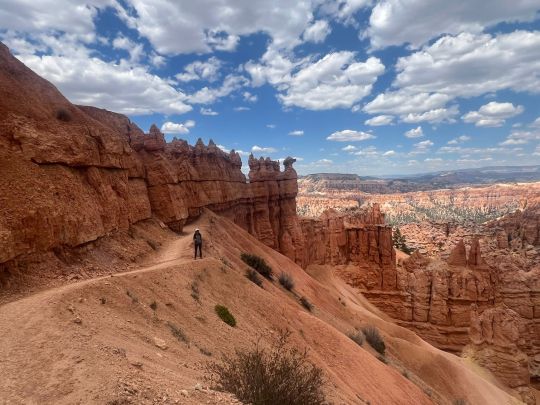
One of the trails. Probably Peekaboo given how empty it is!
For Queen’s Head/Navajo Loop, there are 2 ways to do the Navajo Loop portion – the “Wall Street” side or the “Two Bridges” side. We ended up trying both and thought the Wall Street section was much more interesting.

Navajo Loop - Two Bridges option (can you see the two rock "bridges"?)

Navajo Loop - Wall Street option. The narrowness was very cool.
Other Nearby Hikes
We spent Saturday until mid-afternoon doing some nearby hikes, and then made the ~4 hour drive back to Vegas.
Willis Creek Slot Canyon was really cool. It’s about a 30 minute drive from Bryce Canyon and the walk is mostly flat with a shallow stream running through it. It seems like a fantastic option for people with kids or dogs.
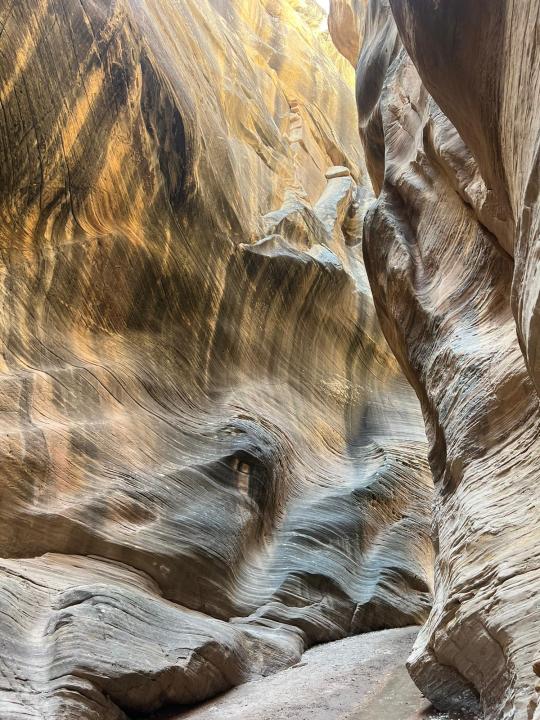
We arrived on Saturday at 9am and departed around 11am, and there was plenty of parking at both times. The last bit of the drive there was a little bumpy, but nowhere near a bad as we expected based on reading reviews. There is no fee to enter.

We managed to keep our feet mostly dry!
Kodachrome Basin State Park is also a ~30 min drive from Bryce Canyon and has several hikes, of which we tried two. We liked the relatively easy Panorama Trail (3 mile loop); it was well worth adding on the very scenic Panorama Point out-and-back (1 mile total). However, there was no shade at all and the desert sun was baking hot, even though the forecast said it was only 70 degrees out. The Grand Parade Trail, which was just across the street from the Panorama Trail and shares a parking lot, was nice but would not make the cut for me in this type of weather. The state park has a $10 daily fee per vehicle (credit cards accepted but it might be good to bring cash if you can, their card reader was temporarily down when we arrived).

View from the Panorama Trail
Food
Like most U.S. national parks, the vegetarian food options in the area were pretty sad. Subway is the best bet, and since they didn’t open on time when we were there, we picked up some basic takeaway breakfast items (yogurt, boiled eggs, a bagel) at Bryce Canyon Coffee Co. one of the days. The national park lodge seemed to have okay options (the black bean burger and quinoa salad were not terrible for lunch) and Under Canvas was also okay, though overpriced/small portions/light on vegetarian protein and potentially only available to guests (not sure about this). The best food we ate on this trip was Mixed Greens in St. George, Utah, an unexpectedly delicious and reasonably priced salads and bowls place in a strip mall about halfway between Las Vegas and Bryce Canyon. We were also happy to eat at Urth Caffe inside The Wynn/Encore in Las Vegas when we returned our Hertz car rental there.
Lodging
We stayed at Under Canvas, a luxury glamping site located a ~20 minute drive from the park entrance. It was in a very pretty area with cozy outdoor seating and many amenities (breakfast and dinner available for purchase onsite, hammocks, yoga mats, games, campfires and smores kits, etc.). The glamping tents had comfortable beds and sufficiently warm bedding for the cold nights, a shower with hot water, a sink, a normal toilet, a contraption for making a fire if desired, and Anker battery packs for charging devices overnight. There was no wifi or electricity (i.e., it wasn’t possible to use a hairdryer or laptop), and cell signal didn’t work for us onsite (so be sure to download offline maps for the park in advance!). The staff were all very nice and helpful. Apparently this is just the second season this site is open, and it generally felt pretty new and clean.
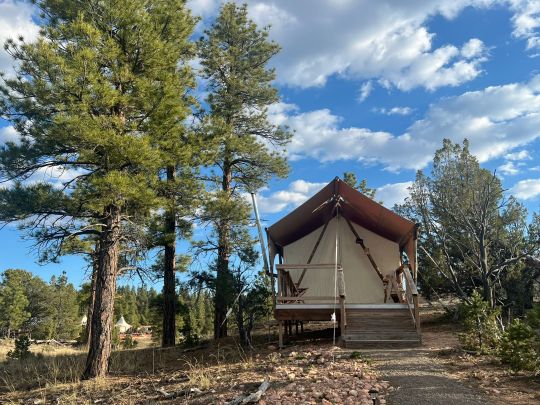
Glamping tent
Under Canvas was a unique experience, but given how expensive it was, I’d choose to stay at a regular hotel if I had the choice – it’s just a bit more convenient in terms of driving time to get to the park, electricity, staying warm overnight, etc., and likely at least a little bit less expensive. That said, if glamping were the only option, I’d totally stay here again – there were no issues and the chance to visit Bryce Canyon made it absolutely worth it.

View from the outdoor patio at Under Canvas
0 notes
Text
Living in Park Slope, Brooklyn
We lived in Park Slope for ~18 months and really enjoyed the neighborhood for its peaceful, quiet vibes. Unlike other places we've lived in NYC, the streets are typically uncrowded and quiet with rarely any shouting outside our home and minimal honking from cars, and people generally seem less rushed. The close proximity to Prospect Park - designed by Frederick Law Olmstead, like Central Park - was definitely a perk, as was having relatively easy access to Manhattan via the subway. We also liked how large, affordable, and relatively not crowded our gym was.
On the flip side, the commute time to Manhattan was long (45 mins at best to midtown, but best to budget an hour for delays), and with longer subway wait times on weekends, we often stayed in the neighborhood vs. venturing into "the city." Most of the housing stock is very old brownstones (ours is from the 1890s), which comes with maintenance issues, lack of elevators, and some level of decrepitude (this was a HUGE problem in the duplex we rented, which had constant maintenance issues and vermin and a very checked-out landlady). And the vegetarian food options are rather depressing -- the neighborhood is overflowing with pasta/pizza joints (yay carbs, but no veg protein), sugary dessert shops, a seemingly disproportionate amount of non-A grade restaurants (per the NYC food safety rating system), and generally mediocre tasting food.
Our time in the neighborhood was split across a 1-bedroom sublet (4th floor walkup for ~3 months) and a 2-bedroom duplex brownstone (garden & parlor levels for ~15 months). Both were based in "South Slope", the even quieter subsection of the neighborhood that is slightly deeper into Brooklyn than "North Slope" (which is more central and closer to express train lines to Manhattan such as the Q and 2/3).
Our Favorite (Vegetarian) Food
While the healthy vegetarian options were not plentiful and a lot of the restaurants are aggressively mediocre compared to Manhattan fare, there were still some places we really enjoyed eating in the neighborhood. These were some of our favorite sit-down spots in/near South Slope, with the caveat that none of them had great veg protein so we only at there as exceptions to our regular routine:
Lore - One of the most upscale places in the neighborhood, and known for its Indian fusion and other "culturally diverse" dishes. For us, this was the best Indian food in the neighborhood (not that there was much competition) and generally really delicious. A reservation is typically needed for dinner, but walk-ins seem possible for brunch/lunch. Closed Mondays.
Pasta Louise - While I generally avoid pasta places for dinner given the heavy carb/low vegetarian protein ratio and tendency towards mediocrity, Pasta Louise's food is actually delicious. We loved the farro salad and many of the vegetarian pastas. The vibe is also very friendly and wholesome, and there are often families with kids. Wait times are generally long if you don't have a reservation.
Haenyo - Korean food. There's only one vegetarian entree - the tofu bibimbap - but it's excellent! Good to make a reservation here, though we were able to walk in on a weekend for dinner once (with a ~20 min wait).
Crosta - More Italian food. While there's no vegetarian protein to be found here, I enjoyed everything I tried, especially the vegetarian lasagna and also the salad and pizzas.
Krupa Grocery - Also in Windsor Terrace, the fake (vegetarian) chicken dish and gnocchi are pretty tasty here. This restaurant doesn't hold a candle to our favorites in Manhattan, but for days that we didn't want to leave the neighborhood, it was a good option for us. We really liked the cute backyard full of picnic tables and string lights.
Bonus: We didn't often venture into North Slope, but we did really enjoyed eating at Fausto there. Not a lot of vegetarian protein but the food was delicious.
We sometimes found better vegetarian protein options at the fast casual places in the neighborhood, including our favorites:
Two Boots - This is the best vegan pizza we know. We love the V for Vegan slice. It's not high in protein, but a delicious treat. Park Slope lifers probably hate it because it's a chain, but hey, it's good! For another pizza place, Norm's Pizza was also pretty good (though not vegan) - I liked their signature vodka sauce pizza.
Taim - Also a chain, and a great spot for make-your-own Mediterranean bowls. Better than Cava, in my opinion (not that there's a Cava in the neighborhood). The falafel comes with some protein and you can also add boiled eggs for some more.
Just Salad - Another chain. Because sadly Park Slope doesn't have many healthy vegetarian options that aren't chains. The salads here are actually quite delicious and you can add tofu to any of them, so this is obviously a winner for us.
Electric Beets - Small business with a bunch of all-vegetarian (vegan?) takeaway foods such as burritos with tofu, vegetarian lasagna, noodles, etc. The food was generally pretty good and we really liked that they had vegetarian protein in several dishes. The owner is also very friendly.
Hanco's - Vietnamese food. The tofu banh me is pretty good, as are the glass noodles with tofu. Think they also do have a few locations in NYC, though I don't really think of it as a chain.
Syko - Syrian/Korean fusion in neighboring Windsor Terrace. Featured in The New Yorker while we lived in the area. We liked the Fatboy, a massive scallion pancake sandwich that left us both with a food hangover after sharing one between us. Unfortunately, we didn't see this on the menu recently.
Sandwich Girl Cafe - We liked the breakfast burrito. Not the best breakfast burrito we've ever had, but definitely the best we've had in Park Slope.
Candidly, there were lots of places we tried in the neighborhood that were very disappointing in terms of the food taste. These included places that people love to love, like Miriam (Mediterranean food) and Masalawala (very spicy Indian food), and places that we'd never heard of but popped in to try. There were some places that were decent but not great, especially relative to their high prices, like Couleur Cafe. And there were places where the menus looked so unappealing for vegetarians that we never bothered to try them. So once we discovered the places we liked, we largely stuck to them.
Cafes, Bakeries, Dessert
Park Slope has tons and tons of cafes, bakeries, and dessert shops. It makes for a more European vibe. Some of my favorites were Culture (for frozen yogurt in the summertime, and yes it's a chain), Variety Coffee Roasters (good chai latte, has quite a lot of seating although often full, and you guessed it...a chain), Muse Cafe (mediocre food/drink tbh, but plenty of seating and always seemed to have seats available), and Techne Cafe (delicious croissants and drinks). The area is also known for Winner, a bakery that releases specific types of breads/baked goods at certain hours throughout the day (and attracts long lines for them). Given I'm not big on carbs this wasn't a favorite for me, and their challah was pretty mediocre, but people love to love Winner. There are many, many more cafes and bakeries in the neighborhood and I'm sure lots of them have tasty treats.
Notably, it was hard to find a decent bagel in the area, although Bagel Pub (...a chain) was generally pretty good. Ironically, we like Brooklyn Bagel, which is located in NoHo (Manhattan), better than anything we tried in Park Slope.
Things to Do
This is the kind of neighborhood that is a great place to live in relative peace. It's less about attractions or things to do in the way that Manhattan, or even some other neighborhoods of Brooklyn, are. So when it comes to things to do, at least for DINKs like us, there was not a lot. We really enjoyed walking and jogging in Prospect Park, which felt like a true getaway from the city. Walking around Greenwood Cemetery was also quite pretty. I enjoyed some of the local bookshops, like The Ripped Bodice (women-focused bookshop, only one other location in Los Angeles) and Powerhouse on 8th (independent bookstore).
Otherwise, finding things to do was more about getting out of the neighborhood - whether to head to other parts of Brooklyn for the gorgeous Brooklyn Botanical Gardens, the (IMO, mediocre) Brooklyn Museum, or a (usually avant garde) show at the Brooklyn Academy of Music, or to head into Manhattan for world-class museums, shows, and food.
Park Slope does seem to have quite a few places that offer activities for kids - pottery studio, art classes, music classes, etc. There is also a Nitehawk Cinema right across from Prospect Park (I don't watch a lot of movies and never visited).
Ultimately, we enjoyed our time living in Park Slope and were also glad to leave the decrepitude of our housing situation and the long commute in to work.
0 notes
Text
One Week in London
I love London. This March was my second time spending a full week here, the first being in September 2019, and it was still as pretty, clean, polite, multicultural, and full of good food, museums, bookstores, and walks. More than once I found myself wondering if London is a better version of NYC...
Stay
Both times we stayed at the wonderful St. Pancras Renaissance Hotel. It's connected to St. Pancras Station, making for near-zero commute when we got off the Eurostar from Paris. St. Pancras is also connected to King's Cross Station, providing excellent access to many Tube lines (and, of course, Platform 9 3/4). The hotel is gorgeous, with a stunning lobby; the rooms are comfortable and well-equipped (not like an American hotel, where it's iffy if you'll get tea, let alone biscuits, in the room no matter the level of luxury); the gym is pretty good and even has a Peloton; and the staff are consistently friendly, attentive, and helpful. Some of the Google reviews complain that the rooms are a bit run-down, but that has not been my experience. Maybe it's not in the league of the Ritz Carltons of the world, but this is one of my all-around favorite hotels.
That said, I spent most of my days between Chelsea and Covent Garden, which are southwest of St. Pancras, and I do think staying somewhere around there would be slightly more central for a tourist trip.
Eat (Vegetarian)
I love that London has so many vegetarian-friendly food options - even more than NYC, I think - and I appreciate that many menus have Indian-inspired food items. Everything I ate was good. In order from favorite to least favorite (though I'd gladly eat at any of these again):
Dishoom - Indian food, multiple locations (we've been to the King's Cross and Covent Garden ones). It's a sit-down restaurant that leans toward fast casual and has a whimsical feel. It's not specifically vegetarian, but I think the food is excellent. We loved the grilled paneer tikka, black chickpea salad, and black dal. They don't take reservations and the waits can be long, but we went for a late (~2:30pm) lunch on a Friday and didn't have to wait.
The Barbary - North African food, located between Covent Garden and Soho. The food is Mediterranean small plates and we loved everything we tried. It's not all vegetarian, and the main shortfall is that there wasn't any meaningful vegetarian protein. But the creative style of the dishes reminded me a bit of abcV, one of our favorite restaurants in NYC. Probably best to get a reservation given there aren't many seats, but we were able to walk in on a Sunday around 6:30pm. This was the fanciest place I ate (besides a friend's private social club, which was next level), though still not super fancy.
Bubala - Mediterranean vegetarian food in SoHo. I ordered the vegetarian mezze for lunch, which was a delightful spread of 8-9 small plates that were perfect for sharing with a friend. There is also a vegan mezze option. Probably best to get a reservation, but I walked in 10 minutes after they opened and was able to get a table.
Itadaziken - Vegan Japanese food in King's Cross. In my opinion, it's hard to go wrong with vegan Japanese. They have ramen (which was good, but not as great as Ippudo) and a sizeable selection of small plates. I love that they have multiple tofu dishes - the tofu steak was great, the kara-age tofu (fried) was tasty but probably not the healthiest, and the cucumber kimchi, grilled eggplant, and sushi were all pretty good (would maybe try some other plates instead next time). The mochi was okay, I probably wouldn't get it again.
Caravan - Vegetarian-friendly European food, multiple locations. I shared several small plates with a friend and enjoyed them all. The tofu was very good but a tiny serving. I'd totally go back. We had a reservation and my friend said she had tried to walk in 3x before and couldn't get a table without a res.
Mortimer House Kitchen - "Elevated global fare" in Fitzrovia, just north of Soho. I went for breakfast and found many appealing options. It was packed, definitely make a reservation, although we lucked out and managed to get a table for 2 without a res.
Thenga Cafe - Vegetarian food, located in the YMCA near King's Cross. This was like a cafeteria for vegetarian Indian food, and the food tasted home-cooked (there is no greater compliment). I really liked the dosa wrap at lunch. It was wonderful to have an option like this while on the road for over a week -- it felt like a break from standard restaurant food.
Granger & Co - Vegetarian-friendly Australian food, multiple locations. We went for lunch and really enjoyed the chopped salad with a side of tofu. The curry with tofu was okay, but a bit too doused in curry powder. In the past I've enjoyed breakfast/brunch there.
Mildred's - Vegetarian food, multiple locations. I tried the fried rice with tofu and it was pretty good -- good portion of tofu, but I'm not a big fried rice fan and wish they had a less carb-heavy tofu option.
Koya Soho - Udon, located in Soho. I am not a huge fan of udon (though I don't dislike it either), but I thought the tofu udon was good. It's really small and seems hard to get into, but we went close to opening time and got the last 2 seats for lunch.
Museums
It's delightful and mind-boggling that London has so many phenomenal museums and most are free -- for everyone, not just for locals. In order of my favorite to least favorite (though again, I really like them all):
National Gallery - This is the national art museum, opened exactly 200 years ago in 1824 by an order of Parliament. Its goal was to showcase British art, although it includes art from across Europe (and a handful of American artworks as well). The first floor spans the 13th-15th centuries and the second floor covers everything after that until the 1920s. There is a free Museum Highlights tour on Tu-Th from 3-4pm and I really enjoyed this (thankfully, it only covers the 2nd floor...I was not sad to skip the medieval art). Entrance is free -- the website says to book online, but nobody checked my ticket.
British Museum - I didn't visit this time, but I loved this museum last time I was here and spent much more time than expected wandering through the fascinating exhibits. Also free to visit. They have some paid tours that you can book in advance.
Natural History Museum - I really like this museum. There are fascinating exhibits on dinosaurs, human evolution, and more. Entrance is free and, though I booked a ticket online, nobody checked my ticket onsite. It's a short walk from Chelsea so I enjoyed heading there afterwards.
Churchill War Rooms - This museum covers the underground area from which Churchill managed Britain's efforts in WW2. It is not free -- it was 32 pounds pp and comes with an audio guide. We spent about 90 minutes here and my favorite part was the Churchill Museum. It's an interesting museum, and if you're a Churchill aficionado it's pretty cool. Personally I enjoyed reading The Splendid and The Vile, Eric Larson's very fun book on Churchill, more than visiting this museum. It is located right by St. James Park, which is gorgeous. We enjoyed walking the 20-30 minute loop around the lake in the park.
Tate Modern - Modern art museum. I am not big on modern art but they have some really famous pieces. I visited last time I was in London and believe entrance is free.
London has many more museums which we didn't have a chance to visit -- Sir John Soane's Museum (art museum, free) and The Courtald Gallery at Somerset House came highly recommended.
Other Stuff To Do
The West End: While there's a lot of overlap between shows on Broadway and the West End, I've really enjoyed seeing Matilda and Les Miserables on the West End during my trips here. Sometimes the West End has tickets that are cheaper than anything I've seen on Broadway (like 20 pounds for the Matilda ticket in 2019) if you buy from the TKTS booth in person or the TKTS website.
Parks: Between this and our 2019 trip to London, I've enjoyed walking in Hyde Park, St. Regent's Park, St. James Park, and up to Primrose Hill for a lovely, peaceful view of London. Hampstead Heath also came highly recommended to me for its walking trails. And I recall Kew Gardens, the botanical gardens ~an hour outside the city by Tube, being really wonderful from when I visited London in high school with my family.
Bookstores: Ah, so many delightful bookstores! I was pretty basic and just went to Waterstones (Chelsea, though there are many locations) and Hatchard's (Piccadilly) and had a great time browsing. There are plenty of Instagram reels showing off other, iconic bookshops in the city.
Shopping: While London shopping has a lot of overlap with options in NYC, there are some stores that I've only found in London -- Selfridges (iconic department store in Mayfair), Fortnum & Mason (delicious teas, jams, chocolates, etc.; main store in Piccadilly), Strathberry (gorgeous handbags), Sweaty Betty (they've shut down their NYC stores in the last few years), and Varley (upscale athleisure). I'm sure I've missed a few. I also just enjoyed walking along Regent Street in Soho and King's Road in Chelsea for a lot of shops clustered nearby.
1 note
·
View note
Text
48 Hours in Paris
We really enjoyed our weekend trip to Paris at the beginning of March! It rained most of the weekend, but that may have actually added to the city’s charm. Last time I was here, in high school, was a whirlwind of crowded tourist sites and I did not enjoy the visit. We made sure this trip was the opposite – no rushing around, waiting in long lines, or visiting tourist traps. It was perfect.
Neighborhoods
Every neighborhood we visited was so cute. Coming from NYC, where it's basically just the West Village that's anywhere near as charming as Paris, I hadn't realized it was a possibility for such vast swaths of the city to be so architecturally striking, clean, and elegant.
The Left Bank
Saint Germain – We stayed on the left bank of the Seine, in the beautiful, quiet Saint Germain area. We enjoyed walking around Luxembourg Garden, window shopping at the luxury boutiques, walking to the Eiffel Tower along the interior streets (with an obligatory stop at Pierre Herme Café for the passionfruit and chocolate “Mogador” macaron), and tapas at Freddy’s, a cute neighborhood wine bar. We stayed at Hotel des Saint Peres, which was recommended by a friend and is also featured in the NYT 36 Hours in Paris article. The “cosy room” we booked was possibly even smaller than a NYC hotel room, but in a nice location that felt safe and free of any street noise. On a future visit, I’d either stay here or in one of the many larger hotels in the Vendome/Opera area, which is very central.
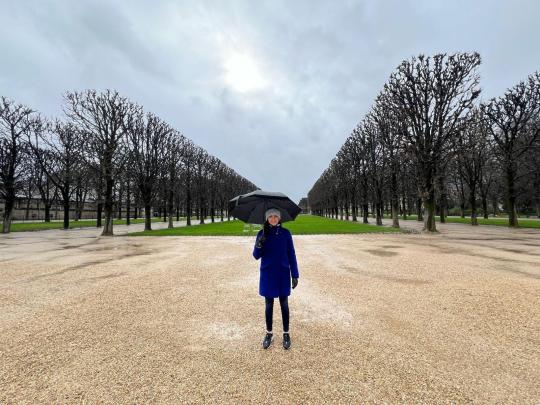
Luxembourg Garden
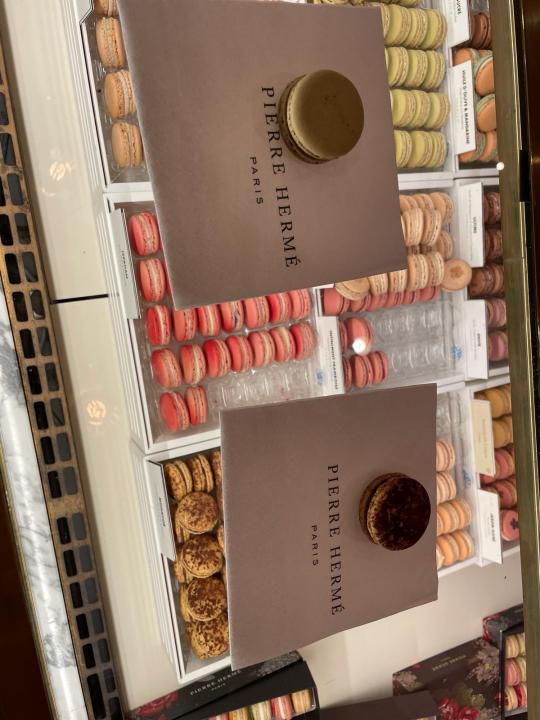
The macarons were exquisite.
Saint Michel – Also known as The Latin Quarter and adjacent to Saint Germain, this neighborhood is similarly nice. We walked around the Sorbonne and Ecole Polytechnique universities (not much to see from outside, tbh), tried visiting the famous Shakespeare & Co bookstore (the long line outside on a Sunday morning was a deterrent), and had a beautiful jog along the Seine towards the Eiffel Tower. We also saw the famous Notre Dame cathedral from outside – it’s still under major construction since the fire several years ago, but the façade looks beautiful. We tried visiting Musee d’Orsay, my Paris highlight from 2008, but it was sold out when we tried booking online same-day. We tried a neighborhood vegan spot, Le Grenier du Notre Dame, which had excellent protein options but was a bit too salty for our taste.

Notre Dame facade at dusk
The Right Bank
Vendome/Opera – From Saint Michel we crossed the Seine to the right bank, where we walked by The Louvre (though didn’t go in – I still feel burned by fighting crowds to see the underwhelming Mona Lisa last time!) and through Jardin des Tuileries. Our food highlight of the trip was lunch at Tekes, a vegetarian Israeli restaurant with delicious, unusual (and salty) takes on veggies like leeks and fennel and dishes like gnocchi and bourekas. Sadly there was basically no protein in the dishes though. We also tried a vegan chain, Wild & the Moon, which had pretty good protein options but was otherwise rather underwhelming (small portions, high prices, food was okay). It was a nice neighborhood to walk around, with a busier feel than the left bank.

Outside the Louvre during the 2 minutes of sun during the entire weekend
Tourist Highlights Walk – From Vendome we walked down the Champs Elysee past many luxury shops to the Arc de Triomph, which was impressive. S has high praise for the view from the top of the Arc, but it looked very crowded so we didn’t bother. Then we walked over to the Eiffel Tower, stopping at a random cute café on the way from the Arc de Triomph for tea and a snack. We saw a nice view of the Eiffel Tower from an elevated area across the river, then walked over and found there wasn’t much to see there (there used to be an open garden next door, but it was closed off).

Arc de Triomph

Montmartre – On Saturday afternoon we walked from Vendome up the hill to Montmartre, stopping at Boulangerie Louvard for their Instagram-viral cookie croissant. Although there was a line winding outside the shop, it moved quickly: the wait was <10 minutes and well worth it. It tasted like a warm cookie from Levain Bakery melted onto a Parisian croissant. Such a treat. In Montmarte we stopped at the Dali Museum (€14 pp) for about an hour– I wasn’t previously specifically interested in Dali, but I tend to enjoy art museums focused on one person (like the Van Gogh Museum in Amsterdam, the Klimt collection at the Neue Gallery, the Andy Warhol Museum in Pittsburgh, etc.) and really liked this one as well. Then we walked further uphill to see the Sacre Couer from the outside and, near the church, a nice view of Paris. This was one of the more touristy areas we visited and some of the alleys leading up to the Sacre Couer were not very appealing in that regard; a friend recommended we avoid Montmartre after dark.

Dali Museum

Sacre Couer

Cloudy view of Paris from outside Sacre Couer
Le Marais – We made the ~hour-long walk from Montmartre to Le Marais, a hip neighborhood along the banks of the Seine. It seemed like a really nice place to walk around, and while we didn’t make any stops, I’d go back. We tried visiting L’as du Fallafel, a famous falafel stand, but it was closed on Saturday (presumably for the Jewish Sabbath).
To/From the Airport
I had a great experience flying Air France from JFK (specifically, really kind flight attendants). Getting from Charles de Gaulle into Paris city center seemed a lot faster by train than car given traffic when I got in on Friday morning, so I took the RER/B train (€11.80 pp one-way, detailed instructions here). It took about 45 minutes to get to Saint Michel (there is also sometimes an express train that I read only takes ~25 mins), and then I walked ~15 mins to the hotel.
To/From Gare du Nord
On the way out we were taking the Eurostar to London, so we took the 4 subway train (purple line) from Saint Germain to Gare du Nord (the big train station). It was very easy and took about 20 minutes door to door. It took about 30 minutes to get to the Eurostar terminal and through their layers of security and passport control for the UK.
0 notes
Text
1 Week in Costa Rica
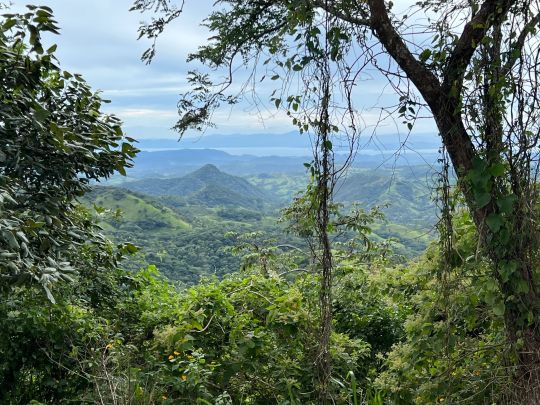
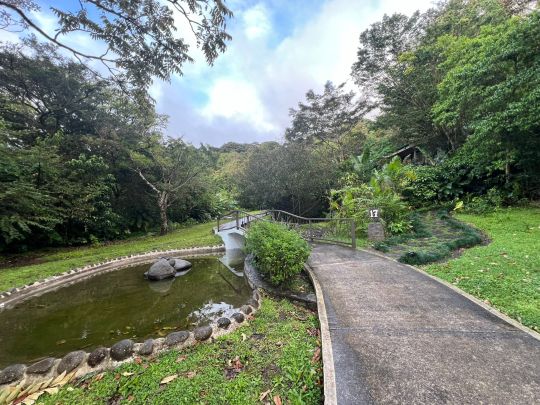
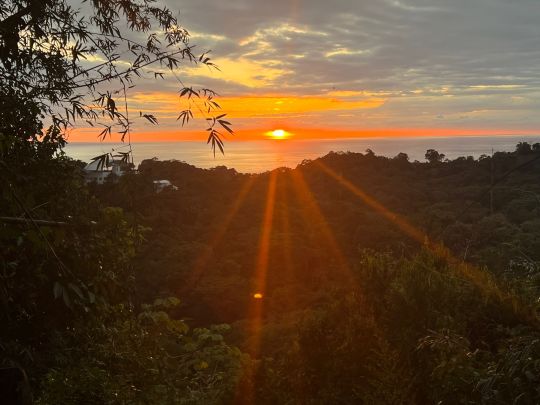
View along the drive from Monteverde to Manuel Antonio
Overview
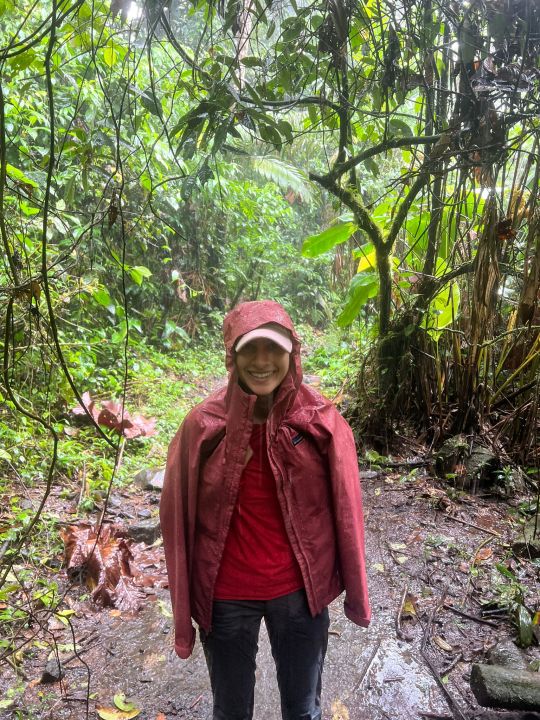
We spent about a week exploring the rain forests, hot springs, and beaches of Costa Rica. I am conflicted about whether I would recommend visiting here and/or return myself.
On the one hand, it was really beautiful (the rain forests were a particularly unique experience for me), we had a relaxing time at the resorts we stayed at, and the direct flight from NYC was convenient and quick (~4.5 hours each way). On the other hand, public infrastructure was poor (e.g., poorly maintained roads with insufficient road signs and highly disorganized traffic; smells of sewage in the national park and even in our fanciest resort at times), the social contract felt less intact than even in the U.S. (we felt like we were being scammed half the time, even in dealings with globally known brands like Hertz and Uber Eats; drivers on the roads seemed both aggressive and incompetent), and everything was comparably expensive to developed countries we’ve visited – think NYC prices for developing world infrastructure.
Personally, next time I’d probably choose a developed country with better infrastructure and similarly beautiful scenery, like Hawaii, somewhere in Europe (Switzerland and Norway are favorites), or if specifically looking for rainforest, perhaps Australia, which has one of the largest rainforests in the world (I haven’t visited that rainforest myself, but found Australia delightful to visit when I was recently in Tasmania).
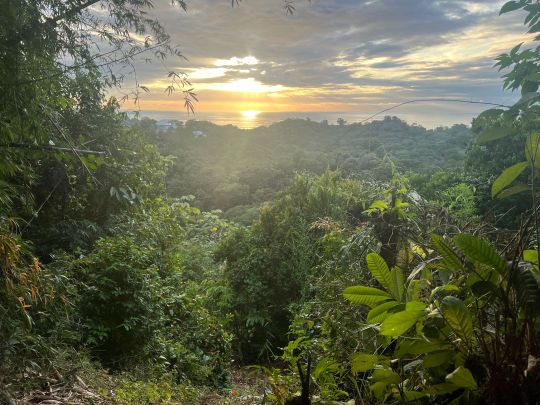
Sunset from the short hike at our hotel's reserve at Manuel Antonio
Here's our Costa Rica itinerary and some high-level commentary on it:
Direct flight from Newark to Liberia (small airport in the northwest part of Costa Rica)
Picked up a one-way car rental at Hertz – our pickup was relatively easy, but we later saw that Hertz in both Liberia and San Jose (where we dropped off the car) have awful reviews for being scammy.
Drive to Arenal (3 nights) – this was a very lazy few days, the main attractions were the Tabacon hot springs and views of Arenal Volcano.
Drive to Monteverde (2 nights) – highlights here were the resort (Senda Monteverde) and the zipline experience over the rainforest.
Drive to Manuel Antonio (2 nights) – the national park here was stunning and rife with wildlife spottings, but the surrounding area was a bit unpleasant (crowded, trafficky, lots of scammers). Seems like a must-visit place if you go to Costa Rica though.
Drive to San Jose (1 night) - We did not hear good things about San Jose and did not explore, we only went there because we were flying out of San Jose Airport back to NYC.
Direct flight from San Jose to Newark
Arenal
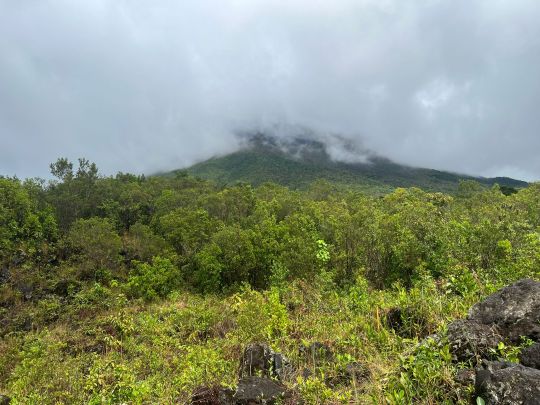
View of the Arenal Volcano from the Arenal National Park hike on a very rainy day
Arenal is an area known for the Arenal Volcano and the Tabacon Resort ($$$$) and its thermal hot springs. It was a ~2 hour drive from Liberia airport – the drive was okay, but not super special.
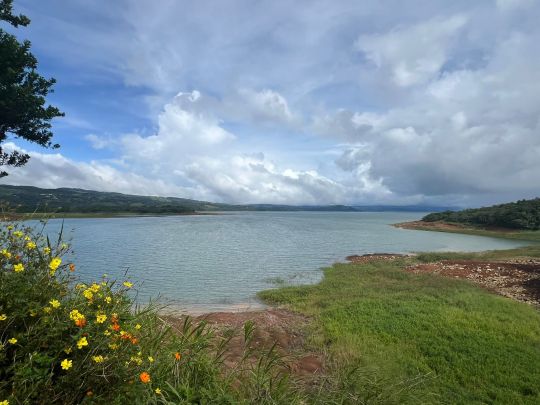
View of the lake on our drive from Liberia to Arenal
The Tabacon Resort was nice, but underwhelming relative to anywhere else we stayed. I’m not big on hot springs, but I was pretty impressed with the resort’s hot springs, which were a bit of a maze of pools within a beautiful garden. Visitors can also pay ~$60pp to access the hot springs without staying at the resort. Personally I wouldn’t go out of my way for this, but if you love hot springs it could be worth a visit.
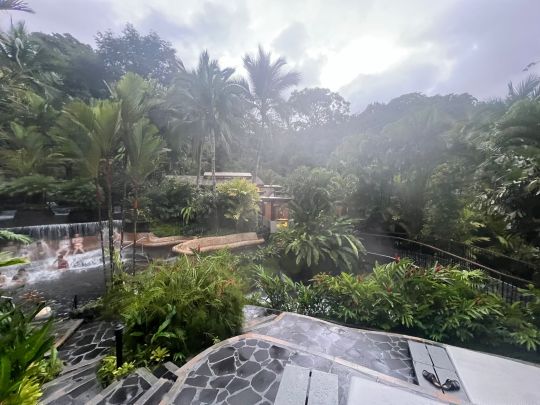
Tabacon hot springs
The activities in the area were nice, but also underwhelming compared to other parts of Costa Rica that we visited. We walked the trail in Arenal National Park (~$17pp). Yes, it was a single trail – we learned that national parks in Costa Rica are compact and expensive relative to national parks in the U.S. It poured almost the entire time we walked, making it a relatively unpleasant experience, and the scenery was very nice but also basically the same as what we saw in the other national parks we visited. The view of Arenal Volcano was fine – not Mount Rainier level amazing though.
The rainforest at Arenal National Park
Trying to hike in pouring rain and muddy trails
The vegetarian food at the hotel was limited and not amazing. We enjoyed the options at Organico Fortuna in the nearby town of La Fortuna (~20 min drive from our resort).
Though our experience was good, I probably wouldn’t return to Arenal vs. other parts of Costa Rica / the world.
Monteverde
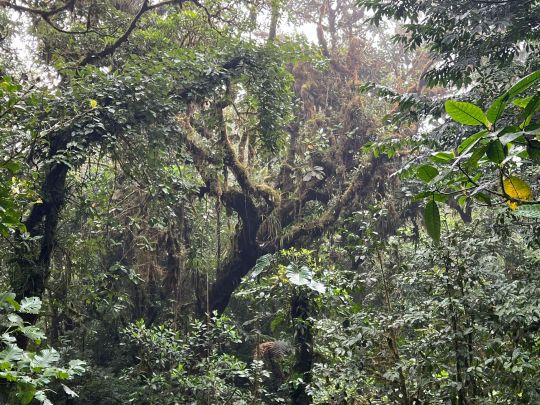
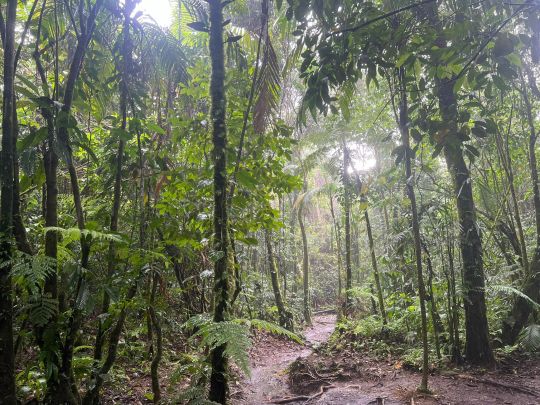
Monteverde Cloud Reserve hike
We had a great time in Monteverde. It was a ~3 hour drive from Arenal on some very potholed roads (honestly a neck pillow for the drive wouldn’t be a bad thing), but the scenery on the drive was very beautiful.
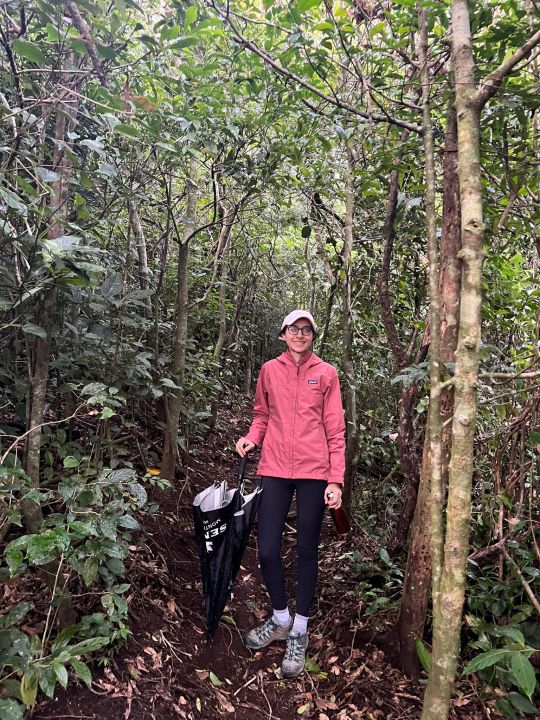
On the trail at the Aguti Reserve near our hotel in Monteverde
The area is known for the Monteverde Cloud Reserve ($25pp entry for a ~2 hour walk in the rainforest). We enjoyed the walk – it wasn’t super different from walking in Arenal National Park, but it was nice that it didn’t rain.

We also had a very nice zipline experience (~$65pp for a ~3 hour experience traversing 13 ziplines). The ziplines took us over the rain forest, which was a very cool vantage point, and the zipline guides were extremely professional and very friendly. I would definitely recommend this.

The zipline experience also included an optional "Tarzan Swing"...
We stayed at the lovely Senda Monteverde ($$$), a luxury resort with rooms with an elevated treehouse vibe. The resort offered free admission to the nearby Aguti Reserve, with lots of trails to walk through rainforest flora. They also had many nice touches such as a free minibar in the room, free activities such as yoga, medicinal tea, and cocktail making, and leaving us heated water bottles before bedtime when it got a little chilly. We had a great experience here.
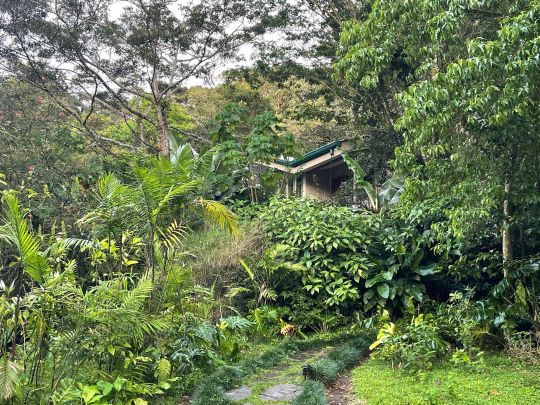
Treehouse vibes at Senda Monteverde
The resort grounds were so lush and beautifully designed
Monteverde was the chilliest place we stayed – I was glad I brought a few full sleeve shirts and a fleece jacket – and it rained on and off during our visit. It was also the least crowded area we visited, which was a treat.
Manuel Antonio National Park

On the water at Manuel Antonio
Manuel Antonio National Park was stunning (entrance is ~$17pp for 3+ hours of hikes in the rainforest and access to beautiful sandy beaches). It encompasses both rainforest and some of the bay leading into the Pacific Ocean. We saw the most wildlife at Manuel Antonio vs. any other area. We didn’t have time to enjoy the beaches, but they looked lovely.
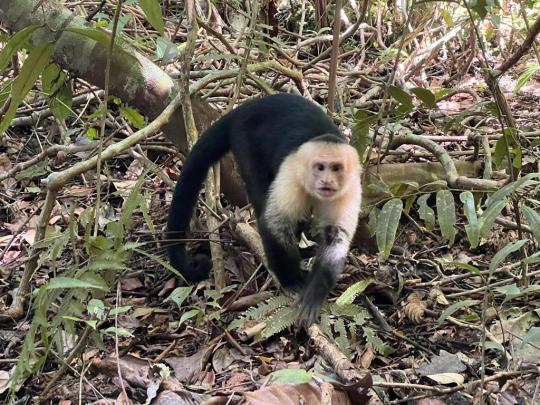
We so so many monkeys on the Manuel Antonio National Park hike!
However, the park is a bit overrun, understandably given its exquisiteness. It was mandatory to buy entrance tickets online in advance (we tried to do this the morning of and all that was left was an 11am entry time, but our hotel concierge told us we could still enter earlier, which worked out fine for us). The park entrance was overrun with aggressive, scammy men posing as official park tour guides (they were not) and trying to fraudulently sell parking spots. We were lucky that our hotel offered a free shuttle to and from the park so we didn’t have to deal with the hassle of parking here (we also saw there was a public bus, which seemed like a good option).
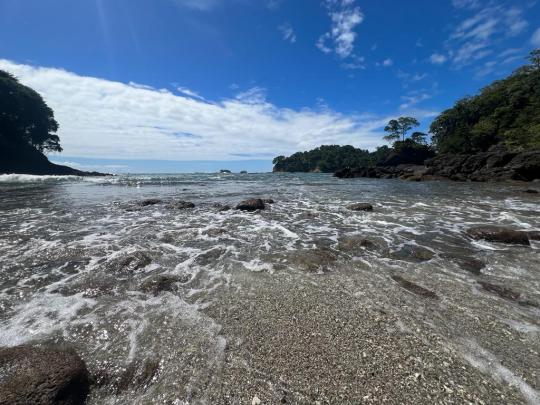
Manuel Antonio hike - one of the trails led to this beautiful rocky beach
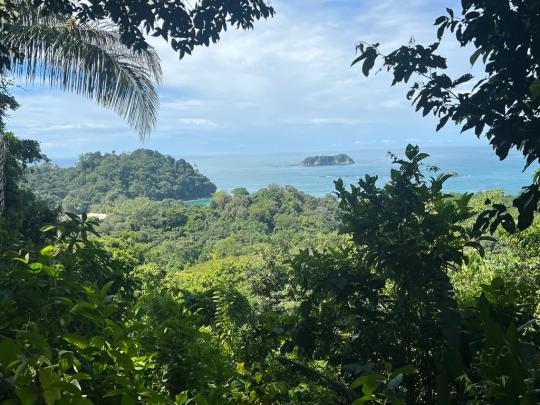
Another trail at Manuel Antonio National Park led to this beautiful viewpoint -- some parts of the park reminded us of the Road to Hana in Maui
We also really enjoyed doing a half-day catamaran excursion (~$80pp, booked through Viator and also available to book through the hotel) with views of the national park from the water. The water was too murky to see anything when we tried snorkeling, but the views throughout were gorgeous.

On the catamaran
We stayed at Gaia Hotel ($$), a resort with rooms that weren’t as luxurious as our other stays, but with the best, most personalized and attentive service we experienced anywhere on our trip. The resort also had a reserve on the property and free guided walking tours of it – we got to see macaws and a beautiful sunset over the water.
Sunset at Gaia (the resort is the white building on the left on the water)
Manuel Antonio was the hottest place we stayed – definitely weather for shorts/t-shirt or light hiking pants/light UPF protective shirt + mosquito repellent. The vegetarian food at the hotel looked unappealing, but there were a few decent restaurants in town (we liked Namaste Indian, Varuna Plant-Based for salads and smoothie bowls, and the Thai restaurant), all in 2-3 block area. Driving in this area was somewhat unpleasant: the one road leading to and from the park was trafficky and full of aggressive and bad drivers, and it was hard to find parking near the restaurants in town.
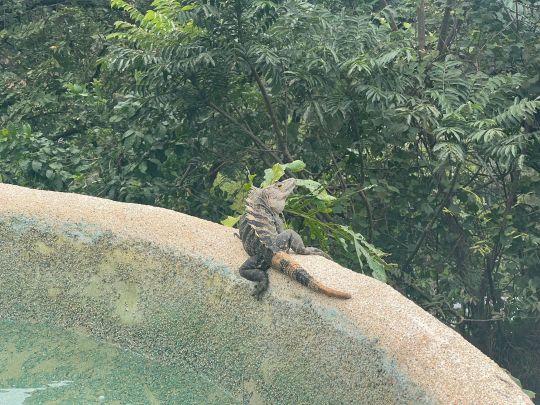
Iguana hanging out by the pool at Gaia resort
San Jose
The ~4 hour drive from Manuel Antonio to San Jose was miserable. The paucity of road signs (i.e., giving drivers advance notice when a 2nd lane on the road was closing) and many disrespectful drivers created a lot of needless traffic and danger on the road.
Once we reached San Jose, we stayed at the Marriott Hacienda Belen on points, a 20-min drive from the airport. It turned out to be a very nice hotel (great fitness center, Christmas carols) though the vegetarian food options were minimal and we used Uber Eats instead (and got stomach sick off the vegan food we tried).
Nothing we saw of San Jose on our drive in, and then later to the airport, made me think it would be a nice place to spend more time.
Returning our car rental to the San Jose airport was a bit complicated since they didn’t give us an address, and we initially went to the wrong location (at the domestic terminal vs. an offsite location). If you use Hertz here – which I’m not sure can be recommended given how poor their Google reviews are – the San Jose airport dropoff location is called “Hertz Costa Rica Rio Segundo, Alajuela” and is opposite a Hampton Inn.
The San Jose international airport terminal was very crowded (on a Saturday mid-day) – security took about half an hour, and neither of the two Priority Pass lounges had any capacity to accept new guests. All of the food places in the terminal had horrible Google reviews (<3 stars).

Just another gratuitous picture of the sandy beaches at Manuel Antonio National Park, since we took 0 pictures of San Jose :)
Logistics
When to visit – We visited in the last week of November, right after Thanksgiving. The first half of the trip was pretty rainy. November is the end of rainy season in Costa Rica -- it’s probably worth trying to visit squarely in the non-rainy season (which starts in December) to be safe.
Driving in Costa Rica – We had a few people recommend we hire a driver to take us around. We personally prefer not to deal with drivers (especially after our poor/scammy experience in Kerala) and liked the flexibility of doing our own driving. The only leg that I thought was so unpleasant as to maybe make a driver useful was Manuel Antonio to San Jose. Luckily, S is a very good driver and we made it just fine.
Renting a car – We were glad to have a 4x4 car for the potholed and muddy roads. Maybe look at other agencies than Hertz given their poor reviews on Google. And FYI, Costa Rica requires purchasing liability insurance directly from the rental car company (we didn’t know this until we arrived and were informed by the Hertz agent).
Vegetarian food – The traditional breakfast of eggs, rice and beans, and plantains was proteinful and delicious, but other than that the vegetarian food at the resorts was generally pretty sad (lots of bland pastas and occasionally a veggie burger with not-crispy fries). Getting enough protein was difficult.
Health & Sanitation – The CDC states that it’s better to drink bottled water in Costa Rica. Some of our hotels told us the water there was potable, but we stuck with bottled water to be safe. The CDC also warns of mosquito-borne diseases, so we were careful to wear long pants and sleeves most of the time and (when it was unbearable) to wear plenty of bug spray.
Currency – The currency, the Costa Rican colon, was exchanging at approximately 530:1 USD when we visited. We never used cash – credit card worked fine everywhere, including at toll booths on the highway and at the national parks. The only place where cash might be needed is perhaps if you take a public bus, like to/from Manuel Antonio National Park (I don’t know for sure how payment for public transit works in Costa Rica).
1 note
·
View note
Text
1 Week in Tasmania
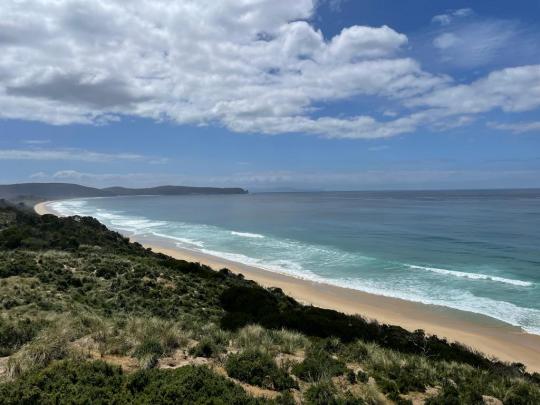
View from Freycinet Lodge in Freycinet National Park
Overview
My candid tl;dr: Tasmania is pretty, but not as stunning as nearby New Zealand. Given what a long trip it is from the U.S., I’d only prioritize traveling this far again for New Zealand.
Tasmania is an Australian island off the southeast coast of the continent. I visited with my parents in November, which is springtime – shoulder season so not crowded, but still a bit cold and windy.
The highlight for me was that every local person we interacted with was so incredibly nice. There was also some neat wildlife that I haven’t seen anywhere else – wallabies, paddy melons, wombats, kangaroos. And bathrooms everywhere were so clean – I’m talking Japan levels of clean!
We did a 1-week road trip starting in the capital city, Hobart, and driving out to two national parks: Freycinet National Park and Cradle Mountain National Park. We ended in the scenic town of Launceston. Each one of these spots had its own charm -- my favorite was Cradle Mountain because it was so pretty and full of wildlife. More on each spot below.
Disclaimer: This blog post is light on discussion of logistics because I did not plan this trip – I just tagged along with my parents.
Hobart
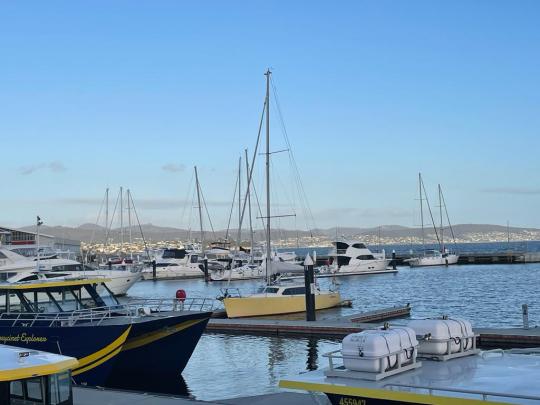
Hobart Harbor
Hobart is the capital city of Tasmania. It’s a ~2 hour flight from Sydney, and it’s also possible to fly there or take a ferry from Melbourne.
I spent 3 nights / 2 days in Hobart and did 2 day trips – one to Bruny Island for some brief, scenic walks (a ~2 hour drive each way, including a ferry) and the other to Port Arthur to tour an old penitentiary site and eat treats at a lavender farm along the way (a ~90 min drive each way, no ferry). Both were fine, but not exactly what I look for on travels (too much driving and touristy stuff vs. longer, scenic hikes), so I’d skip them if I went back.
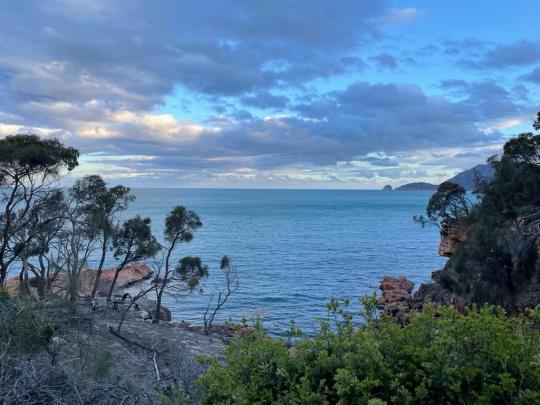
Bruny Island coastline
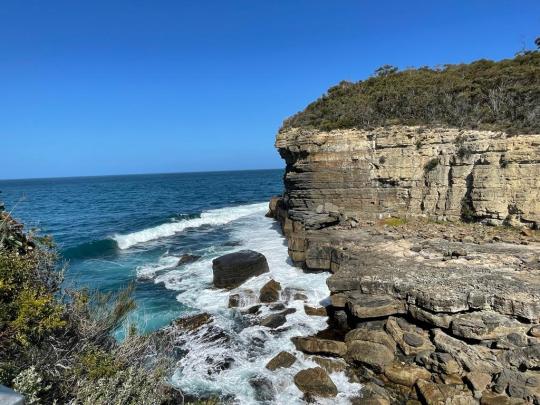
Eagleneck coastline area near Port Arthur
If I were to organize one perfect day in Hobart, it would look like this:
Stay at the Macq01 hotel along the harbor – it was a super cute and well appointed boutique hotel with wonderful staff and a convenient location. One of the best hotels I’ve stayed at in recent memory
Sail on the harbor – we didn’t do this, but it looked picturesque and we saw signs for sailing excursions right outside the Macq01 hotel
Walk (~25 mins) or drive to the botanical gardens – these were some of the nicest gardens I’ve ever seen and entry is free
Eat Thai food at Bite Me (~10 min drive from the hotel, plenty of vegetarian options)
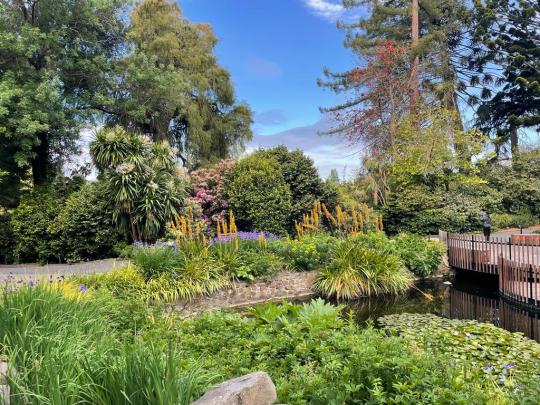
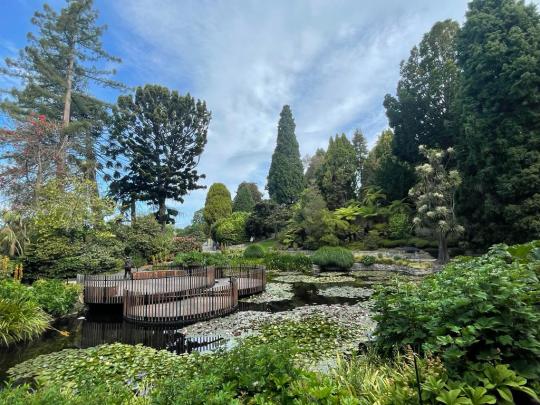

Hobart's botanical gardens stole my heart
Freycinet National Park
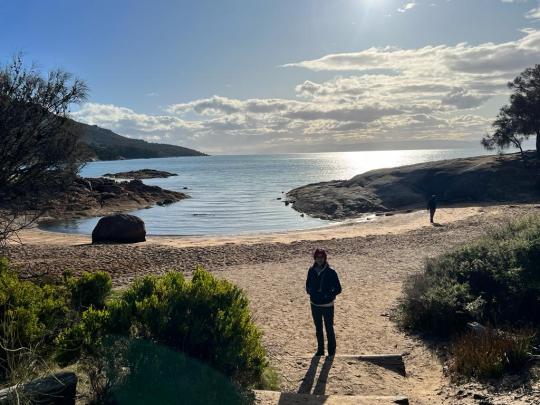
On the beach near Freycinet Lodge
This national park is a ~3 hour drive northeast from Hobart. It’s nice and reminded me of parts of the California coastline like Mendocino, Bodega Bay, Carmel, or Monterey, but it doesn’t compare to some of the most scenic places we’ve visited (e.g., New Zealand, Norway, Switzerland, our favorite parks in the U.S.). I’d go if I were nearby and for some reason couldn’t easily make it to New Zealand. So if you find yourself in the area, here are my recommendations:
Stay at Freycinet Lodge – We got a cabin and it was very comfortable, if not fancy like Macq01. The highlights are the location on the water and the food, which was excellent. And of course, like everywhere we visited, the staff were super nice.
Kayak with Freycinet Paddle – We enjoyed our 3 hour kayaking expedition and thought the guides were very nice and helpful. We got super lucky to have nice weather with a sunny day – the guides mentioned that just the day before it was very windy and cold, and people couldn’t feel their hands. It’s probably a safer bet weather-wise to do this a bit later in the season. We got lucky and saw dolphins!
Walk at Cape Tourville – This ~15 min, mostly flat walk was a ~10 min drive from our hotel and had stunning views of the ocean.
Walk to the Wineglass Bay Lookout – This ~90 min walk was a few minutes’ drive from our hotel and also had very nice ocean views. It’s definitely not hard, but there are some steps and there is no shade, so it’s nicer to do it in the morning or evening to avoid the harsh sun.
There may be some other, longer hikes as well – I’d have loved to explore more had the group been up for it.

Kayaking at Freycinet National Park

Wineglass Bay Lookout
Cradle Mountain National Park

We saw loads of wallabies on the side of the road at Cradle Mountain National Park (and a few at Freycinet, too)
We drove ~4 hours from Freycinet National Park to Cradle Mountain. Since Cradle Mountain isn’t exactly known for its food, we stopped along the week to pick up sandwich materials. The drive felt a bit tedious and the road is very windy towards the end, but once we finally arrived I really enjoyed the scenery and the following walks:
Dove Lake Circuit – This is a ~7 km, mostly flat walk around Dove Lake inside the national park. The vegetation around the water is quite unique and pretty. It reminded me a bit of the Jenny Lake walk at Grand Teton National Park, except the Dove Lake loop was much shorter.
Logistical note: You can park at the Visitor Center, buy a 72-hour shuttle ticket for AUD $15 pp, and take the shuttle ~20 mins to the last stop (Dove Lake) to start this walk. Shuttles were running every 10-15 minutes when we were there, and as it wasn’t super crowded we didn’t have any difficulty getting on a shuttle.
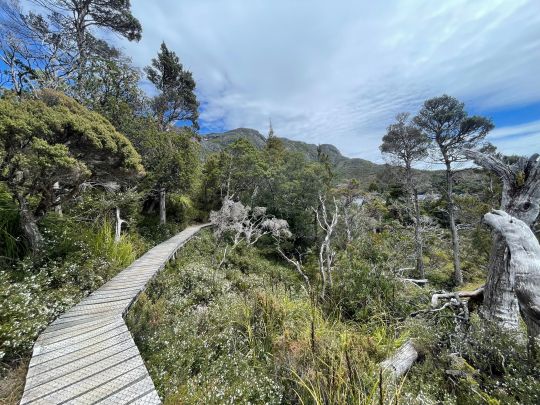
Dove Lake circuit -- most of the walk is on a well-maintained boardwalk
Enchanted Walk – This is a ~20 min roundtrip walk that is super pretty, mossy, and otherworldly. It reminded me of a walk we did at Olympic National Park.
Logistical note: You don’t have to take the park shuttle to access this one (though you can if you want). You can drive your car past the park visitor center and park at the ranger station to start the walk.

This photo definitely doesn't do justice to the Enchanted Walk
King Billy Trail – This is a ~40 min walk that starts right by the Enchanted Walk. We only walked ~10 mins of it in the evening, but we saw a kangaroo and a wallaby in just that short time. It seemed like a really nice trail as well.
The park has many more trails which I didn’t get a chance to explore, but which seemed really nice.
Eat at the dining room at Peppers Lodge. Vegetarian food options did not seem strong in the Cradle Mountain Area, but I was appreciative of the salad options at Peppers. Looking out the window from the dining room, we saw quite a few wallabies running around at night!
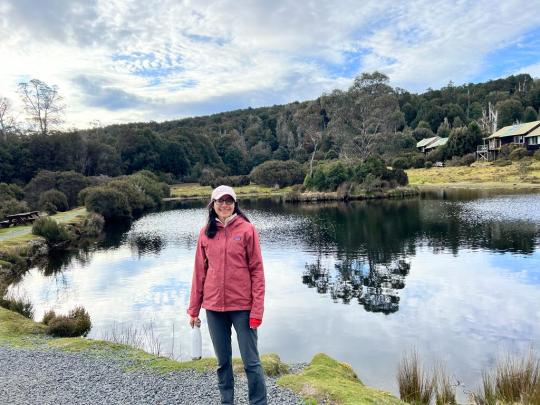
Outside Peppers Lodge
We stayed at the Cradle Mountain Hotel, which was a bit sad – more expensive and less nice than anywhere else we stayed in Tasmania. This reminded me a bit of the U.S., where the level of niceness of National Park lodges often seems inversely proportional to the surrounding scenery. It’s not clear to me that there are nicer housing options in the area, and the hotel was okay, but it’s worth checking if you visit.
Launceston
I didn’t have much time in Launceston, but we did a ~2 hour stop at the Cataract Gorge Reserve which was quite nice. There were some walking trails, a lake, a café and benches for picnicking, a playground for children, and peacocks, wallabies, and birds. Parking was AUD $6.
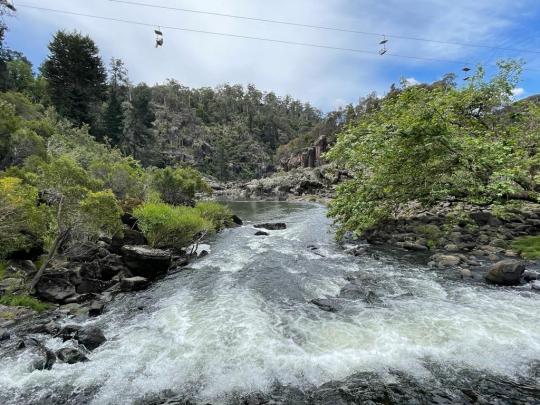
Cataract Gorge -- the chair lift is also an option to see it aerially
Peacock at Cataract Gorge
My parents spent a night at the Mantra Charles Hotel in Launceston, which I stopped by for a bit before my flight to Sydney. The room was about as small as a standard NYC hotel room and looked a bit dated, but it seemed fine. I’m not sure what more there is to do in Launceston, other than being a convenient spot to end a Tasmania road trip.
1 note
·
View note
Text
Norway Fjords Road Trip (3 of 3)
Part III: Geiranger, Trollstigen, Andalsnes/Romsdalseggen Ridge
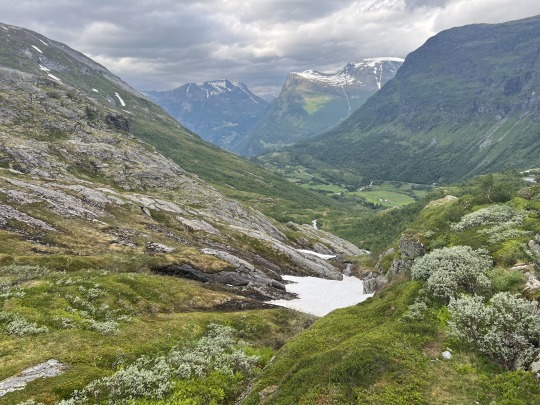
Day 7: Scenic Drive to Geiranger
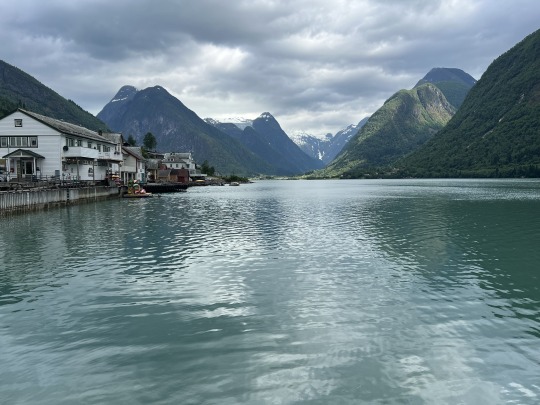
Fjaerlandfjord in the morning
The drive from Fjaerland to Geiranger is one of the most beautiful drives we have ever been on. We saw so many different types of scenery: fjords, lakes, lush valleys, snow-capped mountains, glaciers. In my opinion, it was even more beautiful than driving Going to the Sun Road (the main road) and the Grinnell Glacier Hike (one of my favorite hikes of all time) in Glacier National Park – and that is saying a lot! If we could, we would have budgeted more time to spend in Fjaerland and some of the towns along the drive to enjoy the views, hikes, and water activities.
10:45 AM – Checked out of Fjaerland Fjordstove Hotell.
Our hotel room
Logistical note: Like Hotel Ullensvang, Fjaerland Fjordstove Hotell is on a beautiful fjord, but this hotel was significantly less nice for a similar price. The room was so small we could barely move and there were very few amenities (no A/C, refrigerator, or tea/coffee in the room, limited outdoor seating on the fjord). We stayed at a similar (probably somewhat nicer) B&B in Picton, New Zealand – which is on the beautiful Marlborough Sound, not dissimilar to the Norwegian fjords – a few years ago for ¼ of the price. Even accounting for inflation, the Norway version was comparatively very expensive. Still, there are limited options to stay in the area and it was one of our favorite areas of the trip.
11 AM – Tried the Mundal Valley Hike (~3 min drive from our hotel). I think it would have been great to do a hike in the area, but we were initially confused about where this hike started (it was not well marked) and once we figured it out, the hike did not seem that impressive so we turned back after a little bit.
There was a helpful information booth just across the street from the Mundal Hotel with a written description (in English, yay!) of activities in the area, including a bunch of hikes. There were a few other hikes that looked really nice but were longer / more strenuous. Next time we’d try to book a hike (such as the Nesabraugen Mountain Hike or the overnight excursion to Besshovden) or other activity in advance through Fjaerland Guiding.
Fjaerland also seemed to have a bunch of other nice things to do that we’d love to explore more next time:
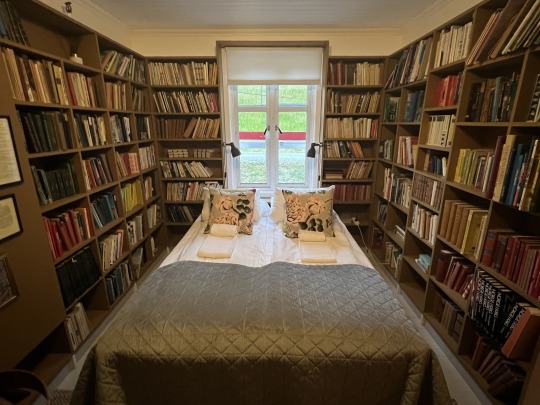
It’s apparently a “book town” with >60k books spread across many different book shops
There is a glacier museum (~$15 pp) that our B&B told us has a really good video about glaciers
You can see and/or walk on glaciers, like the massive Jostedalsbreen Glacier
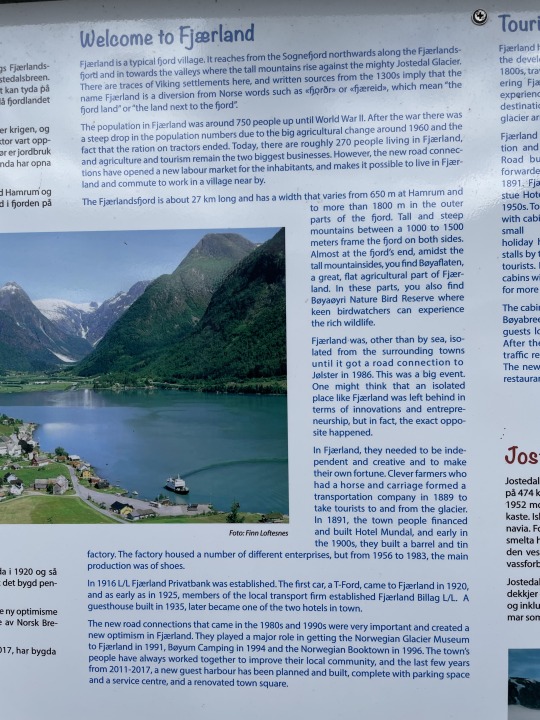
Some info about Fjaerland
11:30 AM – Stopped by the fabulous Boyabreen Viewpoint. This is a view of part of the Jostedalsbreen Glacier and it genuinely made my jaw drop. It’s a bit reminiscent of a glacier I saw on the road from Banff to Jasper National Park, but even more awesome.
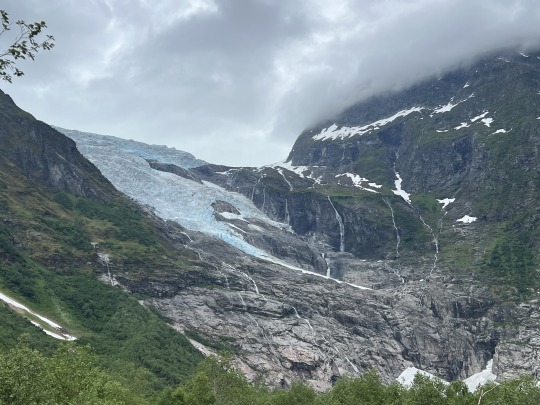
Photos definitely don’t do this glacier justice. It was incredible to see in person.
Logistical note: If you go here, drive past the first parking lot; there is a second parking lot closer to the glacier. There are also picnic benches and a cafe in the area. It’s cold, so dress warmly!
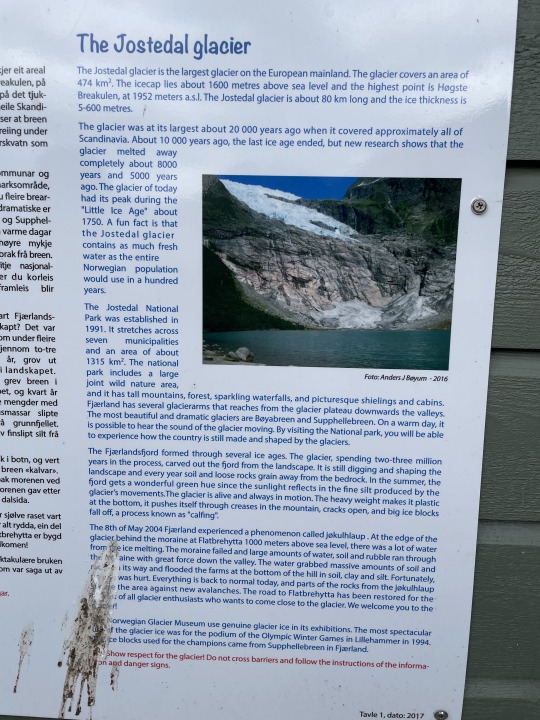
Some info about the Jostedal Glacier, of which Boyabreen is a part.
The rest of the afternoon was spent driving along various fjords and lakes en route to Geiranger. Some things I’d want to do for next time:
Hike in Jostedalsbreen National Park (would need to do more research on which hikes)
Stay at the Olden Fjordhotel – it’s right on one of the most scenic fjords we saw. The hotel seems to have great reviews and it looked like such a pretty place to kayak!
Do the Skalatarnet hike from Loen – this seems like a very difficult hike (6k meters elevation gain) and we read that it is recommended to stay in a cabin overnight at the top – this needs to be booked in advance.
Other activities – there were lots of pretty spots to kayak in these small towns, and we saw people paragliding in Loen. Loen also has a cable car that goes extremely high (~$60 pp) – this might appeal to folks who are less mobile and aren’t able to do hikes that provide similar views.
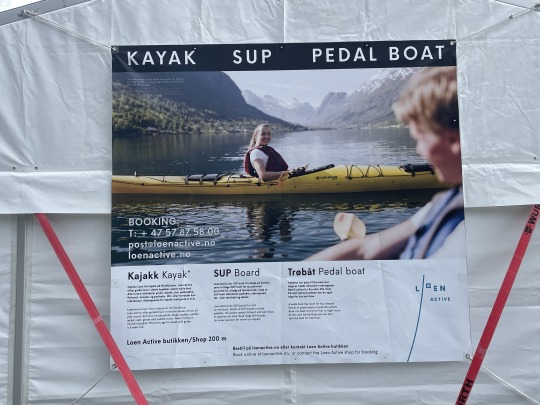

Info about local activities
~4:30 PM – Arrive in Geiranger. This is another very touristy town, but I liked it more than Flam. It’s a bit larger and feels a bit more “real” than Flam, and the drive to Geiranger is truly stunning.
You go up through snow-capped mountains and then steeply down into a beautiful valley in which Geiranger is nestled. The drive in the mountains is like nothing I’ve ever seen before, and the drive down reminded us a bit of the beautiful drive down to Queenstown, New Zealand. We thought it was even more beautiful than the famed drive down Trollstigen.
We stayed at Hotel Utsikten in Geiranger, which was a bit of an upgrade from the Fjaerland B&B.
To get a few steps in, we tried the very short (~20 min) Waterfall Walk. The walk starts at the town center and ends at the Norwegian Fjord Center. Signposts clearly mark the path, which takes you up ~330 stairs to the top of the waterfall. It was a good pre-dinner walk to work up a bit of an appetite after a day spent mostly driving.

Overlooking Geiranger from the waterfall walk
The vegetarian dinner options in Geiranger were a bit disappointing, but we made do with vegetable pizza (we went to Restaurant Olebuda aka Cafe Ule, but several places offered this).
Day 8: Geiranger & Trollstigen
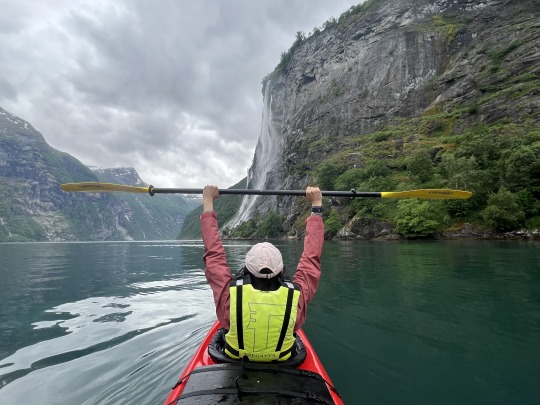
We started the day doing a 3-hour kayak rental with Active Geiranger (990 NOK, we didn’t come across less expensive kayak options elsewhere). They did a great job explaining everything to us and even gave us skirts to wear that fit over the kayak to keep our legs dry (typical practical Norway, we loved it!). Over ~10 km out and back on the water, we saw several beautiful waterfalls.
Given the sad vegetarian food options in town, we made peanut butter sandwiches and set off on the ~2 hour drive to the start of Trollstigen, one of the most famous drives in Norway due to its iconic hairpin turns (though by the time we got there, we had already been on a number of drives with hairpin turns). This was another beautiful scenic drive, and the route also involves a ferry that seems to come every ~30 minutes.
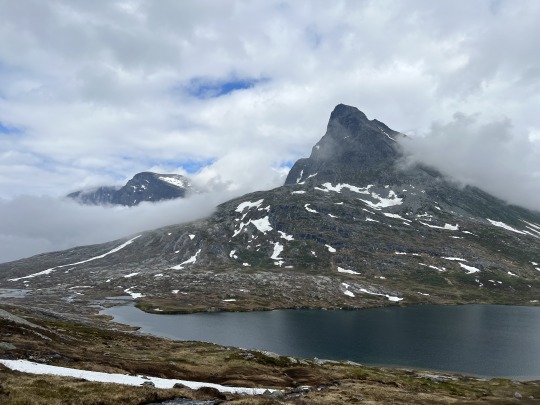
On the drive to Trollstigen
At the top (beginning) of Trollstigen, we parked at the visitor center for a bathroom break and a short walk to some beautiful views (parking appeared to be free). From here there are also options to walk uphill on a 1 km or 5 km (each way) route for more views – if you want to do that, hiking shoes and water will be helpful.

View of Trollstigen from the visitor center
Then we did the ~20 minute drive down Trollstigen, and from there another ~20 minute drive to our hotel in Andalsnes. Lucky for us, Andalsnes has a Thai restaurant, so were able to get some tofu and vegetables for dinner.
Day 9: Andalsnes & Romsdalseggen Ridge
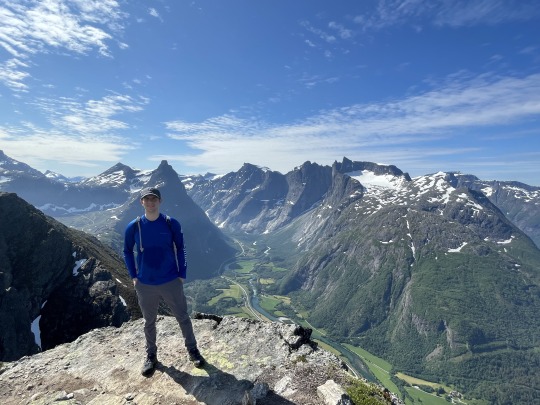
Romsdalseggen Ridge was perhaps the most epic, and most exhausting, hike of our trip.

It’s typically done as a one-way hike that’s just under 7 miles / ~4k feet elevation gain – more elevation than any of the other hikes we did in Norway. Overall, the hike took us ~5 hours with no stops.
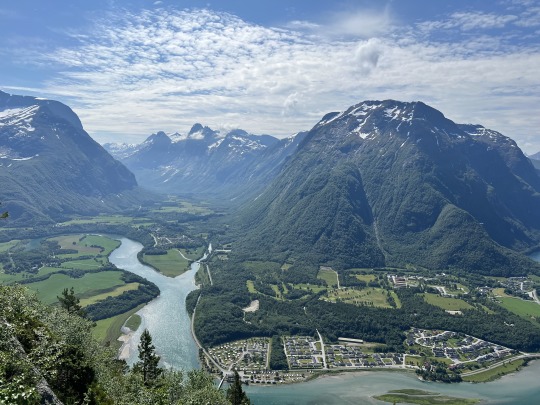
Earthtrekkers wrote that their 8 year old daughter cried on this hike when they did it in 2013. Even though they note that this hike is not recommended for kids under the age of 10, their kids have done some very impressive hikes, so I took this seriously. It did not take me long to see why she was crying. After the first mile of the hike, which was relentlessly uphill under a beating hot sun, my calves were crying. Over the next 2 miles, in which you climb nearly vertically through boulder fields (great if you love rock scrambling), and at times really need to watch your step to not step off a cliff on either side, my brain was crying.
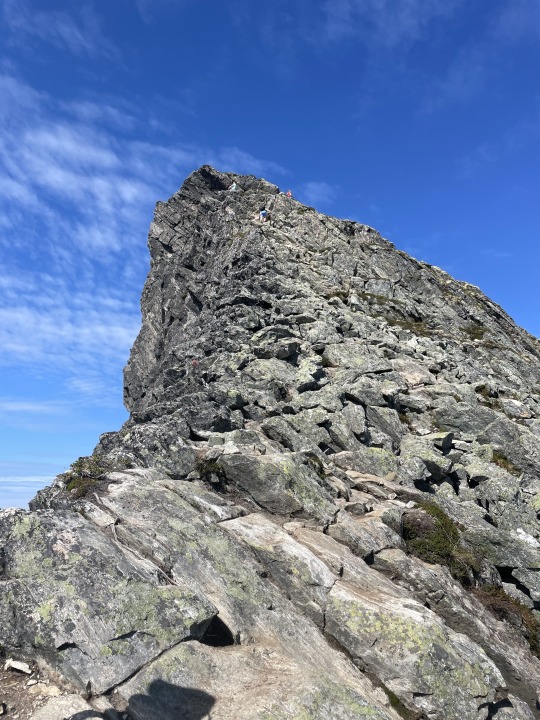
We somehow made it up this pile of rocks (you can see humans at the top if you look closely!)...
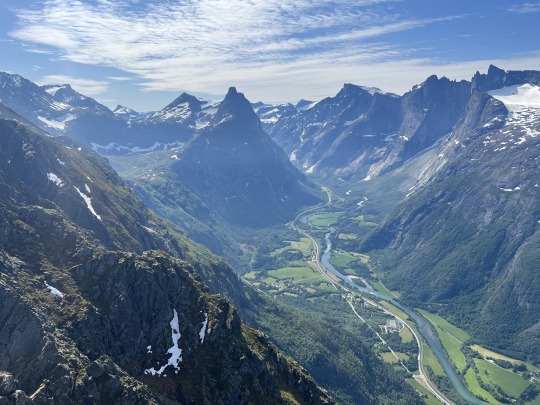
For this epic view!
On the way down, we passed the Andalsnes cable car and then went downhill through a nondescript forest with minimal views for ages – it felt like the opposite of Florli 4444 (so many steps!).
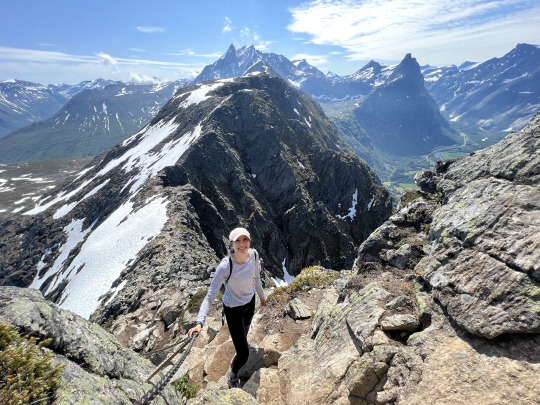
The views, however, were totally worth it. I am so glad we did it.
Logistics:
When & where to hike: The Romsdalseggen Ridge hike typically opens in June (depending on the weather/snow conditions). We weren’t sure if it would be open by the time we got there, so as a backup we were planning to hike to Rampestreken, a viewpoint you pass on the way down from the Romsdalseggen Ridge hike. Since the Romsdalseggen Ridge descent encompasses the Rampestreken hike, we saw it and wouldn’t necessarily recommend it – the Rampestreken hike is relentlessly uphill with minimal views until the viewpoint, and even then you’ll get more of a view if you just take the Andalsnes cable car (which goes a bit higher than the viewpoint). So if Romsdalseggen Ridge is closed, the cable car might be a nicer option.
How to get there: The Romsdalseggen Ridge hike starts from a parking lot that is a ~15 minute drive from the Andalsnes city center. There is a shuttle bus that leaves at 9am and 10am from the city center (250 NOK pp) – I believe you can book a spot on it online. Our hotel, the Grand Hotel, also arranged a small van transport leaving directly from the hotel for the same price, and we were able to book spots on it when we arrived in Andalsnes the evening before our hike. The hike ends in Andalsnes, so it was just a ~3 minute walk from the end of the trail to our hotel. Note: The Rampestreken hike starts at the same spot that the Romsdalseggen Ridge hike ends, and there is a fairly sizeable parking lot just a block from there. We don’t think it would make sense to start the Romsdalseggen Ridge hike from here (and end at the parking lot on the other side) because the descent on the other side – going straight down boulder fields – seems dangerous.
Restrooms: The parking lot where the Romsdalseggen Ridge hike starts does have a bathroom. There was a long line for it and it was less nice than any other hike bathrooms we saw, but it was still clean (this is Norway, after all).
After hiking Romsdalseggen Ridge, we drove ~90 minutes to Alesund, where we spent our last night in Norway.
Day 10: Alesund

Trolling
We didn’t really do anything in Alesund. We got to our hotel room at the Scandic Parken downtown around 5pm and flopped down in our room for a bit, exhausted from the hike. A few dinner spots that looked decently vegetarian friendly, and the Asian grocery store (our potential tofu source) closed by 6pm on Saturday, so we tried pasta and pizza at Cinque Minuti, which turned out to be a disappointing Italian restaurant.
Note: Street parking is free in downtown Alesund outside of 8am-4pm, and on Sundays. Even though we arrived on Saturday evening, it was easy to find a spot.
In the morning we woke up early and drove to Alesund Airport – an easy 15-20 minute drive that is mostly on one road. We dropped off our rental car in the outdoor Hertz parking lot and left our keys in their indoor dropbox as the Hertz office was closed.
For anyone thinking about a similar trip, it’s worth noting that the one-way Hertz car rental from Bergen to Alesund incurred a ~6,000 NOK (~$600) extra dropoff fee, which nearly doubled the entire cost of the 6-day car rental. While we knew one-way car rentals are typically more expensive than roundtrip rentals, this was far more expensive than we’ve seen elsewhere.
Driving in Norway
We found driving in Norway to be a bit different than other places we’ve been in several ways. This included more difficult/narrow roads, unfamiliar road signage and rules, more punitive speeding fines, prevalent tolls and parking fees, and issues with Google Maps.
Difficult roads: Most roads are one lane in each direction, and it’s rare for an extra lane to open up for overtaking a slow driver. Many roads are so narrow that they look like they can barely fit 2 cars. There are hairpin turns galore. You really need to be paying attention and driving carefully.
Unfamiliar road rules & signage: It’s illegal to turn right on red (not that we encountered many traffic lights, given the proliferation of roundabouts). There are default speed limits for the countryside (80 km/hr) and the city (50 km/hr) and you’ll typically see a speed limit sign only in areas where the speed limit is lower; once that zone ends there will be a sign with that lower speed limit crossed out (at which point you can revert to the default speed limit).
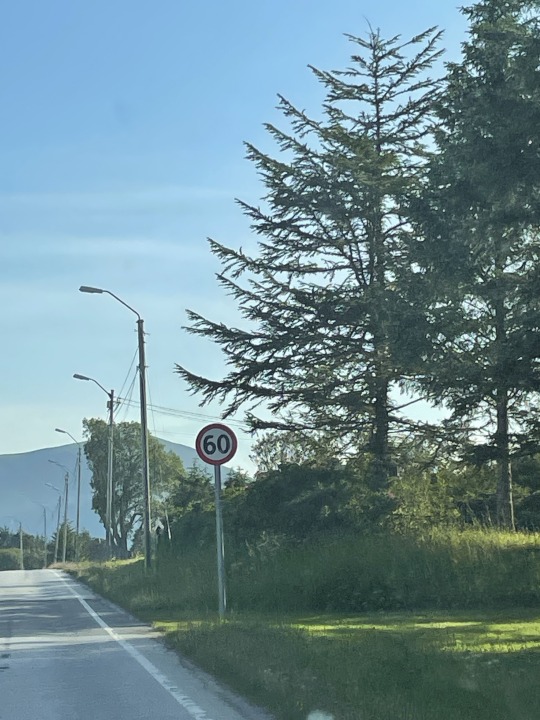
Meaning “the speed limit is down to 60 (from the regular 80 km/h) from here on out”
We also sometimes saw a yellow triangle sign, which apparently means you are on the road that has the right of way (vs. other roads that may converge / turn onto the road you are on).

Meaning “the 60 speed limit is over, go back to the default 80 in the countryside. Oh and also road 65B has the right of way here.”
Last but not least, my favorite road sign was a reminder to abide by the speed (or as they say in Norwegian, “farts”) limit – thankfully not, as we initially thought, an Amber Alert/“face on the milk carton”-style sign for a missing child.
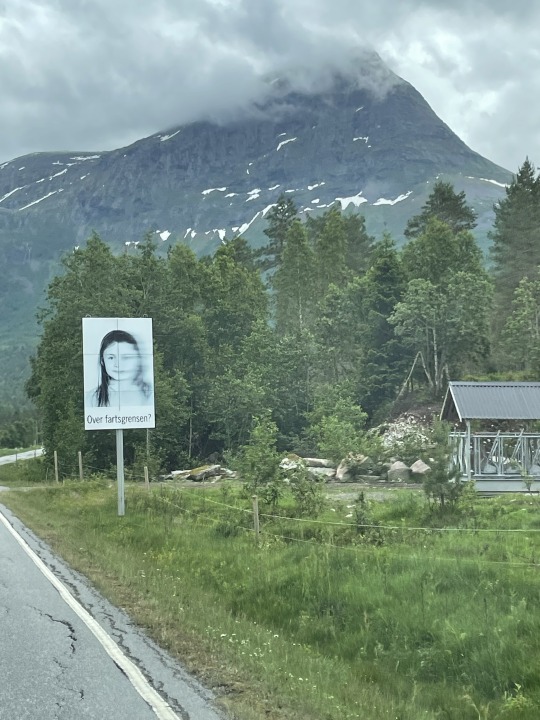

Speeding fines: We read that speeding fines are hefty (hundreds to thousands of dollars) if you’re caught going >3 km/hr over the speed limit. Fortunately, there seem to be road signs that warn you just before you pass speed cameras, and our understanding is that the police are less into trying to issue speeding tickets than in the U.S. (maybe they’re less needed when you have a massive sovereign wealth fund…).
Parking: Most, but not all, parking was paid, and we usually paid at a parking machine when we were leaving (the exception was at Kjeragbolten, where we paid when we arrived). You just input your license plate number and then it charges you based on the time you spent parked in the parking lot.
Tolls: Most tolls were charged automatically to our rental car bill without any action on our part, with the exception of Trolltunga where we paid a 200 NOK toll at a parking machine on the drive up.
Google Maps: The Google Maps app frequently got confused – usually when we were going through tunnels – and would incorrectly change the route mid-drive. It was important for us to carefully review directions before starting on a drive, and it was also useful to screenshot the directions at the start of the drive in case anything went wrong with them during the drive. That said, we did have cell phone reception (though it was sometimes slow) almost everywhere we went.
A Few Last Logistical Tips
Gas: Our first rental car took diesel, which I’d never heard of for a non-truck. We only knew this because Hertz happened to mention it. Our second rental car took regular petrol.
Gas Stations: Most unmanned gas stations only took a credit card with a PIN (credit cards without a PIN were declined) or a debit card (the exchange rate was a little bit worse than using credit). In this situation, one can use a debit card or pay inside at a manned gas station.
0 notes
Text
Norway Fjords Road Trip (2 of 3)

View from Trolltunga
Part II: Bergen, Hardangerfjord, Trolltunga, & Flam/Naeroyfjord
On this part of the trip, we thought visiting Hardangerfjord and hiking Trolltunga was a standout experience. We are less excited by cities and areas that are crowded with tourists, so we were less fans of Bergen’s tourist attractions and Flam (it’s on a beautiful fjord, but so is every other fjord town we passed on our multi-day drive).
Day 4: Bergen
We took a ~25 minute flight from Stavanger to Bergen. The Stavanger airport was quite nice and easy to navigate; we only needed to get there an hour before our flight and we still had time for a quick shakshuka breakfast there.
The Bergen side was busier and felt more like any big city. The customer service at Hertz rental was poor, and I’m not big on cities (vs. scenic rural areas) so I wasn’t entirely surprised that I didn’t love the couple hours we spent in Bergen. We went to the two most famous tourist spots – the funicular (Floibanen) and the Bryggen district, which is a ~10 min walk from the funicular. This area seems to be Bergen’s version of Times Square (though certainly without the billboards and lights) in that everything seems to cater to tourists. I’m sure I would have enjoyed Bergen more if I’d known of some off-the-beaten-path places to go.
Floibanen
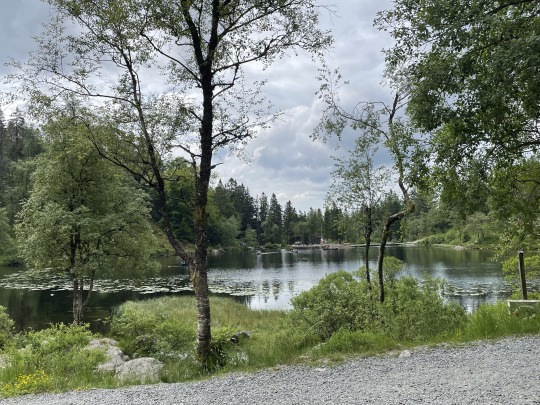
Lake at the top
The funicular was a <5 min ride each way and was jam-packed with tourists. The vibe was very cruise boat tourist (lots of middle-aged people from the midwestern U.S.). The view from the top is very pretty and you can walk a few minutes to a small lake where there is free canoeing for kids. It was nicer than most places’ version of ‘pay a lot of money to go to the highest point in the city.’
Parking: We parked in the Rosenkrantz Parking Garage a ~3 min walk from the Floibanen (~$20 for 4 hours, pay at the parking machine just before you leave).
Tickets: The line to buy tickets was very long, so I went on the Floibanen website and bought tickets online (something like ~$15 per person) as we were walking over from the parking garage. It was super quick and easy – you just buy tickets for the same day, without needing to specify a time slot. Then we got into the line for people with prepaid tickets (which was still long because a large tour group had just arrived, but it moved pretty quickly).
Bryggen District
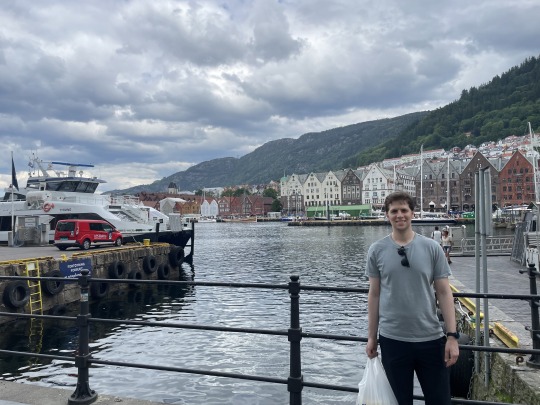
This has been compared to San Francisco’s Painted Ladies, and I didn’t really see much of a parallel. It was just a bunch of shops selling generic tourist wares. I could have done without this.
Lunch
There didn’t seem to be a ton of great vegetarian food options, but luckily we found a fast casual place called Daily Pot that had a pretty good salad and a decent thai curry (no vegetarian protein though, sadly).
We were able to stop by an Asian grocery store nearby and pick up tofu, which was great since we didn’t find tofu in any of the regular supermarkets we want to in Norway. There are also plenty of regular supermarkets in the same area to re-up sandwich materials, etc. for before we left the city.
In the afternoon we drove along the gorgeous Hardangerfjord to Hotel Ullensvang, where we spent 2 nights before and after hiking Trolltunga. Not only was the fjord especially stunning, but this also turned out to be the nicest hotel we stayed in, with amenities like an indoor/outdoor swimming pool, jacuzzi, indoor tennis court, ping pong, and lots of indoor and outdoor seating along the fjord. There aren’t good vegetarian food options nearby, so we were glad to have picked up groceries in Bergen. Unlike many of the later hotels we stayed at deeper into western Norway, this one did have a mini-fridge in the room.
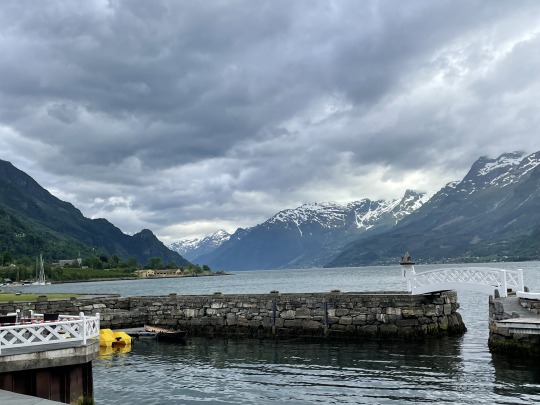
The view from Hotel Ullensvang
Day 5: Trolltunga
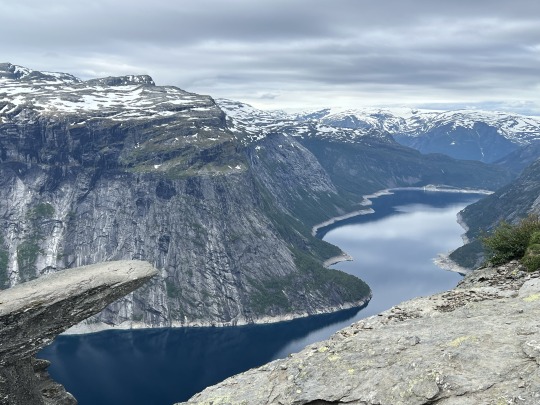
Iconic view of the “troll’s tongue” (Trolltunga)
Trolltunga was a really beautiful hike. It’s ~12.6 km out and back (~6.3 km each way) from the top (P3) parking lot (more on parking below). Although it’s 2x as long as Kjeragbolten, I thought it was substantially easier.
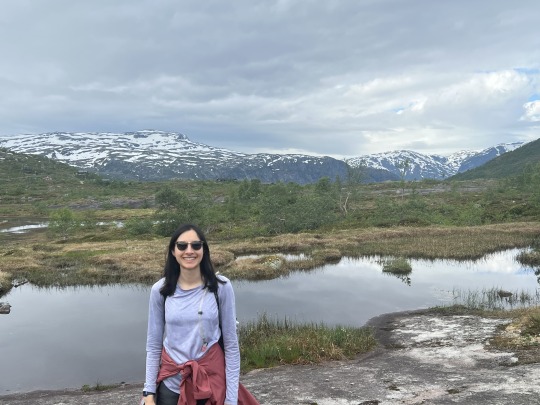
Trolltunga also has no shade, but luckily for us it was overcast the entire time, so the temperature felt a lot more comfortable (a full sleeve shirt + windbreaker was perfect).
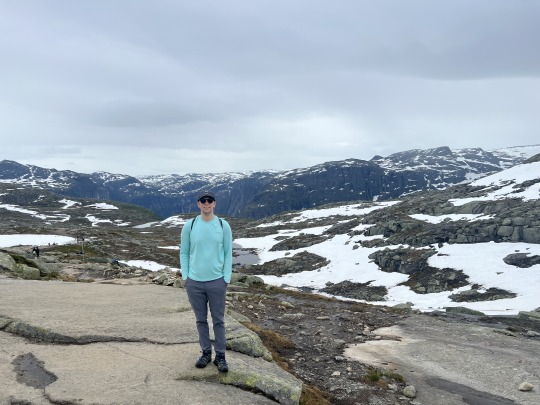
The hike took us 6 hours roundtrip from P3. We started around 9am and finished around 4pm, including a 1-hour break at the top to eat lunch and relax.

On the drive home we stopped by the grocery store in Tyssedal, which had a salad bar(!) as well as various other staples (fruits, vegetables, sandwich materials, etc.).
Back at our hotel, we enjoyed taking a swim and playing ping pong. We ate outdoors right on the fjord. We could have spent another day at this hotel just enjoying the views and amenities.
Logistics:
Parking: You can reserve parking at Trolltunga P3 online in advance (600 NOK for parking + 200 NOK toll). Once you park, you need to walk down a short, steep bit of road to get to the trailhead. If you don’t park at P3, you can take a shuttle from the lower (P2) parking lot (300 NOK for parking + 200 NOK toll to drive up there + 150 NOK per person for the shuttle). Or you can walk an extra ~3 km each way to get from P2 to P3 – it’s extremely steep and definitely the hardest part of the hike.
Restrooms: Only available at P2, not at P3.
Lodging: When we researched lodging options near the hike, such as in the towns of Odda or Tyssedal, we didn’t find anything that looked nice. Instead, we stayed at the Ullensvang Hotel, which was a 40-minute drive each way, and felt that was a great choice. We also saw housing options that looked nice in Kinsarvik, which adds ~10 mins to the drive on top of the 40 mins from Ullensvang.

Day 6: Flam
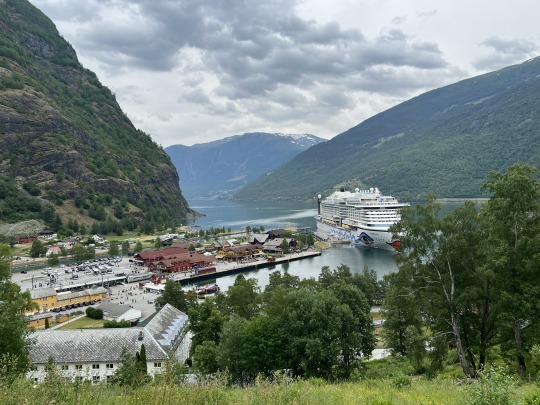
View of Flam
Flam is like a tourist Potemkin village. It is tiny – just about 3 blocks long – and seems to exist for the sole purpose of sending tourists en masse on fjord cruises and train rides.
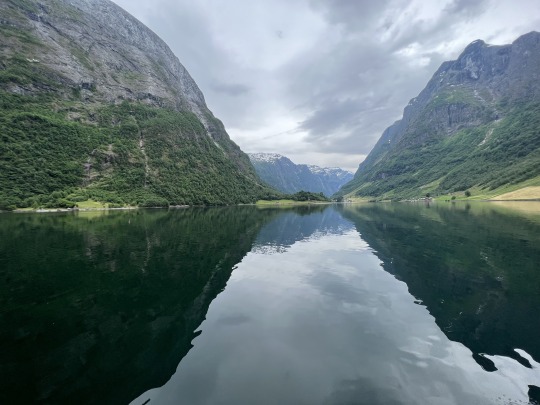
Naeroyfjord from the fjord cruise
We followed the “Norway in a Nutshell” itinerary and did a 2-hour fjord cruise on Naeroyfjord, a 1-hour scenic train ride on the Flamsbana, and a ~2 hour bike ride from Myrdal back to Flam. It was all very beautiful, but now that we have seen that Norway has so much beautiful scenery in many different areas, we don’t think it’s necessary to go to Flam to see the best the country has to offer. We think we could have done all of the same things in quieter, less touristy settings (which is our personal preference).
7 AM – Checked out of Ullensvang Hotel and started the ~2 hour drive to Flam.
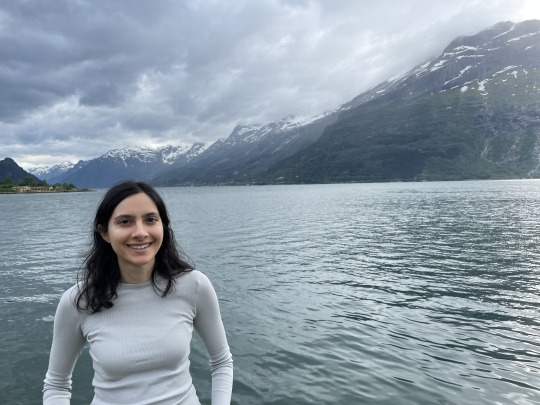
Bye, Hardangerfjord / Ullensvang!
9:30 AM – Naeroyfjord Cruise: The cruise starts at Flam’s Pier 1 (park in the paid parking lot behind the Coop Marked grocery store, 100 NOK/day) and takes you to the town of Gudvangen. There are some stops along the way that look like they could be nice for hiking or camping. The views of the fjord reminded us of visiting Milford Sound in New Zealand. We booked the cruise online through Norway’s Best for ~$60 pp. On the way back, we took a ~20 min shuttle bus to get from Gudvangen to Flam (also booked through Norway’s Best for ~$10 pp).

Fjord views
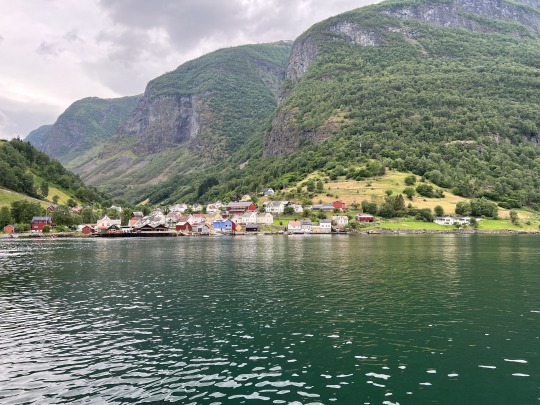
Cute towns along the fjord
Logistical note: Standing outside on the cruise was pretty, but very cold and windy. Take warm clothes!

Bundled up on the fjord cruise
12:15 PM – Lunch: Flam has a bunch of food trucks but nothing looked particularly promising for vegetarian food, so we ate sandwiches at a picnic table along the water.
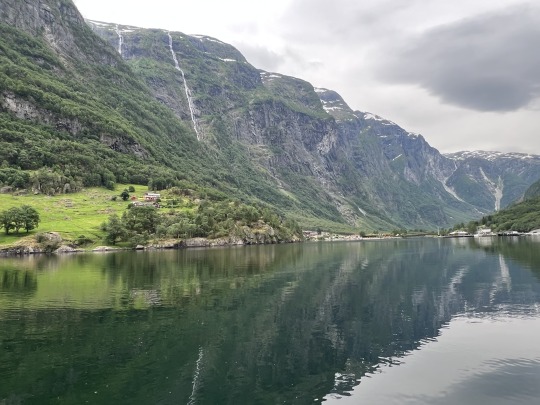
Just another view of Naeroyfjord that has nothing to do with our lunch spot...
2:35 PM – Flamsbana: The train ride starts at the Flam train station and goes to the town of Myrdal. The views are scenic, but again, not necessarily better than views we got while driving through Norway. We read online that the views are better if you sit on the right side of the train, but I didn’t think it made a big difference where we sat. We booked our train tickets through Norway’s Best for ~$60 pp (we paid a little more to take our bikes on board). People lined up to board the train even before 2PM.
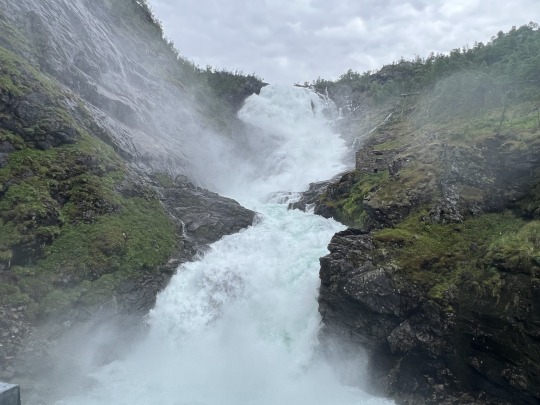
The train stopped at this epic waterfall for a 5 minute pit stop
3:45 PM – Biking: The ~20 km bike ride from Myrdal to Flam is stunning and almost entirely downhill. It starts off EXTREMELY steep: you start by biking down 21 hairpin turns. The bike rental folks didn’t give us any information at all, so it was a shock to realize how steep it was at the beginning.
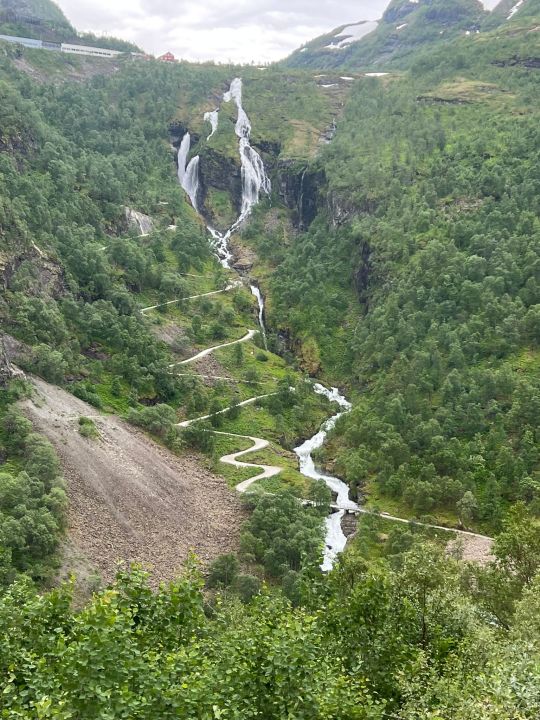
The start of the bike ride
However, it is manageable – the trick is to hold down both brakes on the bike (front and back wheel) 50-75% for the entire downhill so that you can take it very slow. The downhill is on gravel (which unfortunately was wet when we went, since it had just rained) so if you pump the brakes the tires will skid unhelpfully.

After surviving the 21 hairpin turns
The scenery is awesome – this was one of my favorite parts of our trip. It’s much more immersive than sitting in the Flamsbana (train).
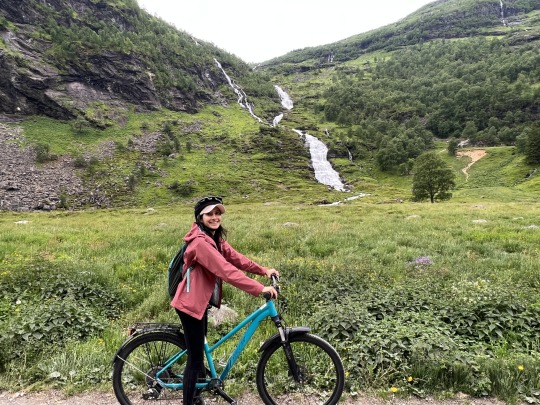
Also, if you don’t want to do the 21 hairpin turns, you can take a zipline down – just know that there are still some fairly steep downhills later in the bike ride.

Note on bike logistics: We made a reservation online in advance but this wasn’t necessary. You can stop by the Flam bike rental shop (also operated by Norway’s Best) to rent a bike for a couple hours or a full day (~$40 pp), and then take it on the train – they will put it in a separate compartment for you and you pick it up when you reach Myrdal. This increases the cost of the train ticket. Better yet, you can rent a bike at the Myrdal train station and drop it off in Flam. Both bike rental options provide helmets.
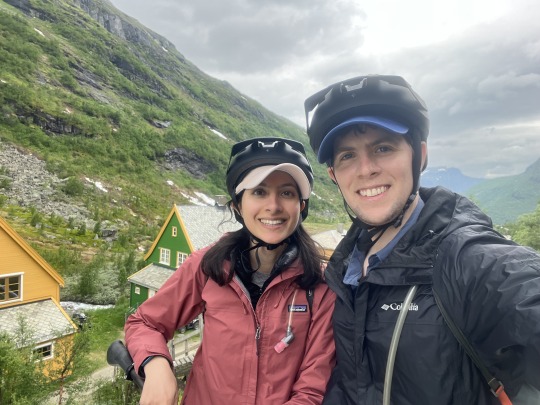
6:15 PM – After dropping our bikes off in Flam, we drove to our next stop, a B&B in the town of Fjaerland along the Fjaerlandsfjord. The drive involved taking a car ferry, which added time to the drive but was a pretty self-explanatory process. We stopped for veggie burgers along the way at a place called Vagal Burger, which was a nice break from our homemade sandwiches.

On the car ferry
10 PM – Arrived at Fjaerland Fjordstove Hotell. This was a very long day! If I did it again, I’d probably cut out Flam (and find somewhere else to go biking in Norway, since that was such a nice experience), or at least skip the fjord cruise and sleep in.

Fjaerlandfjord around 10PM -- still light out until late in the summertime!
0 notes
Text
Norway Fjords Road Trip (1 of 3)

View along the Trolltunga Hike
Overview
Norway is one of the most beautiful places we have visited. A big reason we wanted to visit is that we loved New Zealand and heard that Norway’s scenery is similar – it did not disappoint.
We did a 10-day road trip that included hiking, biking, and kayaking through western Norway and if anything, our key insight was that you don’t have to go to specific tourist spots to see the country’s beauty; there is striking beauty nearly everywhere. Every drive we took was incredibly scenic, and the most touristy areas (like Flam or Trollstigen) were no more beautiful than random fjord towns, mountains, and glaciers we drove by (especially the drive from Fjaerland to Geiranger!).
What we loved:
Really beautiful scenery
It’s a very high-functioning society with an excellent quality of life. Basic things that should be automated in the 21st century actually are automated, like public restroom toilets and faucets or paying for parking and tolls. Simple safeguards are put in place, like high fines for speeding (probably not a coincidence that we hardly saw any crazy drivers), a reflective safety vest in the glove compartment of every rental car, and even a handwashing sink at the entrance to at least one grocery store we visited. The whole society seems designed for practicality and ease, even in the smallest ways (e.g., single-serve yogurts at the supermarket always come with a spoon attached in the packaging. Not a plastic spoon, but a wooden one). As a result, everything feels more orderly and a little easier to navigate. It feels like the social contract is more intact in Norway than in most other countries we’ve spent time in – we didn’t see any obvious poverty (unsurprising given they have a strong social safety net), waiters don’t rely on tips to make ends meet, etc. We were impressed all around.
What we found challenging:
It’s one of the most expensive places in the world. Restaurant prices are like eating out in Manhattan (but the food isn’t necessarily as good). Hotels (quality-adjusted) are even more expensive!
There is more of a language barrier than we expected. Most signage is in Norwegian and people default to communicating in Norwegian. As a result, restaurant menus were sometimes a challenge, as was signage at some tourist attractions. While most people seemed to also speak English, sometimes they didn’t seem to understand us or be able to respond in English.
Vegetarian food options were not great. We ate a LOT of sandwiches that we made ourselves and we were very glad we brought protein bars and protein powder packets to stay well nourished (especially while hiking).
We loved Norway and would be delighted to return, especially given its relative proximity to New York. That said, it is worth noting that New Zealand shares similar advantages without the disadvantages we noted for Norway (though perhaps its disadvantage is that it is very far away!). I’m not sure Norway has displaced New Zealand as my favorite place that I have visited, but it is very high on the list.
Itinerary
Our 10-day road trip mostly followed Earthtrekkers’ Norway fjords itinerary from 2013. This is the first in a series of blog posts detailing our travels. My hope is these details can help anyone who visits these places to have as seamless a trip as possible.
Part I: Stavanger
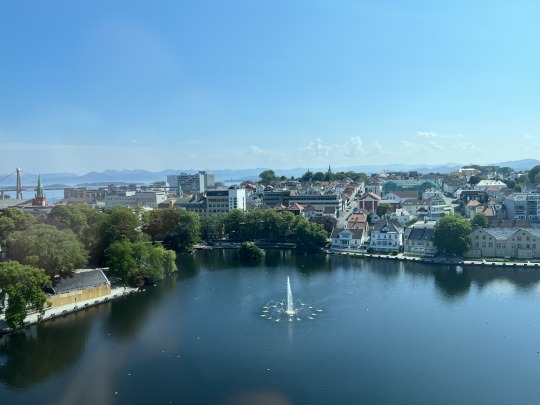
Stavanger city center
Stavanger is a city in southwestern Norway that is a good landing spot for a couple of well-touristed hikes: Pulpit Rock (Priekestolen), Kjeragbolten, and Florli 4444. The main fjord accessible from here is called Lyseford. We did the first two hikes and saw Lysefjord from the top of Pulpit Rock. Overall, we thought Stavanger and the surrounding area were nice, but after subsequently seeing other parts of western Norway that really blew us away, we think this area could potentially be skipped.
We flew into Stavanger (via a couple hour layover in Oslo). It was easy to pick up a rental car – we used Hertz – and took 25-30 mins to drive to our hotel in the city center.
Day 1 - Pulpit Rock (Priekestolen)

View of the “pulpit” over Lysefjord
This is one of Norway’s most popular hikes. We did this hike first thing after arriving from a redeye and dropping our stuff off at our hotel. On just a few hours of sleep, and with a very hot sun overhead when we started around 3:30PM, we found it to be quite tiring, but very pretty. The trail is just under 5 miles out and back and is rated Moderate – it would potentially be considered Moderate/Hard in the U.S., but this is Europe after all, and people of all ages were doing the hike. It starts off very steep - hiking sticks would be helpful – and gets easier after the first 1-1.5 km. Overall it took us 2.5 hours + a 15 min break at the top.
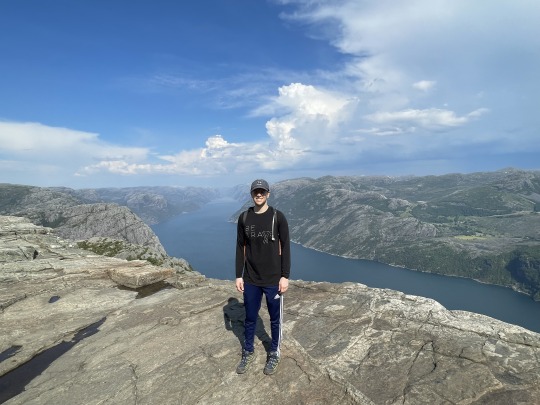
Hanging out at the top of the hike
There isn’t much of a view for most of the hike, but at the top you’re on a cliff with a lovely view of the Lyseford down below. It’s not the most special hike we’ve ever done, but it was nice.

More views from the top
Logistics
Getting there: We drove ~40 mins to this hike via the fancy new Ryfylke Tunnel, a very long tunnel that looks like a cave inside and for some reason has colorful uplighting in various places. The toll was something super expensive – Hertz automatically added it to our car rental bill so we didn’t need to stop and pay (this was the case for all toll roads we drove on in Norway, and there ended up being a ton that we didn’t even know about until we saw the Hertz bill).
Parking: Parking is NOK 200 (~$20) per car. We got there around 3:15PM on a Friday and there were plenty of parking spots.
Restrooms: Restrooms are in the parking lot and were clean.
Day 2 - Kjeragbolten
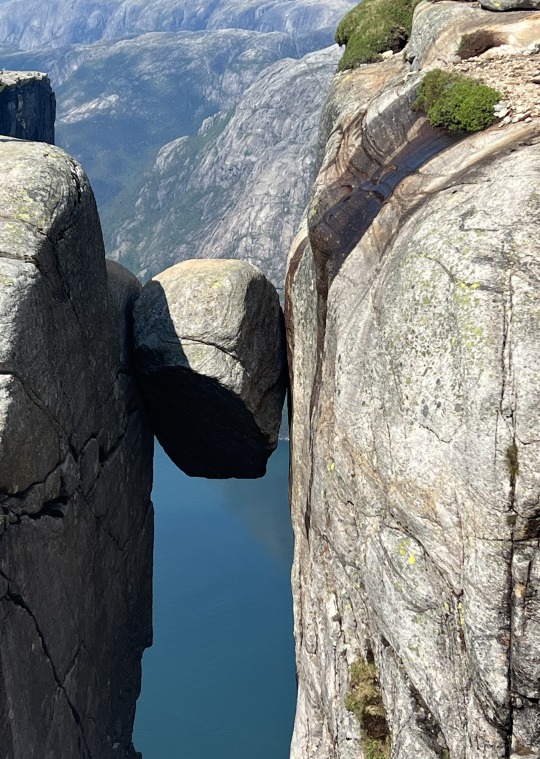
Kjeragbolten is the hike to Norway’s iconic boulder between two rocks.
It’s a 10 km / 6 miles out-and-back hike (5 km / 3 miles each way) that is European strenuous (as opposed to American “strenuous”) – it is really hard! The terrain is rocky the entire way, unlike any other hike we can remember, and there are many parts where you’re going almost straight uphill or straight downhill, with long stretches that have chains to hold on to so you don’t just slide down the face of the rock. It’s a difficult hike not just because of how steep it is, but also because there are plenty of opportunities to lose your footing.

Pretending I’m not crying inside at the steep rocky parts with chains (the photo does not do the steepness justice)
If you’ve done the Beehive Trail at Acadia National Park or Camelback Mountain in Phoenix, the steepness of Kjeragbolten and the corresponding necessity of the chains feels 100x. The number of times I saw the chains and thought, “that’s excessive/unnecessary” was 0. We were very glad we brought hiking sticks. We saw very few children on this hike.
There is no shade anywhere on the trail. For us the weather was extremely sunny and hot the entire time (10am-2:30pm, including ~30 mins to eat lunch and relax a bit at the top). This made the hike even harder.

The views are pretty out-of-this-world: stark mountains, some with snow still on them, and water views including lakes and fjord. We haven’t seen a lot of hikes that look like this. Earthtrekkers wrote that this is their favorite hike in the world. We liked it, but can’t say it outranks some of our all-time favorites like Tongariro National Crossing or Roy’s Peak in New Zealand, or Trolltunga and Romsdalseggen which are also in Norway. All of those hikes are pretty challenging, but for me Kjeragbolten was the hardest (well, maybe next to Romsdalseggen). Overall it took us 4 hours + ~30 mins for lunch.

There was still quite a bit of the snow on the ground, some of which we walked through along the trail.
Logistics
Getting there: Drive 2.5 hours (each way) from Stavanger to Kjeragbolten (we just typed Kjeragbolten into Google Maps). The drive starts on a highway and then you turn onto some back roads that go by beautiful lakes/fjords. Finally you drive ~25 km up an extremely narrow and winding road – it looks like it is one-way, but it’s not, so drive carefully! – with gorgeous views to the start of the hike.
Parking lot: We read online that there are 400 parking spots, though it didn’t look like that many in person. There were plenty of open spots when we arrived on a Saturday at 10am, and also when we left around 3pm, which we thought was a bit surprising for such a well-known hike. The cost is NOK 300 (~$30) per car and you can pay by credit card at a parking machine upon arrival; make sure to put the parking voucher on your dashboard.
Restrooms: The restrooms are at the parking lot. There were several stalls and it was clean. We did not see any bathrooms during the hike, and it’s very open so there weren’t really places to go along the trail.
Day 3 - Walking in the ‘burbs
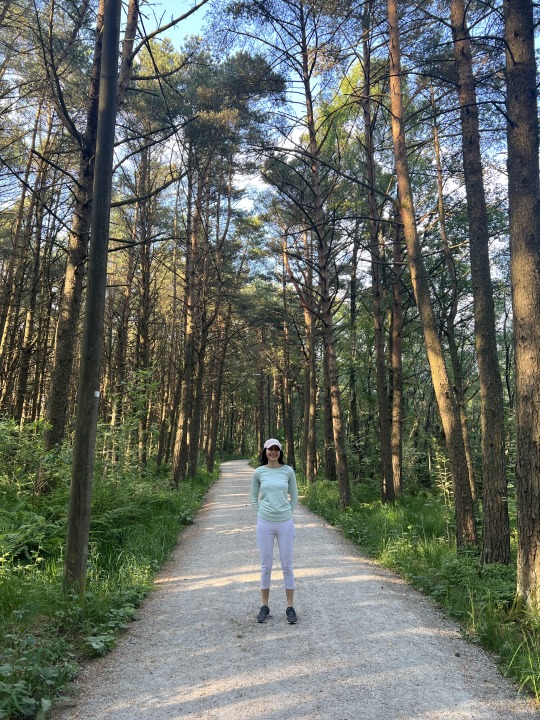
We were feeling tired and lazy after Kjeragbolten. Instead of following our original plan of hiking Florli 4444 – a hike in the town of Florli, along the Lysefjord, that entails going up >4,444 steps (!) – we slept in, got brunch, napped, and did a ~5-mile walk around Stokkavetnet, a very nice lake just a few minutes’ drive outside of Stavanger city center. It reminded us a bit of Jenny Lake in Grand Teton National Park (minus the mountains) – we saw horses, deer, a golf course, kayaking, and lots of people swimming, biking, and jogging. It was really nice to see a less touristy side of Stavanger, and it reinforced our perception that locals can enjoy a really nice quality of life.
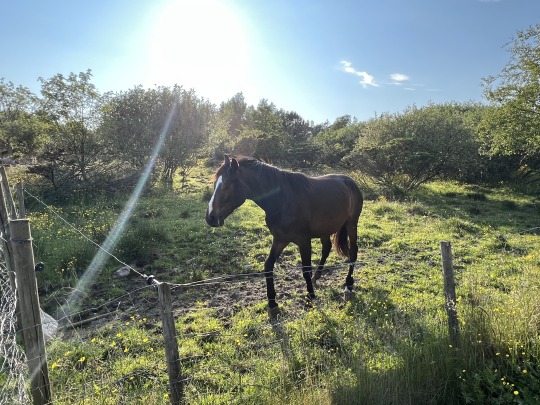
Note: If you do want to hike Florli 4444, you can take the Kolumbus Ferry from Lauvvik (a ~40 min drive from Stavanger) to Florli for ~$14 per person roundtrip. Tickets can be booked online; when we looked the night before we intended to go, the ferry was sold out. You can also book an excursion directly from Stavanger via gofjords.com (which was also sold out) or via Rodne tours which was charging ~$80 per person roundtrip. Given the number of stairs involved, we do not regret skipping this hike.
Stavanger: Things to Know
It seems to be pronounced like “stuh-VAHN-gur”
There are so many roundabouts! We didn’t encounter a single traffic light in the town or on any of our drives to hikes in the area.
The downtown has lots of places to eat, including the best vegetarian options we were able to find during our Norway trip. We liked Mogul India – the bhindi (okra), palak paneer (cottage cheese in spinach), and sabudana vada (sago fritter) were great – and Wanna Thai was also pretty good – we were fans of the massaman curry with tofu. There was a vegan Vietnamese place (Chay Vegan) that we were interested in but never had a chance to try.
Downtown also has multiple supermarkets if you want to pack sandwich materials for lunches, etc.
There are quite a few hotels downtown. We stayed at the Radisson Blu and it was fine, though nothing special for how expensive it was – clean and comfortable enough, Manhattan-sized hotel rooms (i.e., very small, which we came to learn is common across Norway).
All parking in the town is public (and I think free?). We parked at the Olav Parking Garage just around the corner from our hotel.
The town is very touristy. The hikes were full of people speaking Russian and Spanish, and occasionally some other languages, and the main strip downtown was packed with what appeared to be tourists from a cruise ship docked along the water.
Look out for the next posts covering the remainder of our Norway travels!
0 notes
Text
Island Fever in Bermuda
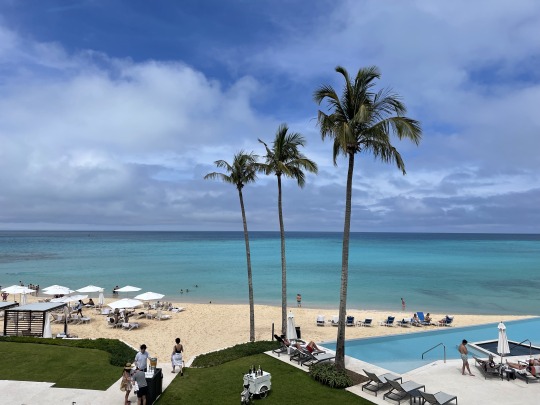
View from the balcony at the St. Regis Bermuda
Bermuda is a British territory off the coast of North Carolina. It is a very small island with just a few flights a day going to and from its commercial airport.
We chose to visit because 1) I love a relaxing beach getaway and 2) It’s (supposed to be) a a 2-hour direct flight from NYC and 3) We had a lot of Marriott points and were interested in checking out the St. Regis Bermuda. Thanks to flight delays on both ends and the local airport closing down at 4pm (earlier than our flight’s delayed takeoff time!), our weekend turned into a bit of a logistical mess. After all this, our desire to get off the island and get home gave us our very first taste of island fever!
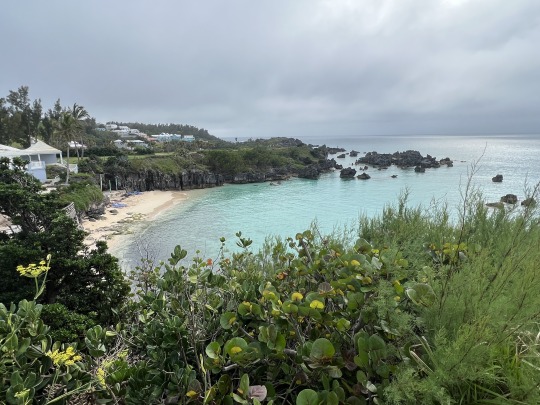
Waterfront near St. Catherine’s Park by the St. Regis Bermuda
Our takeaways:
Bermuda is a pretty tropical destination. Our experience reminded us of resorts in the Caribbean or the waterfront in Sausalito (in the Bay Area)
It is very, very expensive for what it is. We have paid half as much for nicer stays in places like Hawaii or Laguna Beach, or the same amount for a significantly more luxurious stay in the Maldives
If you run into logistical difficulties -- a delayed or missed flight, the airport shutting down early, etc. -- it can be difficult to get a seat on another flight because there are so few flights each day, and you’ll likely break the bank paying for a mediocre hotel room booked at the last minute
Overall, it’s nice but, in my view, not worth the trouble or expense relative to other vacation destinations
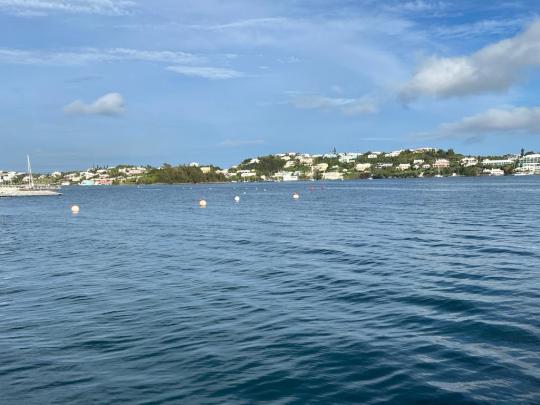
The waterfront by the Fairmont reminded us of views of Sausalito
We ended up spending 2 nights at the St. Regis, which is a quiet, secluded beachfront property on one end of the island, and 1 night at the Hamilton Princess Fairmont hotel, which is centrally located on the waterfront in the capitol city of Hamilton and walkable to restaurants, etc. The two properties had very different feels -- the St. Regis felt like a peaceful resort that could’ve been anywhere in the world -- good for someone who wants a relaxing beach vacation -- whereas the Fairmont had Vegas vibes and might be more exciting for someone who wants to explore and get a feel for what Bermuda is like. As vegetarians, the food in both areas was okay but not great.
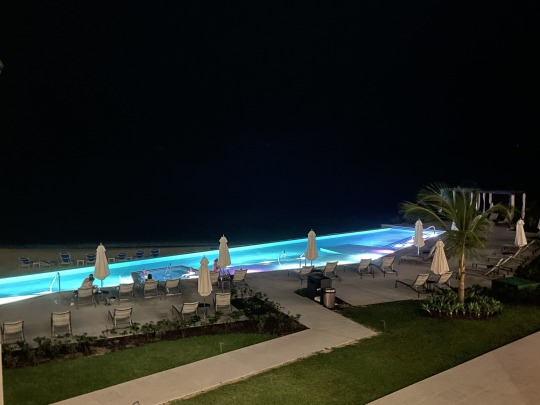
The St. Regis infinity pool at night
0 notes
Text
Elk Pen Loop Trail in Harriman State Park (NY)

We decided to explore some hiking just outside of NYC and had a few friends recommend Harriman State Park. We picked the Elk Pen Loop Trail because it seemed long enough (7.5 miles) to justify the ~1.5 hour each way drive from Brooklyn and was highly rated on Alltrails.
Is it worth it?
As you’ll see from the photos in this post, this trail takes you through a fairly standard-looking forest vs. the spectacular landscapes from our recent hiking destinations. It felt like a moderate hike with a few challenging ascents at the start, but it was a bit more technical than usual for us because the trail isn’t well-groomed. That said, it met our need for getting out into nature for a couple hours! I’m not sure I’d put in the effort to drive all the way out there from Brooklyn again, but I probably would go if I lived closer, like on the Upper West Side.

One of the more green areas along the trail in late March
How to do it?
The #1 thing to know about this trail is that there are no markings posted to tell you which way to go. We couldn’t have done it without periodically checking the Alltrails map, which worked for a while on my T-Mobile network and then we had to switch over to using S’s Verizon network when I lost connection. As moderate to fast hikers (for the U.S.), this hike took us 4.5 hours, so be sure your phone has a charged battery.

In some areas we couldn’t find a well-defined trail, and in others there were deep piles of leaves that hid uneven ground that was easy to trip on. There were lots of spiky plants jutting onto the “trail” as well. We were glad to have worn long pants and to have each brought a hiking stick.
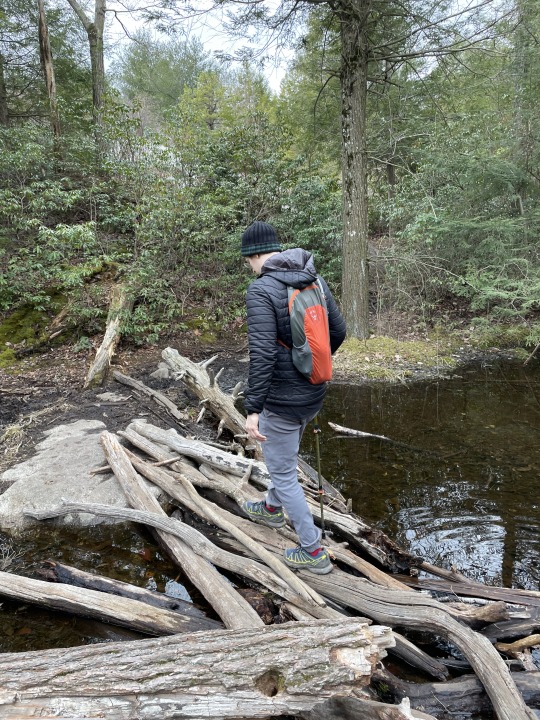
We traversed a couple streams that didn’t have a real bridge and required some balance to cross, like this pile of logs
We used Google Maps to head to the Elk Pen Parking Lot in Tuxedo, NY. The highway exit that Google suggested was unexpectedly closed off, so we continued on the Palisades Parkway for a couple miles to Exit 18 and drove to Tiorati Circle in the state park. There a barricade blocked us from continuing on Arden Valley Road, but when we called the Harriman State Park/Tiorati office they told us it was okay to drive past the barricade. We had read that the lot has 25 parking spots, and on a chilly Friday morning around 10am, there were maybe 5-7 cars and plenty of available spots. It was the same when we returned to the lot in the mid-afternoon.
A guide to the hike
The trail starts out rather boring but becomes more interesting. We started on the Appalachian trail, which is marked by white blazes.
We got some nice views of a lake along the way.

Perhaps 25% into the hike, we encountered the Lemon Squeezer, a very narrow path hemmed in by rock. We continued to follow the Appalachian Trail (white blazers) through the Lemon Squeezer and then perhaps for ~20 mins beyond that.

Approaching the Lemon Squeezer

In the Lemon Squeezer

Trying to exit the Lemon Squeezer!
We hit an intersection where there was a wooden post naming many trails. We turned right to pick up the Long Path, a trail marked by turquoise blazes.

Following the turquoise blazes
Proceeding along this path, we passed a swamp with tall grass.

At some point we picked up the “L” path, and later we reached a clearing where we transferred onto the “red dot in a white circle” path.
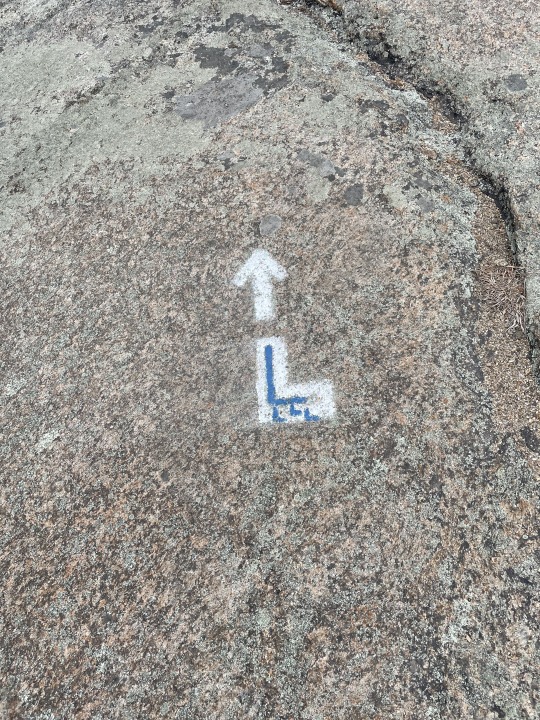
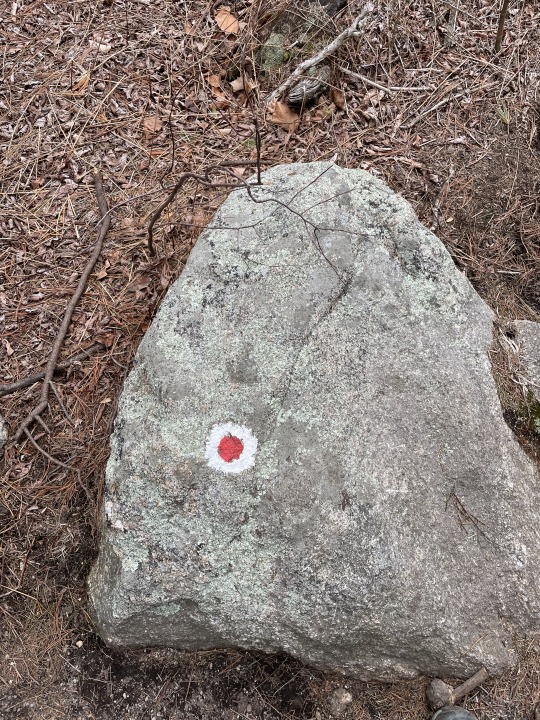
We got lost a couple times and used Alltrails to backtrack and find the right trail. After the red dot with white circle, at some point we shifted onto the Dunning Trail, marked by yellow blazes.

Getting a bit tired of constantly checking the map and looking for the right blazes
This yellow blazes trail seemed to intersect with the Appalachian Trail (white blazes) for a while.
Last, we got onto the Arden-Surebridge trail, marked by a red triangle on a white blaze. These markings appeared to be stapled onto the trees, while all the previous markings we followed had been painted onto the trees or rocks.

We wrapped up the walk in a forest that led us, at the very end, back to a flat grassy area by the parking lot.
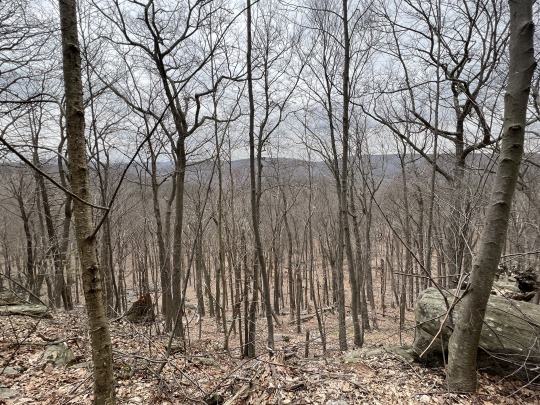
We stopped for a late lunch in Nyack, which has a cute downtown that reminded us a bit of Missoula, Montana. We really liked the acai smoothie at Bari, a healthy foods restaurant. Be sure to download the Parkmobile app to pay for parking ($1/hr + Parkmobile’s $0.30 fee).
0 notes
Text
Kerala Road Trip
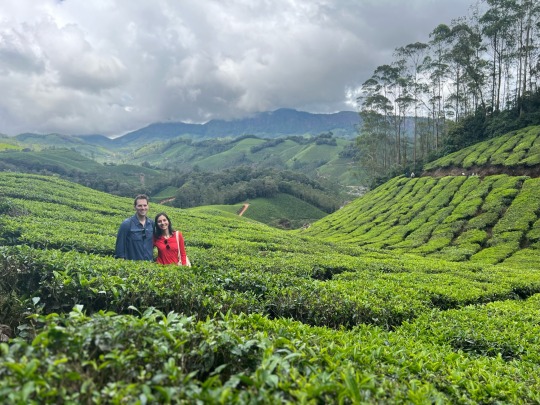
Walking in Munnar’s tea plantations
The Verdict: We felt Kerala was not bad, but overhyped, egregiously overpriced in December, and not worth the opportunity cost of traveling to a country with good tourist infrastructure (potable water, good roads, access to information for travel planning, decent affordable lodging, competent customer service, etc.).
Why Kerala? We needed to be in south Kerala in late December for a wedding and wanted to tack on a ~week-long vacation somewhere warm and nearby. We had originally hoped to travel to Sri Lanka but changed plans due to the political situation there in 2022. We loved our trip to the Maldives after the last time we were in India, back in 2019, but figured we should try somewhere different this time. Traveling somewhere further like Thailand, Bali, etc. seemed too far/tiring. So we decided to spend our week exploring different parts of Kerala, a state we have long been intrigued by given its renowned progressive politics and high literacy rate, the famous backwaters houseboat scene, and my interest in seeing south India, which I have never visited despite having been to India ~15 times.
Trip Overview:
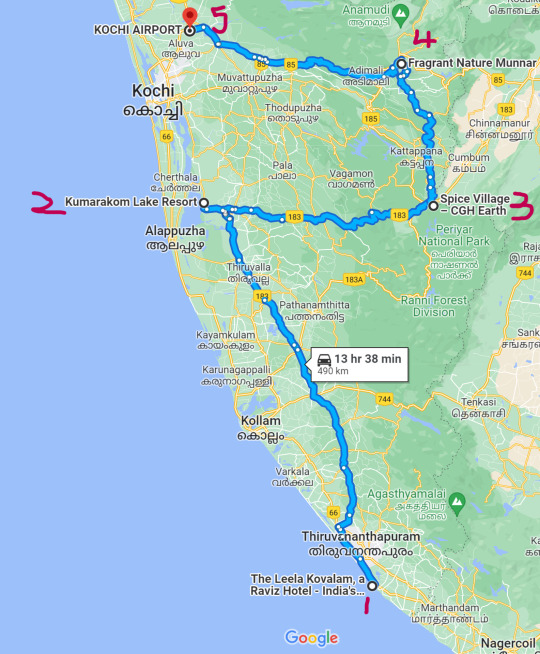
Kovalam: Beach town at the southern tip of Kerala. We started by spending 4 nights here specifically for the wedding. It was fine, but not a place we’d go out of our way to visit. Since we were only there for the wedding and didn’t do any tourist activities, we won’t focus on Kovalam in this post.
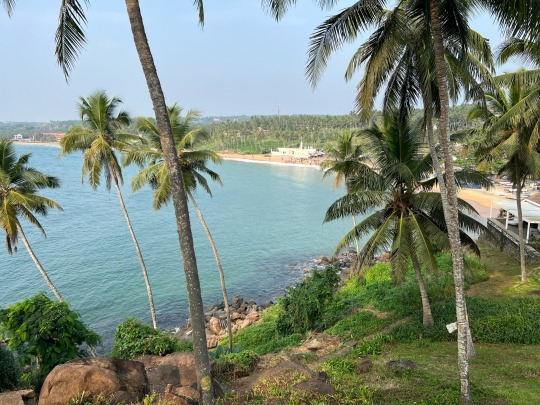
View of the water from Leela Kovalam, the resort we stayed at
Alleppey/Kumarakom: Alleppey (aka Alappuzha), on the west coast of the state, is the most famous area for taking a houseboat on the Kerala backwaters. When we were planning our trip around August, about 4 months in advance of our travel, we had a really hard time finding a decent houseboat with reliable reviews so we opted to skip this. (Our friends found a ~$400/night houseboat on Airbnb that had great reviews and they really liked it). Instead, we stayed nearby at Kumarakom Lake Resort, a very nice but crazy expensive luxury resort. [4-5 hour drive from Kovalam]
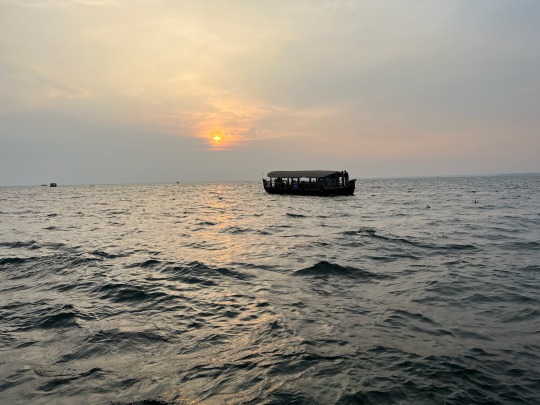
On a sunset boat ride on Kumarakom Lake
Thekaddy: On the eastern side of Kerala; known for Periyar National Park, a tiger reserve where it turns out nobody ever sees the tigers. We had planned a half-day hike in Periyar with the hopes of seeing wild elephants and other wildlife, but unfortunately missed the tour. We stayed at another ridiculously expensive resort here, which wasn’t anywhere as nice as Kumarakom. Thekaddy is skippable. [4 hour drive from Kumarakom]
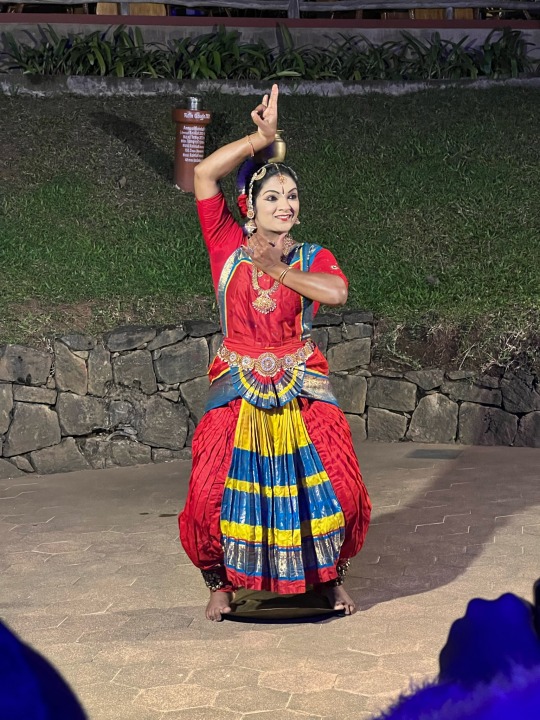
Traditional dance performance at our hotel in Thekaddy
Munnar: In the northeastern corner of Kerala, Munnar is known for its scenic tea plantations. The scenery really did deliver, but everything else about our experience here was so poor (the process of trying to book a hotel, get information about activities/tours, find safe restaurant food in town, constantly getting ripped off, commute times, safety on the crowded and winding roads) that we cannot recommend it. [4 hour drive from Thekaddy]

Walking on a tea plantation in Munnar
Kochi: We ended our trip at Kochi airport, from which we flew to Mumbai. We had the chance to spend a couple hours in downtown Kochi, which was compact and charming, but didn’t have time to check out other neighborhoods.
Kumarakom Lake Resort

Inside Kumarakom Lake Resort
We spent 2 nights here and the experience was basically perfect. It was about as similar to the Maldives as anywhere I’ve been -- standalone villa with a private plunge pool, charming decor, gorgeous views of the lake, 5-star service, delicious food, activities like yoga, pottery making, etc. Even though it was so comfortable, in my opinion the $400/night room rate is still completely egregious for India. You can travel to Italy, Switzerland, Spain, Scotland, etc. and stay in beautiful hotels that are less expensive and easier to get to from the western world (the drive to Kumarakom from Kovalam was long and uncomfortable). I wouldn’t go out of my way to come to Kumarakom unless I already needed to be in Kerala for some other reason. If you are here, then yes, it is a lovely property to visit.
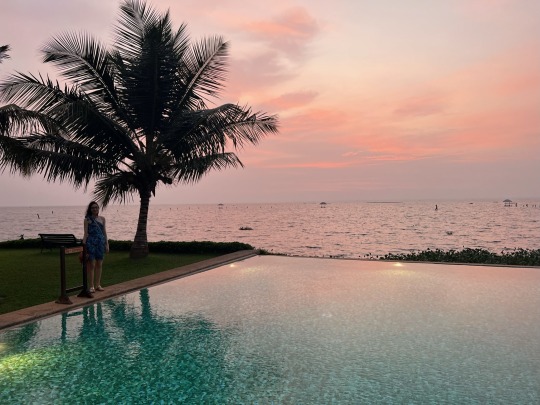
Note: We stayed in a villa, not a houseboat, because reviews of the resort’s houseboat stays did not sound great.

Nearby Activities
On the drive up from Kovalam, our driver recommended we stop at Jatayu Earth Centre, which has a cable car up to a massive sculpture of a famous bird from The Ramayana. I’m not big on tourist attractions or cable cars in third world countries, but it was actually pretty cool. If you’re staying at Kumarakom Lake Resort, I’d scurry along to make the most of your time there, but if you don’t have anywhere to be, this could be a nice stop.
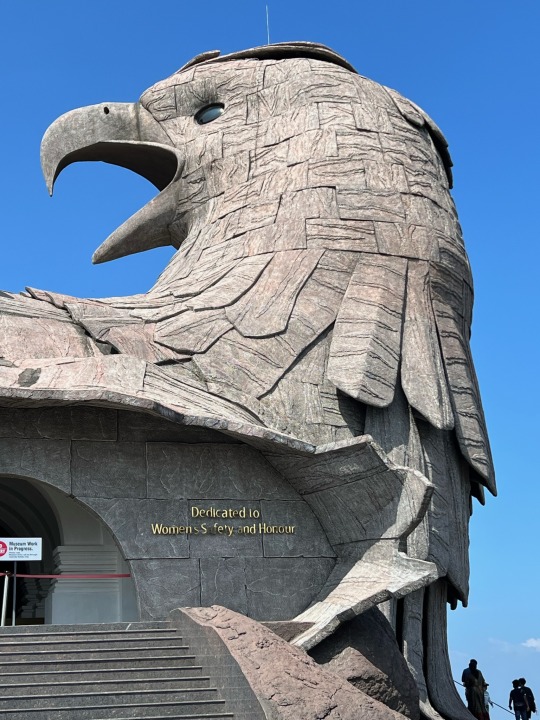
Walking around the Jatayu monument. The dedication to “women’s safety and honour” is a specific reference to The Ramayana storyline.
Thekkady
We spent 1 night at Spice Village, an “eco-resort” in Thekaddy. Like Kumarakom Lake Resort, it was also egregiously expensive and had delicious food. The room was a standalone thatched hut that was pretty nice inside, if not Kumarakom-style luxurious, and the activities were interesting -- a traditional dance performance, cooking demonstration, and nighttime walk with the onsite naturalist, whose fascination with plants, insects, and animals was truly contagious. Unlike Kumarakom Lake Resort, the service was not particularly attentive or helpful and we felt less insulated from the discomforts of traveling in India (i.e., sewage smells in certain parts of the property, thumping music from a neighboring resort late into the night, the room safe didn’t work, etc.). We wouldn’t travel all the way to Thekkady just to stay at this resort.
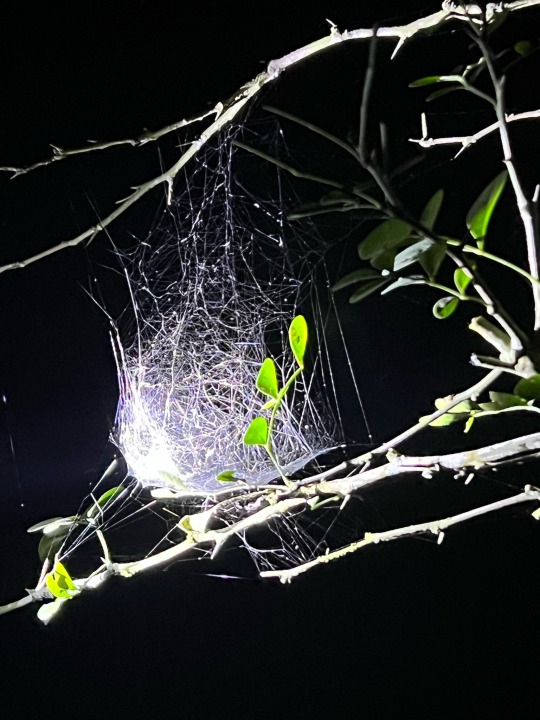
We saw quite a few spiderwebs on our nature walk at Spice Village.
Nearby Activities
Our driver advised us to stop at Deepa World, a spice plantation, where a tour guide who spoke decent English took us on a 20-minute walk and showed us different spice plants. It was only INR 100 (like $1.20) per person and it was actually a really neat experience, especially as we then kept spotting a lot of these spices growing in the wild around Kerala.
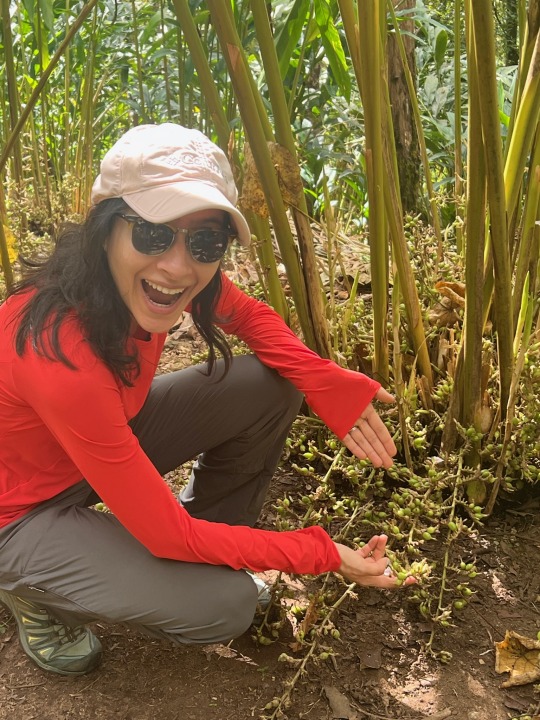
Our tour guides in Kerala were consistently excited to point out cardamom pods growing in the wild.
Although we unfortunately didn’t get a chance to visit Periyar National Park, my sense from reading online reviews is that we didn’t necessarily miss too much.
Munnar
The tea plantations were so beautiful and lovely to walk through, but the experience of staying in Munnar was really not great. We stayed for 3 nights at Fragrant Nature Munnar, a supposed 5-star hotel that surprised us with its dilapidated condition, lackluster service, and yucky food (I honestly didn’t even know that Indian food in India could taste bad until we stayed here...). Finding lodging in Munnar was a frustrating process because it was difficult to understand which hotels are actually good (this one had just as good Google ratings as hotels that we later learned are actually decent) and when we did get leads on “good” hotels, they tended to be unresponsive, unhelpful, and/or scammy during the booking process. I even asked for leads on Reddit, and the responses indicated that a lot of Kerala hotels’ online reviews are fabricated by the hotel owners and therefore aren’t trustworthy. Everything was extremely expensive around Christmastime -- as context, our Munnar lodging was significantly more expensive and probably less nice than a Motel 6 in the rural U.S. While we weren’t specifically looking for luxury stays -- especially after breaking the bank in Kumarakom and Thekkady -- we just wanted a place that was clean with safe and decent-tasting food (very important because in Munnar you’re totally dependent on your hotel for your meals). The difficulty of finding this was a huge turn-off and is frankly a huge reason I would not recommend visiting here.
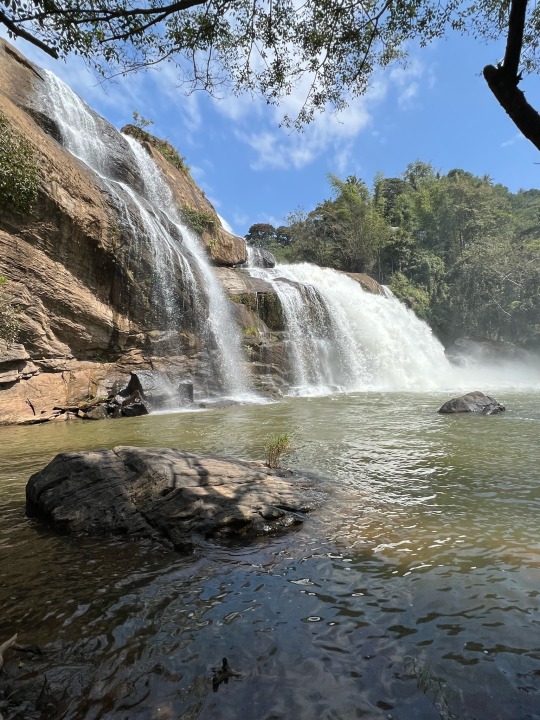
A waterfall we saw in Munnar
Nearby Activities
While Kumarakom and Thekaddy were basically about the resort experience, Munnar is all about the gorgeous natural beauty that is available for all to enjoy, regardless of your wealth/ability to stay in a luxury resort. And what is specifically unique about the views here are the stunning tea plantations!
Our favorite activity of our entire Kerala trip was a half-day hike booked through Viator (Mountain Hiking through Munnar Tea Plantation, operated by the Munnar Tourist Information Office). Not only do we generally love hiking, but we had a chance to walk through gorgeous tea plantations unlike any landscape either of us has experienced. There were vibes of Hobbiton, Vietnamese rice paddies, and the lush Scottish countryside. If after reading this post you for some reason still decide to travel to Munnar, we highly recommend doing such a hike!
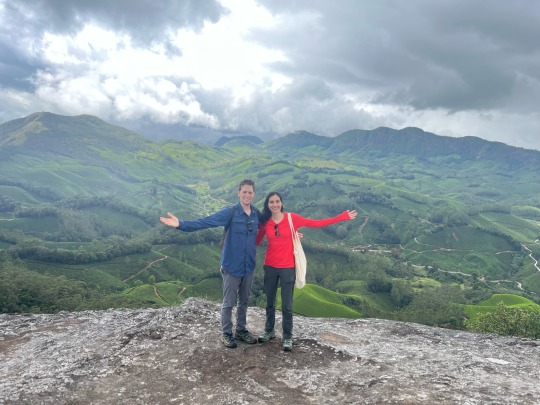
On the tea plantation hike
The other activity we tried in Munnar was a “Jeep Safari” that our driver told us we’d really like (hard not to believe he wasn’t getting a kickback from the tour operator). We got driven around to some waterfalls, a scenic viewpoint, and a dam, none of which were really that great. It was also very overpriced for India (US $50 for a 3 hour tour, at least half of which was spent just being driven around). We do not recommend it.
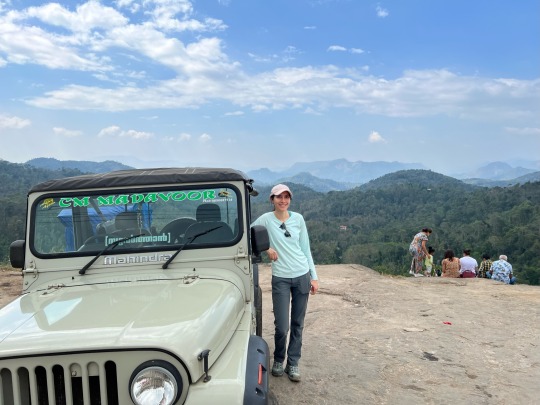
Jeep Safari scenic viewpoint
In terms of other activities, we read about recommendations to visit Eravikulam National Park and the scenic viewpoints at Top Station, Madupetty Dam, and Echo Point. These are all extremely popular destinations among Indian tourists and given the crowds, long commute times, and middling reviews we read online, we decided to skip them.
Logistics
As I referenced in the Munnar section, planning the logistics of our entire trip to Kerala was a real pain -- far more difficult than anywhere else we have traveled. There was very limited information available online and the Indian travel agents we got connected to during the planning process were unprofessional and unresponsive, so we ended up choosing our hotels based on recommendations from family friends and online research (which obviously didn’t work out well for Munnar). We learned that booking directly through the hotel’s website is the most expensive option (though probably the least painful, as you don’t have to deal with time zone differences, language barriers, and the general annoyances of dealing with Indian customer service staff). However, there tends to be a substantial discount if you contact the hotel directly. And apparently you’ll get an even lower rate if you go through a travel agent. Which brings me back to finding it awful to try to work with Indian travel agents...
0 notes
Text
Zion National Park in November

OVERVIEW
Zion National Park was the 2nd most visited U.S. national park in 2021, according to the National Park Service. It is a gorgeous area that combines a Sedona aesthetic with Yellowstone-like prairies and some Grand Canyon-like spots. Many people have raved to us that Zion is their favorite national park and that Angels Landing and The Narrows are some of their favorite hikes of all time. Having visited over 20 national parks in the last 2 years, our assessment is that Zion and these hikes are very nice, but a bit overhyped.
That said, we felt November was a fabulous time to visit Zion. It’s definitely off-season, and as a result it was not very crowded, at least on Thursday and Friday (Saturday was still a bit packed). We didn’t have to stress about finding a parking spot, waiting in long lines for the shuttle, or being cramped on trails with hordes of tourists. In fact, with a bit of warm clothing, the weather was very pleasant for hiking (not atrociously windy like Joshua Tree at this time of year!).
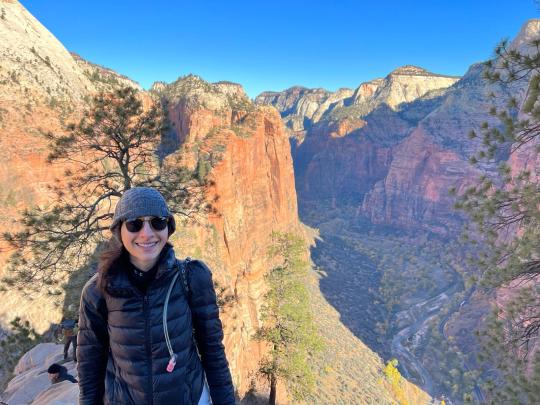
Hiking to Angels Landing
HIKES
1. The Narrows

The Narrows is one of the 2 most popular hikes in the park, and it is very unique compared to any other hike we’ve done. You’re basically wading through a river in a very long, narrow, and scenic canyon.

There is a long version where you take a private shuttle up to the “top” (Chamberlain Ranch) and hike down 16 miles to the park shuttle stop. This was not an option in November (thank goodness!) so we did the “bottom-up” version where you start at the park shuttle stop, walk 1.1 mile on land via the scenic Riverside Walk, and then get in the water and wade as far as Big Springs (4 miles in the water), which is as far as you can go without a permit.
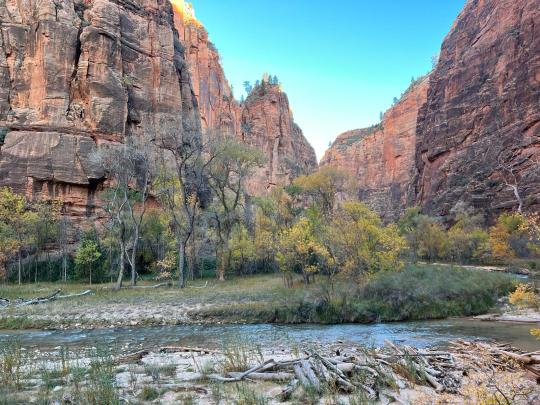
Riverside Walk
If you do the bottom-up version, it is recommended to go at least as far as the iconic “Wall Street” area, which is about 2 miles into the river. We unintentionally walked well past the beginning of Wall Street and almost got to Big Springs before we stopped to eat lunch and then decided to turn back. The way out was harder as we were going against the current, which was decently strong in some parts, while we shaved about 30 mins off the return trip, with the current at our heels.

If you’re like me and 1) don’t love cold weather/water, 2) have zero interest in walking in a river for many hours, don’t fear -- with the right gear we stayed very comfortable and warm, the water levels usually didn’t go above knee height, there are several parts when you can actually walk on dry land along the sides of the canyon, and you can turn back at any time that you like. I’m glad we did it because S loved it, and I’m also glad it’s a once-in-a-lifetime kind of hike because I’m good not walking in a river for 5 hours again.
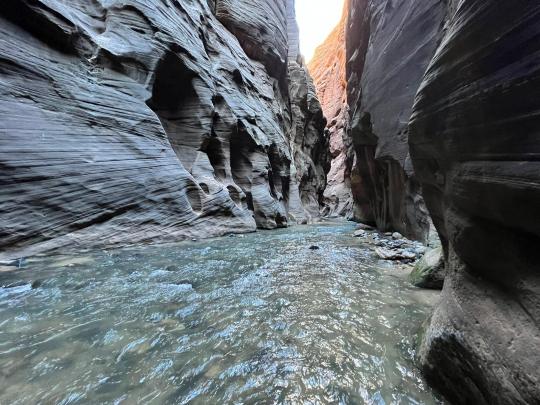
Logistics for The Narrows:
Permits: This was not required for the short version of the hike, starting from the bottom and only walking a few miles in. We read that permits are required for the long version of the hike, starting from the top and walking all the way down to the shuttle stop.
Equipment: Since this hike entails wading through a river, it is prudent to use equipment including special boots, neoprene socks (to keep your feet warm; I was glad to have 2 pairs in 40-degree weather), a shoulder-height hiking stick, and dry pants in cold weather. The park ranger told us there are 5 companies in Springdale that provide these rentals. We used Zion Adventures, which had excellent Google reviews, and charged $49pp for the full rental package with dry pants (it’s $75pp if you get a full dry suit, which we did not need as the water did not go above mid-thigh height at any point in our hike). We stopped by the store the afternoon before our hike to try on the equipment and take it home with us so we could get an earlier start on the day of the hike -- much needed as there was already a line to enter the park by 8:30 a.m. on a Friday in mid-November. Note: The dry pants/suit are waterproof but do not keep you warm. We were advised to wear fleece pants (which I hadn’t brought) or, as a substitute, multiple pairs of polyester pants (long underwear + leggings worked perfectly for me), and similar clothes on top (e.g., warm base layer, fleece jacket, light down jacket). A covering for the ears and gloves were a must, and we were very glad to have brought Hot Hands hand warmers to put in our gloves. The gloves also helped prevent against chafing while carrying the hiking stick, which was very helpful to gauge the water depth as some areas were unexpectedly deep.
Location: We parked at the visitor center and took the Green Line shuttle to the last stop, Temple of Sinawava.
Time of Year: We had thought going in November might be too cold, but it was absolutely fine (and this is coming from someone who ALWAYS feels cold). The temperature range on the day of our hike was about 25F-45F, and we were very comfortable with our warm clothes and rented equipment. It was also really nice that the hike wasn’t very crowded at this time.
2. Angels Landing
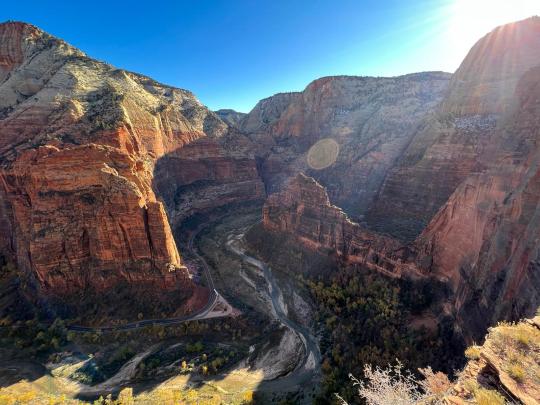
Angels Landing is the other most popular hike in the park, in addition to The Narrows. It is a ~5 mile out-and-back hike that starts along the lush Virgin River, where you might find deer or even bighorn sheep hanging out (like we did in the morning), and then ascends along Sedona-esque cliffs to the grand finale, a fairly short (we estimate ~1 mile out-and-back) rock scramble assisted by chains.

Hiking with the chains at Angels Landing
The hike is rated strenuous by many sources; I would say it is moderately challenging until the rock scramble, which requires more careful footwork but still didn’t feel strenuous in terms of fitness level required. It’s nowhere near as hard as the rock scramble at Emory Peak in Big Bend National Park, or as strenuous as the steep Camelback Mountain hike in Phoenix. We thought it was a nice hike with good views the entire time, but also that it is a bit overrated; it didn’t compare to some of our favorite national park hikes. The entire hike, with liberal stops for photos, took us 2.5 hours roundtrip.
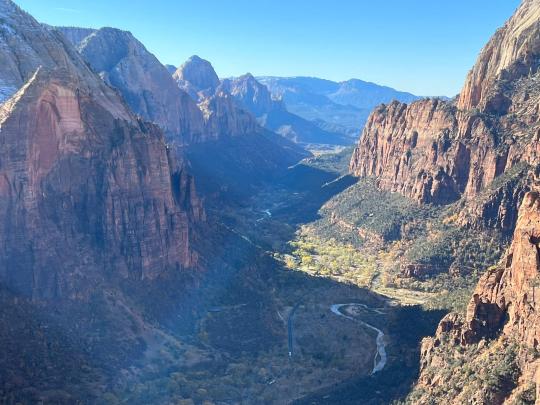
View from the top of Angels Landing
Logistics for Angels Landing:
Permits: In 2022, the park started requiring a permit to do this hike, which you can procure for $3 per hiker via a lottery on recreation.gov. If, like us, you don’t plan ahead far enough to enter the lottery several months in advance, you can still enter it starting at 12:01am MST the day before you hike -- so if you want to hike it on a Wednesday, for example, you can enter the lottery on Tuesday at 12:01am MST, which is effectively Monday night on the west coast or the wee hours of Tuesday morning on central or eastern time zones. The lottery remains open for a couple of hours and then you’ll get an email later the same day (we got ours in the afternoon) telling you the result of your entry. I found the lottery somewhat confusing and unlike the process for other national park permits we’ve applied for, but luckily we did get permits. When we got to the hike, nobody even checked for our permit, perhaps because the park wasn’t very crowded on a Thursday in mid-November. Note: You can actually do most of the hike without a permit; the permit is only required for the famous rock scramble part, which is the part of the hike that is technically called Angels Landing.
Location: To get to the trailhead, we parked our car at the visitor’s center, hopped on the 8:15am Green Line shuttle (it wasn’t full), and got off at stop #6 - The Grotto around 8:30 a.m. Note that cars are not allowed to drive through this part of the park during most of the year, so taking the shuttle is a requirement. We hear the shuttle gets extremely crowded during peak season, and that it is wise to line up early to get a spot on the first shuttle of the day at 7 a.m. We crossed the street to get to the Virgin River, then followed signs to the trailhead.
Restrooms: There are restrooms with normal toilets at the shuttle stop, as well as port-a-potty style toilets during the actual hike.
Weather: It was quite cold (in the 30s Fahrenheit) and shady when we started hiking around 8:30 a.m., but by the time we descended mid-morning, the sun was overhead and it felt quite warm even though the temperature was only in the low 40s. Throughout the hike I was glad to have long underwear under my hiking pants, an Under Armour base layer, a Uniqlo ultralight down jacket, warm hat, gloves (especially for gripping the chains), and sunglasses. However, I ended up shedding the additional fleece jacket I brought very early into the hike, and my thick Smartwool hiking socks were sweaty after the first ~30 minutes. Hiking poles would have likely been useful to protect knees during the descent, although you’d probably want to stow them away for the rock scramble parts.
Timing: We did this hike first thing in the morning to beat the crowds, although luckily it wasn’t very crowded on the day we visited.

On the trail to Angels Landing
3. Emerald Pools
This is a short hike to 3 pools of water - the Lower Pool, Middle Pool, and Upper Pool. We read that it is a 3-mile loop but we couldn’t figure out exactly what the loop was and did it as an out-and-back hike. It is rated moderately challenging and we agree; there were plenty of little kids taking on this hike.

Upper Pool
Each pool is located against a background of an interesting amphitheater-like canyon -- the Upper Pool was especially unique. They really didn’t compare to any of the alpine lakes that we saw at national parks like Rocky Mountain, Glacier, Banff, etc., but it was still a nice hike. We had plenty of time on our trip to include this hike, but if you were pressed for time, you could skip it.
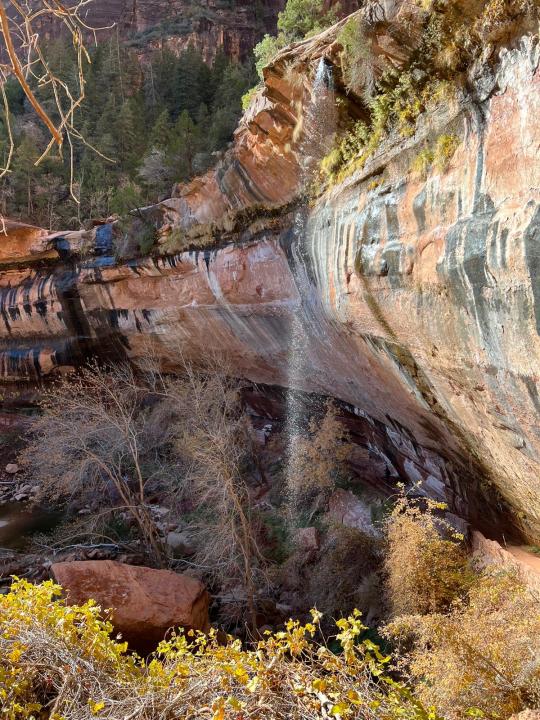
Lower Pool
Note on trail conditions: Several parts of the trail were very muddy - we were glad to be wearing proper hiking shoes. And some of the trail by the Lower Pool was unexpectedly icy, so watch out on a cold day!
Emerald Pool Logistics
Location: We took the Green Line shuttle ~15 mins from the Visitor Center to Zion Lodge (1 stop before The Grotto, which is the stop for Angels Landing). We crossed the street to get to the Virgin River, then turned right to take the trail that goes by all 3 of the pools.
Timing: We did this hike right after Angels Landing, given the proximity.
Weather: Given we started the hike around 11 a.m., it was quite sunny and warm despite the temperature being in the 40s F. A single layer of pants, a full-sleeve shirt, a light down jacket, a baseball cap, and gloves for certain shady parts of the hike would have been adequate, though I was dressed a bit more warmly. If you want to sit and eat a snack at the Upper Pool (which we thought was nice), a warm hat is good as it was a bit chillier up there.
4. Watchman Trail

This was my favorite trail at Zion National Park! It’s a 3 mile out-and-back trail starting from the Visitor Center. It is pretty easy with just a little bit of uphill climb and the views are really lovely; it reminded us a bit of the Sedona Airport Loop Trail.
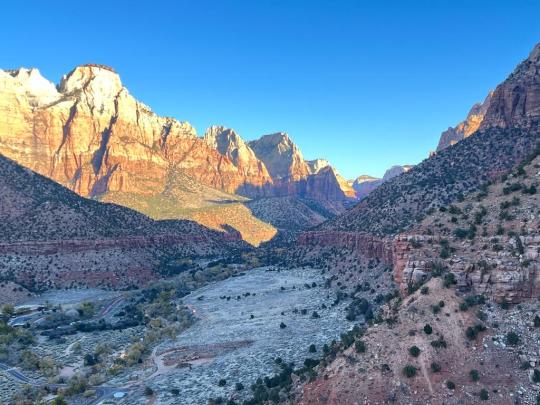
I thought it was great bang for your hiking buck and it’s logistically very simple (no permits, no shuttles, etc.). You just park at the Visitor Center and walk over. In my opinion, the views are at least as nice as the views from Angels Landing. We even saw an actual buck at the end (honestly it came a little too close for comfort...)

Other Hikes
Canyon Overlook Trail - This is a 1 mile out-and-back hike that we read is nice but weren’t able to do. The park shuttle doesn’t go here; you have to drive to it, and beware there are only 15 regular parking spots (all of which were full when we arrived on a Saturday around 9:45 a.m.) plus 2 handicapped parking spots. It’s about a 15 minute drive one-way from the Visitor Center. At least the drive is scenic!
Weeping Rock Trail - This is another ~1 mile out-and-back hike. It reopened in November 2022 after being closed since 2019. It is stop #7 on the Green Line shuttle, and the shuttle only stops here in one direction, on the way back from Temple of Sinawava (stop #9) to the Visitor Center (stop #1). We were too tired after hiking the Narrows to stop and do this on the return shuttle trip.
STAY
We stayed in the town of Springdale, which is right outside the park. The Springhill Suites was very nice, reflecting its excellent Google reviews. It had better reviews and was cheaper than Zion Lodge (the only lodge in the park) and included a free breakfast -- the typical Marriott hotel buffet spread. It was only a 5 minute drive from the park entrance. Our room had a mini-fridge and a microwave. We would gladly stay there again.

View from the Springhill Suites lobby/breakfast area
EAT (VEGETARIAN)
Overall the food was NYC prices with quality that was nothing to write home about. Thankfully, the vegetarian options were adequate. These are the places we tried for dinner; all were fine.
Bit & Spur Restaurant & Saloon -- The menu has tons of vegetarian options and the service was friendly. It’s a bit expensive, as we’ve found to be typical for restaurants right by national parks, but tastier than anywhere else we tried. We liked the tofu tacos and brie quesadilla.
Thai Sapa -- Given the limited vegetarian protein options in town, we grabbed a meal here for our tofu fix. The green curry was pretty good but quite spicy and a tiny serving relative to the price, and the drunken noodles were definitely not the best we’ve had, but still decent because, after all, they are drunken noodles.
Oscar’s Cafe -- Mexican food. A good source of black beans for protein; we thought the black bean & guac salad was pretty decent. The sweet potato burrito was ok but fried, and light on the side serving of black beans.
Groceries: We stopped for lunch supplies at the Walmart in Hurricane, UT, which was right on the route from Las Vegas to Springdale (the town just outside of the park). We had read that groceries are cheaper in Hurricane than in Springdale.
0 notes
Text
Weekend in Mexico City aka CDMX

Hot air balloons at Teotihuacan
Summary: This was our second time spending a long weekend in Mexico City -- last time as tourists, this time as wedding guests. We found that all the locals we interacted with were very nice, the city is pretty walkable, and there are lots of museums and cultural venues that are somewhat interesting. As vegetarians, we found the food to be pretty tasty (if not the most veg protein-forward) and 20%-30% cheaper than comparable options in major U.S. cities, although both times I had stomach issues (even though we carefully avoided drinking tap water!).
Overview:
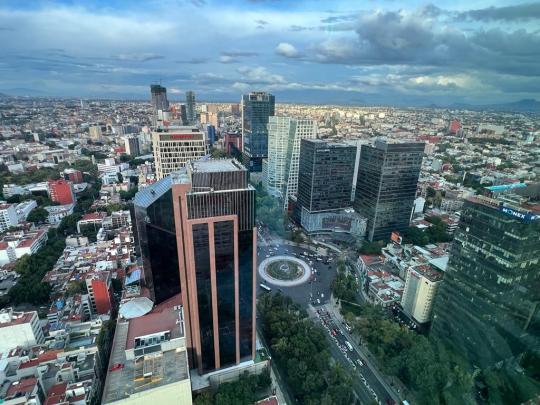
View from the Sofitel rooftop
Economic/social development: Mexico City seems to fall pretty solidly between major cities in wealthy industrialized nations (e.g., U.S., EU, Japan, etc.) and those in some of the poorest developing countries (e.g., India, Ethiopia, etc.). On the one hand, there is a fair bit of poverty and infrastructure issues -- we encountered quite a few child panhandlers (though way fewer than in cities like Mumbai and Delhi), tap water isn’t potable, the sidewalks are strewn with potholes and dangling power lines, and sewage smells waft up on the city streets. On the other hand, the streets seemed pretty clean and the majority of (though not all) people seemed to have their basic shelter and clothing needs met (at least in the more touristy neighborhoods). There are some neighborhoods that are known to be quite unsafe for women (a la Delhi), whereas in the touristy areas we stayed in, we felt safe even walking home after dark.
Vegetarian food: There are quite a few vegetarian/vegan-only restaurants, and there are often options at other restaurants as well. However, we found it somewhat challenging to find options with enough vegetarian protein (it’s a lot of carbs, vegetables, beans, and cheese - so some protein but not enough). Also, despite being pretty careful, I’ve had stomach problems 3/5 times I’ve been to Mexico, so it’s not exactly my favorite food destination.
Attractions: All of the attractions we visited were fine, if not the most exciting. We more just enjoyed walking around and exploring neighborhoods. More on what we did below.
Stuff we did:
Frida Kahlo Museum - We visited back in May 2018. It’s a fairly small but interesting museum. We’re not particularly Frida Kahlo fans, but we are glad we visited. We went on a weekend and even though we had bought tickets in advance online, there was still quite a long line to get in. We definitely recommend making advance reservations. The museum is close to a neighborhood called Coyoacan that a lot of blogs and guides recommend visiting. We stopped by the Coyoacan Market and walked around the neighborhood a bit. It was okay.
Chapultepec Park - This is the “Central Park” of CDMX. It’s full of street vendors selling snacks and chachkas. There is also a massive military memorial and quite a few museums. Don’t expect anything as manicured as Central Park, or, say, any of the major parks in Tokyo or Kyoto, but it’s a big green space.
Teotihuacan - Archeological site about 30 min drive south of Mexico City. There’s not a whole lot there but you can walk around the ruins. We went very early on a Sunday morning to avoid the heat (there is no shade and the sun is very intense) and crowds (we read that it’s free for Mexican nationals on Sundays). We saw some people taking hot air balloons nearby, which seems like it could be quite scenic.

View of Teotihuacan from our visit in 2018
Anthropology Museum - This museum is close to Chapultepec Park and is known for having a very large collection of artifacts like ancient skulls, baskets/textiles/tools, and information about the modern cultures of indigenous Mexican tribes. It is a large museum and has a lot of descriptive information in the exhibits, but it is mostly in Spanish, so likely quite a bit less engaging for non-Spanish readers. A couple of friends strongly recommended this museum, but to be honest we found it a bit boring. If you go, you can avoid long lines by purchasing your admission tickets from a self-service kiosk in the admissions hall, near the museum store. Admission was around US $4 per person.
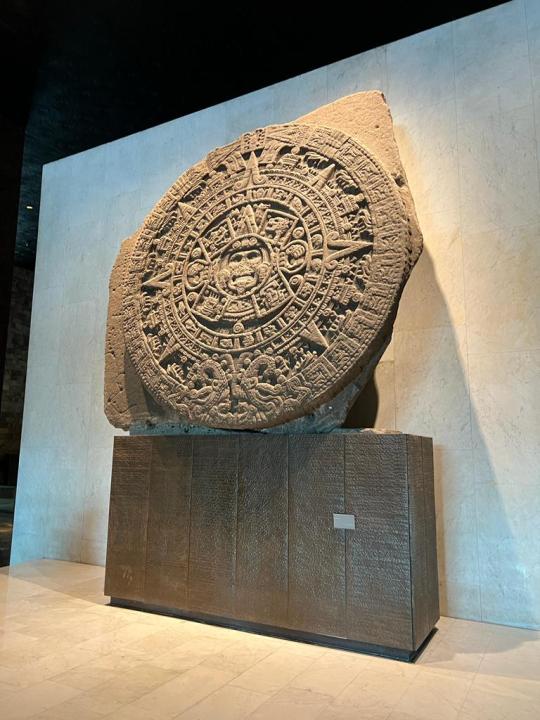
Sundial at the Anthropology museum
Walking tour of the historic district - We did a free walking tour last time we were here and it’s probably a good way to get a guided introduction to the city and its history. I wouldn’t really know, because I spent most of the tour dashing from one bathroom to the next after getting sick from something I ate :/
Walking or biking on Paseo de Reforma - We did plenty of walking on this main city thoroughfare. It’s pretty nice, and the street is closed off on Sundays for people to walk/bike/roller blade/etc. -- we saw a lot of people taking advantage of this It was reminiscent of how Park Ave gets closed off for a few summer weekend days in NYC.

Paseo de la Reforma on a Sunday
Walk around Roma Norte, La Condesa, Polanco neighborhoods - These are the main touristy areas and they are pretty nice. Avenida Amsterdam in La Condesa is particularly scenic.
Visit art museums: The city seems to have a plethora of art museums! We did not visit any, but if you like art, this seems like a great thing to do.
Vegetarian food we liked:
La Pitahaya (Roma Norte) - This place has some of the best vegan/vegetarian Mexican food we’ve ever had, and there are tons of vegan protein options.
Ojo de Agua (multiple locations) - This is a chain that we quite liked for brunch. It’s not all vegetarian, but there are good egg options. I also liked the chocolate/peanut butter/yogurt smoothie, and it’s nice that they offer soymilk as a milk substitute.
Lardo (La Condesa) - This is a Mediterranean-inspired restaurant; we went for Sunday brunch and it was really delicious. There are quite a few egg dishes as well as other options. It is quite popular, especially among foreigners; when we got there around 11:50am, there was a 20 minute wait for a table.
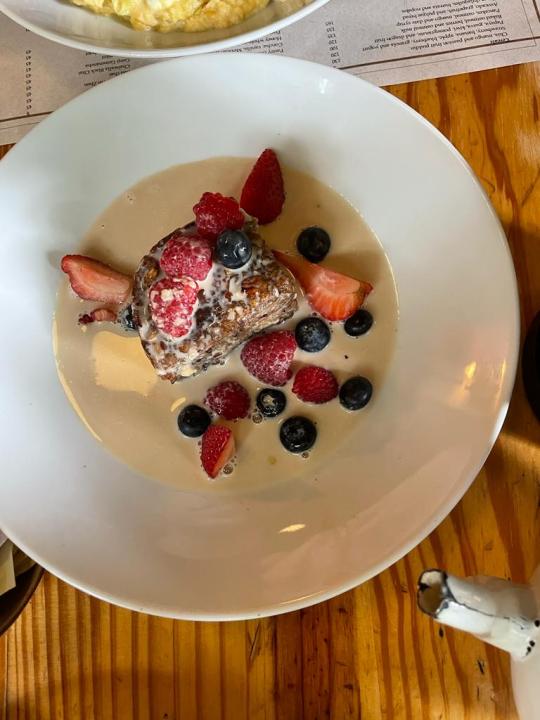
Baked oatmeal with fruit

Egg dish with veggies and soy sauce

Really, really good scrambled eggs (with zucchini)
Other places we tried: Last time we were here we ate dinner at Dulce Patria and Azul, which we thought were both fine but a bit over-hyped. We weren’t able to get a reservation at Pujol (very famous restaurant) and didn’t try this time, as a number of friends also told us it was pretty over-hyped. We heard great things about Quintonil (also very famous) but didn’t manage to get a reservation. They do take walk-ins, though.

Eating at Dulce Patria in 2018
A note on vegan/vegetarian restaurants: We found quite a few places online, but other than La Pitahaya, many of them had multiple reviews from people who got sick after eating there. In 2018 we ate at Por Siempre Vegana, a well-known vegan taco stand, and I got super sick afterwards. We read similar reviews about Fat Vegan (which looks unhealthy anyways) and Veguisima, so avoided them.
Where to stay:
We loved our stay this time at the Sofitel Reforma. It’s a gorgeous luxury hotel (that was surprisingly affordable with the wedding block rate) with fantastic customer service, a really nice heated indoor pool, and a gym with amazing city views. It is right on Paseo de Reforma and very walkable to Roma Norte, La Condesa, and Chapultepec Park. Ubers in CDMX are super cheap, but we walked most places because it was easy and interesting.

View from the Sofitel gym

Emclosed rooftop pool at the Sofitel
Previously, we stayed in an Airbnb in La Condesa, which also worked out well. We would have gladly stayed in Roma Norte given all the food options there.
The airport
The Mexico City airport was a 20-30 minute drive from our hotel in Reforma, depending on traffic (the range covers traveling on Monday at 6am and Friday at ~6pm). Uber was inexpensive and easy for the commute.
It’s not a super fancy airport, but if you have the Amex Platinum credit card, we can recommend the Centurion Lounge. It was a somewhat unusual Centurion Lounge: they served us a (delicious) two-course breakfast that was brought out one course at a time by servers, rather than the usual breakfast buffet. The meal took about 45 minutes. At the end they brought us a bill, but the charges were waived for Amex Platinum cardholders. Reviews online suggest that guests who access the lounge using other credit cards may be charged for food.
0 notes